Set Reviews

Set Review - #75952-1 - Newt's Case of Magical Creatures - Fantastic Beasts - The Wizarding World

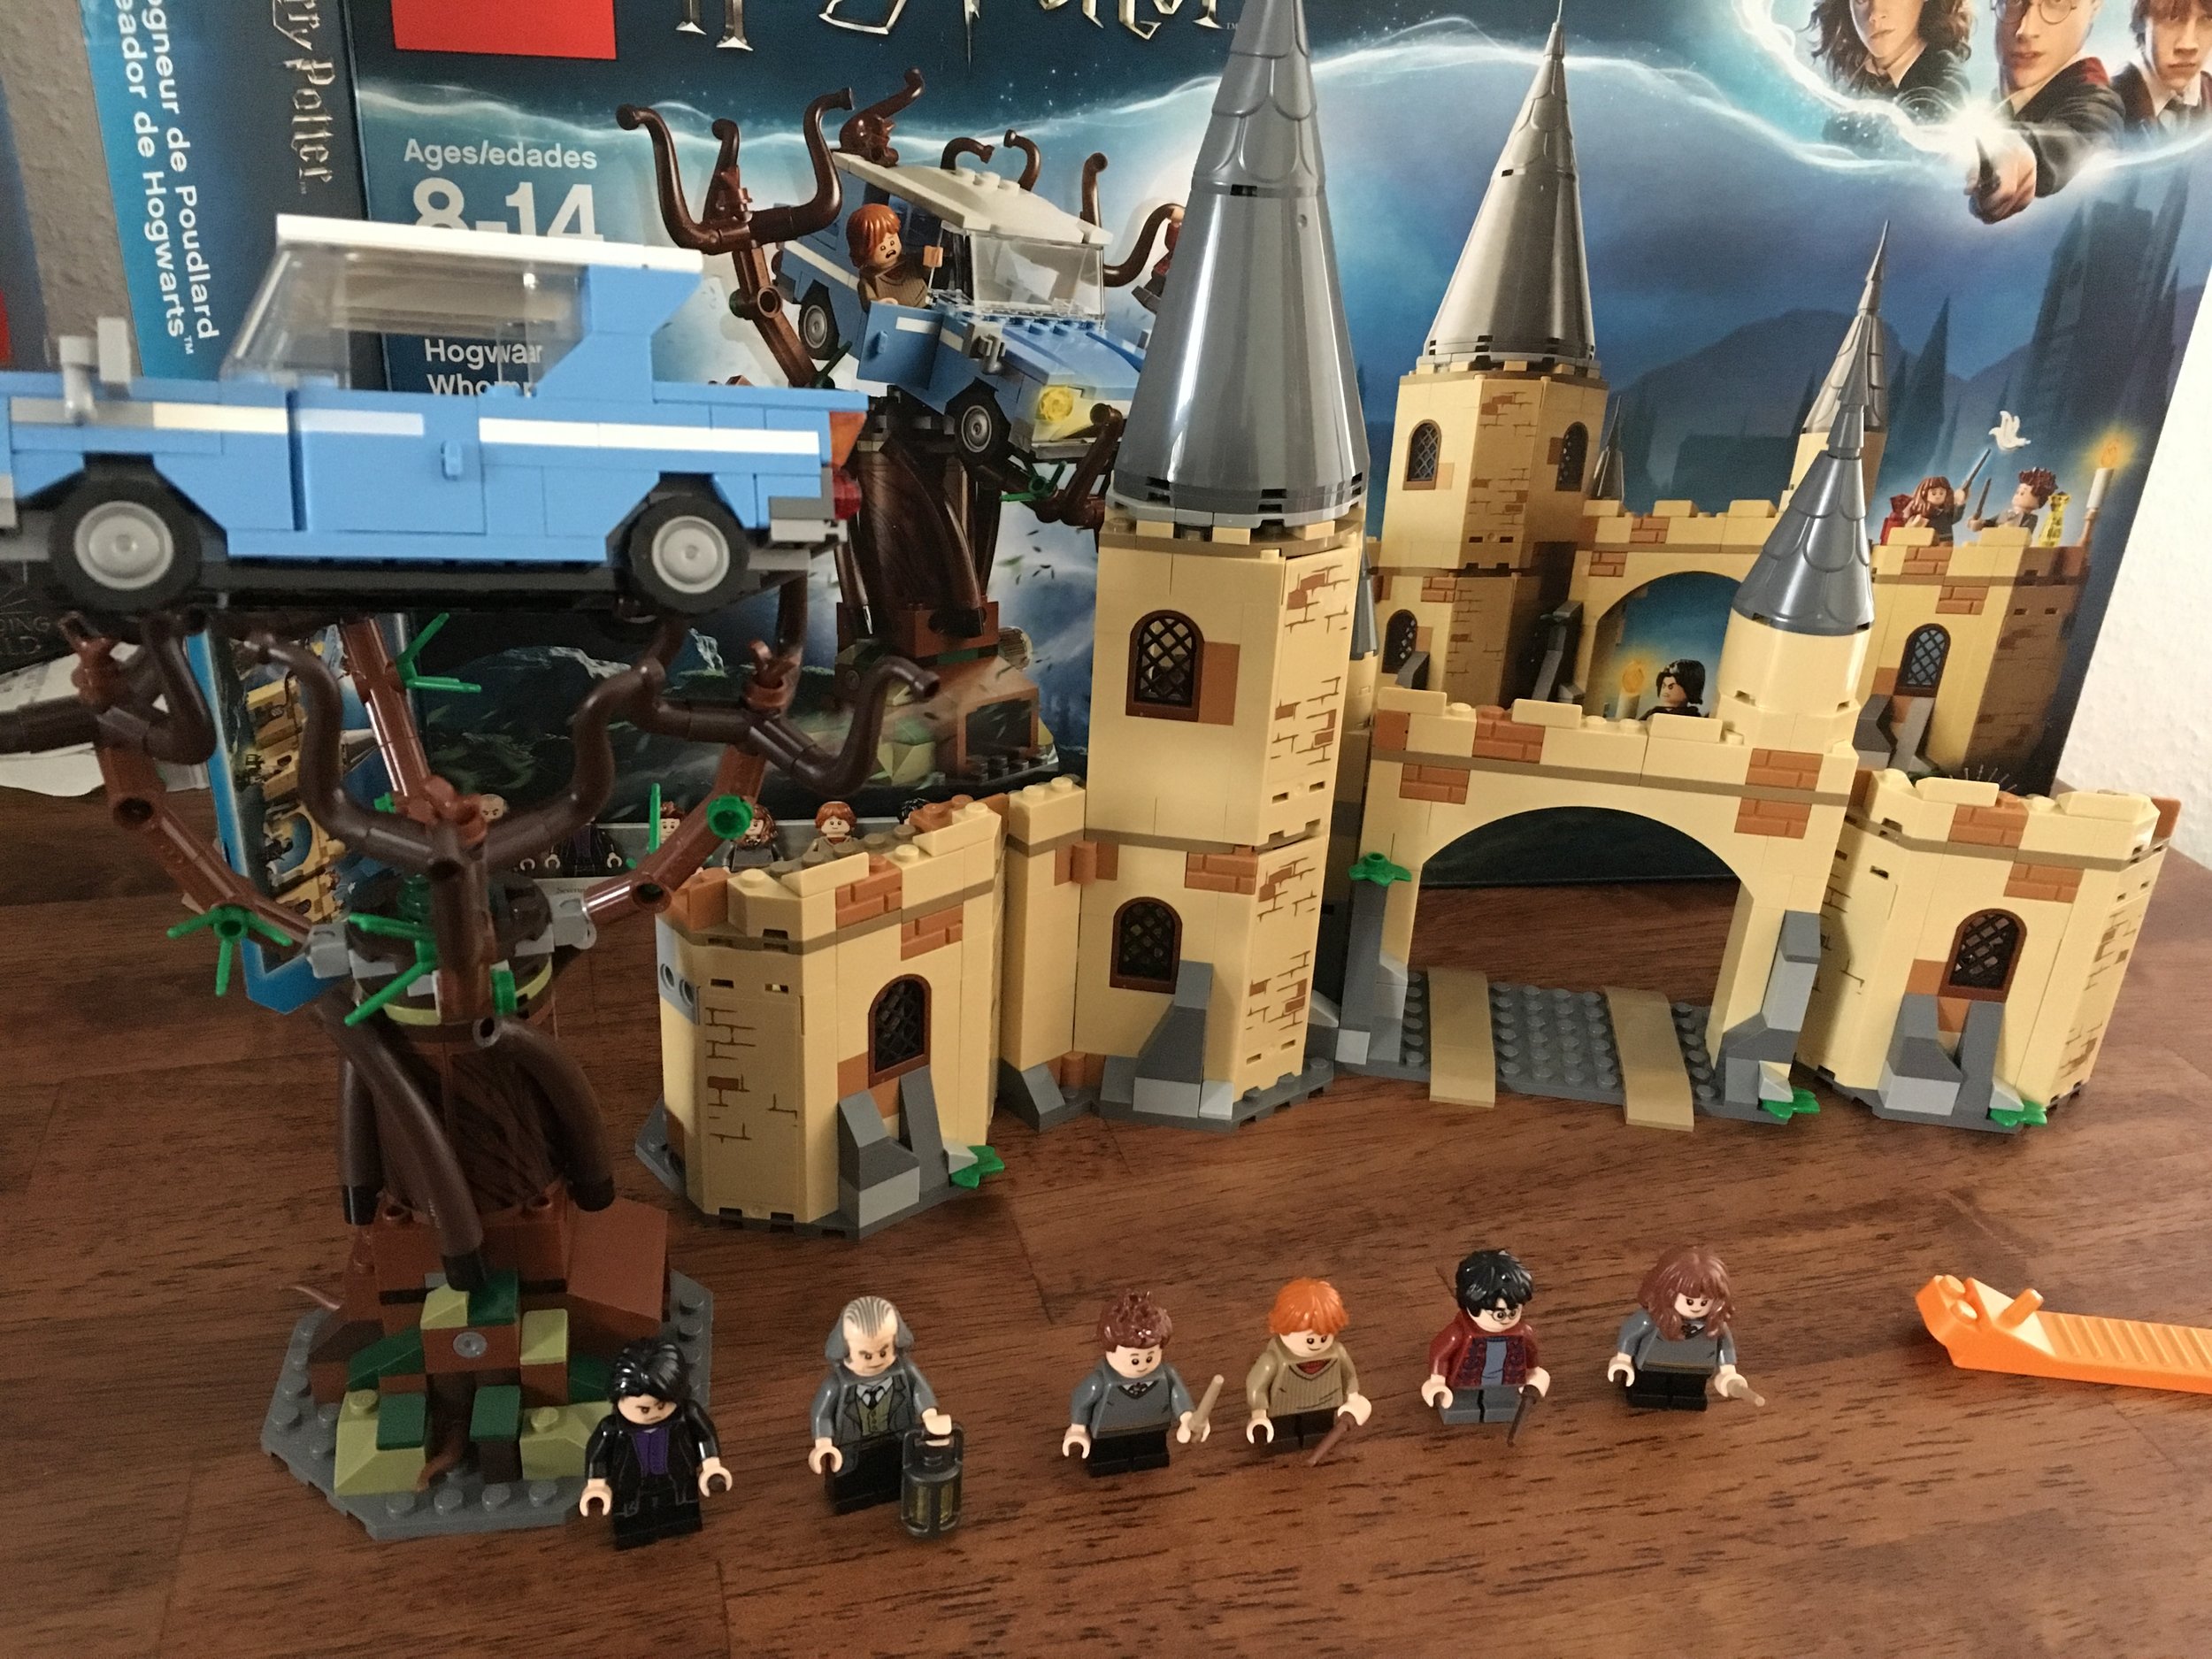
Full disclosure, I have not seen the Fantastic Beasts 2 movie that was released back in November 2018 at the time of drafting this post. With that being said, I have seen the first Fantastic Beasts movie and I thought it was good. I was wondering how they would work a spin-off in and they did it. Kind of like Star Wars in that as long as you have some of the same plot details, you can make a movie about anything and make money on it. Enough blabbing…

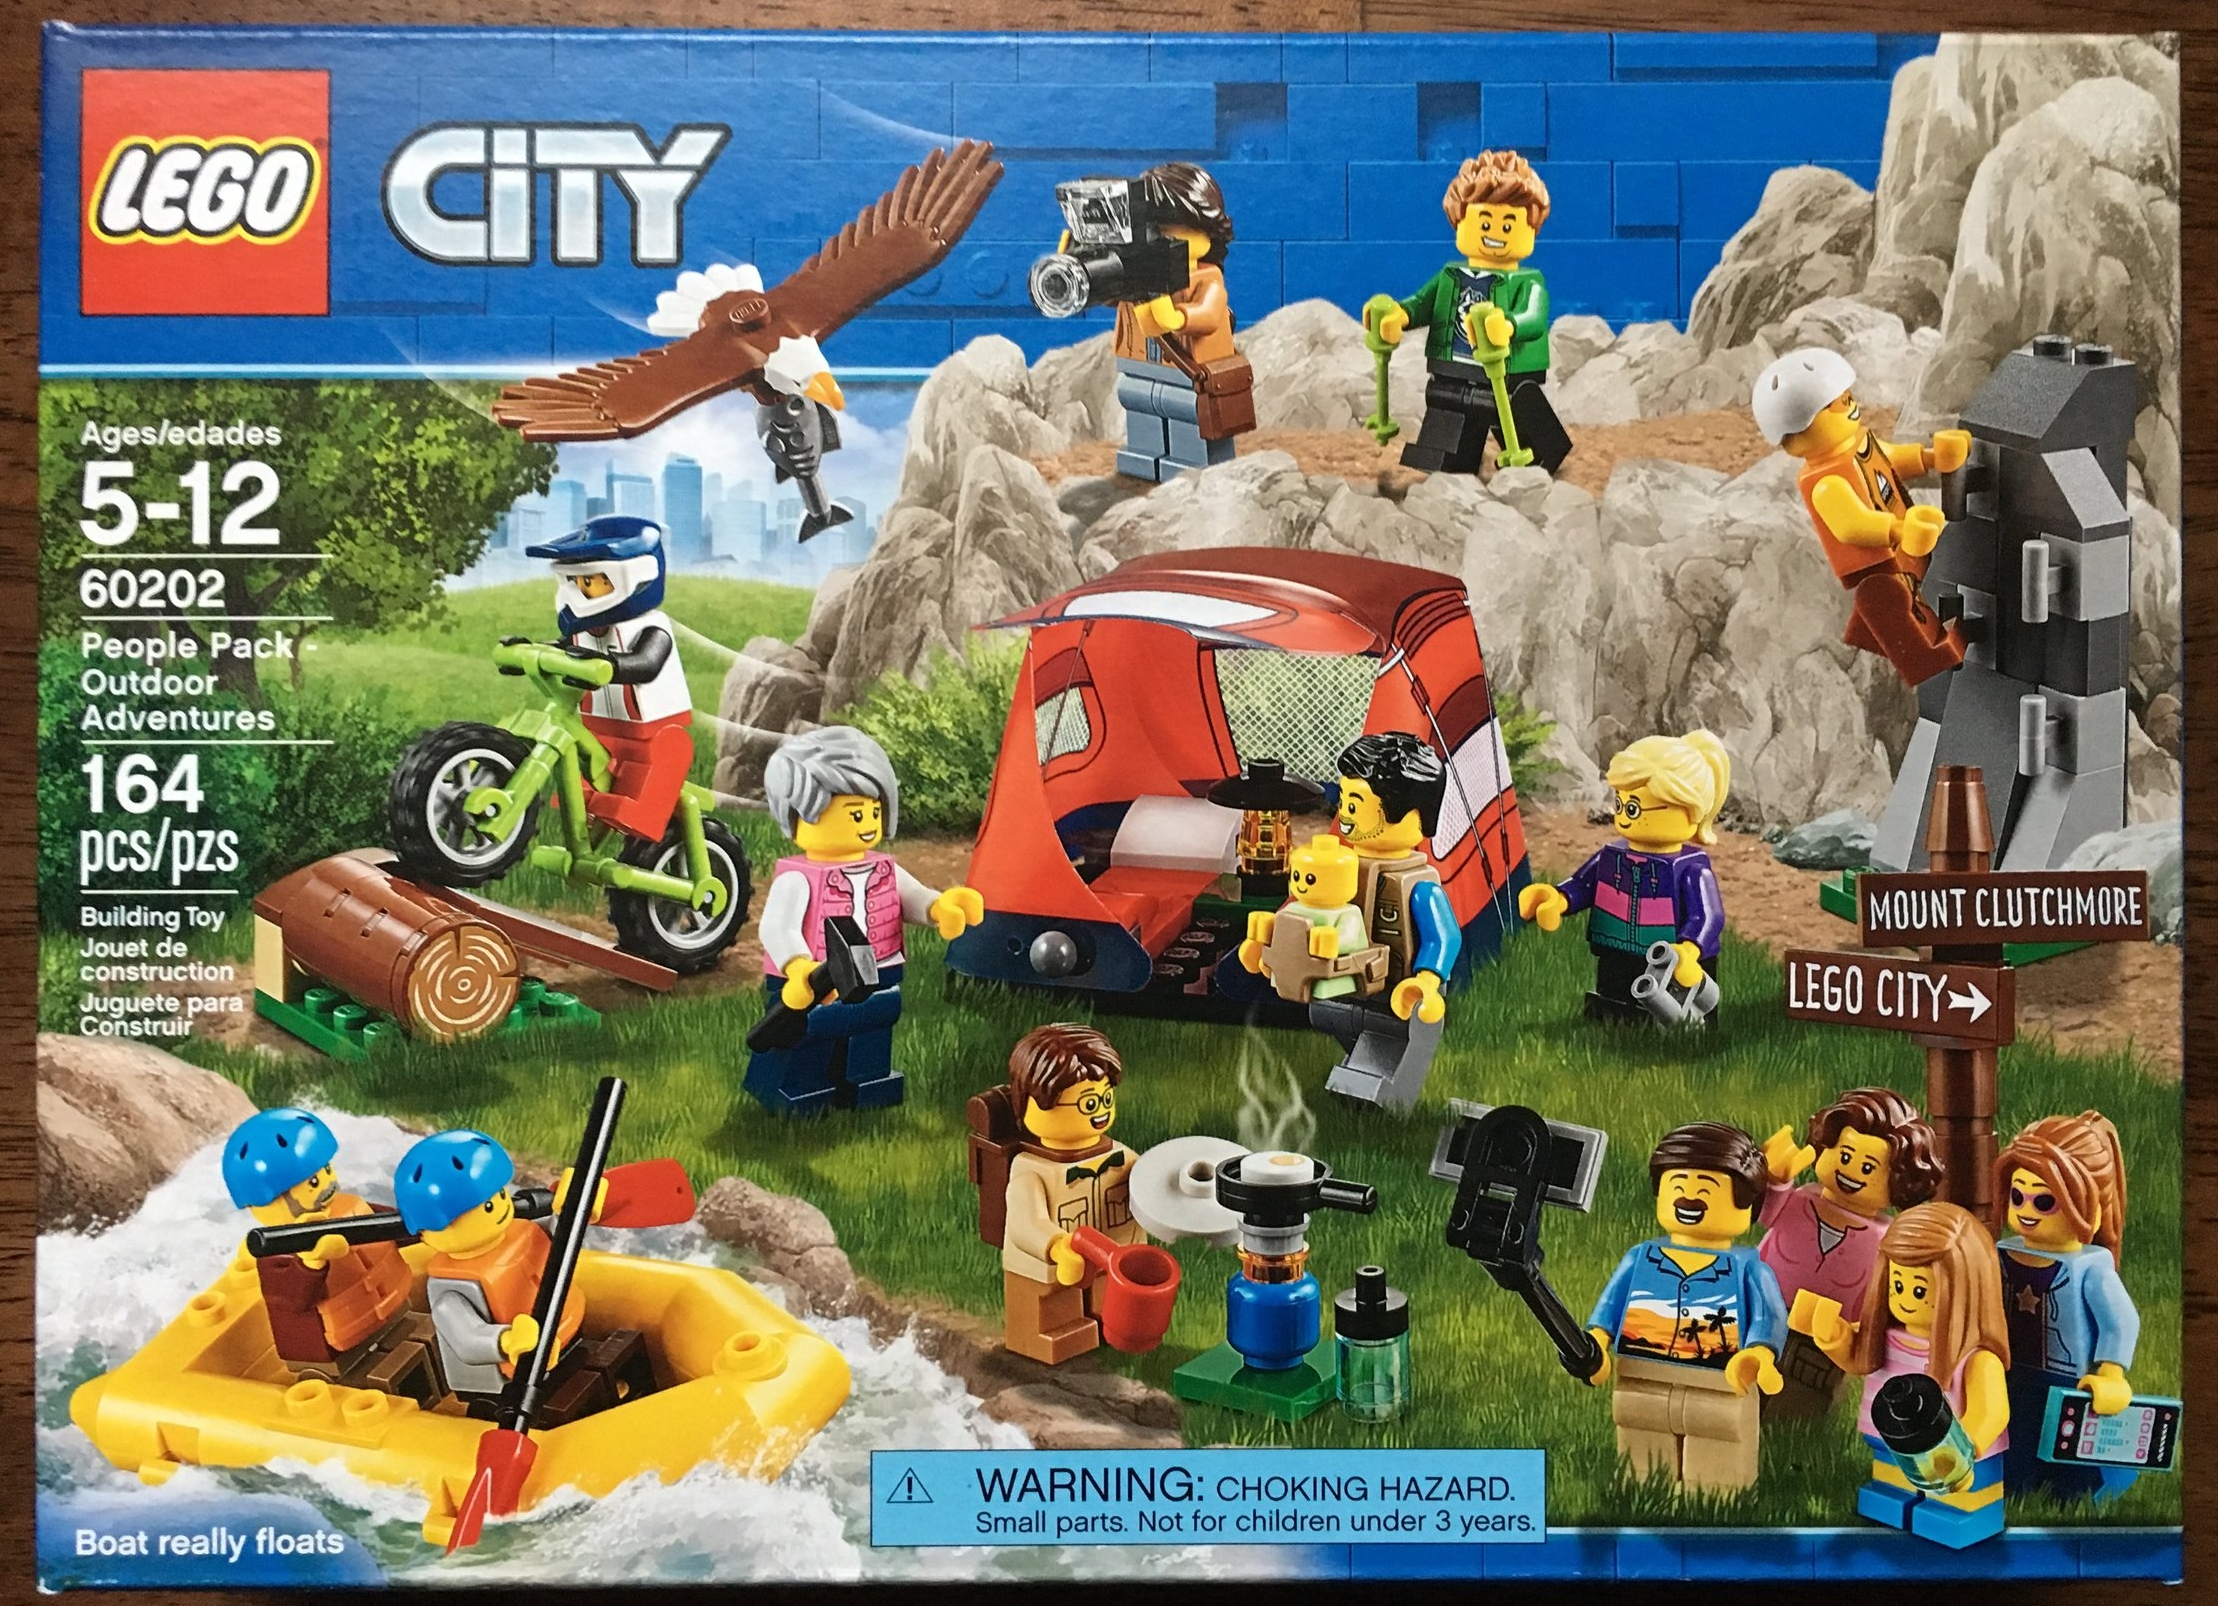
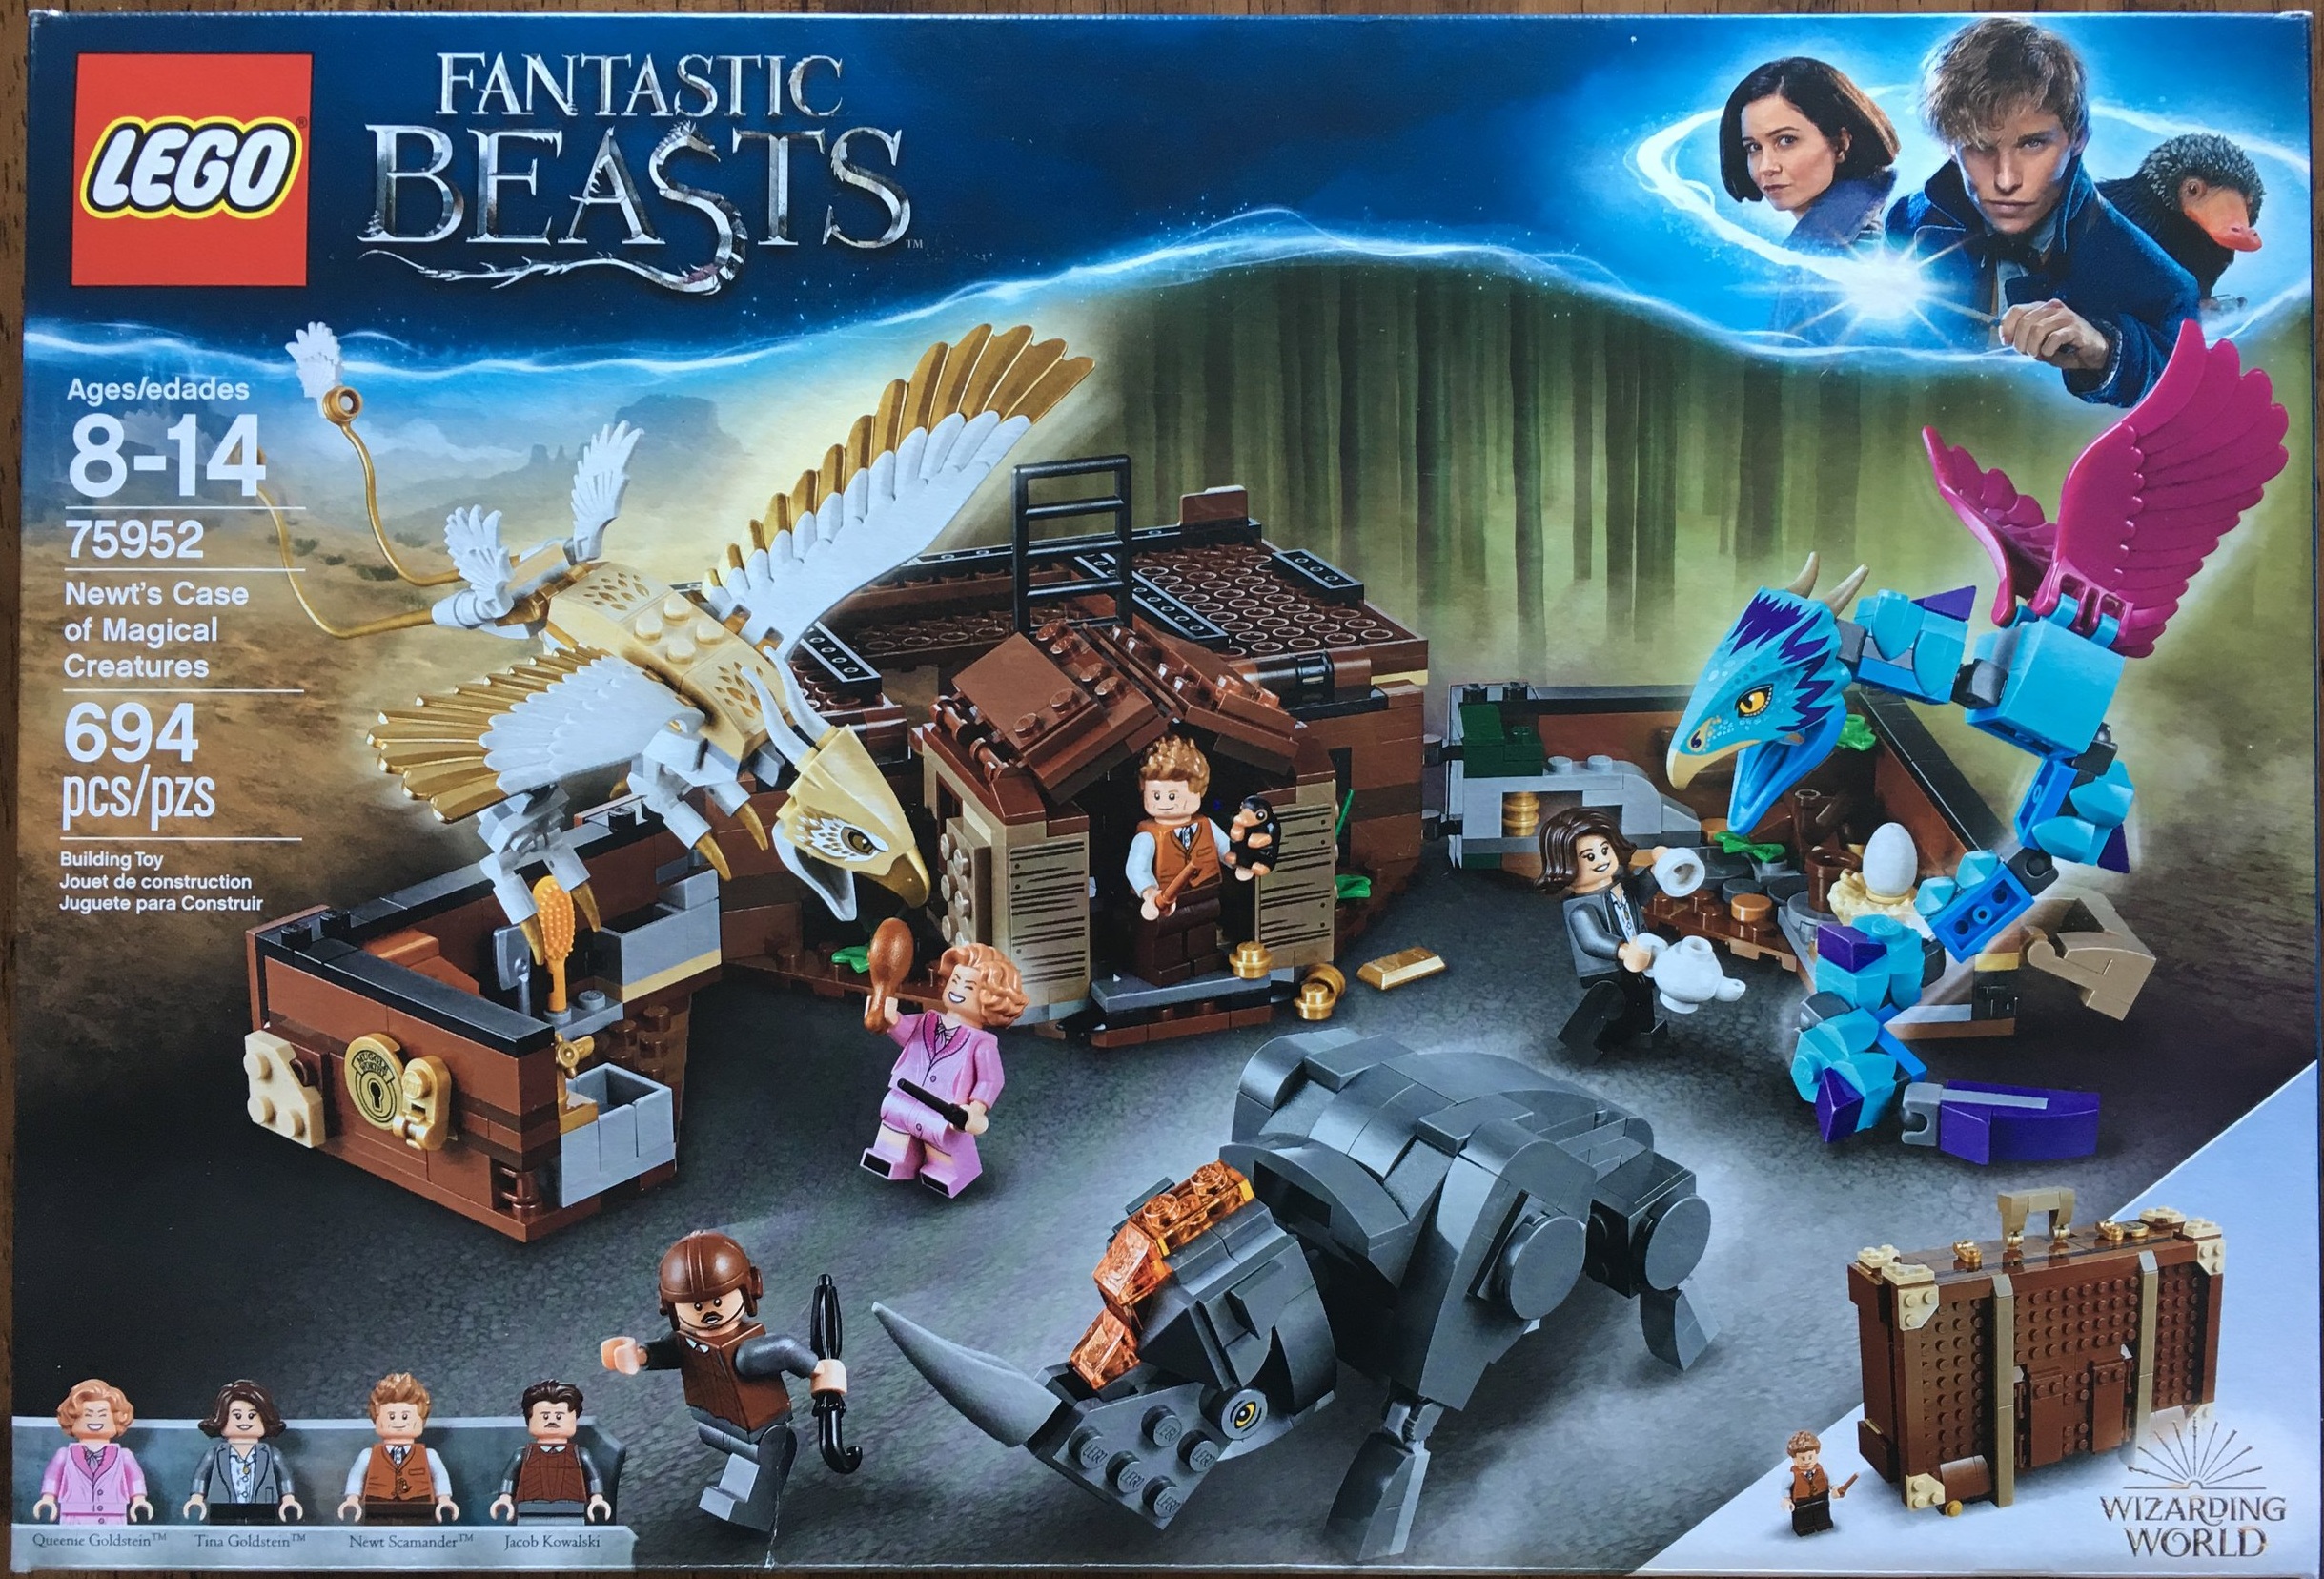
Set number 75952-1 - Newt’s Case of Magical Creatures was released on 24 August 2018 in the US. It retails for $49.99 and with 694 pieces, it works out to be $0.072 per piece. I waited and got it 20% off on Amazon.com so even better. As of today (30 December 2018), it’s still 20% off there so if you were looking to pick this one up at a discount, now is your chance. Onto the review…

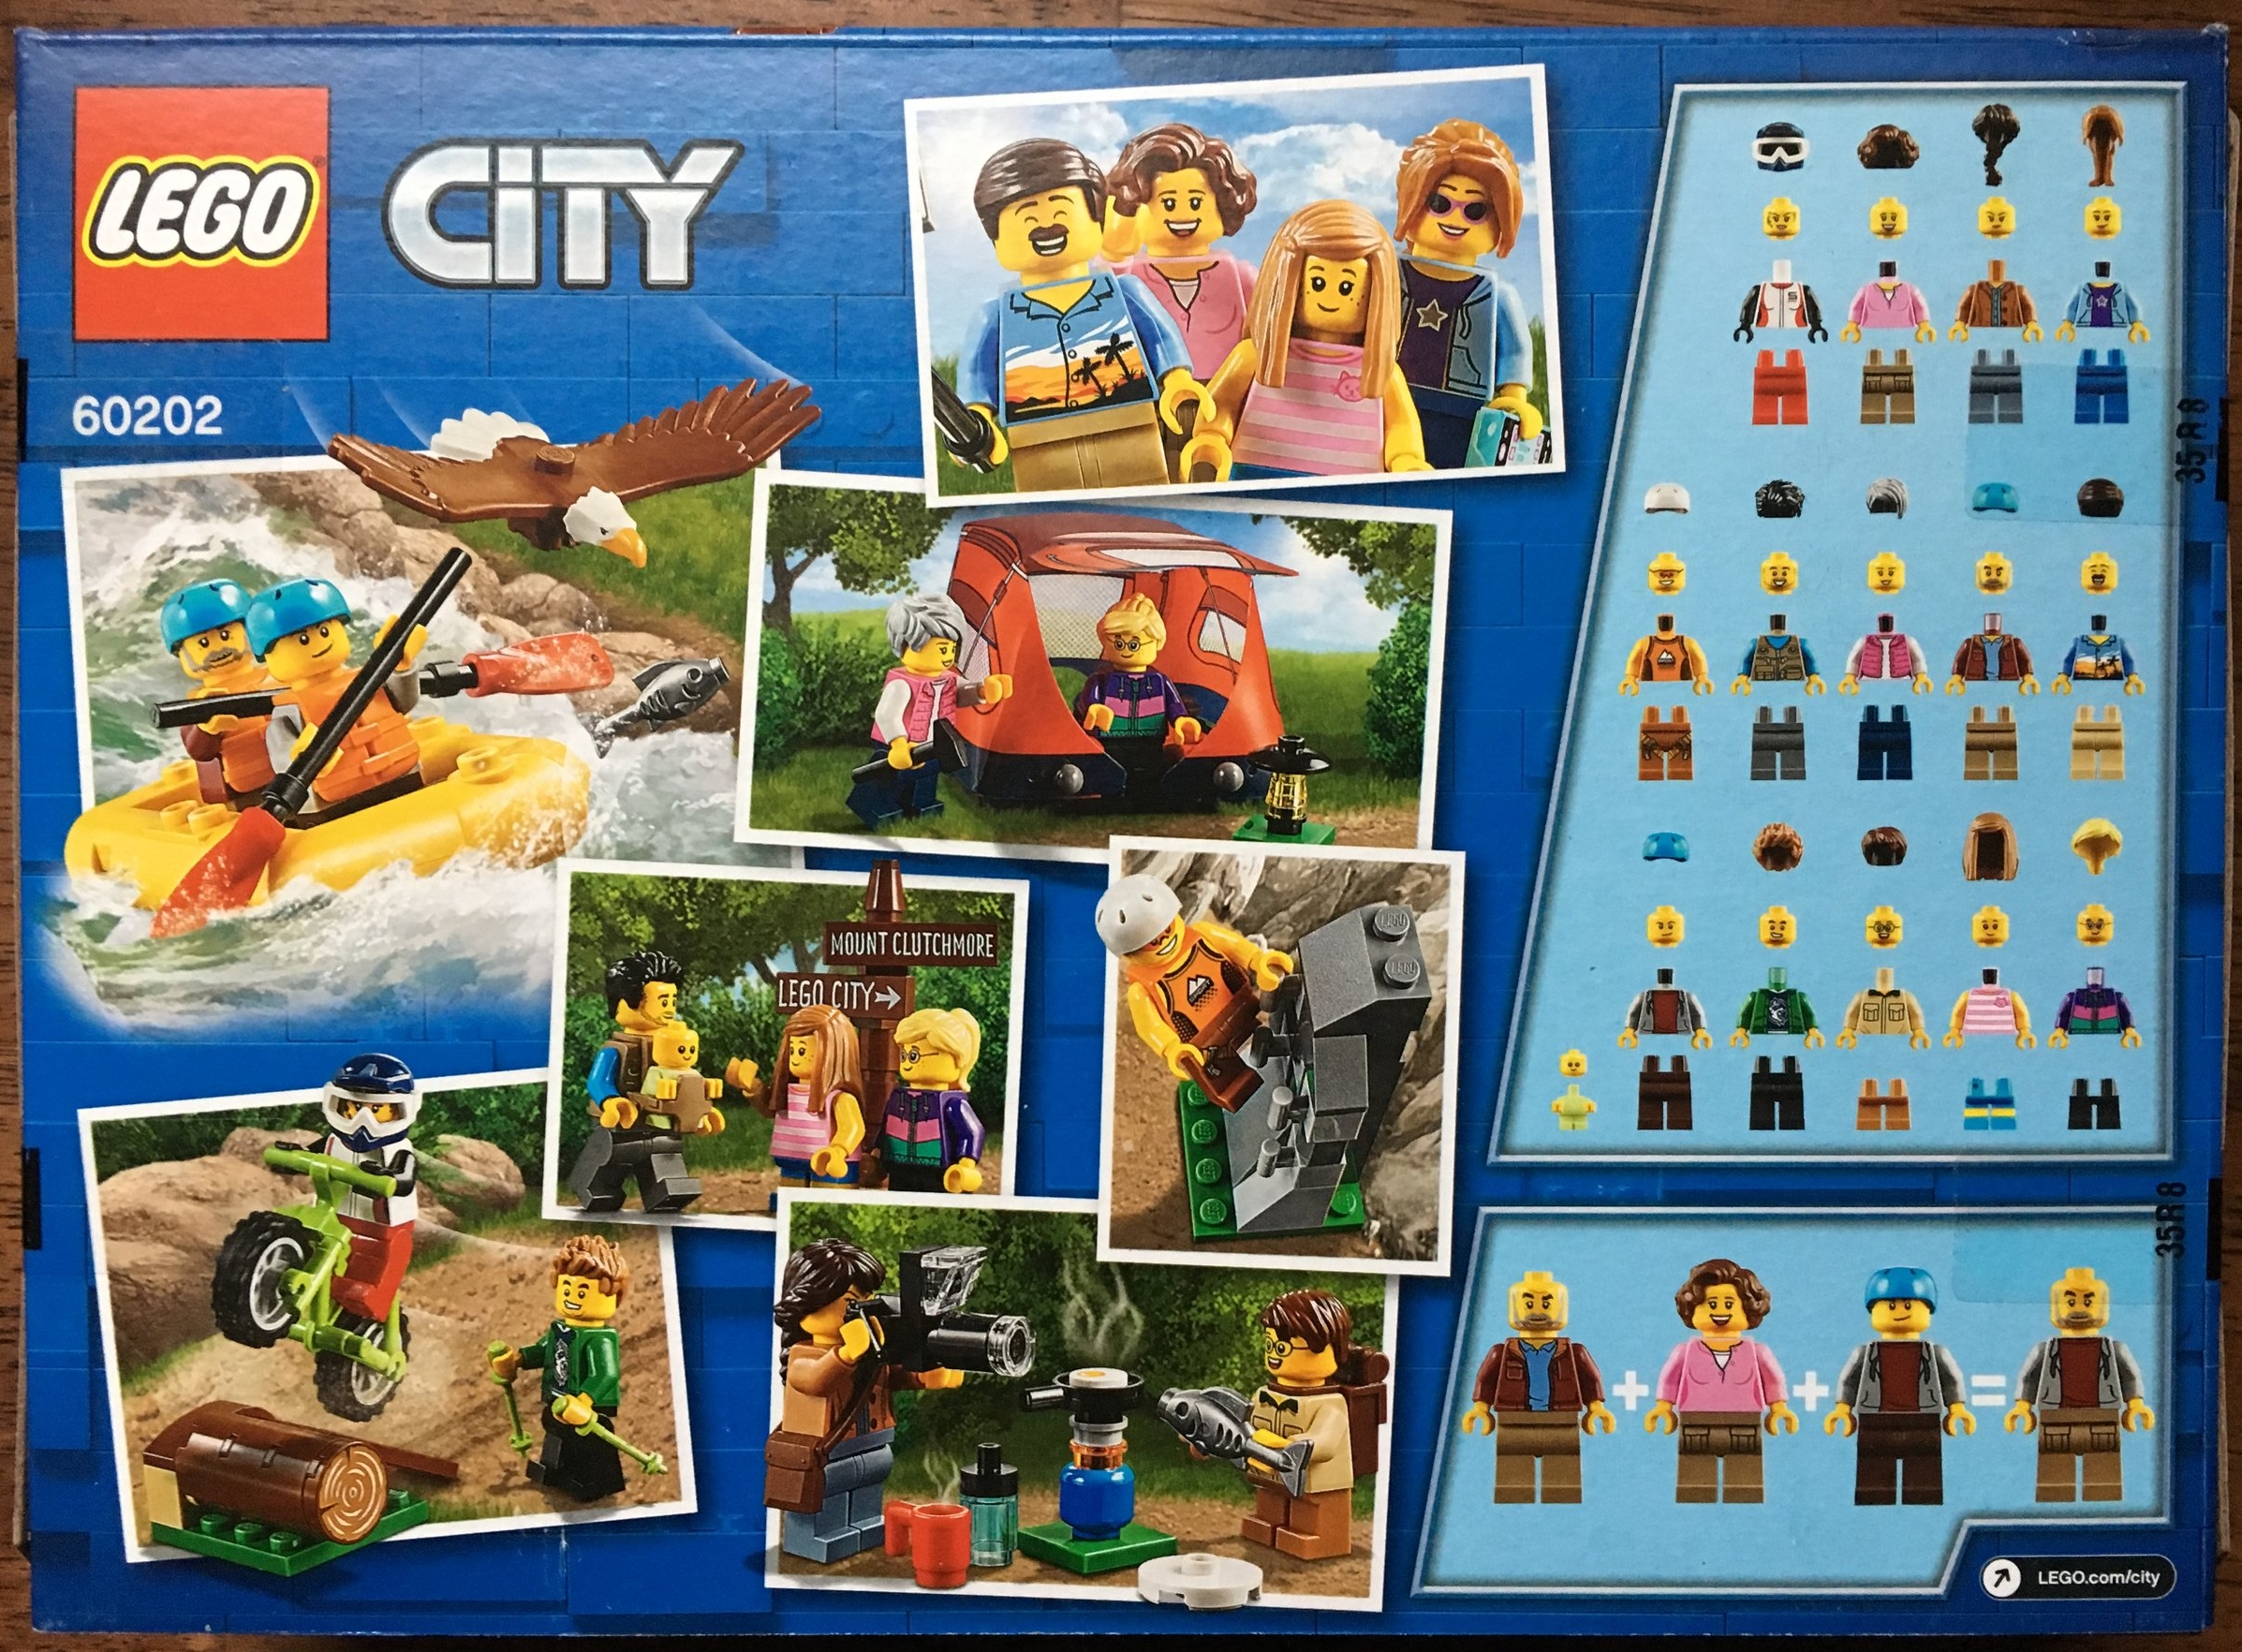
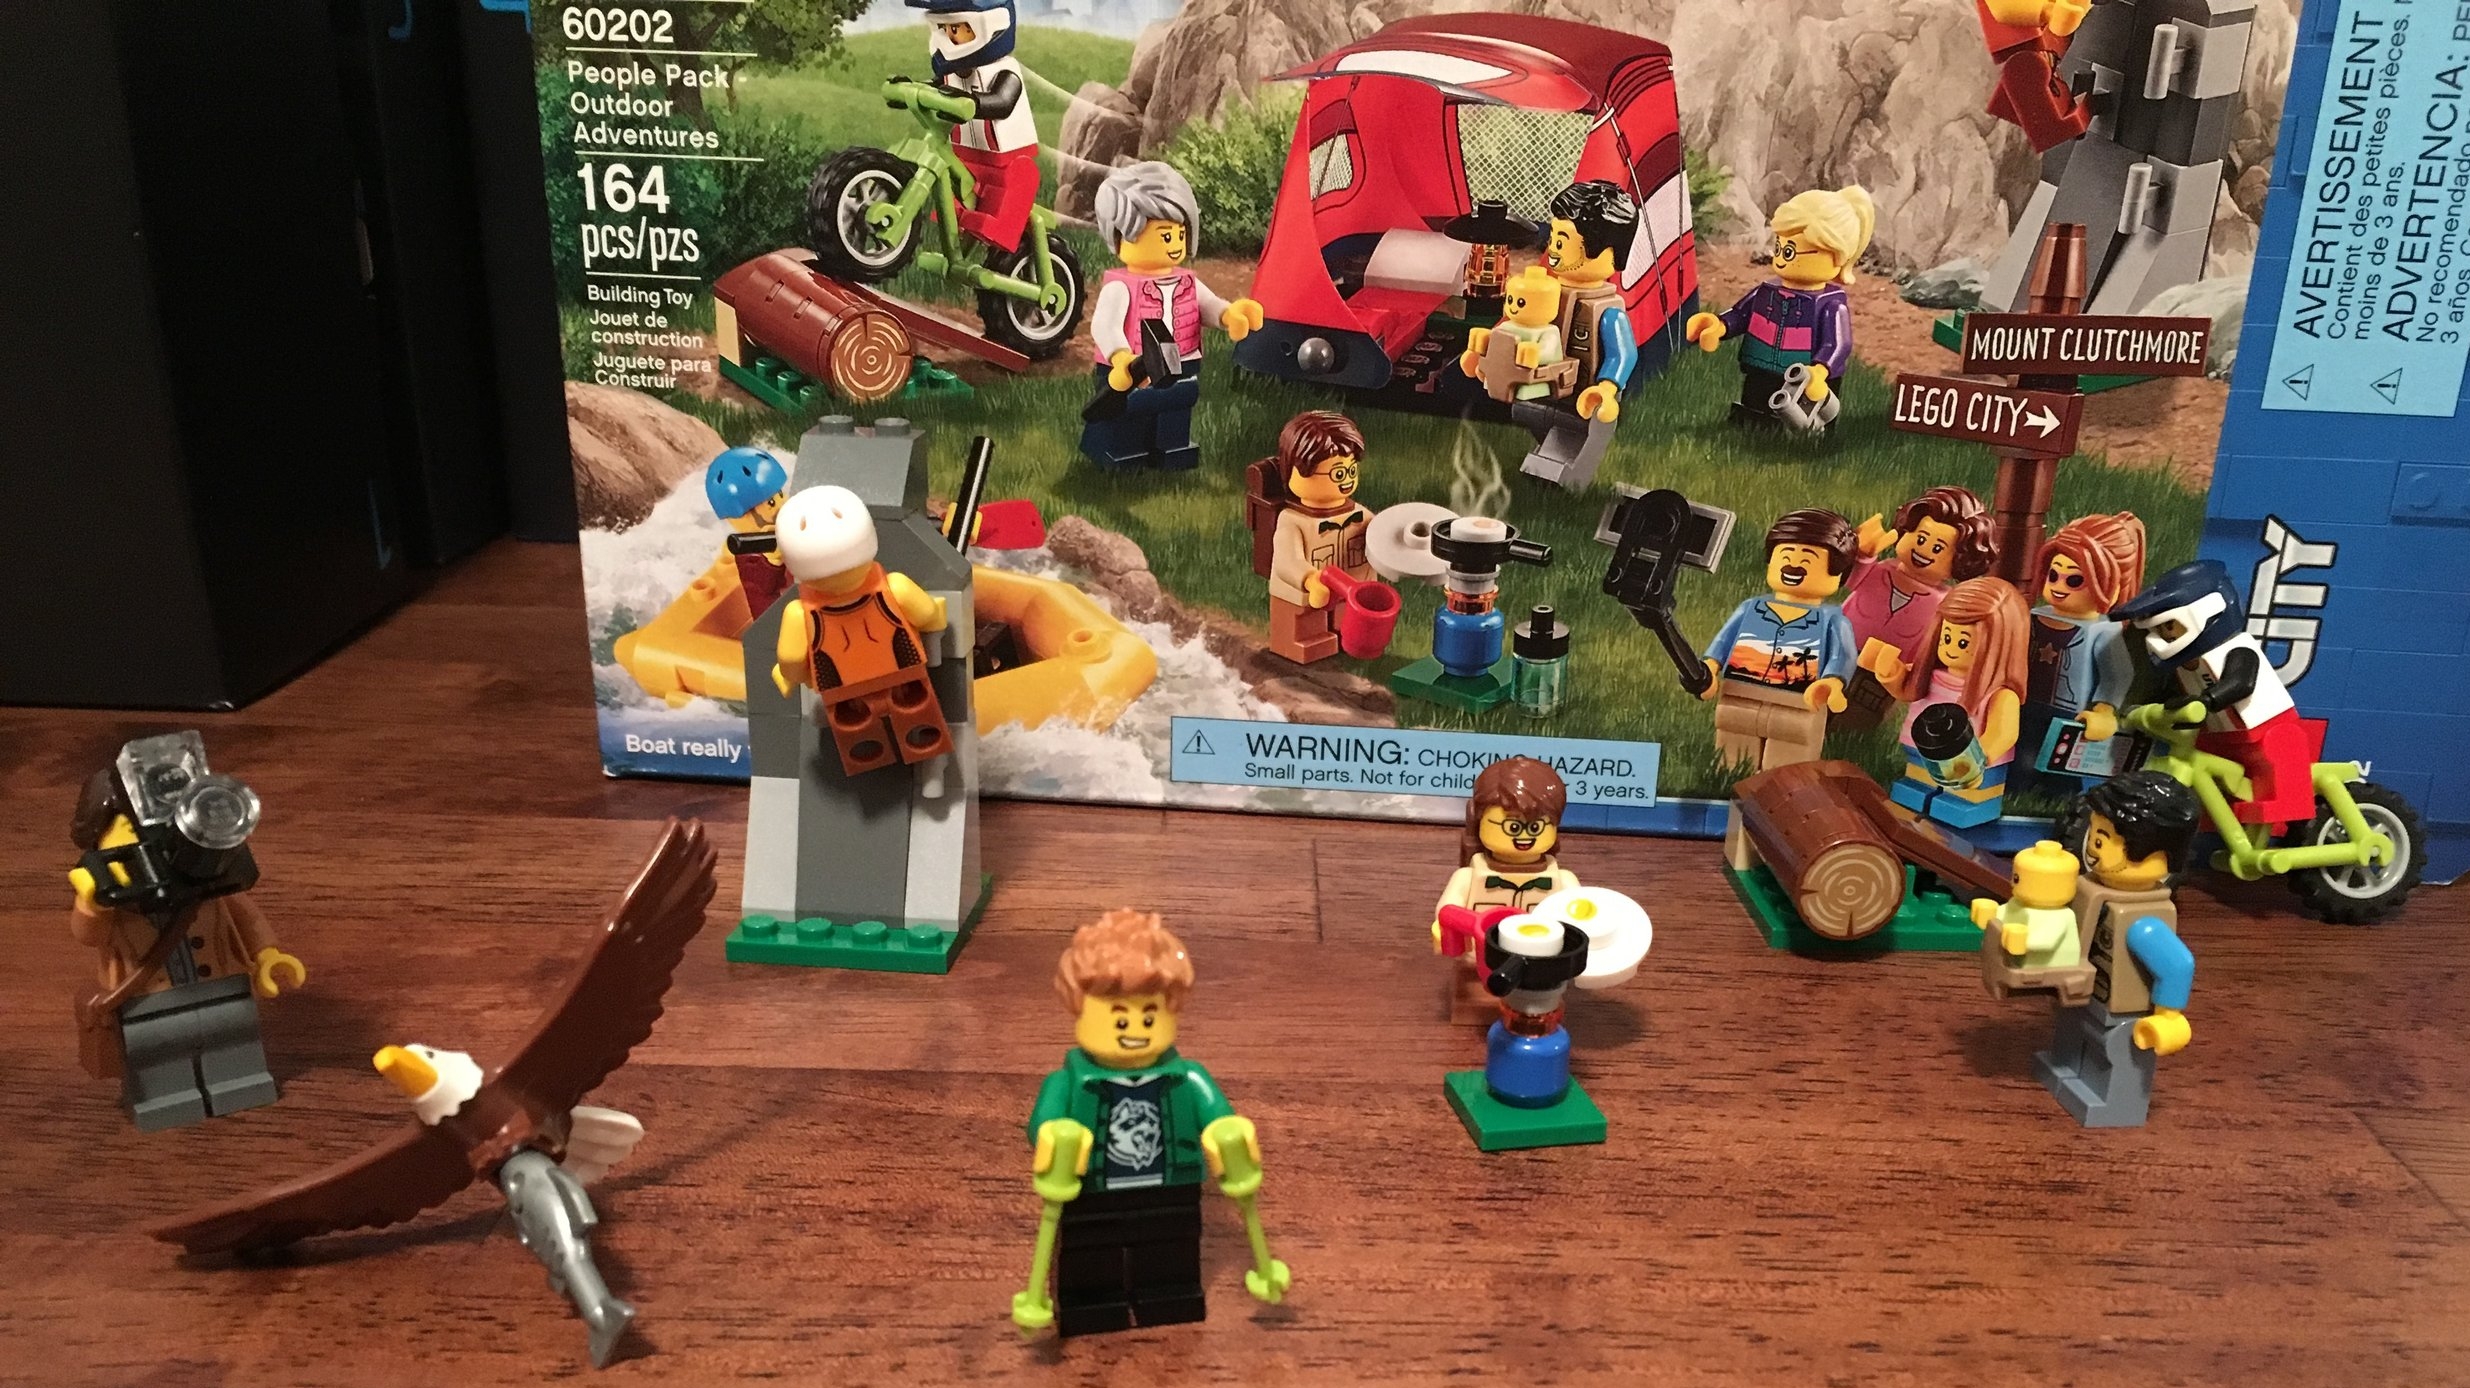
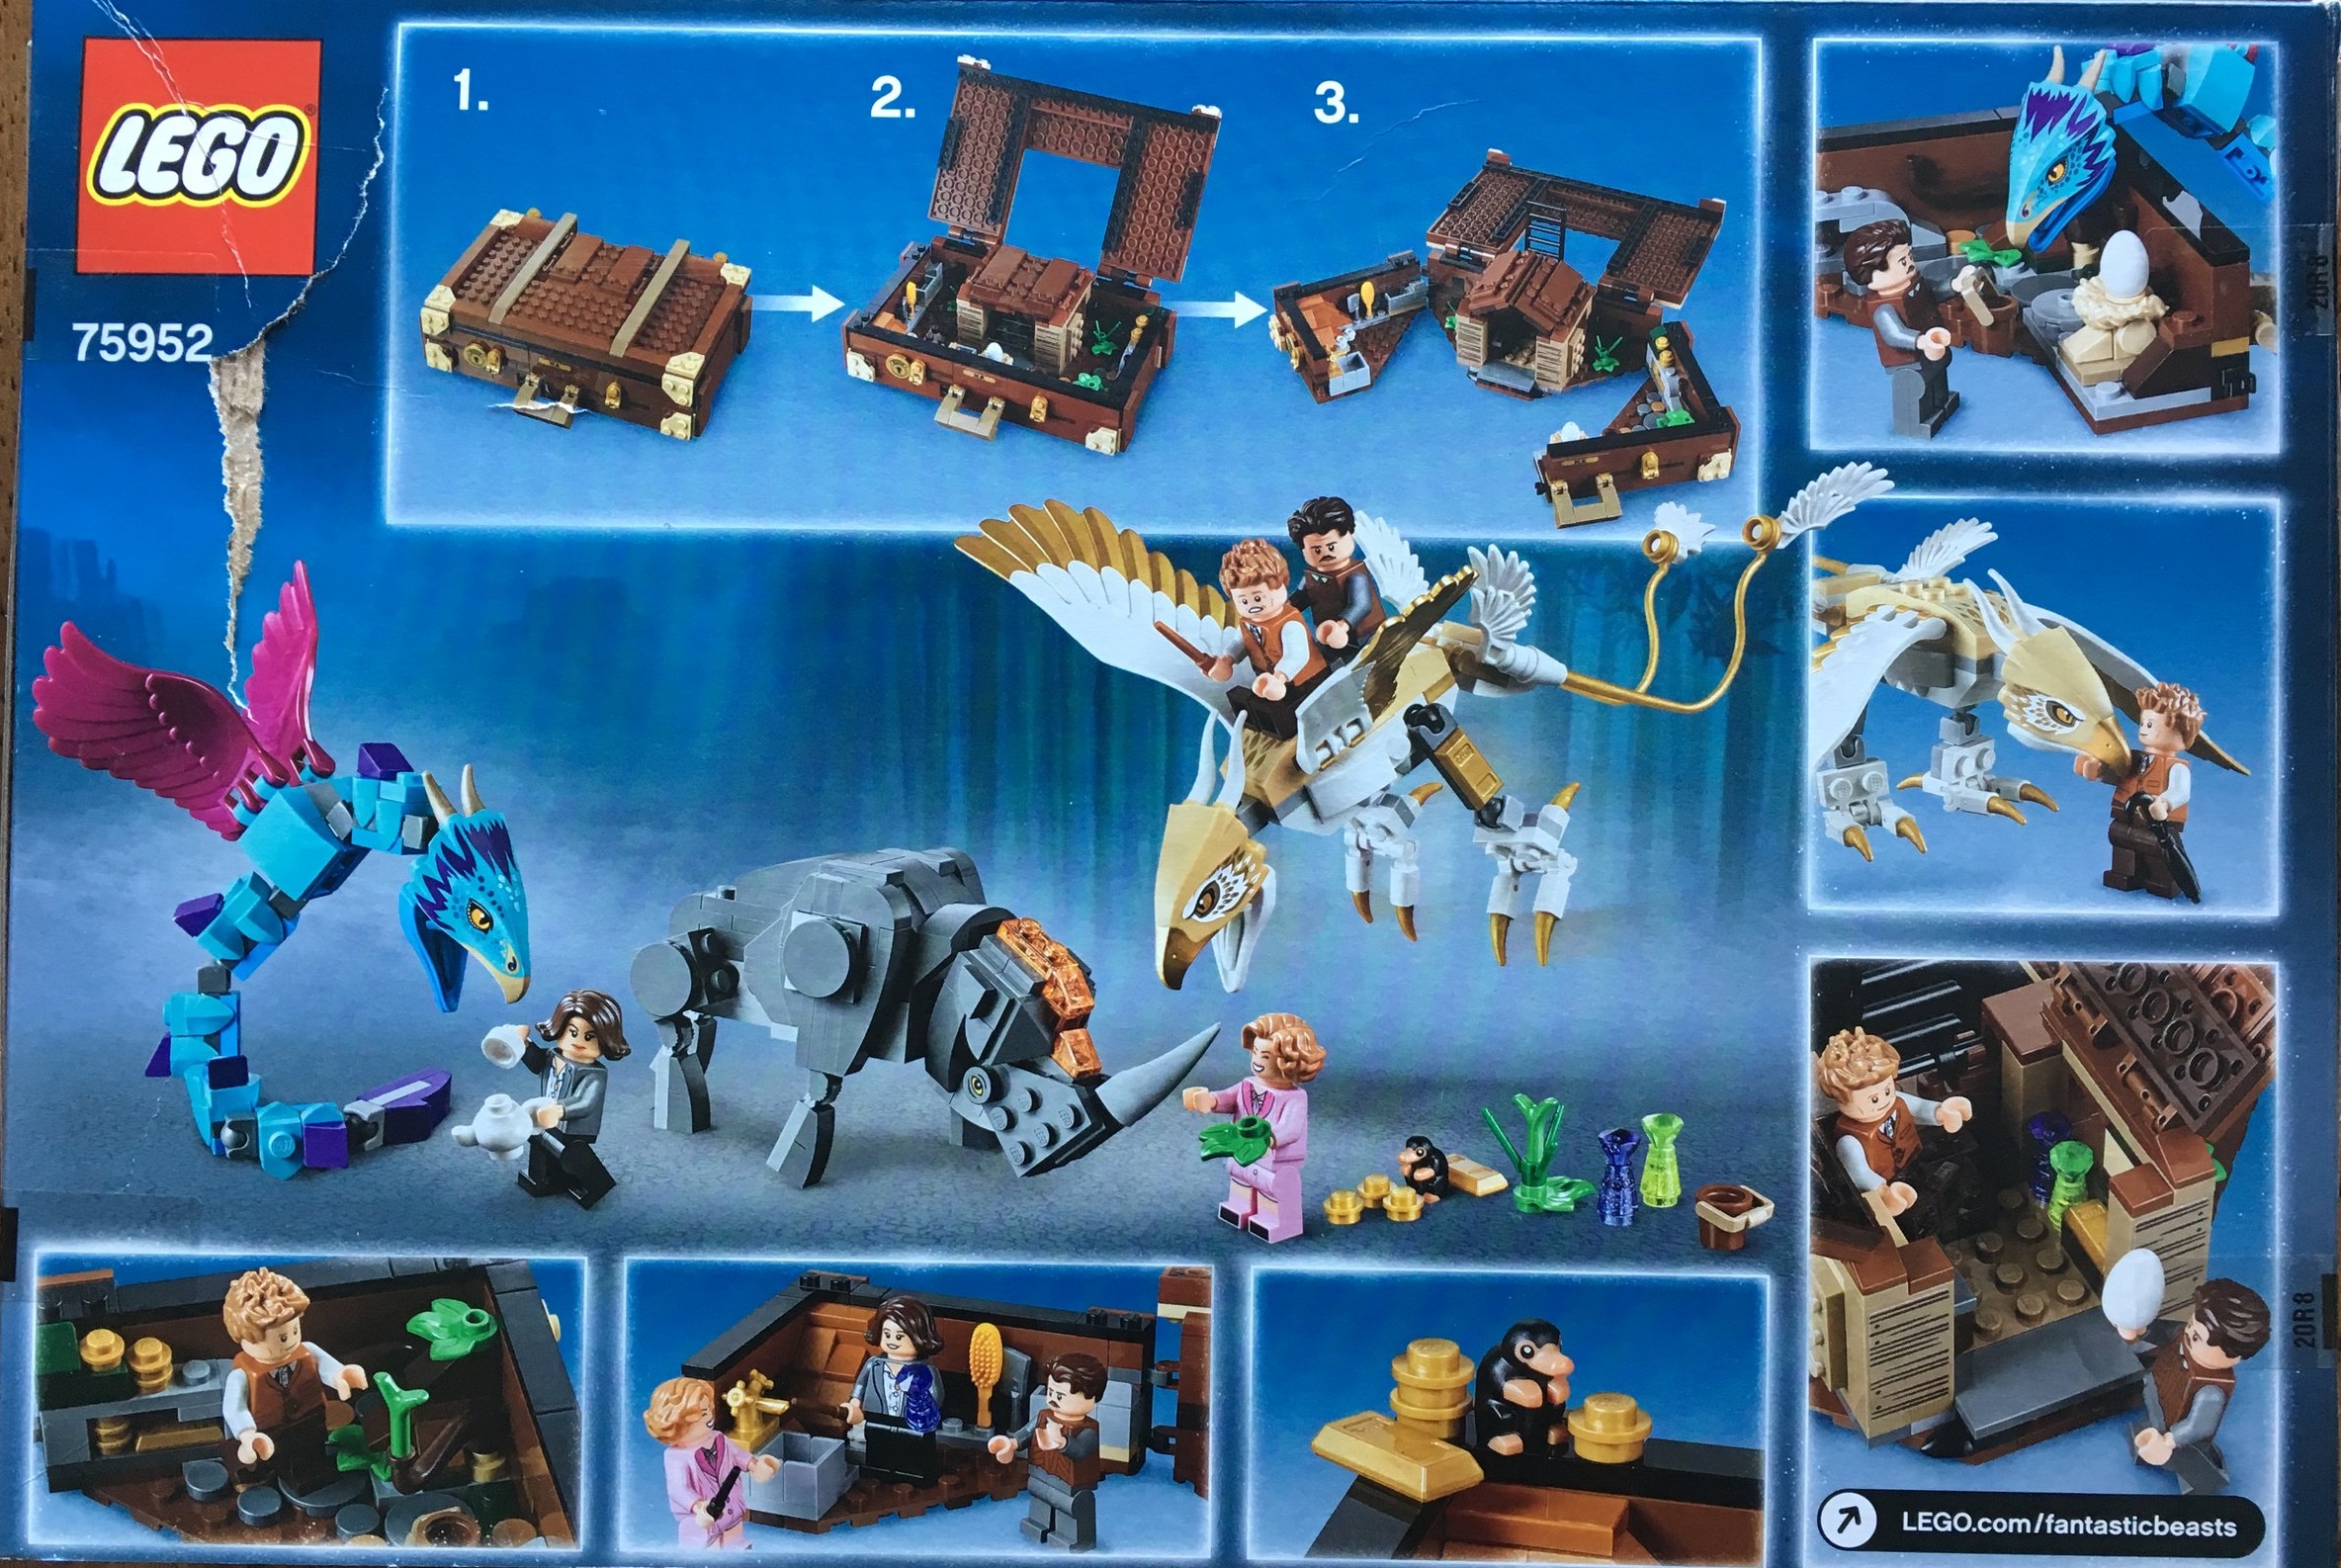
Here is the box. The front shows the case opened up with all of the creatures and minifigures. The back shows the play features. You can also see the damage that the box took during shipping on the back. Thanks Amazon.com! I guess that’s what I get… 20% off, but a banged up box.

75952_boxfront.jpg
75952_boxback.jpg

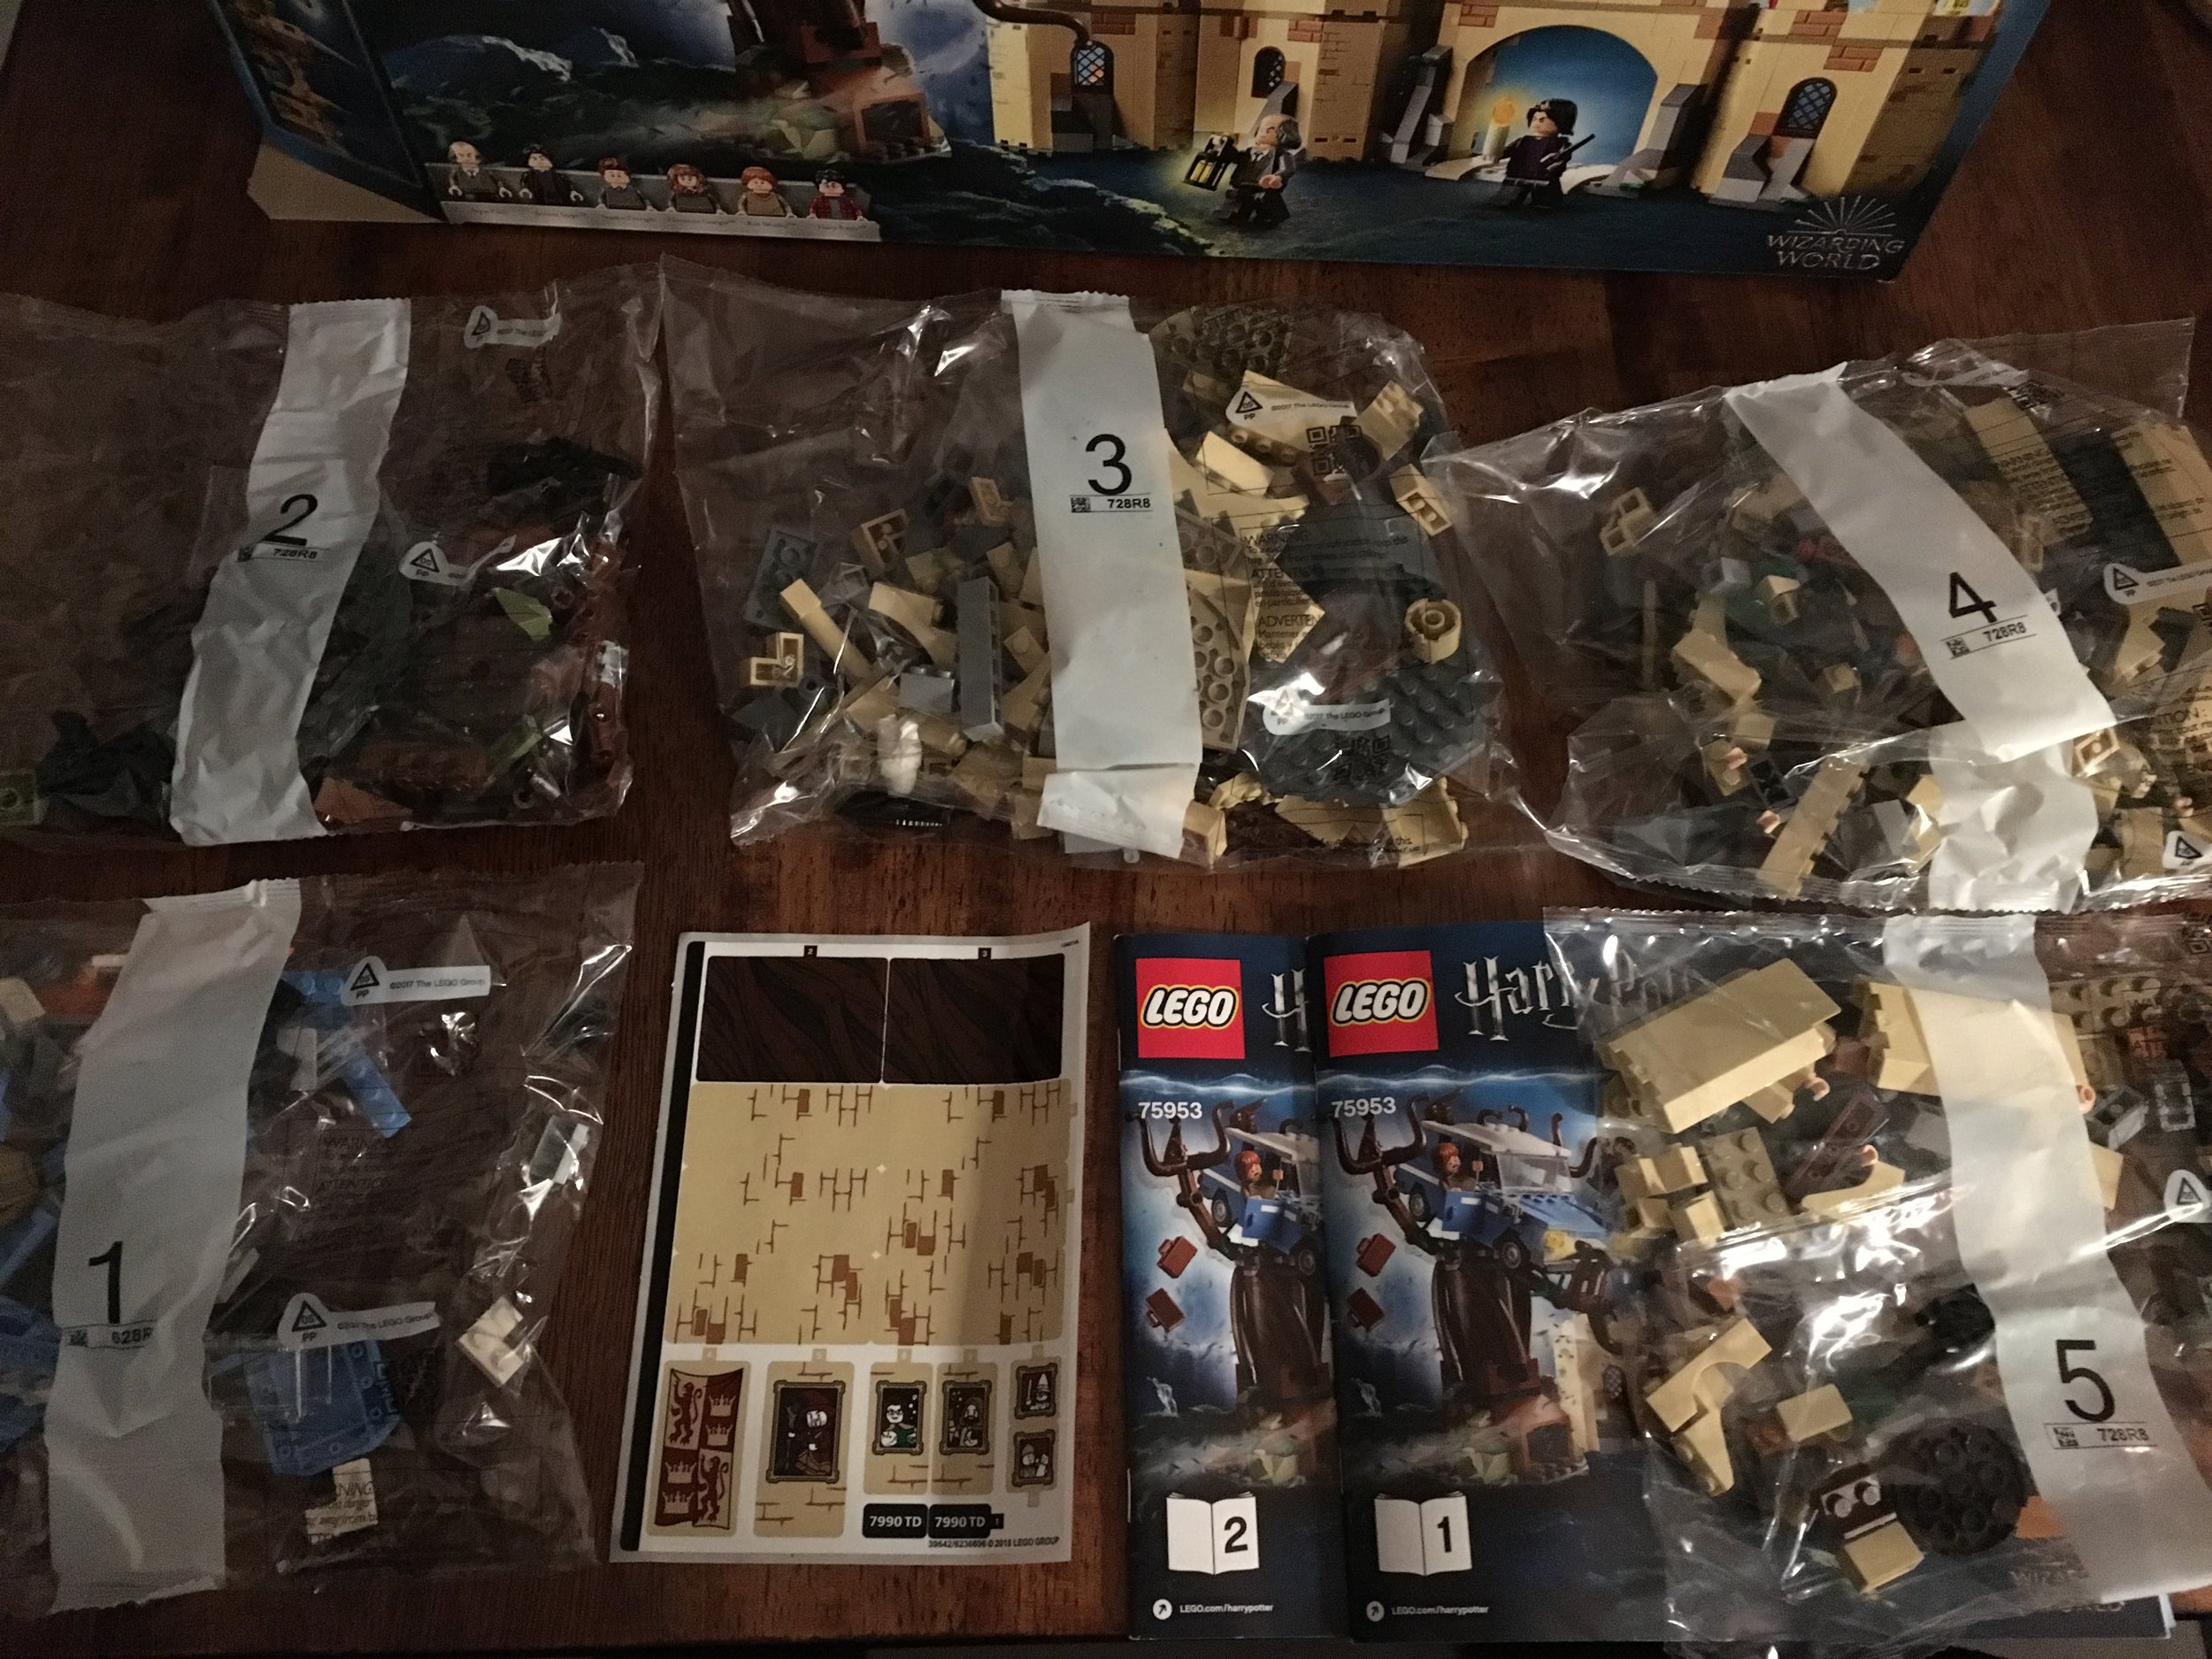
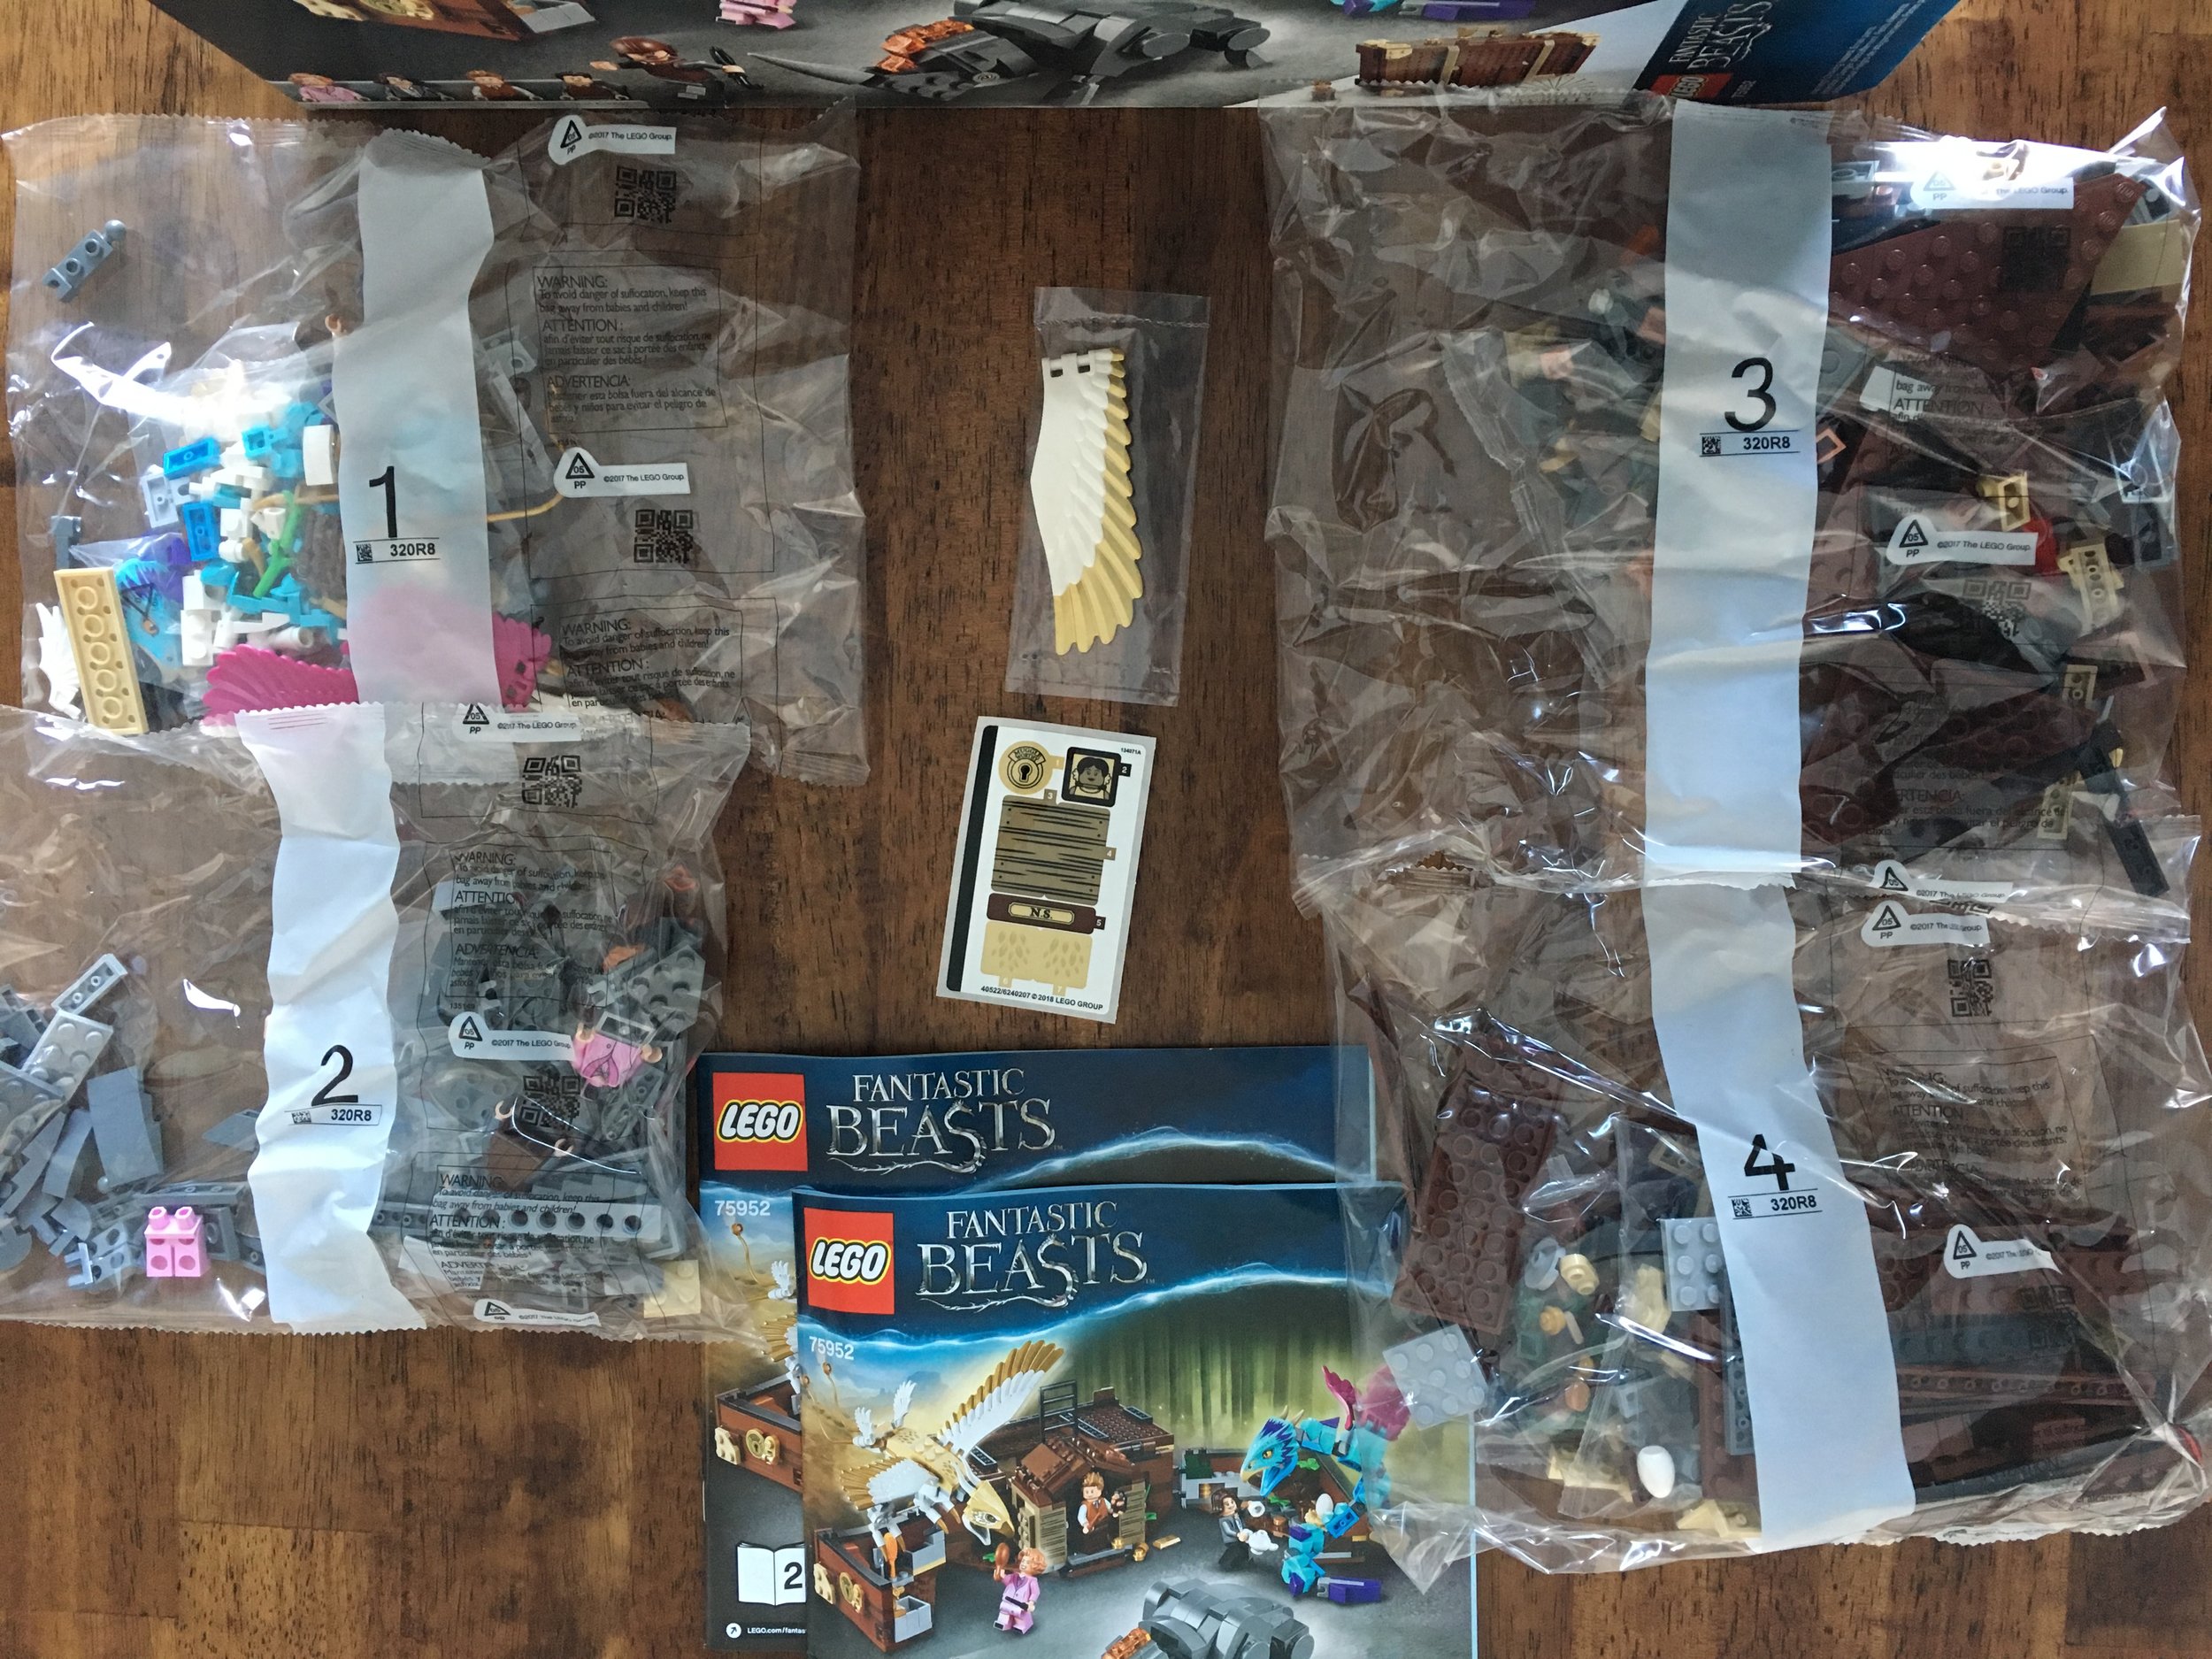
The contents of the set are four numbered bags, 2 instruction booklets that were jammed into the box, and a small sticker sheet. There is also a wing in a separate bag. I’m not a big enough fan of the movie to know all of the names of the different beasts. I looked it up and it is a Thunderbird wing. When I first opened the package, I was worried because only one wing was on its own. The other wing is in bag one. I’m not sure why one is in bag one and one is separate. So don’t panic if you can’t find the other wing loose in the box.

75952_contents.jpg

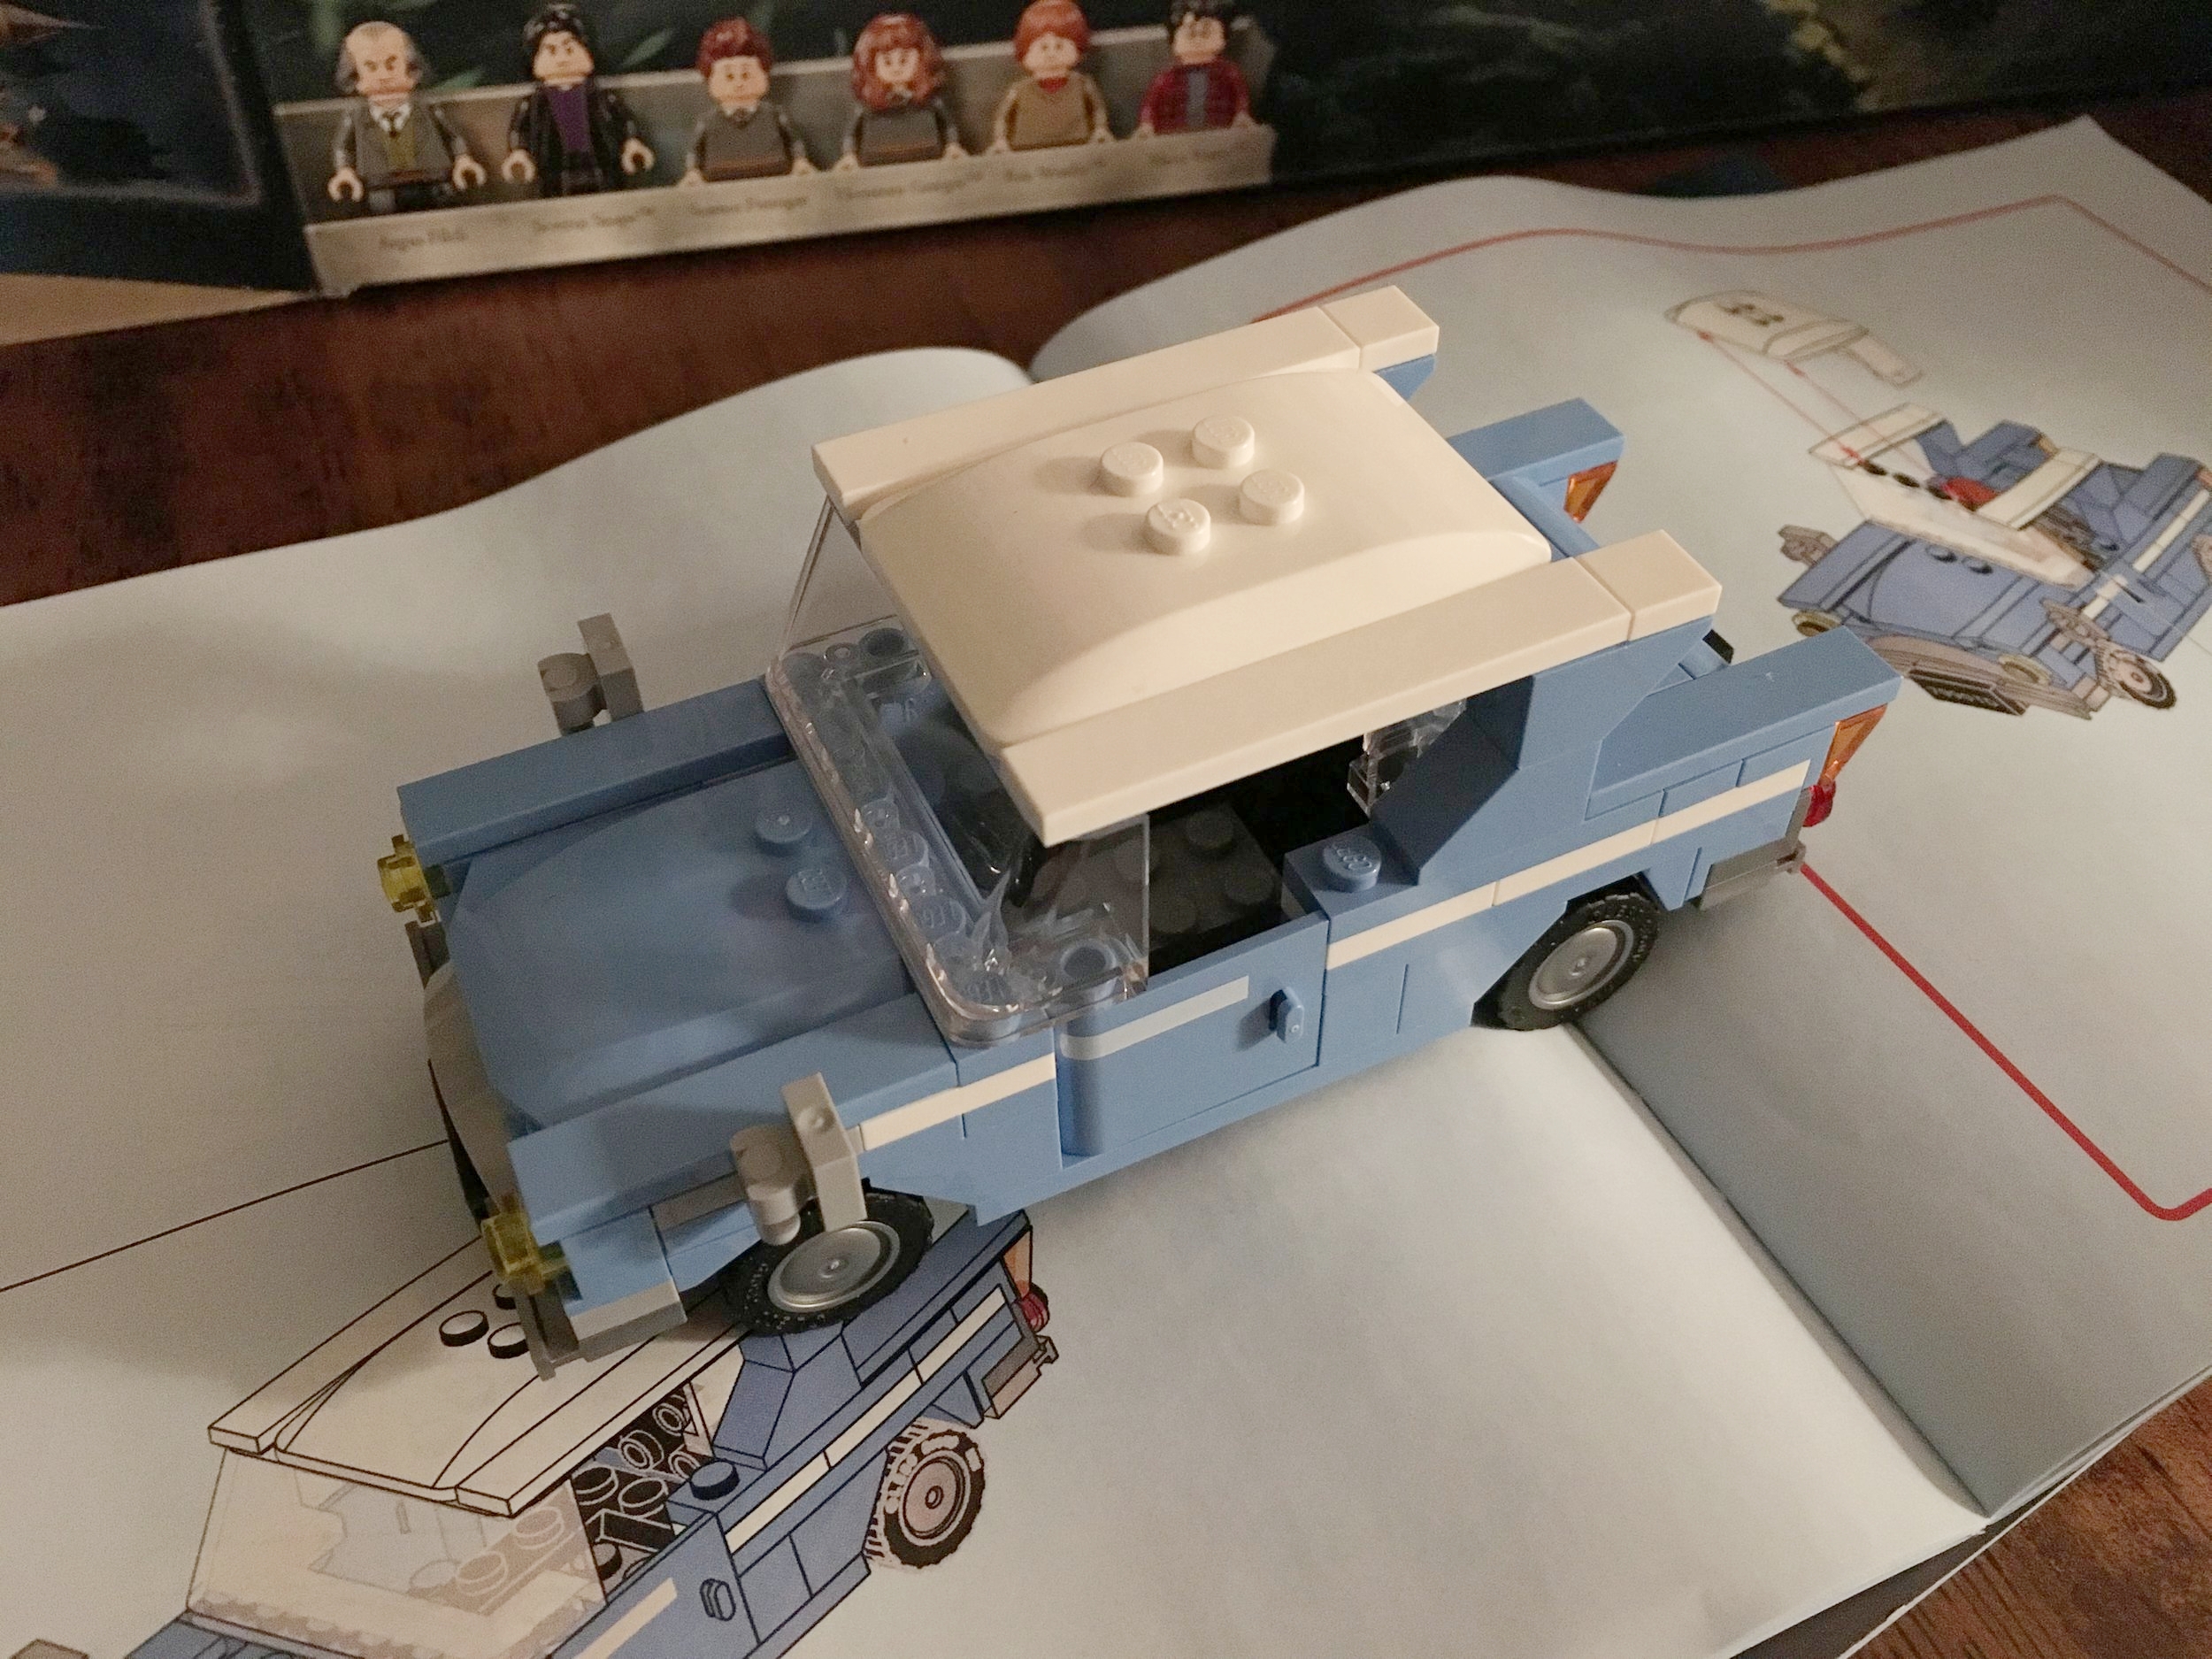
Bag one builds the Thunderbird (white and gold winged creature), the Occamy (bluish/purple creature that looks like a bird and a snake), and the Niffler (tiny duck billed platypus type creature). The 2 minifigures are Newt Scamander and Tina Goldstein. Newt has his wand and is holding a Bowtruckle (I’m not going to try and explain this one… just Google it). Tina has her wand and the tea pot used to hold the Occamy (again, Google it or just watch the movie if you haven’t seen it).

75952_bag1.jpg

The second bag includes the Erumpent (the big rhino looking creature) along with the minifigures for Jacob Kowalski and Queenie Goldstein. Jacob comes with a hair piece and a helmet and is holding an umbrella. Queenie has her wand.

75952_bag2.jpg

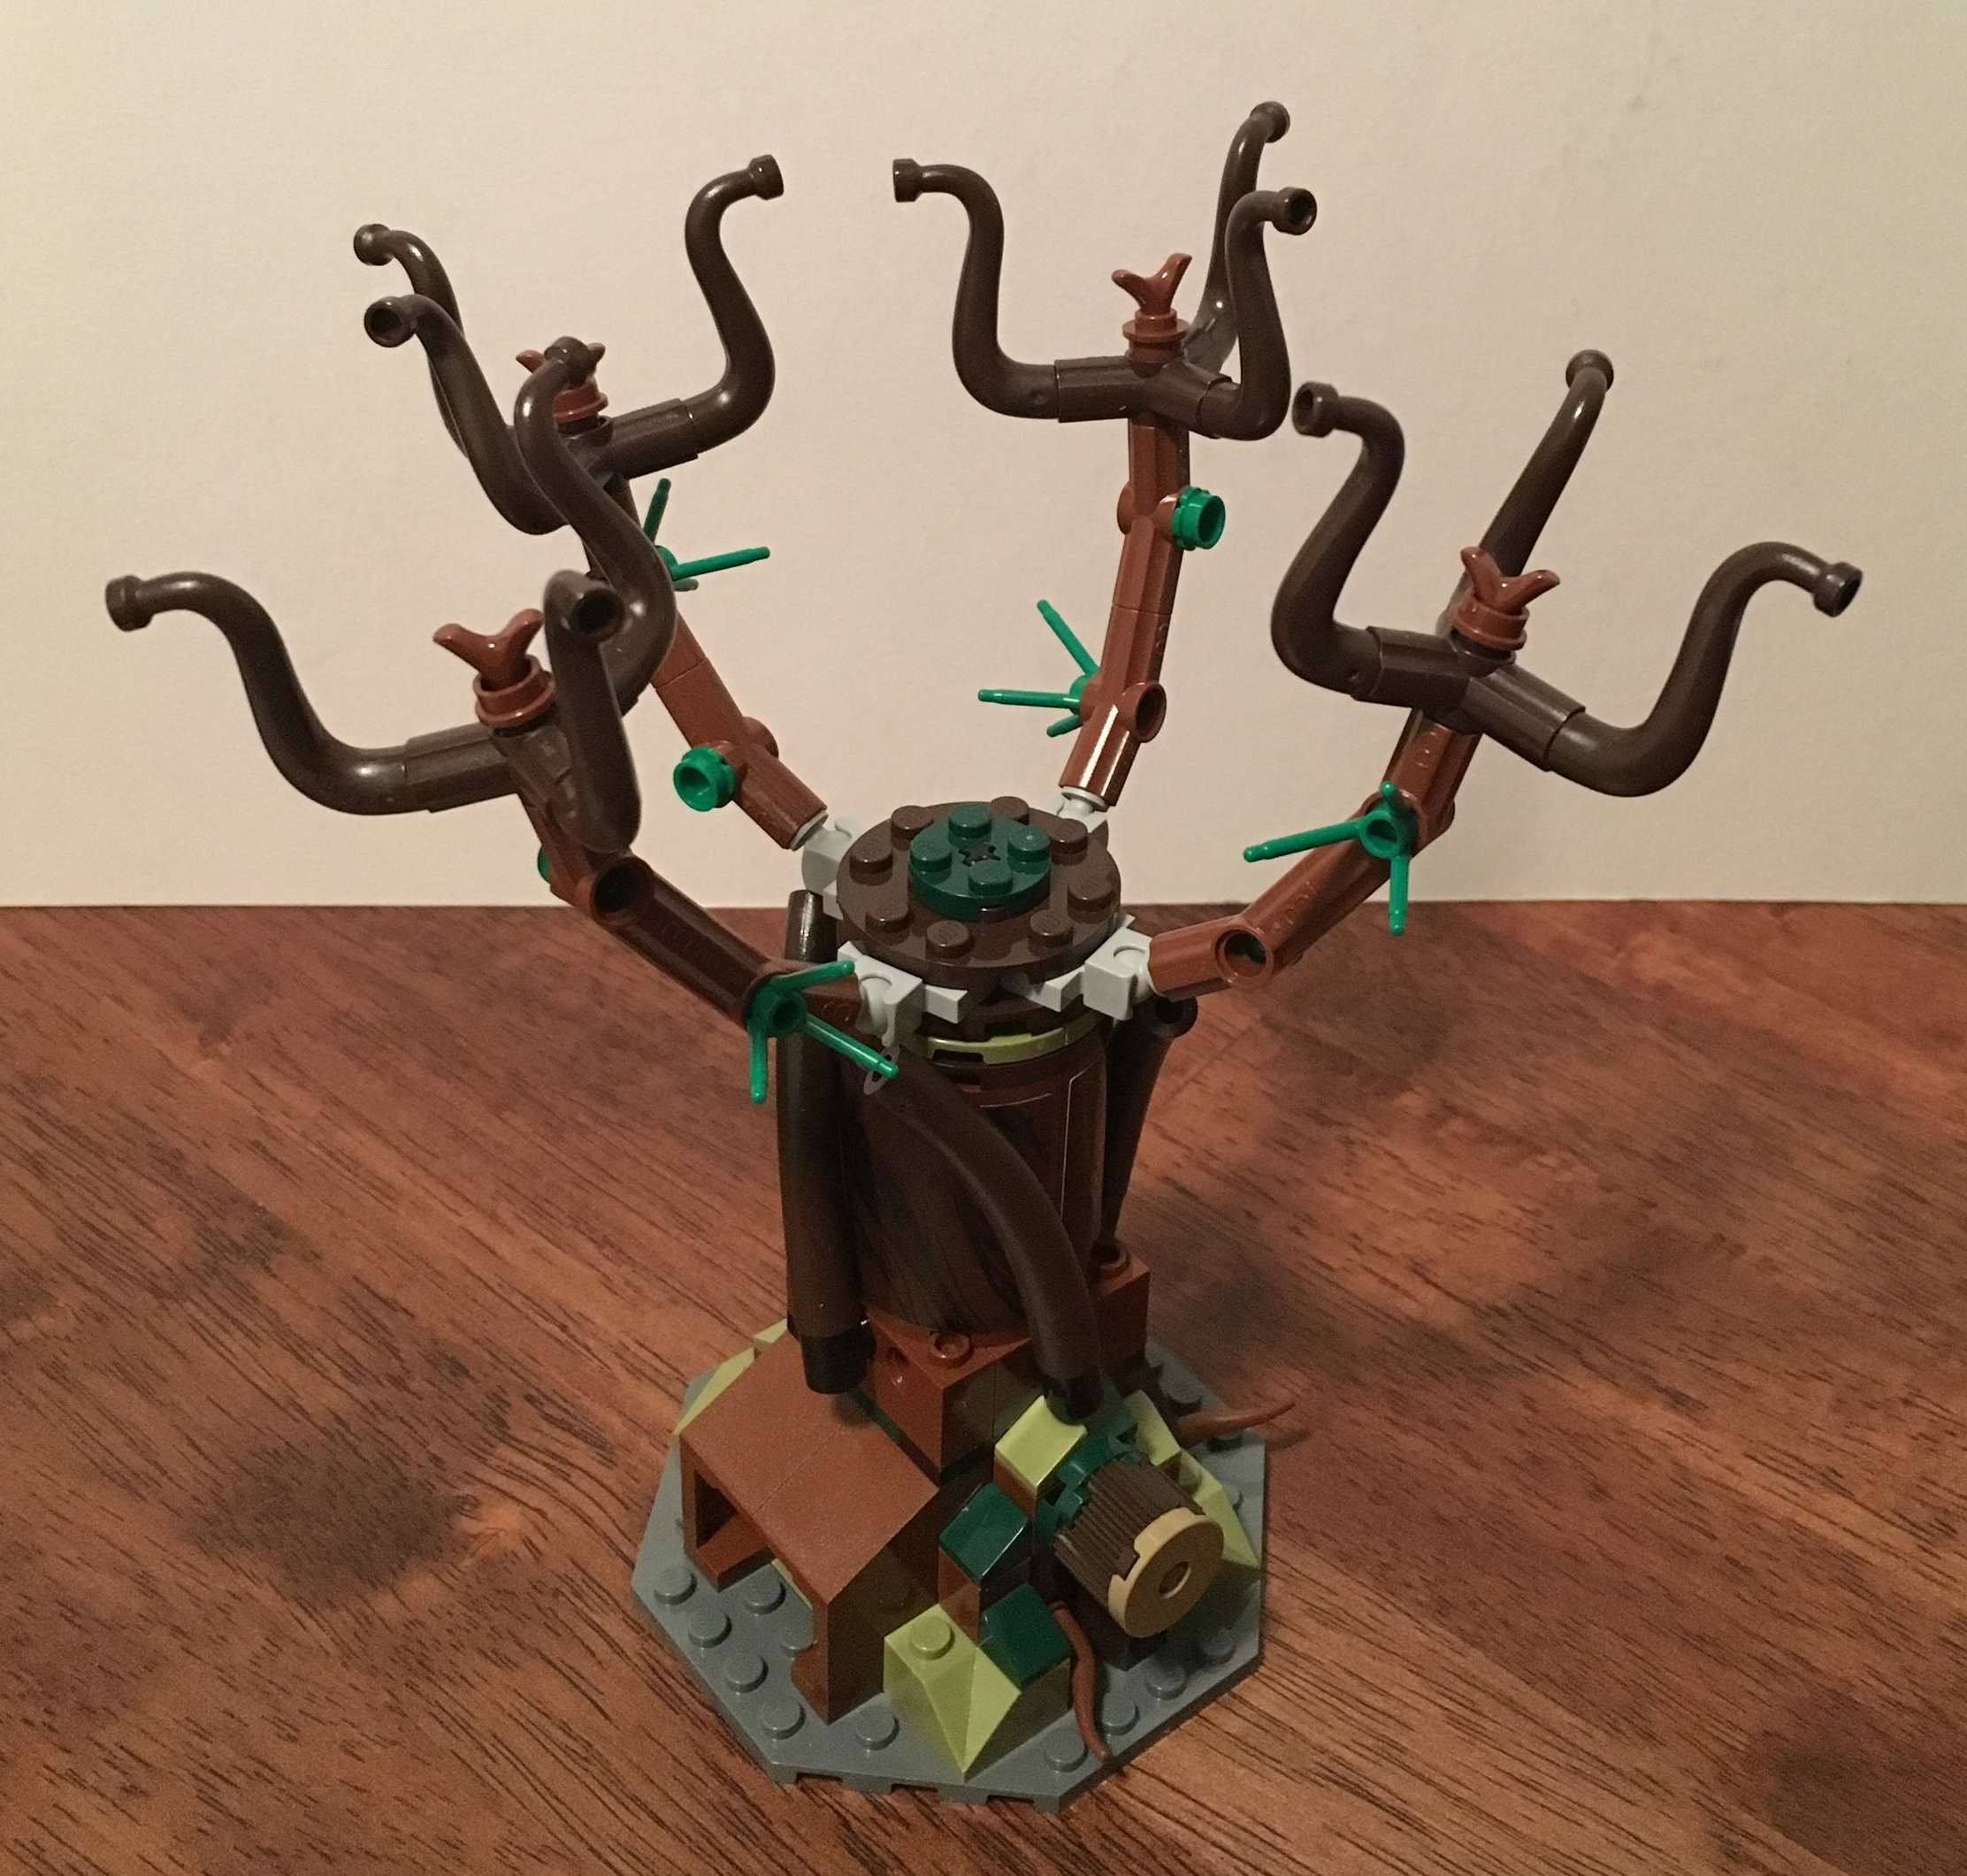
The third bag starts the case. I will have to go back and watch the movie as I will be honest and say that I’m not sure how accurately the case is being portrayed as compared to the movie version.

75952_bag3.jpg

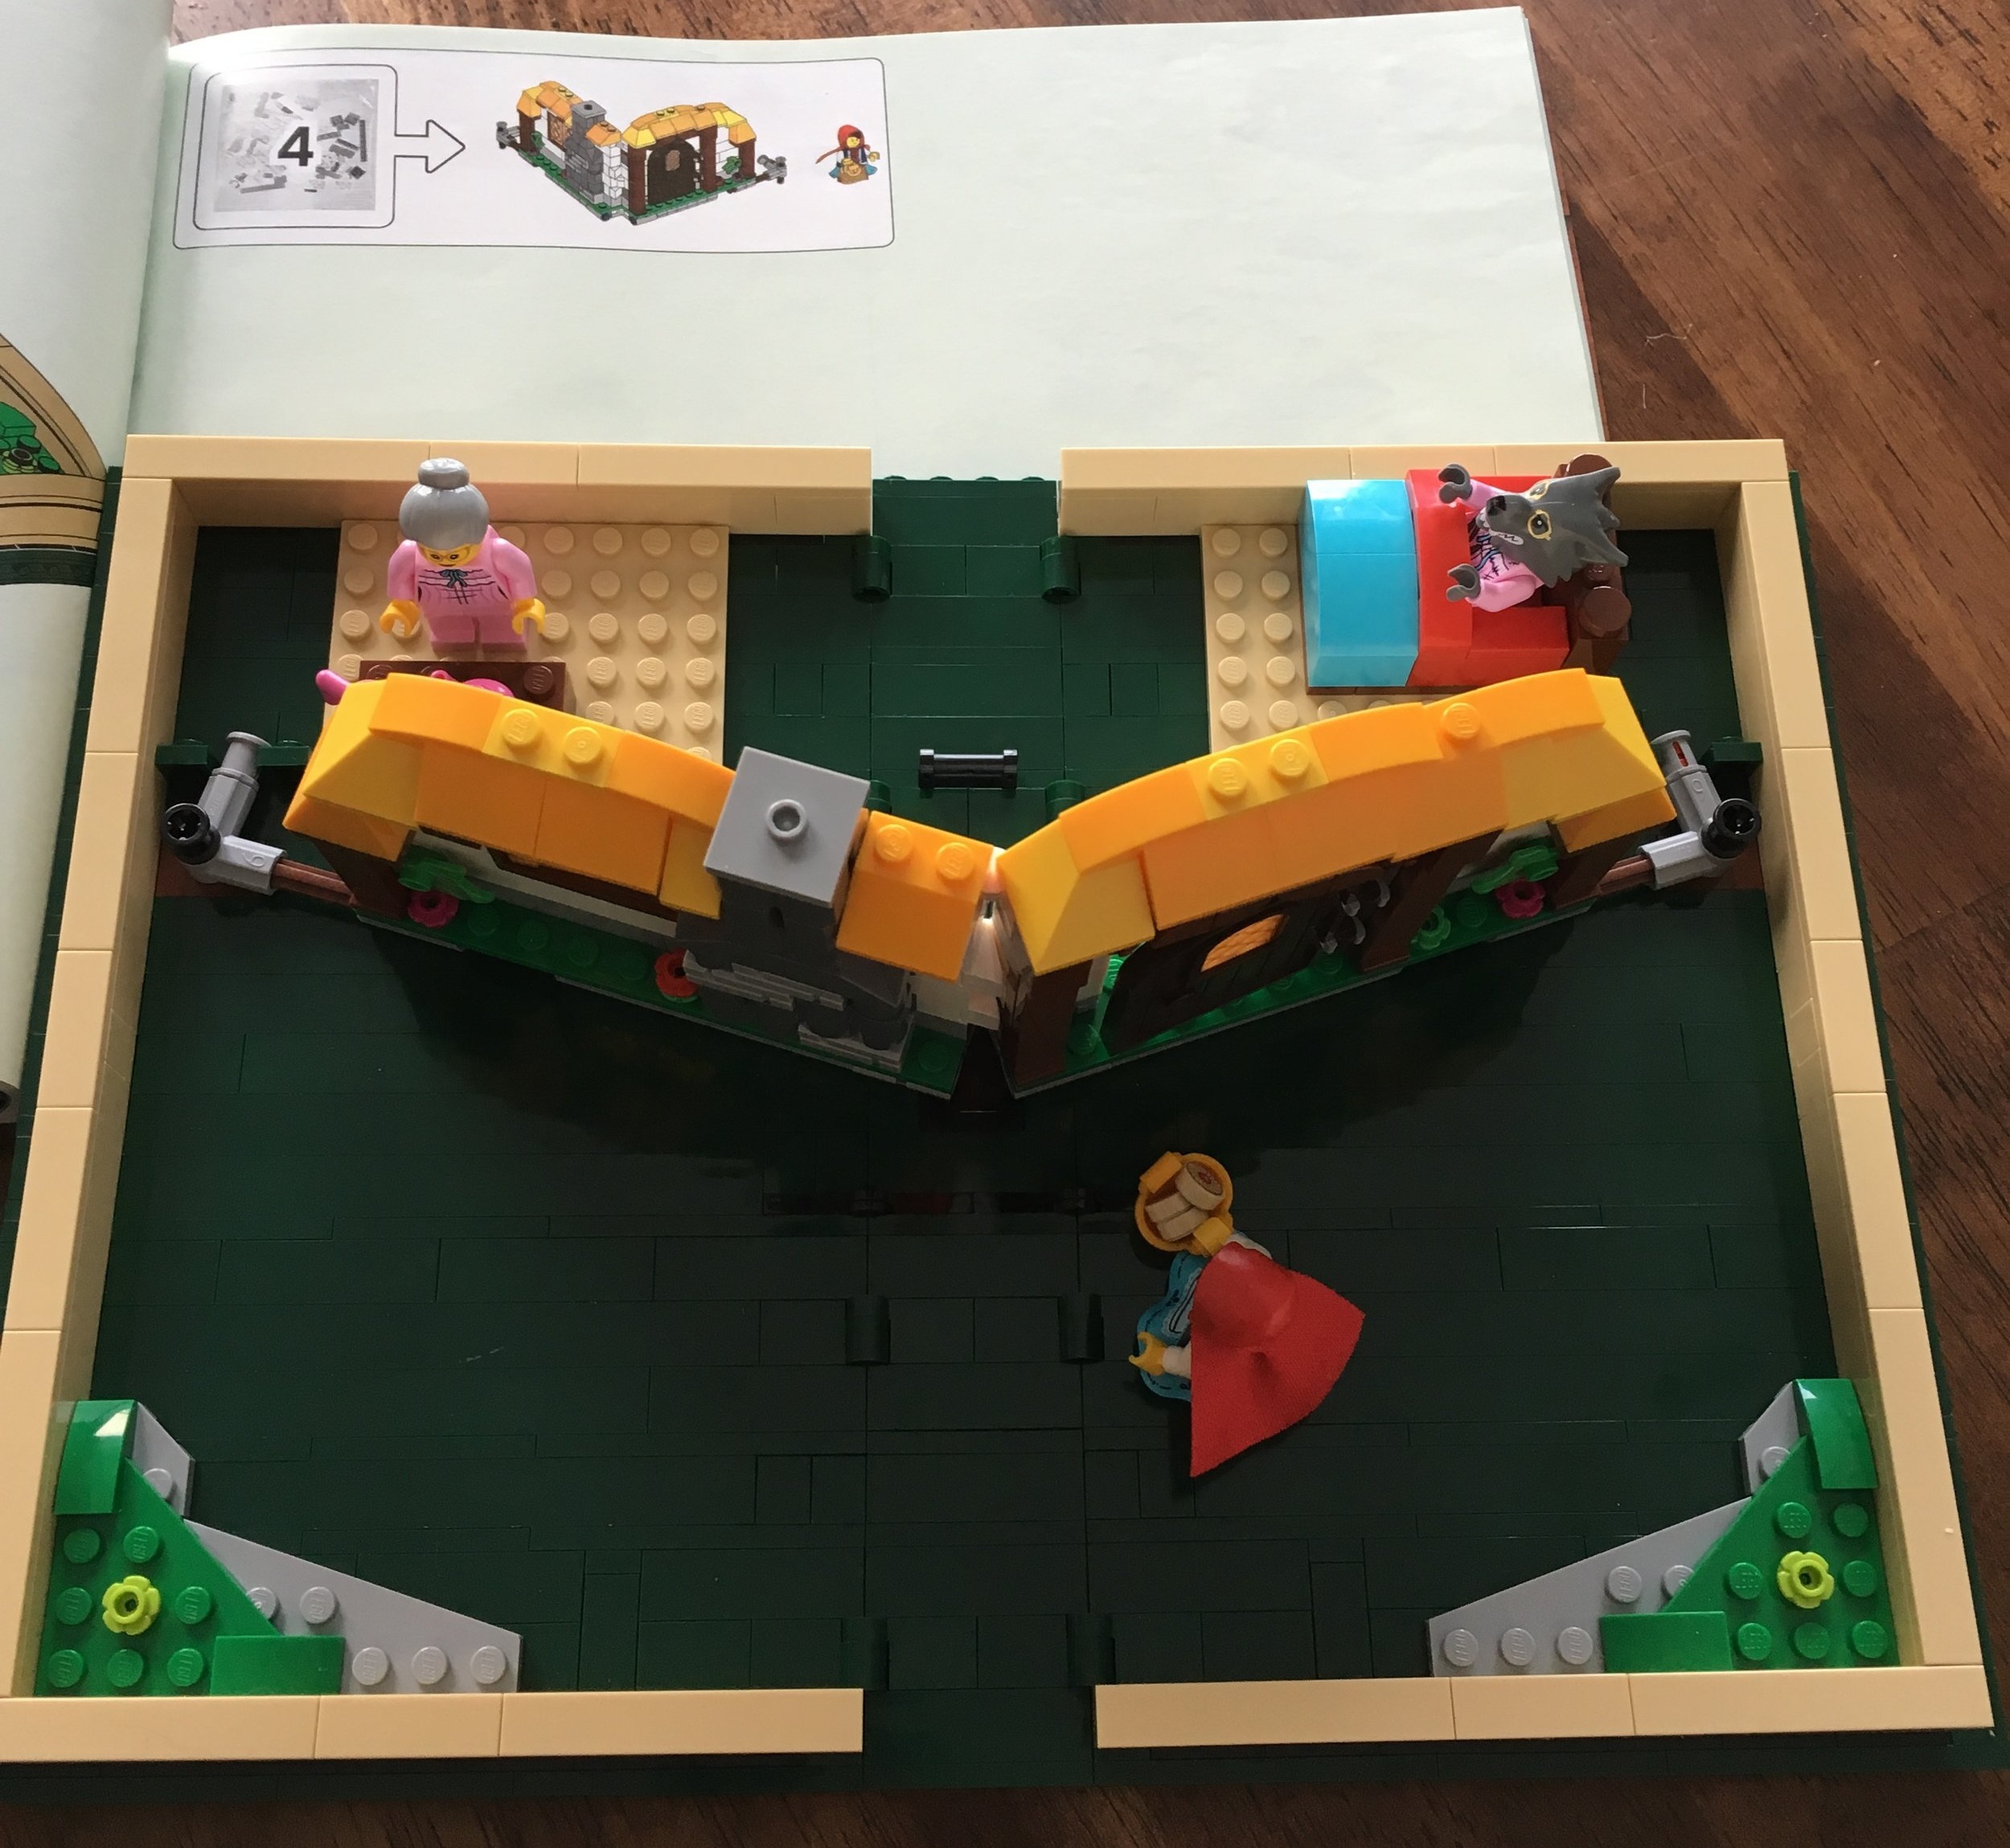
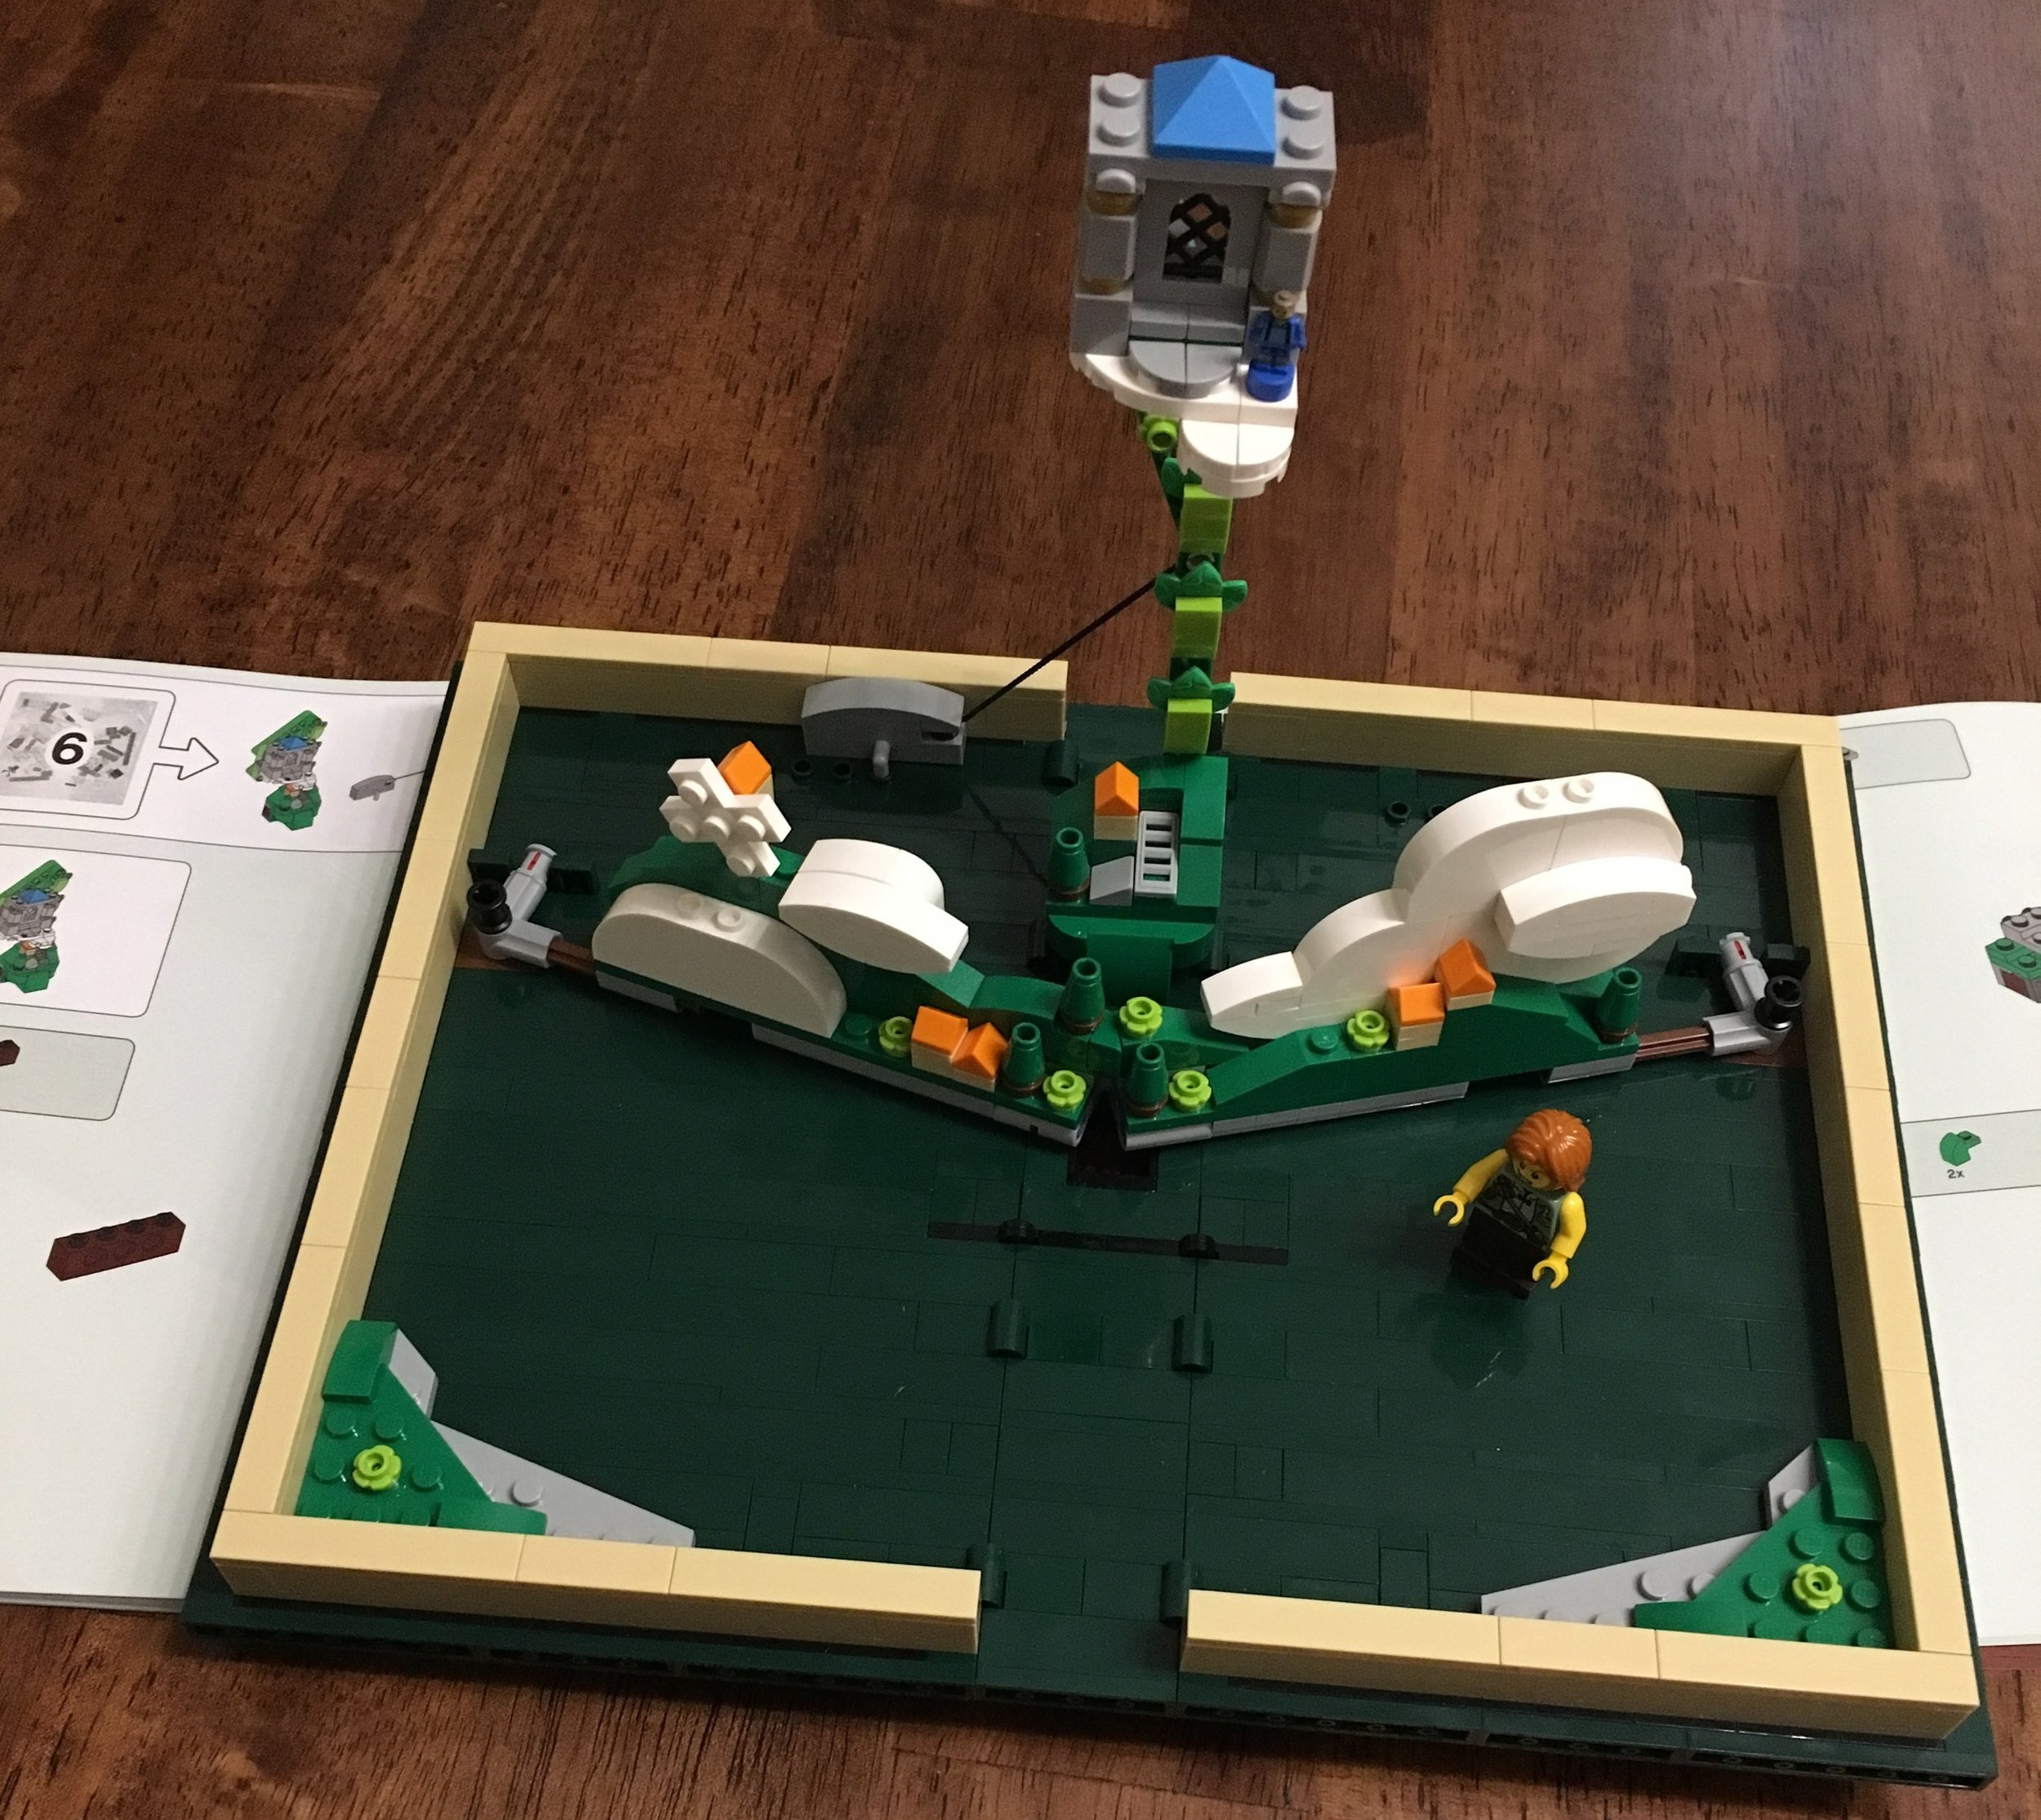
The fourth bag completes the case. Here are pictures of the case opened and then closed. If anything, it captures an item from the movie, but also gives you opportunities to do your own thing. Much like the LEGO Ideas Pop-Up Book, there are many different things you could do with this case besides representing the Fantastic Beasts movie.

75952_bag4a.jpg
75952_bag4b.jpg

Here’s a final picture of everything from a top down view. Not the greatest of pictures, but it shows all that you get. From a play standpoint, it captures a lot of the characters from the movie along with a key piece of the movie. From a parts standpoint, there are some good parts that could be used in other MOCs, but nothing too out of the ordinary. The build wasn’t too challenging and really didn’t have any different techniques that stood out to me. The sticker sheet was small so that made the build slightly better as I wasn’t putting stickers on after every other instruction page. Overall, unless you’re a big fan of the movie, I wouldn’t rush out to buy this one. I wouldn’t have purchased it without the 20% off sale at Amazon.com.

What are your thoughts on this one?

75952_final.jpg

Set Review - #21315-1 - Pop-Up Book - LEGO Ideas

For those of you that have been into or at least have followed the LEGO Ideas series, #21315-1, Pop-Up Book is the 23rd in the series. Has it been that many already? It was released on 2 November 2018 in the US with a retail price of $69.99. It contains 859 pieces which works out to be $0.081 each. Not too bad in terms of price per piece and if you’re willing to wait until the end of it’s shelf life, it may go one sale at some of the retailers. Onto my review…

The front of the box shows the book along with some smaller pictures of the options for what can pop-up. The back shows some better details of the two pop-up options inside that can be placed inside the book.

21315_boxfront.jpg
21315_boxback.jpg

This set contains six bags of bricks. Bag one contains a piece separator. It also contains the 2 large brown 8x16 tiles with one having the title “ONCE UPON A BRICK” printed on it. I was super thankful that I didn’t have to apply that as a sticker and that the set contains no stickers at all. YAY! The instruction booklet starts off with some introductory pages. The first two are about the sets creators (Jason Alleman and Grant Davis) otherwise known as JK Brickworks for Jason and Grant has a Flickr page showing his work. The second two pages are about the set’s designers from the LEGO Company. You can see their YouTube video here. The final few pages give a history of pop-up books and the stories portrayed in this set. After you read it in English, you can switch to French and Spanish.

21315_contents.jpg

The first bag starts the build of the book’s cover. This bag is almost all parts colored what I call forest green, but Brickset calls “Earth green.” Either way, I’m a big fan of this color and even if you don’t end up liking this set, you’ll at least have a whole bunch of really great parts to build other things with out of this set in the Earth green color.

21315_bag1.jpg

The second bag completes the cover.

21315_bag2.jpg

The third bag really turns the set into a pop-up book. The first picture (top left) shows the addition of the “pages” in what Brickset calls “Brick Yellow,” but I think is more of a light tan. You can also see the start of “Little Red Riding Hood” with Grandma’s bed on the right and a table with a pink tea pot and mug on the left. The second picture (top right) shows the front cover which has the 8x16 brown tile with the printed “ONCE UPON A BRICK” pop-up book title. It also has the names of the designers in 1x6 brown tiles underneath. How cool is that to have the LEGO Company printing parts that have your name on them and then having them sell a set with your name on it worldwide? Awesome!

The next two pictures (bottom left and right) show the detailing on the spine of the book and then the back cover. The back matches the front only the 8x16 tile is not printed.

Bag 3 includes the Grandma and Big Bad Wolf minifigures, but I’ll cover them next.

21315_bag3a.jpg
21315_bag3b.jpg
21315_bag3c.jpg
21315_bag3d.jpg

The fourth bag finishes up the “Little Red Riding Hood” scene. This bag includes Red with her bag of goodies to bring to Grandma. The pop up portion itself includes the house with a door that you can open. One could argue that there isn’t a ton of detail here, but I think between the original designers and LEGO designers, they got it right. It’s got a good amount of detail to portray the story, but it’s not over the top to the point where it loses functionality. You have to take the minifigures out to close the book, but the rest of the parts can remain when you close it.

The minifigures are great. The wolf with the tattered outfit that he stole from Grandma is very creative. I like that the wolf also has her glasses on. I never understood how Red didn’t immediately realize that it was a wolf. I guess you can tell the story how you want after you build it. Maybe it’s not a wolf, but a storm trooper or Emmet joins Red for some cookies.

21315_bag4.jpg
21315_bag4b.jpg

The fifth bag starts on “Jack and the Beanstalk.” It includes a microscale build of the village with clouds on top. There’s a windmill and some tiny houses. A piece that probably isn’t new, but was new to me was the cheese sloped size roof tile used on the windmill and two of the houses. I think it’s a good addition to the LEGO parts catalog. This bag also includes the Giant and a microfigure of Jack. The set comes with 2 microfigures of Jack so just in case you lose one or if Jack and his twin want to go hang out with the Giant.

21315_bag5.jpg

The sixth bag finishes up “Jack and the Beanstalk” with the actual beanstalk and the castle at the top. The functionality here is very creative with the use of Technic parts to make the beanstalk expand as you open up the book.

What struck me when building this set is that LEGO has left it open for builders. The title on the front cover does not say “Little Red Riding Hood” and “Jack and the Beanstalk.” It’s an open ended title. What’s been provided is a cover with a building space. The functionality for the pop-up portion of the book has been shown and there are studs on the top and bottom of the pages that you can use to insert your own stories. A quick Google search brings up results from a whole bunch of builders who have made pop up castles, pirates, and scenes from movies. At the writing of this post, LEGO Ideas is running a contest to see what kind of design you can come up with for the pop-up book. It’s definitely worth checking out some of the contest entries just to see how creative some people are when it comes to building.

Overall, this set is a win. I was a big fan. It’s a great build with a lot of great pieces and it opens up a new building technique to explore. If the price is too steep, wait a few months and keep checking on Amazon.com, Walmart, and other retailer sites to see if they have it for a discount.

Happy building!

21315_bag6.jpg

Set Review - #10263-1 - Winter Village Fire Station - Creator Expert

The 2018 Winter Village set was released on 2 October 2018. It’s a fire station and adds to the line of sets that started back in 2009. This is the 10th set in the line. This year, the set is 1,166 pieces and retails at $99.99 in the US. This puts it at $0.086 per piece which is pretty decent. It’s slightly less than last year’s set ($0.089 and keep in mind that the set includes a light brick which is probably more expensive to put together).

You can see my review of the 2017 set Winter Village Train Station here.

Here is the box. Like many sets, the front shows the whole set while the back shows some of the set features.

10263_front.jpg
10263_back.jpg

The set contents are 3 sets of bags, the two instruction booklets in a bag with the sticker sheet, and a piece separator (in the first set of bags).

10263_contents.jpg

The first set of bags builds what I will call the accessories. It includes a bench with a lamp post, a Christmas tree with some gifts, an ice skating rink, the fire truck, and a sled. The Christmas tree design is one that I have not seen before. It’s better than just throwing in a one piece molded tree, but I think it misses out on some of the realism of branches that can be created using LEGO bricks. The ice rink includes a hockey player with a hockey stick on the ice. The skating area is rather small and it includes a fireman statue. The fire truck does not have a ton of detail, but it fits into the theme of vehicles used in previous Winter Village sets. This bag includes 2 fire fighters. There is a female and a male and they each come with a hair piece and a helmet. And don’t forget the fire dog! In my opinion, the stickers on the fire truck were a pain. I always find it challenging to put a sticker on a 1x2 tile or on the 1x2 cheese slope. I find it hard to get the sticker exactly centered on the tile part. I’d rather have bigger stickers on bigger pieces and printed small tiles or cheese slopes. Finally the sled includes some gifts and there is a baby minifigure with a gift on his/her shirt to ride on it. The set shows a girl minifigure along with the sled.

10263_bag1.jpg

The second set of bags completes the first floor of the fire station. As you can see, the front includes a fire hydrant and a snowman. The main doors on the first floor open in to allow the fire truck to drive in or out. There are stairs leading up to the second floor that have some white pieces attached to show the poor shoveling job that was done. Like the rest of the Winter Village theme, the back is not completed (something for you to do on your own). The truck is longer than the building itself. The back does show you some of the items in storage to include another helmet, an ax and a pick, fire extinguishers, and a clock. This set of parts bags includes a saxophone playing minifigure to… I’m not sure how he fits in.

10263_bag2a.jpg
10263_bag2b.jpg

The third set of bags completes the build and adds the second floor and roof. It also includes another fire fighter. From the front, you can see the station is covered in some Christmas decorations of greenery with red. The tower above the fire pole slide area has a pretty cool design on the front and right sides. The building also has some snow along the edges. Looking inside you can see a small kitchenette with a coffee maker, stove top, and sink to help cook the hot dogs you can have with your coffee. There’s an old school red phone to get calls and a radio installed into the wall. A fold up bed is attached to the wall (the bed uses a sticker for the pillow and sheets… really?). Under the bed is a play area and a dog bone for the fire dog. The living quarters also include a table with 2 chairs.

10263_bag3a.jpg

The top of the building has a flag (with stickers to attach) and a slot for you to attach the light brick. The light brick really only lights up the front two windows and in my mind doesn’t do much for the set.

10263_bag3b.jpg
10263_bag3c.jpg

Here’s a view of the final product. I got it during double VIP points so I got some benefit, but it was not on sale. These sets typically go on sale only at the end of their shelf life so you’ll have to wait at least 2 years on this one if you want to get it on sale. Overall, I think this set fits into the Winter Village line very well. We’ve had a toy shop, a bakery, a post office, and others and a fire station is a great addition. This set has a lot of play built in and the accessories go well with the rest of the theme.

If you’ve been sucked in like me to this theme, definitely pick this set up. Wait for double VIP points or for when there is a cool free set for buying a specific amount. At $99.99, this set should put you at the right place to get whatever set is being offered.

Happy building!

10263_final.jpg

Set Review - #42083-1 - Bugatti Chiron - Technic - PART 2

If you missed Part 1, you can see it here. If you want to see what a real Bugatti Chiron looks like or what the factory looks like, you can see that here. If you want to see more about the set, keep reading…

Instruction Book 2 is 322 pages long. It starts off with the set of bags numbered 7 in build box 3. This section of the build is labeled rear body work and deck lid. With Book 1 being the internals, Book 2 focuses on the externals. The bags numbered 7 include the construction of the rear spoiler and then a lot of the body for the back to include the portion around the engine and part of the top of the passenger compartment. Number 8 completes a lot of the detail in the rear to include the cool looking brake lights. There are also a number of stickers that go here. I am not a fan of stickers, but I realize LEGO has to do a price balance between printed pieces and sticker sheets. The cost of the sticker sheet probably helped save a few dollars on an already expensive set. I’m not the best at sticker placement, but it looks okay.

42083_bag7.jpg
42083_bag8.jpg

Bags 9 and 10 are labeled the seats and interior on page 108 and start off box four. The seats are Technic built with some System pieces for added detail. As the build went on, I realized that there were more and more System pieces used. I’m not a good builder/designer to begin with, but I’m impressed at the ability to combine the 2 types of pieces into one set and to have it go seamlessly like they did. Bag 9 is the seats and some more of the outer paneling. Bag 10 is the dashboard, steering wheel, glove compartment, and a bunch more stickers.

42083_bag9.jpg
42083_bag10.jpg

Bags 11 and 12 start on page 200. This section is labeled front body, lights, and horseshoe grill. Bag 11 is mainly the doors, but there are a few details to build up the front of the car. Bag 12 is the details on the front to include the front hood (and storage area), the bumper, the grill design, and the lights. There are a lot of System pieces used in the front to include the bumper and lights. The detailing is pretty impressive between the Technic and System pieces. It still has the Technic look without windows and with the various spots for pin attachments, but it still captures the sleek look of the actual car.

42083_bag11.jpg
42083_bag12.jpg

Bag 13 finishes everything up with the final details, the key to raise and lower the spoiler, and much like the Porsche (#42056-1) a handbag to stick in the trunk. It completes a few details to include a lot of the long, thin tubes that help create some of the contours on the car. The instructions for bag 13 also include the wheels and rims. The rims have a 1x1 round tile with the Bugatti logo on them and thankfully that was not a sticker. You even get an extra one (not sure what I’ll do with it).

The end of the instructions give you a link to go to and put in the code on the 1x4 tile that identifies your car. Similar to #42056-1, they have some free content. I have yet to go and see what it is, but #42056-1 had some cool graphics, a certificate of ownership, and some high resolution photos of the vehicle as well. If I ever have my own brick cave someday, maybe I’ll have to print a few of these up.

Here’s a top view of the car and then a view of the front with the hood open and the bag sitting next to it. The bag is made of all System pieces versus the Technic style bag of #42056-1.

42083_top.jpg
42083_hood.jpg

Here is a good look at the front to include the horseshoe grill and the lights. Also a view inside the car by the driver’s seat. With my smartphone and poor lighting, you can’t see all the details, but you can see the main details: steering wheel, dashboard with various dials, paddle shifters, and shifter.

42083_front.jpg
42083_inside.jpg

Finally, here’s the back. After seeing the real car, I think the designers did a great job getting it accurate. The first picture is with the spoiler down and the second is with it up and the key still in. The key goes into a small hole behind the driver’s side rear tire. I have yet to be able to do it without peering in to try and find it. The design is impressive as it locks in the up position as well.

42083_back1.jpg
42083_back2.jpg

So the final verdict… I had a blast building it. The design is sleek and very sturdy. It’s very impressive. Unfortunately it is very expensive! I used a gift certificate, but even with that it was still high. I hit a double VIP point day so that helped some, but yikes. LEGO keeps testing the boundaries on price and it’ll be interesting to see where they finally break their fan base. While it’s a great set and I hope LEGO continues this series, I would like to see the price go back to under $300 similar to #42056-1.

What are your thoughts on this one? Too expensive? Priced right for the build?

Happy building!

42083_final.jpg

Set Review - #42083-1 - Bugatti Chiron - TECHNIC - PART 1

My guess is most people who are into LEGO and reading this blog are not able to throw down $2.5 million for a Bugatti Chiron, but thankfully LEGO came to our rescue and built a much cheaper version. Following the 2016 release of the Porsche 911 GT3 RS on the LEGO Technic line, LEGO released the Bugatti Chiron on 2 June 2018. Retail price in the US is $349.99 or $0.097 per piece. Opportunities for sales were limited on the Porsche. It just retired and I saw it on Amazon.com for 20% off for less than a day. Using VIP points to get a discount is one of the best ways to pay less for this set at this point. While it’s not $2.5M, $350 is kind of hefty for the LEGO world.

This set came with a lot of fanfare from LEGO. The lead up to its release included a number of teaser videos and trailers along with a countdown clock. After it was finally released, the videos didn’t stop. Here are a few you might want to check out if you didn’t get to see them:

LEGO builds a full scale Bugatti Chiron

LEGO shows off the build and its functions

Kicking off the review, the Bugatti Chiron is shipped in its own box inside of a box when you order it from Shop @ Home. While this method is probably more costly, I like that when you spend a bit of money, they take the time to make sure your set arrives in good condition. From the label on the box, my version was manufactured in October 2018 in Mexico. I ordered it during the double VIP points weekend in October 2018 so not bad timing for LEGO’s supply chain.

42083_shipping.jpg
42083_image_tag.jpg

The set box itself is very flashy with a front view of the car on the top of the box and a back few of the car on the bottom with a few detailed pictures on the bottom as well.

42083_boxfront.jpg
42083_boxback.jpg

Similar to the Porsche 911 GT3 RS (#42056-1), When you open the box up, there are parts boxes. Unlike the Porsche set, this one has the boxes and instruction booklet creating a picture of the car. Props to the designers on this one. There are 6 parts boxes, 2 instruction booklets, and a sticker sheet. Each box is numbered. The instruction books show what box of parts you are on based on what page you are on. It does not list what parts bag set you are on though so if you’re like me and you build in spurts, you have to search for where you left off. Book 1 is 305 pages long. It includes some snazzy pictures of the LEGO design and of the actual car model. It also mentions that there is a podcast you can listen to while building the set. I did not do that so if anyone else did, let me know what you thought of it.

42083_box_inside.jpg
42083_contents1.jpg

Book 1, box 1 starts off with page 21 that says you will be building the engine and gearbox first. pages 22 and 23 show where you’ll be when finished with that section and there is a picture of what I presume is an engine and gearbox in the background. I won’t go too much into the details of the build other than to say when you’re used to building the LEGO System pieces and the last Technic build you did was over 2 years ago, it is a bit of a challenge (for me). I’ve definitely had to take my time as I’m not used to looking at instructions with the various Technic pieces.

Below are pictures of where you are at the end of each build. So all of the bags numbered 1, then numbered 2, and so on.

42083_bag1.jpg
42083_bag2.jpg

Here are bag sets 3 and 4. Number 3 finishes off the engine in the back of the car. It’s a very impressive design job too! They fit a lot in a small space. Number 4 starts on the front of the car to include the steering column.

42083_bag3.jpg
42083_bag4.jpg

On page 138 is labeled “The Marriage Process.” The book mentions that this is the way that the actual Chiron is built in that the front and back are assembled and then they join the two together. This section starts with set of bags number 4, the marriage process actually happens in number 6. Bags labeled #5 finish up the front of the car and some of the frame. I included my build and the picture on pages 140 and 141 of the set designer (Aurélien Rouffiange) merging the 2 sections of the build. Hopefully I built mine correctly.

42083_bag5.jpg
42083_bag6.jpg

I spent 5 posts on the Porsche (#42056-1) and I thought it was a bit much. My goal for this one is to give a quick overview instead of making you go through 5 pages of how great the build was.

With book one being complete, I figured it was a good time to post where I’m at. So far, I’m very impressed by the Bugatti Chiron. LEGO raised the bar with the Porsche 911 GT3 RS and they did it again with the Chiron. The box design and layout are impressive, the details inside the instruction book about the car and the set are cool, having the option to listen to a podcast about the project is an added bonus, and in general the build is very impressive in terms of functionality and matching what the actual car is like. While I had a gift card and purchased during a double VIP point period, at this point I say that it was a good purchase. It has definitely been worth my time and the funds I spent.

Stay turned for part 2

Set Review - #60202-1 - People Pack - Outdoor Adventures - LEGO CITY

One of the things that LEGO has gotten right over the past couple of years is listening to fans. The People Packs associated with the CITY line seem to be a direct response to fans asking for more minifigures to be in their city scenes. The first one released in 2016 was #60134-1 - Fun at the Park and then they had #60153-1 - Fun at the Beach in 2017. 2018’s version is #60202-1 - Outdoor Adventures. Released on 2 June 2018 in the US, it is the third set in a line of CITY sets that includes minifigures for your CITY scenes. This set cost $39.99 in the US, but I waited for it to hit 20% off at Amazon.com before spending anything on it. If you are willing to wait even longer, right now (November 2018), #60153-1 - Fun at the Beach is 35% off at Amazon.com in the US. Not a bad deal if you ask me. Back to the set at hand, Outdoor Adventures is 164 pieces and 15 minifigures. It works out to $0.244 per piece if you get it at full retail in the US, but it’s misleading since you are also getting 15 minifigures. If you look at it by minifigure, that’s $2.67 per minifigure which isn’t too bad if you compare it to the Collectible Minifigures that run at $3.99 each.

Onto the set… The box is similar to most boxes. The front interestingly mentions that the boat floats. I’m wondering if the designed the raft intentionally to float or if it just happened that way and they decided to advertise it on the box that way. Is it just the boat? Do the minifigs add too much weight? Have these questions already been answered and I’m wasting your time?

The back shows all of the minifigures to include each piece of the minifigures that can be interchanged. It even shows how you can interchange them to make different combinations. With 14 options, I’m sure the math is out there to say how many zillions of combinations there are. The baby minifigure cannot be interchanged for obvious reasons.

60202_box_front.jpg
60202_box_back.jpg

The contents are 2 numbered parts bags, 2 instruction booklets, and a plastic sheet which is part of the camping tent. LEGO probably could have done this all at once, but looking at the age range, a 5 year-old probably needs it broken up. Also included is a small bag with an eagle in it.

60202_contents.jpg

Bag 1 starts off with a female minifigure with a camera (left of picture). She has a small bag around her neck that sits on her side. Her face has 2 sides. One side is both eyes open and the other is with one eye open as if she’s looking through the lens of the camera. Is that a first for LEGO? A character who is looking through one eye? The box shows this minifigure taking a picture of the eagle which caught a fish. It is the standard LEGO fish and the fish’s mouth attaches to the eagle’s claw area so it looks like the eagle caught the fish.

Moving to the right in the picture is a rock climber scaling a mini rock formation. The rock formation itself isn’t that great, but considering the size of the set you can’t complain. Build a bigger rock face for the minifig to scale on your own. The minifig itself has sunglasses on his face and a helmet.

Next up in my picture (center front) is a hiker with 2 hiking poles. The set comes with an extra pole just in case you lose one I guess. The minifig has a green outer shirt on with what looks like a wolf face on the shirt printed underneath.

Moving on is a boy with a back pack cooking over a portable gas cooker. He has a pot and is frying an egg. He also has a plate and a mug. The set comes with 2 fried egg 1x1 round tiles so you can put one on his plate and one in the pan or however you want to set them up.

Next up is a male minifigure with a baby carrier who is carrying a baby minifigure. As a Dad who has carried his kids in a carrier in front, I thought this minifigure was great. You have to tilt him back a bit so he does tip over due to the weight in front, but that’s what I do when I have my kid strapped to me anyways so it is realistic.

Finally is a female minifigure in racing gear and a helmet with goggles on a mountain bike. Unlike some of the bikes of the past, her legs don’t go down too far on the bike so it looks like she’s riding it pretty high up. It comes with a small jump for her to ride up and over a log. The log comes with a 2x2 round tile with the print of a log on it to make it look like it was sawed down.

60202_bag1.jpg

The second bag starts on the left in the picture with a minifigure with a hammer who is supposedly setting up the tent. I have her standing by a lantern. Next up in the back are 3 minifigures posing for a selfie. There is an adult female with a portable lantern, the male in his Hawaiian shirt and the selfie stick (his face can be a posing face or a relaxed look), and then a girl wearing shorts who also has a portable lantern. Behind them is a sign with arrows pointing to attractions. One is to LEGO CITY and the other is to MOUNT CLUTCHMORE. A nice touch to the set I think.

In front of the picture is the raft (that supposedly really floats) and 2 minifigures with oars, life vests, and helmets.

Next up is child minifigure wearing a jacket. She has glasses on and is holding a pair of binoculars.

Finally is another female minifigure who has either sunglasses or her normal smiling face. She is holding a smart phone. My daughter helped me put this set together and insisted that we put her in the tent. Speaking of the tent, it is a simple build with 2 sleeping spaces. The plastic tent sets up nicely around the bricks and you can have both flaps open or closed as you wish.

60202_bag2.jpg

Here are all the minifigures in a picture. I didn’t have anything to lift up the eagle and probably could have used some more bricks to stage these minifigures, but you’ll live. Bottom line, it’s a great set if you are a CITY fan and you want more minifigures to add to your CITY. Every time I get one of these People Packs, it makes me want to create a scene with all of these characters. I don’t seem to ever have the time to do that, but maybe some day. In the meantime I have the minifigures to add to the scene I’ll create. Has anyone built a scene with these minifigs?

If you want to buy this set, it is 20% off at Amazon.com in the US and Walmart too (as of November 2018). If you wait longer, the sets seem to discount further. Definitely don’t pay full price on this one.

Happy building!

60202_final.jpg

Set Review - #75951-1 - Grindelwald's Escape - Fantastic Beasts - Wizarding World

The second Fantastic Beasts move will be released in the US on 16 November 2018 (if you believe everything you read on the internet). Although here in Germany you can get movie tickets for 13 November. This one is called “The Crimes of Grindelwald.” Beyond seeing the trailer, I don’t know much about the movie so no spoilers to report here. I initially thought the first movie was just an attempt to keep the series going after a successful and profitable run of Harry Potter books and movies, but the first movie was actually pretty good. Hopefully this movie will be good as well.

Onto the set… #75951-1, Grindelwald’s Escape, was released in the US on 24 August 2018. It retails for $19.99, but I was able to pick it up for 16% off at Amazon.com. It has 132 pieces and 2 minifigures so that works out to $0.151 per piece which is rather steep in my opinion. I’m not sure if this is due to the Thestral figure which is unique to this set or not. Full disclosure, I had to look “Thestral” up. Otherwise, I would have just said winged-horse. Is “Thestral” even right? Anybody?

Here is the box. It’s the standard look with the set featured on the front and the play features on the back.

75951_boxfront.jpg
75951_boxback.jpg

I had my 4-year old help me build this set (you can see her hands in the picture). As we opened the instructions, we had to follow them exactly as printed. One of the pictures shows a minifigure separating the pieces by color. This is the first time I’ve ever done that and it actually makes building very easy since you know which pile to look in. With smaller sets, I’ve never actually bothered, but it worked good for both of us.

This set has 2 bags of parts which are not numbered and an instruction booklet. There are no stickers to apply. YAY!

75951_contents.jpg

The set starts off with the minifigures. There are 2 which are Seraphina Picquery (in the lighter blue) and Gellert Grindelwald in the black with white hair. I have yet to see the movie so I’m not going to comment on whether they look like the movie characters or not. They both have dual faces and both come with wands and what Brickset calls a “mini shooter.”

The Thestral is next and you apply a brick harness and the wings. I’m curious to see if this figure will become popular on the secondary market or not due to its uniqueness.

Lastly is the coach. Nothing overly spectacular about this build. My kiddo had a tough time with a few of the attachments and I had to help a lot, but still it is a fairly easy build. The pieces aren’t overly exciting, but the wheels go back to the LEGO Castle days. I like the doors to the coach as well.

75951_final.jpg
75951_final2.jpg

My overall opinion… this set isn’t too exciting. If you’re a big fan of the movie series, then it may be worth getting for the minifigures, but it didn’t do much for me. Check for sales on Walmart, Amazon.com, and/or Target. Hopefully it’ll go down in price more if you’re looking to pick it up.

Happy building!

Set Review - #75955-1 - Hogwarts Express - Harry Potter - Wizarding World

As I’ve stated, more Harry Potter sets to review… This one is #75955-1 Hogwarts Express. It was released on 5 September 2018 in the US and retails for $79.99. I picked it up on sale at Amazon.com and since buying it the set has moved up to 20% off. Anyways, the set has 801 pieces and 6 minifigures. It works out to $0.10 per piece at retail (obviously less if you get it on sale). That’s right about average in my mind and not bad for a licensed set. Onto the review…

Standard box… Front shows the set with all of the minifigures. The back shows the play features with the Dementor appearing 3 times. I think this set will be popular just for the Dementor alone.

75955_box_front.jpg
75955_box_back.jpg

The set includes 7 bags of parts, an instruction book, and a sticker sheet.

75955_contents.jpg

Bag one starts to build Kings Cross station to include platform 9 3/4. It also includes the minifigures for Professor Remus Lupin and Ron Weasley as well as a baggage cart. 9 3/4 is a wall on Technic pins that rotates when you run a minifigure into it. Bag one also includes a piece separator.

75955_bag1.jpg

The second bag includes the rest of the station and the Harry Potter minifigure. One of the nice features of this set is the mix between stickers and printed parts. The 2x2 newspaper tiles are printed which are 2 less stickers to worry about.

The station itself is pretty simple, but to make it any bigger would bring the price up. For the set, I think the platform gets the key part which is the wall to go through. If builders want more of the features, they can build them on themselves.

75955_bag2.jpg

The third bag starts the engine itself with the wheels and the bottom part of the engine. The wheels are a pretty simple assembly as compared to the Emerald Night set.

75955_bag3a.jpg
75955_bag3b.jpg

The next bag completes the engine. I was glad that the front curved piece (what’s the official term? Nose?) was printed as well as the “Hogwarts Castle” rounded tile piece on each side. The only thing that confused me on this set are the turning ratio of the front 4 wheels. There is an assembly that can be moved up to allow the wheels to turn and then put down to lock them into staying straight. For someone like me who plans on motorizing this train eventually, this piece seems unnecessary. I would rather have the front able to turn all the time without the awkward piece to lock it into place. This will be something that I redesign eventually.

Everyone else has brought this up and I have to as well. This train is not motorized. There are numerous videos and sites out there where you can see how others have motorized this train. You can use Power Functions train motor or an M motor with some Technic pieces. Either way, it is possible to motorize it without totally wrecking the design. While I would have preferred for the train to come motorized, I think this would have brought the price up pretty high… maybe over $100?

75955_bag4a.jpg
75955_bag4b.jpg

The fifth bag adds the tender and Hermione. The tender is a very simple build and it is connected by Technic pins versus the magnets of trains of old. My guess is that this helps to keep the cost down. Thoughts? I’ve heard builders complain about them and others say they are okay so we’ll see…

75955_bag5.jpg

The next bag starts the passenger coach with a Trolley Witch. The coach is a pretty simple build and is fairly small. I think I would have made it larger, but it fits the scale of the engine. I will add that to my to-do list… re-designing the coach and adding some more.

75955_bag6a.jpg
75955_bag6.jpg

The seventh bag completes the coach and adds a Dementor. On the positive side, the Dementor is a cool design and in my mind it matches the actual character well considering it is a minifigures. On the negative side, the coach is small and only has 4 wheels. If you go back to the coaches in the Emerald Night or Horizon Express, they have 8 wheels and each set is on a piece that pivots with a Technic pin that fits into the car itself. This one has wheels that are just attached to the car without the ability to pivot. Since it’s such a small car, the wheels are closer together and it shouldn’t be an issue that they don’t pivot. This car is similar to this old set…

75955_bag7.jpg

So I realize that I am not the intended audience for this set. After all, the box says it is meant for ages 8 to 14. I would have beefed up the coach, motorized the engine, and added in a few pieces of straight track. I will add “building more coaches” to my LEGO building to-do list. In the meantime, I think this is a great set. It does the Hogwarts Express good justice and I think the play factor for this set is good given there are 6 minifigures. While there were a lot of stickers, I think they added some good detail to the set and they weren’t too bad to apply. In the end, I recommend buying this set. Try and pick it up on sale at Amazon.com, Walmart, or elsewhere.

Happy building!

75955_final

Set Review - #75950-1 - Aragog's Lair - Harry Potter - Wizarding World

You can tell I’ve been on a trend lately as here is another one from the Wizarding World of Harry Potter. This one is #75950-1 - Aragog’s Lair. It was released in the US on 24 August 2018. It has 157 pieces and 2 minifigures. This puts it at $0.095 per piece. I picked it up on Amazon.com for 14% off or $12.92. Not a huge savings, but I’ll take it. If you can be patient, I’ll bet the savings will be better closer to the end of its shelf life.

This set depicts a scene from “Harry Potter and the Chamber of Secrets.” Hagrid tells Harry and Ron that they should follow the spiders to get answers (there’s more to it, but that’s the shortened version). They follow the spiders and end up meeting Aragog and a myriad of Aragog’s offspring. If you’ve never seen the movie before and you don’t like spiders, I would advance through that scene. If you have seen it, you know what I’m talking about.

Onto the set… The box is pretty standard. The front shows what you get and the back shows some play features.

75950_front.jpg
75950_back.jpg

This set contains 3 parts bags that are not numbered and an instruction booklet. Best of all, there are no stickers. Yay!

75950_contents.jpg

Due to the low piece count, it’s a pretty quick set to build. You start with minifigures of Harry and Ron. Both figures have 2 faces. I took the picture with the content faces and you can see the distressed faces on the box. The build starts with the tree and then finishes with Aragog. Nothing too special about the tree, but Aragog was an interesting build. I’m impressed with how realistic the builders got it to look in such a small set. Also, you can adjust the legs and abdomen to move Aragog around. The set includes 5 smaller spiders (2 black, 3 tan) and while it’s not completely accurate compared to the number of spiders from the scene in the movie, you can get the idea that there were a lot of spiders.

For play purposes, you can add this to #75953-1 - Whomping Willow as they are from the same movie. The Weasley family car plays a big part in the scene in the Enchanted forest with Aragog.

75950_build.jpg

Overall, it is not a bad set. Considering the piece count, you get a bunch of details and 2 minifigures. It’s under $0.10 a piece which is good considering it is a licensed set and if you pick it up on sale, even better. Definitely shop around to see where it is cheapest. If you’re a Harry Potter fan, I would look to add this one to your collection.

What are your thoughts?

Set Review - #75953-1 - Hogwarts Whomping Willow - Wizarding World - Harry Potter

I reviewed the collectible minifigure series and some Brick Headz for the Wizarding World of Harry Potter. Now it’s time to look at one of the sets that was released. #75953-1, Hogwarts Whomping Willow is a recreation of a scene from the movie “The Chamber of Secrets” where Ron and Harry are in Ron’s family’s car on their way to Hogwarts. They end up landing in the tree and the tree seems to get upset that they are there (this shouldn’t be a spoiler, the movie and book have been out for a while). Anyways, this set was released on 24 August 2018 in the US. It retails for $69.99, but Amazon.com had it on sale for 15% off or $59.68. It has 753 pieces and 6 minifigures. If you get it at full retail in the US, it works out to $0.093 per piece so not too bad for a licensed theme.

The box front is pretty standard. It shows the whole set, provides details about age, set number, title, and number of pieces, shows the minifigures in the set, and has a picture of the actors from the movie. The back shows the play features of the set and how it was made to be connected to set 75954-1 Hogwarts Great Hall.

75953_boxfront.jpg
75953_boxback.jpg

The contents of the box are 5 bags of bricks, 2 instruction booklets, and a sticker sheet. I’m not a fan of stickers, but they aren’t tiny so while the sheet is bigger, it’s not a lot of stickers.

75953_contents.jpg

Bag one is the Weasley family car and minifigures for Ron and Harry. The build is pretty simple. The doors swing open and so does the trunk. The trunk fits 2 minifigure suitcases. Since the minifigs have the shorter legs, they can’t actually sit in the car. So Ron has to stand to drive and if you position them correctly, you can fit the 2 minifigures in the car at once. And just for reference, bag 1 includes a piece separator.

75953_bag1.jpg

Bag 2 builds the Whomping Willow itself. The build starts with the base that has Technic elements. I wasn’t expecting that, but it made sense as it went on. The Technic elements allow you to rotate the tree similar to how it moves around in the movie. The branches of the tree can be re-positioned as well. I’m not a huge Harry Potter fan, so I can’t tell you the significance of the door underneath the tree, but I do recall it being used in one of the movies to go somewhere. I think the tree itself lacks detail, but the LEGO designers probably had to do a cost-benefit analysis to determine if it was really worth it to put more effort into making the tree look more realistic versus increasing the price with more pieces. The tree does hold the car for play purposes although there are some green flower stem pieces that do not stay in real well.

IMG_6284.JPG

The third bag builds what I think is Gryffindor tower. Maybe… It includes a sleeping area, an area on the bottom floor that is (I’m not sure), and then space in the tower at the top where Hedwig is placed in the instructions.

75953_bag3_front.jpg
75953_bag3_back.jpg

The next bag adds a potions mixing room and an outdoor walkway area. These areas attach to the main area with Technic pins. While I’m not a huge fan of this part of the build, I realize that this set is meant for play and not detail. For a detailed set, I should probably buy Hogwarts Castle (#71043). For play features, I think this set is fine.

75953_bag2_front.jpg
75953_bag3_back.jpg

Bag 5 completes the build. It adds Professor Snape and his office. Considering the size of the set, I think the designers packed some good details into this area along with some fun pieces to include potion containers, a lamp, and a copy of the Daily Prophet.

75953_bag5.jpg
75953_office.jpg

Here is the final set with all of the minifigures. It has some great play features, a lot of great pieces, and I like how the set can connect to 75954. If you’re a Harry Potter fan, I would pick this set up if you can find it at a discount like I did. As Christmas approaches, it might come down even more so watch for it.

75953_final.jpg

The minifigs are (top to bottom, left to right) Professor Snape, Filch, Seamus Finnigan, Ron Weasley, Harry, and Hermione. They all have dual faces, but I am only showing one side on this review. Except for Filch, everyone has a wand. Filch has a lantern which is cool looking, but about half as tall as he is. The 4 students are all shorter minifigs. Hermione and Seamus have on their uniforms, but Harry and Ron are in their street clothes. I don’t own any of the old Harry Potter sets so I don’t have much to compare these to, but I’m impressed. In my opinion, they resemble the characters from the movie pretty well.

75953_minifigs.jpg

I have never read the Harry Potter books, but I have seen all of the movies. I enjoy the plot line and while I’m not a super fan, I find it entertaining. I never purchased any of the older releases, but this release impresses me so far. While it is not the most detailed build, it lines up fairly well with the movie. If anything, I think the pieces included are good and can be used for other builds if you want to take this one apart. The minifig selection is good for this set with 6 included and the stickers aren’t too daunting. Overall, I call this one a buy if you are a Harry Potter fan.