Set Reviews

Set Review - #70841-1: Benny's Space Squad - The LEGO Movie 2

From what I can tell, the LEGO Movie 2 was released on 8 February 2019 in the US. Is that right? Well it’s the end of March and I have yet to see it. I’ll get there, don’t worry. And you don’t have to worry about spoilers in this post if you haven’t seen the movie either.

From the last movie I wasn’t a huge fan of the sets that came out. I bought a few, but that was it. With this movie, there really haven’t been any sets that I saw and immediately wanted to add to my collection. That was until I saw #70841-1: Benny’s Space Squad. I was a huge LEGO space fan as a kid. I collected some of the Classic sets and then some of the others like Blacktron, M-Tron, and Space Police. Some really great sets… those were the days…

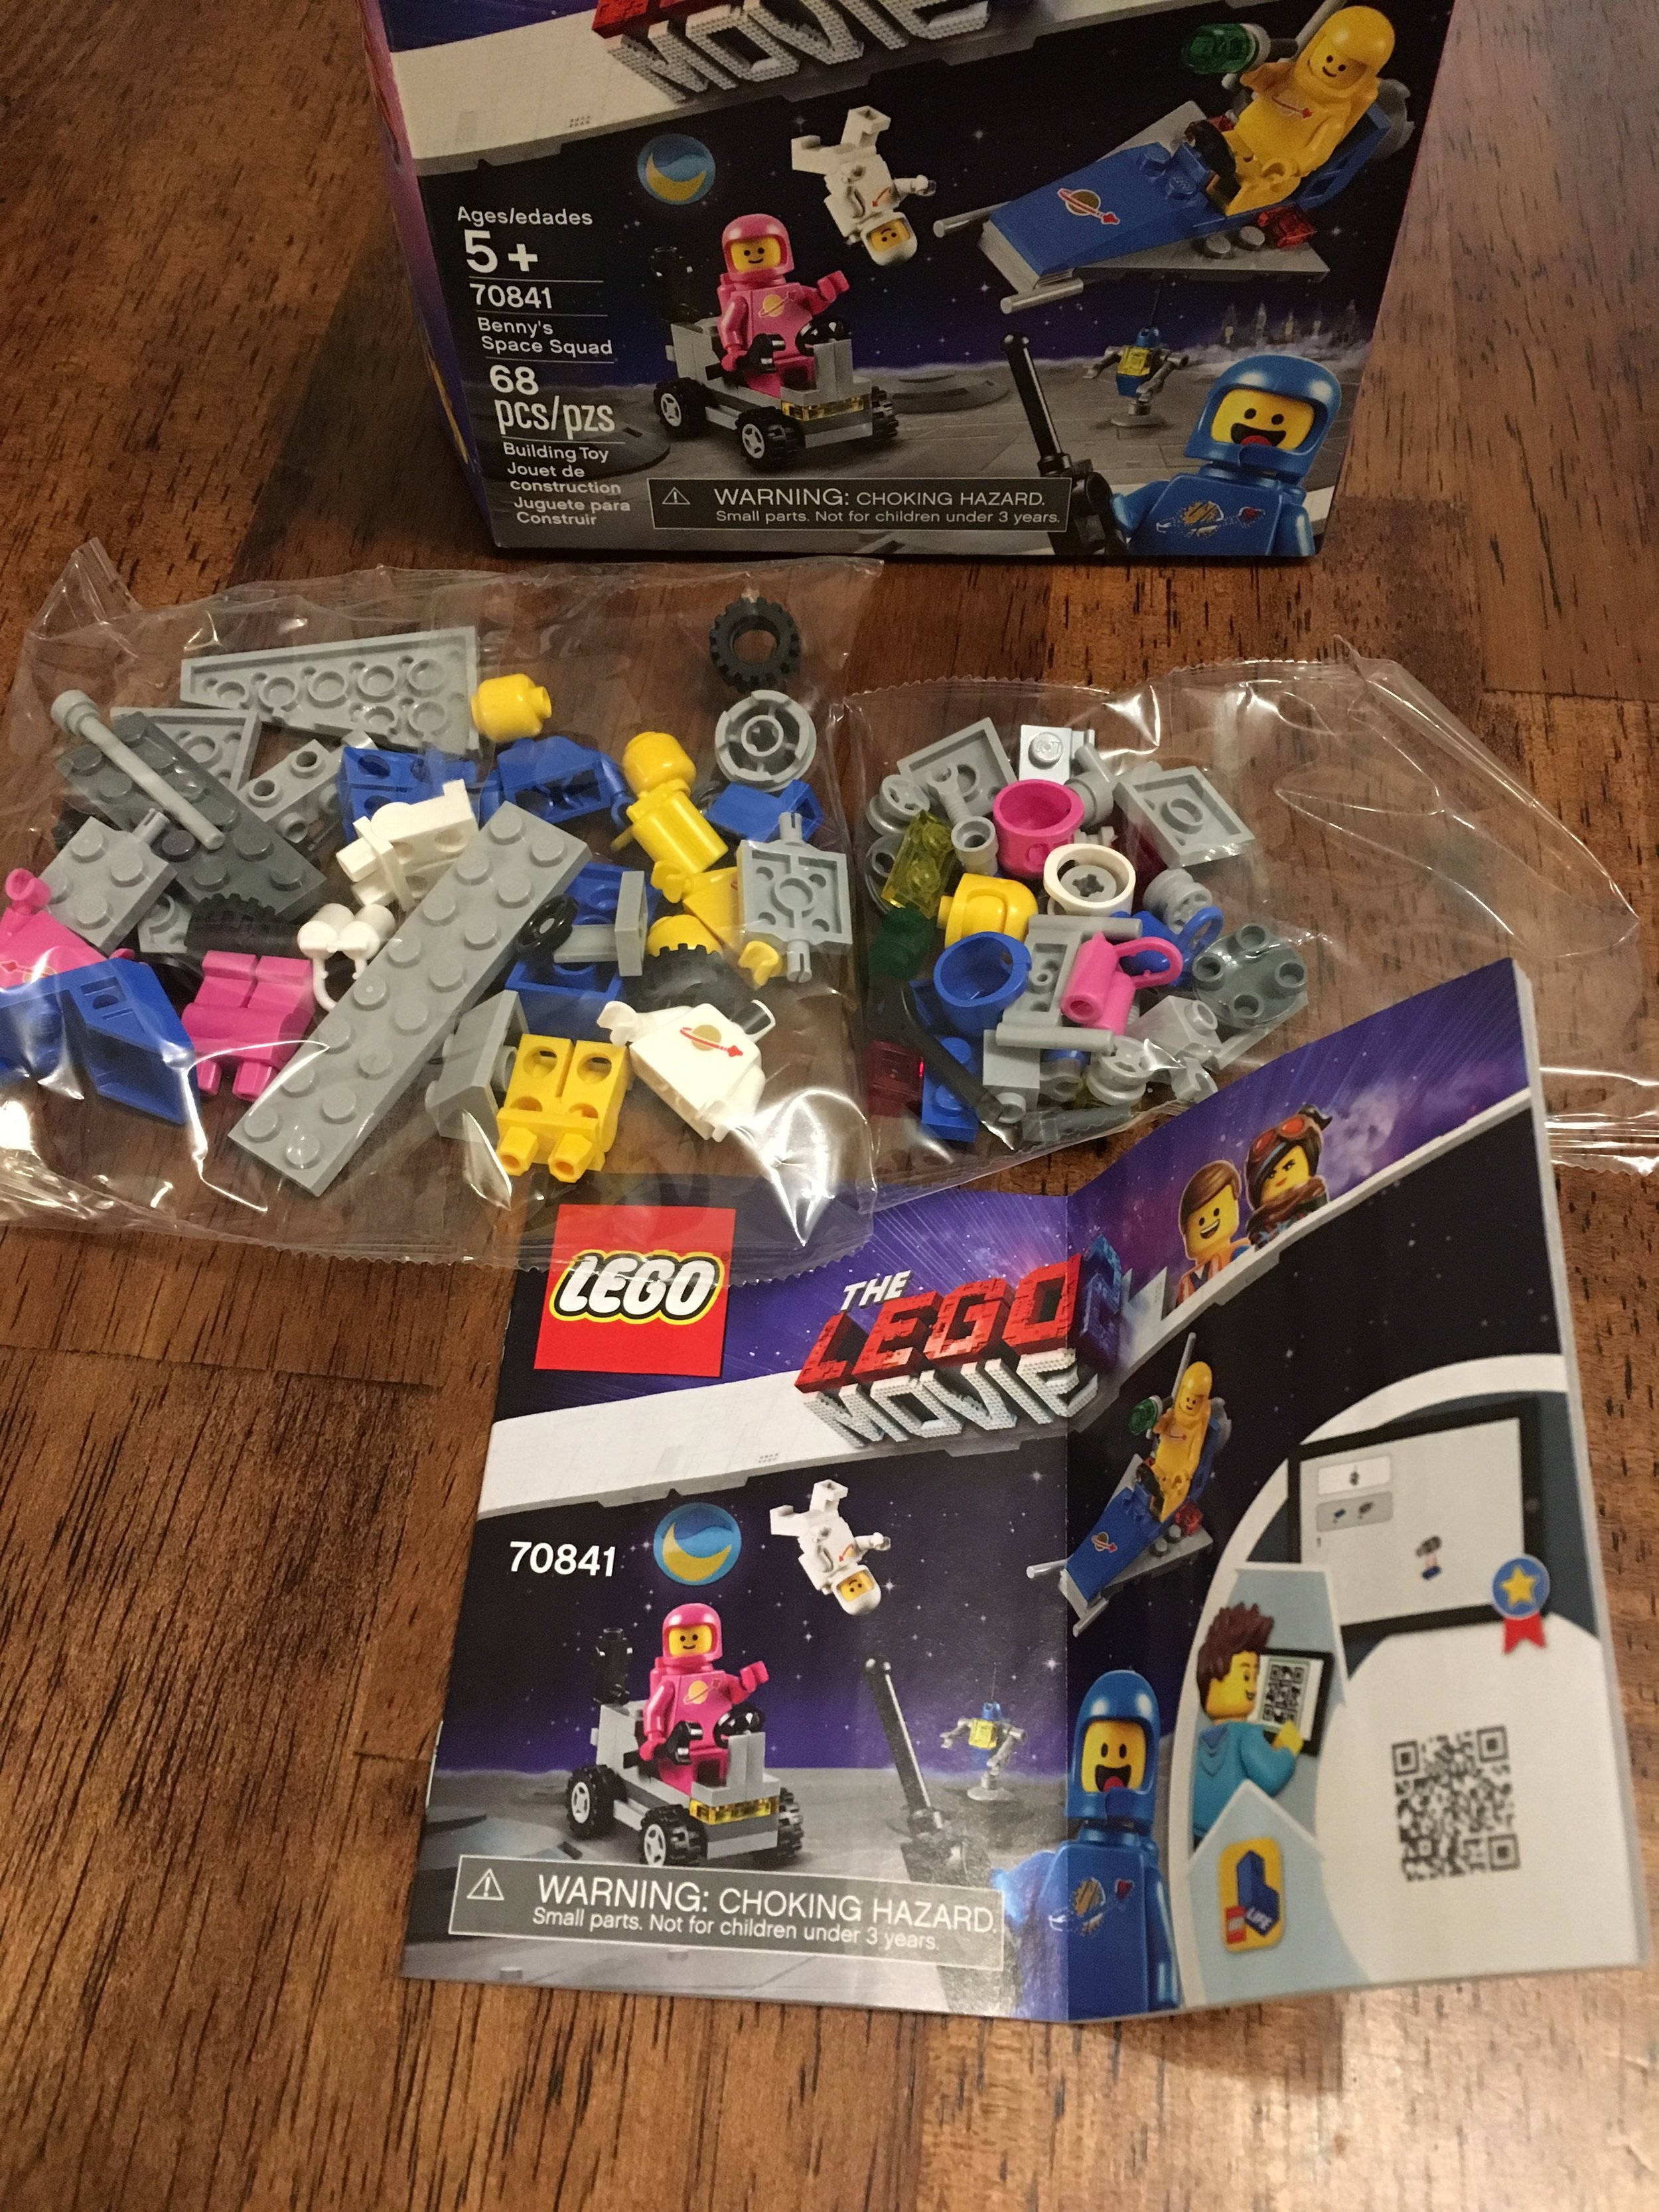
Well the LEGO Company knows that there are suckers like me out there who miss our kid days and would love to see more LEGO space. In the first movie we had #70816-1: Benny’s Spaceship, Spaceship, SPACESHIP! This time around we have Benny’s Space squad. It was released in the US on 10 January 2019. It contains 68 pieces and has five minifigures (well four and a droid). At $9.99 that makes it $0.147 per piece which is pretty steep… As I mentioned, I’m a sucker for space so I bought into the overpriced set.

With only 68 pieces in the box, it’s a pretty small box. The front shows the set while the back shows the features. It also names the characters. Kenny (yellow), Benny, Lenny (pink), and Jenny (white). I can’t wait to see MOCs appearing with a bunch of pink Lenny minifigures and spaceships made of LEGO Friends colors. The pink is a fun addition to the yellow, blue, and white space minifigures. I think I have red and black from back in the day and if you bought the Exo-Suit (#21109-1), you have green too.

70841_boxfront.jpg
70841_boxback.jpg

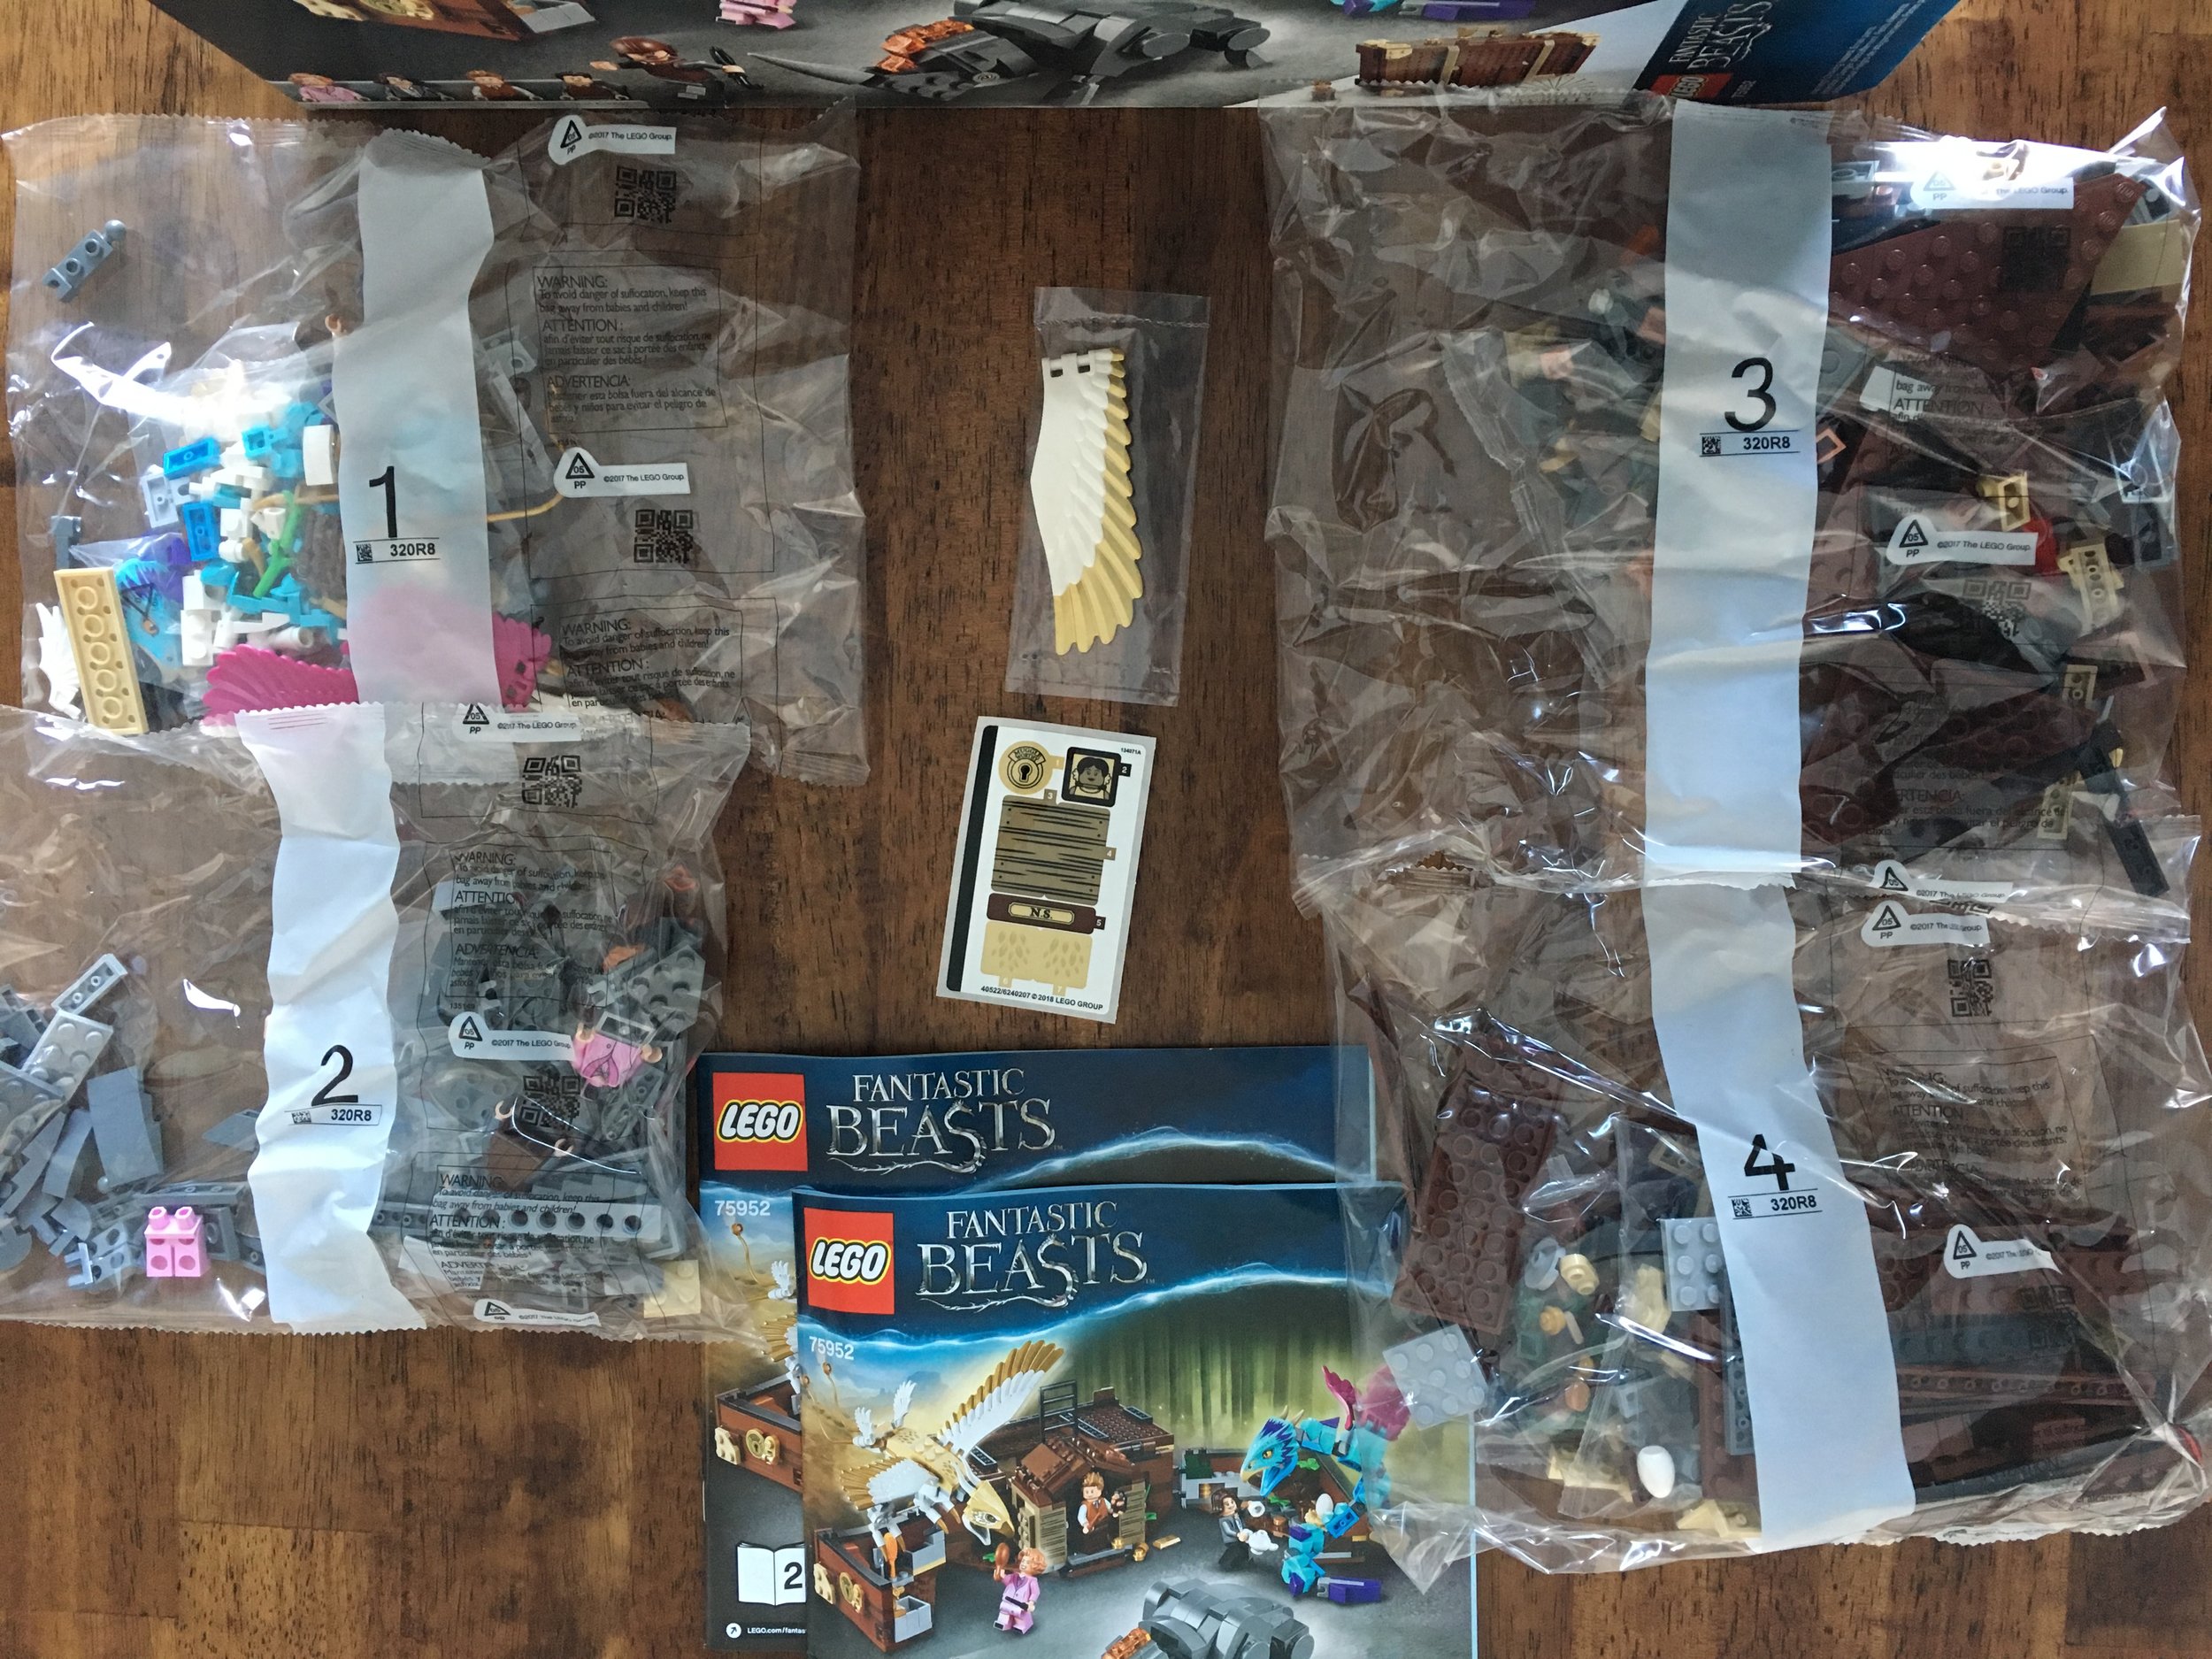
The contents are two small parts bags and an instruction booklet. Nothing special considering it’s such a small set.

70841_contents.jpg

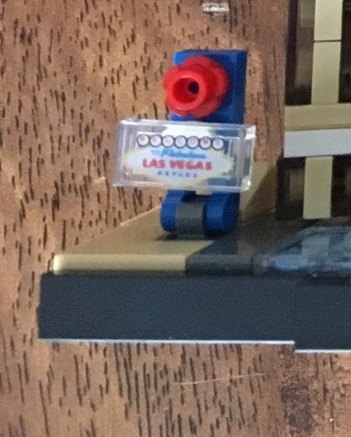
It’s a pretty simple build. There is a small ship that is built in the Classic Space colors. There is also a small dune buggy type vehicle that two of the minifigures can ride on. There is a droid this you get to build as well. The minifigures each come with an accessory. I assembled them for the picture based on the instructions. Some interesting things about them… the metal detector is different from the old space line. The detector portion itself is flat versus having a stud and hole like back in the day. Also the radio that Benny is holding has a different design on the one side. It’s indented versus flat. That’s the first time I have seen one like that.

Benny is the only minifigure with two facial expressions (happy and sad). The rest of the figures just have the old fashioned two dots and a line for a mouth.

70841_final.jpg

Overall it’s a minifigure pack. I bought the set because I liked the minifigures. So if you’re interested in the minifigures like I was, then go for it. Otherwise, don’t bother. There isn’t much of a build involved and not a ton of great pieces or just pieces in general.

I haven’t seen this one on sale yet, but hopefully it’ll catch at least $1 off at some point. Maybe before next Christmas?

Happy building!

Set Review - #75954-1 - Hogwarts Great Hall - The Wizarding World - Harry Potter

Okay, the last of 2018’s Harry Potter sets. Sorry it took me so long to get through them. Thankfully I finished before the 2019 wave comes out (assuming that happens).

Hogwarts™ Great Hall (#75954-1) was released in the US on 24 Aug 2018. It retails at $99.99 in US and I have yet to see it on sale at Amazon.com or anywhere else for that matter. The set contains 878 pieces and 10 minifigures. This puts it at, $0.114 per piece which is a bit steep in my opinion. Is it worth it? Let’s dig in.

Here’s the box. The front shows the set while the back shows the play features (pretty standard). The back shows that you can connect this set with #75953-1 Hogwarts™ Whomping Willow to expand your play with the castle. The Great Hall set has portions of the first 2 books to include “The Sorcerer’s Stone” and “The Chamber of Secrets.” For example, the Mirror of Erised is from “The Sorcerer’s Stone” while the basilisk is from “The Chamber of Secrets.”

And hardcore Potter fans help me out here… At what point did the basilisk chase Professor Quirinus Quirrell like it shows on the bottom left corner of the front of the box?

75954_boxfront.jpg
75954_boxback.jpg

This set contains 6 parts bags. Bag 1 has a piece separator included in it. The instructions are bagged and include the sticker sheets. The set also includes 3 dark gray plates to include 2 which are 16x16 studs and 1 which is 8x16 studs.

75954_contents.jpg

The first bag includes one of the boats used to transport the first year students across the lake to get to the school. It is the same boat used back in the old Pirates theme days. It also includes a basilisk from “The Chamber of Secrets,” Fawkes the phoenix from “The Chamber of Secrets,” The Mirror of Erised from “The Sorcerer’s Stone,” and Dumbledore, Hermione, Harry, and Draco minifigures. Everything is pretty simple in terms of the build. The basilisk seems pretty lame in my opinion, but I don’t have any recommendations to make it better other than to just not include it in the set as the basilisk never appears in the Great Hall. This bag also includes Hedwig (Harry’s owl) and the Sorting Hat.

75954_bag1.jpg

The second bag starts to build the Great Hall itself. The build is fairly simple and not very complex. It’s mostly stacking parts on top of each other. Kind of boring…

75954_bag2.jpg

Bag three continues to build up the Great Hall. I expected a bit more detail in this set as compared to #71043-1 Hogwart’s Castle as this one is larger. It was interesting how some parts had more detail while others didn’t have any additional detail. One area in particular that caught my eye were the windows. In #71043-1 the windows, while small, had colored translucent plates behind the grills used for the windows to give them the stained glass look. This set does not have color in the windows at all. The reasoning probably is that they could either have the design on the window or the color, but not both. I don’t know. Does anyone have any ideas on how to make the windows colored while retaining the same look that it has now?

75954_bag3.jpg

Bag four continues the build to include the walls and the tower. There are a number of stickers that add detail to include the clock and some of the brick design stickers on a few of the larger wall pieces.

75954_bag4.jpg

The fifth bag builds up the inside of the hall. There are candles on the ceiling and the house banners. If you’ve watched the movies, you can see the candles floating. I think LEGO did a decent job making them float. The parts look a bit ugly, but I get what they are trying to do. As for the banners, you can flip them around to see all four of the houses so everyone is represented. Finally, there is a stairwell that is added and the stairs can close up. I don’t recall where the stairs are used in the books/movies, but it is an interesting piece that I have not seen used before.

75954_bag5.jpg

Before I wrap up the build, I wanted to hit on a few of the accessories. The first is the Mirror of Erised. You get a few choices of what to put in the mirror as you can see. I get why they did it, but I think they could have cut back on the set cost by just having one piece and a clear sticker. The 4 stickers and extra piece don’t do much for me. Is it for the play factor?

75954_erised1.jpg
75954_erised2.jpg

You also get a boat and a basilisk. I find both of these extraneous and not needed in the set. I guess when the students first arrive in their first year they take the boat and one of their first stops is the Great Hall, but I would rather they focus on making the Great Hall more detailed than having one of the boats. Same with the basilisk. I’m pretty sure it never was in the Great Hall. They could do a Chamber of Secrets set and put it in there, but it’s just additional bricks to help jack up the price.

75954_boat.jpg
75954_basilisk.jpg

As mentioned earlier, the set comes with Scabbers, Hedwig, and the Sorting Hat. I’m okay with these being in the set. They all were in the Great Hall with the main characters at one point or another.

And here we have the main reason for the set. This set is a (very expensive) minifigure pack. You get (top row, left to right) Ron Weasley, Susan Bones, Hermione Granger, Draco Malfoy, Harry Potter all with the short minifigure legs. In the bottom row (left to right) you get Professor McGonagall, Professor Quirinus Quirrell, Rubeus Hagrid, Albus Dumbledore, and Nearly Headless Nick.

Students first… who the heck is Susan Bones? I initially thought it was Ginny Weasley, but then I looked at the box and saw that it was Susan Bones. I don’t recall her being named in the movies and my NLS who has read all the books didn’t recall her either. I had to do a Google Search to find out who she was. Definitely an odd minifigure choice.

Okay, onto the larger minifigures. I like how they made Hagrid a larger figure. The arms snap in with Technic like pins and the torso is a much larger piece too. I’m sure it’s out there, but I can’t recall this design being used. In the Ninjago movie Collectible Minifigure series, Garmadon has 2 standard minifigure torsos stacked on top of each other to create his height. I like what LEGO did for Hagrid better to make him larger.

A number of these minifigures only show up in this set so it could help the price of the minifigures go up on the secondary market. I wouldn’t buy this set hoping for that though.

75954_animals_hat.jpg
75954_minifigures.jpg

The sixth bag completes the build. The tower is finalized to include a few rooms in it which I should know, but I don’t and then Fawkes who normally lives in Dumbledore’s office. Maybe it would be better if I knew what the rooms are, but the tower doesn’t do much for me. I’m sure it is there for play purposes. And I added another picture of the Great Hall just because. The last bag is just the tower build and it connects to the Great Hall.

75954_bag6a.jpg
75954_bag6b.jpg

Overall, I was disappointed in this set. The cost is too high compared to what you’re getting. The 10 minifigures are great, but there are some excesses that should have been done away with like the basilisk, the boat, and the extra Mirror of Erised designs. There are also a lot of larger brick wall pieces which I’m sure add to the cost of the set. I would have rather seen more focus on details and the build versus making it an easier build to put your minifigures in.

If you’re looking to get this set, wait for it to go on sale. It’s not worth it at the current high price point that it’s at.

What are your thoughts?

75954_final.jpg

Set Review - #75956-1 Quidditch Match - Harry Potter - The Wizarding World

I’ve had this set on my shelf for a while and finally got a chance to build it so here’s the review. #75956-1: Quidditch Match was released on 24 August 2018 in the US. It retails at $39.99 and with 500 pieces and 6 minifigures that works out to be $0.08 per piece. I have yet to see it on sale at Amazon.com or Walmart. I got this one at full retail price from LEGO Shop @ Home during the time leading up to Christmas for double VIP points.

Here’s the box. The front shows the full set with the minifigures flying around on their brooms. The back shows some of the play features of the set as per usual.

75956_boxfront.jpg
75956_boxback.jpg

The set contains 3 parts bags, 2 instruction booklets, and a sticker sheet. The instructions were folded, but the sticker sheet was in-between the instructions so at least it was somewhat protected.

75956_contents.jpg

If you’re interested in the Harry Potter line of sets hopefully you’ve either read the books or have seen the movies. I admit that I have only seen the movies. My NLS has read the books though so that’s got to be worth a few points.

Bag one builds two of the four viewing towers. The red and yellow colored one is the Gryffindor tower. It includes a Hermione Granger minifigure with a wand and the bottom part of the tower has a door piece with a sticker that swings out. I assume it is so the quidditch players can fly through there, but I could be wrong.

The green and gray tower is the Slytherin tower and it includes Professor Snape with a wand. This tower is built similar to the other one only it has a Technic pin attached to a translucent orange flame piece to match the scene from the Sorcerer’s Stone where Hermione casts a spell to start a fire to distract Professor Snape.

75956_bag1.jpg

The second bag completes the remaining two towers. The blue and gray tower is the Ravenclaw tower. I couldn’t tell you any of the characters from the book/movie who were in that house and they don’t appear in this set either. The tower has a speaker/megaphone attached to it.

The other tower is the Hufflepuff tower. It is black and yellow and also contains the scoring display. There is a brick container that holds 1x1 round tiles that you can attach to the Technic pins in the tower to display the score of your game. It also comes with four 2x2 tiles to display the houses playing. Each tile has a sticker to use and there is a tile holder in the back of the tower.

This bag includes the Harry Potter minifigure with his super long cape (why didn’t they use a smaller sized one for him?), broom, and a snitch. It also includes Lucian Bole with his broom and bludger (if you don’t know what that is, Google it).

75956_bag2.jpg

The third and final bag completes the set (which I took in front of my 71043-1 Hogawts Castle set). It includes the three goals, a clear piece attached to some Technic parts to move the keeper who can protect the goals, and connections for 2 of the towers to the goal area of the pitch. It also includes a chest to hold the parts and a trophy for the winners.

Bag three includes Oliver Wood and his broom (Gryffindor) and Marcus Flint (Slytherin) who is holding a broom with a… I have no idea what that is attached to his broom. I think it’s supposed to be your way to try and shoot the quaffle (yes I had to look that up) through the goal. There’s also another shooter on the ground that has a bunch of 1x1 round black plates. I’m not sure what it is for. Anybody smarter than me on this one?

Overall, it’s a pretty simple build. There isn’t much to this one and I’m kind of disappointed by it. I would feel slightly better about it if I had waited for it to go on sale. I’d definitely recommend waiting for a sale if you are interested in this set. For big Harry Potter fans, buying 2 of these would allow you to have a good start to making a full up quidditch pitch. It would take some additional parts, but you could make the viewing towers a bit bigger and you’d have 2 goals. You’d probably have to supplement with some other minifigures as well.

In terms of building techniques, this one is pretty simple. It definitely fits the 7 to 14 year age range that they list versus an old fart like me. It’s not really a piece pack either. The parts really aren’t that spectacular so don’t buy this set looking for rare parts.

What are your thoughts on this one?

Happy building!

75956_bag3.jpg

Set Review - #71043-1 - Hogwarts Castle - Harry Potter

In 2017 and 2018, I tackled the two largest sets that the LEGO Group had to offer. First off was #10256-1 Taj Mahal, which at the time was the second largest set out there with 5,923 pieces. Then it was #75192-1 Millennium Falcon with 7,541 pieces. Well the previous #2 is now #3 and I got sucked into buying and building the new #2. Hogwarts Castle (#71043-1 ) has 6,020 pieces. It was released on 2 September 2018 or as can be seen below, it was put on shelves in LEGO stores on 1 September. The retail price in the US is $399.99 which works out to be $0.066 per piece.

I used some VIP points, bought during double VIP points, made sure there was a good free offer to go with a purchase over a certain dollar amount, and used EBates (to get $20 back at the time). Still not a cheap set, but not a bad way to get a substantial discount on it.

Below is the box the set came in (it had an outer box to protect the inner box). The tag says it was made in Mexico in August 2018. I bought it in November so it sat for three months after production.

71043_delivery.jpg
71043_production_tag.jpg
71043_shelf.jpg

Here’s what the set box looks like. The front shows the front of the set while the back shows the back of the set and some of the details inside the castle that are included.

71043_boxfront.jpg
71043_boxback.jpg

The contents included 37 numbered parts bags, 3 parts bag with larger pieces and BURPs, and a package that included the instructions and stickers. Some of the parts were in the separate white box shown while some were just in the main box. I’m not sure why they had that distinction.

The first instruction book had a write up about the design team, some info about designing the set, and info about the set designer and graphic designer. Definitely something interesting and out of the ordinary, but cool for a set to have.

There are 3 sheets of stickers. I’ve seen debate on some of the sites about whether to use the stickers or not. There are a lot and I don’t like stickers, but I decided to use them anyways.

The parts box, inside the set box, inside the LEGO big set box, that was inside the shipping box…

The parts box, inside the set box, inside the LEGO big set box, that was inside the shipping box…

Instructions

Instructions

Set contents

Set contents

Stickers

Stickers

The full build is built on two bases if you want to call them that. The first book completes the first base. The bottom portion contains a lot of the BURP pieces as well as a lot of slopes and cheese slopes to make the BURPs look like the bottom base of the castle. The whole assembly is pretty sturdy and it took some time to build as you really had to pay attention to where the cheese slopes went on which part of the BURP. Normally I can just complete each step and move onto the next one, but for this build I had to pull the pieces for that step and then build. That way I knew whether I had done everything for that step or not.

Here are two views of the build from the first instruction book below.

71043_part1a.jpg
IMG_7001.JPG

The bags for the first book also included the boats (pictured later). I did some Googling and it looks like the boats are used by first year students to cross the lake from the train station to get to the castle and then return to the train station. They are also used by graduating students. They first appeared in the book/movie “Harry Potter and the Sorcerer’s Stone.”

The first book also includes a minifigure for Godric Gryffindor (pictured later). He has the sword of Gryffindor and a wand. The set includes a stand that you build and put stickers on picturing the crest of each house at Hogwarts. That stand is easy to build and I like how they used the stickers to show who each of the minifigures are.

Finally, below the base built with the first instruction book is the Chamber of Secrets. It includes the entrance to the chamber and then the chamber itself with the basilisk inside.

The Chamber of Secrets

The Chamber of Secrets

The door to the Chamber of Secrets

The door to the Chamber of Secrets

The second instruction book finishes the first half of the build. It includes the Great Hall, the main tower, and the courtyard. The top also includes a bunch of dementors. It also includes the minifigure for Helga Hufflepuff.

The main tower (is there another name for it?) is built very similar to the building technique of #21309-1 NASA Apollo Saturn V. I’m not sure where, but I thought I saw a LEGO video somewhere where the designers of both sets shared building techniques with each other. Anyone know what I’m talking about?

71043_part2a.jpg
Inside the Great Hall

Inside the Great Hall

Moaning Myrtle’s Bathroom (top) Moving stairs (bottom) Professor Dumbledore’s office (not pictured above the bathroom)

Moaning Myrtle’s Bathroom (top)
Moving stairs (bottom)
Professor Dumbledore’s office (not pictured above the bathroom)

71043_part2b.jpg
Tower

Tower

Hungarian Horntail Dragon

Hungarian Horntail Dragon

The third book is the second part of the bottom base. It is very similar to the first base with a lot of BURPs and slopes to add detail. It includes the minifigure for Salazar Slytherin.

71043_part3a.jpg
Wizard’s Chess Board

Wizard’s Chess Board

The room on the left is the Room of Requirements and the room on the right is a Potions Classroom.

The room on the left is the Room of Requirements and the room on the right is a Potions Classroom.

The Flying Keys room with the broom to ride to catch the right key.

The Flying Keys room with the broom to ride to catch the right key.

The Mirror of Erised

The Mirror of Erised

The set includes a number of small builds within the larger set. I will go through them quickly here.

Boats for crossing the Black Lake

Boats for crossing the Black Lake

The Whomping Willow with the Weasley car. You can see my review of the Whomping Willow set here.

The Whomping Willow with the Weasley car. You can see my review of the Whomping Willow set here.

Hagrid’s Hut to include the garden with pumpkins and Aragog (the spider). You can see my review of the Aragog’s Lair set here.

Hagrid’s Hut to include the garden with pumpkins and Aragog (the spider). You can see my review of the Aragog’s Lair set here.

The set includes 28 minifigures. This includes 4 of the standard sized minifigures. The 4 minifigures are the namesakes for each of the houses of Hogwarts. From left to right they are Godric Gryffindor, Helga Hufflepuff, Salazar Slytherin, and Rowena Ravenclaw.

71043_minifigures.jpg

The remaining minifigures are microfigures. There are 24 for some reason my set had 36. The 4x12 plate was not part of the set, but I grabbed it from my spare bricks to put them on.

71043_microfigures.jpg

The fourth instruction book finished the build. As you can see from the pictures, there are a few additional rooms that get finished. The first is the school’s library. The picture I took gives a good view of how the designers gave the windows the stained glass look. Using 1x2 grills and translucent colored plates it gives the windows a pretty cool look. The next picture includes Professor Umbrige’s office from “The Order of the Phoenix” book/movie. It also shows the Defense of the Dark Arts classroom on the right side.

School library (top) with the Room of Requirements (bottom left) and Potions classroom (bottom right)

School library (top) with the Room of Requirements (bottom left) and Potions classroom (bottom right)

Professor Umbridge’s Office (top left) Defense of the Dark Arts Classroom (top right) Chamber of Secrets Warning (bottom)

Professor Umbridge’s Office (top left)
Defense of the Dark Arts Classroom (top right)
Chamber of Secrets Warning (bottom)

So here’s the final set (without Hagrid’s Hut and the Whomping Willow). Was it worth what I paid? Overall, I think yes. I enjoyed the build. It was challenging and fun. There are a lot of great pieces and techniques used in it. I was nervous at first that it would be all small pieces since it is at a smaller scale, but it thankfully is not all small pieces. The stickers were annoying, but not too bad and they do provide some nice details to the set. I think part of the argument is that each book/movie adds different parts to the castle and they weren’t all there at once (like Professor Umbridge was only in one book/movie). In my mind it’s all good. I’m not trying to build the Castle for a specific movie. I wanted to capture it all like the designers built it. So not a big deal. If you want to build the set by book/movie, then go out and buy 7 sets and use only the stickers that apply to each book/movie.

Will this set ever go on sale? Hard to say. Usually LEGO doesn’t discount the really big sets. Sometimes Amazon.com or Walmart will, but you have to be right on the site when they announce the sale to get it because everyone else sitting there and waiting will scoop it up. Using VIP points helped and getting double VIP points was good too.

In the end it was definitely worth the investment. Now I just have to figure out where to put it. Along with where to put the Millennium Falcon and Taj Mahal.

Happy building!

71043_final.jpg

Bohrok Product Review - LEGO® Bionicle®

James from the site Brick Pals contacted me asking if he could do a post for the Bricks for Bricks blog. I said sure and today I have his post. I’m not a Bionicle fan and I typically don’t go back to past sets to do reviews so you’re getting both from James. If you like his work, definitely head over to Brick Pals. They have some good minifigure reviews… especially of the collectible minifigure series sets. Enjoy his article!


In 2002, BIONICLE was entering its second year. It had hit the ground running and became more popular than LEGO could have hoped for. It's own comic book series, an online game, a promotional campaign by McDonald's; it had it all. But with its heroes, the six Toa, having fought the Makuta and won, they needed a new enemy.

Enter the Bohrok: mysterious, insectoid beings that appear out of nowhere. Controlled by parasitic brains called krana, the Bohrok seem to have only one goal: to "clean it all." In other words, they were going to destroy every last piece of nature on Mata Nui, and anyone who got in their way. Split between six swarms, each one wielding one of six elements, they were one of the deadliest threats the Toa would ever face.

Description

There is a saying in the BIONICLE universe about the Bohrok: if you wake one, you wake them all. In this case, if you own one, you own them all. Like the Toa Mata, the Bohrok are copies of each other, the only difference being their shields and colors. So, we will be talking about them as a group rather than individual sets.

Released in the first wave of the 2002 BIONICLE sets, the Bohrok are generally made up of about forty pieces. They're not that tall, only coming up to shoulder height of the Toa Mata. What they lack in size, though, they make up in originality.

The Bohrok were among the most creative sets to come out of the BIONICLE line. I think that their introduction was one of the highlights of BIONICLE. There's something about their alien appearance that can draw people in. The short stubby arms and legs, the shields on their "hands," the eyes and fangs on their mouths, and the domed head. It was like nothing ever seen in LEGO before!

The Bohrok had several unique features that made them so appealing. The first is their actual shape. The Bohrok come in ball forms. Thanks to their design, they can transform out of ball mode into attack mode. This design is incredibly convenient, allowing them to get put in storage without taking up too much space while looking cool.

The next feature is the snapping head. The Bohrok use a combination of gears, a lever, and a rubber band to create this. By pushing down the bar, it will cause the Bohrok's head to lunge forward to attack. Put it in the right place, and it will knock the mask off a Toa!

The third and final feature is inside the Bohrok's heads themselves. Unlike most beings in BIONICLE, the Bohrok do not wear masks. Instead, they wear these tiny, rubber things called krana. Unlike masks, the krana are organic, and thus are alive. There are eight krana for each of the Bohrok swarms, and they got packaged at random, so you never knew what you would get.

The cool thing is that, by pressing down on the Bohrok's eyes, their heads would flip open and launch the krana like a catapult. Even cooler, the krana could attach themselves to the face of the Toa. In the universe, this would assimilate the victims into the swarm.

Benefits

The Bohrok's combination of its features is fantastic! The ability to turn from ball to attack form, the snapping head, the krana, everything is incredible. They even have one final feature: the canisters they come in.

Each Bohrok canister comes with a hook that goes on the lid. This lets owners put the Bohrok ball mode and suspend them from inside their canisters as if they are asleep. This simple yet effective form of immersion made the toys all the more real.

Conclusion

Of the sets to come out of Gen 1 BIONICLE, the Bohrok are among the most memorable thanks to their design, features, and appearance. They made be carbon copies of each other, but their role in the story of BIONICLE was one of the highlights of the original sets. I recommend getting at least one of these things online if you haven't already!

Set Review - #21047-1 - Las Vegas - Architecture Skylines

LEGO released the Las Vegas Skyline as part of its Architecture series back on 2 September 2018. While I’m not a collector of every Architecture set, this one hit home with me because I lived in Las Vegas for 4 years. It retails in the US for $39.99 and with 501 pieces, that makes it $0.08 per piece. I picked it up at Amazon.com for 20% off or $31.99 so no complaints from me on price. I just had to wait for the set to be discounted.

Most of the sets in the Architecture Skyline series like #21039-1 Shanghai feature famous landmarks in the city, monuments, tall skyscrapers, or other key buildings. Las Vegas is the only one that features only resort casinos. I’m not sure what else they would put… the Hoover Dam? Or… that’s really it. So they selected a few of the casinos and given that there are so many in Vegas, they had to choose. They picked mainly from the Strip (except for one) and originally they were in order of appearance as your drive through the Strip or along I-15 that runs parallel to it. Unfortunately for LEGO, one of the casinos they choose was the Mandalay Bay Resort where in October 2017 a really awful thing happened there and a lot of innocent people lost their lives. When LEGO announced the set, there were a lot of comments about it being inappropriate to highlight this Resort after what had happened less than a year ago at the time. So they smartly delayed the set to redesign. Now the skyline is not in order, but it works.

Onto the review…

Here is the box. The front shows the completed set, the back shows the completed set with pictures of the actual buildings nearby.

21047_boxfront.jpg
21047_boxback.jpg

The box has 5 unmarked bags and an instruction booklet. The instruction booklet has some facts about the city and the buildings in the beginning and then throughout the build. It also has a number of quotes to include the one I posted from the box.

If you’re bored, Google “Cinnamon Stomberger.” It’s not who you think it is…

21047_contents.jpg
21047_quote.jpg

Onto the build… The base is built first. It’s nothing out of the ordinary. Space for the buildings with a printed tile on the front.

21047_base.jpg

To start the build, you make the Fremont Street Experience and the Stratosphere hotel. Fremont Street is in Downtown Las Vegas and not a part of the Strip. For those of you not familiar, the Strip is actually part of Unincorporated Clark County. So the city of Las Vegas gets mad that it doesn’t receive tax revenue from the Strip. When I was there they were promoting Downtown Las Vegas quite a bit because they got revenues there. At the time, downtown was pretty sketchy, but I hear it has improved. The Fremont Street Experience is much larger than what is in the set so it was scaled down substantially. I get what they tried to do, but it doesn’t to much for me. They should have added another of the better known casinos instead of an inadequate Fremont Street Experience model.

21047_fremont.jpg
21047_stratosphere.jpg

Next up is the Stratosphere which is on the northern end of the Strip. I lived in Vegas before smart phones were big so instead of GPS, we navigated around the city based on where the mountains were and the Stratosphere. I think they did a good job capturing it in a miniaturized LEGO form.

Next up on the east side of the Strip and still on the northern end is Encore which is part of Wynn Resorts. Encore is the second hotel which was built after the Wynn and it looks very similar. My guess is they choose Encore over Wynn to get the Wynn name out of the set given recent misconduct reporting on the company’s namesake CEO. Encore is a curved hotel which makes it a challenge to build at such a small scale. I think LEGO captured the color scheme good, but at such a small scale, adding in the curve makes the building look a lot less sleek than it actually is in real life.

21047_encore.jpg
21047_luxor.jpg

The Luxor is on the southern end and west side of the Strip. The LEGO build has half of the hotel casino and then the sphinx out front. The head piece is pretty cool and they captured the obelisk out front too. The only thing I would have improved on would be the famous Luxor light on the top. They added in the red light on top of the Stratosphere and I think it would have been cool to show the Luxor light too.

The final building is the Bellagio. The Bellagio replaced Mandalay Bay in the set. Mandalay Bay is next to and further south of the Luxor on the south end of the Strip. The Bellagio is actually further north on the west side of Las Vegas Blvd. No big deal…. I think they did a good job capturing this casino and its famous fountains out front. If you have never been to Vegas, definitely YouTube the fountain show. It’s cool to see and even better in person. There is another tower to the left that they didn’t include called the Spa tower. I've spent the night there and got to watch the fountains from above. Pretty cool! The wings of the hotel are held up by some clips so the back of the hotel is ugly looking in this design, but as long as you stick to the front, you’re fine.

21047_Bellagio.jpg
21047_sign.jpg

Last up is the famous “Welcome to Las Vegas: sign. I think this is the only time I’ve seen a Skyline set have a printed tile versus a build. I get why they did it, but I think it looks tacky. It also doesn’t look quite to scale given the pieces behind it.

Here’s the final set… I think the designers did a decent job capturing the city given the constraints, but I don’t agree with all of their choices. Fremont Street looks dull and the Encore loses out of its sleekness. Could they have added in Caesar’s Palace and its statues? Paris Las Vegas and the Eiffel Tower? Treasure Island and the pirate ship? The Mirage and the Volcano? MGM Grand and it’s awesome bright green color? NY NY? I realize you are limited to space so maybe the goal was to pick buildings where you didn’t have to put a lot of outside detail into the model to get across the resort you’re building.

My overall take is that I don’t think I would have picked this one up if it wasn’t on sale. Also, having lived there, I have a connection to the place too. As a touristy place, I’m sure selling a brick built version of the Strip goes over well to include at the LEGO Store that wasn’t there when I lived there. The build was alright and there are some decent pieces, but overall this one didn’t excite me.

What are your thoughts?

21047_final1.jpg
21047_final2.jpg

Set Review - #10268-1 - Vestas Wind Turbine - Creator Expert

In 2008, LEGO worked with Vestas to build a wind turbine set to be released to employees of Vestas. Of course that created an opportunity and the set is now currently going for almost $400 on the secondary market sites. If you were like me and you weren’t able to get #4999-1, you’re in luck as the re-release of the Vestas Wind Turbine (#10268-1) happened on 24 November 2018. Or as the LEGO Designer video says, there is now a “Vestas for the rest of us.”

The 826 piece set retails for $199.99 in the US which works out to $0.242 per piece. Yikes! It’s high, but it also includes a 32x32 stud baseplate and Power Functions gear. So is it really not that bad? Maybe. Let’s take a look at the set.

Here’s what the box looks like. The front shows the set, the back shows the functionality. It also highlights the fact that the tree pieces are made from the sustainable plastic similar to #40320-1.

10268_boxfront.jpg
10268_boxback.jpg

The contents are 12 parts bags, a wrapped instruction booklet and a 32x32 stud base plate. The parts bags are not numbered so you just open them all and start building versus opening bag one to build a specific part. With 826 pieces this method was manageable. I knew that some of the bigger pieces weren’t needed right away so I didn’t have to open them all at once.

The instruction booklet is part instruction booklet and part propaganda campaign. LEGO gets a chance to boast about their program to go green and to talk about how great wind turbines are for the world. Not only does the front of the booklet contain a few pages of details, but throughout the build there are little tidbits here and there that talk about wind turbines.

I think what the LEGO Group is doing is great in terms of becoming more sustainable, but I didn’t need all of the information in the instruction booklet to tell me that. I’ve read articles on it and have seen news videos about the program. I don’t want to have to spend money on a set and pay for instruction booklet pages for something that I could just click a link to online.

10268_contents.jpg

The build starts with the Vestas maintenance vehicle, the 2 workers, and their equipment. The truck looks more like an ambulance than a maintenance vehicle. The back even has a place to stick their equipment which could also be used for a stretcher. Page 8 of the instructions shows a pick up truck and a small SUV next to a wind turbine tower. I would have preferred a pickup versus the bulky ambulance.

10268_vehicle.jpg

Next up is the house at the base of the wind turbine. I’m not sure what to make of the house. None of the pictures of wind turbines in the instruction booklet shows a house nearby and I have never seen one in the US or in Europe. I understand the concept of trying to show that we can use wind energy to power our houses, but I’m not sure if the house fits. The house has a mailbox, a small patio with 2 chairs and a table, a small cot (not really a bed), and some simple random appliances. The house build doesn’t do anything for me. I would have preferred a transport truck to carry blades or some sort of equipment used to install or maintain the turbine.

10268_housefront.jpg
10268_houseback.jpg

The bottom of the tower contains a small park which is not realistic. Have you ever seen a park bench at the bottom of a wind turbine tower? Enough complaining. The green BURPs are a nice touch and will be great for future MOCs needing green settings. The door on the back leads to… nowhere, but I get what they’re trying to do. It works as you see some of the pictures in the instruction booklet where there’s a door at the bottom.

10268_towerbottom.jpg
10268_towerback.jpg

Okay, so I’ve been pretty negative so far, but I will say that the building of the turbine was much better and made up for what I didn’t like about the building and the vehicle. So 5 positive things to make up for my negativism:
1 - There are zero stickers in this set. YAY! All of the parts with logos are all printed.
2 - Having recently built the Technic #42083-1 Bugatti Chiron, I was a fan of using System pieces to detail a Technic set. This set is mostly System, but it has Technic pieces to make it function. I’m a big fan of the combination of the two. I know the Creator Expert carnival sets use this as well and it would be cool to have more of the same in the LEGO world.
3 - The set is expensive, but having the Power Functions stuff included makes worth it in my opinion. Instead of having to build the set without it all, you can just install it at once. The set is not ideal for building and then easily putting in Power Functions equipment later. Some of the train sets that I own are good at designing it so you can easily add Power Functions. For this set, you might as well re-build the whole turbine, tower, and house.
4 - The tallest set out there is the #21309-1 NASA Apollo Saturn V set. This set is the second largest and it is a big one. I don’t have a photo shoot area (as you have seen) so trying to get a picture of this one was tough. I think between the movement with the Power Functions and the sheer size, this set will be a great addition to some of the LUG displays out there. I’m looking forward to seeing pictures and videos of this one being used in large City scene displays.
5 - The turbine can spin about the tower portion as the wind changes. So not only do the blades turn, but you can rotate the turbine itself. There are Power Functions wires inside so it doesn’t spin forever, but you can spin it about 180 degrees in either direction. Also, the blades can be inserted in a separate Technic pin to change their angle. This mimics how changes in conditions require changes to the blade directions of an actual turbine. Two simple things, but they really add to the set in my opinion.

10268_turbine1.jpg
10268_turbine2.jpg

I fit the entire blade section into one picture and then put a foot long ruler next to one of the blades.
The diameter of the blades is 28 inches (72 cm) so each one is about 14 inches. The tower is 26 inches (67 cm) so almost 40 inches total to the top of the blade.

10268_turbine3.jpg
10268_turbine4.jpg

Overall was it worth it? The wind turbine is great, but the rest of the set is lacking in my opinion. I picked this one up during double VIP points, I used EBates to get 2.5% back, and I got a free #40292-1 set along with it so it wasn’t a complete waste. Will this one go on sale? Hard to say. I’d like to see it on Amazon.com for 20% off, but there’s no telling what LEGO will do with the sales of this set. Should you get it? I think it depends on what you plan to do with it. Like I said, it would be great in a large City display, but on it’s own it is a tough sell.

What are your thoughts?

Set Review - #75952-1 - Newt's Case of Magical Creatures - Fantastic Beasts - The Wizarding World

Full disclosure, I have not seen the Fantastic Beasts 2 movie that was released back in November 2018 at the time of drafting this post. With that being said, I have seen the first Fantastic Beasts movie and I thought it was good. I was wondering how they would work a spin-off in and they did it. Kind of like Star Wars in that as long as you have some of the same plot details, you can make a movie about anything and make money on it. Enough blabbing…

Set number 75952-1 - Newt’s Case of Magical Creatures was released on 24 August 2018 in the US. It retails for $49.99 and with 694 pieces, it works out to be $0.072 per piece. I waited and got it 20% off on Amazon.com so even better. As of today (30 December 2018), it’s still 20% off there so if you were looking to pick this one up at a discount, now is your chance. Onto the review…

Here is the box. The front shows the case opened up with all of the creatures and minifigures. The back shows the play features. You can also see the damage that the box took during shipping on the back. Thanks Amazon.com! I guess that’s what I get… 20% off, but a banged up box.

75952_boxfront.jpg
75952_boxback.jpg

The contents of the set are four numbered bags, 2 instruction booklets that were jammed into the box, and a small sticker sheet. There is also a wing in a separate bag. I’m not a big enough fan of the movie to know all of the names of the different beasts. I looked it up and it is a Thunderbird wing. When I first opened the package, I was worried because only one wing was on its own. The other wing is in bag one. I’m not sure why one is in bag one and one is separate. So don’t panic if you can’t find the other wing loose in the box.

75952_contents.jpg

Bag one builds the Thunderbird (white and gold winged creature), the Occamy (bluish/purple creature that looks like a bird and a snake), and the Niffler (tiny duck billed platypus type creature). The 2 minifigures are Newt Scamander and Tina Goldstein. Newt has his wand and is holding a Bowtruckle (I’m not going to try and explain this one… just Google it). Tina has her wand and the tea pot used to hold the Occamy (again, Google it or just watch the movie if you haven’t seen it).

75952_bag1.jpg

The second bag includes the Erumpent (the big rhino looking creature) along with the minifigures for Jacob Kowalski and Queenie Goldstein. Jacob comes with a hair piece and a helmet and is holding an umbrella. Queenie has her wand.

75952_bag2.jpg

The third bag starts the case. I will have to go back and watch the movie as I will be honest and say that I’m not sure how accurately the case is being portrayed as compared to the movie version.

75952_bag3.jpg

The fourth bag completes the case. Here are pictures of the case opened and then closed. If anything, it captures an item from the movie, but also gives you opportunities to do your own thing. Much like the LEGO Ideas Pop-Up Book, there are many different things you could do with this case besides representing the Fantastic Beasts movie.

75952_bag4a.jpg
75952_bag4b.jpg

Here’s a final picture of everything from a top down view. Not the greatest of pictures, but it shows all that you get. From a play standpoint, it captures a lot of the characters from the movie along with a key piece of the movie. From a parts standpoint, there are some good parts that could be used in other MOCs, but nothing too out of the ordinary. The build wasn’t too challenging and really didn’t have any different techniques that stood out to me. The sticker sheet was small so that made the build slightly better as I wasn’t putting stickers on after every other instruction page. Overall, unless you’re a big fan of the movie, I wouldn’t rush out to buy this one. I wouldn’t have purchased it without the 20% off sale at Amazon.com.

What are your thoughts on this one?

75952_final.jpg

Set Review - #21315-1 - Pop-Up Book - LEGO Ideas

For those of you that have been into or at least have followed the LEGO Ideas series, #21315-1, Pop-Up Book is the 23rd in the series. Has it been that many already? It was released on 2 November 2018 in the US with a retail price of $69.99. It contains 859 pieces which works out to be $0.081 each. Not too bad in terms of price per piece and if you’re willing to wait until the end of it’s shelf life, it may go one sale at some of the retailers. Onto my review…

The front of the box shows the book along with some smaller pictures of the options for what can pop-up. The back shows some better details of the two pop-up options inside that can be placed inside the book.

21315_boxfront.jpg
21315_boxback.jpg

This set contains six bags of bricks. Bag one contains a piece separator. It also contains the 2 large brown 8x16 tiles with one having the title “ONCE UPON A BRICK” printed on it. I was super thankful that I didn’t have to apply that as a sticker and that the set contains no stickers at all. YAY! The instruction booklet starts off with some introductory pages. The first two are about the sets creators (Jason Alleman and Grant Davis) otherwise known as JK Brickworks for Jason and Grant has a Flickr page showing his work. The second two pages are about the set’s designers from the LEGO Company. You can see their YouTube video here. The final few pages give a history of pop-up books and the stories portrayed in this set. After you read it in English, you can switch to French and Spanish.

21315_contents.jpg

The first bag starts the build of the book’s cover. This bag is almost all parts colored what I call forest green, but Brickset calls “Earth green.” Either way, I’m a big fan of this color and even if you don’t end up liking this set, you’ll at least have a whole bunch of really great parts to build other things with out of this set in the Earth green color.

21315_bag1.jpg

The second bag completes the cover.

21315_bag2.jpg

The third bag really turns the set into a pop-up book. The first picture (top left) shows the addition of the “pages” in what Brickset calls “Brick Yellow,” but I think is more of a light tan. You can also see the start of “Little Red Riding Hood” with Grandma’s bed on the right and a table with a pink tea pot and mug on the left. The second picture (top right) shows the front cover which has the 8x16 brown tile with the printed “ONCE UPON A BRICK” pop-up book title. It also has the names of the designers in 1x6 brown tiles underneath. How cool is that to have the LEGO Company printing parts that have your name on them and then having them sell a set with your name on it worldwide? Awesome!

The next two pictures (bottom left and right) show the detailing on the spine of the book and then the back cover. The back matches the front only the 8x16 tile is not printed.

Bag 3 includes the Grandma and Big Bad Wolf minifigures, but I’ll cover them next.

21315_bag3a.jpg
21315_bag3b.jpg
21315_bag3c.jpg
21315_bag3d.jpg

The fourth bag finishes up the “Little Red Riding Hood” scene. This bag includes Red with her bag of goodies to bring to Grandma. The pop up portion itself includes the house with a door that you can open. One could argue that there isn’t a ton of detail here, but I think between the original designers and LEGO designers, they got it right. It’s got a good amount of detail to portray the story, but it’s not over the top to the point where it loses functionality. You have to take the minifigures out to close the book, but the rest of the parts can remain when you close it.

The minifigures are great. The wolf with the tattered outfit that he stole from Grandma is very creative. I like that the wolf also has her glasses on. I never understood how Red didn’t immediately realize that it was a wolf. I guess you can tell the story how you want after you build it. Maybe it’s not a wolf, but a storm trooper or Emmet joins Red for some cookies.

21315_bag4.jpg
21315_bag4b.jpg

The fifth bag starts on “Jack and the Beanstalk.” It includes a microscale build of the village with clouds on top. There’s a windmill and some tiny houses. A piece that probably isn’t new, but was new to me was the cheese sloped size roof tile used on the windmill and two of the houses. I think it’s a good addition to the LEGO parts catalog. This bag also includes the Giant and a microfigure of Jack. The set comes with 2 microfigures of Jack so just in case you lose one or if Jack and his twin want to go hang out with the Giant.

21315_bag5.jpg

The sixth bag finishes up “Jack and the Beanstalk” with the actual beanstalk and the castle at the top. The functionality here is very creative with the use of Technic parts to make the beanstalk expand as you open up the book.

What struck me when building this set is that LEGO has left it open for builders. The title on the front cover does not say “Little Red Riding Hood” and “Jack and the Beanstalk.” It’s an open ended title. What’s been provided is a cover with a building space. The functionality for the pop-up portion of the book has been shown and there are studs on the top and bottom of the pages that you can use to insert your own stories. A quick Google search brings up results from a whole bunch of builders who have made pop up castles, pirates, and scenes from movies. At the writing of this post, LEGO Ideas is running a contest to see what kind of design you can come up with for the pop-up book. It’s definitely worth checking out some of the contest entries just to see how creative some people are when it comes to building.

Overall, this set is a win. I was a big fan. It’s a great build with a lot of great pieces and it opens up a new building technique to explore. If the price is too steep, wait a few months and keep checking on Amazon.com, Walmart, and other retailer sites to see if they have it for a discount.

Happy building!

21315_bag6.jpg

Set Review - #10263-1 - Winter Village Fire Station - Creator Expert

The 2018 Winter Village set was released on 2 October 2018. It’s a fire station and adds to the line of sets that started back in 2009. This is the 10th set in the line. This year, the set is 1,166 pieces and retails at $99.99 in the US. This puts it at $0.086 per piece which is pretty decent. It’s slightly less than last year’s set ($0.089 and keep in mind that the set includes a light brick which is probably more expensive to put together).

You can see my review of the 2017 set Winter Village Train Station here.

Here is the box. Like many sets, the front shows the whole set while the back shows some of the set features.

10263_front.jpg
10263_back.jpg

The set contents are 3 sets of bags, the two instruction booklets in a bag with the sticker sheet, and a piece separator (in the first set of bags).

10263_contents.jpg

The first set of bags builds what I will call the accessories. It includes a bench with a lamp post, a Christmas tree with some gifts, an ice skating rink, the fire truck, and a sled. The Christmas tree design is one that I have not seen before. It’s better than just throwing in a one piece molded tree, but I think it misses out on some of the realism of branches that can be created using LEGO bricks. The ice rink includes a hockey player with a hockey stick on the ice. The skating area is rather small and it includes a fireman statue. The fire truck does not have a ton of detail, but it fits into the theme of vehicles used in previous Winter Village sets. This bag includes 2 fire fighters. There is a female and a male and they each come with a hair piece and a helmet. And don’t forget the fire dog! In my opinion, the stickers on the fire truck were a pain. I always find it challenging to put a sticker on a 1x2 tile or on the 1x2 cheese slope. I find it hard to get the sticker exactly centered on the tile part. I’d rather have bigger stickers on bigger pieces and printed small tiles or cheese slopes. Finally the sled includes some gifts and there is a baby minifigure with a gift on his/her shirt to ride on it. The set shows a girl minifigure along with the sled.

10263_bag1.jpg

The second set of bags completes the first floor of the fire station. As you can see, the front includes a fire hydrant and a snowman. The main doors on the first floor open in to allow the fire truck to drive in or out. There are stairs leading up to the second floor that have some white pieces attached to show the poor shoveling job that was done. Like the rest of the Winter Village theme, the back is not completed (something for you to do on your own). The truck is longer than the building itself. The back does show you some of the items in storage to include another helmet, an ax and a pick, fire extinguishers, and a clock. This set of parts bags includes a saxophone playing minifigure to… I’m not sure how he fits in.

10263_bag2a.jpg
10263_bag2b.jpg

The third set of bags completes the build and adds the second floor and roof. It also includes another fire fighter. From the front, you can see the station is covered in some Christmas decorations of greenery with red. The tower above the fire pole slide area has a pretty cool design on the front and right sides. The building also has some snow along the edges. Looking inside you can see a small kitchenette with a coffee maker, stove top, and sink to help cook the hot dogs you can have with your coffee. There’s an old school red phone to get calls and a radio installed into the wall. A fold up bed is attached to the wall (the bed uses a sticker for the pillow and sheets… really?). Under the bed is a play area and a dog bone for the fire dog. The living quarters also include a table with 2 chairs.

10263_bag3a.jpg

The top of the building has a flag (with stickers to attach) and a slot for you to attach the light brick. The light brick really only lights up the front two windows and in my mind doesn’t do much for the set.

10263_bag3b.jpg
10263_bag3c.jpg

Here’s a view of the final product. I got it during double VIP points so I got some benefit, but it was not on sale. These sets typically go on sale only at the end of their shelf life so you’ll have to wait at least 2 years on this one if you want to get it on sale. Overall, I think this set fits into the Winter Village line very well. We’ve had a toy shop, a bakery, a post office, and others and a fire station is a great addition. This set has a lot of play built in and the accessories go well with the rest of the theme.

If you’ve been sucked in like me to this theme, definitely pick this set up. Wait for double VIP points or for when there is a cool free set for buying a specific amount. At $99.99, this set should put you at the right place to get whatever set is being offered.

Happy building!

10263_final.jpg