Set Reviews

Set Review - #75965-1: The Rise of Voldemort - Harry Potter

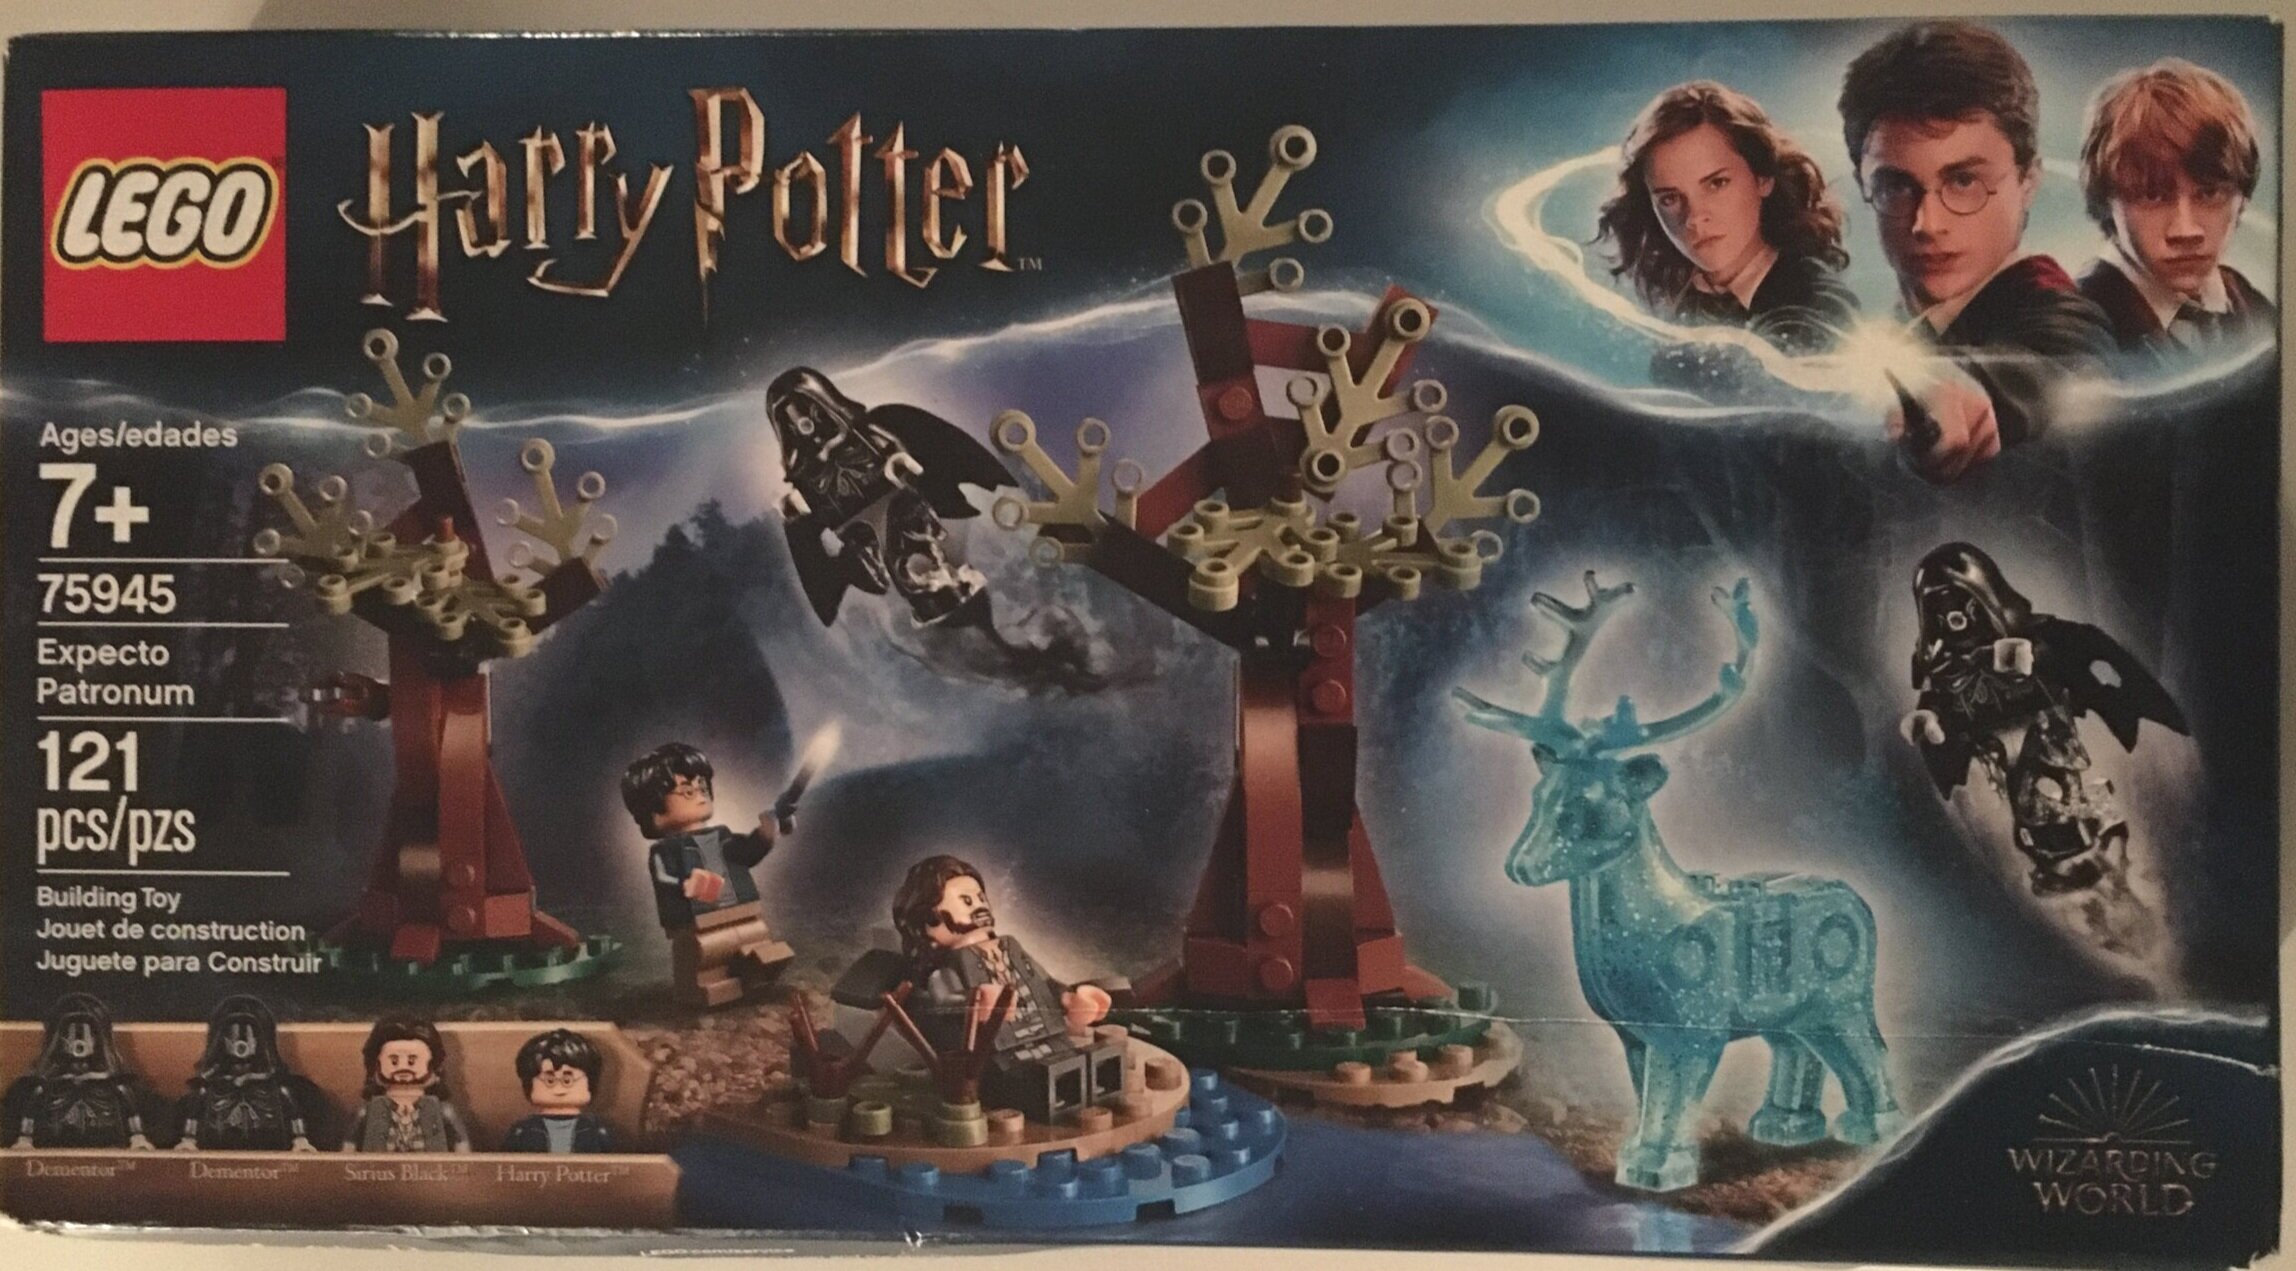
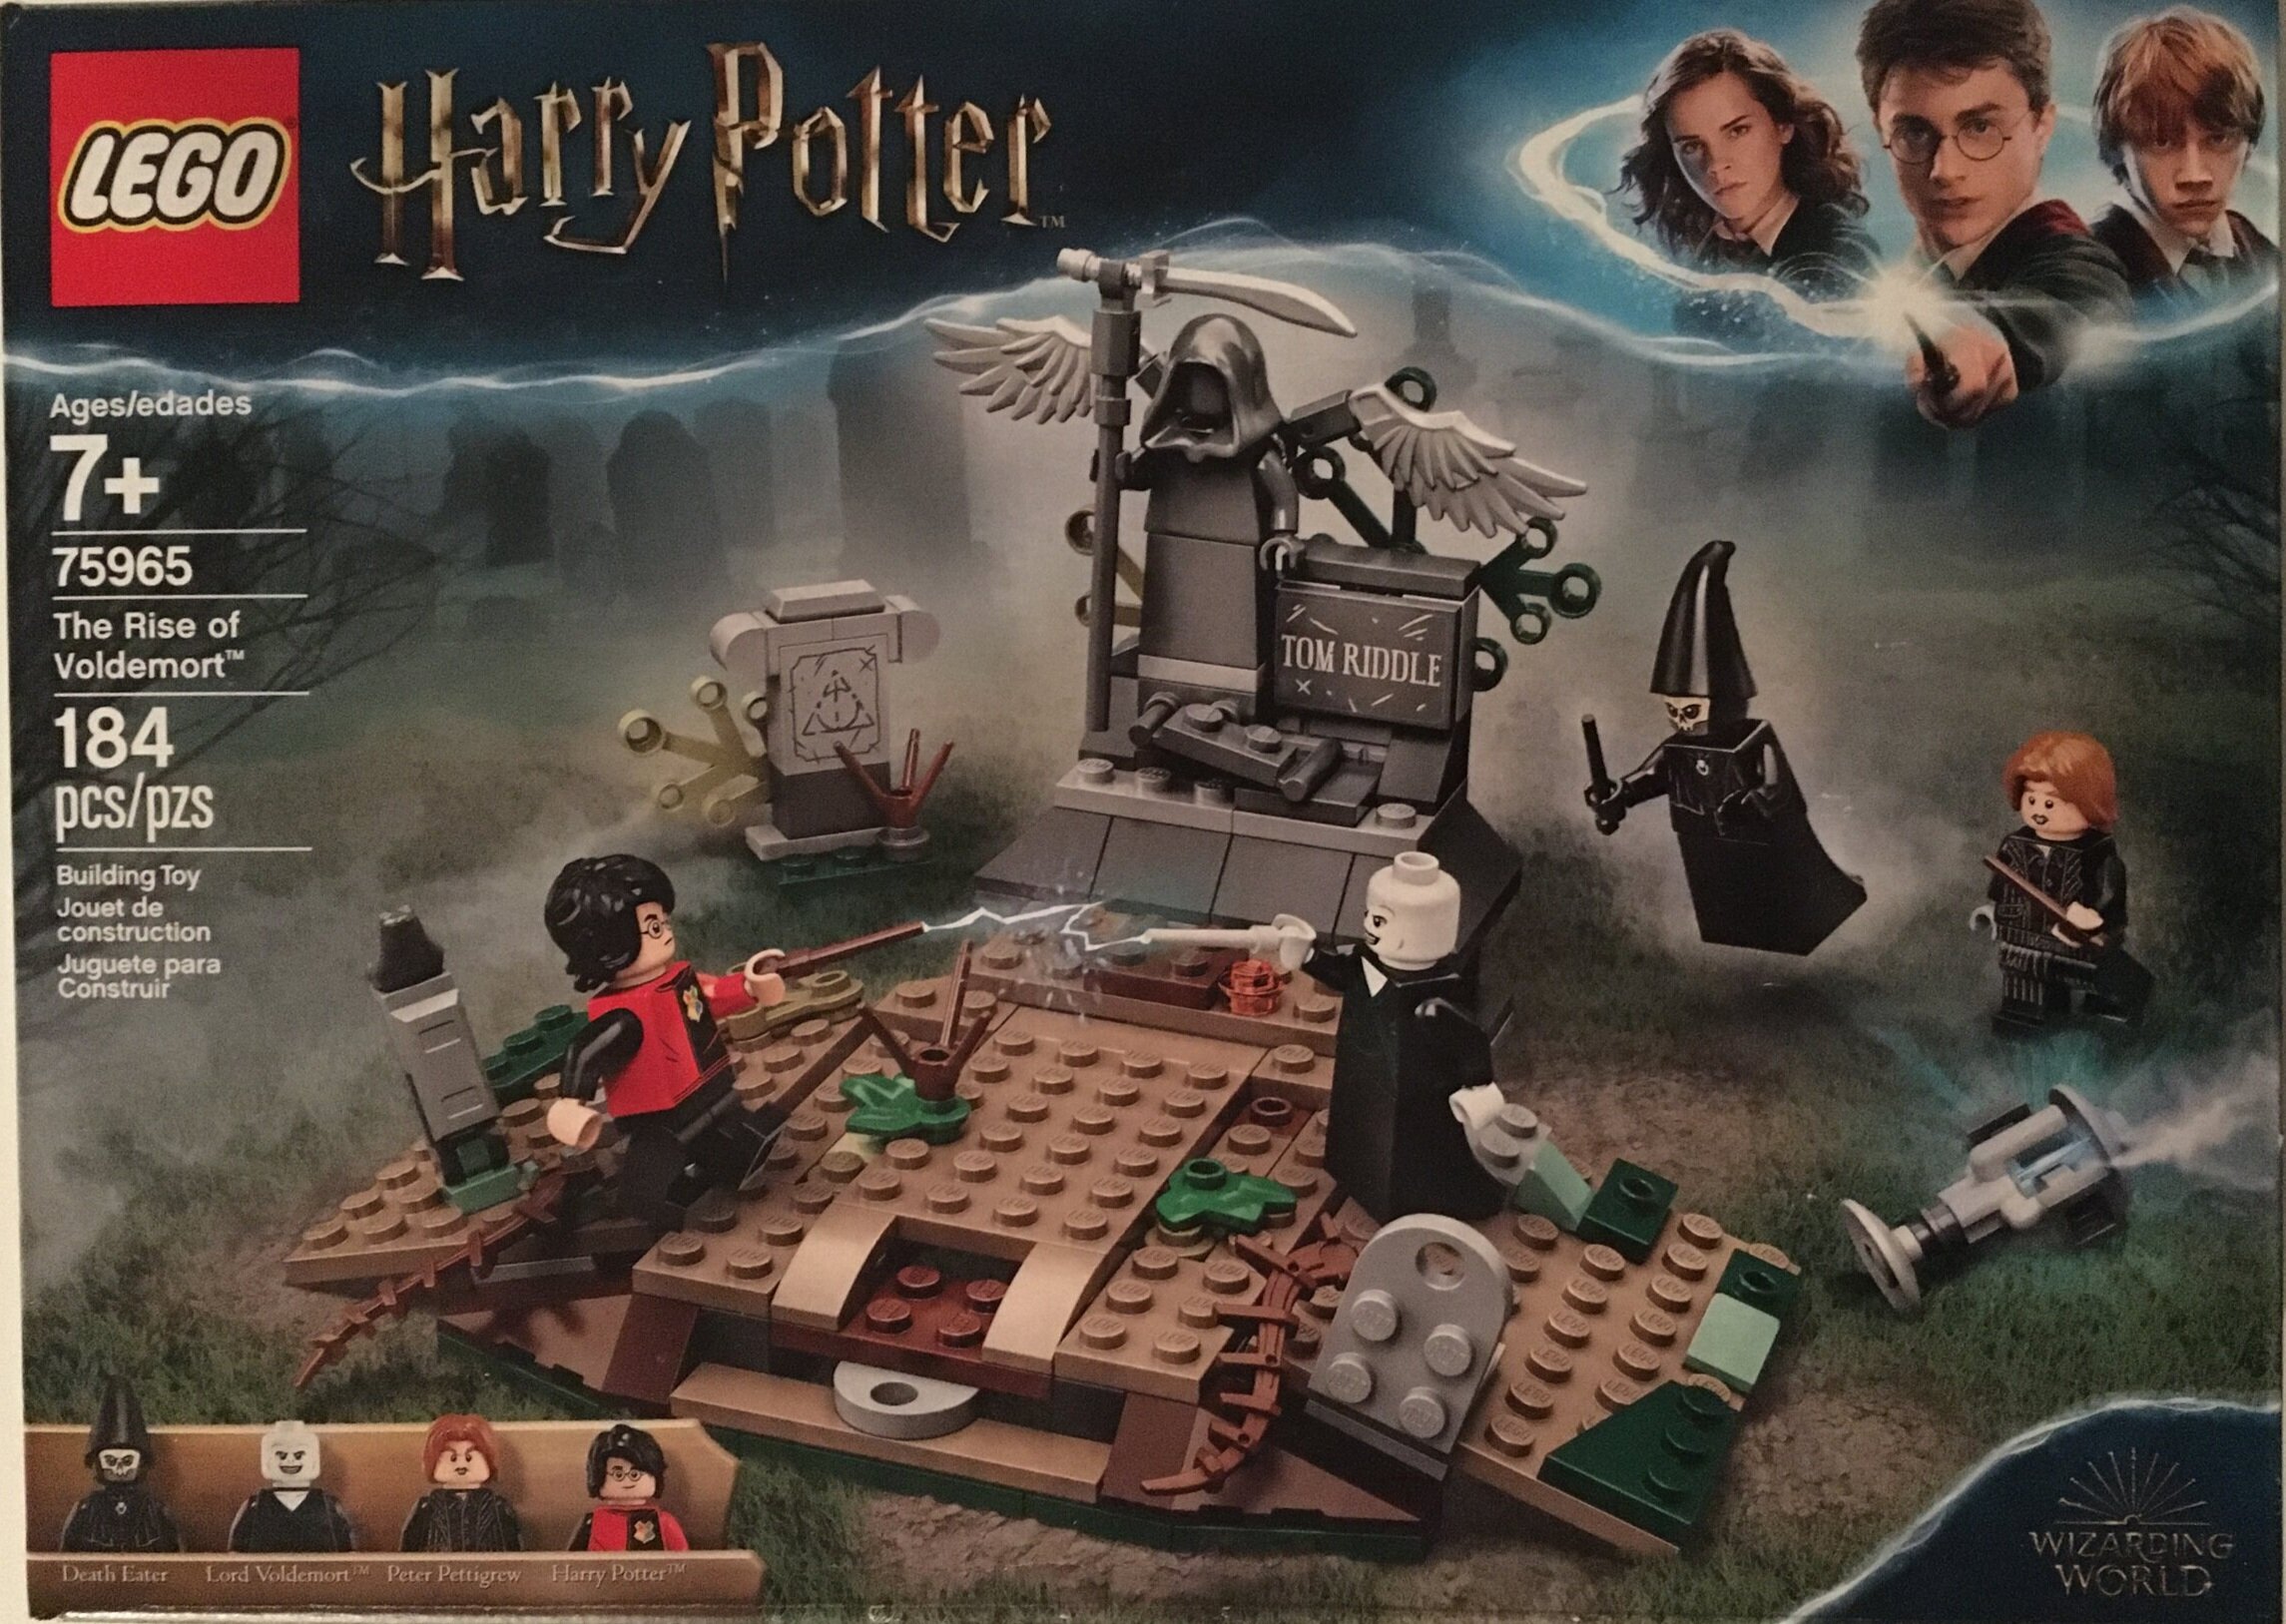
Here’s another one of 2019’s Harry Potter sets. It’s number 75965-1: The Rise of Voldemort. It contains 184 pieces and 6 minifigures. The set retails in the US for $19.99 which works out to $0.109/piece. It was released in the US on 2 August 2019 and was discounted on Amazon.com for 20% off a few weeks ago as of the writing of this post.

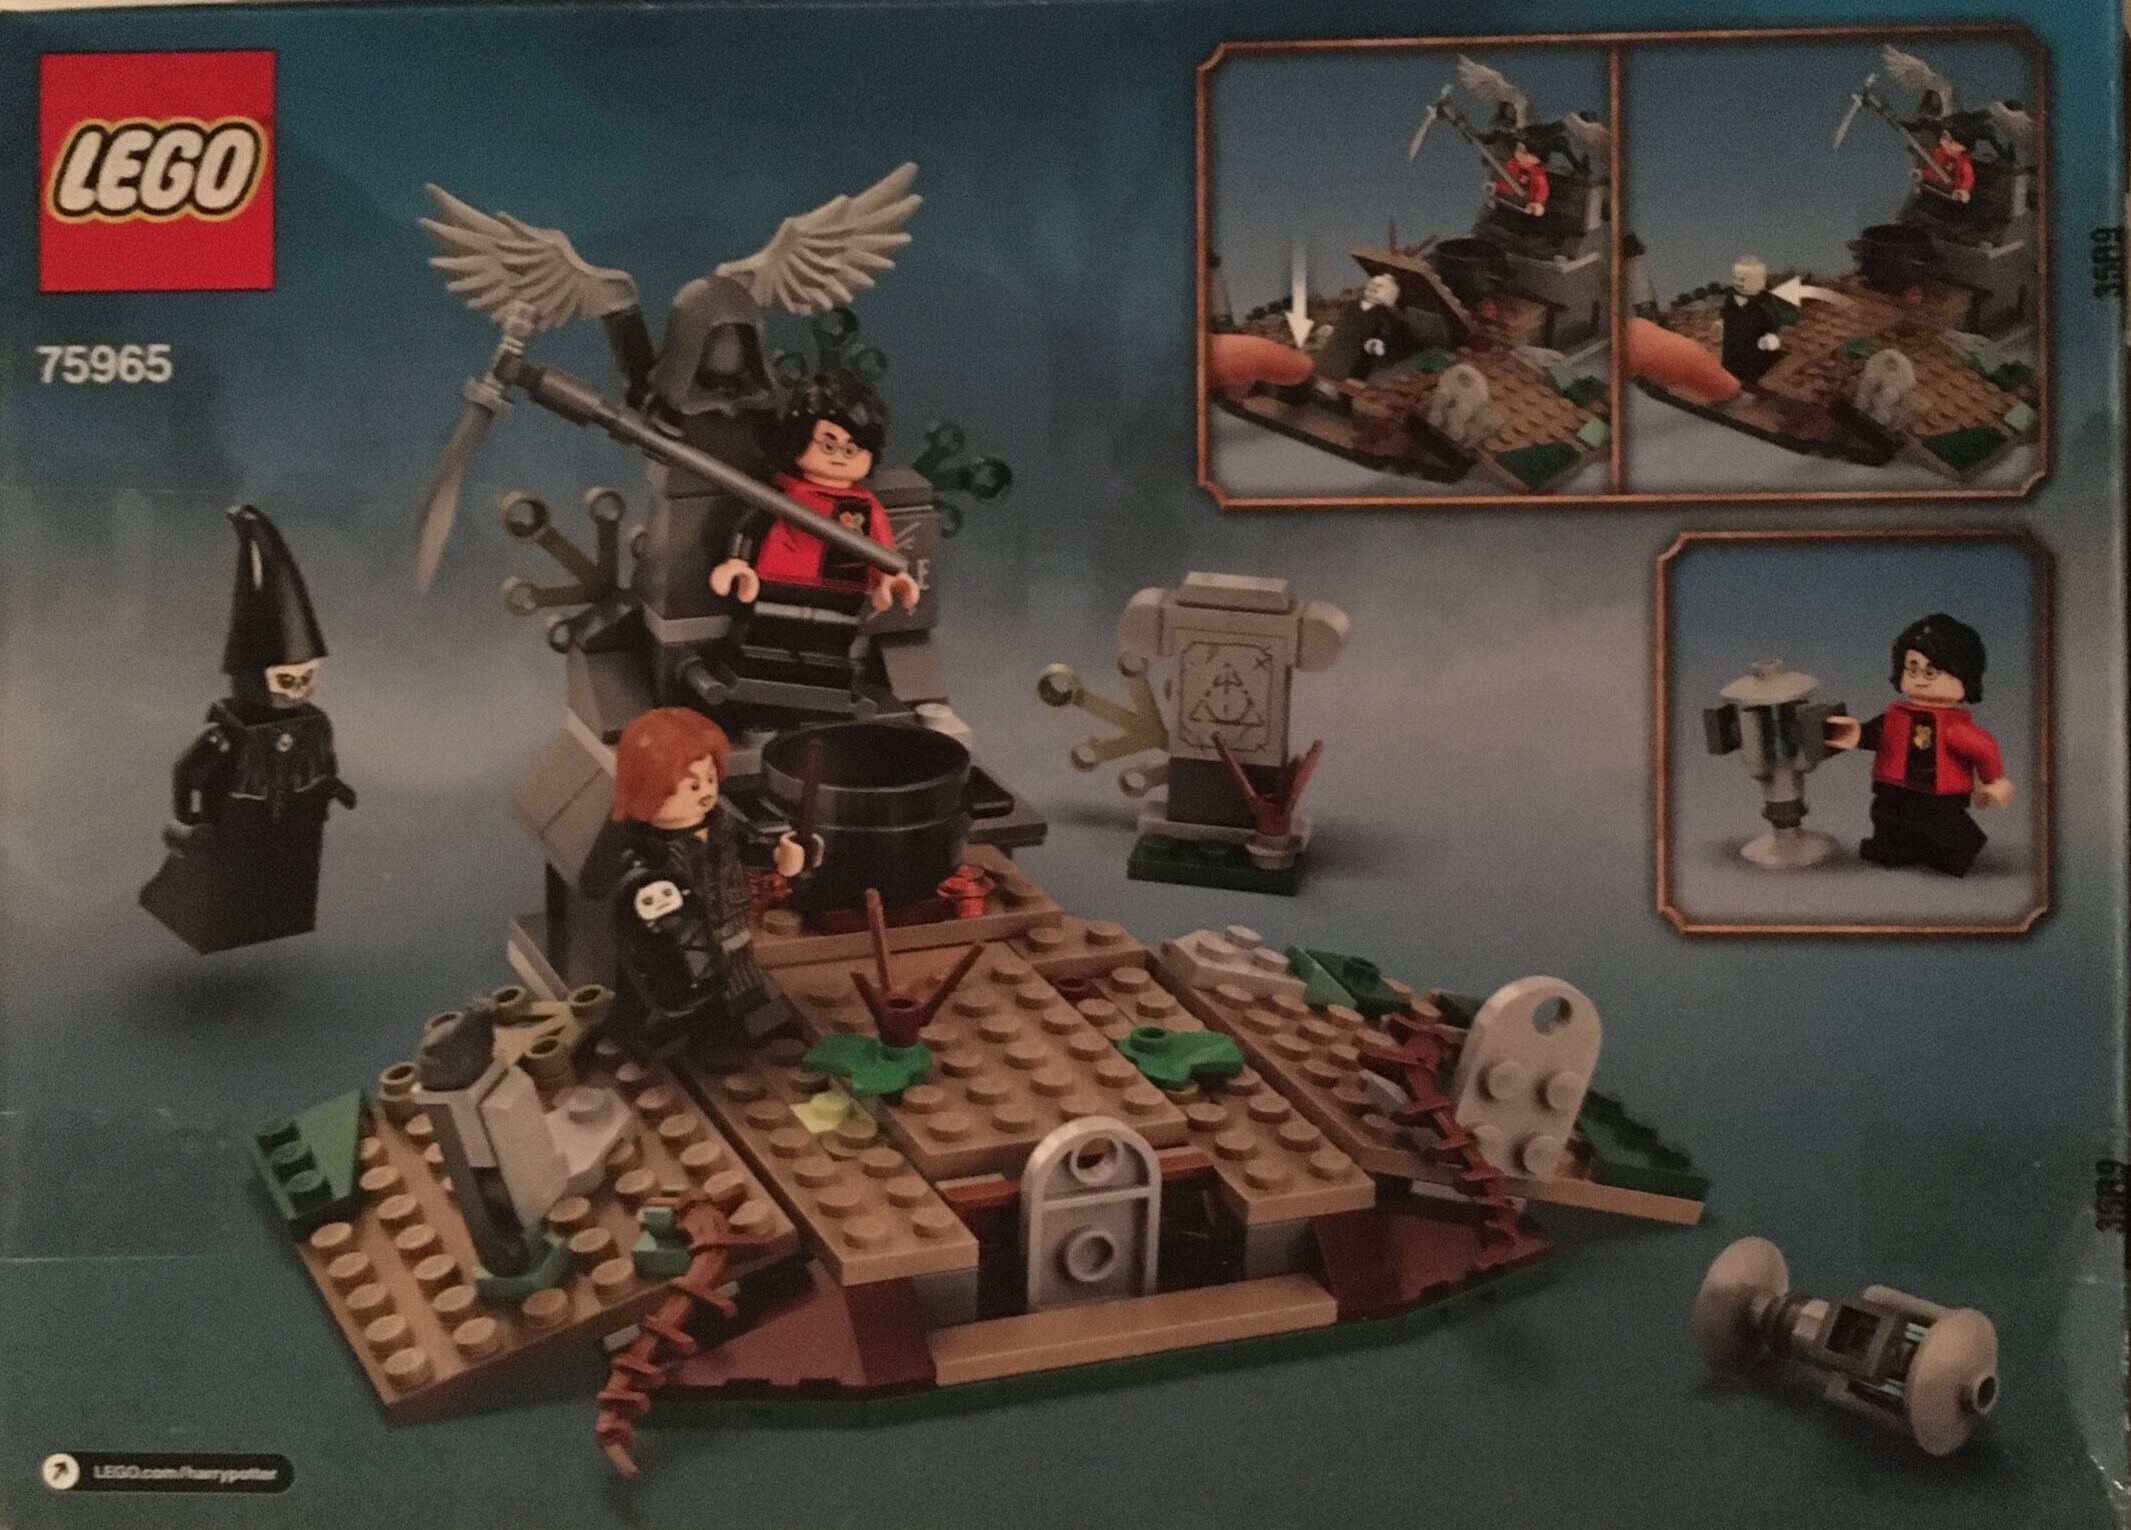
The front shows the set with the characters animated. The back shows some of the play features to include how you can have Voldemort appear out of the grave and how Harry can grab the port key.

75965_box_front.jpg
75965_box_back.jpg

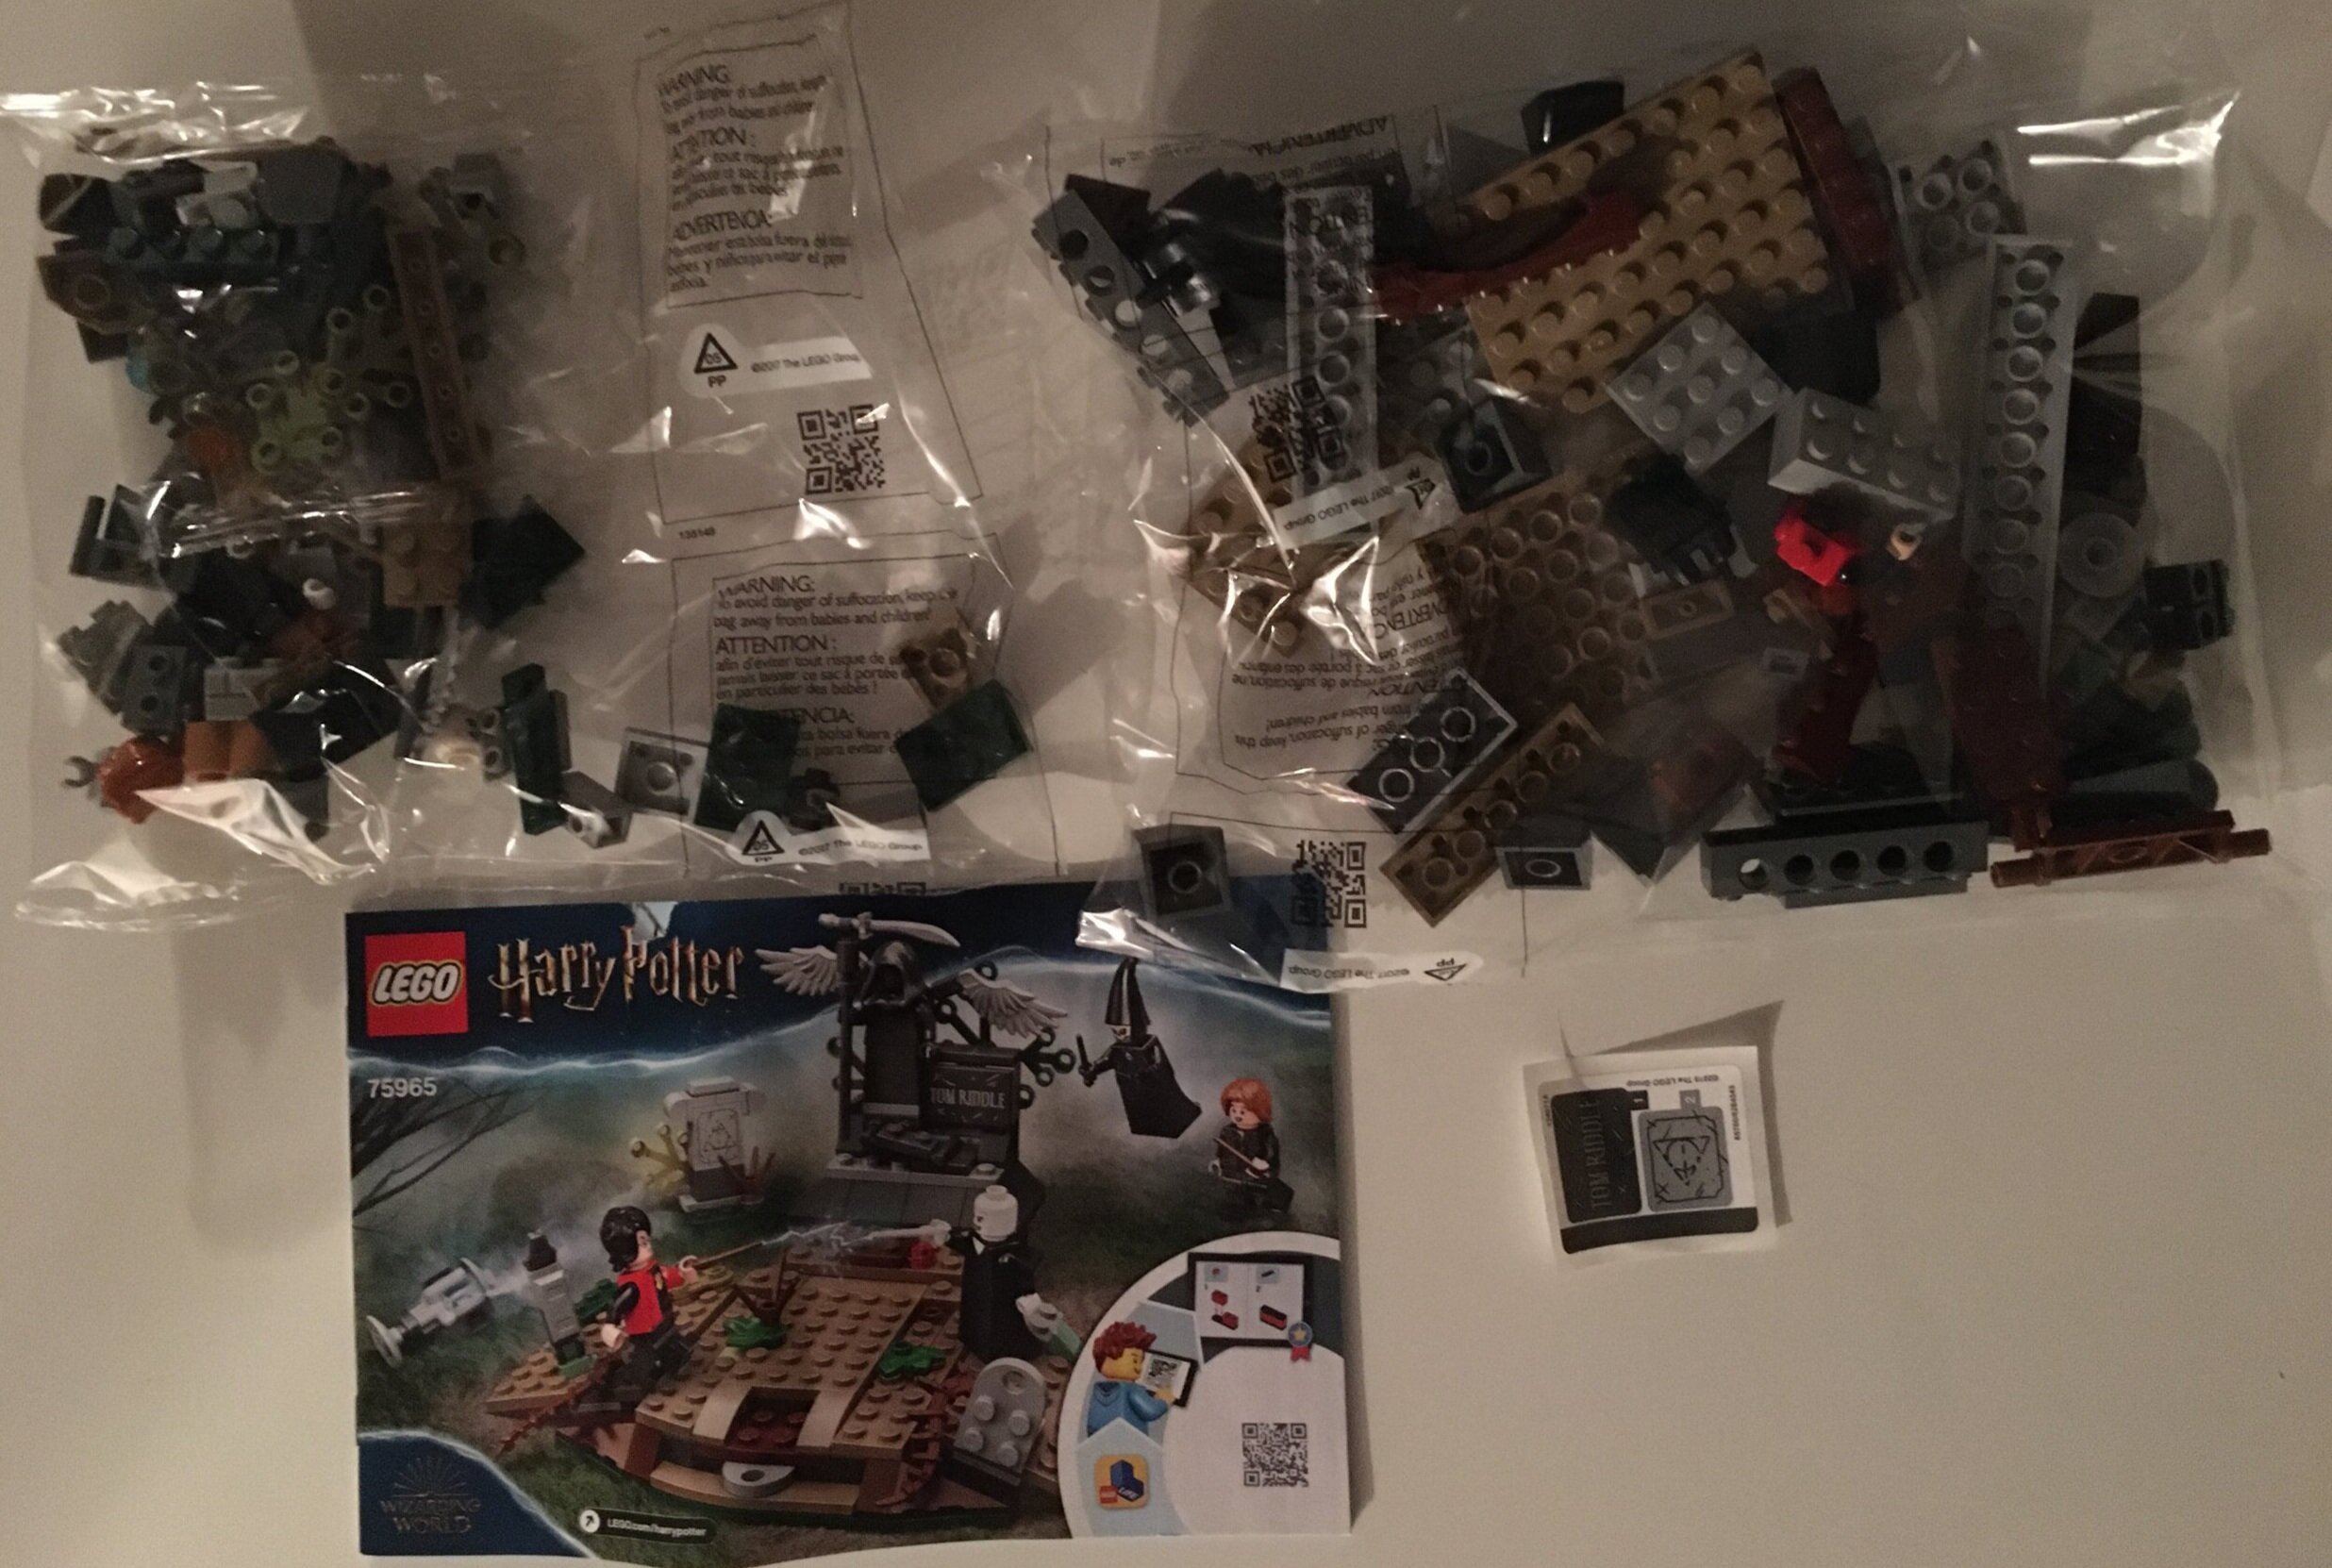
The set contains 2 parts bags, and instruction booklet, and a sticker sheet. Thankfully the sticker sheet is small with only 2 stickers.

75965_contents.jpg

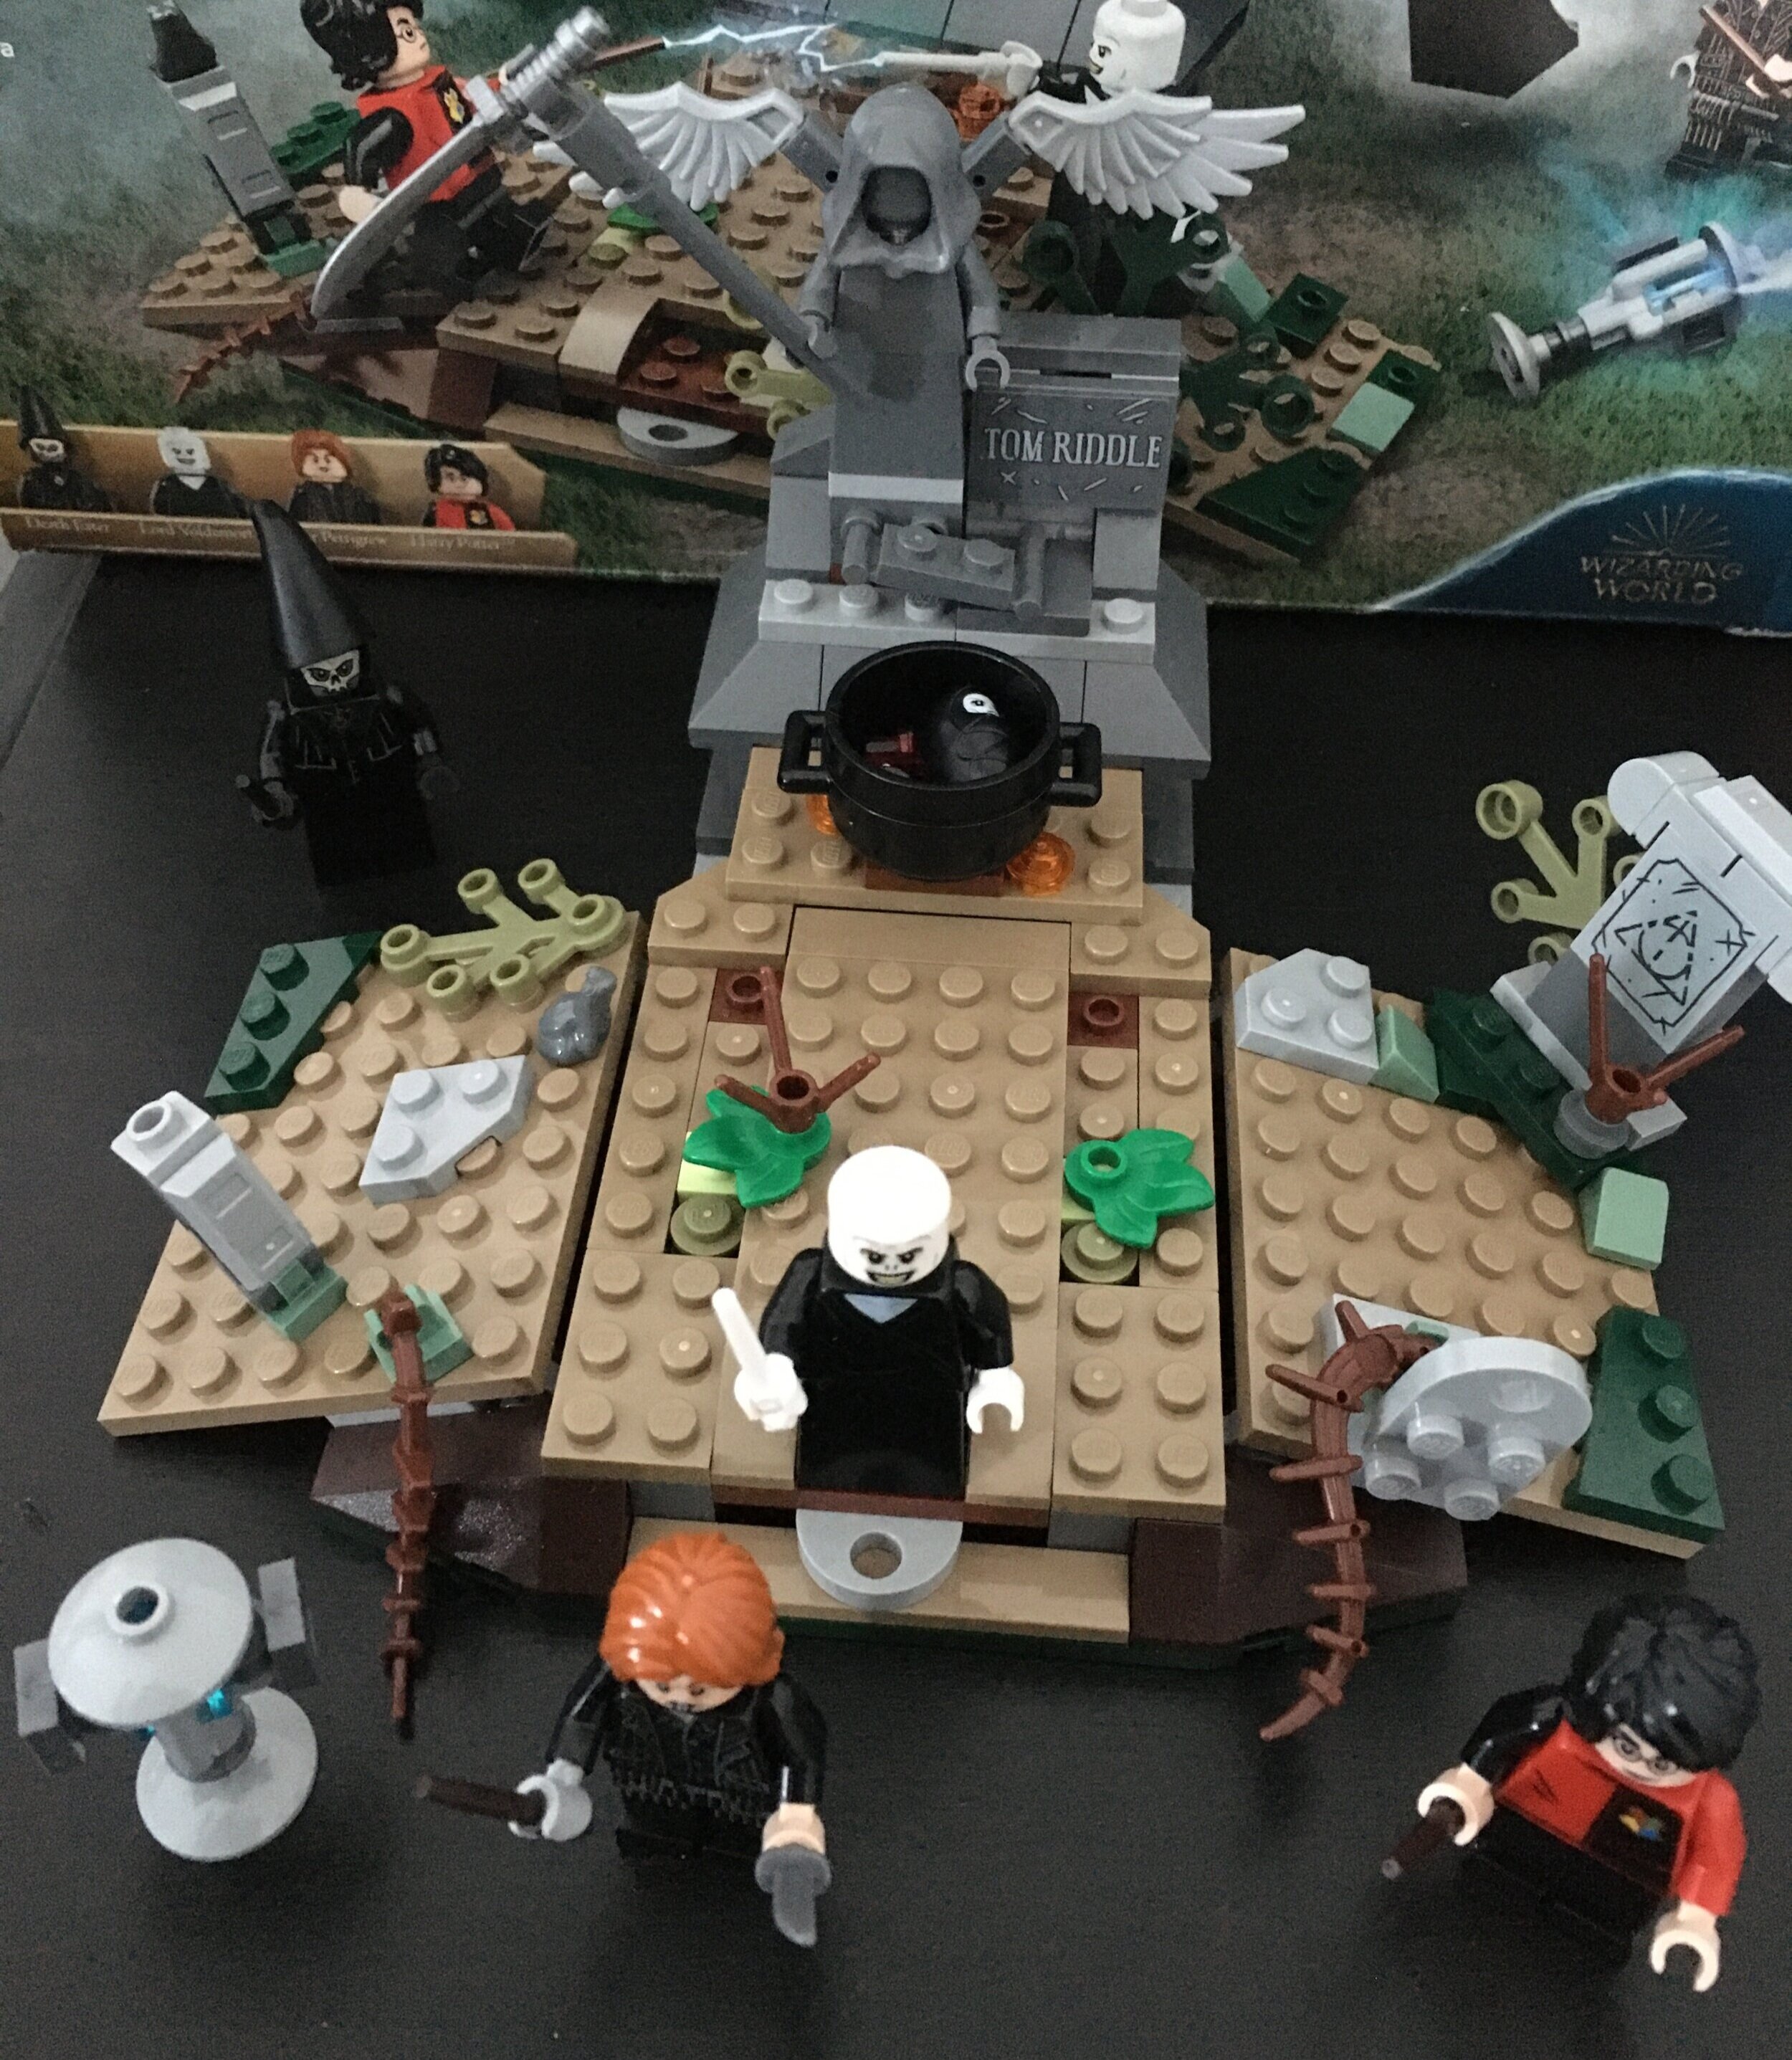
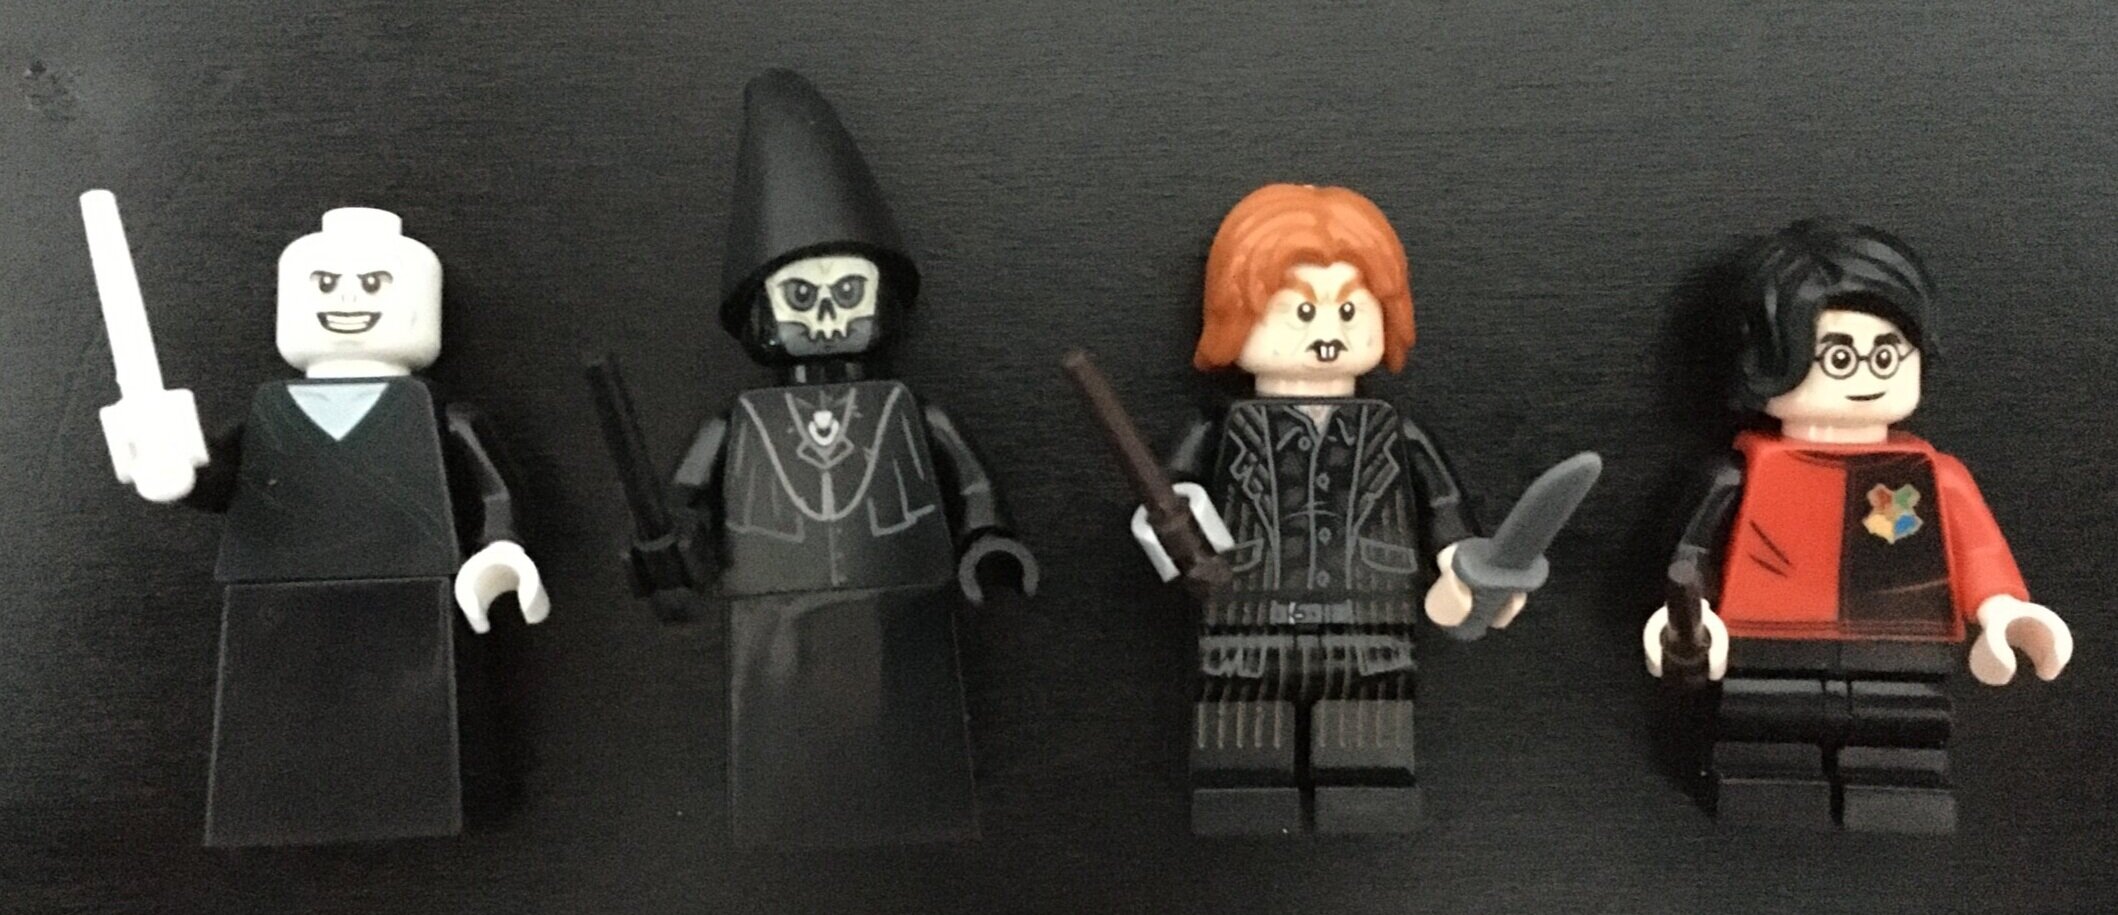
This set seems to be another minifigure pack. The 4 main minifigures are (from left to right) Voldemort with a white wand, a Death Eater with a Mask on Peter Pettigrew in human form (who has 2 facial expressions), and Harry Potter in his Tournament Uniform (he has 2 facial expressions as well).

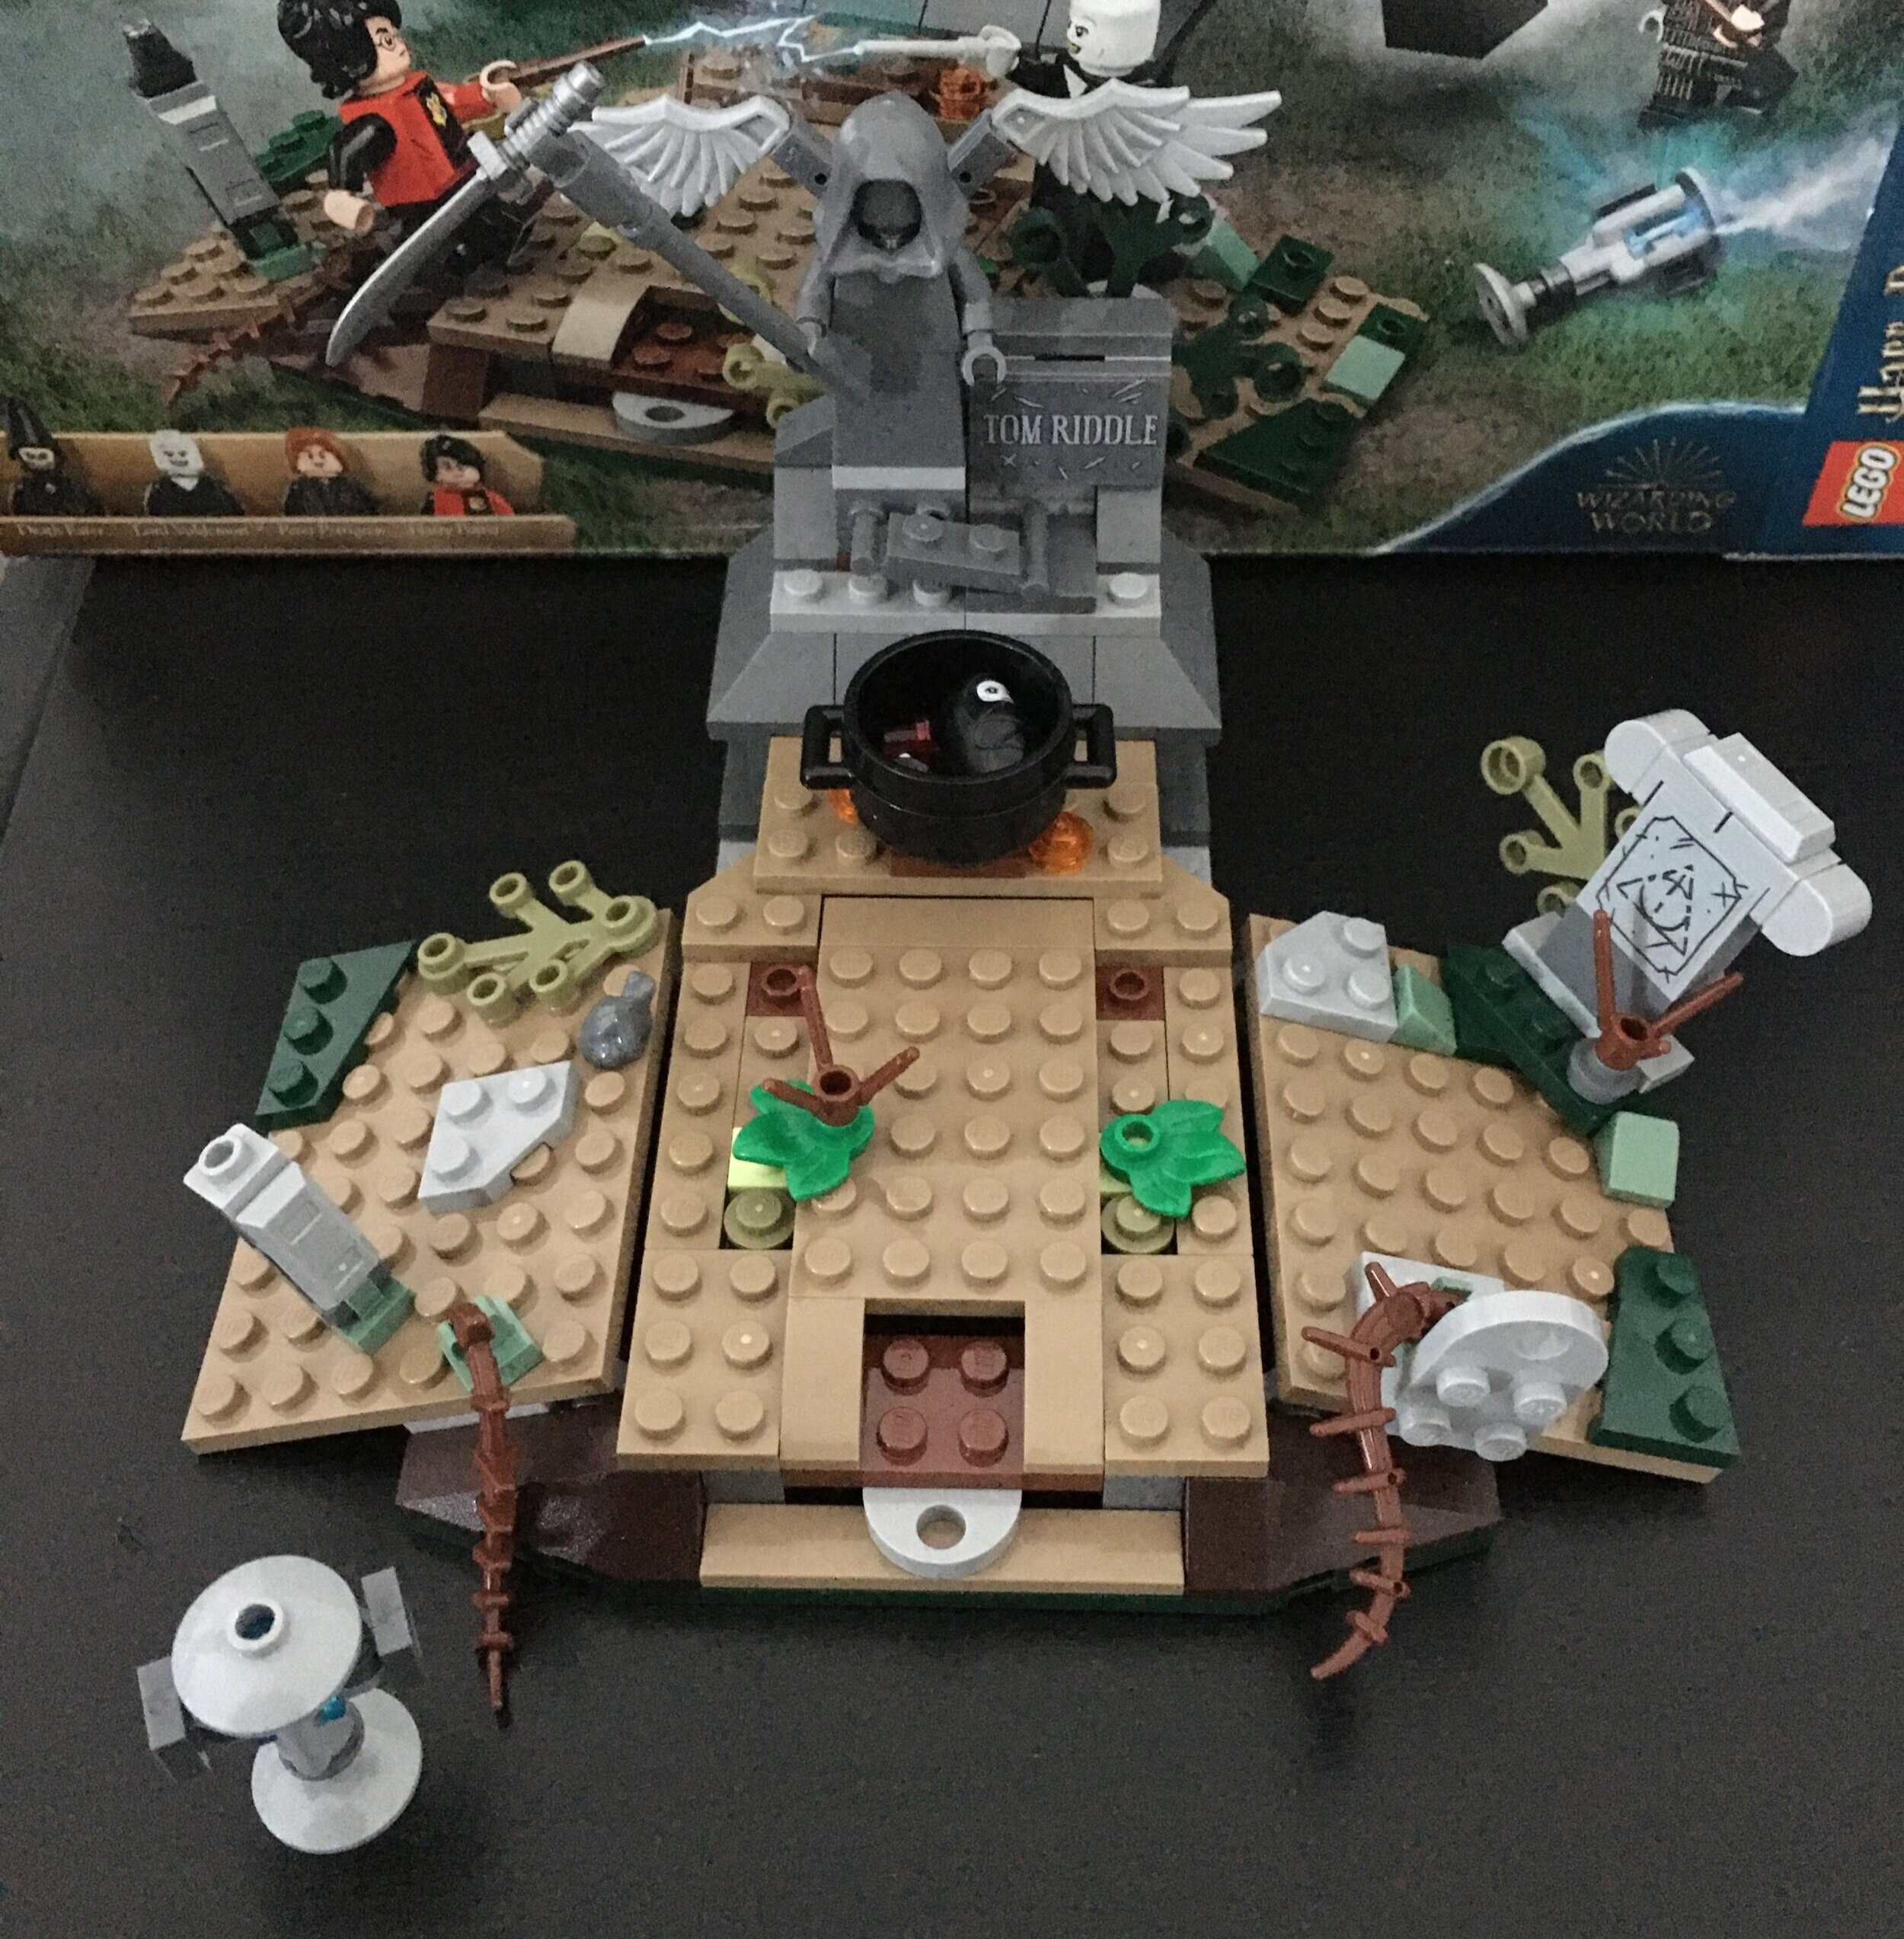
Brickset says there are 2 additional minifigures. One is the grave statue above Tom Riddle’s grave. The second is a small baby. The grave statue plays a part as they use it to hold down Harry, but I don’t recall a baby in the movie (and I didn’t read the book). Overall, it’s a decent collection for those looking to collect Harry Potter minifigures.

75965_minifigs.jpg

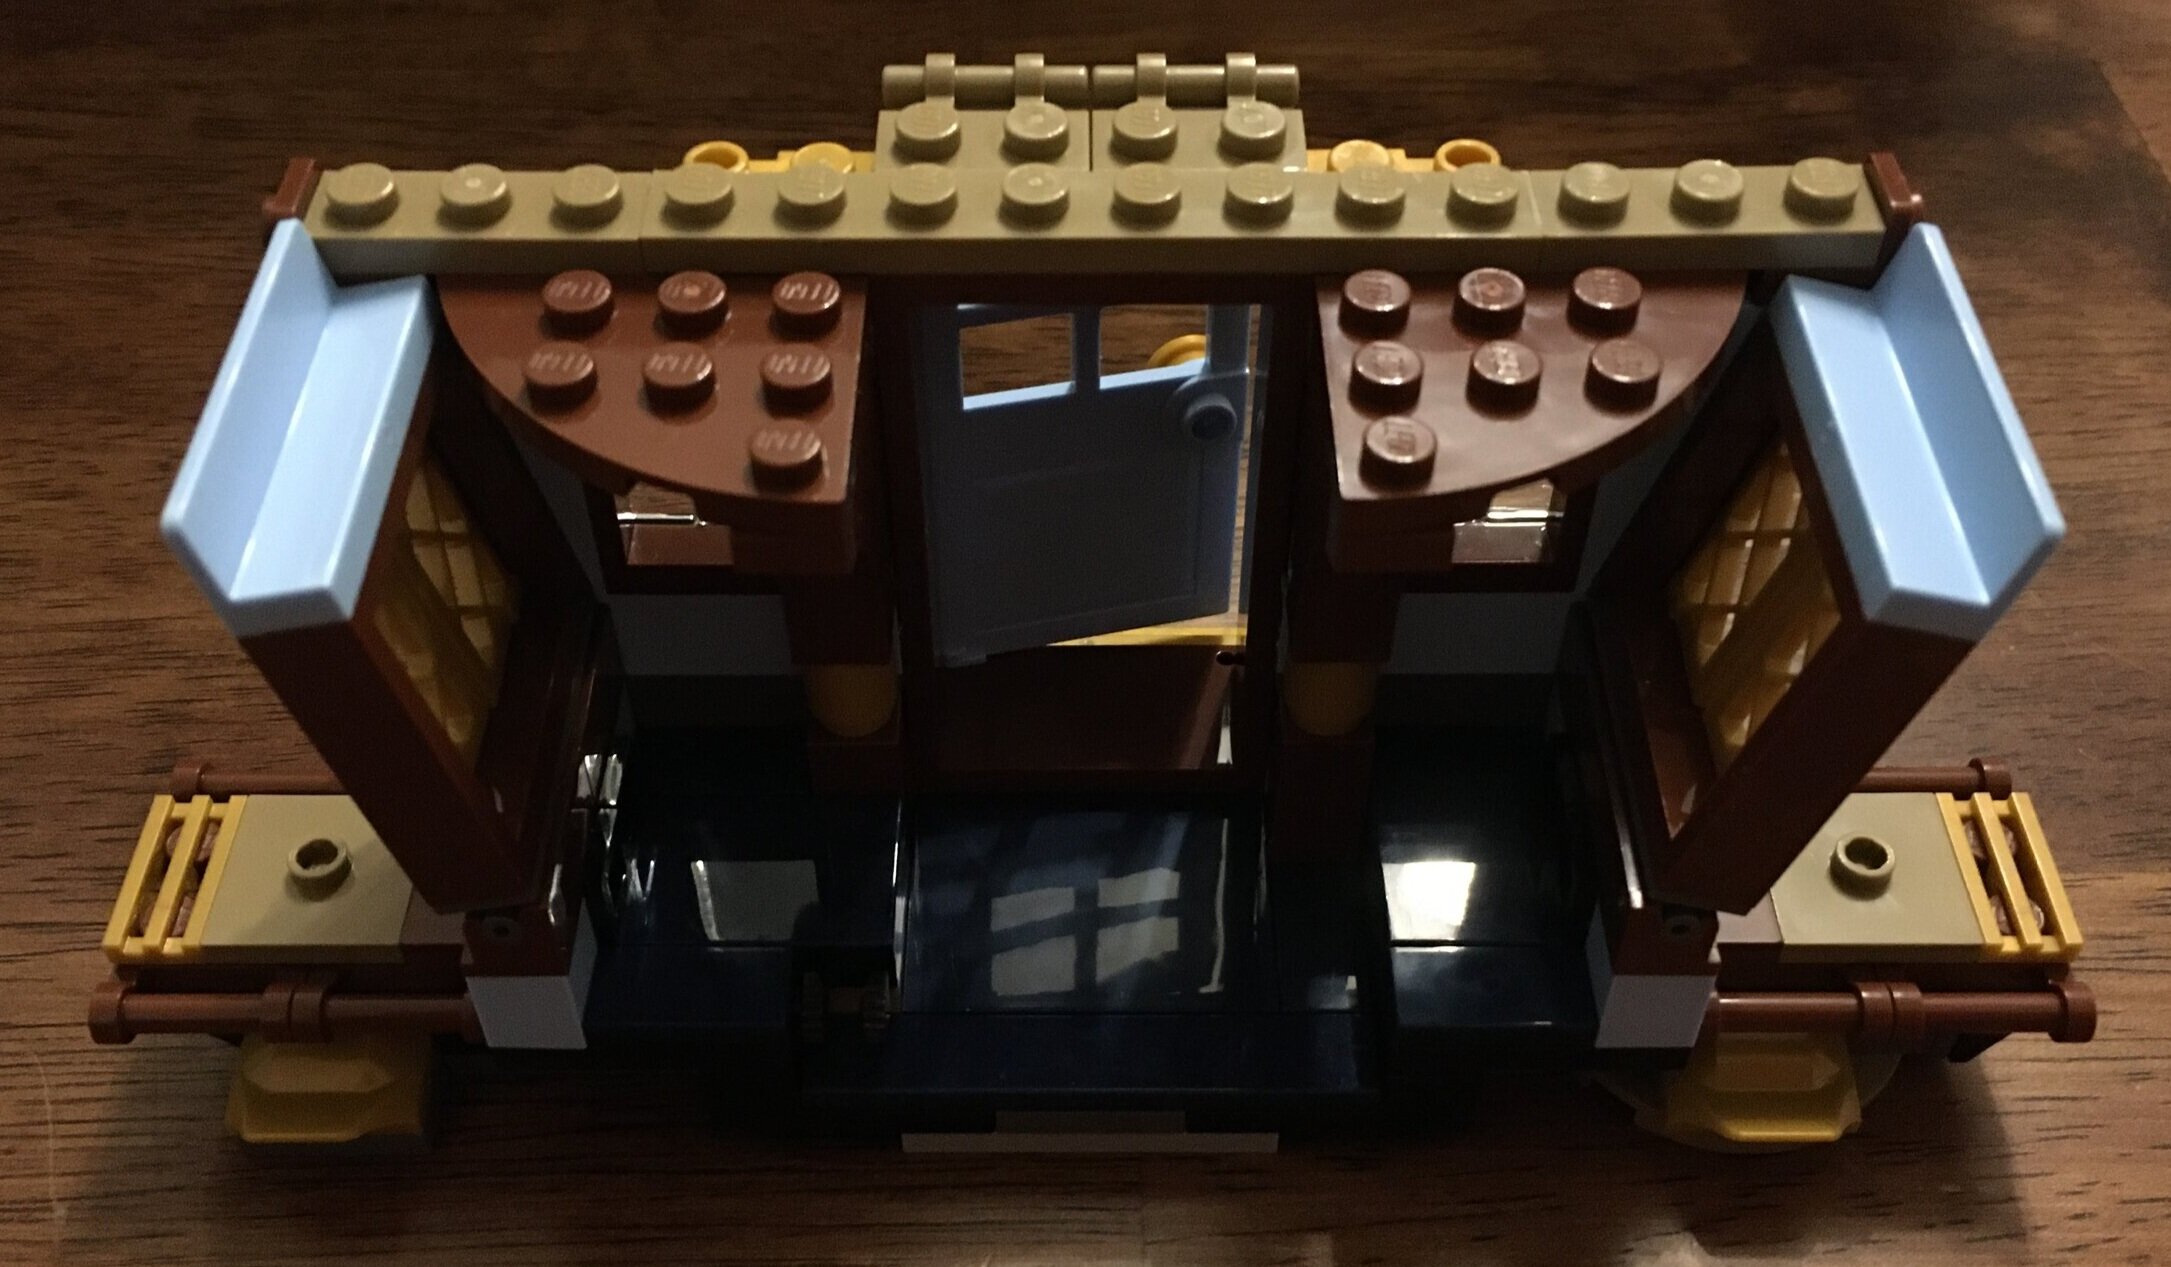
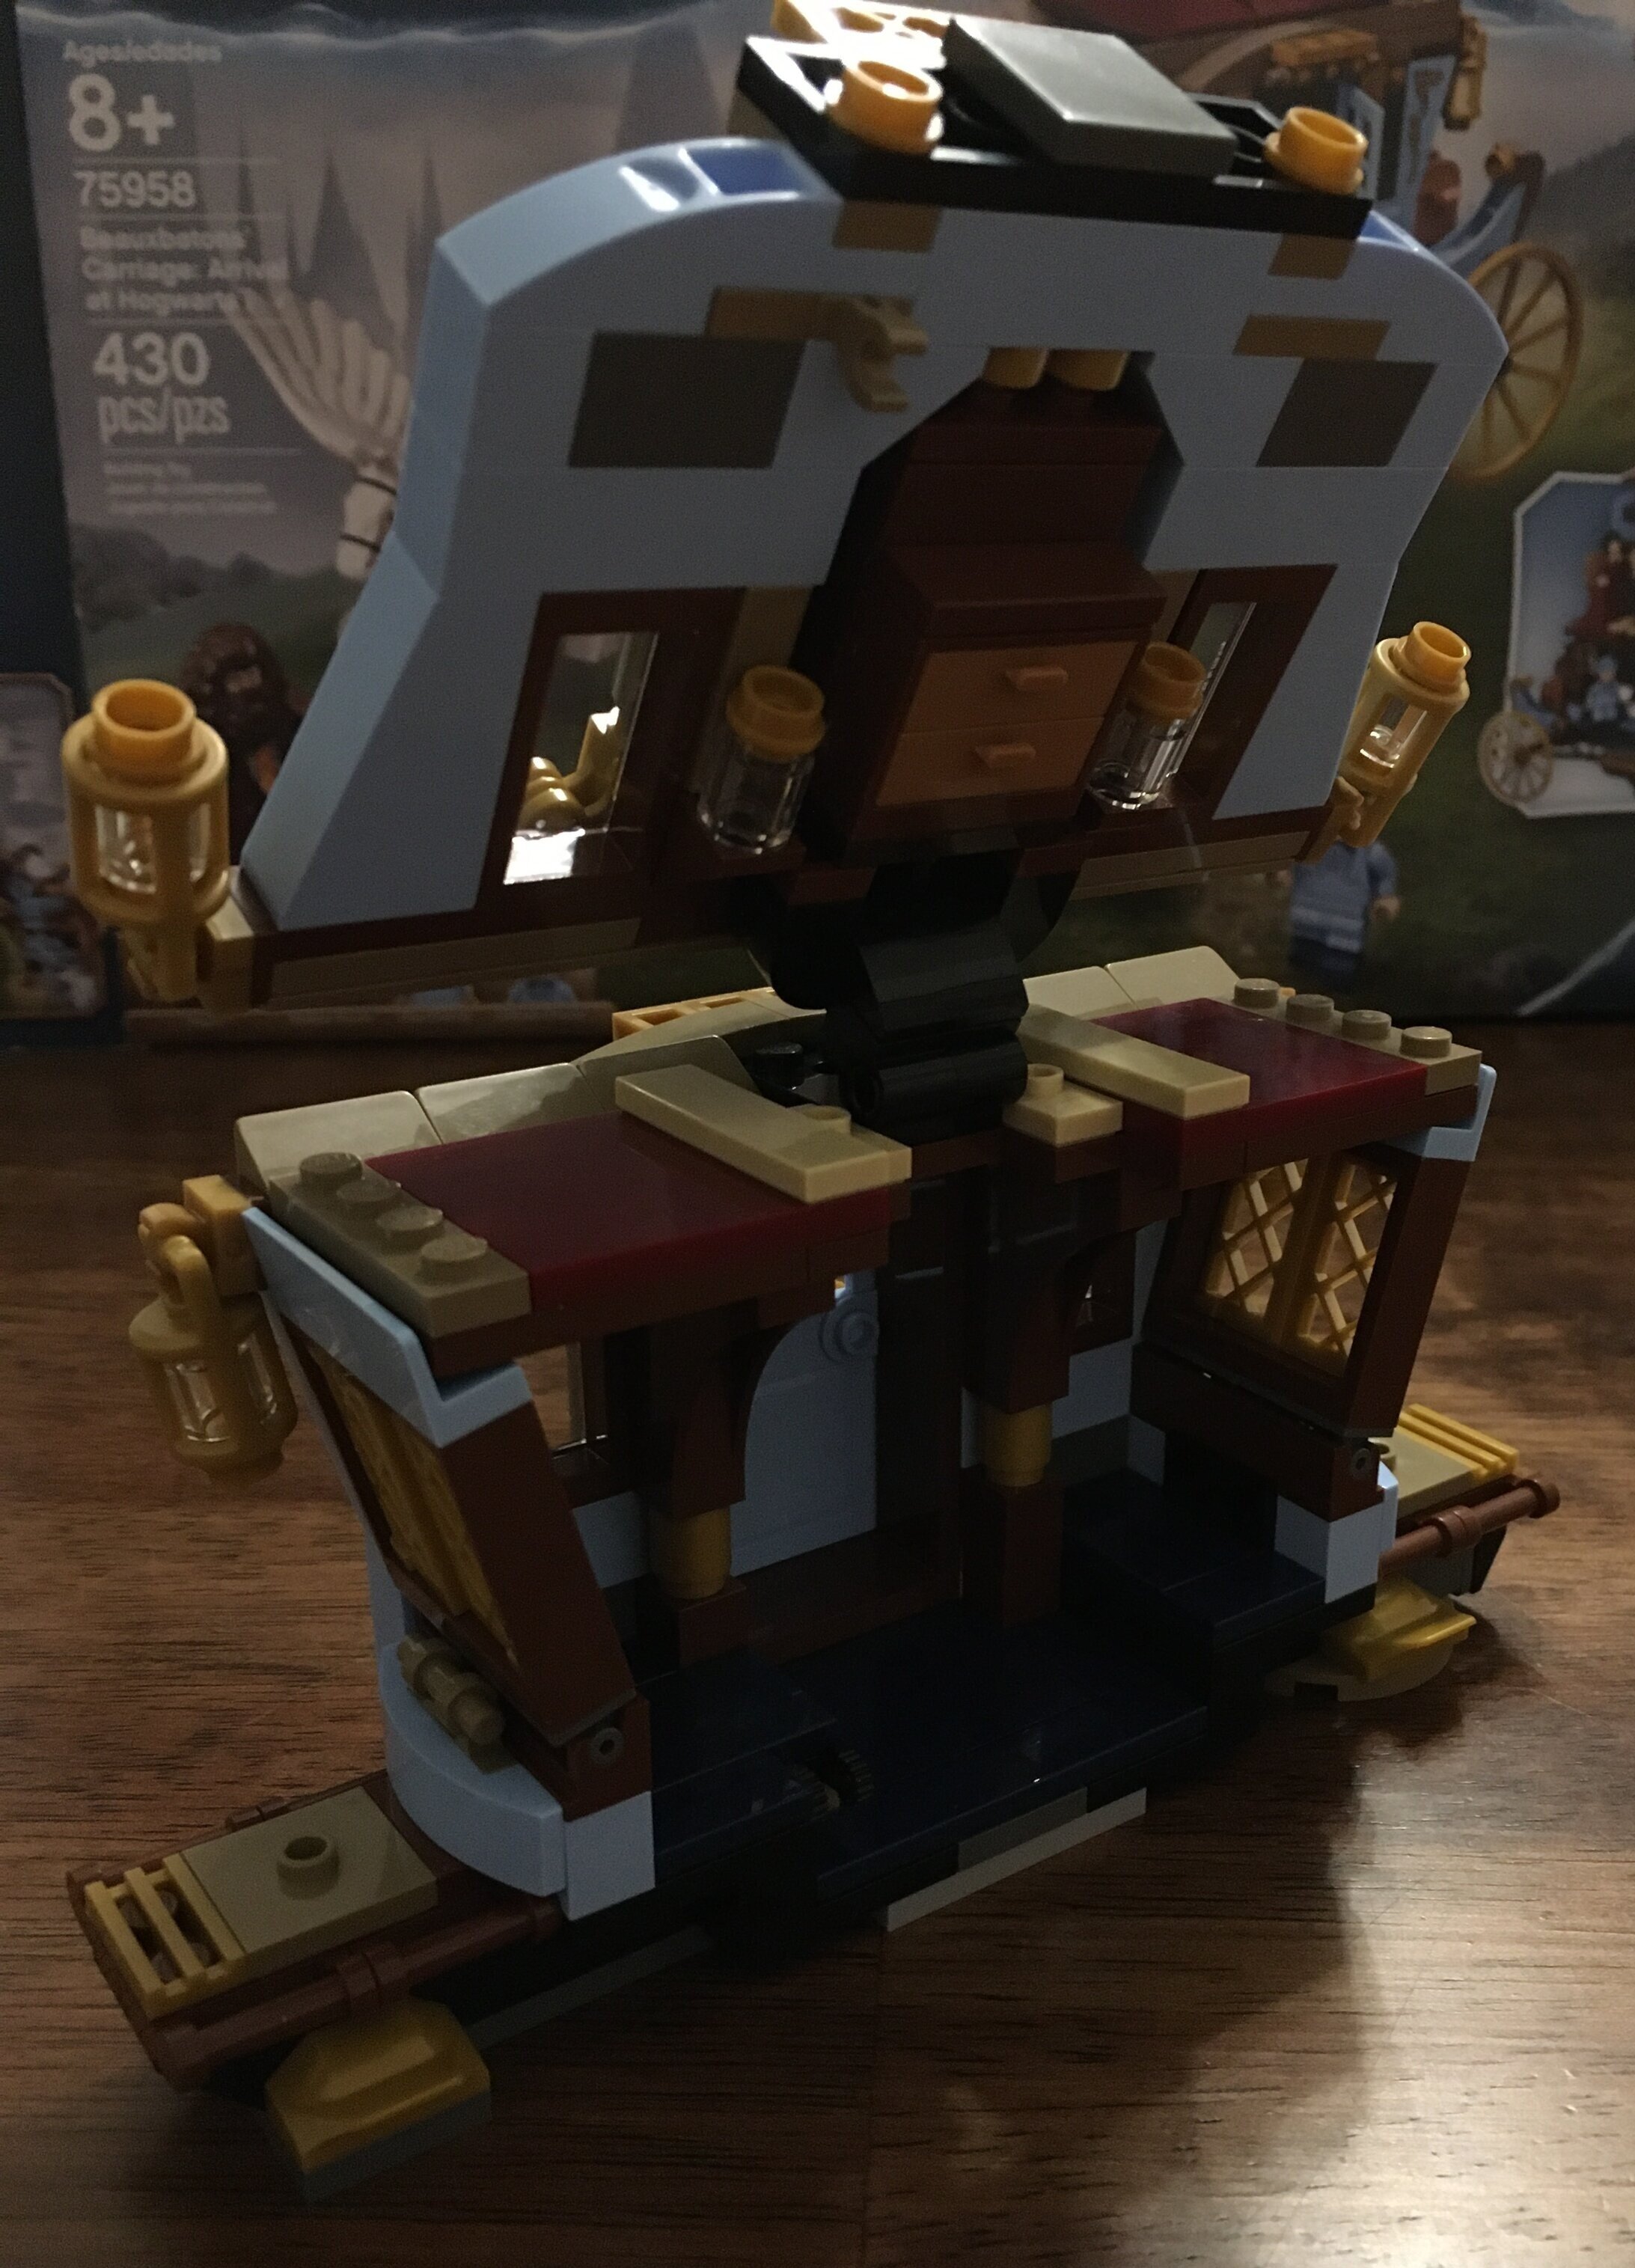
The set is pretty simple to put together. It starts with the center portion with the grave stone. Then it builds the left and right sides. In terms of detail, this set doesn’t have a lot to it. I like the use of a few plant pieces and brown plant pieces, but beyond that it is pretty bland (which is to be expected for a 184 piece set I guess). In terms of pieces for other MOCs, I like the pot piece, but after looking it up you can find it in 35 other sets so it’s not really rare. The port key is a small part of the set, but I like the build with the 1x1 translucent blue brick inside of the… um… not sure what it is called. Brickset calls it an assembly piece. Either way, I’m a fan of how that was build.

Overall, it’s not a bad set although a little violent for kids with Peter Pettigrew’s knife and the statue’s weapon type thing. It’s a rather dark set for a 7-year old in my opinion.

If you’re a Potter fan and you want the minifigures, definitely pick this set up on sale. Otherwise, I didn’t think this one was worth it even with the 20% discount I had from Amazon.com. What are your thoughts?

75965_build1.jpg
75965_final.jpg

Set Review - #21318-1: Tree House - LEGO Ideas

How are we on the 26th LEGO Ideas set already? Crazy!

#21318-1: Tree House was released in the US on 2 August 2019. It retails for $199.99 in the US and contains 3,036 pieces along with 4 minifigures. The price per piece works out to be $0.066/piece, which is decent. I had a gift card to use so it helped along with the double VIP points I earned. I read a few reviews on this one ahead of time with some mixed opinions, but I was excited to give it my own review.

The box is quite large with the front showing the full set in the summer mode along with a small picture of the autumn mode. It also highlights the sustainable plastics used on the plant pieces. The back highlights some of the details, shows how you can remove the roofs of each of the rooms, and shows the tree house in the autumn.

21318_box_front.jpg
21318_box_back.jpg

The box contains 16 part bags and then another box with part bags in it. The full set contains 19 numbered bags. There are two bags numbered 1 and then one bag each through number 19. There are 5 bags each for the summer leaves and autumn leaves. The instruction book is wrapped in plastic to prevent damage.

21318_contents1.jpg
21318_contents2.jpg

The instruction book has 431 pages total. Like other Ideas sets, this one has some information about the fan designer and the LEGO designer.

21318_instructions.jpg
21318_instructions2.jpg

I won’t show pictures of all the steps, but the build kicks off with the base and the Technic pieces that support the main structure of the tree. I like how the base is not just a large base plate, but is instead built up using various pieces. For building purposes, there is a stream and a few other pieces that help you differentiate which side is which. This helps later on as you are trying to determine which parts of the tree go where.

As you can see, the first bag includes a brick separator as well as the first of 4 minifigures.

21318_build1.jpg
21318_build2.jpg

I included shots of the instructions along with the build so you can see where its at and how the set is assembled. The set starts with an inner structure that connects to the initial Technic structure. Then the outer “bark” of the tree is installed on the outside. I can’t tell if I’d prefer the “bark” to be tiles or plates. I think the plates work… tiles might look too smooth. Although you could get the contours of bark using various tiles and slope pieces. Just a thought… I’m okay with how it was designed so far.

21318_build3.jpg
21318_build4.jpg

As the build continues, the tree trunk gets taller. The “branches” where the parts of the tree house get installed. They aren’t very realistic looking, but once the structures go on top, it doesn’t really matter. I like how the tree has a few details such as the sawed off branch shown by the 2x2 round printed tile and the bird house with the bird outside.

21318_build6.jpg
21318_birdhouse.jpg

Each of the tree house structures takes two parts bags to build. Considering the length of the build, I cut those pictures out and just included the finished product. The first one you build is a “master bedroom” with a bed, dresser, and some decorations. The second one is a bathroom with a toilet, sink, and tub. Each room is set up so it fits on the “branch” and then has an attachment on the top for the roof. Both builds are pretty similar, but have some differences to help them stand out. I like the color scheme and how the build makes it still look natural like in color to fit on the tree.

The bathroom has a pulley system attached so you can haul stuff up to the tree house. Not sure how you get to the stuff, but it’s a cool idea. I also like how the bathroom has a water storage tank. Maybe the pulley is used to bring water up for the bathroom?

21318_build8.jpg
21318_build10.jpg

The last structure is a kid’s room with bunk beds. It is connected to the other structure with a rope like bridge.

Next up are the roofs. They are all pretty similar, but have slight differences to make sure they fit onto the main structure. The dark blue color is a great choice in my opinion.

21318_build12.jpg
21318_build13.jpg

Next up, you finish off the tree trunk. It’s not exactly a smooth transition to smaller branches, but we’ll take it. Instead there are a number of attachment pieces for connecting branches to be built later.

After that, you build a stairway up to the tree house. I’m glad they didn’t just use one of those large stair pieces, but instead constructed stairs in the color scheme and included twists in the stairs. A few of the tiles have printing on them to add to the detail that they are made of wood.

21318_build14.jpg
21318_build15.jpg

The build includes an outdoor kitchen at the bottom of the tree with a fire pit and cooking pot, a table with chairs, and some food and drink options. Additionally there are 4 minifigures I displayed here. There is a male and female adult and then two kids. They all look like they have their woodland gear with my favorite being the girl’s vest. Additionally, the girl sports one of the hat pieces with hair attached which I am a fan of. It is a little more realistic than just the hat and lipstick to show it is a girl/woman.

21318_minifigs.jpg

The last 3 bags of the set are all parts for the branches. The build instructions give you the option of building with the green and dark green or yellow and lighter brownish type pieces. I chose to build with the green, but the build is the same with the other colors. Or you could be really crazy and mix the green and yellow to have an early autumn type tree. The branch pieces are not exactly the best designed in my opinion, but I think the greenery hides them well enough so they don’t stand out. Note that it will take a bit of time to switch out the colors. The green pieces are attached well so they don’t just fall off which is a good thing.

Overall, I was really impressed by this set. For one it is something completely different that has never been done before. You could fit this into a woodland/forest scene really well. I’m hoping to see some good modifications from the fan community of this set.

This set is at the $200 point, but I found it to be worth it. There are a lot of pieces and the colors and piece options are great for other MOCs if you want to take this one apart. More importantly, if my NLS gets a vote, I was told we’d make space in the house to display this one as she really liked this one. Bonus! That didn’t happen after the Millennium Falcon was built so I’ll take this one as a win as otherwise my bricks are confined to a specific space in the house that is out of the way and that’s it.

What are your thoughts on this one?

Some overall pictures are below.

21318_final1.jpg
21318_final3.jpg
21318_final2.jpg
21318_final4.jpg

Set Review - #75945-1: Expecto Patronum - Harry Potter

We’re into the second year of Harry Potter sets that started in 2018 and here is another one I built for a review. #75945-1: Expector Patronum was released on 1 July 2019. It’s cost is $19.99 and contains 121 pieces and 4 minifigures. It works out to $0.165/piece. This is a bit high in my opinion, but I purchased the set at 20% off on Amazon.com in the US. This is still a bit high, but better. I suspect at the end of this set’s life, it will be in the 30% to 40% discount range.

Here is the box. The front shows the set while the back shows the “action” features.

75945_box_front.jpg
75945_box_back.jpg

The set contains 4 parts bags, an instruction booklet, a package with the patronum, and the capes for the dementors.

75945_contents.jpg

Here’s the build… at such a small set, there isn’t much to it. There are 2 “trees” that aren’t very exciting. In fact, they are pretty lame. Other than having some green branches, they don’t look much like trees at all. Having seen the movie, I get what they are trying to portray, but what is the point of this set? Is it just a minifigure pack?

75945_build.jpg

Here are the minifigures. The Dementors are pretty cool looking and might be one of the reasons to pick up the set. Harry has mid-size legs. Not the non-movable kid legs and not the full size legs either. Sirius has his prison uniform. They both have dual sided faces. Harry has a wand.

75945_dementors.jpg
75945_minifigs.jpg

The other reason to get this set is the Patronum which is a deer (watch the movie or read the book if you want to know more). It’s a translucent blue deer and has sparkles inside. The set includes a 1x2 brick, a 1x2 plate, and then a round saucer type piece in the same consistency. If you are looking for pieces like this, then it might be worth it to get the set. I highly recommend picking this set up at a discount. Look for more than 20% off if possible. You might have to wait until this time next year for bigger discounts, but it might be worth the wait.

What are your thoughts?

75945_patronum.jpg

Set Review - #75958-1: Beauxbatons' Carriage: Arrival at Hogwarts™ - The Wizarding World - Harry Potter

The first new wave of Harry Potter sets arrived last year (2018) and now in 2019 we have a second wave. They have been out for a bit, but my preference is to wait until they go on sale. This set, #75958-1: Beauxbatons' Carriage: Arrival at Hogwarts™, was released in the US on 2 August 2019. It contains 430 pieces and retails for $49.99 in the US. It works out to $0.116/piece which is a bit on the steep side in my opinion.

This set depicts characters from the fourth book “Harry Potter and the Goblet of FIre.” Beauxbatons is a French wizarding school and the school arrives for the Tri-Wizard’s tournament in the carriage this set depicts (yes, I had to Google all that).

The box shows the full set on the front, the minifigures on the bottom left of the front and the characters from the movie on the top right. The back shows some of the different play features of the set.

75958_front.jpg
75958_back.jpg

The set contains three parts bags, an instruction booklet, and a small sticker sheet. Bag 1 contains a piece separator.

75958_contents.jpg

The first bag begins to build the carriage. I like how the designers achieved the angles on the front and back. I also like the light blue color and I think it goes well with the brown and gold brick colors. Beauxbatons was never shown in the movies, but this would make for a good MOC. A French style chateau with brown, light blue, gold, and the tan-ish color would look cool.

75958_build1a.jpg
75958_build1b.jpg

The second bag almost finishes the carriage. The second picture shows how one side of the carriage lifts up. I assume this was done for playability as you can get to the minifigures more easily versus removing the roof. While I’m not a fan of stickers, I do think they add to the set with the gold design on the light blue pieces.

75958_build2a.jpg
75958_build2b..jpg

This set comes with 4 minifigures and no it does not come with the base plates from the collectible minifigure series. I added them just to help the minifigures lay flat for the picture.

From left to right there is:

Rubeus Hagrid - This is a taller minifigure. To achieve the height, the torso is bigger, but the legs are the kid version legs. His arms are connected to the torso by a Technic like attachment.

Madame Maxime - She is the tall head of the school. I don’t recall how much taller she is over Hagrid in the movie, but I think they got it right with this minifigure.

Gabrielle Delacour and Fleur Delacour - These are two sisters attending Beauxbatons. Fleur (older and the taller minifigure) was a part of the Tri-Wizards tournament and her sister Gabrielle (smaller minifigurte) plays a big part in one of the challenges in the book/movie.

Overall, I think it is a good mix of minifigures for the set. Only 2 of the girls are really named and the rest are extras as far as I know, so I’m not sure what good it would have done to add more of the girls in. Especially since you can only make the carriage so big.

75958_minifigures.jpg

The third bag finishes up the build. The carriage has a top which needs to be removed before you can flip up the side. Additionally, it adds the wheels. The front axle rotates so it adds some playability. Additionally, there is a chest with tea cups to go with a table inside with a tea pot.

I’m sure the Harry Potter world has an official name, but I’ll call them winged horses. They are attached to the carriage via a somewhat bulky looking hitch. I’m not sure how I would redesign this part, but to me this part doesn’t match the elegance they tried to achieve on the carriage.

75958_final.jpg

My final thoughts on this set… if you’re not a Harry Potter fan, then don’t bother unless there are specific parts you want from this set. If you are a Harry Potter fan, then it’s a good addition to the collection. You get some good minifigures and the designers did a decent job depicting the scene given the scale they used. I definitely recommend getting the set at a discount. Check amazon.com, Walmart, and Target for the deals they are offering. I think the full retail price is a bit steep.

Keep building!

Set Review - #60234-1: People Pack - Fun Fair - CITY

This is the fourth year LEGO has released a People Pack for the CITY theme. We started with #60134-1: Fun at the Park, then #60153-1: Fun at the Beach, and then #60202-1: Outdoor Adventures. Next up is this set, #60234-1: Fun Fair. It has 183 pieces and 14 minifigures. It retails in the US for $39.99 which works out to be $0.219/piece or $2.85/minifigure. The release date was 2 Aug 19, but I waited for it to hit 20% off on Amazon.com. If you wait further, the discount should increase. #60202-1: Outdoor Adventures is around 30% off at the time of this post and the previous sets have done the same on Amazon.com close to retirement.

Onto the review…

It has the standard box layout with the front showing the full set and the back showing some play features.

60234_front.jpg
60234_back.jpg

The set contains 2 parts bags and an instruction manual. It feels light to me. A quick comparison:

Fun Fair - 183 pieces - 14 minifigures
Outdoor Adventure - 164 pieces - 15 minifigures
Fun at the Beach - 169 pieces - 15 minifigures
Fun in the Park - 157 pieces - 15 minifigures

You’re getting more pieces, but one fewer minifigure. A lot of the pieces are small so I’m not sure if you’re really gaining more with the additional pieces. I wonder if it was a conscious decision to do this or just how the set got designed?

602343_contents.jpg

Here is what the first bag builds:

-A ring toss game where minifigures can attempt to throw rings onto a duck The table with the ducks spins. I like the little duck part and I think they could go well in a pond type scene.
-A game where you have to hit a target with a shooter to get it to fall down. There are 3 plates connected with Technic pins that have a 2x2 round tile with a target print on them. The minifigure can then use a shooter similar to those found on Star Wars sets to try and knock them down. The shooter will actually knock them down, you just have to keep track of the 1x1 round plate.
-A clown on stilts.
-A face painting station with a small table filled with 1x1 tiles for the different colors. of paint.

60234_build1.jpg

The minifigures include (top to bottom and left to right):
-A boy minifigure with a propeller cap (awesome!) and Benny the Spaceman shirt.
-A female minifigure with a pink shirt and white pants, but nothing too out of the ordinary.
-A male minifigure with a dark blue and red striped plaid shirt and green-ish colored pants (not sure of the official color name).
-A mullet touting man with goatee and rock-n-roll tank top. Spot on for some of the county fairs I have been to around the US.
-A minifigure on stilts with a giant purple top hat and holding a balloon animal to give away.
-A face painter with some paint spots on her overalls. The set showed up with 2 brushes.
-A girl who looks excited to have a tiger design painted on her face.
-Another girl. We let her hold the purple teddy bear that I guess she won as a prize.

Overall the first bag has a good variety of minifigures which can be used in a fair scene or elsewhere in your CITY.

60234_minifigs1.jpg

Bag 2 has 6 minifigures and 5 have food. One is playing a game of strength where you hit the spot with a hammer to drive up the part. In this case, a Technic piece drives up a 1x2 brick with rail attached up a larger rail to hit the bell. The only other build is the bike for selling ice cream. It’s a cool build, but a bit big. The minifigure needs a step ladder to get into the ice cream case. Not sure how to scale it back down to make it more to scale though.

IMG_9762.jpg

The remainder of the minifigures includes (left to right, top to bottom):
-A female minifigure who is the ice cream vendor. Her hair is attached to her hat and I don’t recall ever seeing that shirt before.
-A male minifigure in a jacket holding a giant hot dog.
-A female minifigure in a jacket with a shirt underneath
-An older male minifigure in a workout suit with gray receding hair who bought some ice cream
-An older female in a purple workout suit with a coffee cup. I like that she has glasses and white hair.
-A younger male with a popsicle. This one is blue versus the standard green one I have seen in other sets.

60234_minifigs2.jpg

Here are all of the parts of the set. I like the theme and I think they go well with some of the existing Creator Expert sets (Carousel, Roller Coaster, etc.) and some of the Creator 3-in-1 sets as well. I like some of the non-standard minifigures and the builds are pretty creative with the moving parts. If you’re going to pick this set up, I definitely recommend getting it on sale. I think $39.99 retail in the US is too high. It’s around 20% off now and will probably move to closer to 30% next year when it is getting ready to retire.

What are your thoughts?

Happy building!

60234_final.jpg

Set Review - #40305-1: LEGO® Brand Store

Set #40305-1: LEGO® Brand Store was originally released as a Brand Store exclusive set. I mentioned it in my store reviews here and here. Well its status has changed and as of 4 September 2019, it is available on LEGO Shop @ Home in the US. I had to search for it by number as I couldn’t find it on any of the drop down categories. Has anyone else found it there?

The set itself has 362 pieces and 2 minifigures. In the US it is $24.99 ($0.069/piece) and in Germany where I picked it up it’s 24.99€ (0.069€/piece). So a better deal in the states depending on how much sales tax you pay. For those of you keeping track, it’s been available in Germany since 2 June 18 according to Brickset.com.

Onto the set…

Unlike most set boxes, this one is very generic with a yellow background. It just has the LEGO logo, but no other details beyond the shadow of a city. The front shows the set and the back goes into some details on the set.

40305_front.jpg
40305_back.jpg

The contents are 4 numbered parts bags, a fifth parts bag with no number, the instruction booklet, and a small sticker sheet. My sticker sheet had an error on it. One of the boxes had a duplicate box sticker attached below it. Nothing a pair of scissors could not solve, but I have never seen an error on a sticker sheet in a set.

40305_contents.jpg

Onto the build… bags 1 and 2 are required for the first section of instructions. This builds the first floor of the shop. Externally, the front entrance door is offset from the store front by a stud. It has a flag outside, minimal decoration above the door, and sadly a sticker for the LEGO logo versus a printed tile (I was hoping it would be printed). On the inside you have some sets for sale on the wall, a bin with nothing in it, a small MOC on display in the front window, a cash register, and what I assume is the pick a brick wall. Nothing overly amazing about this build other than I like how they were able to build this to minifigure scale and capture some of the details.

40305_build1a.jpg
40305_build1b.jpg

Bags 3 and 4 finish the set off. The front has some simple decoration, but still some nice details. There is some coloring and texture, 2 flags, awnings over the windows, and then the edge of the roof has a simple, yet nice design. Inside you have more sets on the wall, some MOCs in the window (a fire truck and I’m not sure what the other one is). There is what appears to be a build-a-minifigure station and then a shield in a bin which I’m not sure what it represents in a Brand Store. As you can see from the last picture, the top of the store has a yellow 2x4 brick design. This is a fun detail and I’m not sure if it actually exists on any actual Brand Stores out there.

40305_build2a.jpg
40305_build2b.jpg
40305_top.jpg

The set comes with two minifigures. One is a child with a red baseball cap on. I assume it is a male, but in theory it could be a female with short hair covered by the cap. The other is an adult male. He’s got a Hawaiian style shirt on and looks pretty chill with a goatee and wavy hair. You can figure out whether the adult is a worker, parent, or an AFOL.

The set does not come with a Brand Store worker which I see as a downside. I do have one from a previous free set with purchase, but it would have been great to get one with this set. I know the design exists, but it probably has to do with wanting the set cost to remain at its current level. I’m not sure how much adding in another minifigure would skew the price.

40305_minifigures.jpg

Here are pictures of the full set. Its design reminds me of the Creator 3-in-1 type buildings with a front and no back half. In my mind, these buildings are good for builders like me who are not good a coming up with MOCs on their own. I can take what was started and build the back half. Maybe include some stairs so you can actually get to the upstairs in the store?

Overall it’s a fun set. The pricing isn’t bad and they have captured a Brand Store well given the scale. As mentioned, a store worker minifigure would have been preferred in the set. As an AFOL, it is not a challenging build, but the box states ages 8+ which lines up with the difficulty.

What are your thoughts on this one?

Happy building!

40305_final1.jpg
40305_final2.jpg

Set Review - #21316-1: The Flintstones - LEGO® Ideas

The 24th LEGO® Ideas set was released on 2 March 2019. It is “The Flintstones” and was made by fan designer Andrew Clark. The set has 748 pieces and retails in the US for $59.99. This works out to $0.08/piece which isn’t too bad. Amazon.com has had it on sale for 20% off at the time of this post for a few weeks now. I waited for this one to go on sale as it interested me, but not enough to buy it right away at full price. So let’s see if it was worth the wait.

Like most sets, the front shows the whole set built with the back showing some of the features to include the removal of the roof, the bowling set, the car and the rack of ribs, and some of the inside furniture.

21316_box_front.jpg
21316_box_back.jpg

The contents are 6 bags with an instruction book. There is a piece separator in bag one. Excitedly, there are no stickers! WOOHOO!!!!!

21316_contents.jpg

Here is the instruction book. It is not wrapped in a separate package like some of the more expensive sets. It does have a few pages about the set to include the fan designer and LEGO designers (as shown). There are also some pages on The Flintstones show itself.

21316_instructions.jpg
21316_instructions_pages.jpg

Bag 1 builds the car, rack of ribs, and minifigures for Fred and Wilma. The car has the look of the Flintstones car, but I have 2 complaints. First is the roof is a bit flimsy. There isn’t much structure to it and it fell apart on me while I was building it. To be fair, I don’t have a better solution. The second is the wheels. They are held together by two round plates which is fine on one side where the studs face in, but on the side where the studs face out, they rub against the frame of the car. Not badly, but could a tile piece have been used there? On the plus side, I like the use of the 2x2 round tile that is printed to look like a cut log as the axle.

21316_build1a.jpg
21316_build1b.jpg

The second bag starts to build the house (sorry for the background change, I had to switch building areas). Nothing overly exciting here. The back of the house is attached with hinge pieces for access and play I assume.

21316_build2.jpg

The third bag finishes most of the wall structure. Outer detail is added later. Also, the windows are in place and space for the door.

21316_build3.jpg

The fourth bag adds some detail on the outer walls. From my picture you can see it better on the instruction sheet. The opposite side of the house has it as well as a chimney. I like the palm tree used in the set. It is reminiscent of the one used in Pirate themed sets back in the day.

21316_build4.jpg

Bag 5 adds some inner details to include curtains on the windows, a TV (with a printed tile brick for the screen), a couch, coffee table, lamp, a small cupboard, a door, and a container with the bowling set. Besides the TV tile, there is also a picture on the wall and the curtains are printed. YAY no stickers! I like the house details. Not over the top, but enough to look like the inside of the house from the cartoon.

This bag also completes the minifigures with Barney and Betty.

21316_build5.jpg

The sixth bag completes the set with a roof that is easily removable, some plants along the outside of the house, and a mailbox with a printed piece for the Flintstone name. I like how they made the roof angle versus making it flat.

21316_final.jpg

Here are the minifigures. Betty and Wilma have two faces while Fred and Barney just have one expression. The response I saw from the fan media was not being impressed by these. They wanted molded heads versus the standard minifigure shape. I agree that the standard head doesn’t look as realistic, but I still think they captured the look of the Flintstones characters. I am also glad that the legs are printed versus having to add a cloth piece as the pants/dresses.

There has also been some debate about who to include. Where are Pebbles and Bam-Bam? What about Dino? My opinion is this set was not designed to capture the whole show or to be the start of a Flintstones line of sets. It is a one off that highlights the show and LEGO captured the main characters. I am good with just the four.

21316_minifigs.jpg

Overalll, it’s a good set. There are some decent pieces and it captures the theme well. The build is not overly challenging and there are no stickers (YES!). I’m glad I picked the set up at 20% off versus full price. It didn’t really seem like a $60 set to me. There is nothing that really jumps out at you other than the nostalgia for the theme. I’d put this set down as middle of the road.

What are your thoughts?

21316_mailbox.jpg

Set Review - #10265-1: Ford Mustang - Creator Expert

If you’ve been paying attention, #10265-1: Ford Mustang has been out in the US since 1 March 2019. I just got it and built it recently. I caught it on a double VIP point period so I paid the full $149.99 price, but got the added bonus of more VIP points. It has 1,471 pieces which works out to $0.102 per piece.

There are a lot of Blogs, YouTube channels, and other social media sites that race to be the first to review a set. Sites like the BrickBlogger claim to not be the first, but to be the most thorough. My goal is to do neither. I want to review sets where I have found a way to get them at a discount or to take advantage of some sort of deal like double VIP points or special edition free offers. That’s why this review is coming out over six months after the set was released in the US.

Onto the review…

The front of the box shows a picture of the car with its non-customized build. The set is listed for ages 16 and up and the Ford Mustang logo is there as well. The back shows the model with some of its customized options installed as well as some of the movable/removable parts.

10265_box_front.jpg
10265_box_back.jpg

The set contains 6 sets of parts bags. Some have 2 bags per number while some have one. There’s also an instruction book that is wrapped in plastic along with a sticker sheet. Thankfully, the stickers are mainly license plates. There are only 6 that go on the actual model.

10265_contents.jpg
10265_stickers.jpg

Similar to #10266-1: NASA Apollo Lunar Lander, the instruction book contains information about the set. This one gives some background on the Ford Mustang (in English, French, and Spanish) and then gives facts throughout the build on the various pages. The picture below is one of the information pages at the beginning with a bright red Mustang pictured.

10265_instructions.jpg

The first bag includes a piece separator as many of the larger sets do. The initial build is the main frame and base of the car. There are a good number of Technic pieces used to build the axles, steering, and the lift function that we will see later.

10265_build1.jpg

The second set of bags includes the start of the front fender/bumper, some of the engine, the steering column and wheel, some of the interior to include the gear shift, and the rear axle. Of note, the steering column actually turns the wheels, the wheels spin, the rear wheels can be raised or lowered, but the shifter does not actually change anything. It moves, but is not connected with the rest of the car like #42083-1: Bugatti Chiron.

10265_build2.jpg

The third set of bags includes the seats, some of the side paneling, part of the doors, and some of the structure that will support various parts of the car added later. Both seats are the same design and have good use of SNOT techniques.

10265_build3.jpg

The fourth set of bags adds the front and rear windshield, the frame to hold the roof and trunk, the side paneling in the back, and the rear bumper to include the brake lights and the Mustang logo. I added a few other pictures so you could get a look at the other sides of the car.

10265_build4.jpg
10265_build4a.jpg
10265_build4b.jpg

I’m a failure of a blogger or maybe I was just too into the build, but I skipped taking pictures after the fifth set of bags were added to the build. I’ll go with being too into the build. Sorry…

This section adds the front bumper, headlights, front grill, front side body, remainder of engine, and remainder of doors (top and mirrors).

The last set of bags adds the hood, roof, trunk, and wheels. I like the white stripes going across the vehicle. I think it is a nice touch versus just using one color for the whole vehicle. It also has the license plates and then the custom pieces.

10265_build6.jpg

This car has a number of movable parts to include the hood, both doors, the trunk, steering wheel and front wheels, and the roof can be removed. This adds to the play factor, gives you some more options for display, and adds a bit of realism to the model.

10265_functions.jpg

I have yet to decide which plates I would like to use. You get 5 options. In the picture below, I believe the ones on the top left are Australian. The bottom left are UK plates (fun fact, the one plate is yellow so they can better take a picture of your plate with speed cameras at night). The 2 sets of plates in the center are both from the US with the top being from Michigan and the bottom from California. The plates on the right appear to be from Germany (the one with the 2 round logos goes on the back… that’s your registration).

10265_plates.jpg

The inside has a steering wheel and 2 dials on the driver’s side. There’s a radio in the center along with the shifter. The passenger doesn’t get any fun details. Not pictured, but one of the stickers is a rear view mirror with a car in view. I think the car has the right amount of internal details without over doing it or making the model too large and the price too high.

10265_inside.jpg

The instruction book talks about how the Mustang was made to be customized. The instructions list six different ways to customize this set. The first is the adjustable rear suspension. I don’t have it pictured, but underneath the back of the car is a piece that you can spin to raise or lower the back of the car. Next is the “shorty exhaust headers” on either side of the car. I have the driver’s side set pictured below. The next two are the “supercharger with scoop intake” and “front splitter” that I have shown in the same picture. Finally, there is the “real spoiler” and then the “nitrous oxide tank” in the trunk. You can choose to put some, none, or all of these options into the model. The build is made in such a way that you aren’t prevented from doing any of them. There are minimal pieces to remove in order to add the customized options in. Between these features and the different license plates, this is a pretty cool option to have with the car.

Supercharger with Scoop Intake Front Splitter

Supercharger with Scoop Intake
Front Splitter

Rear Spoiler

Rear Spoiler

Shorty Exhaust Headers

Shorty Exhaust Headers

Nitrous Oxide Tank

Nitrous Oxide Tank

Overall, I’m a fan of this set. If you have read some of my past reviews, I talk about the combination of System and Technic pieces in a build. I am personally not good at combining the two, but I enjoy building using both. Having the functionality offered by Technic and the detail that comes with System is awesome and this set gives you that. Unlike the Technic cars, this one is more detail than functionality, but I think LEGO achieved a good balance between detail and functionality in this set.

The price is on the borderline of being a bit high. The Creator Expert sets don’t often go on sale and usually they don’t until their end of life. Getting a discount now will most likely involve using VIP points or catching some other sale. If you find it cheaper or use some other method to get a discount, let me know in the comments below.

What are your thoughts on this set?

Happy building!

Set Review - #80103-1: Dragon Boat Race

If you actively track the LEGO world, then you might be familiar with this set and how it came to be. If not, here’s the short history. LEGO released #80101-1: Chinese New Year’s Eve Dinner, then #80102-1: Dragon Dance, and then this set #80103-1:Dragon Boat Race in 2019. These sets were only available for purchase in the Asia Pacific region of the world. These sets along with a few others that had various exclusivity tie ins, like only available at Target or Walmart, caused a lot of fans of the brick to be upset that they missed out or to pay a lot on the secondary market. LEGO listened and set a date where they would offer exclusive sets for a 3-6 month period everywhere after the initial run at the region intended.

The first set to be released everywhere (to my knowledge) is #80103-1: Dragon Boat Race. It was released on 1 July 2019 in the US. The cost is $49.99 for 643 pieces and 15 minifigures. It works out to $0.078/piece which is pretty good if you ask me.

The front of the box shows the full set. In the upper right corner is a logo with some characters that I am unable to read. In English on the logo it says “The Dragon Boat Festival” and “Chinese Festival Special Edition.” Like most sets, the back shows the various features of the set and that the boats have wheels so you can push them on a floor or table.

80103_box_front.jpg
80103_box_back.jpg

The contents are 5 parts bags, a sticker sheet (which got folded up in the box), and an instruction book.

80103_contents.jpg

The first bag starts off with the red boat and 4 minifigures. The boat is pretty simple to build and there are stickers along the edges that my picture doesn’t capture. There is also a course marker in the form of a flag for the water. The minifigures are all in similar uniforms and a few have 2 facial expressions.

80103_build1.jpg

Bag 2 finishes off the red boat with the dragon face and the tail. It also adds the drummer to help the rowers keep pace. I really like how the designers made the cranium and tail of the dragon. The piece usage is pretty simple, but very clever. My favorite is the red croissant piece on the nose.

Additionally, this bag comes with part of the dock which has a noodle seller and a potential buyer/dragon boat race spectator. The stickers for the decorations really add to the set in my opinion and there are some cheese slopes with printed noodles on them.

And yes, I forgot to add on the bar across the front until after I took the picture (in case you were looking that close).

80103_build2a.jpg
80103_build2b.jpg

The third bag starts the green boat. The build is very similar to the red boat and the 4 rowers are included in this bag. The minifigures have orange torsos and white pants. Similar to the other boat crew only a few have dual faces.

80103_build3.jpg

Bag 4 completes the dragon boat and includes the drummer to keep the pace. The dragon’s head is just as clever as the red boat. I like how the minifigure flippers are ears and the telephone piece help make the nostrils.

This bag also includes an addition to the dock area started in bag 2. There’s a viewing area with 2 minifigures. The minifigures have flags to wave and one got some noodles to eat while watching. The dock doesn’t have much to it in terms of design and there are steps that will go to the stand in bag 5.

80103_build4a.jpg
80103_build4b.jpg

Bag 5 finishes the build with the construction of a viewing stand where we assume the race judge minifigure views the race. He also keeps track of the trophy for the winners. The stand has some great details to help it fit the culture. The brick design on the top with brick hot dogs is actually a pretty cool design. The flags in front with the stickers showing two dragons racing is also a cool design. That’s right, I just said stickers were good.

Below the dock in the water is some plant life and a frog hanging out. The water is created with clear tiles on top of blue plates

80103_build5.jpg

Here’s the whole set once you are done. There are some mixed reviews out there, but personally I am positive on this set. It is something different and opens up a whole new realm of possibility for LEGO. To have cultural builds and to sell them everywhere could help expose the rest of the world to new things. The age range is listed as 8+. If a kid builds this, they may want to know more about that culture and what is being presented. It could be an opportunity to do some internet searches and show what it is all about. When I lived in Alabama, they actually had an annual dragon boat race so maybe there is something nearby that you can go see.

The set price and price per brick isn’t too bad and the assortment of pieces is actually pretty decent. Plus the amount of minifigures you get in this set is a bonus. I’m a fan overall and I look forward to seeing how people add this set to their CITY scenes.

What other cultural builds should LEGO take on?

Happy building!

80103_final.jpg

Set Review - #BL19003: Skyline Express - BrickLink AFOL Designer Program

I reviewed the first set I received (Bikes!) from the BrickLink AFOL Designer Program here. This is the second one that I ordered. It is BL19003: Skyline Express. It arrived similar to the first one in a box with the BrickLink logo on it. The first picture is the outer box. Inside that box was the second box. I was glad to see it was well protected.

BL19003_outer_box.jpg
bl19003_middle_box.jpg

Here’s the set. It was $139.99 for 1,365 pieces. That works out to $0.103 per piece. The front of the box shows the set, the BrickLink logo, the 60th anniversary logo, and the hand written set number (#981). The back shows the opposite side of the set.

The other picture I posted shows that the set designer uses the name jazlecraz and he’s from Australia.

bl19003_front.jpg
bl19003_back.jpg
bl19003_side.jpg

Much like the last set, this set has a cover on the box that comes off. The inside of the box cover is a printed photo that can be used as a background for the set. This one is of Sydney, Australia.

bl19003_skyline.jpg

The box inside the cover is similar to the last set. It’s a black box. The top has the word “BrickLink” and the back has information about the AFOL Designer Program.

bl19003_morebox.jpg
bl19003_morebox2.jpg

Much like the last set, there’s a seal on the box. When you open the seal, it says “void.” So if you’re planning to hold onto it or re-sell it, definitely don’t mess with that sticker. The inside looks like it was packed by hand with a card on top that has a “thank you” from LEGO and BrickLink.

bl19003_seal.jpg
bl19003_open.jpg

The contents were 15 parts bags numbered one through four. There is a 16th bag with the special anniversary brick. There are 2 dark tan 16x16 plates as well. There is also the instruction booklet and the card which shows all of the sets on the opposite side of the “thank" you.”

bl19003_contents.jpg

In the instruction book is a note from Jared Le Cres, the designer of the set. He mentions that he has a video that shows how to install a motor into the train. You can watch the video here. It’s not a smooth integration. You need to buy a bunch of parts if you don’t already have them on hand and you obviously need a motor and battery box. The design itself looks a bit bulky too as the motor pops out of one of the cars. To top it off, you need to raise the roof of the station to make sure the train fits. As I haven’t tried to motorize it myself, I won’t complain or be negative. Just a word of warning if you want to follow the designer’s plan.

bl19003_instructions1.jpg

Additionally, inside the instruction booklet is a quick write up on the set.

bl19003_instructions2.jpg

The first set of bags starts the station. build From left to right there are stairs going to the upper level, ticket machines and a schedule board, and then a Juice bar titled “Jüs.” I can’t say I have seen those stairs before, but they are an interesting piece. In a lot of the modular builds, they build curving stairs with bricks so this is a first. Maybe it is from a Friend’s set? The Juice Bar is pretty simple, but it fits right into the scene with some stools to sit on and a wide counter.

The supports for the upper level are not the sturdiest things, but then again it is an AFOL set. They get the job done, but LEGO would have made them stronger. I had no problems with them, but it made it a challenge when I went to transport it around.

bl19003_build1.jpg

The second set of bags finishes the upper floor. There is another set of stairs to get all the way to the top platform. Then there’s another schedule screen and some seats for minifigures to use while waiting for trains. With the station complete the use of colors hits you. The juice bar really stands out with its orange and the blue also contrasts with the white. If I were to put this in a large CITY scene, I would want this by some more modern buildings or maybe skyscrapers. The top is finished off with a small roof made of trans blue clear windows to let in light.

The juice bar also has some glasses, brick fruit, and some bowls. Forgot to mention that previously.

bl19003_build2a.jpg
bl19003_build2b.jpg

The third set of bags is the track. The track is all raised and it is held up by supports connected on the bottom with white plates used in the collectible minifigure sets. There is a good mix of straight and curved pieces and you can adjust the track a bit or buy other sets with track to expand what you have. I have not tried to motorize the train yet, but from what I’ve been told it is a challenge to have it go up hill so you’ll have to stick to the flat track for now until a better solution is found.

bl19003_4a.jpg
bl19003_4b.jpg

The last portion is the train and minifigures. I’ll get to the minifigures in a bit, but the train to me is a little weak. While the minifigures can fit inside, there are no seats or doors. You have to take the cars apart if you want to put minifigures in or out. I think I will look to modify the train at some point in the future.

I also found that it derails rather easily when I try to move it along the track. Maybe it will do better when it has its own motor. We’ll see I guess. For now, it slips often when I pull or push it.

bl19003_final1.jpg
bl19003_final2.jpg

The set comes with six minifigures. There is a good variety in my opinion. I like the differing torsos and there is even an extra hair piece. I also like that there’s a female minifigure with a ball cap on. I don’t think that is seen often, but maybe I’m missing something. It’s a good selection of minifigures. Well done!

bl19003_minifigs.jpg

The train wasn’t enough to curb my enthusiasm for this set. I’m a big fan of what the designer did and while LEGO will probably never bring back the original monorail, this type of monorail works for me. It’s a bit pricey, but if you consider that the track and supports are probably a bit more expensive, that’s most likely where it came from. I look forward to adding this set to my CITY sometime in the future and hopefully motorizing and adding some track on.

Has anyone motorized a train like this yet? Any thoughts on how it works?

In the meantime, happy building!