Set Reviews

Set Review - #75980-1: Attack on the Burrow - Harry Potter

Finally got the last of the 2020 Harry Potter sets. I ordered it back in December 2020, it was out of stock, it showed up, it shipped, USPS “lost it,” I’m working with LEGO on a replacement, and I reordered to have to wait for it to come off back order to actually get it. So let’s hope it’s worth it…

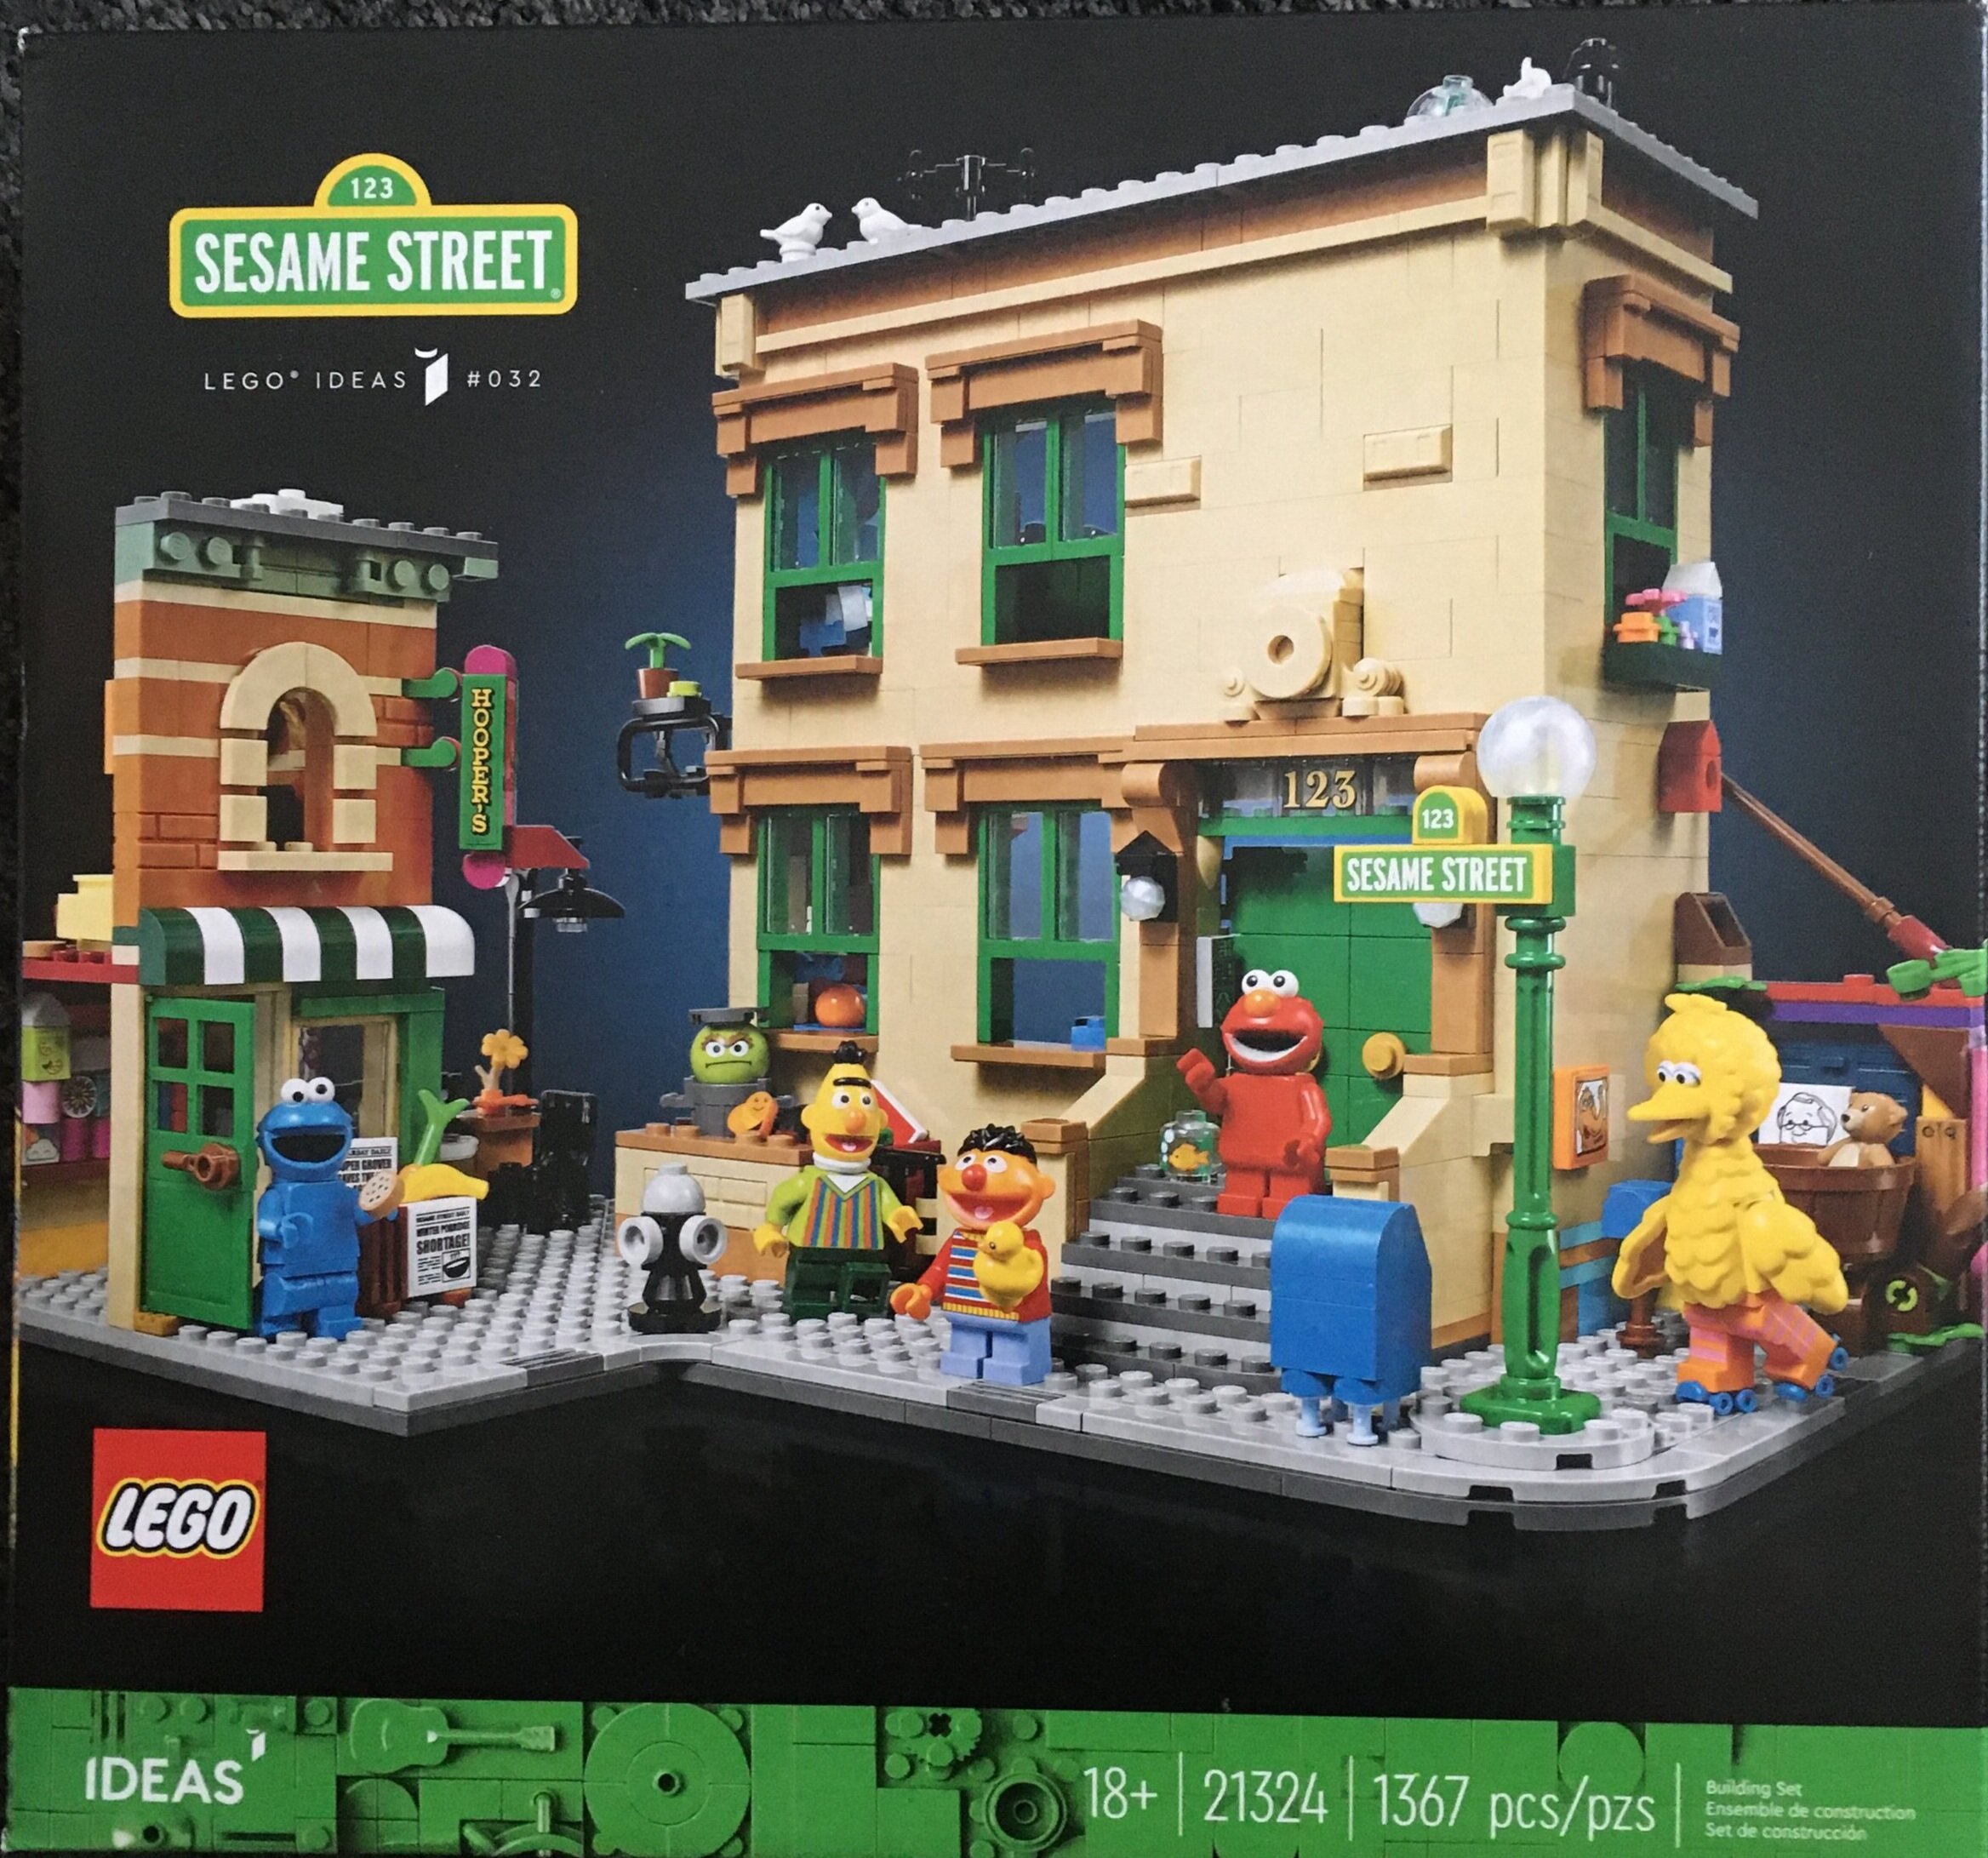
Released back on 3 July 2020, #75980-1 contains 1047 pieces and retails at $99.99. This works out to $0.096 per piece. Not too bad, but I have yet to see this set on sale (even in Germany). Onto the review…

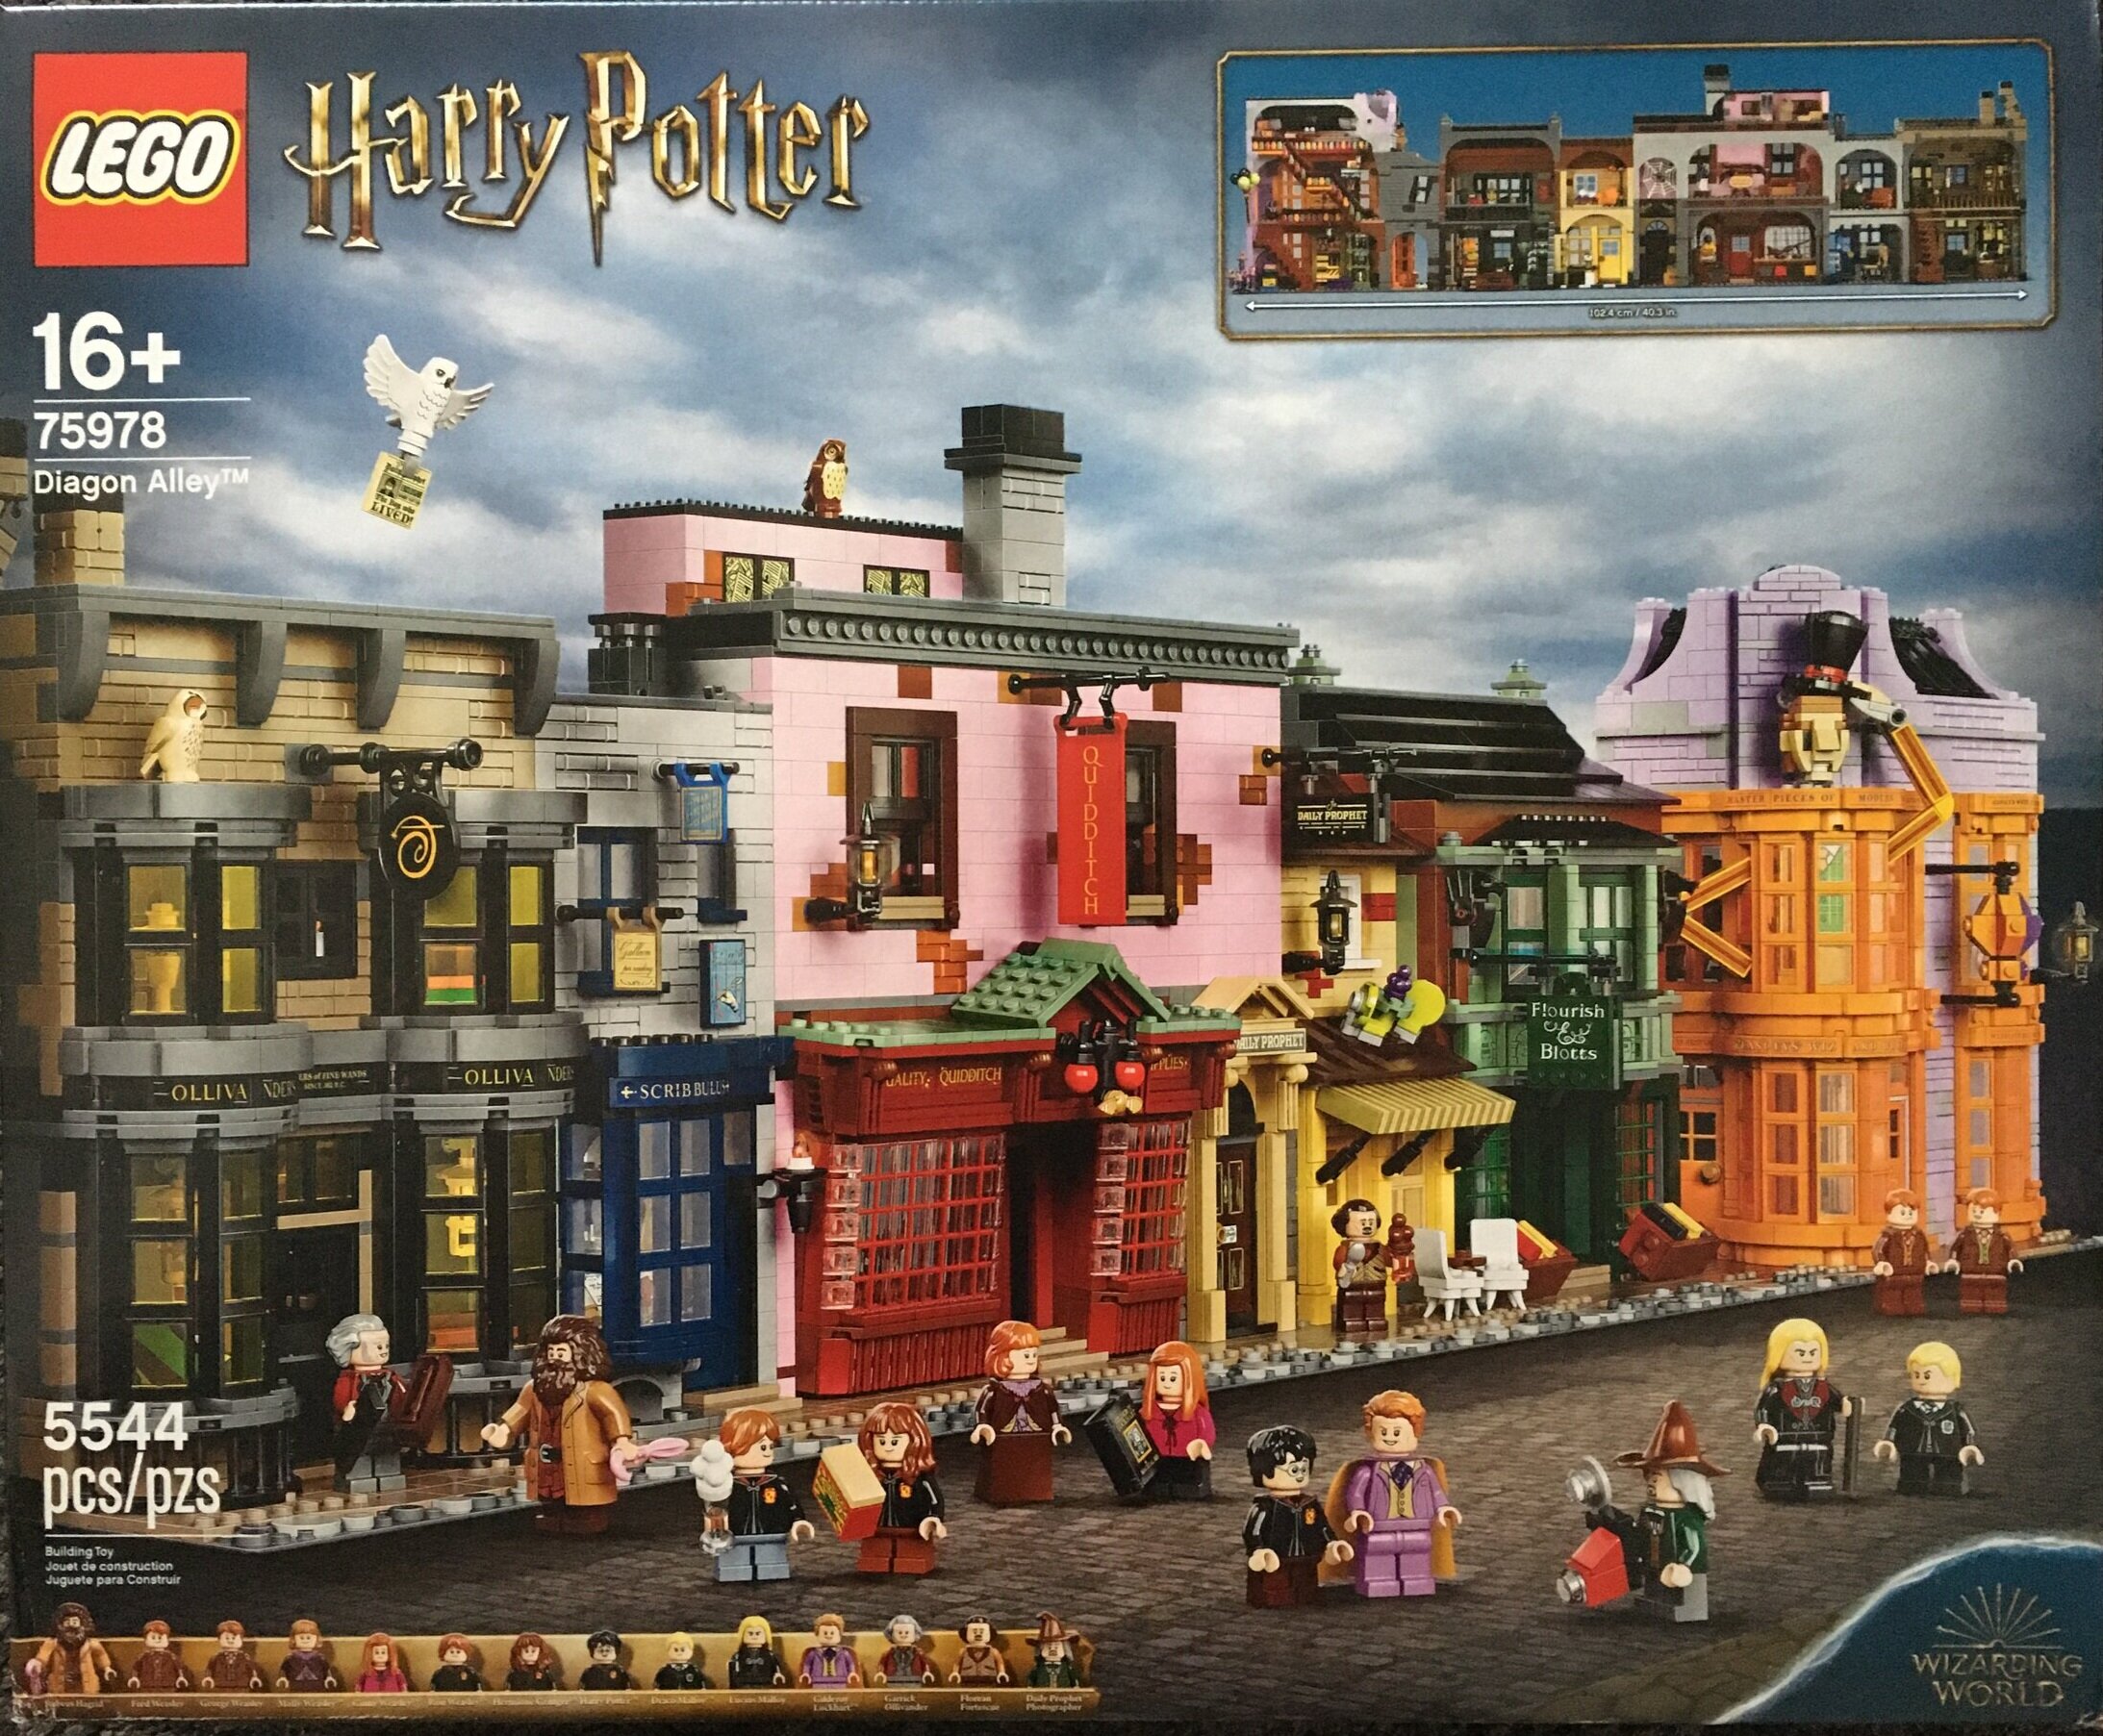
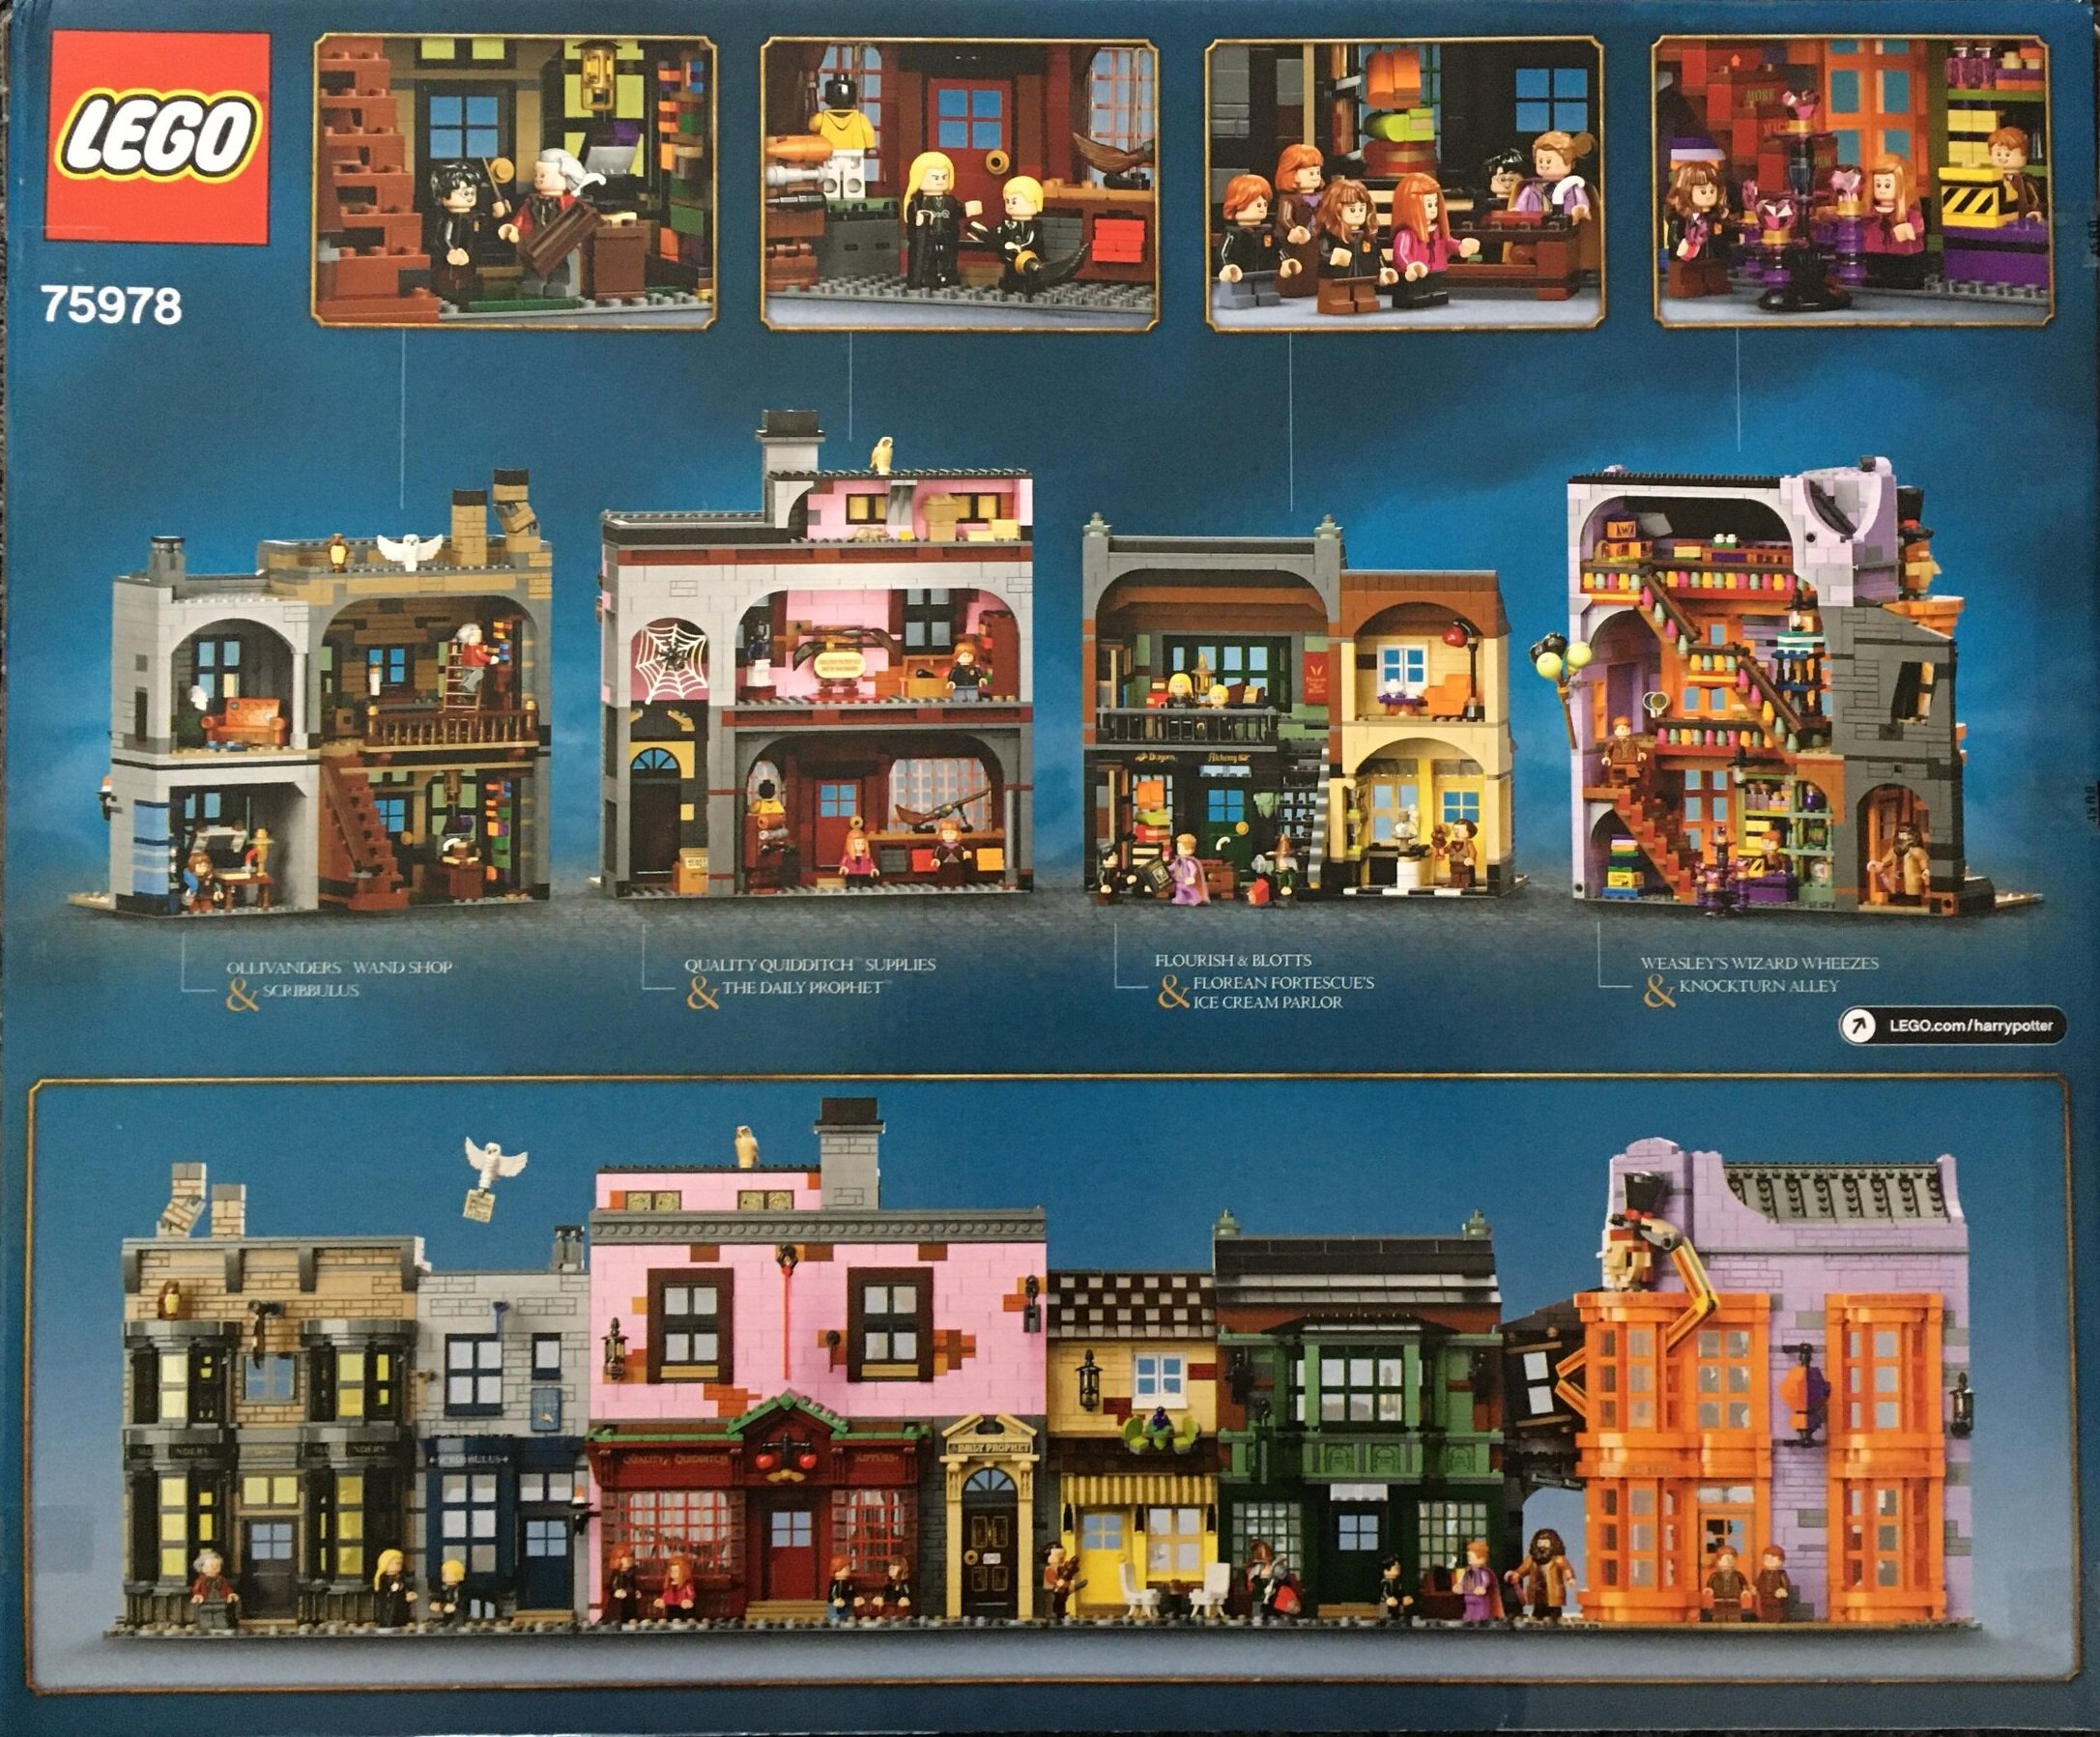
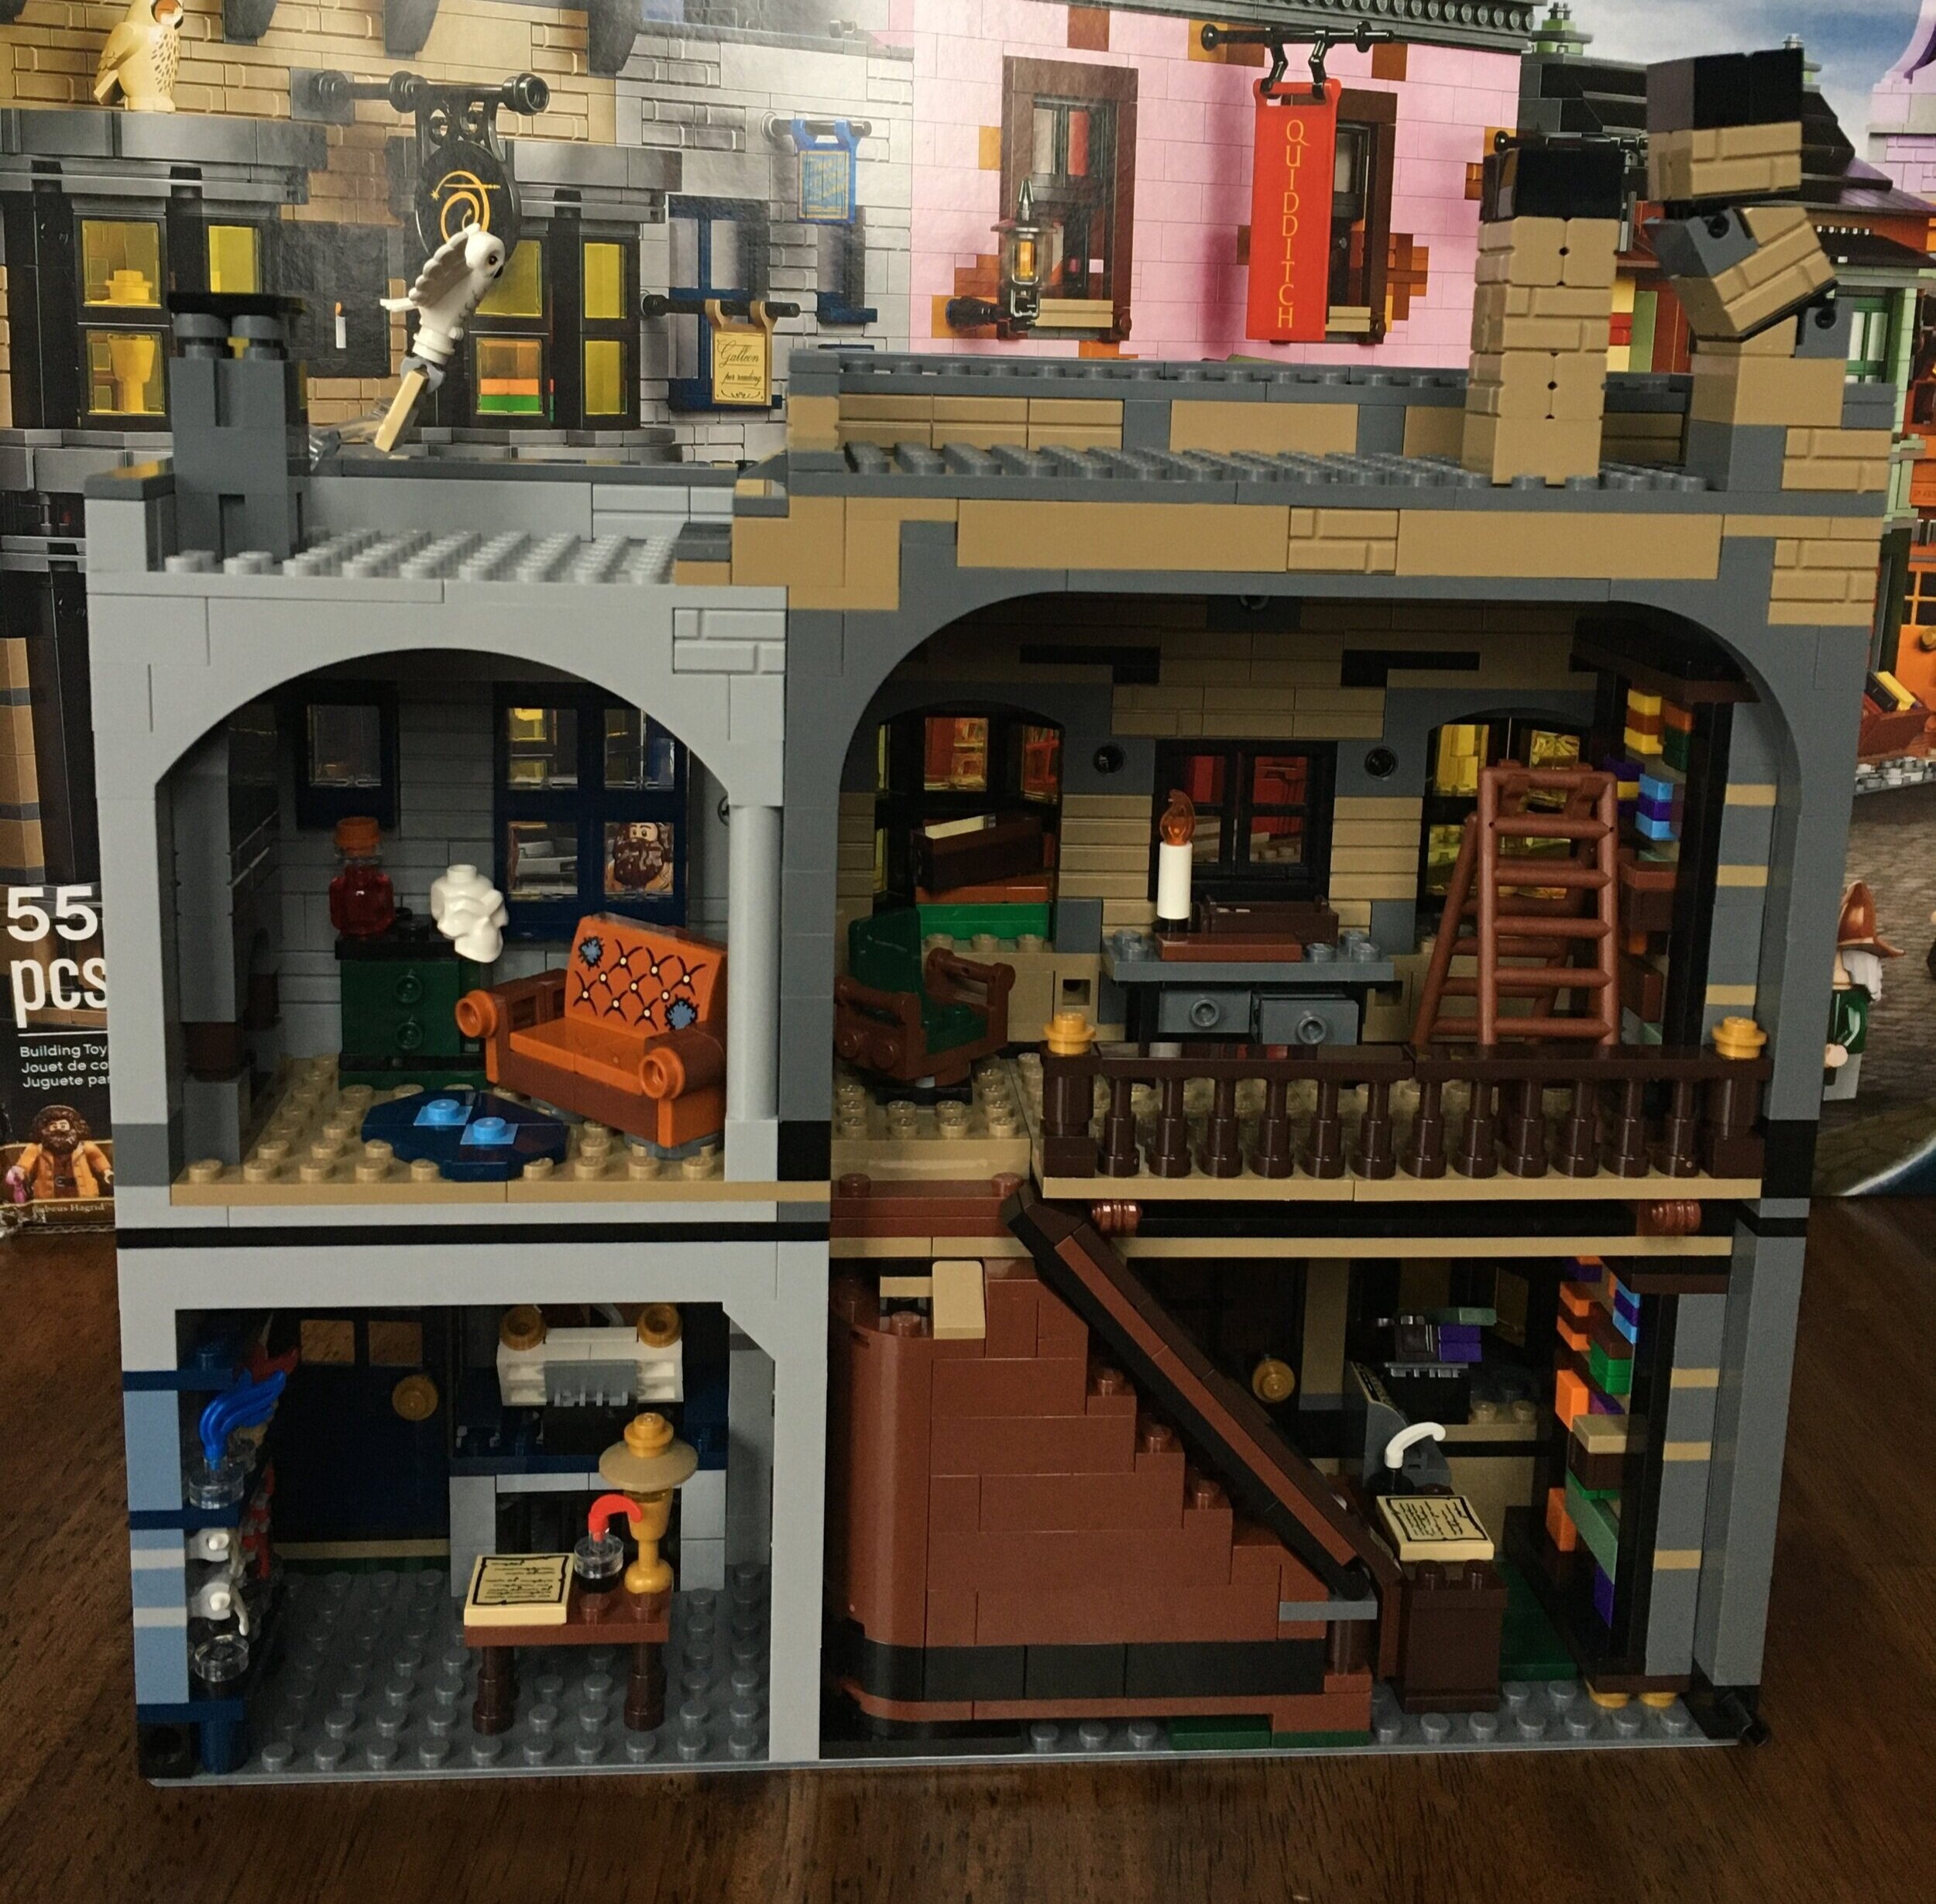
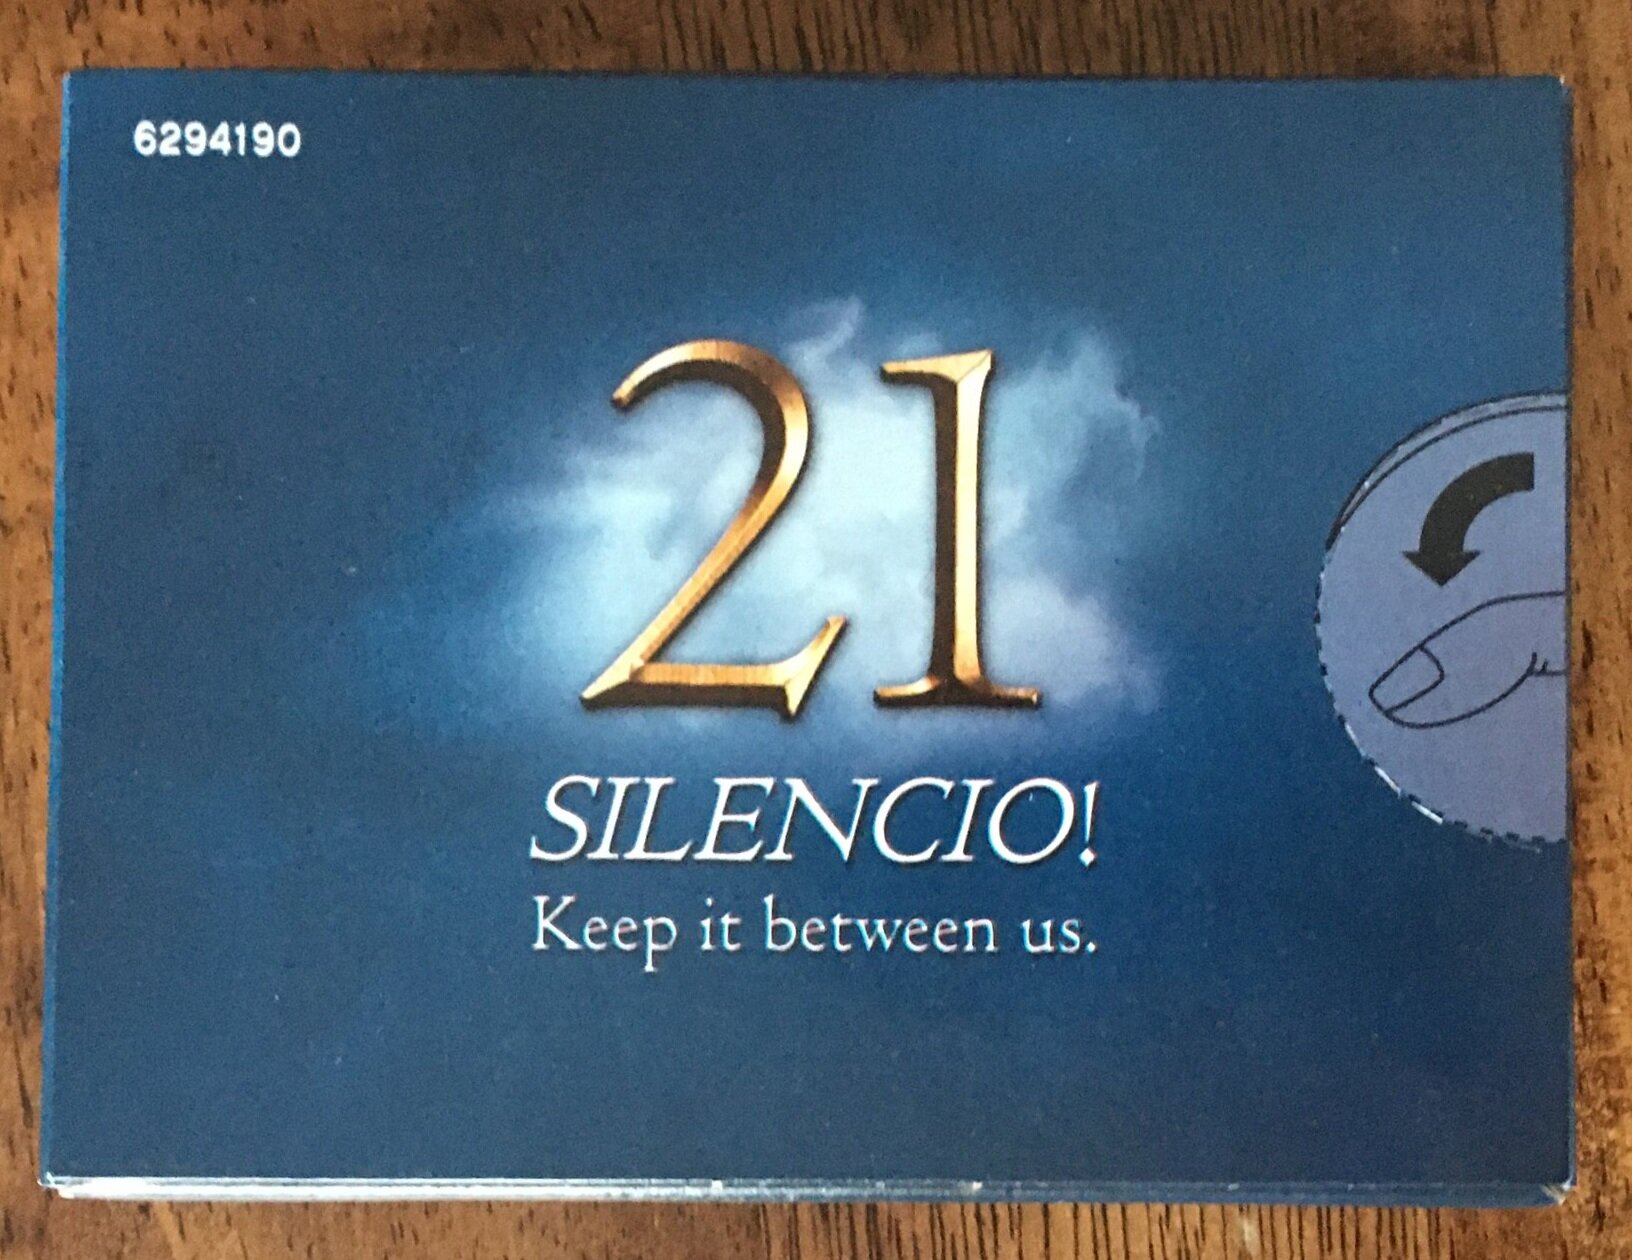
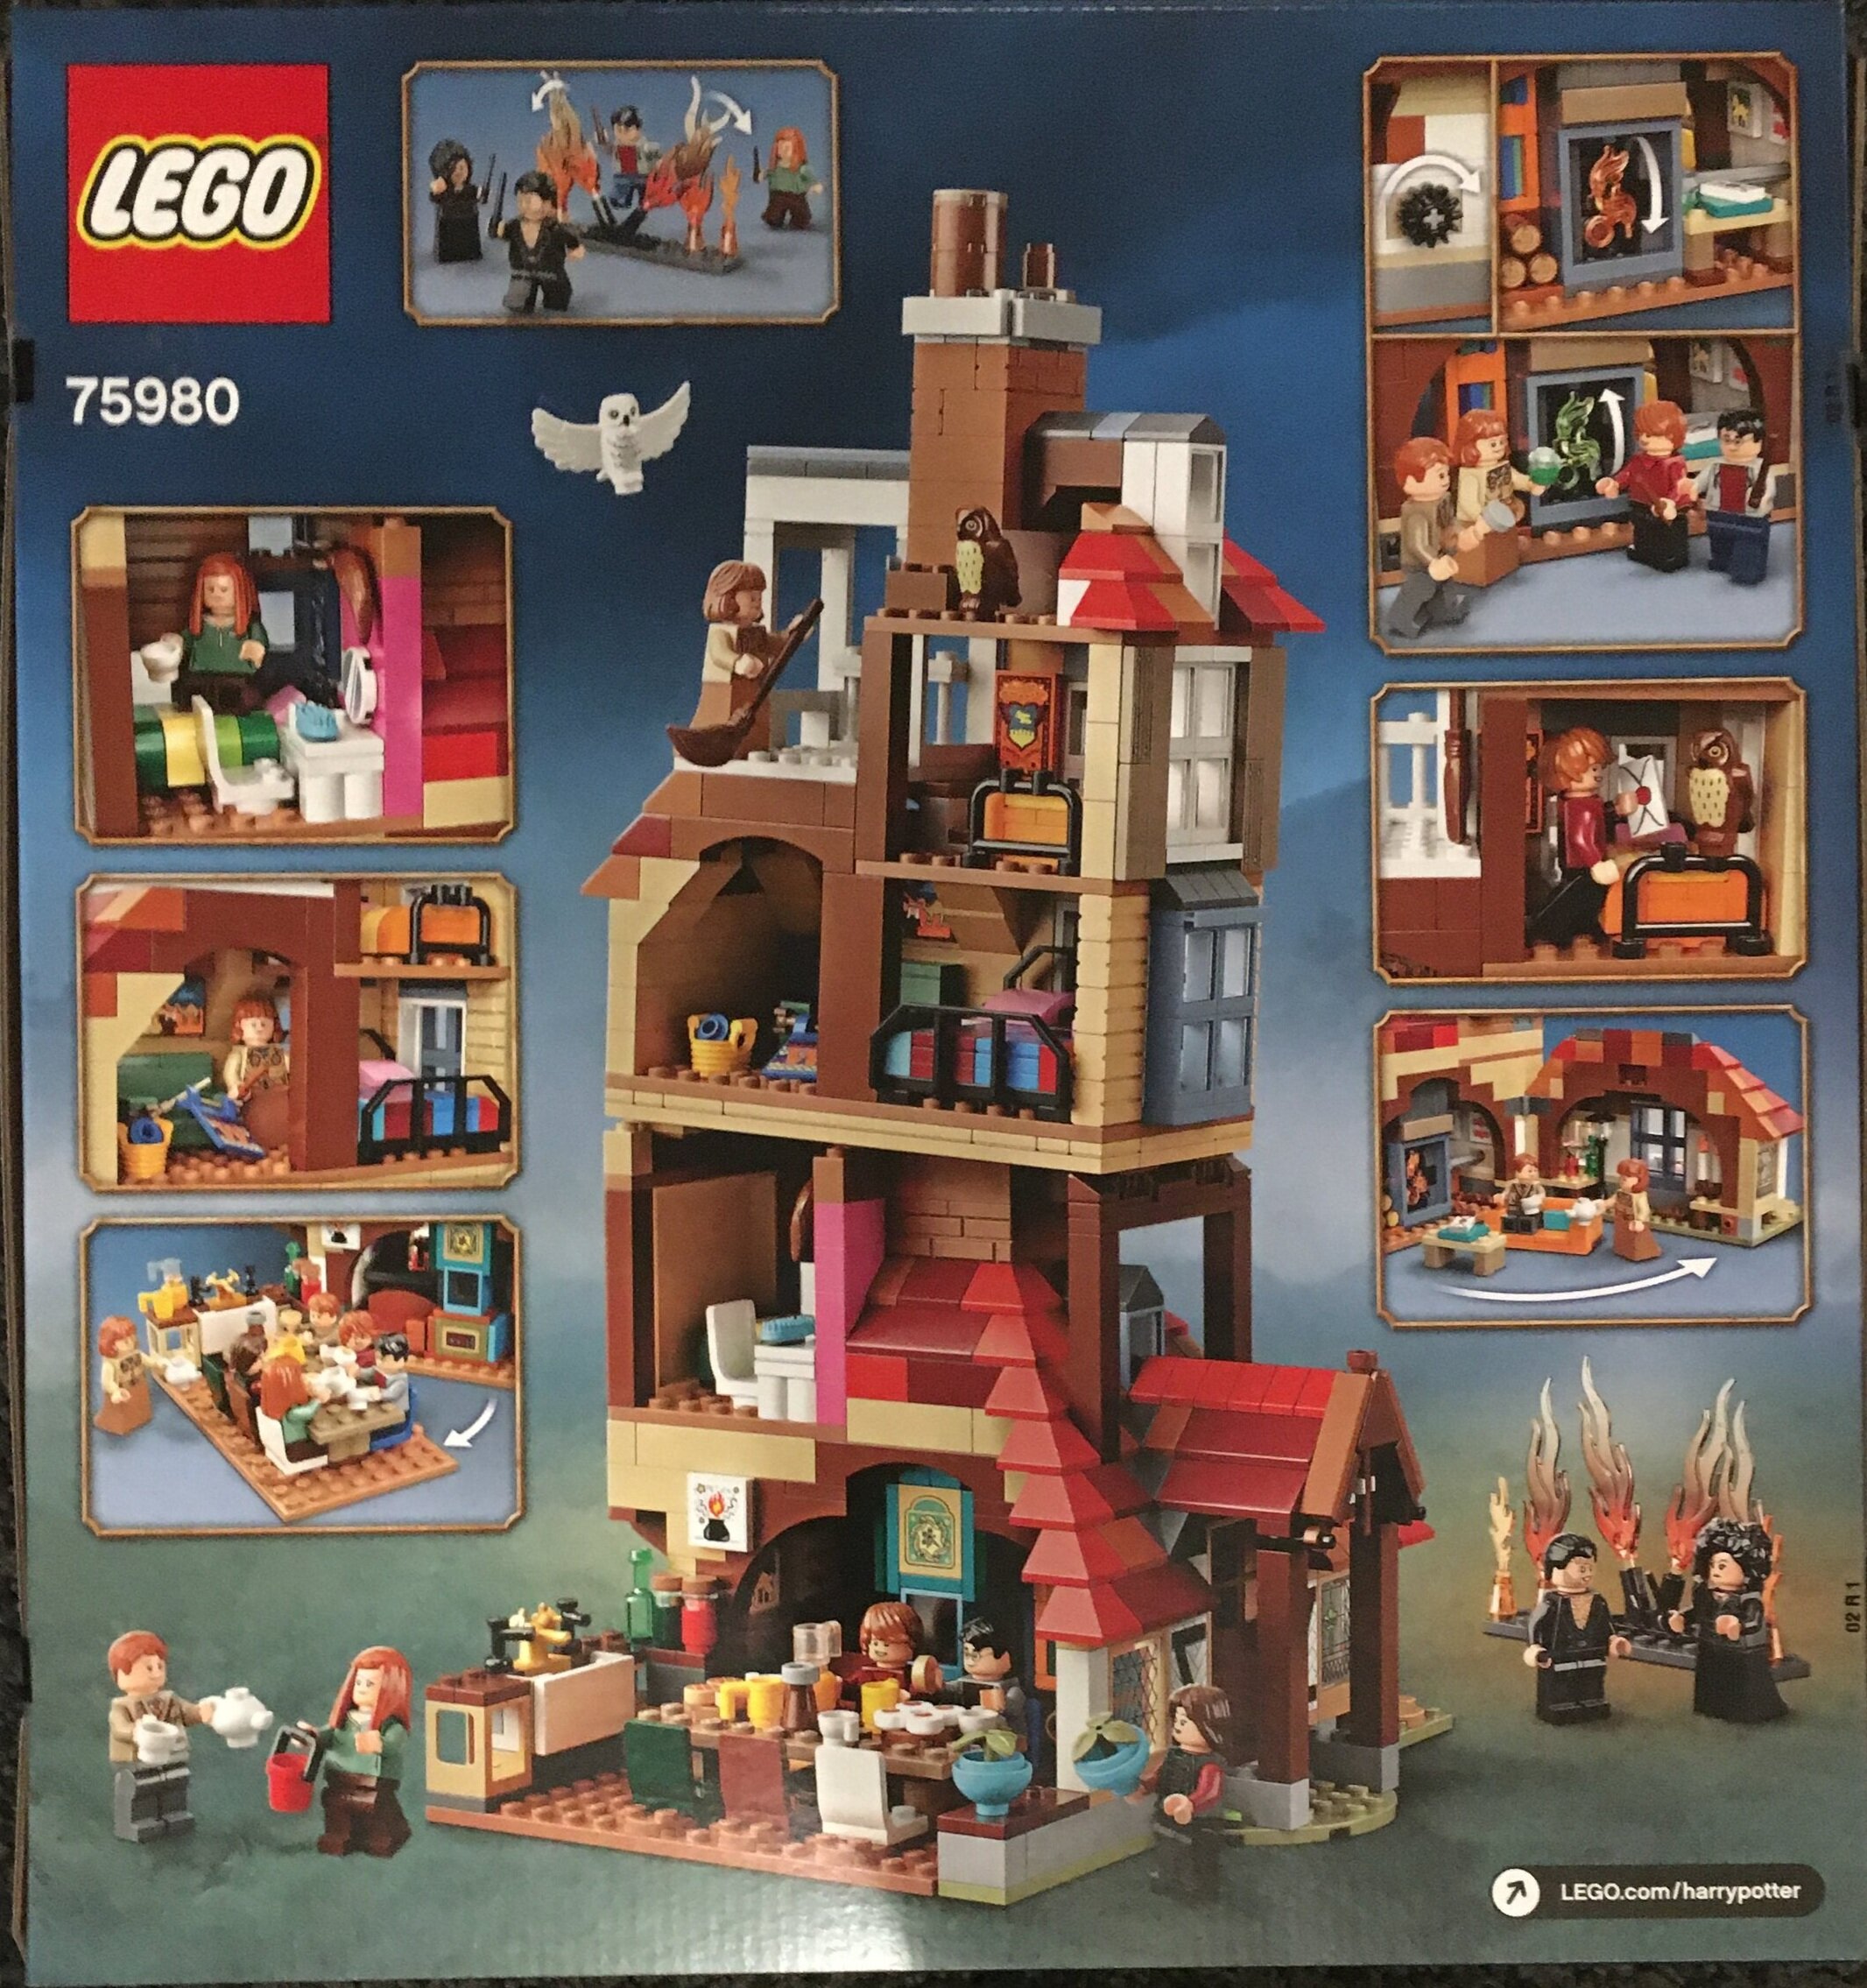
The box shows both sides of the set on the front with some designed features. The back shows all of the different play features like most sets do.

75980_box_front.jpg
75980_box_back.jpg

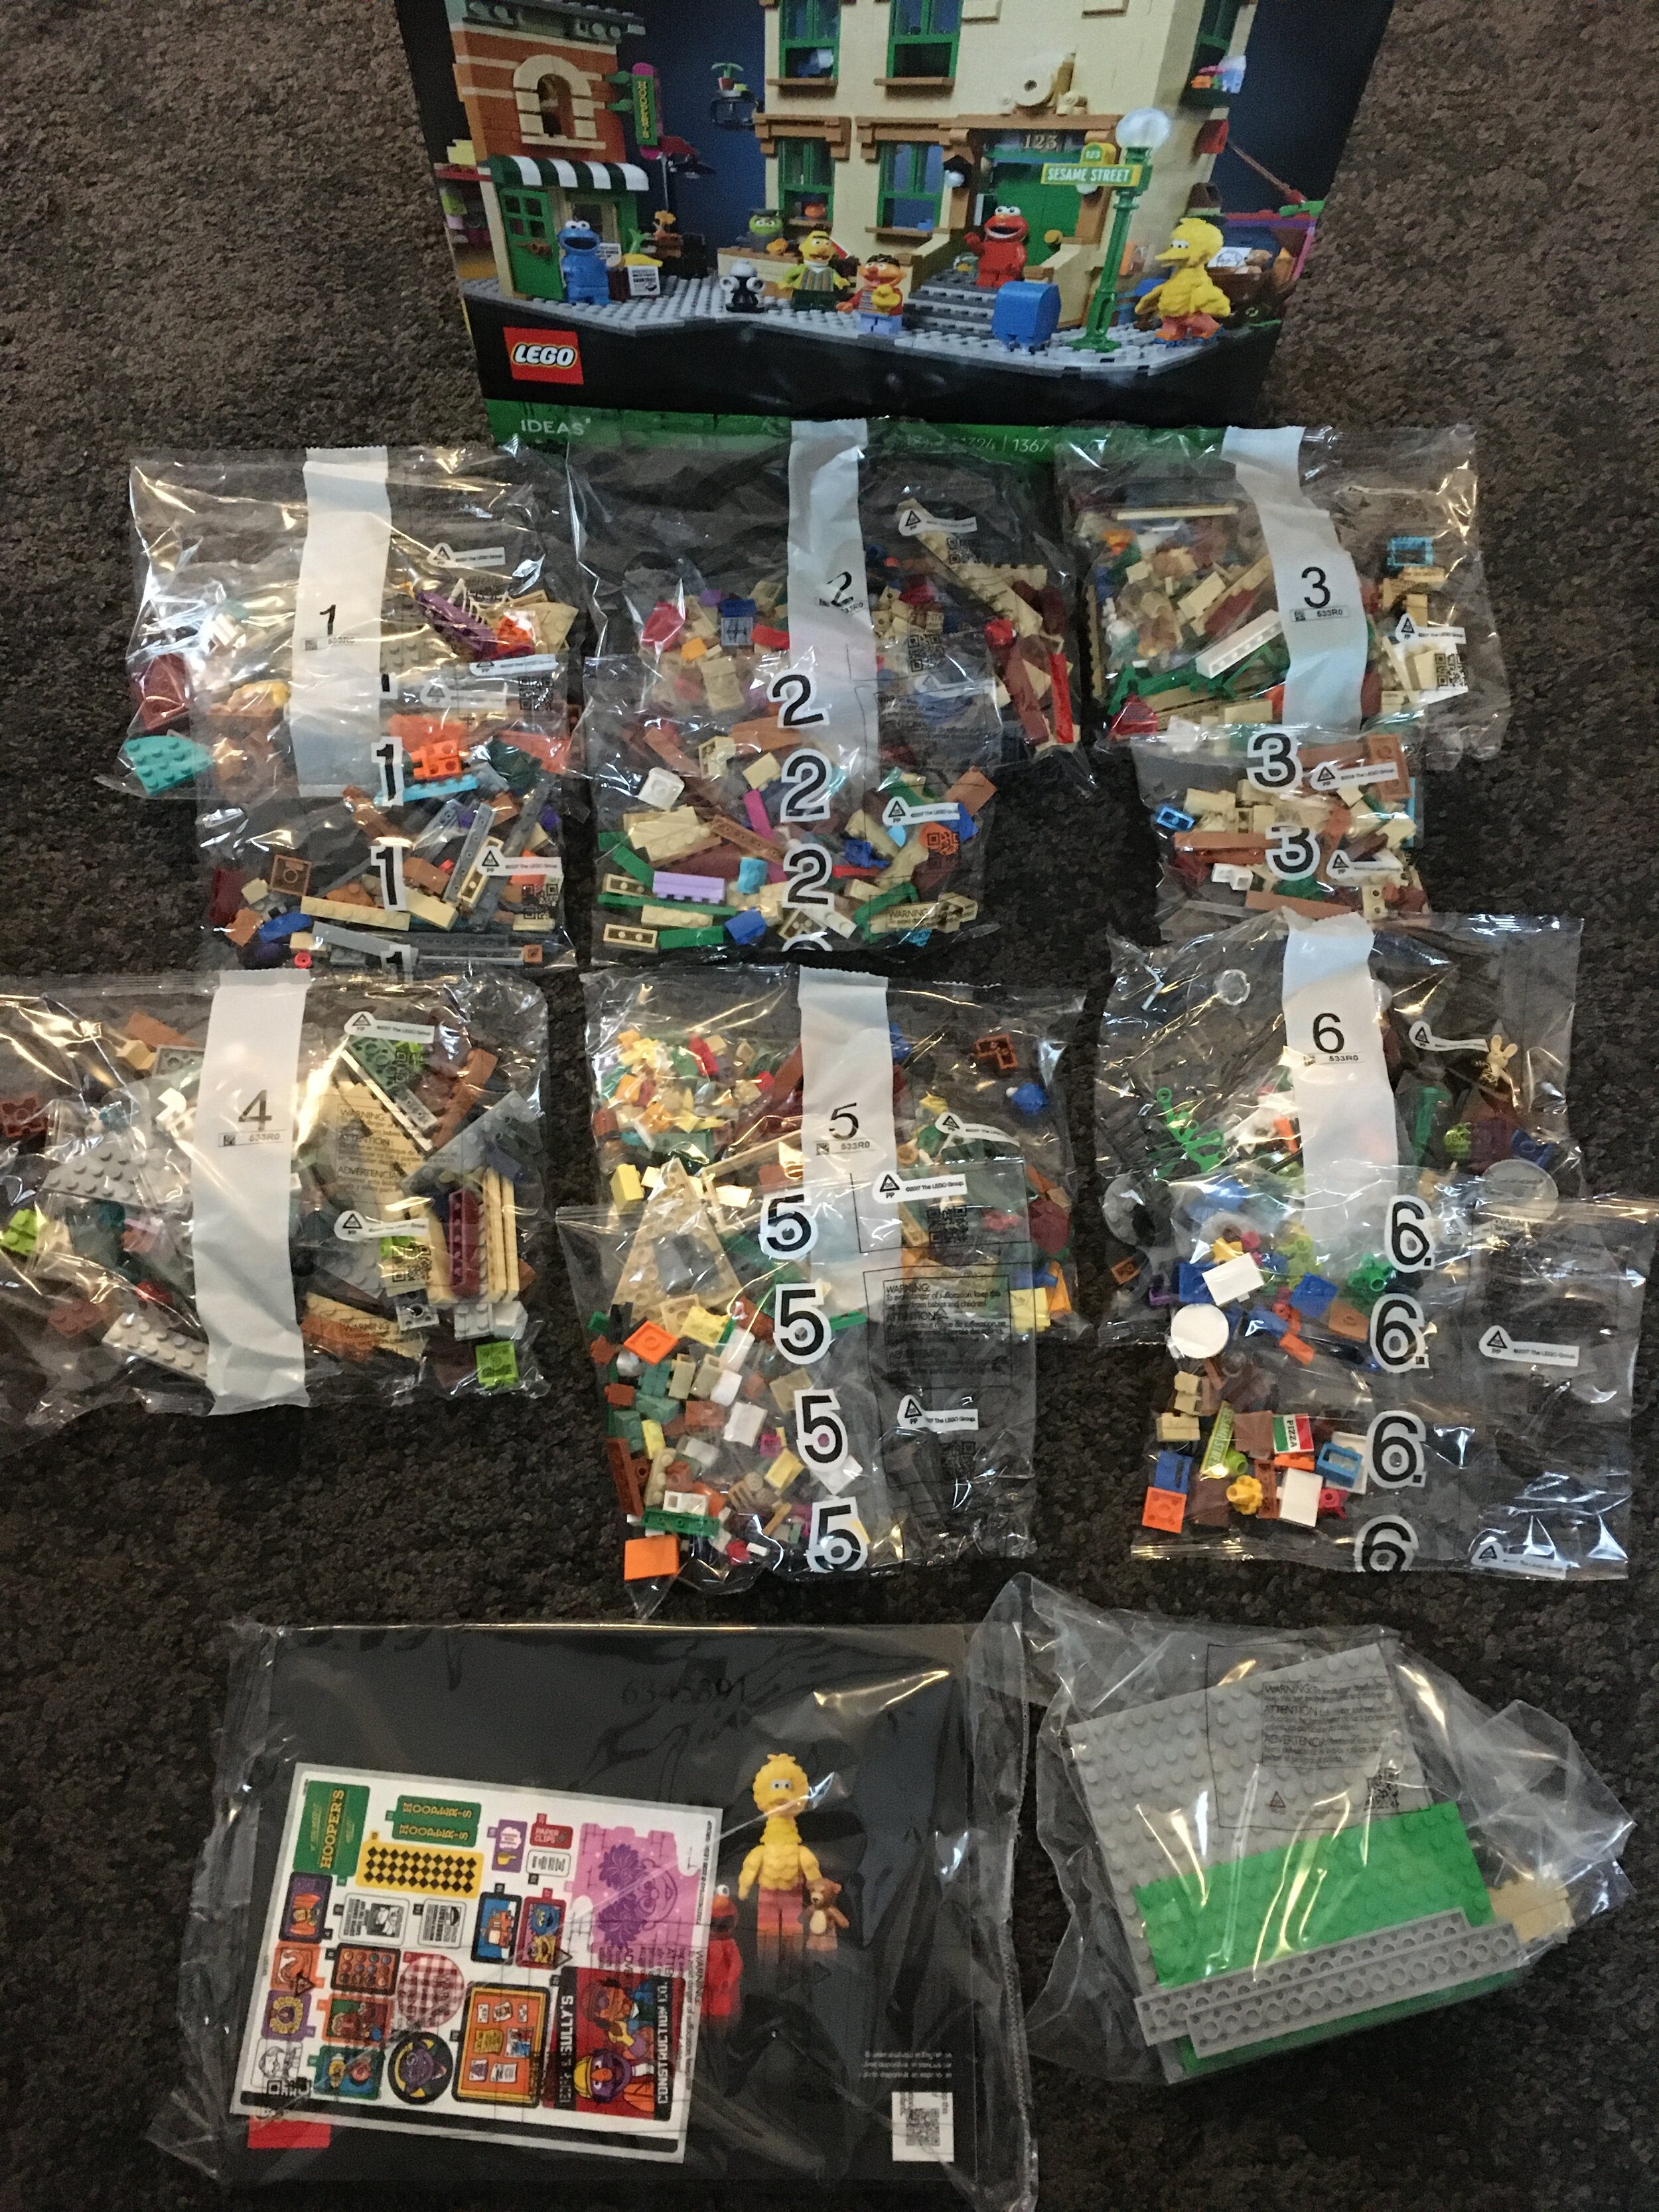
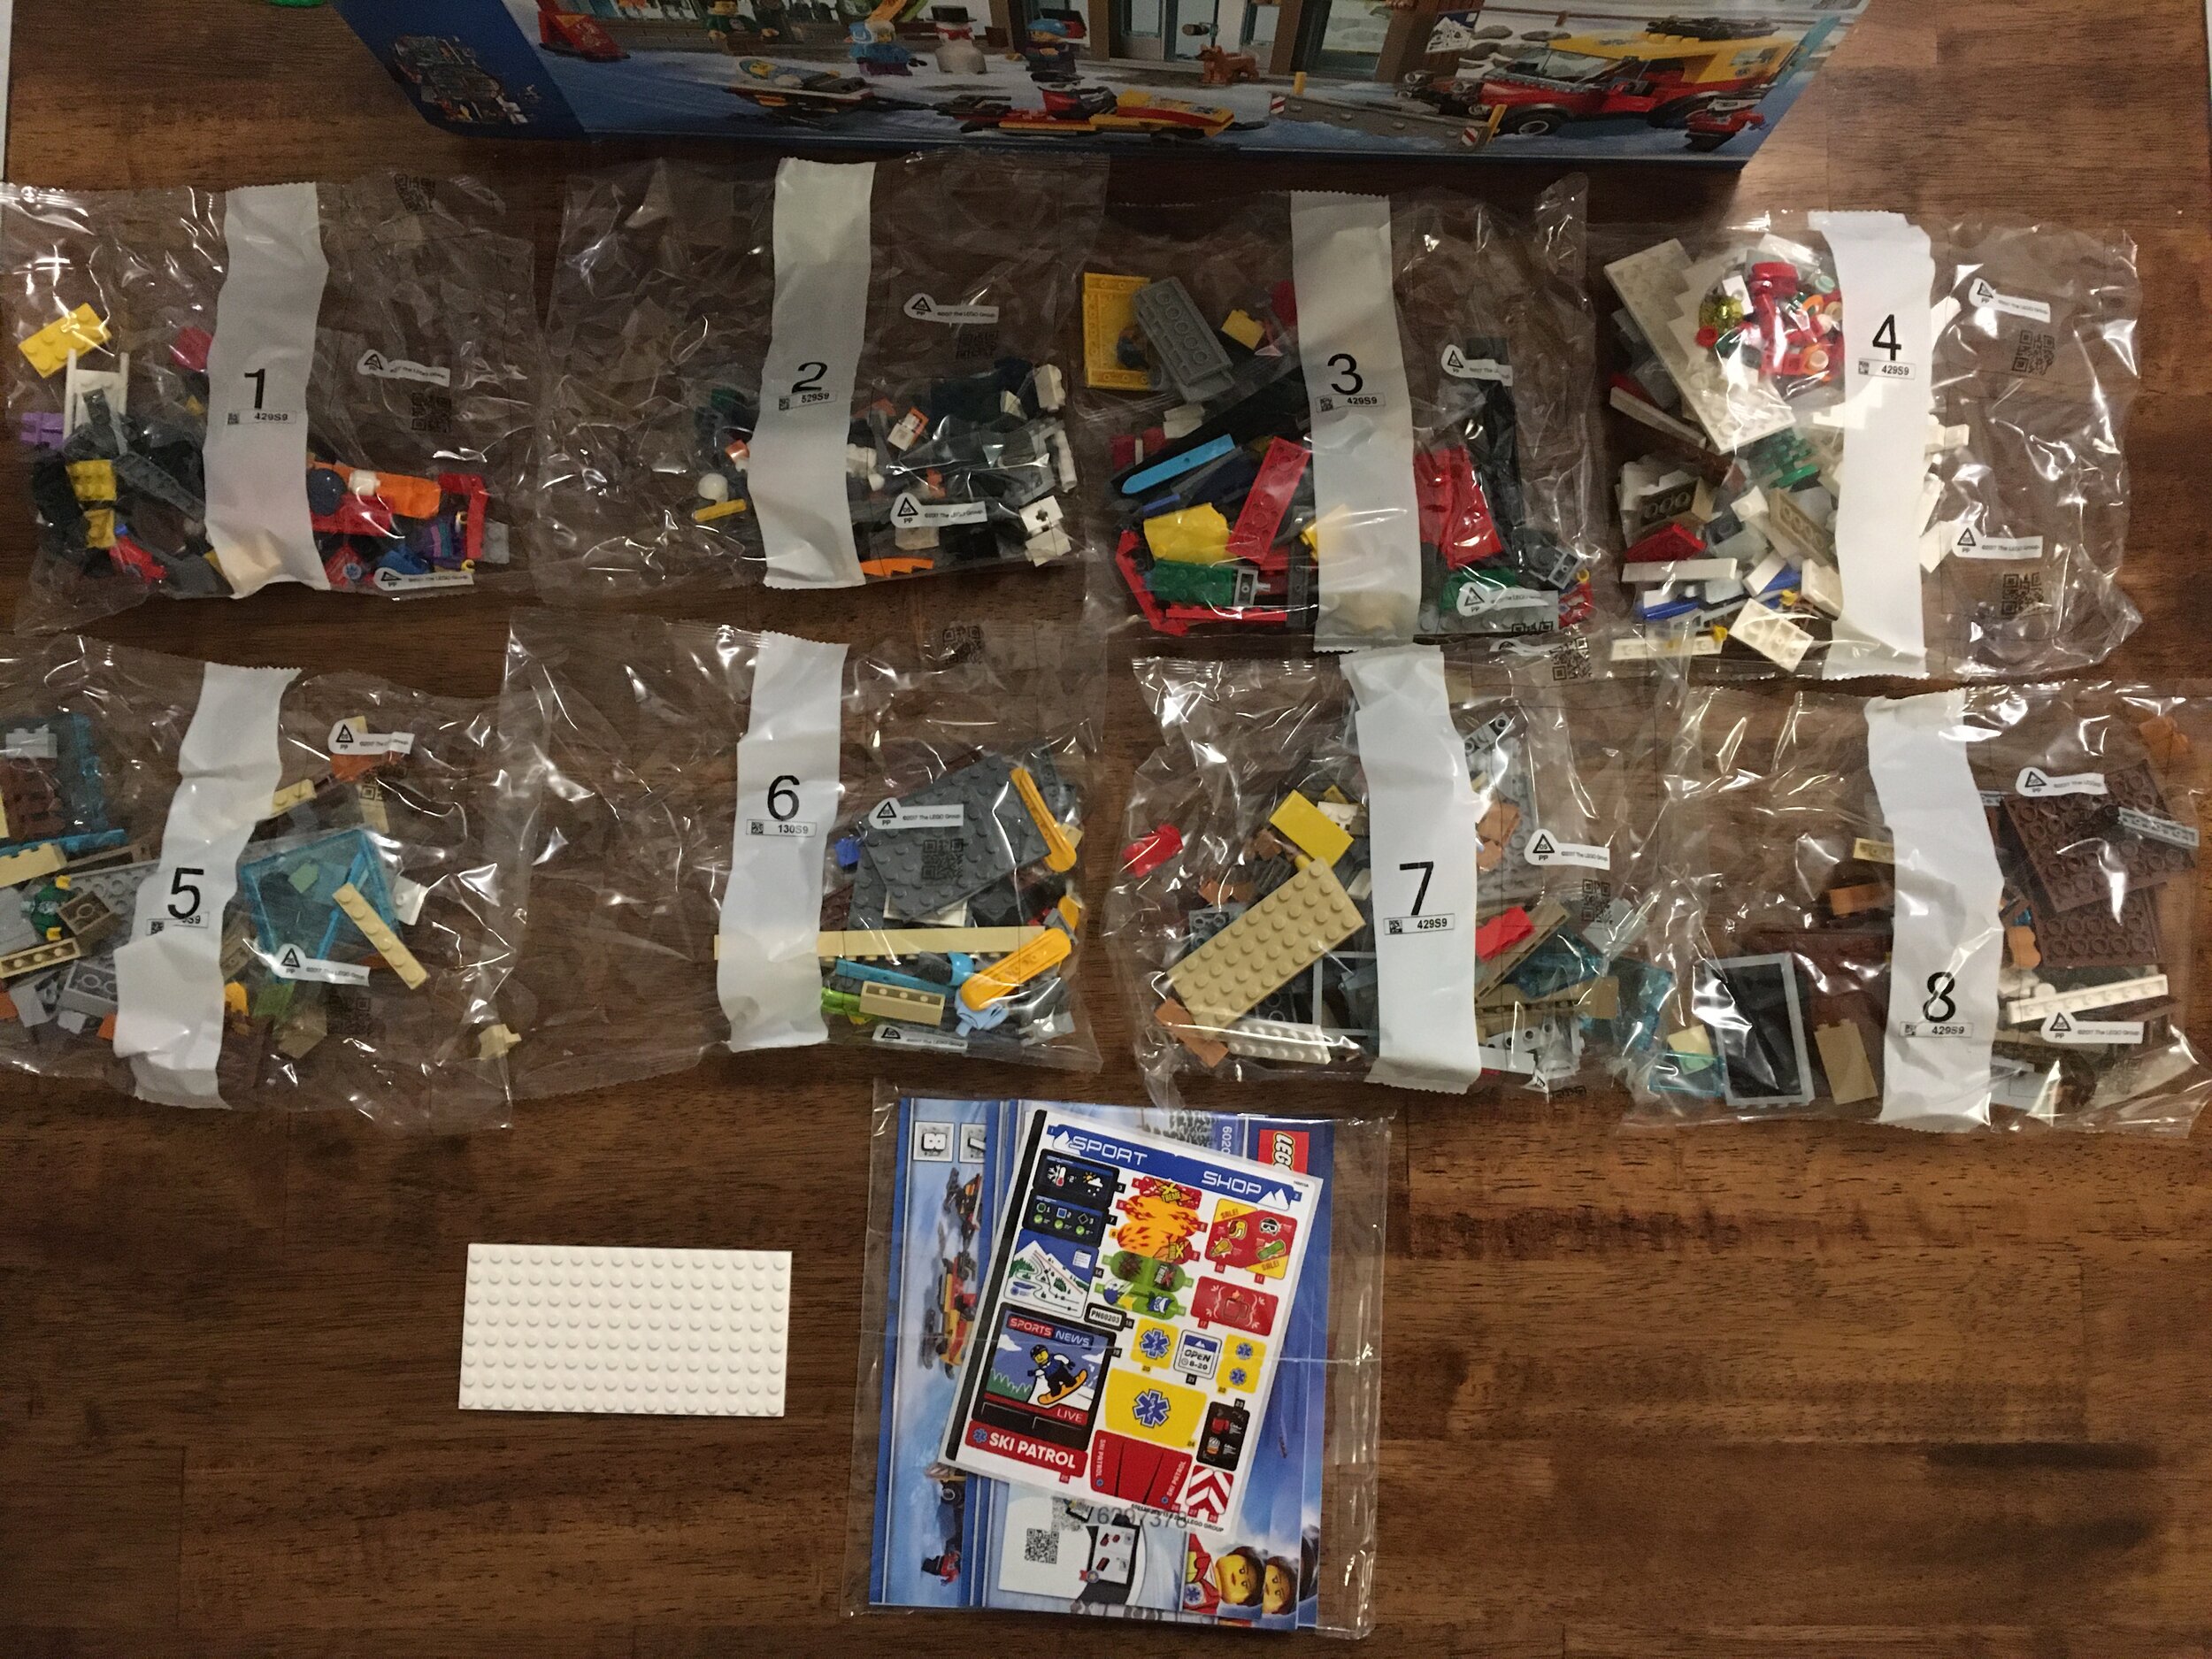
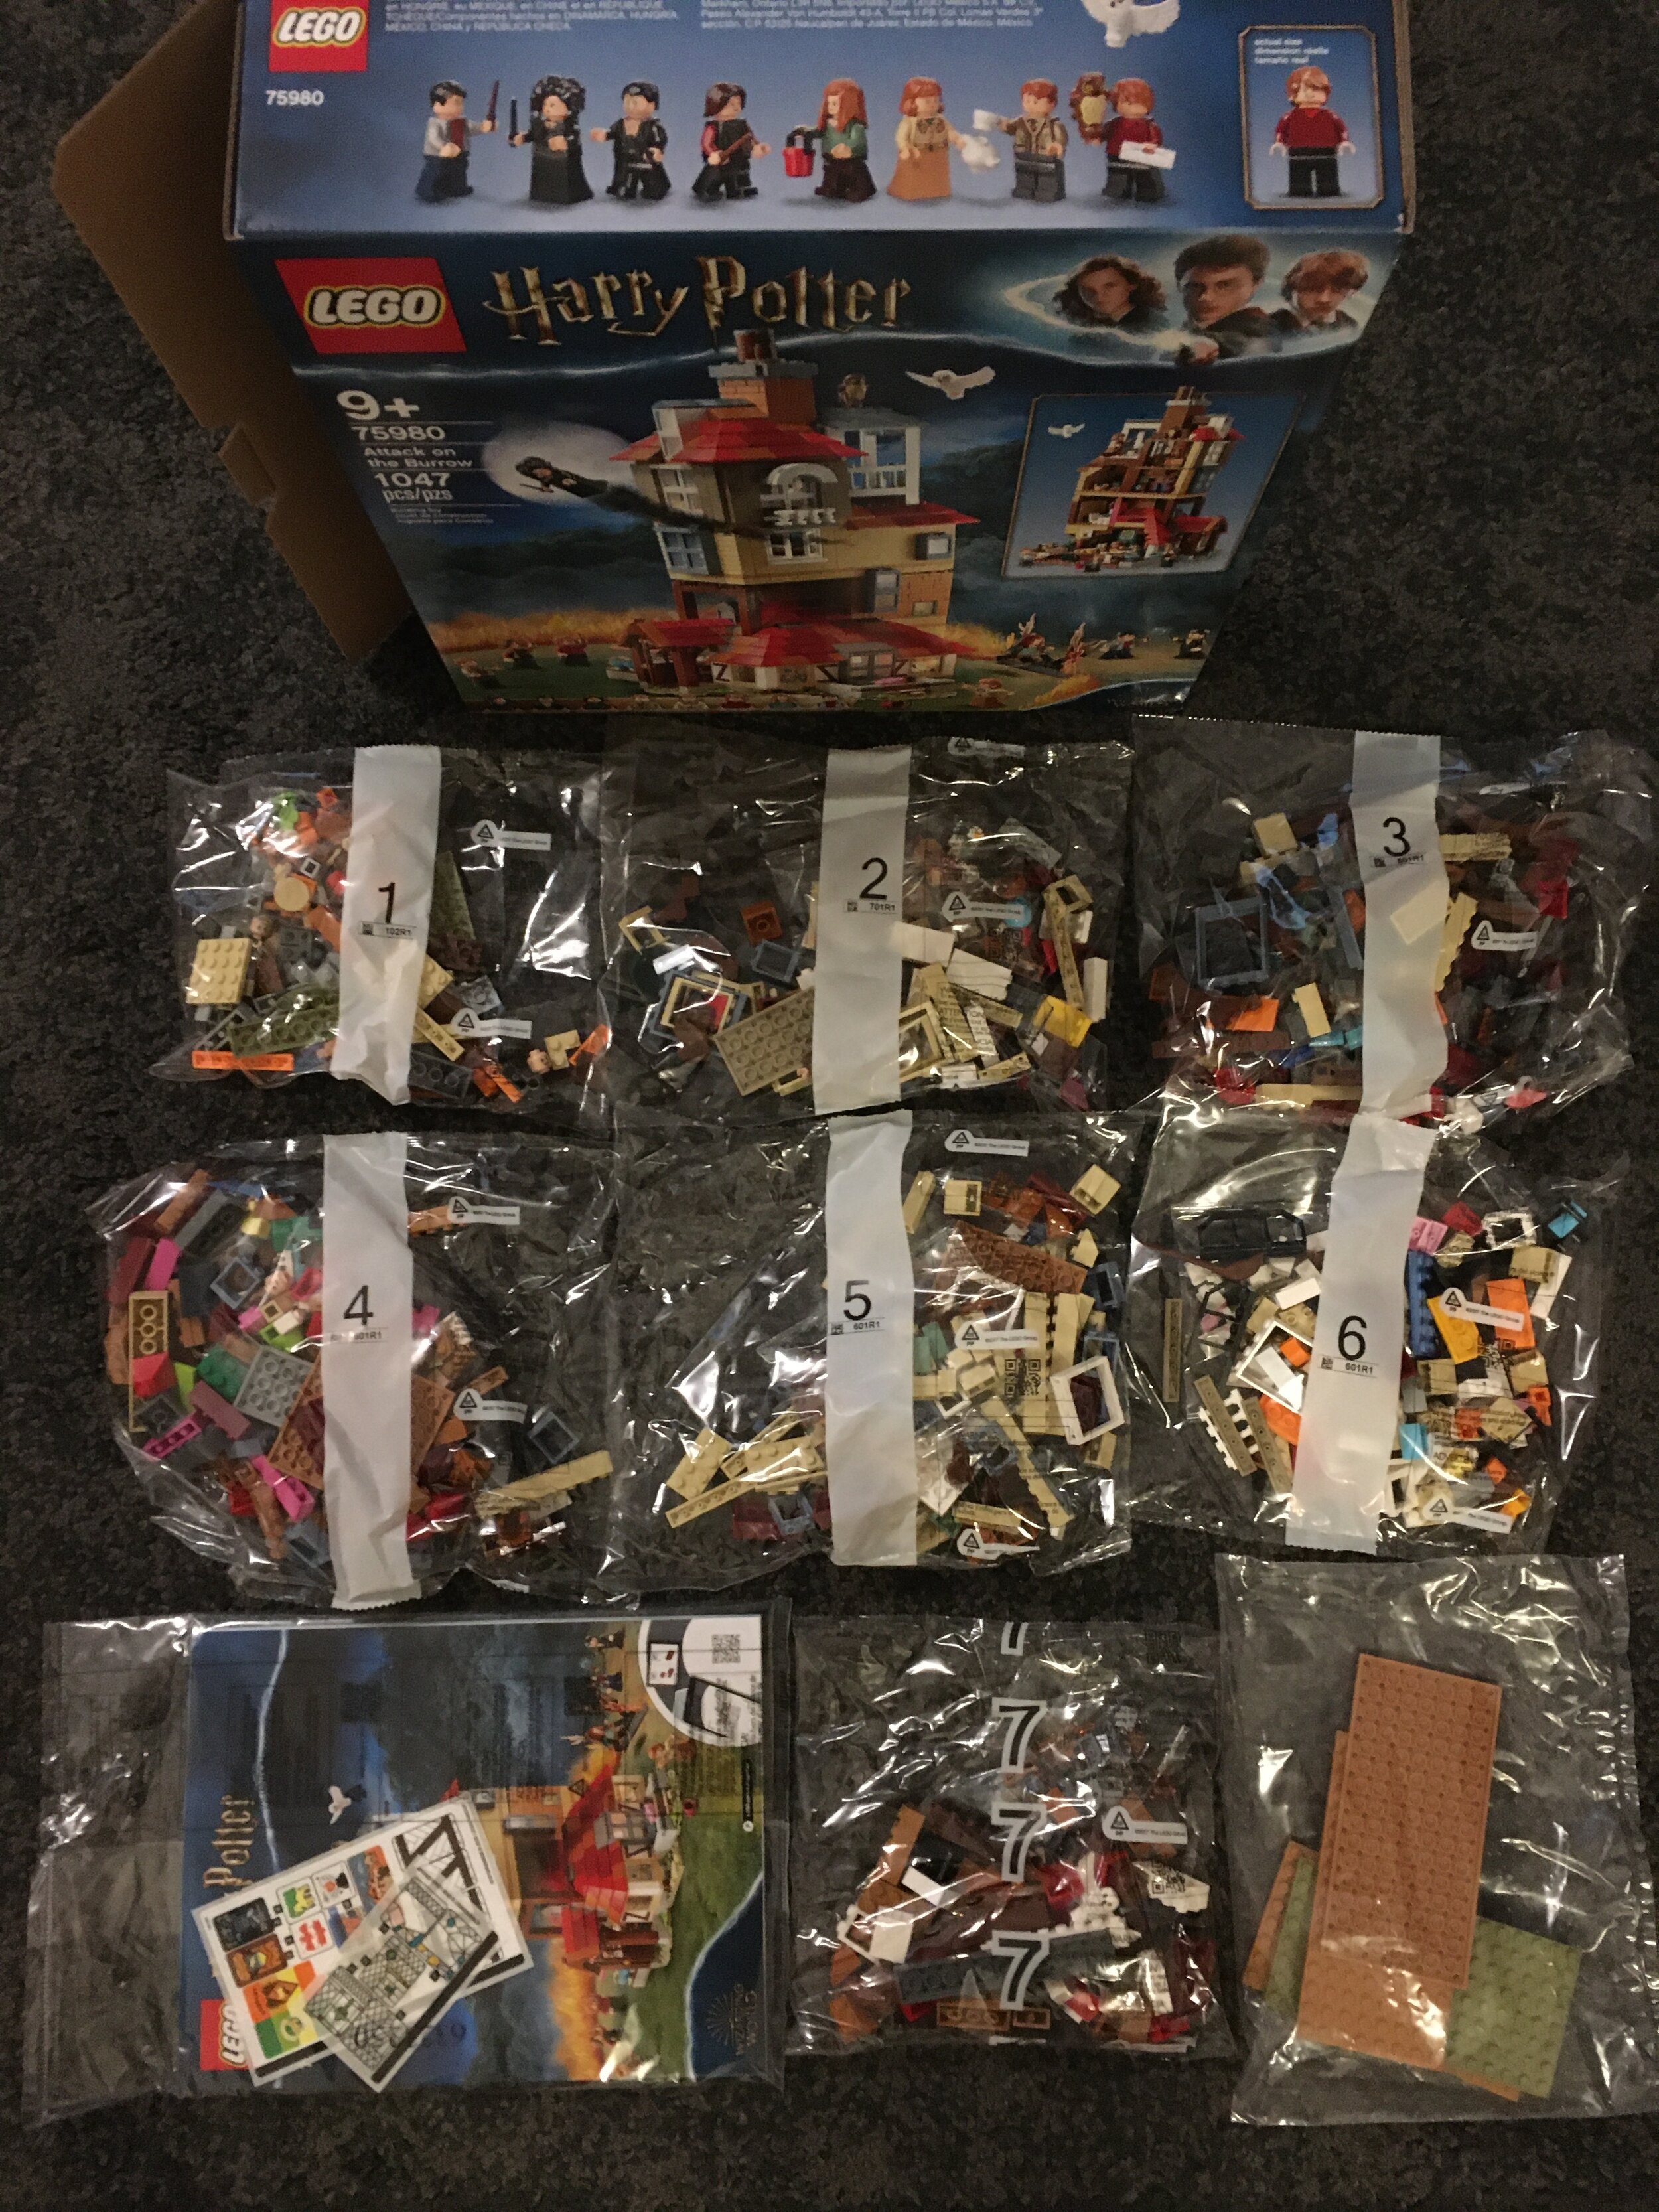
The set contains seven numbered parts bags, an un-numbered bag with larger plates, and the instructions are sealed up with the stickers.

75980_contents.JPG

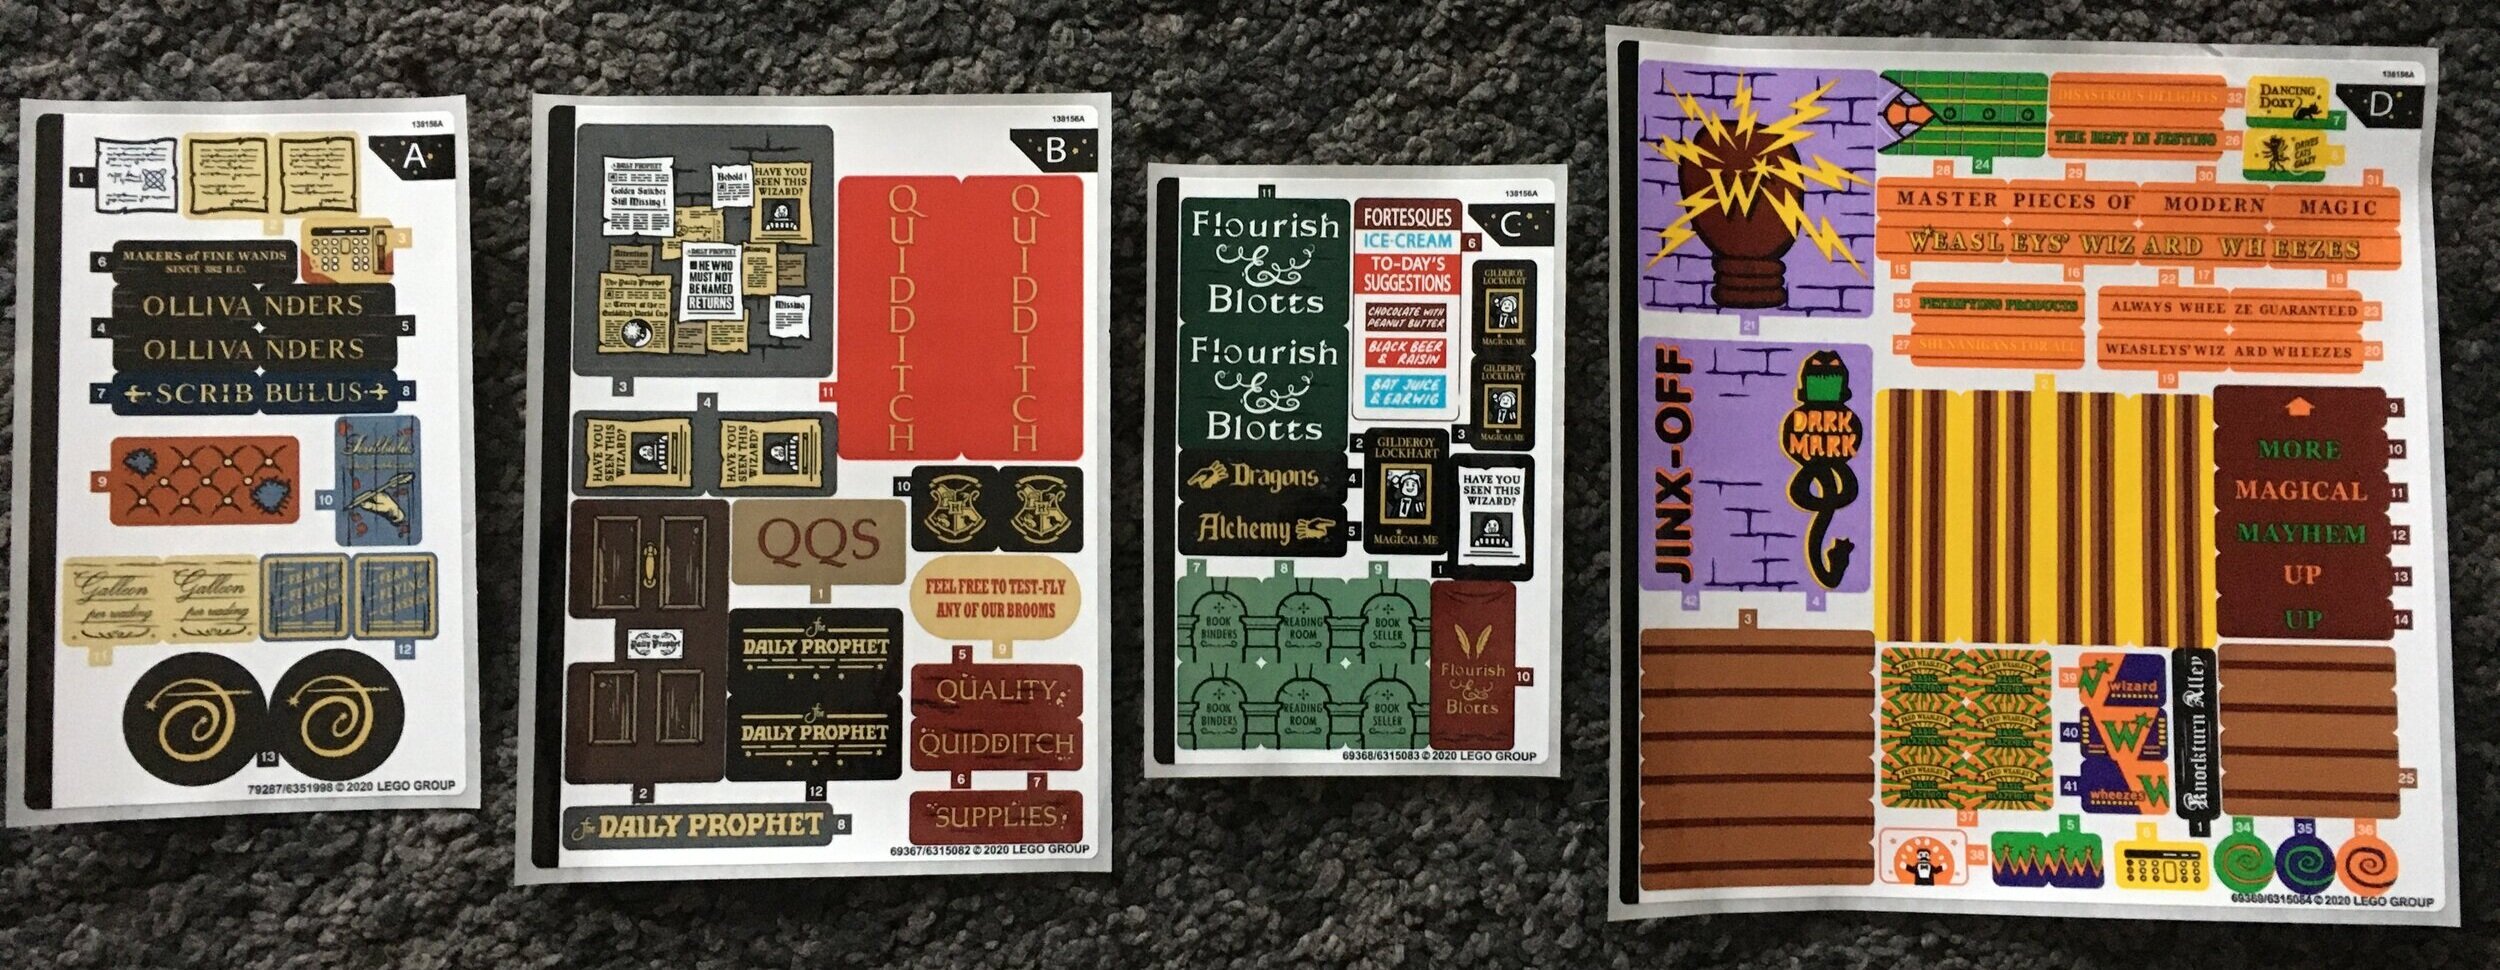
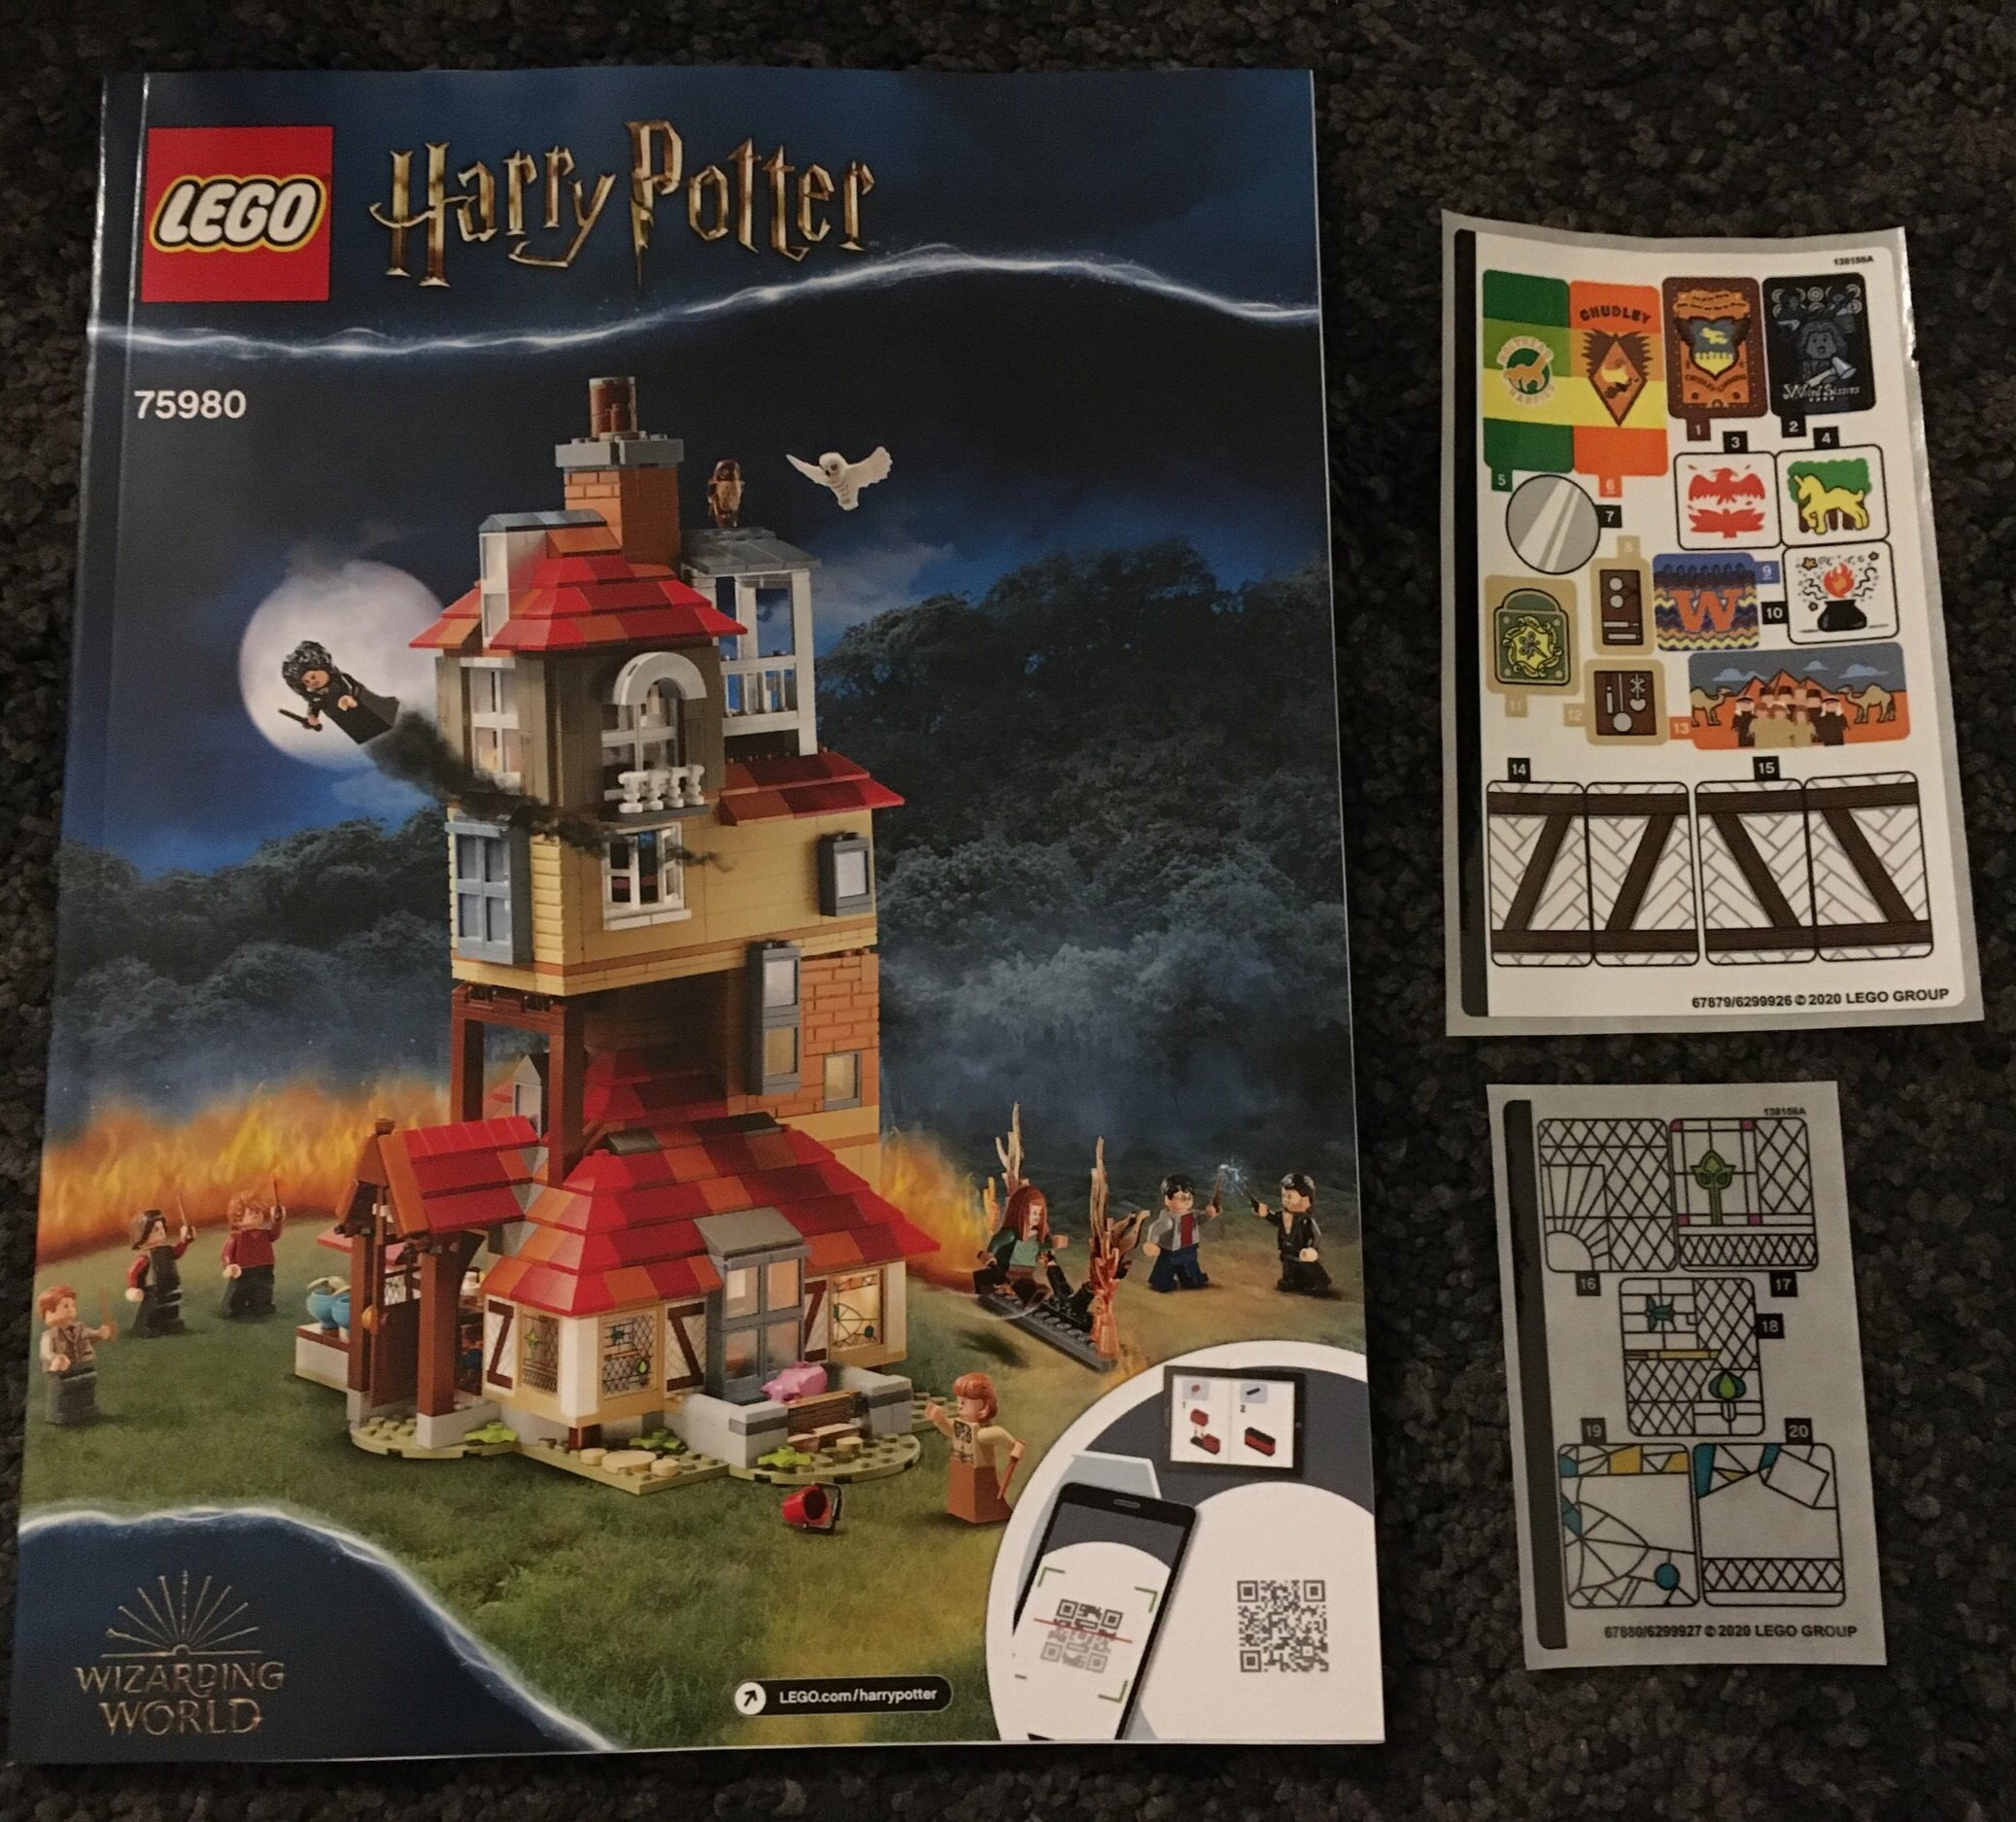
Here are the instructions and stickers. Nothing special about the instructions. No special write ups or pictures. There are two sticker sheets which are both fairly small. One is the normal sheet and the other is clear stickers. There aren’t a ton of stickers so I can’t complain too much. As a technique, I’ve started using the piece separator to apply stickers versus my fingers. It’s actually worked very well. Maybe you all already do that, but if you haven’t, give it a try.

75980_instructions.jpg

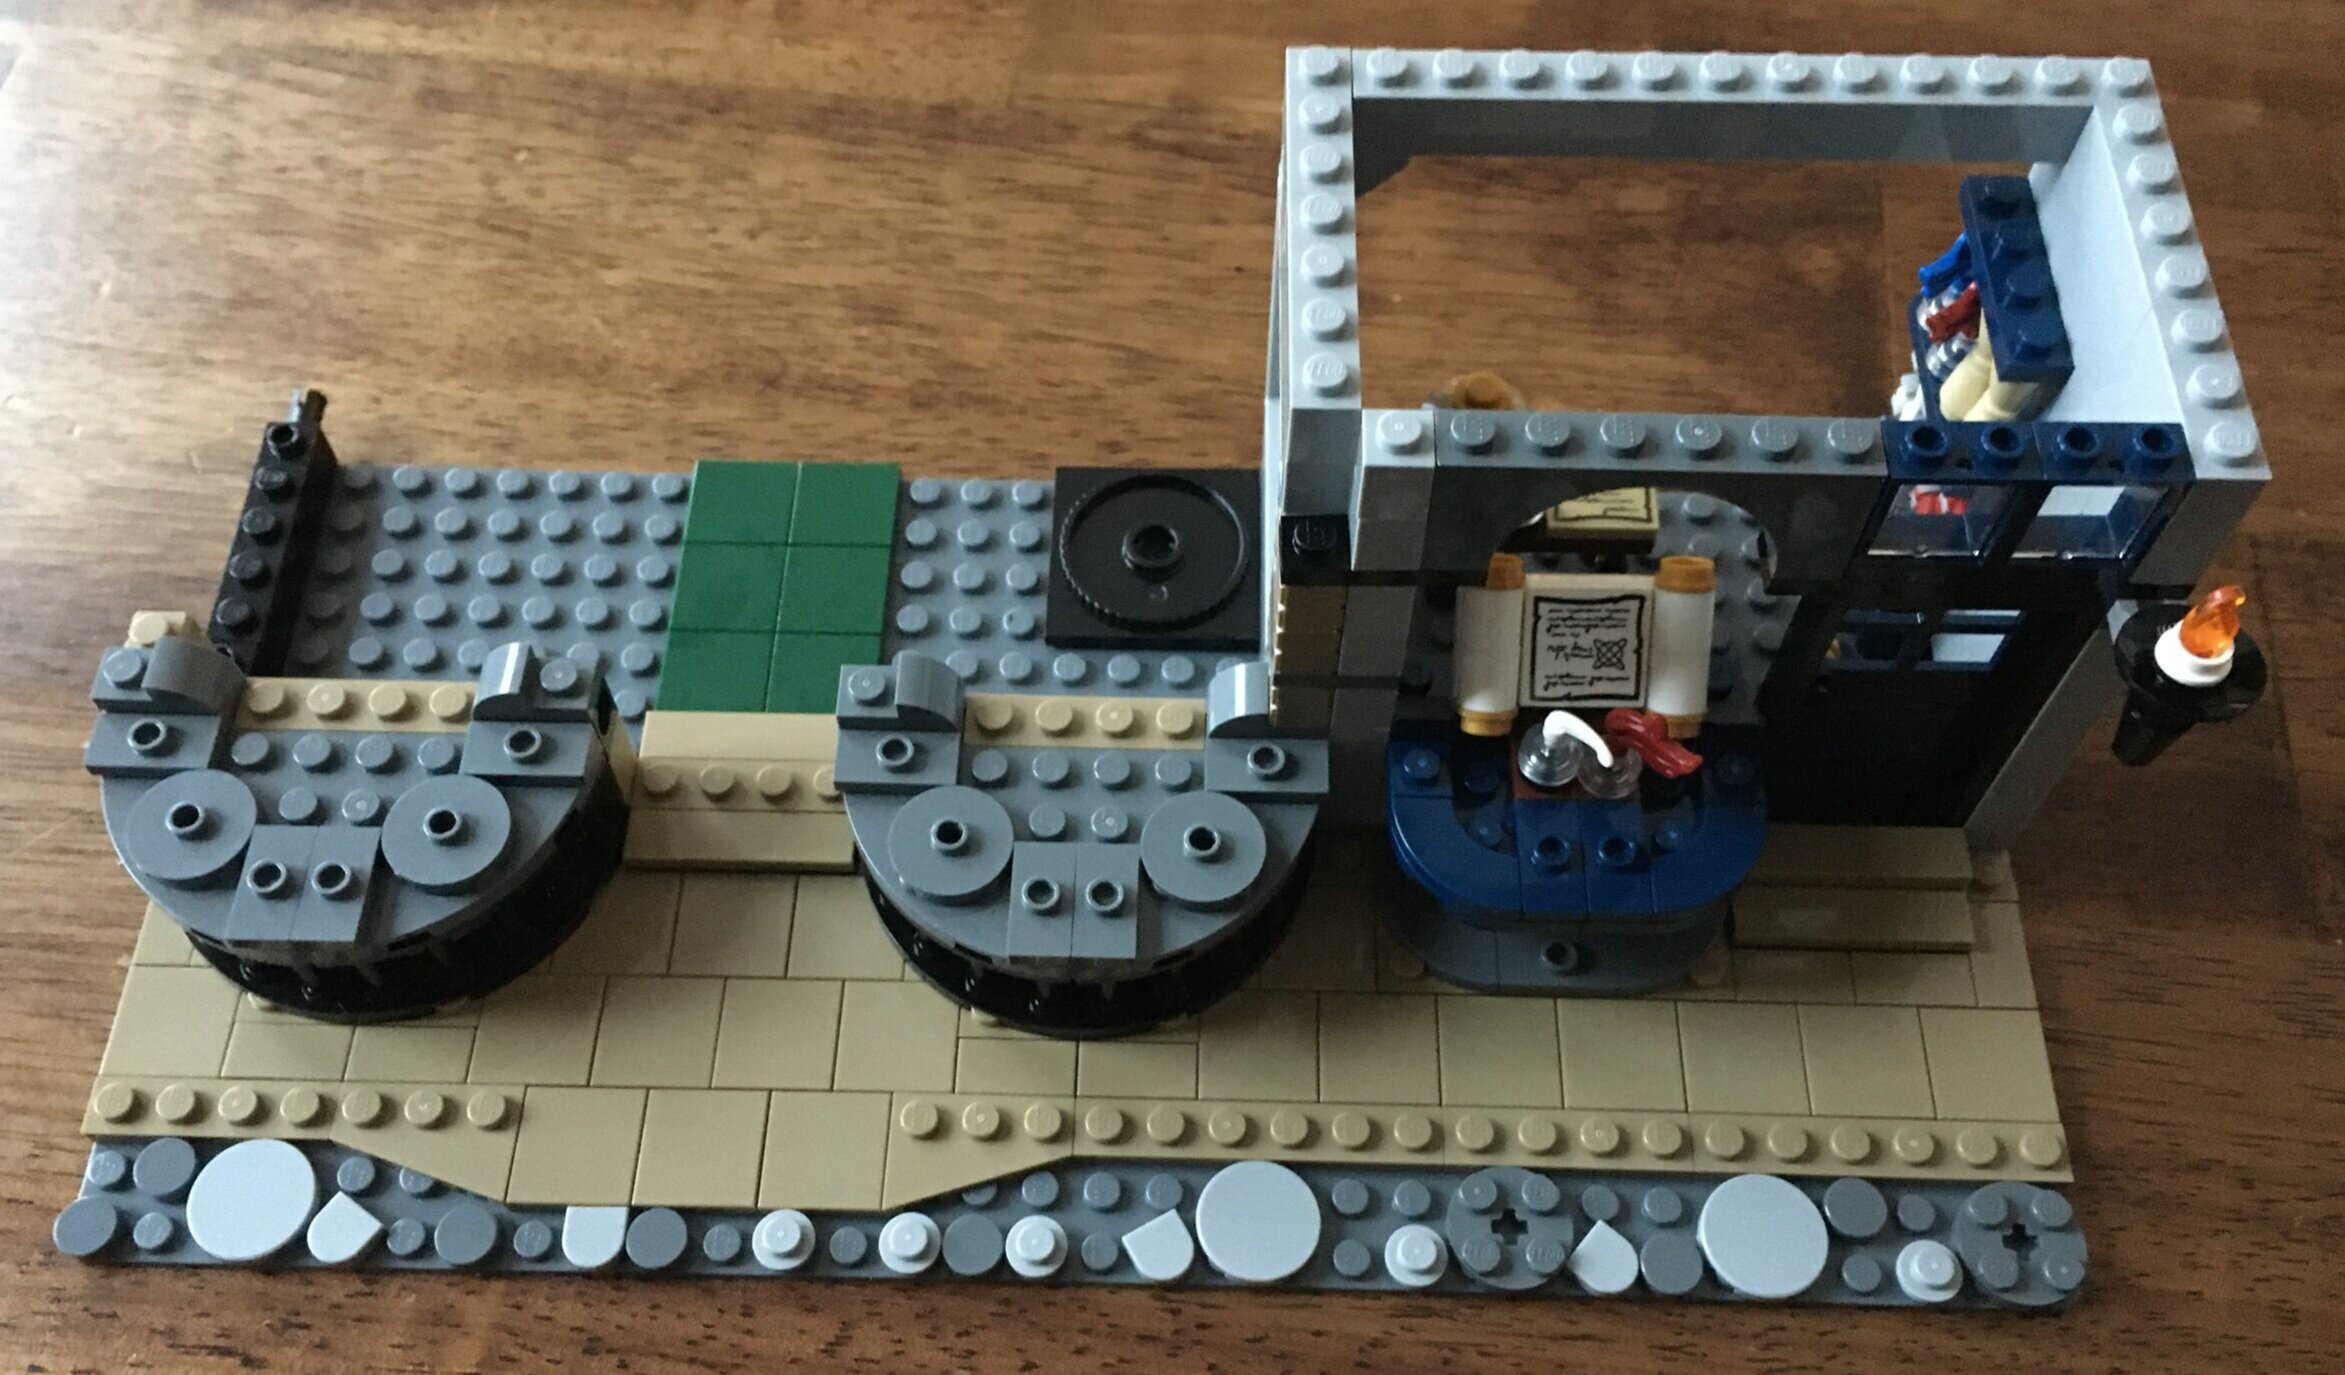
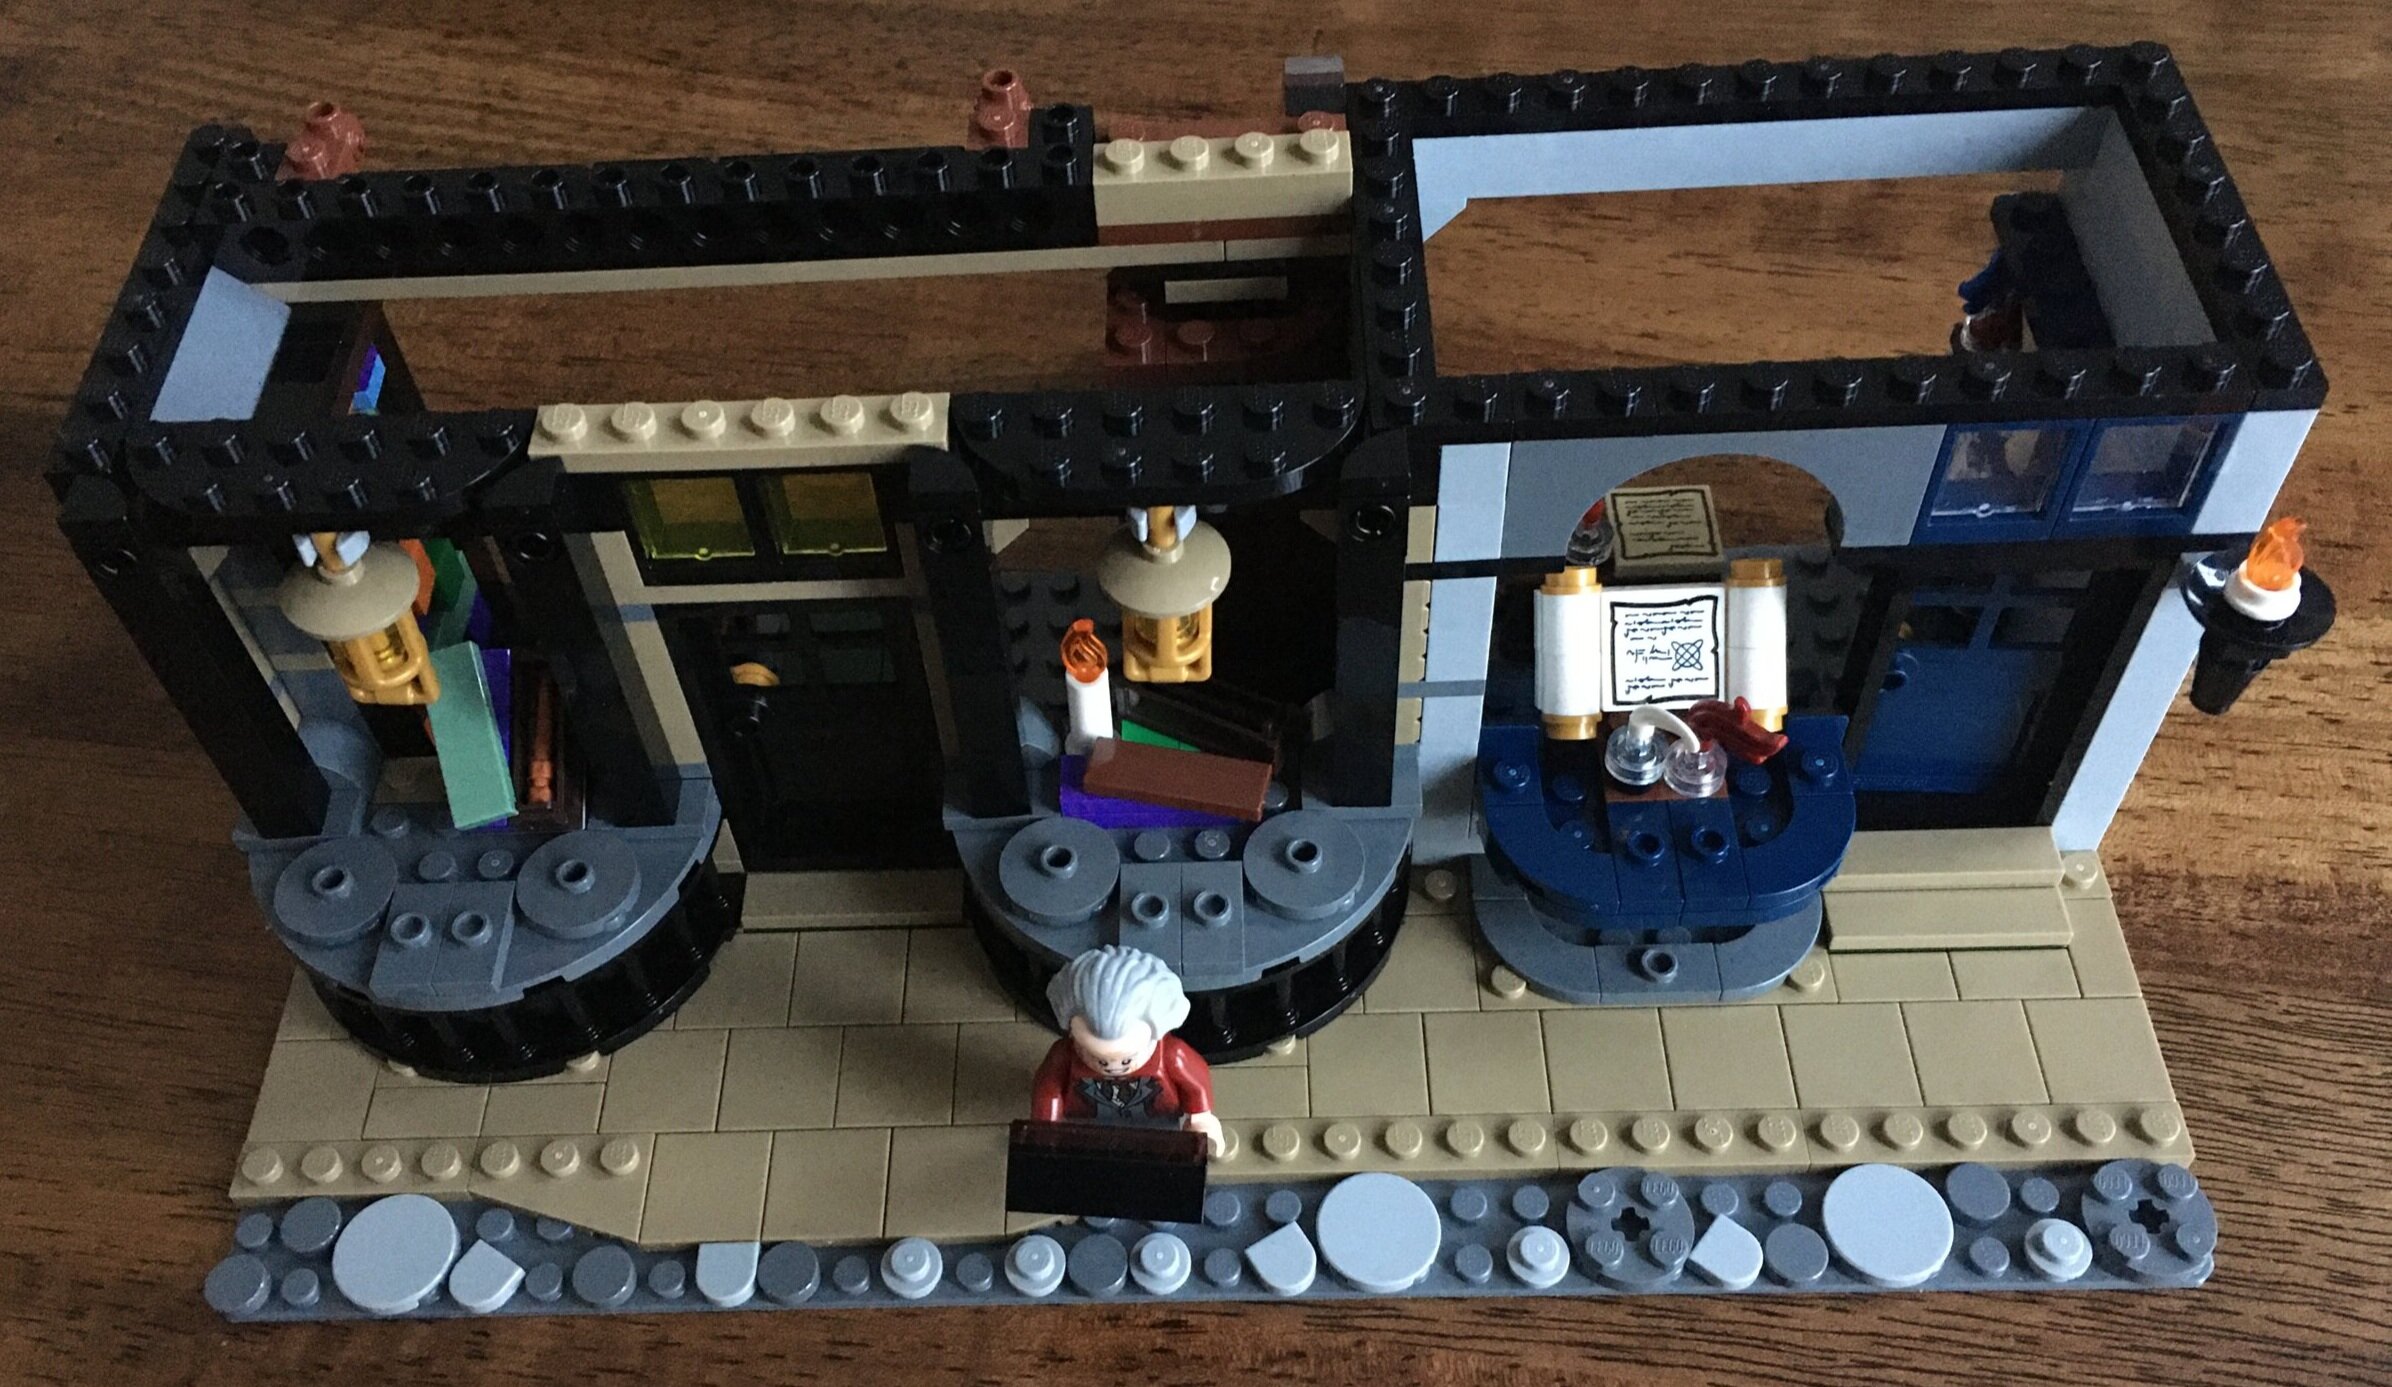
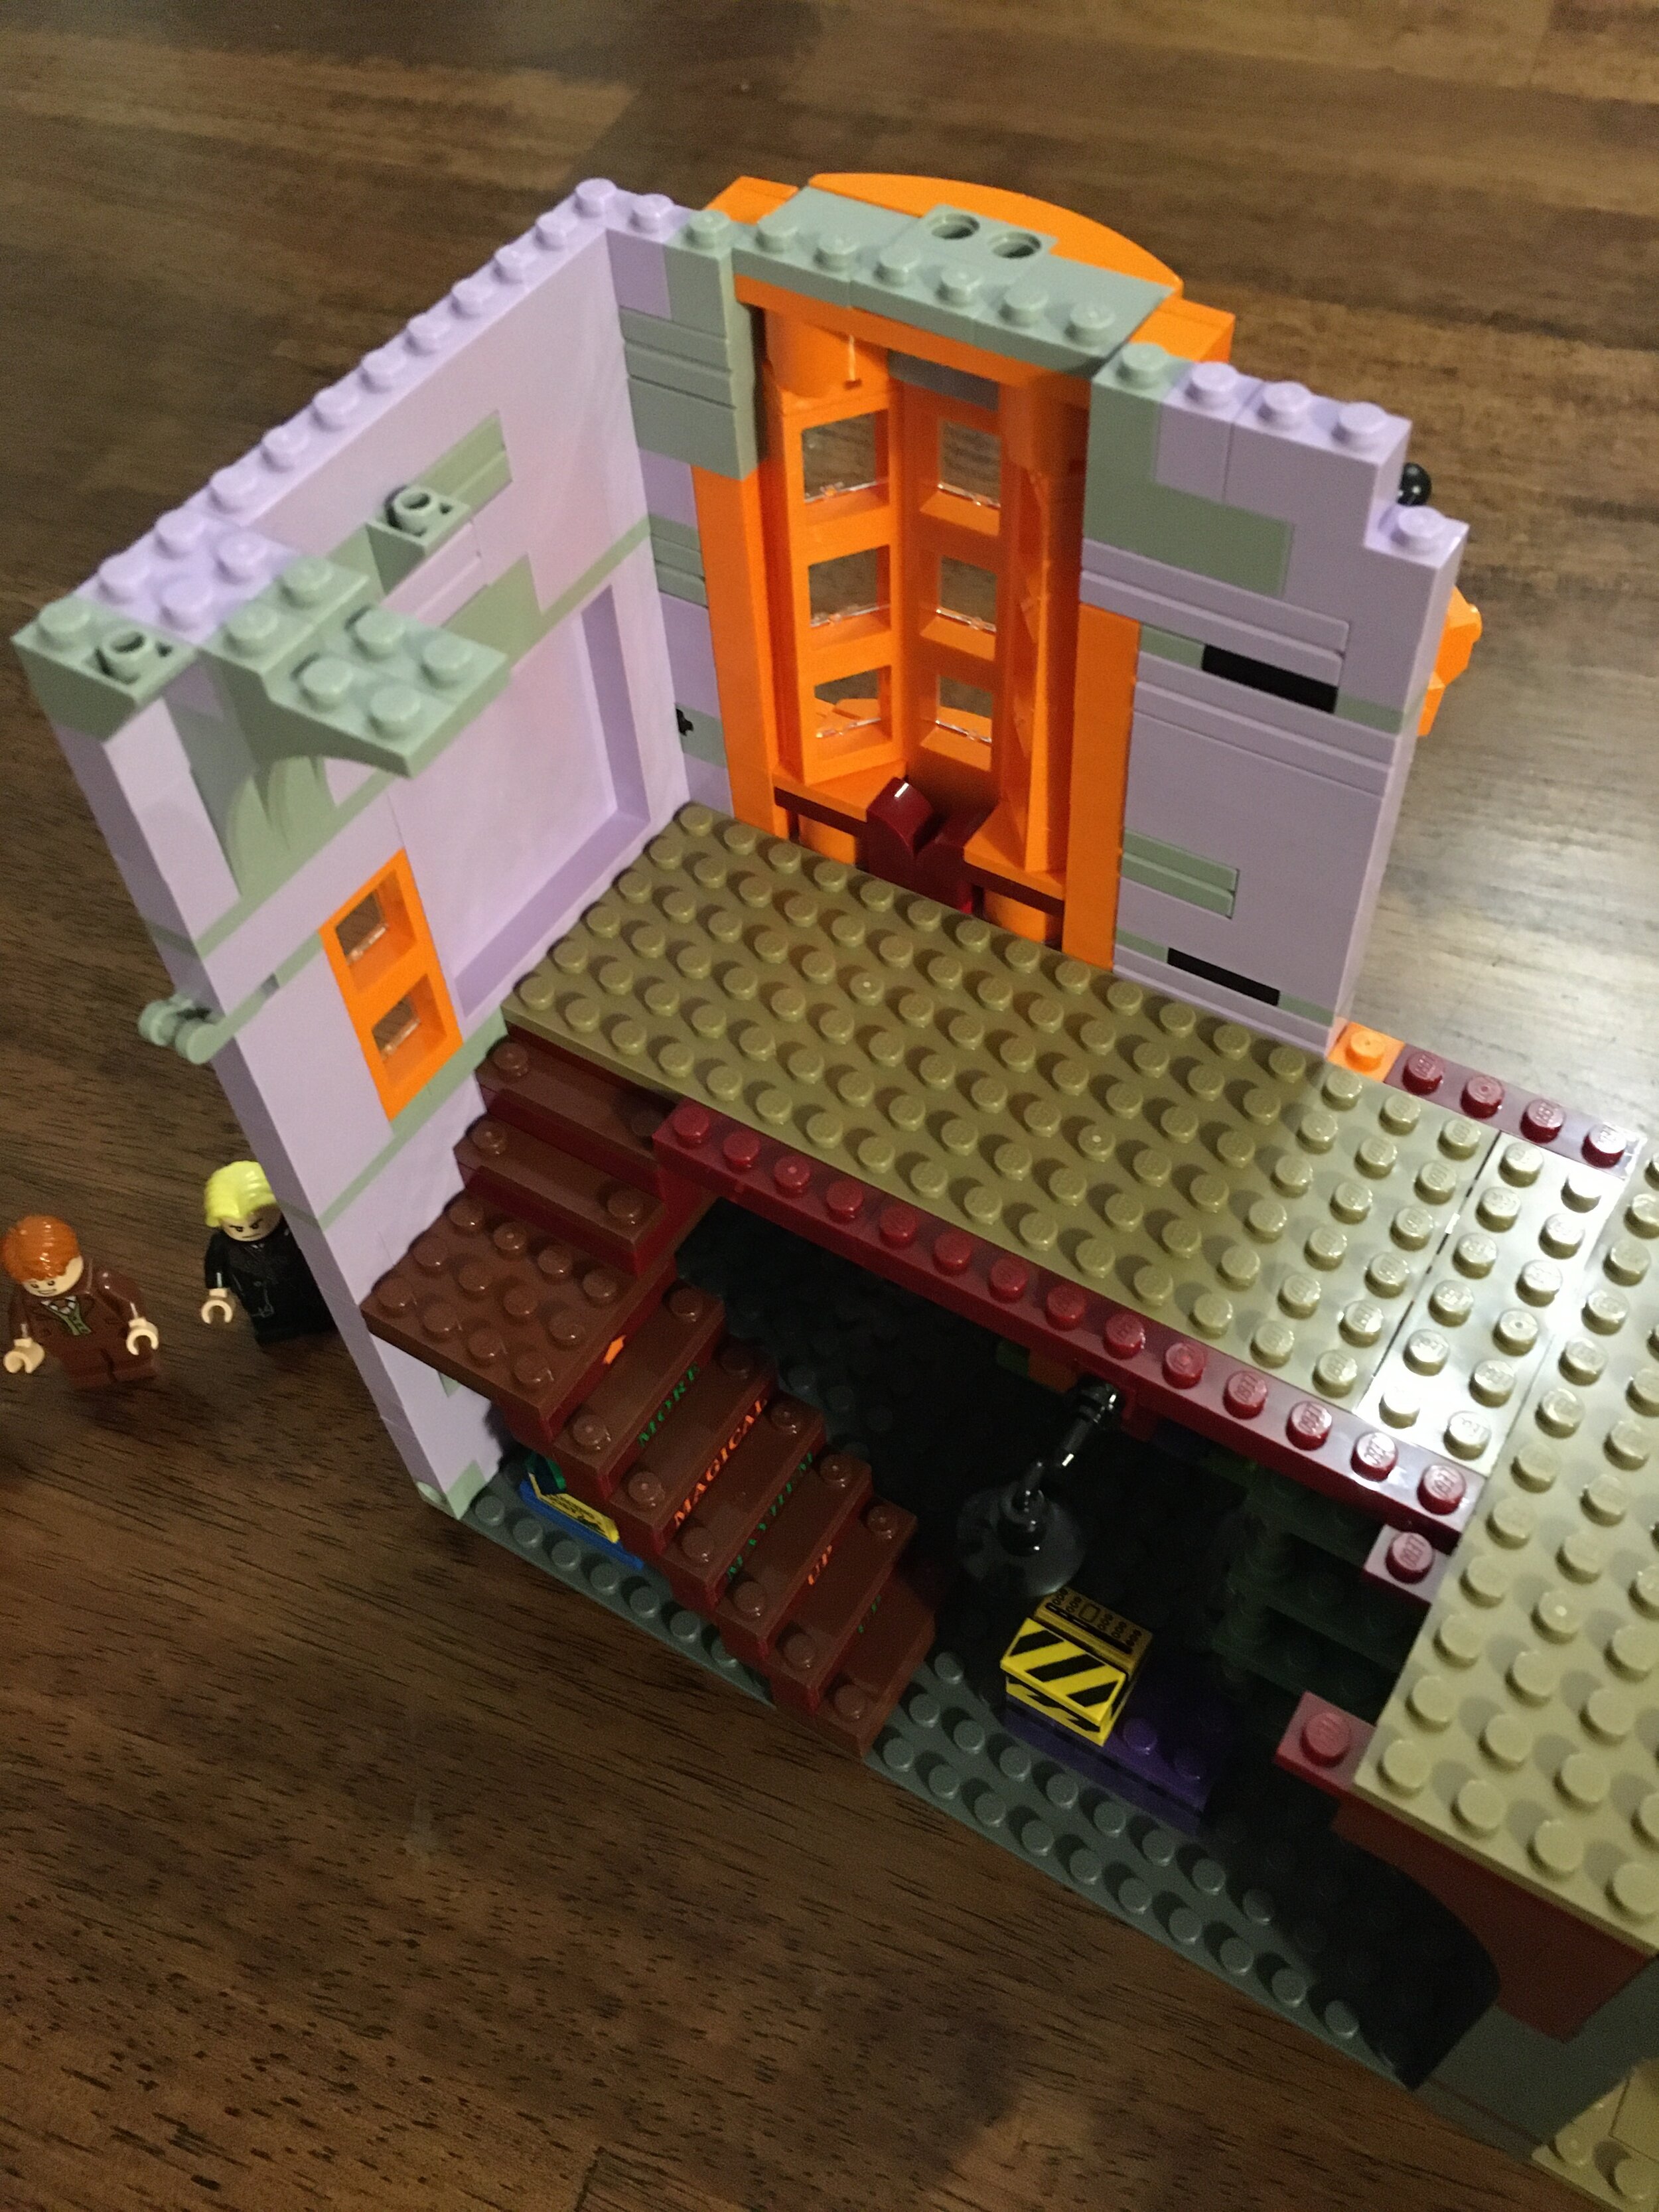
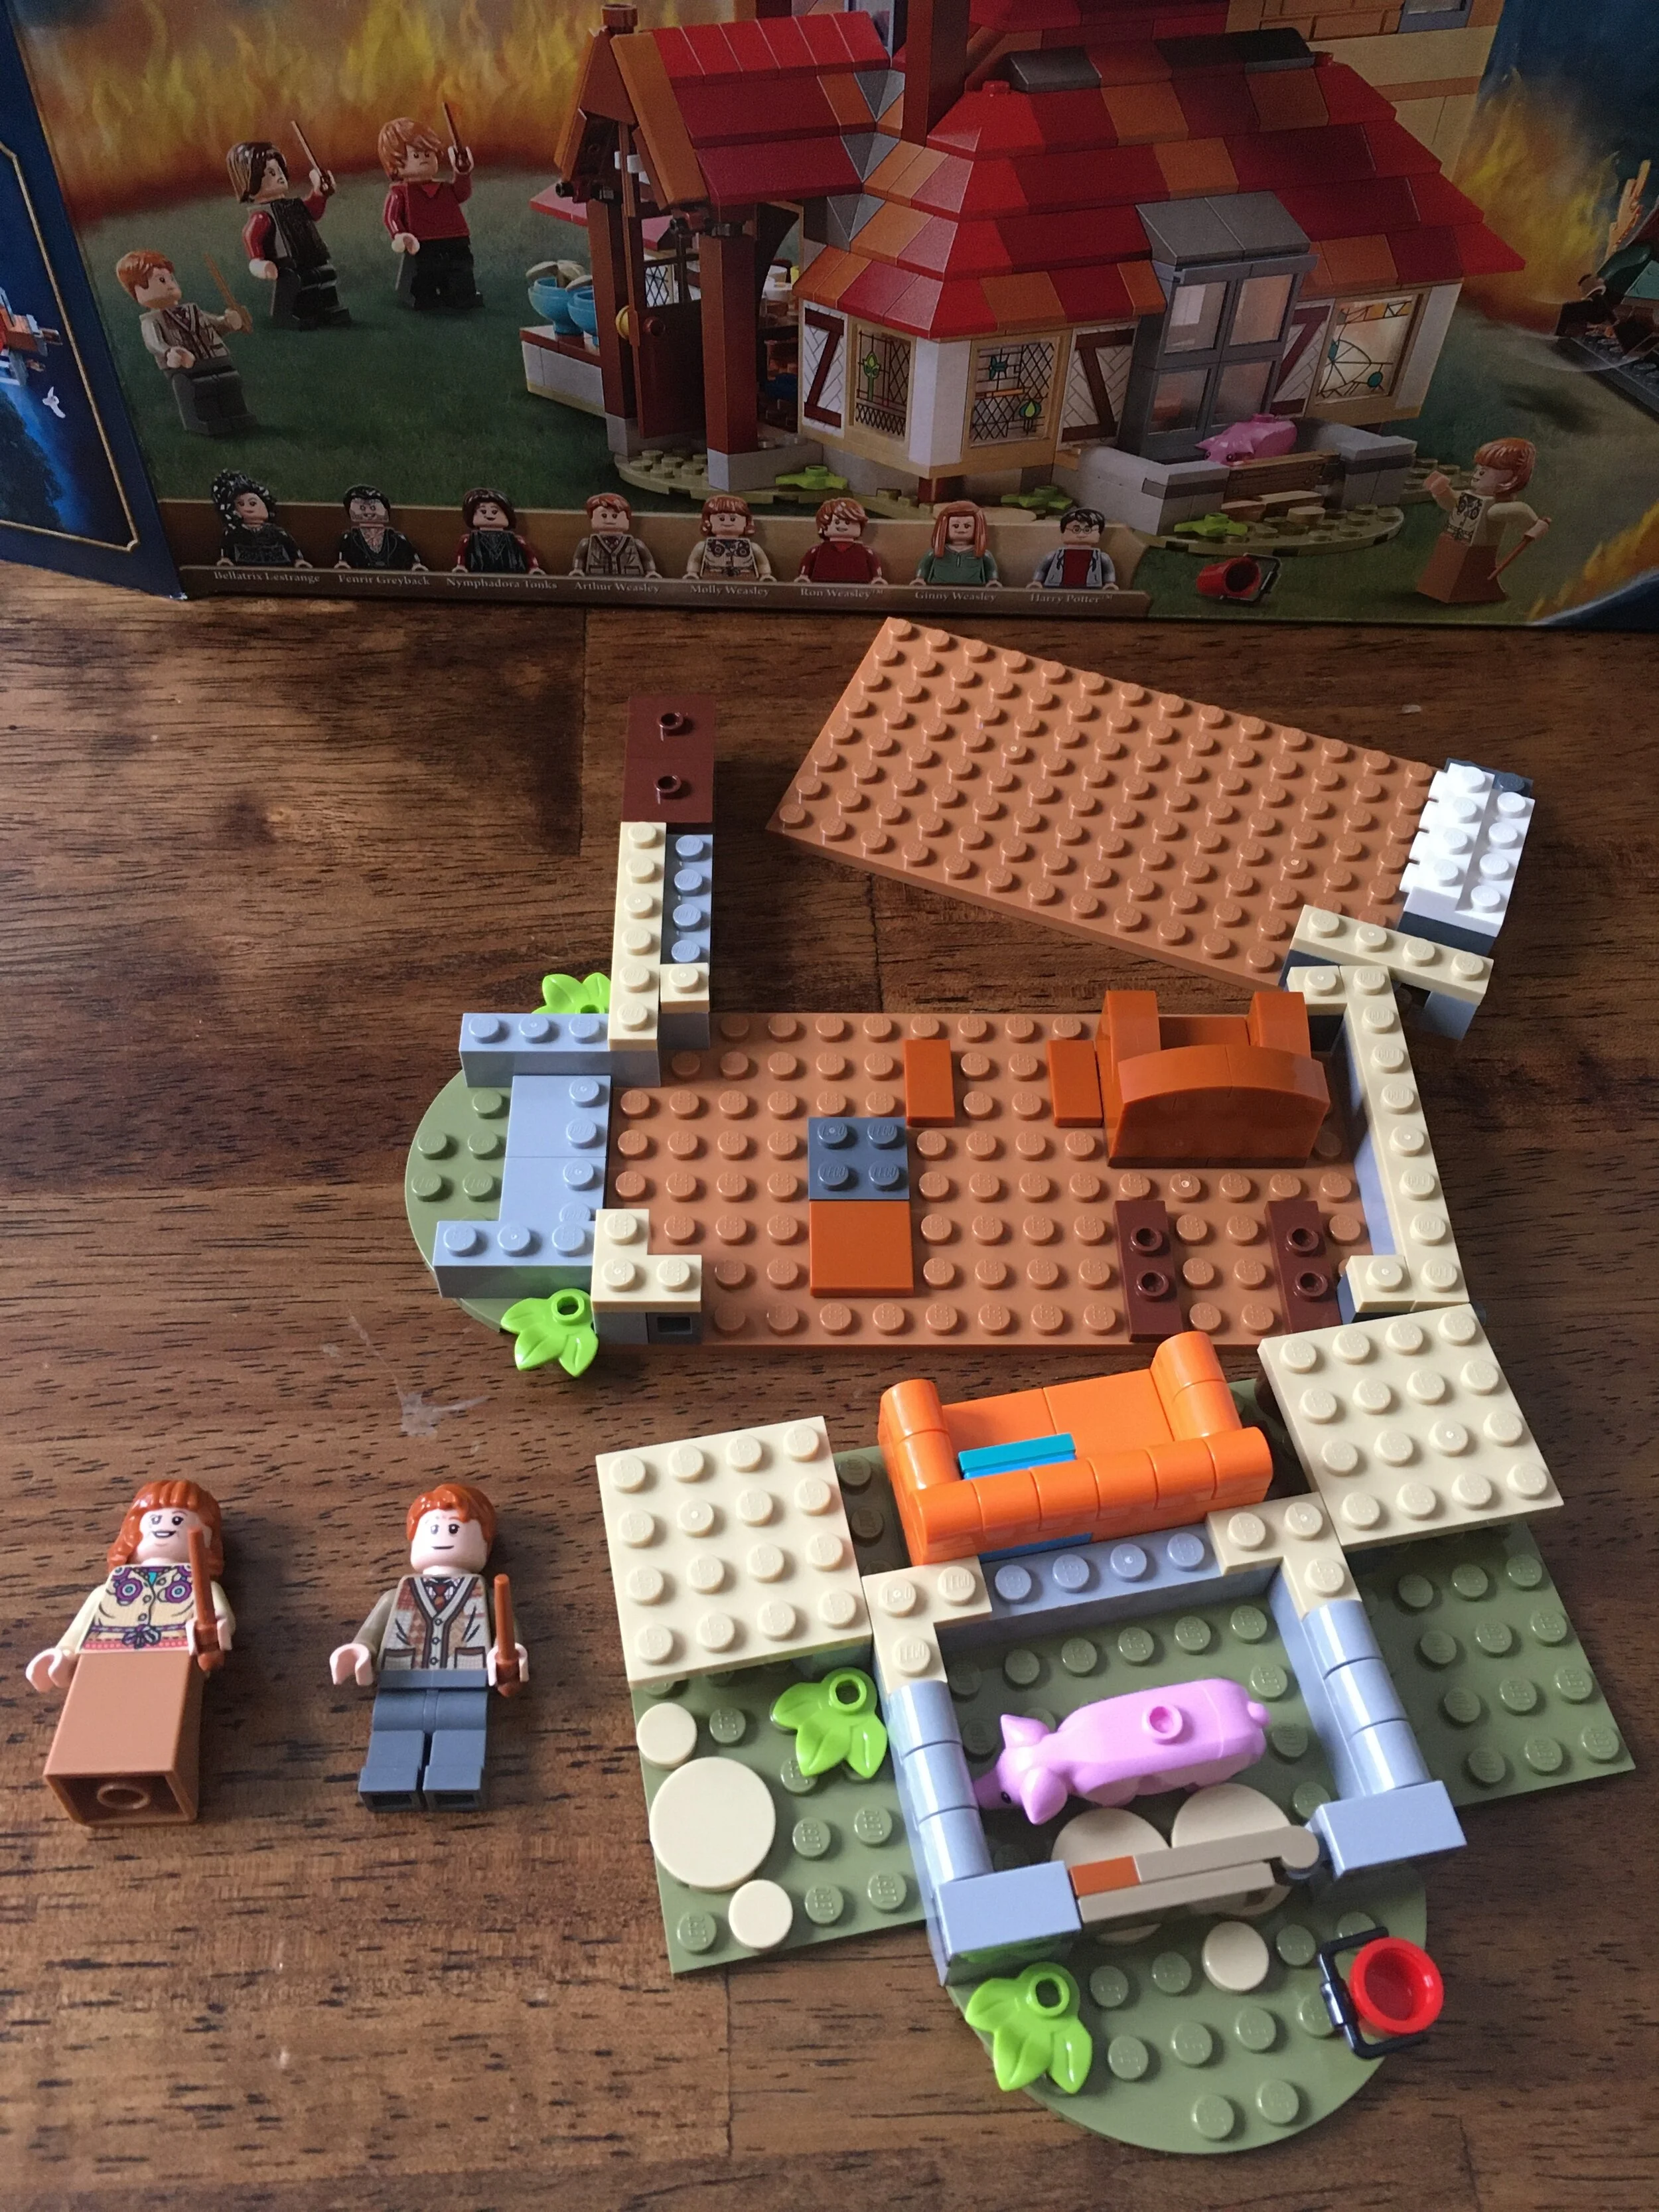
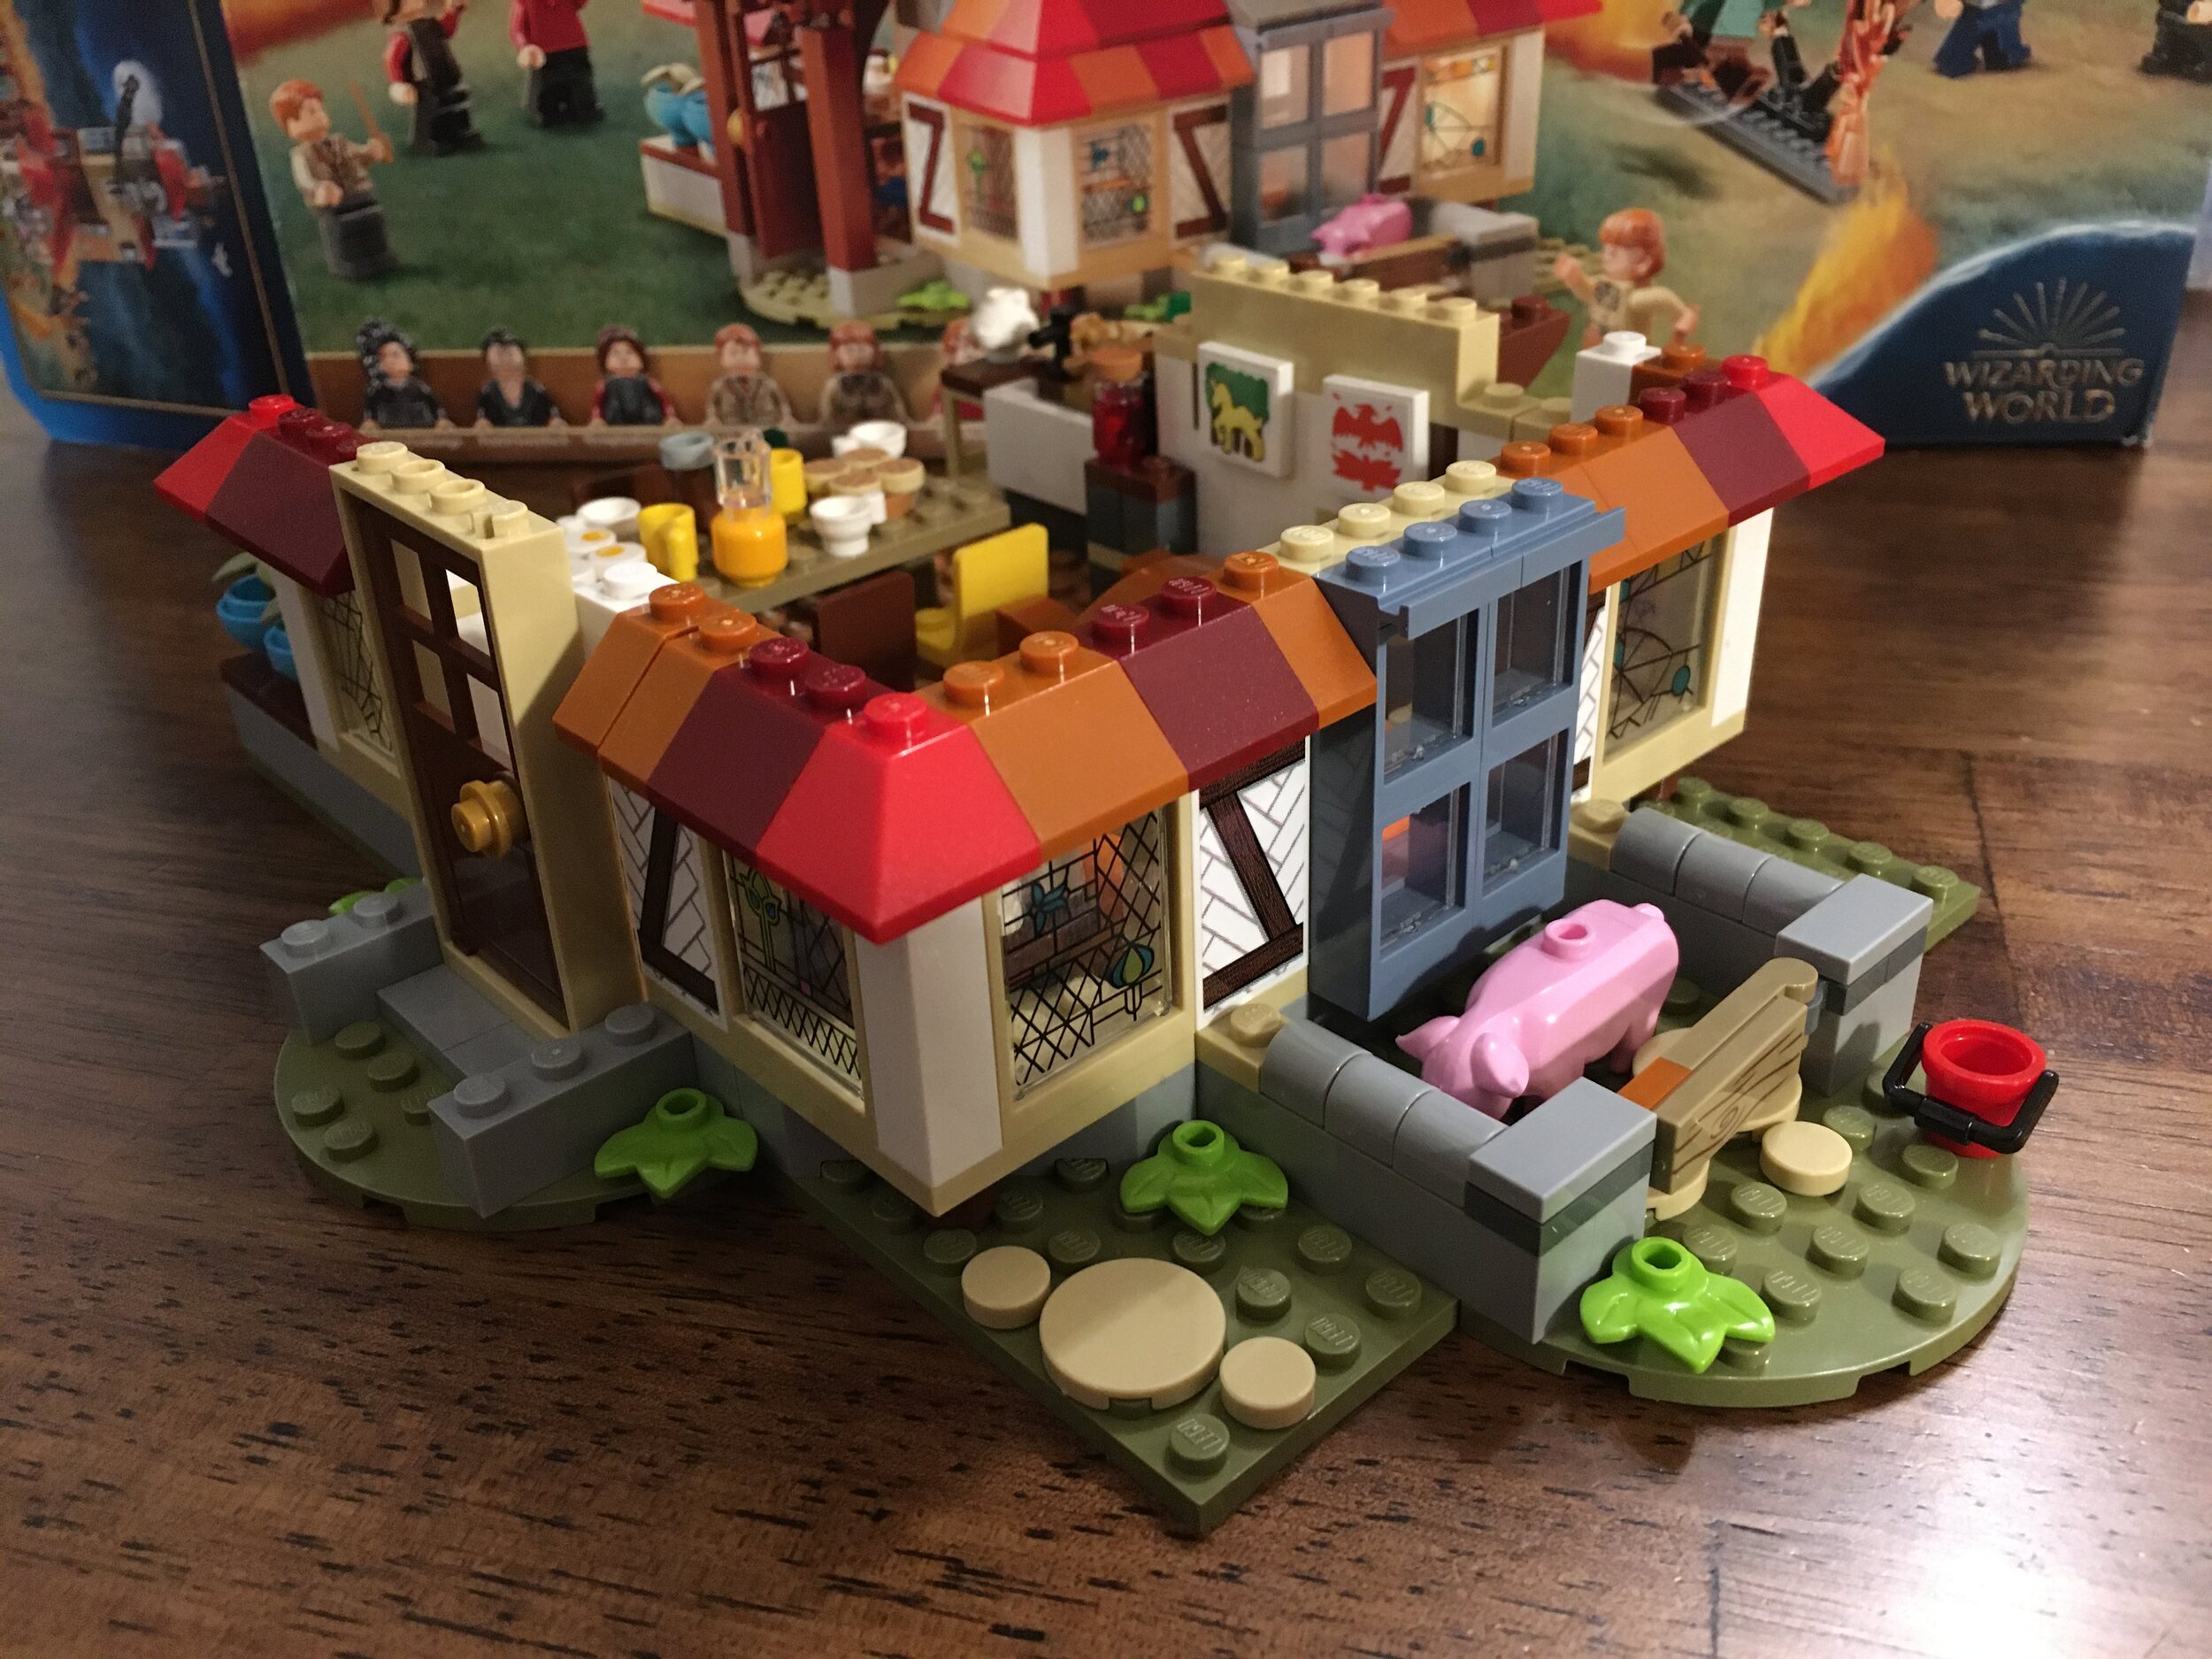
The first bag contains a piece separator and starts the base of the building. It is connected with hinges so you can get to the inside later on which works out nice for play features. You get a pig with this set… I didn’t even know they had pigs, but I won’t complain. You also get Arthur and Molly Weasley.

For the rest of the build, I decided not to include the minifigs by bag and I’ll bring them all up at the end.

75980_build_1.JPG

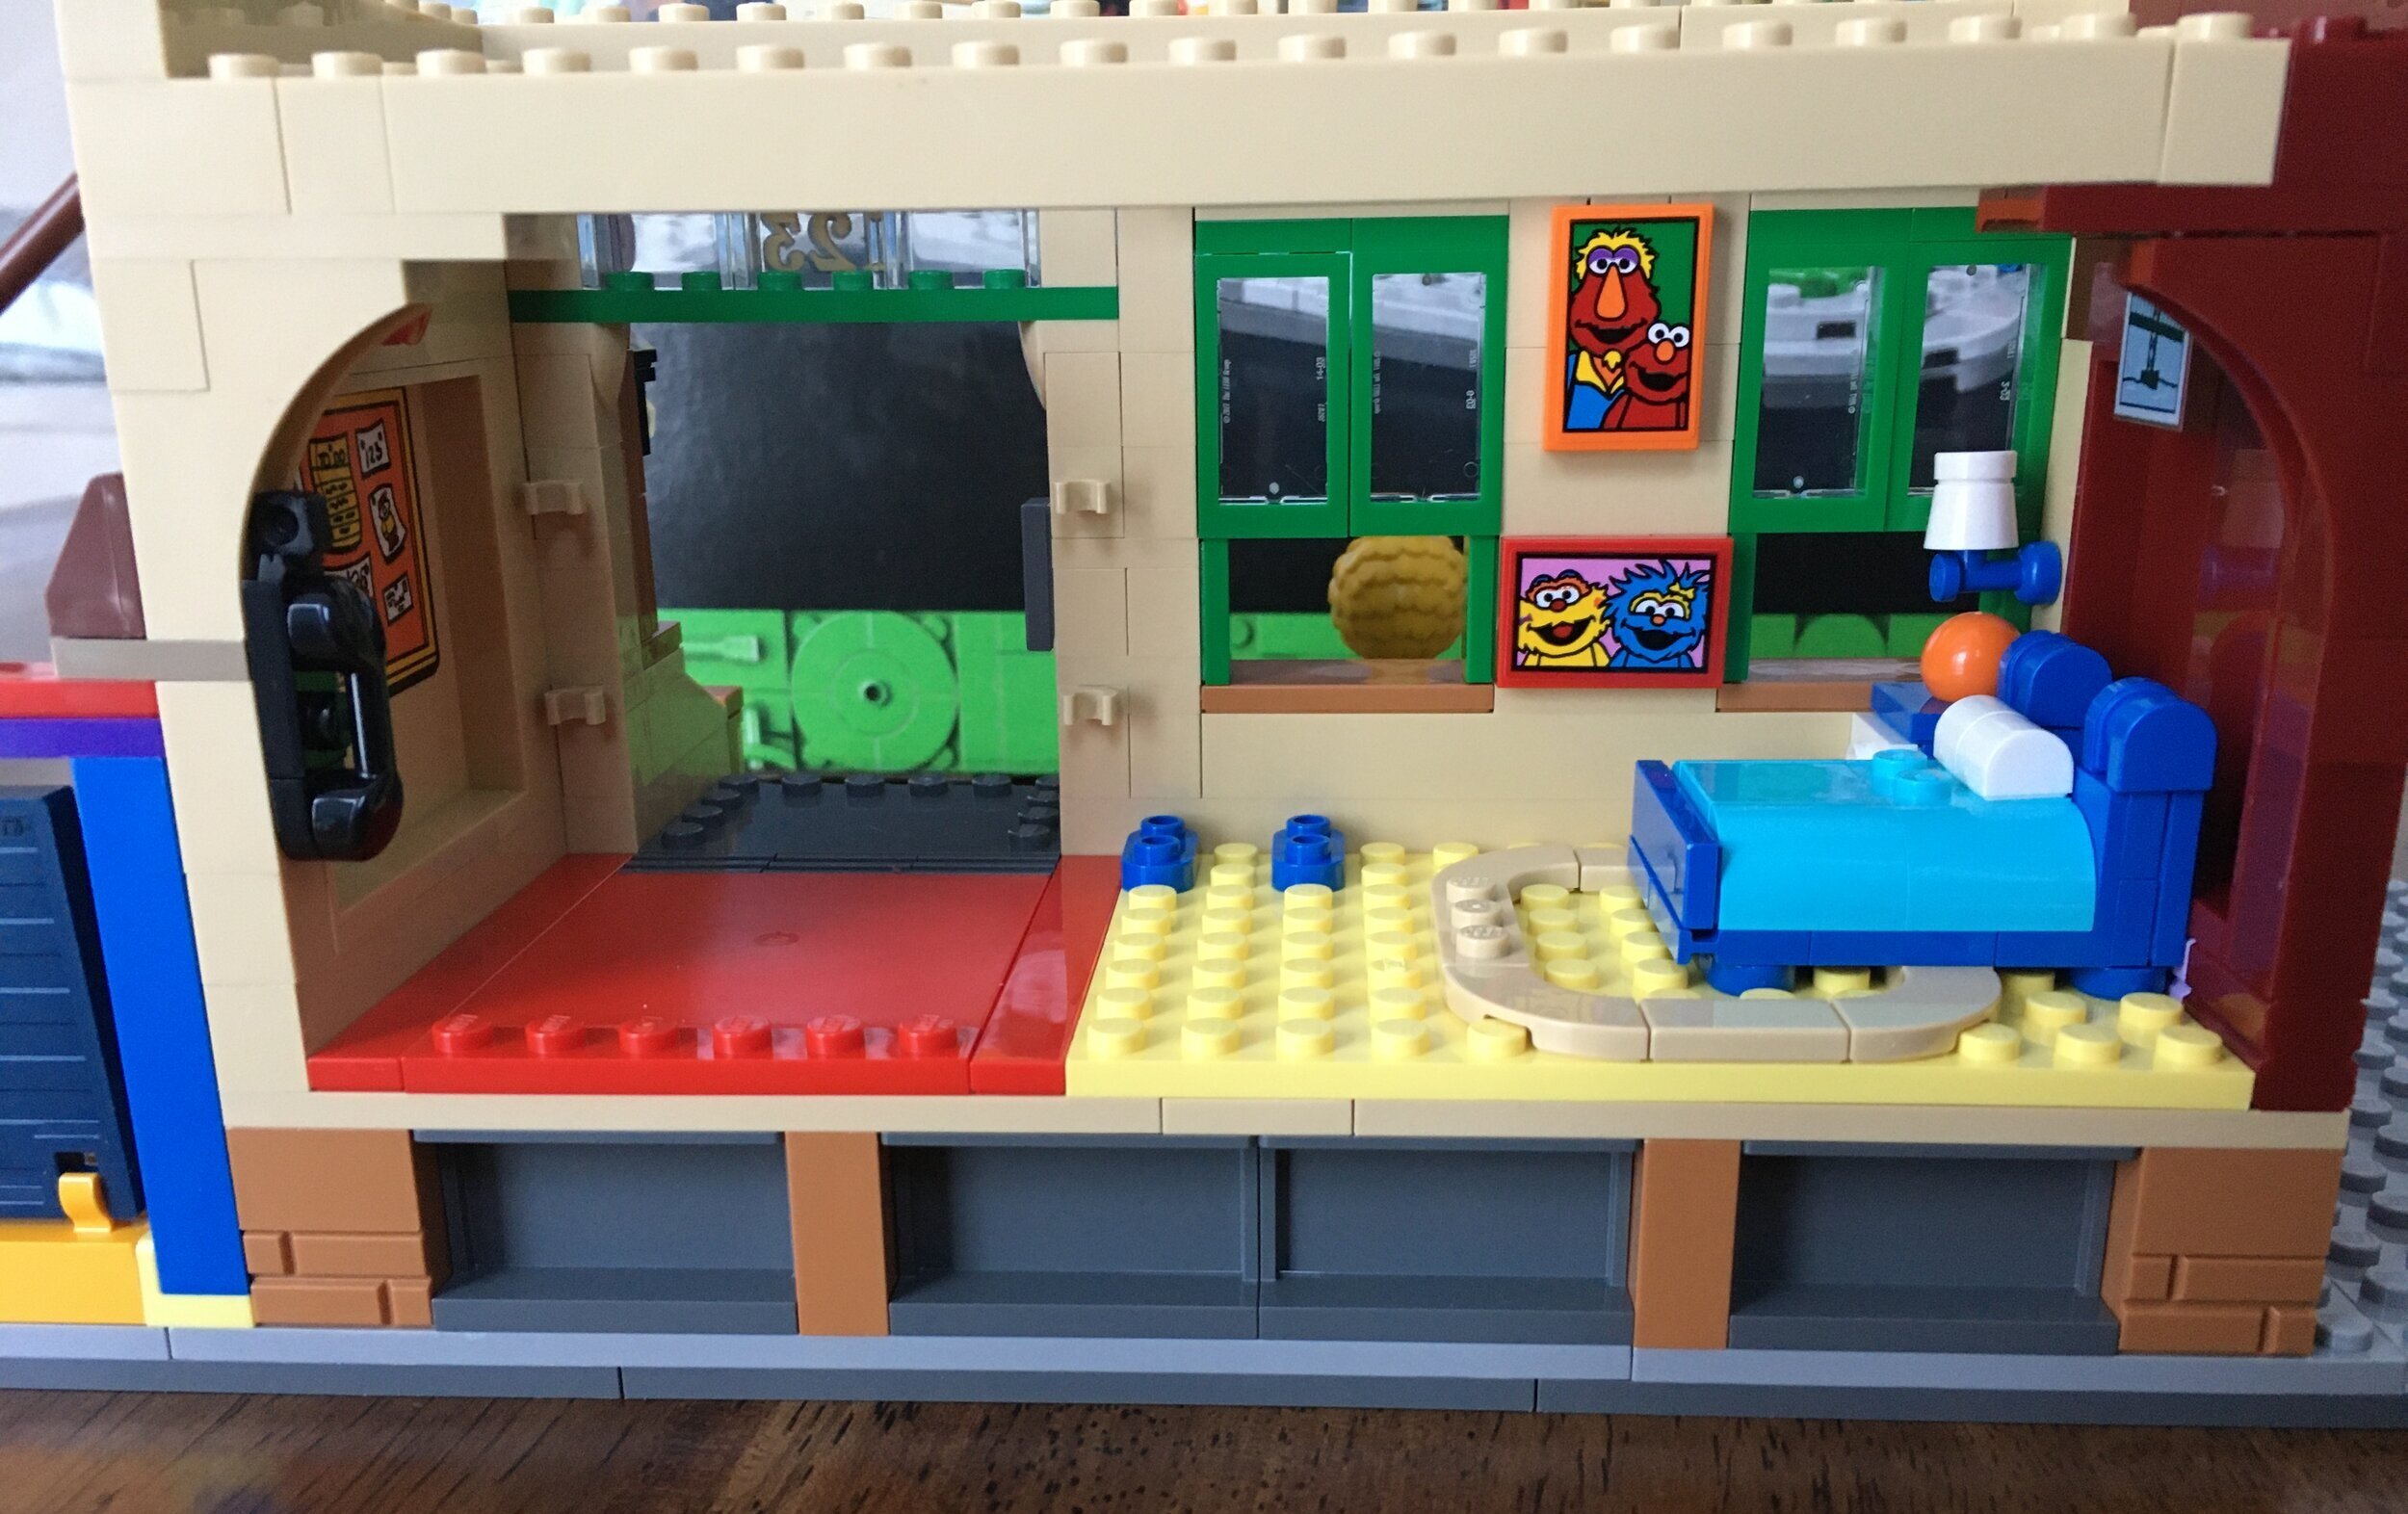
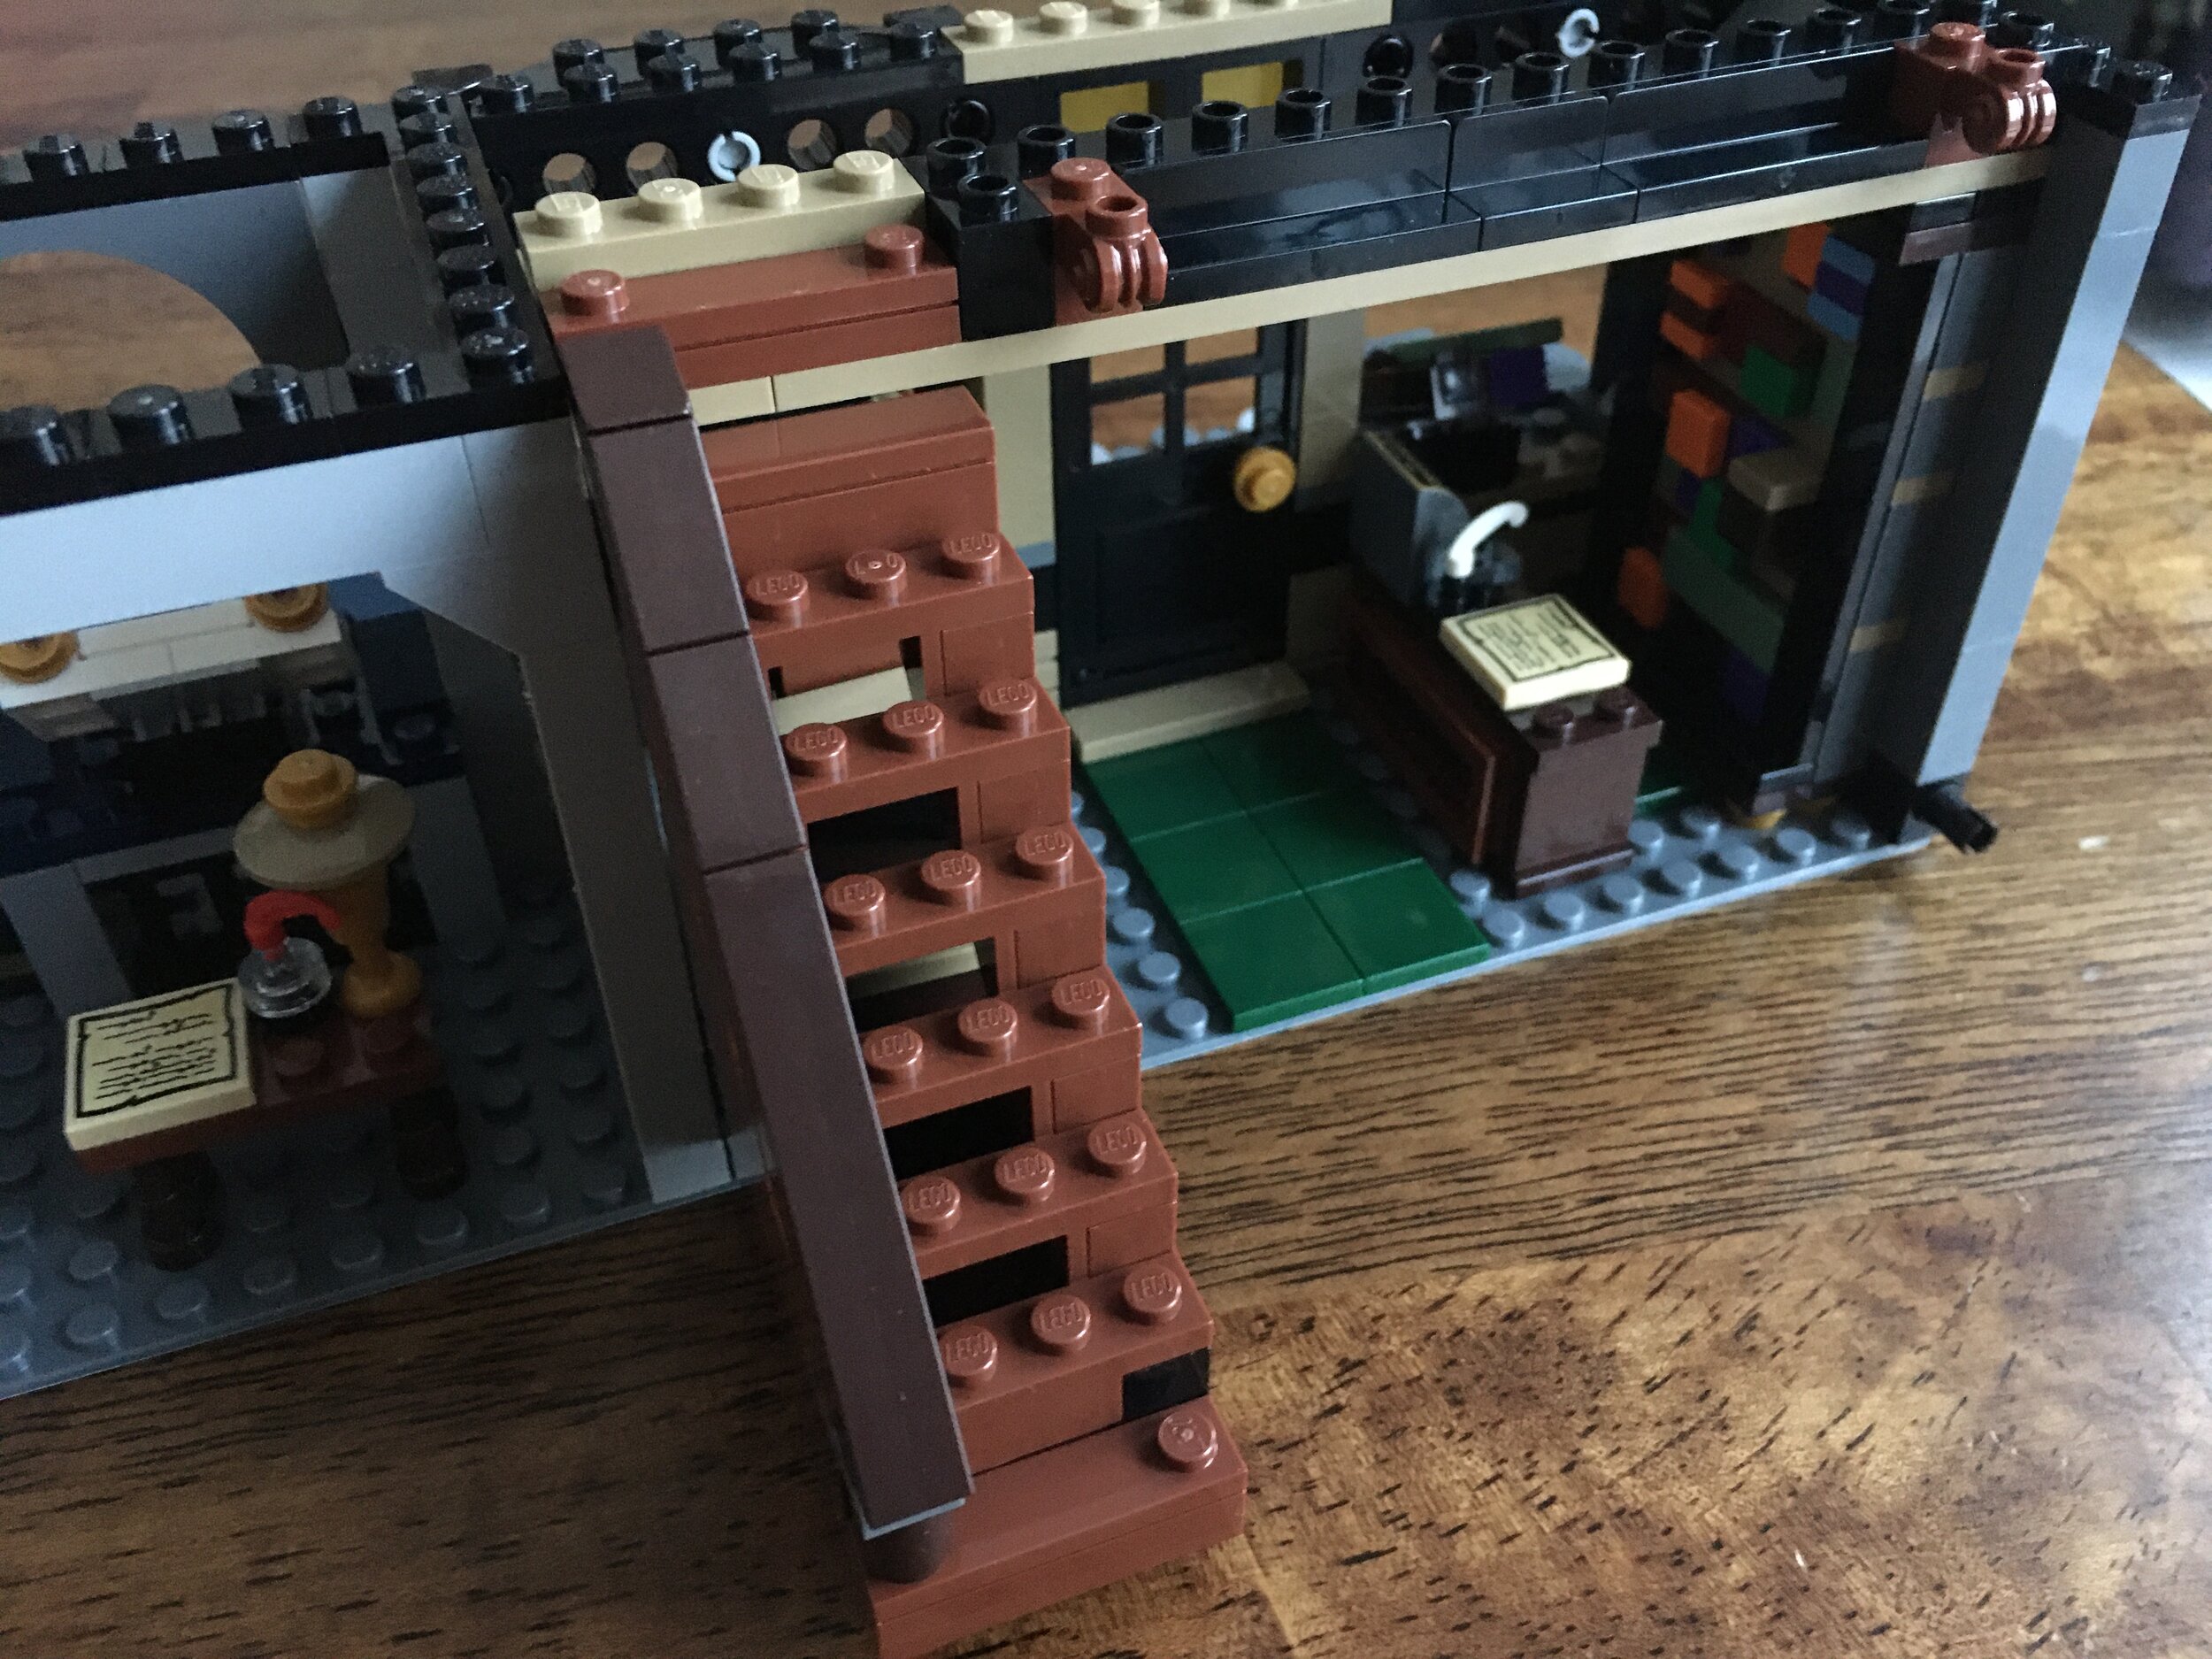
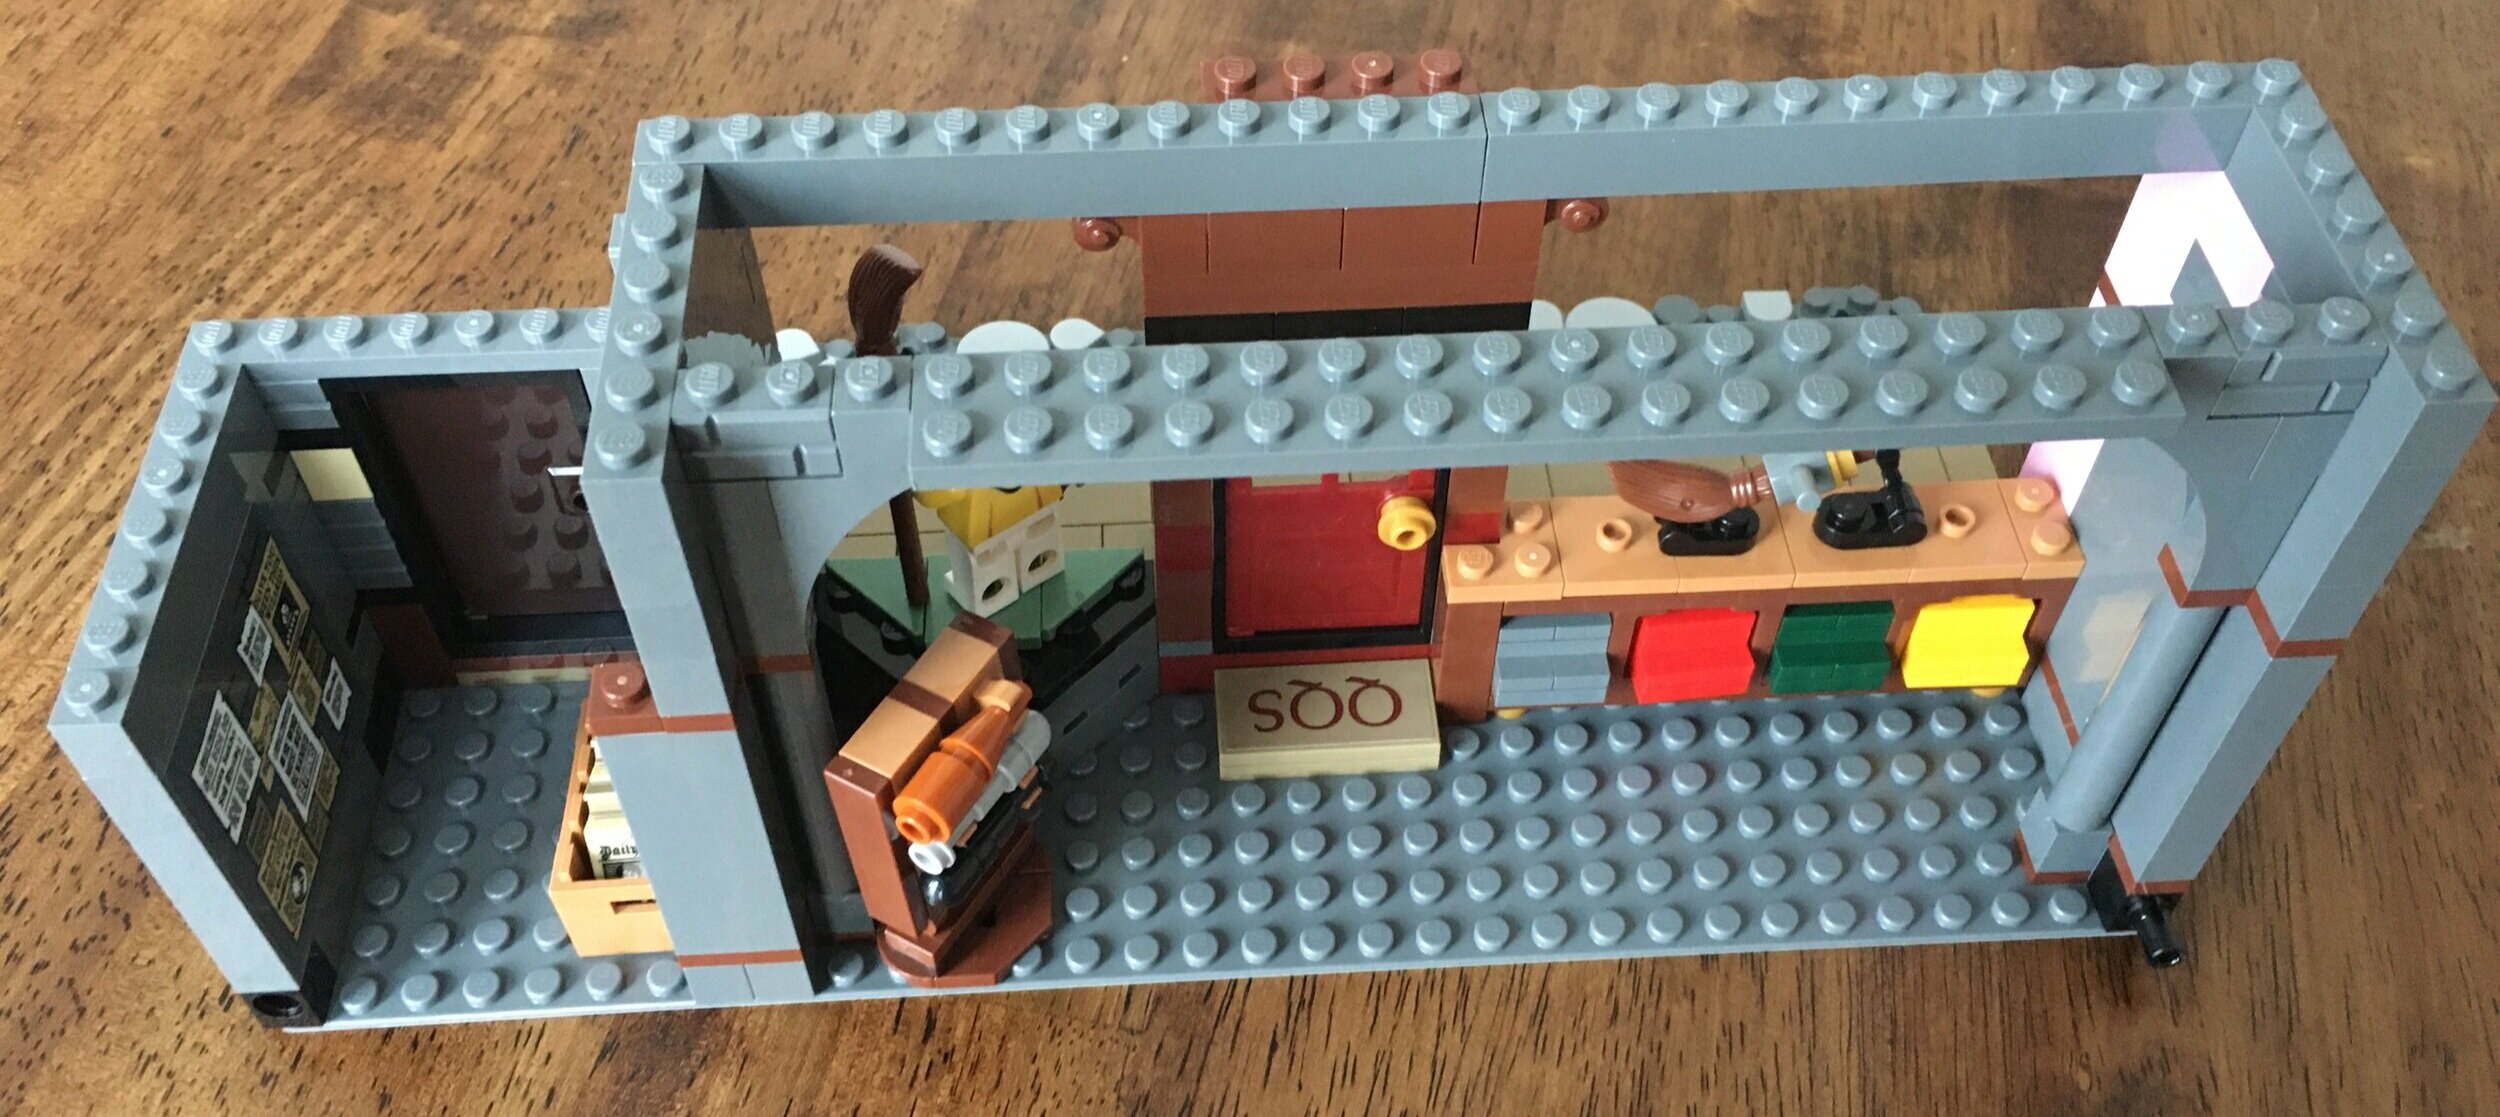
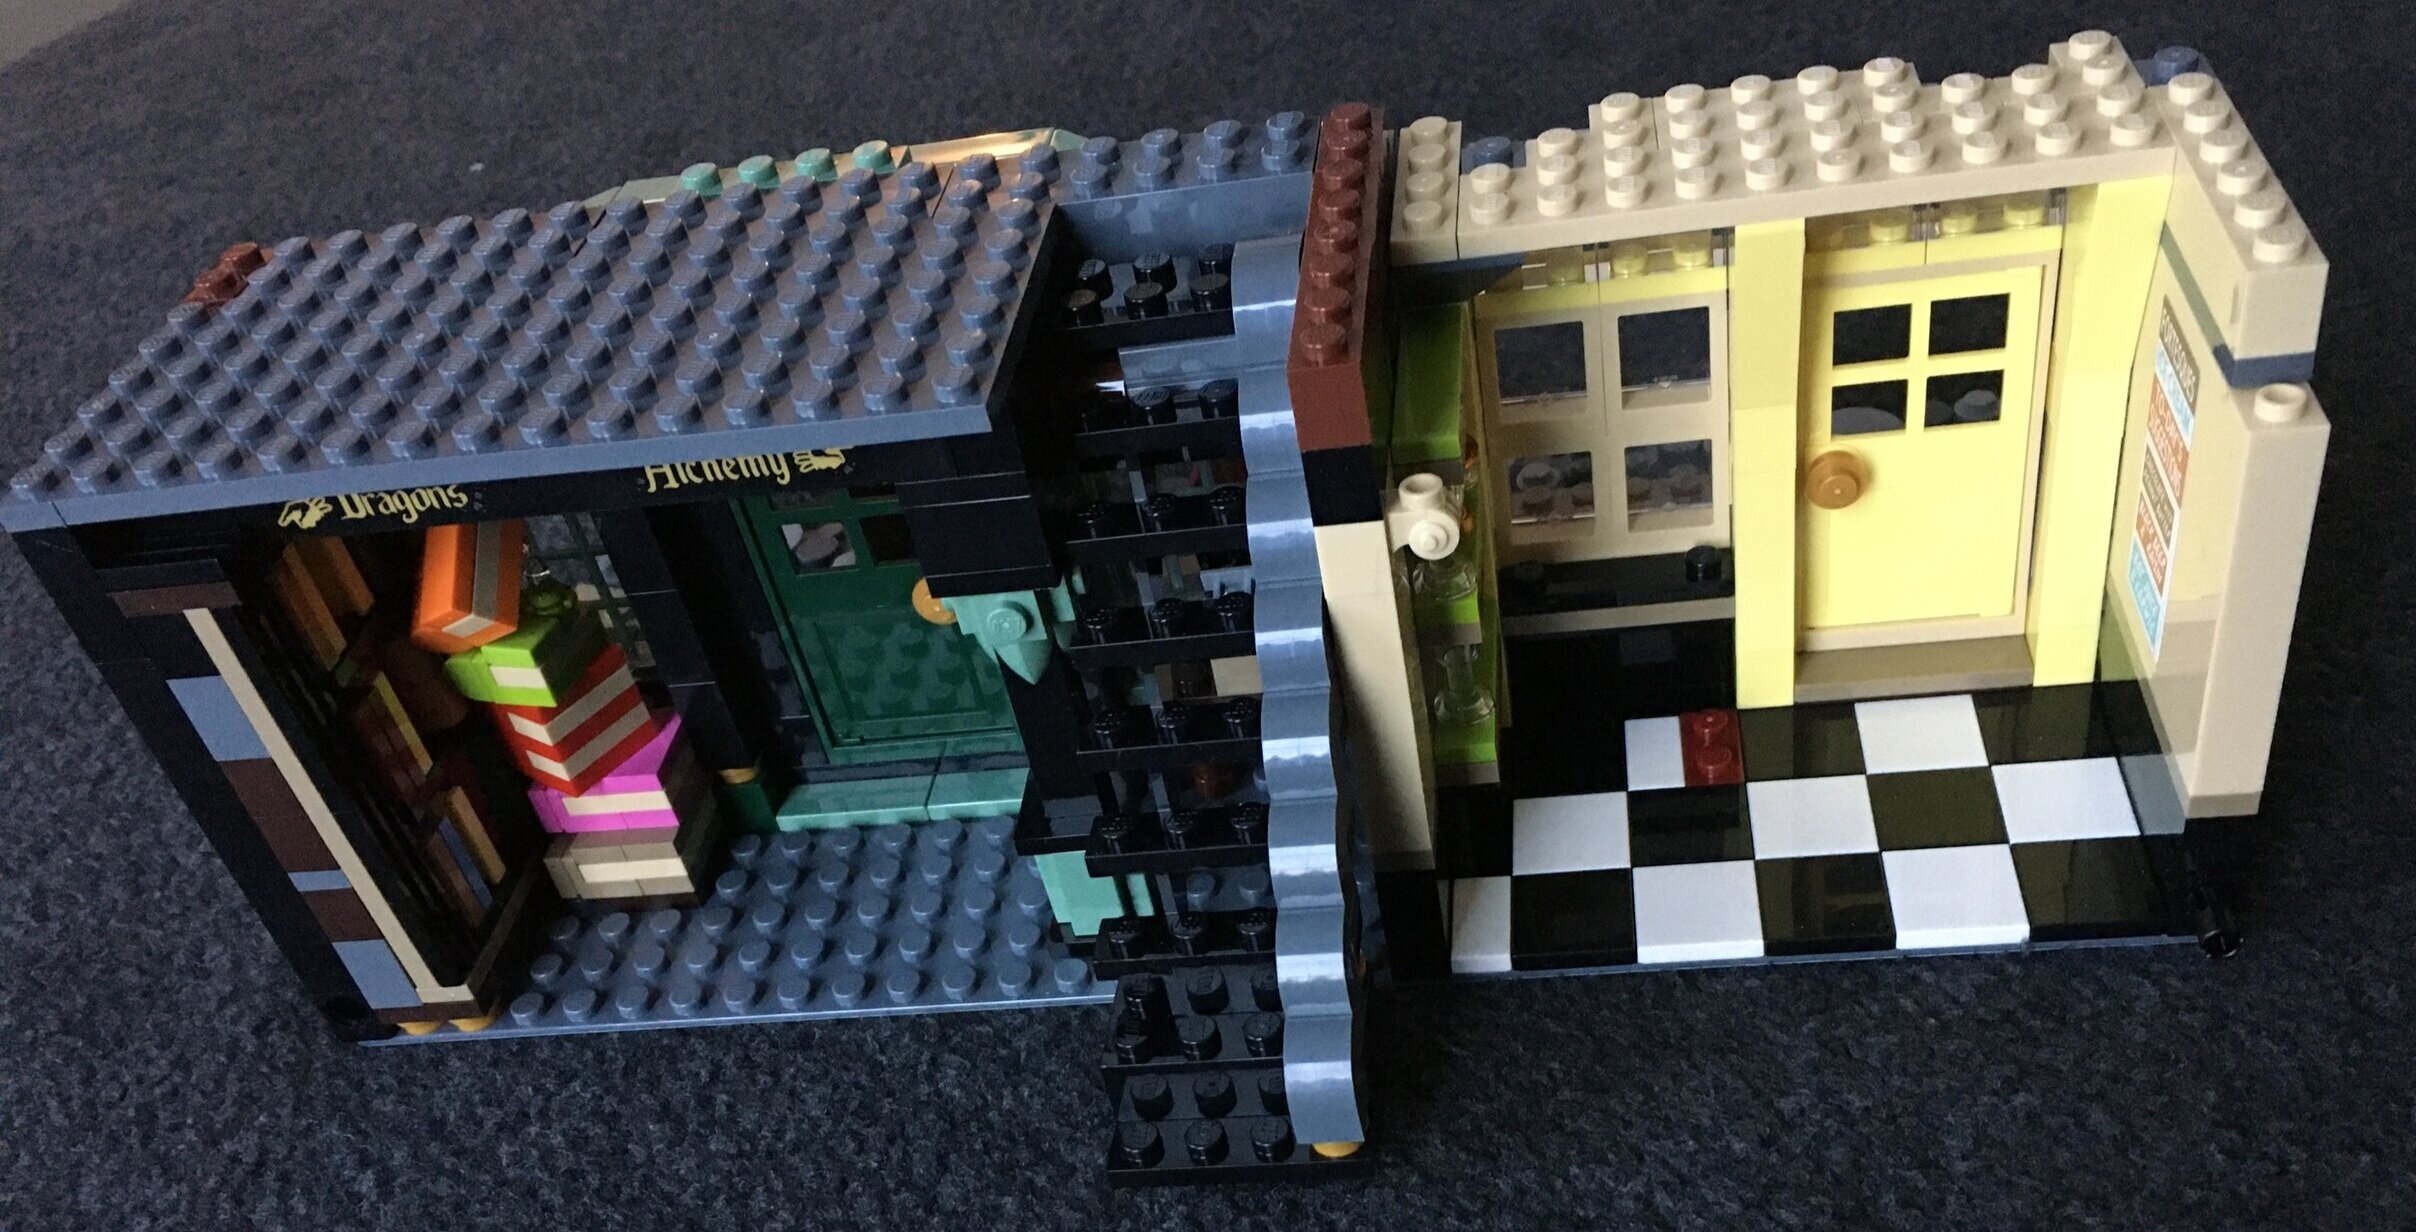
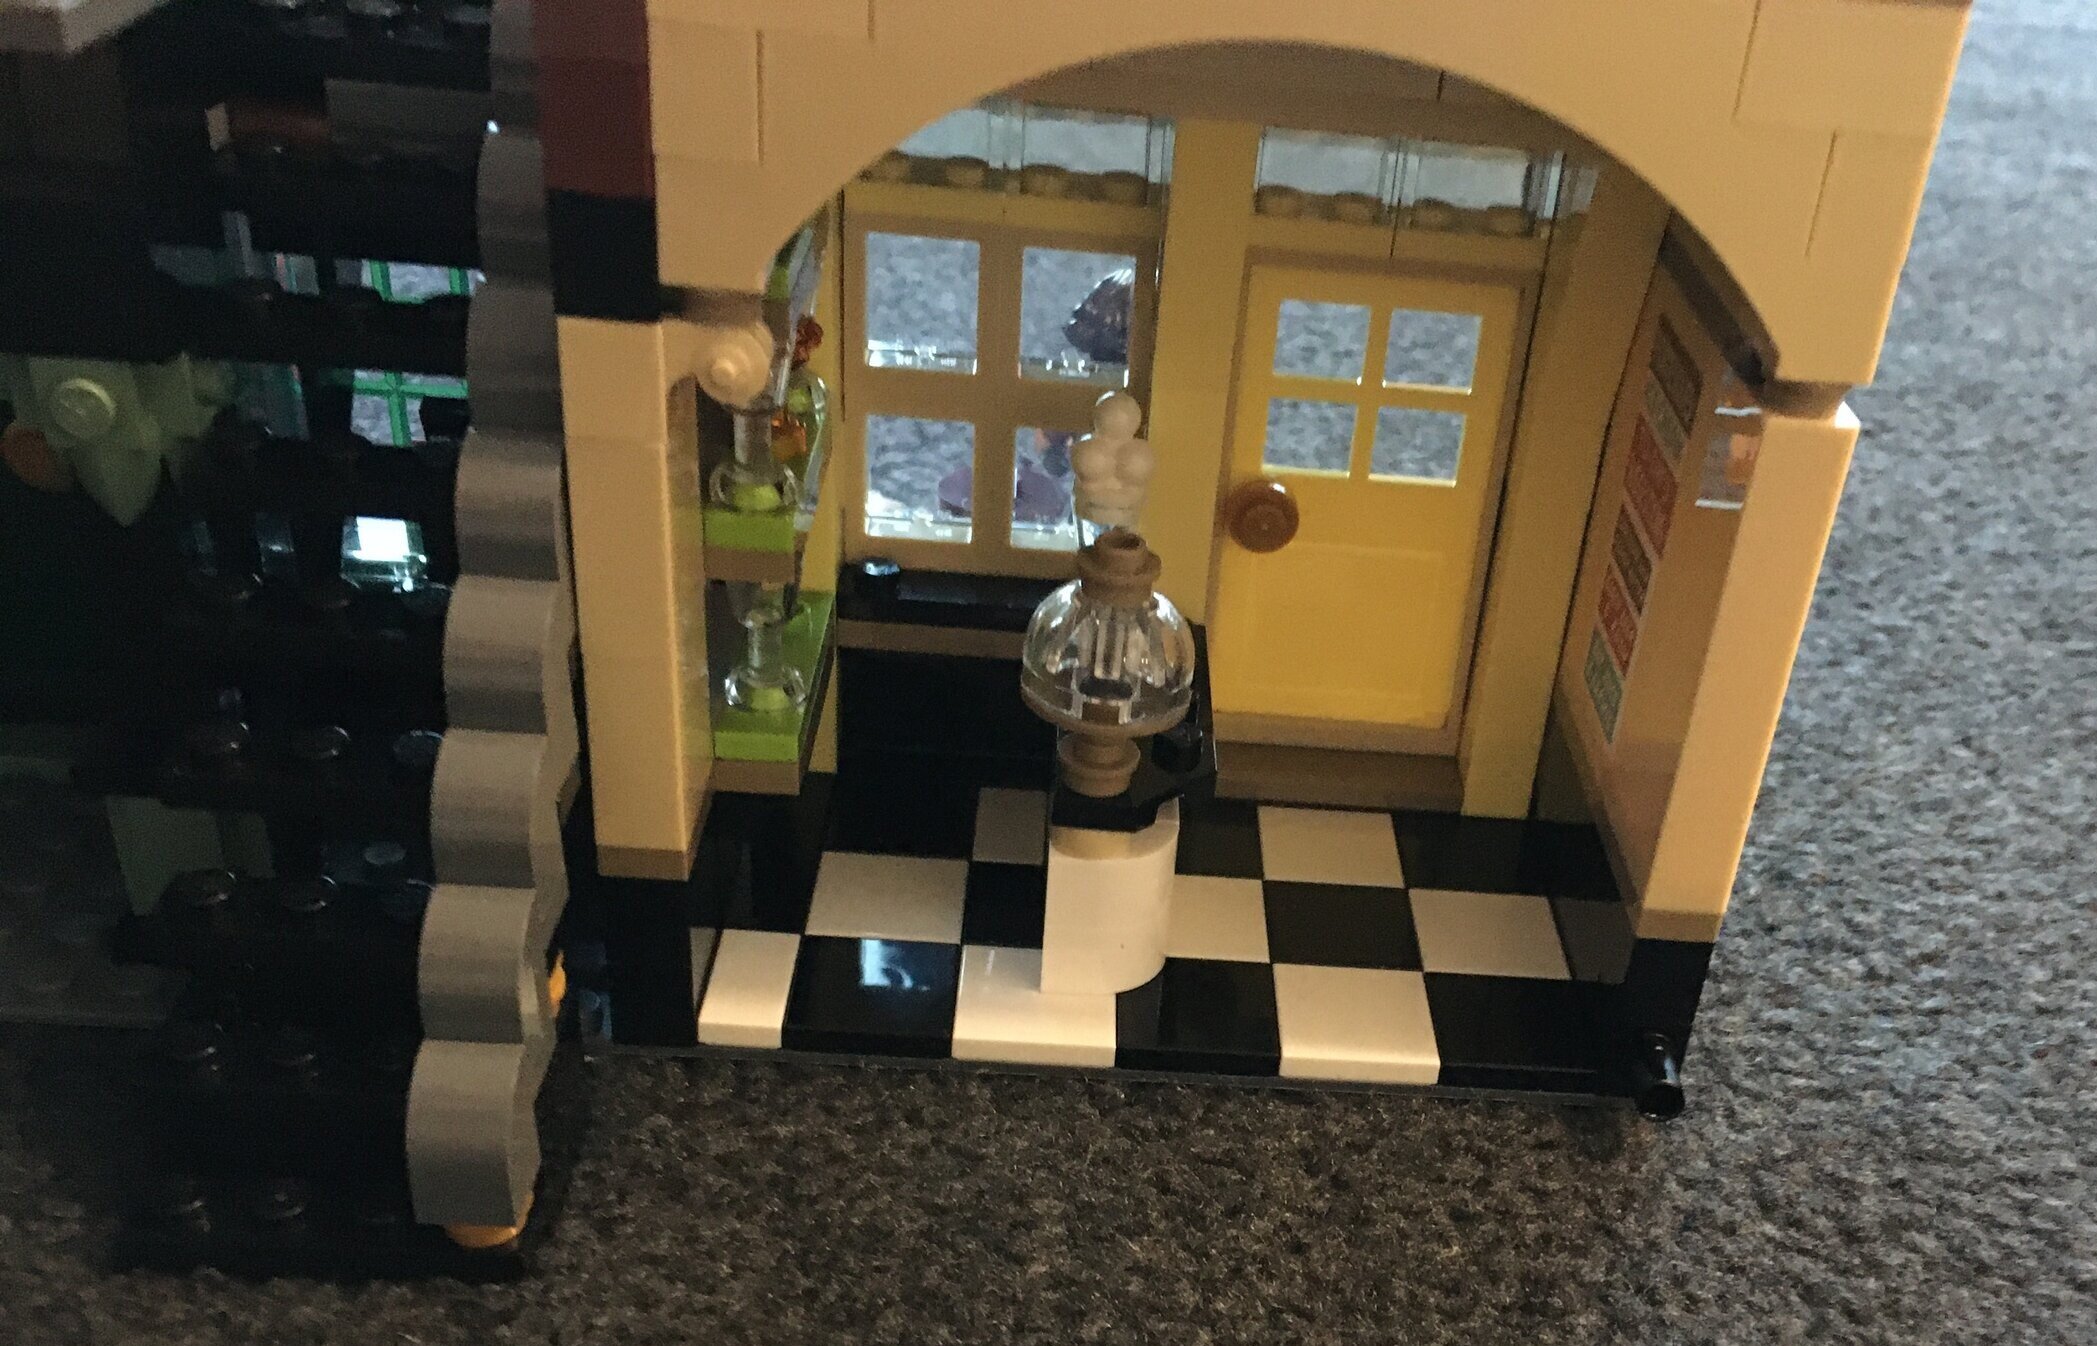
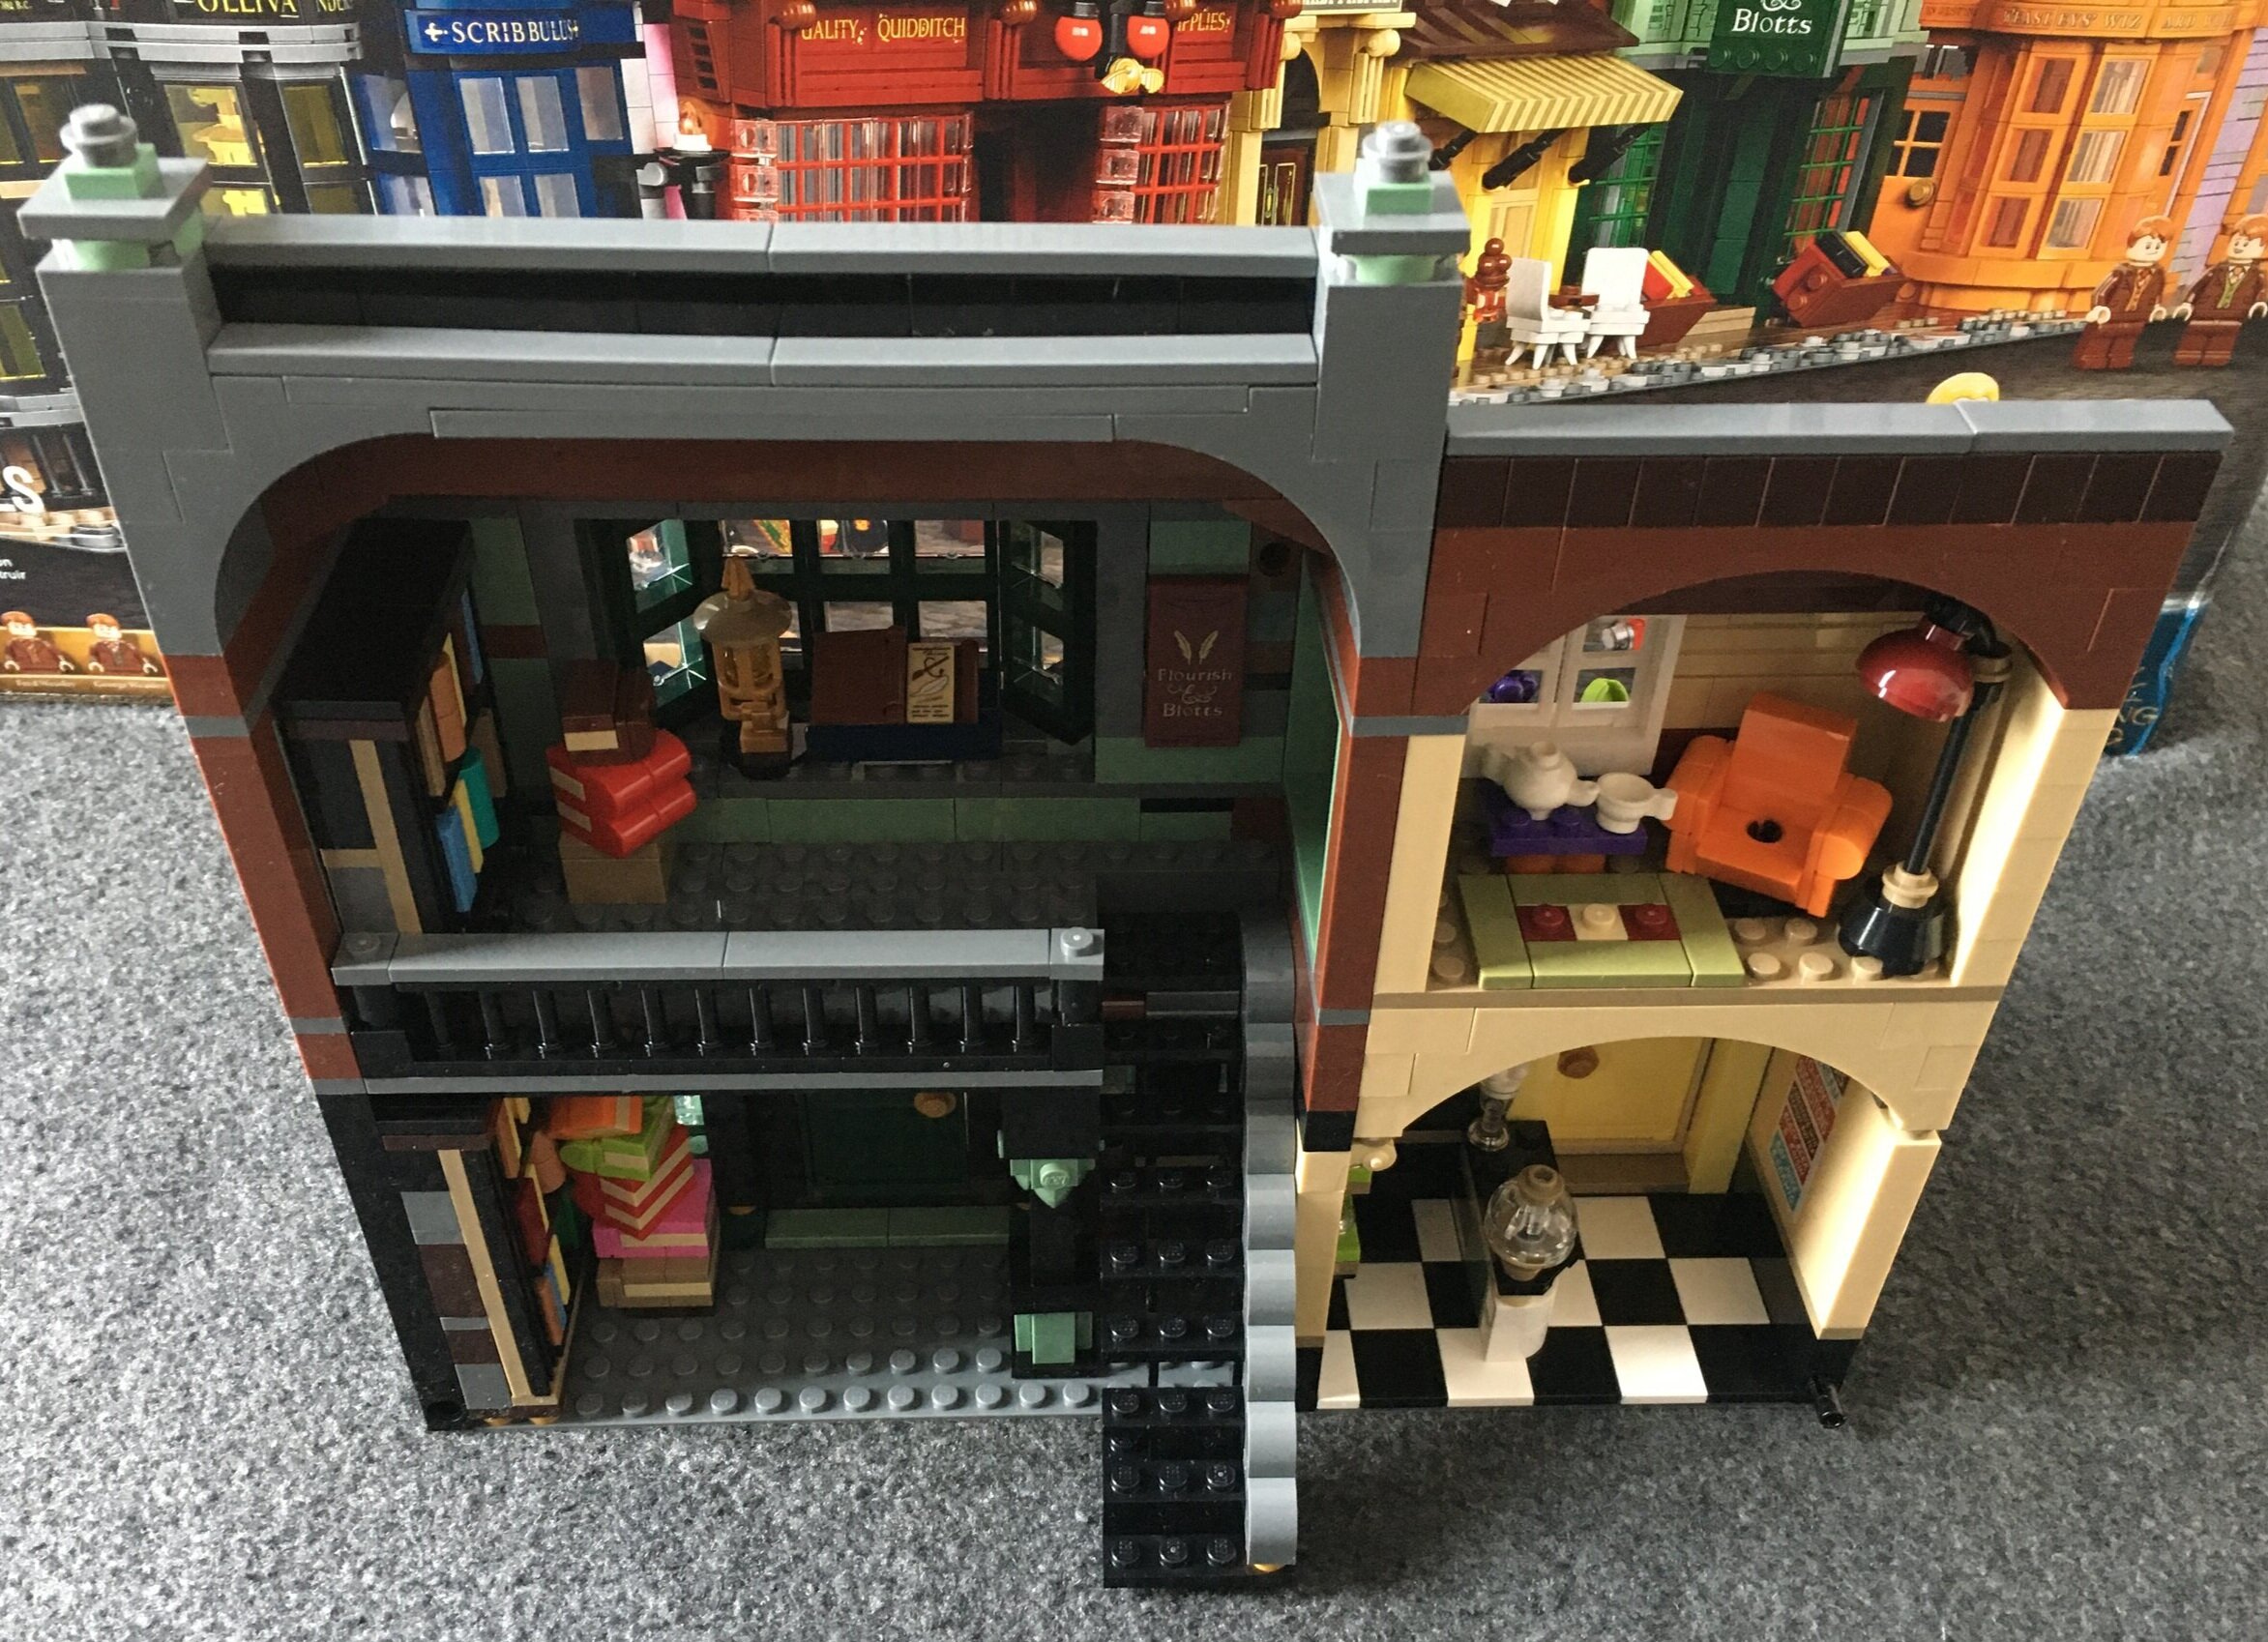
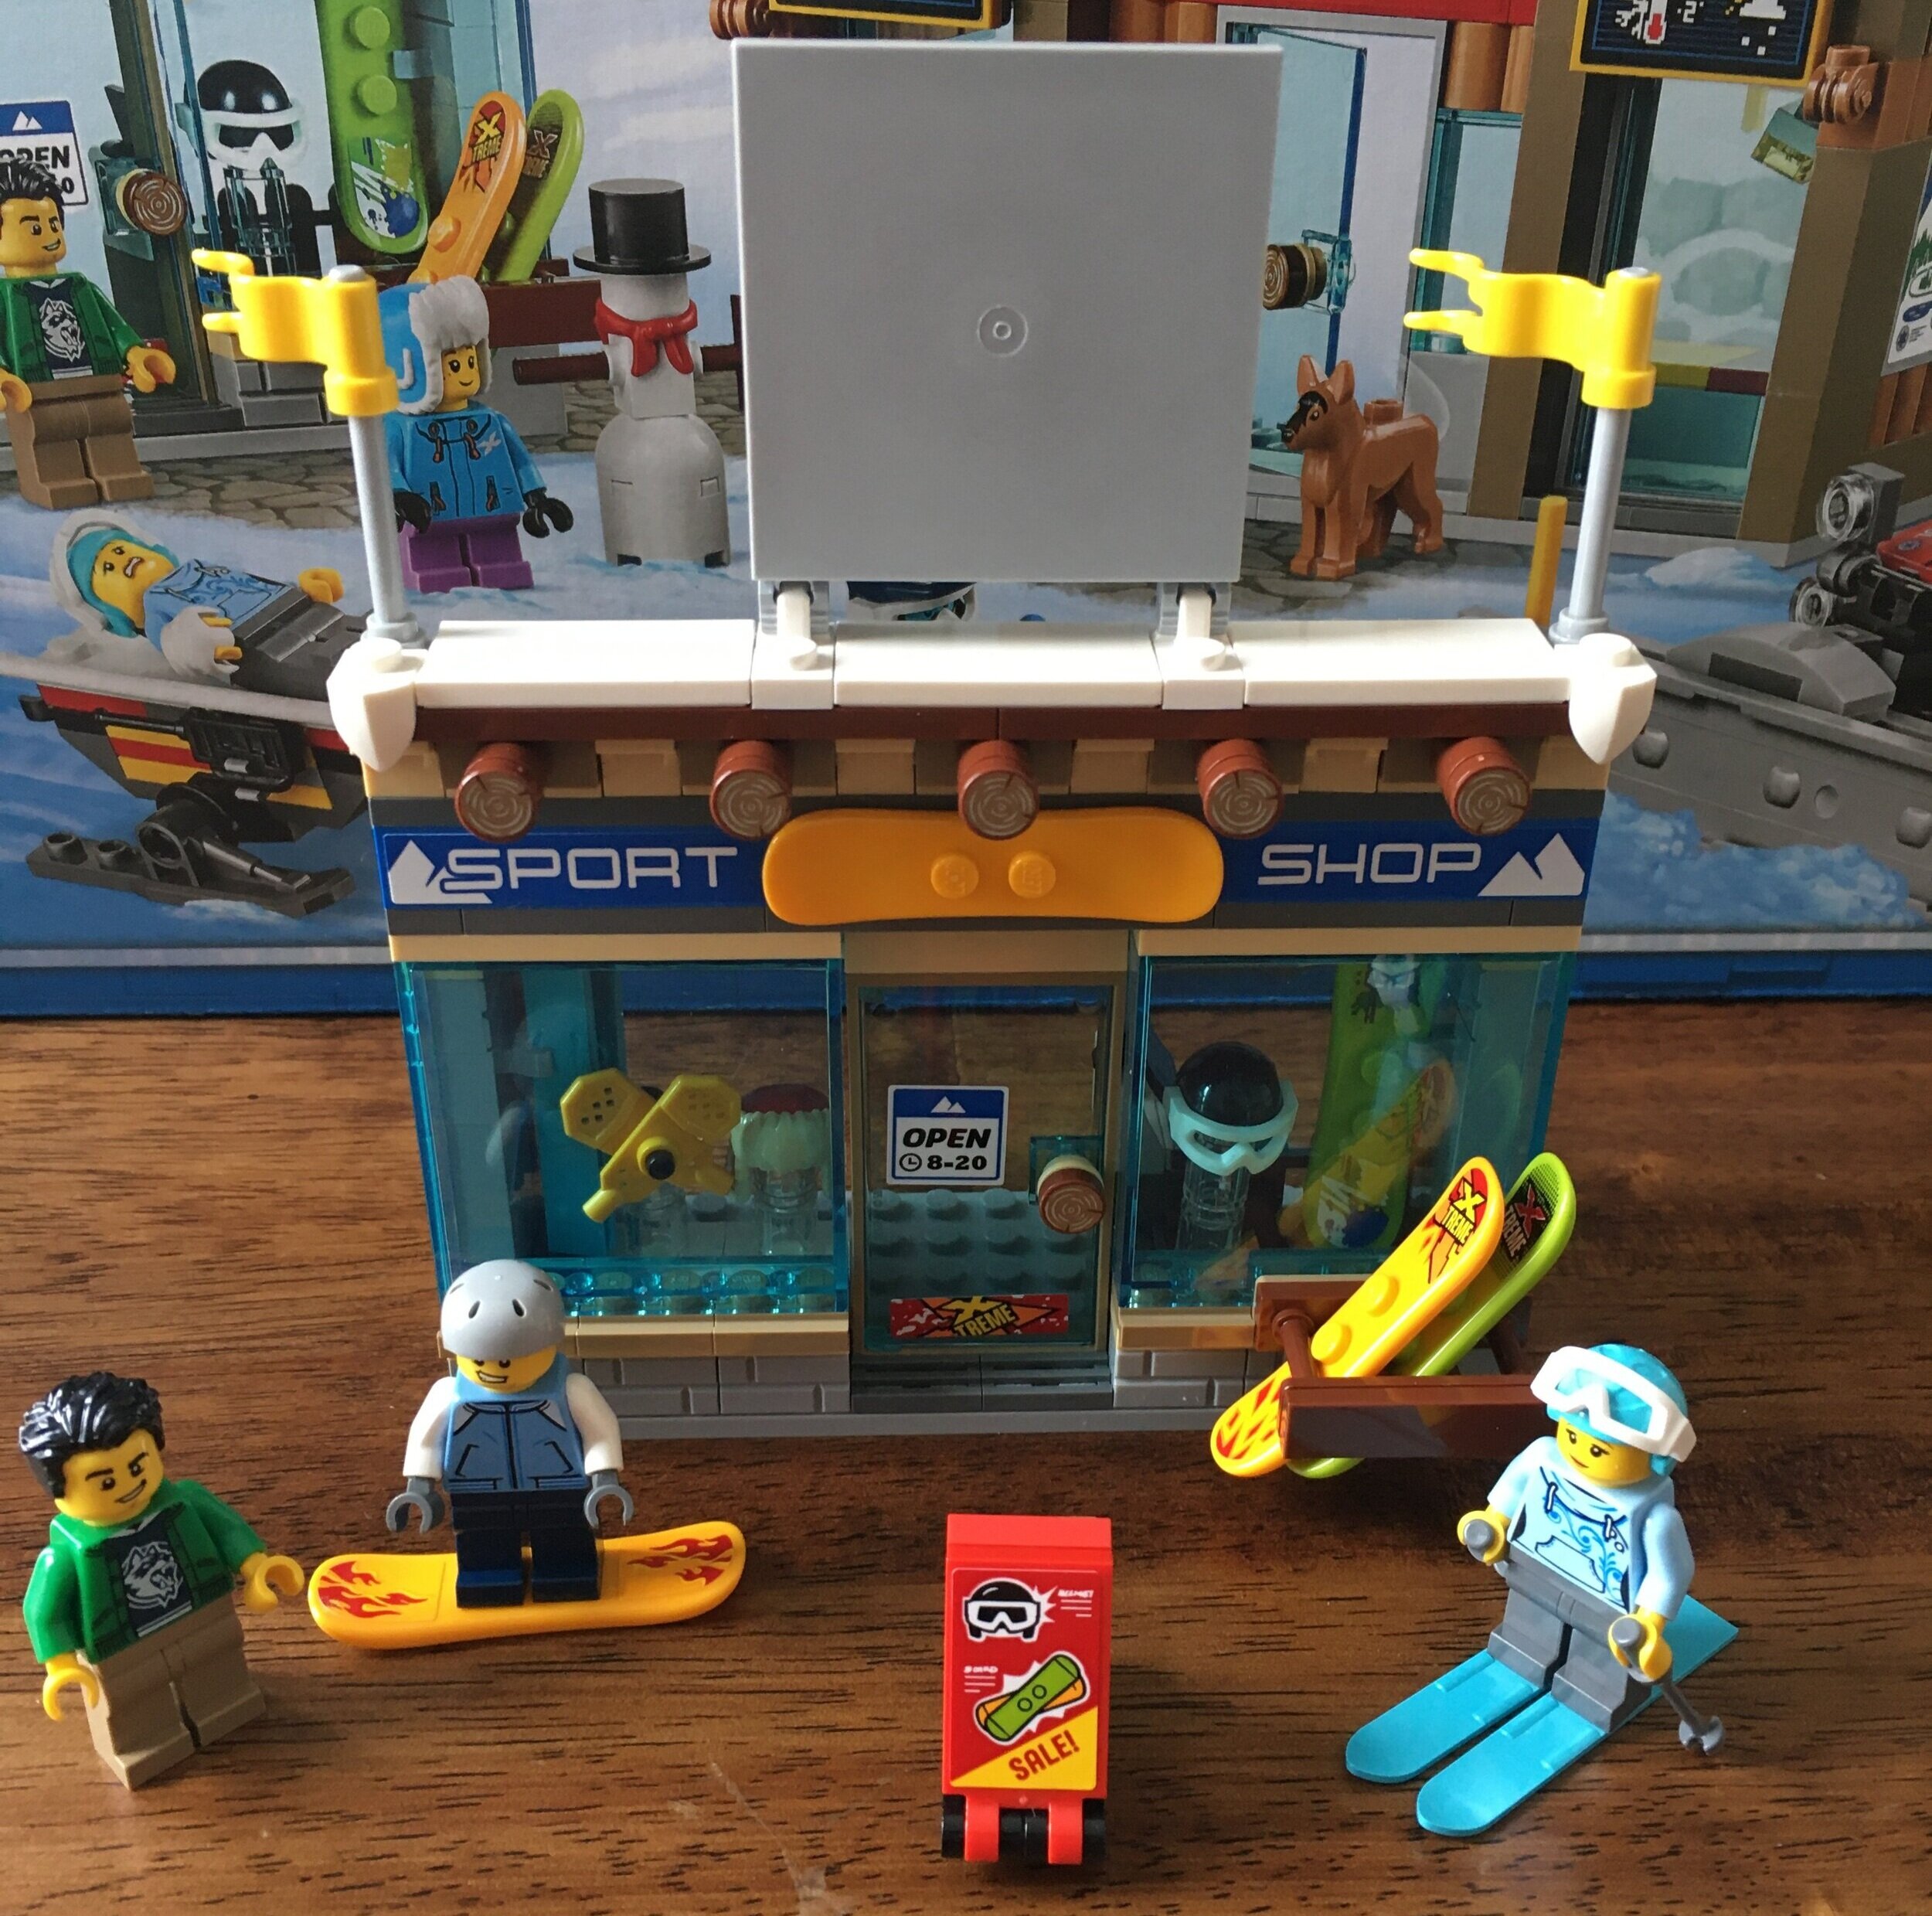
The second bag of parts builds out the living space. You get a table loaded up with a breakfast of eggs and waffles. There’s a small little sink area as well. The living space has a couch, a chair, and various decorations to include lamps, candles, and plants. Outside, you can see some of the clear stickers which actually look pretty decent. I managed to put them on without getting any air bubbles in them so that was good.

75980_build2a.jpg
75980_build2b.JPG

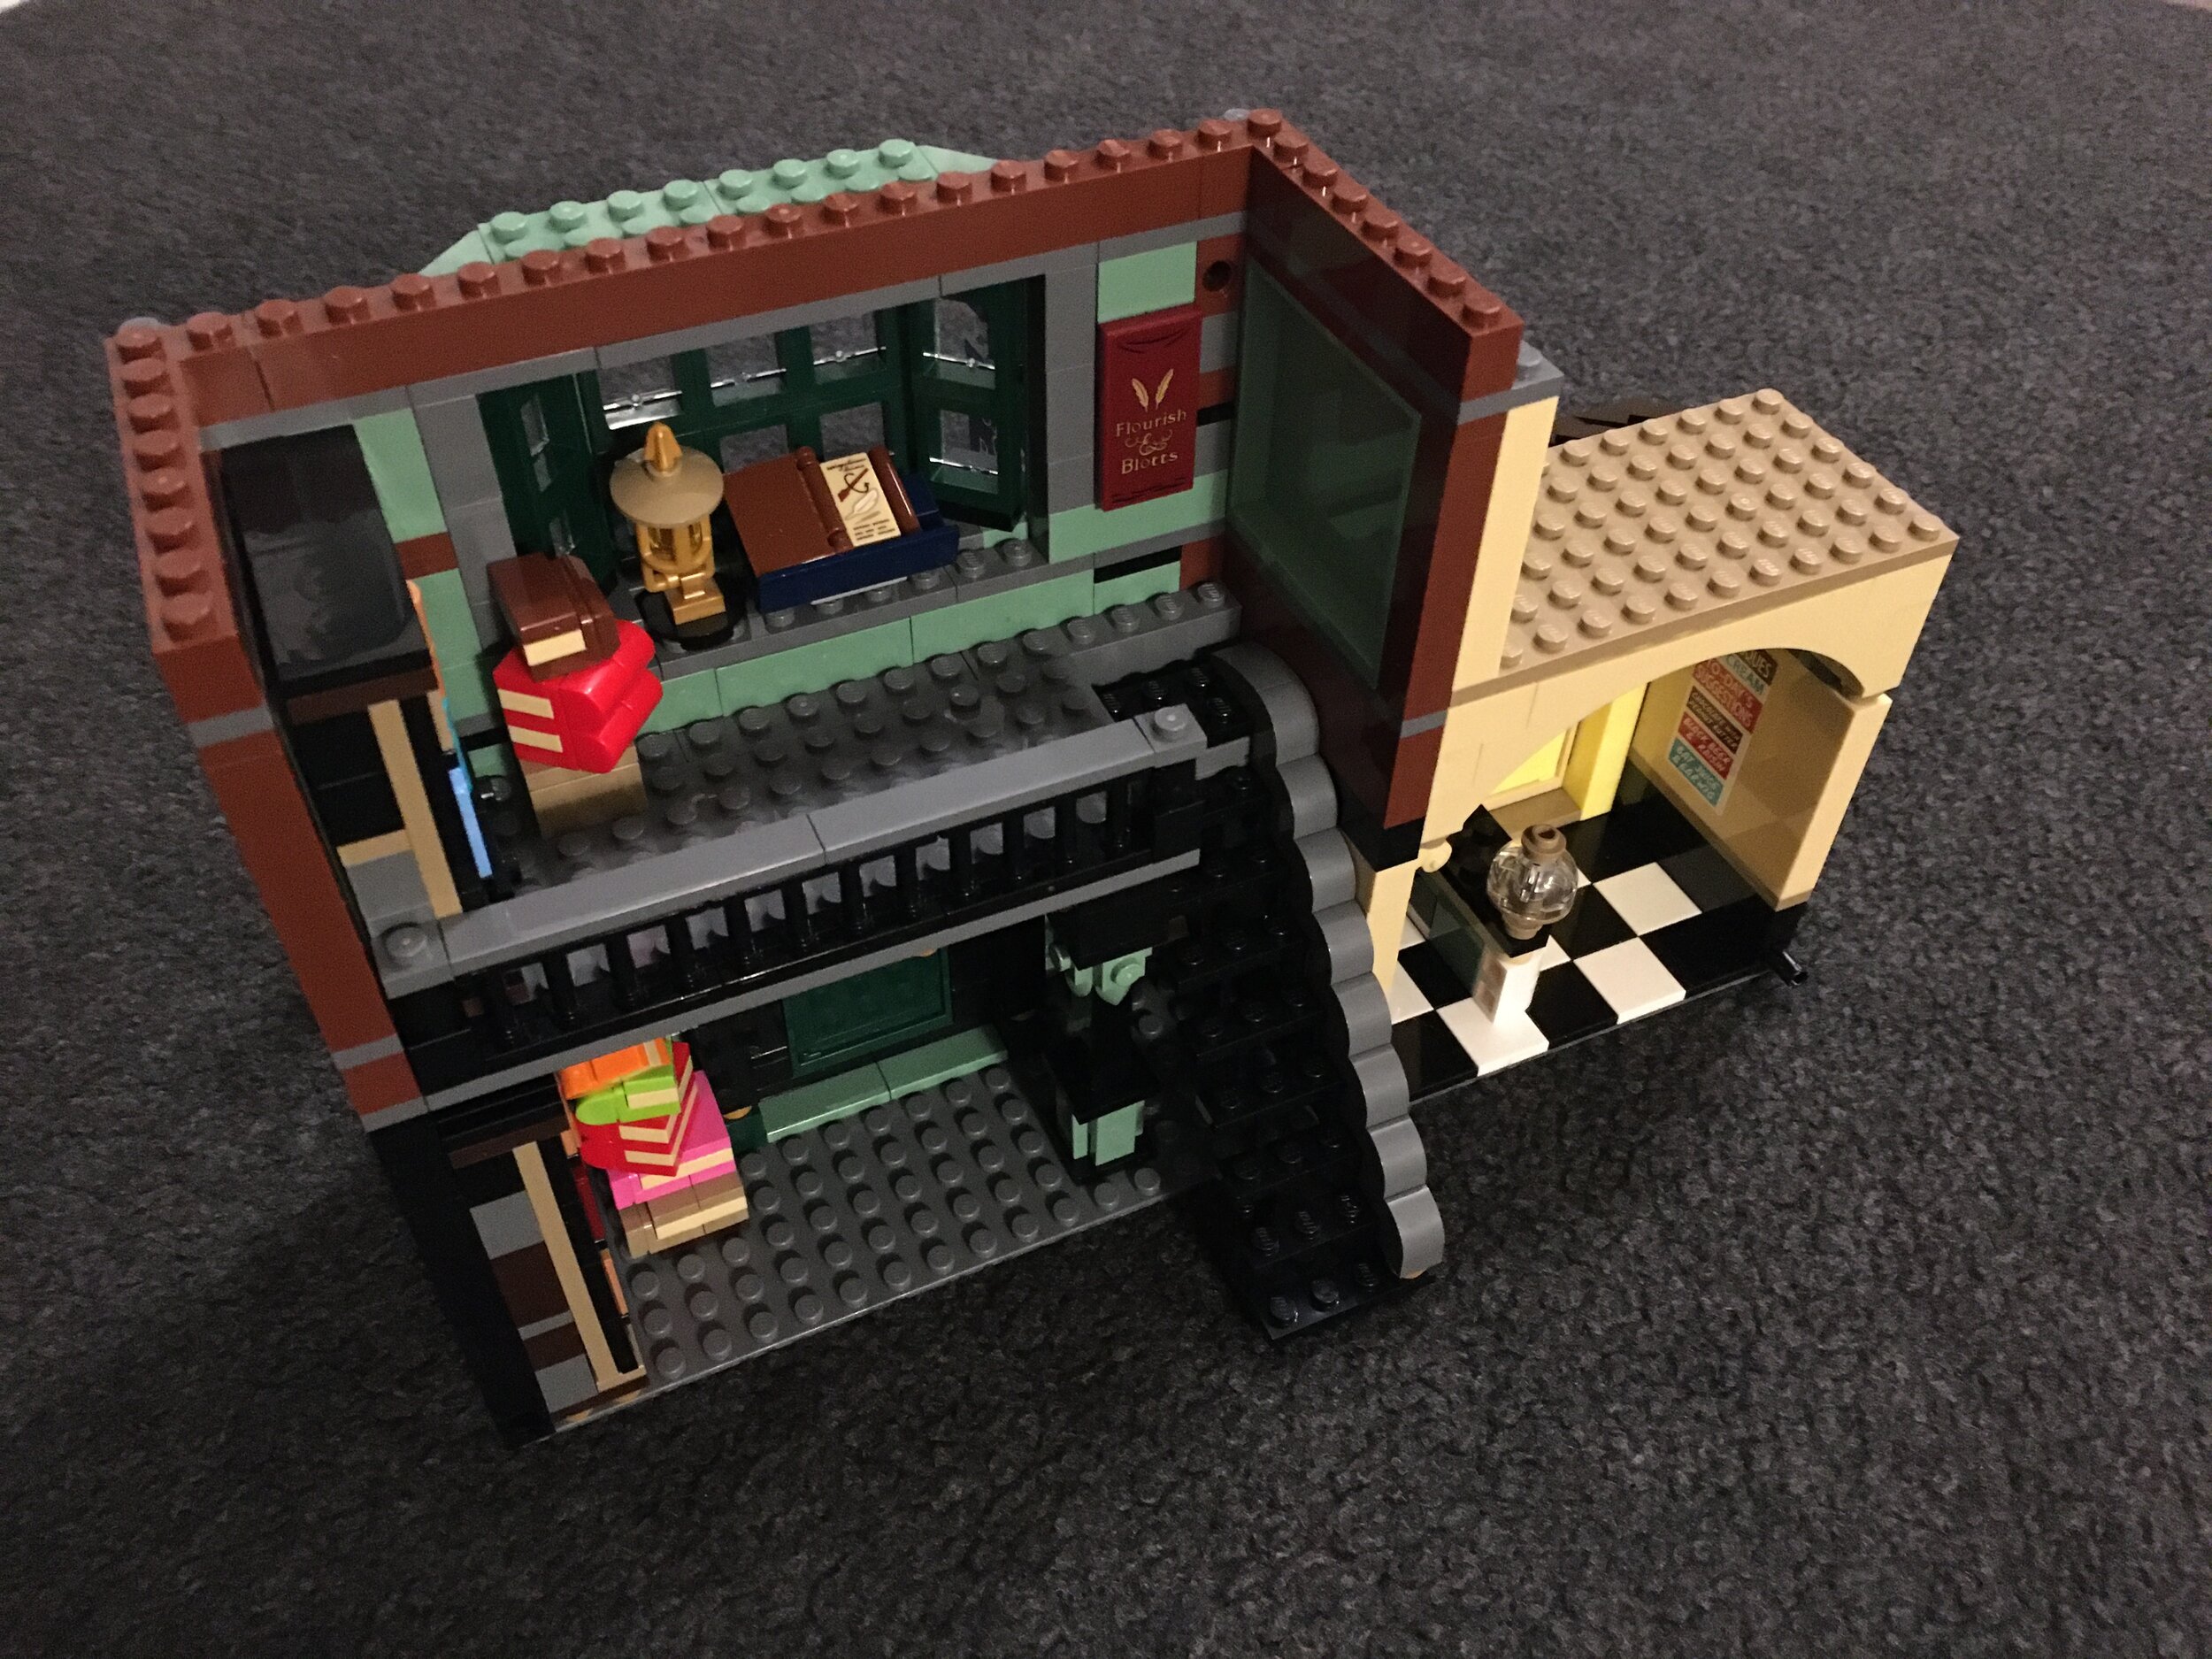
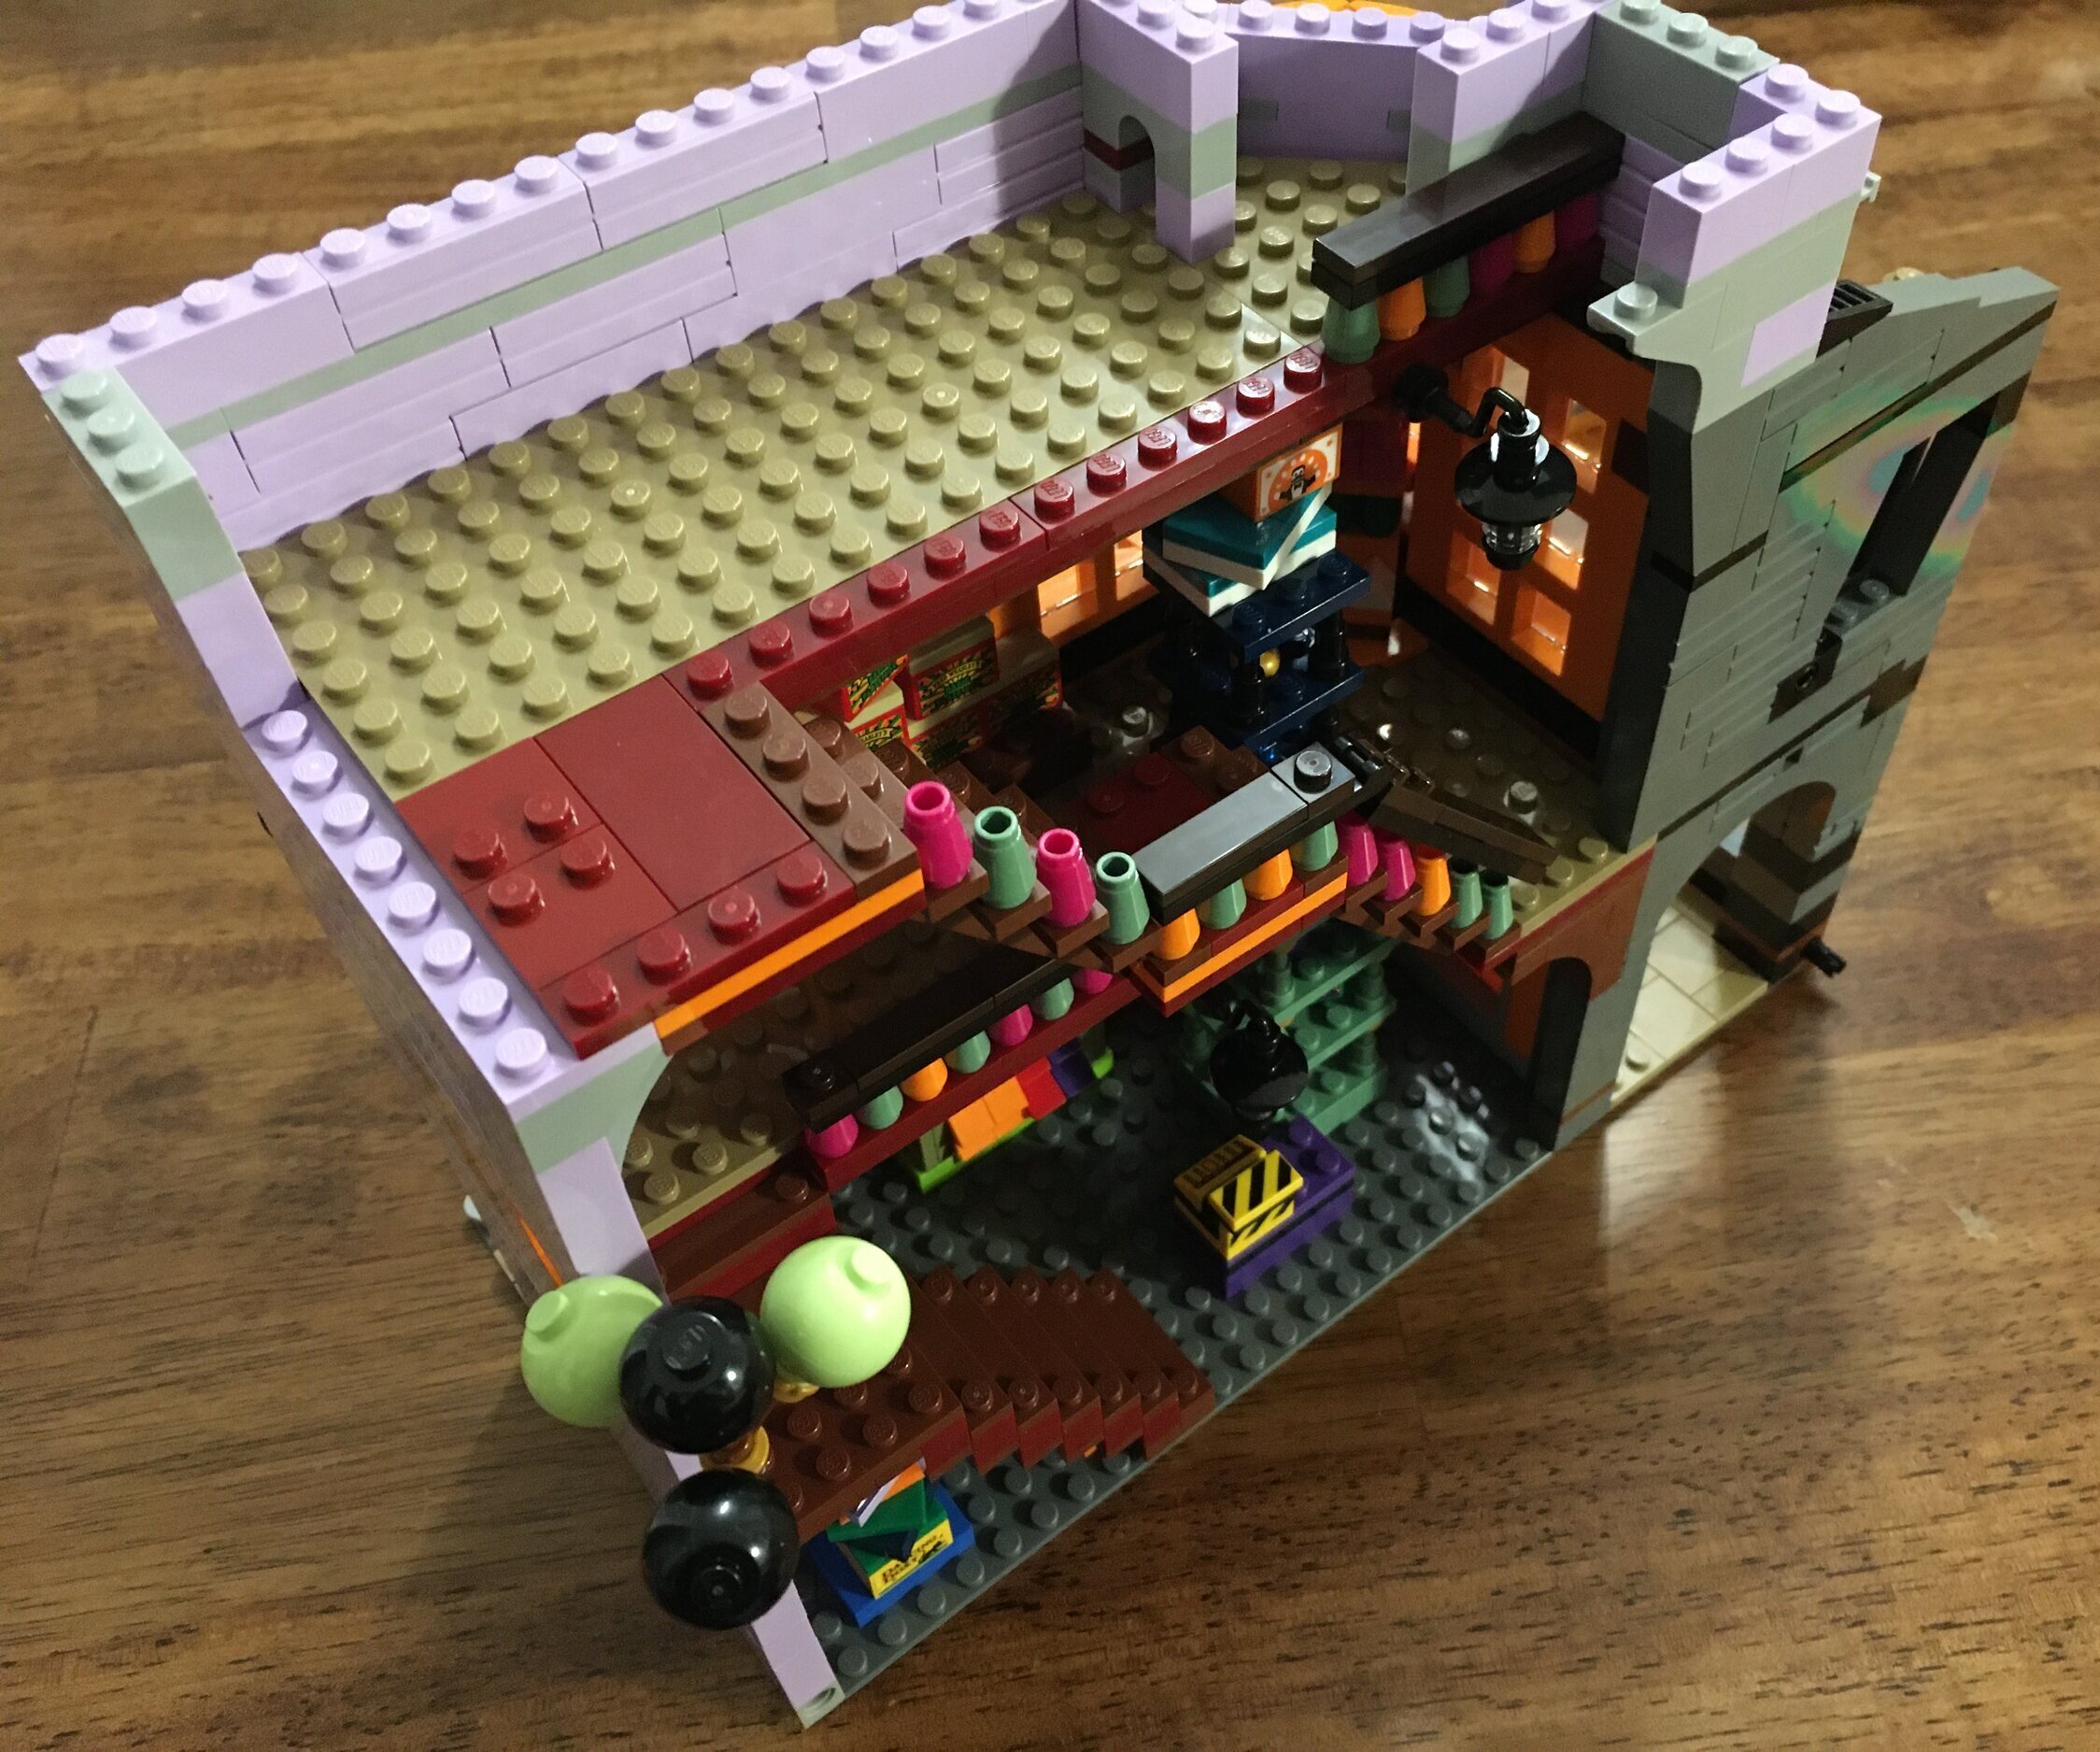
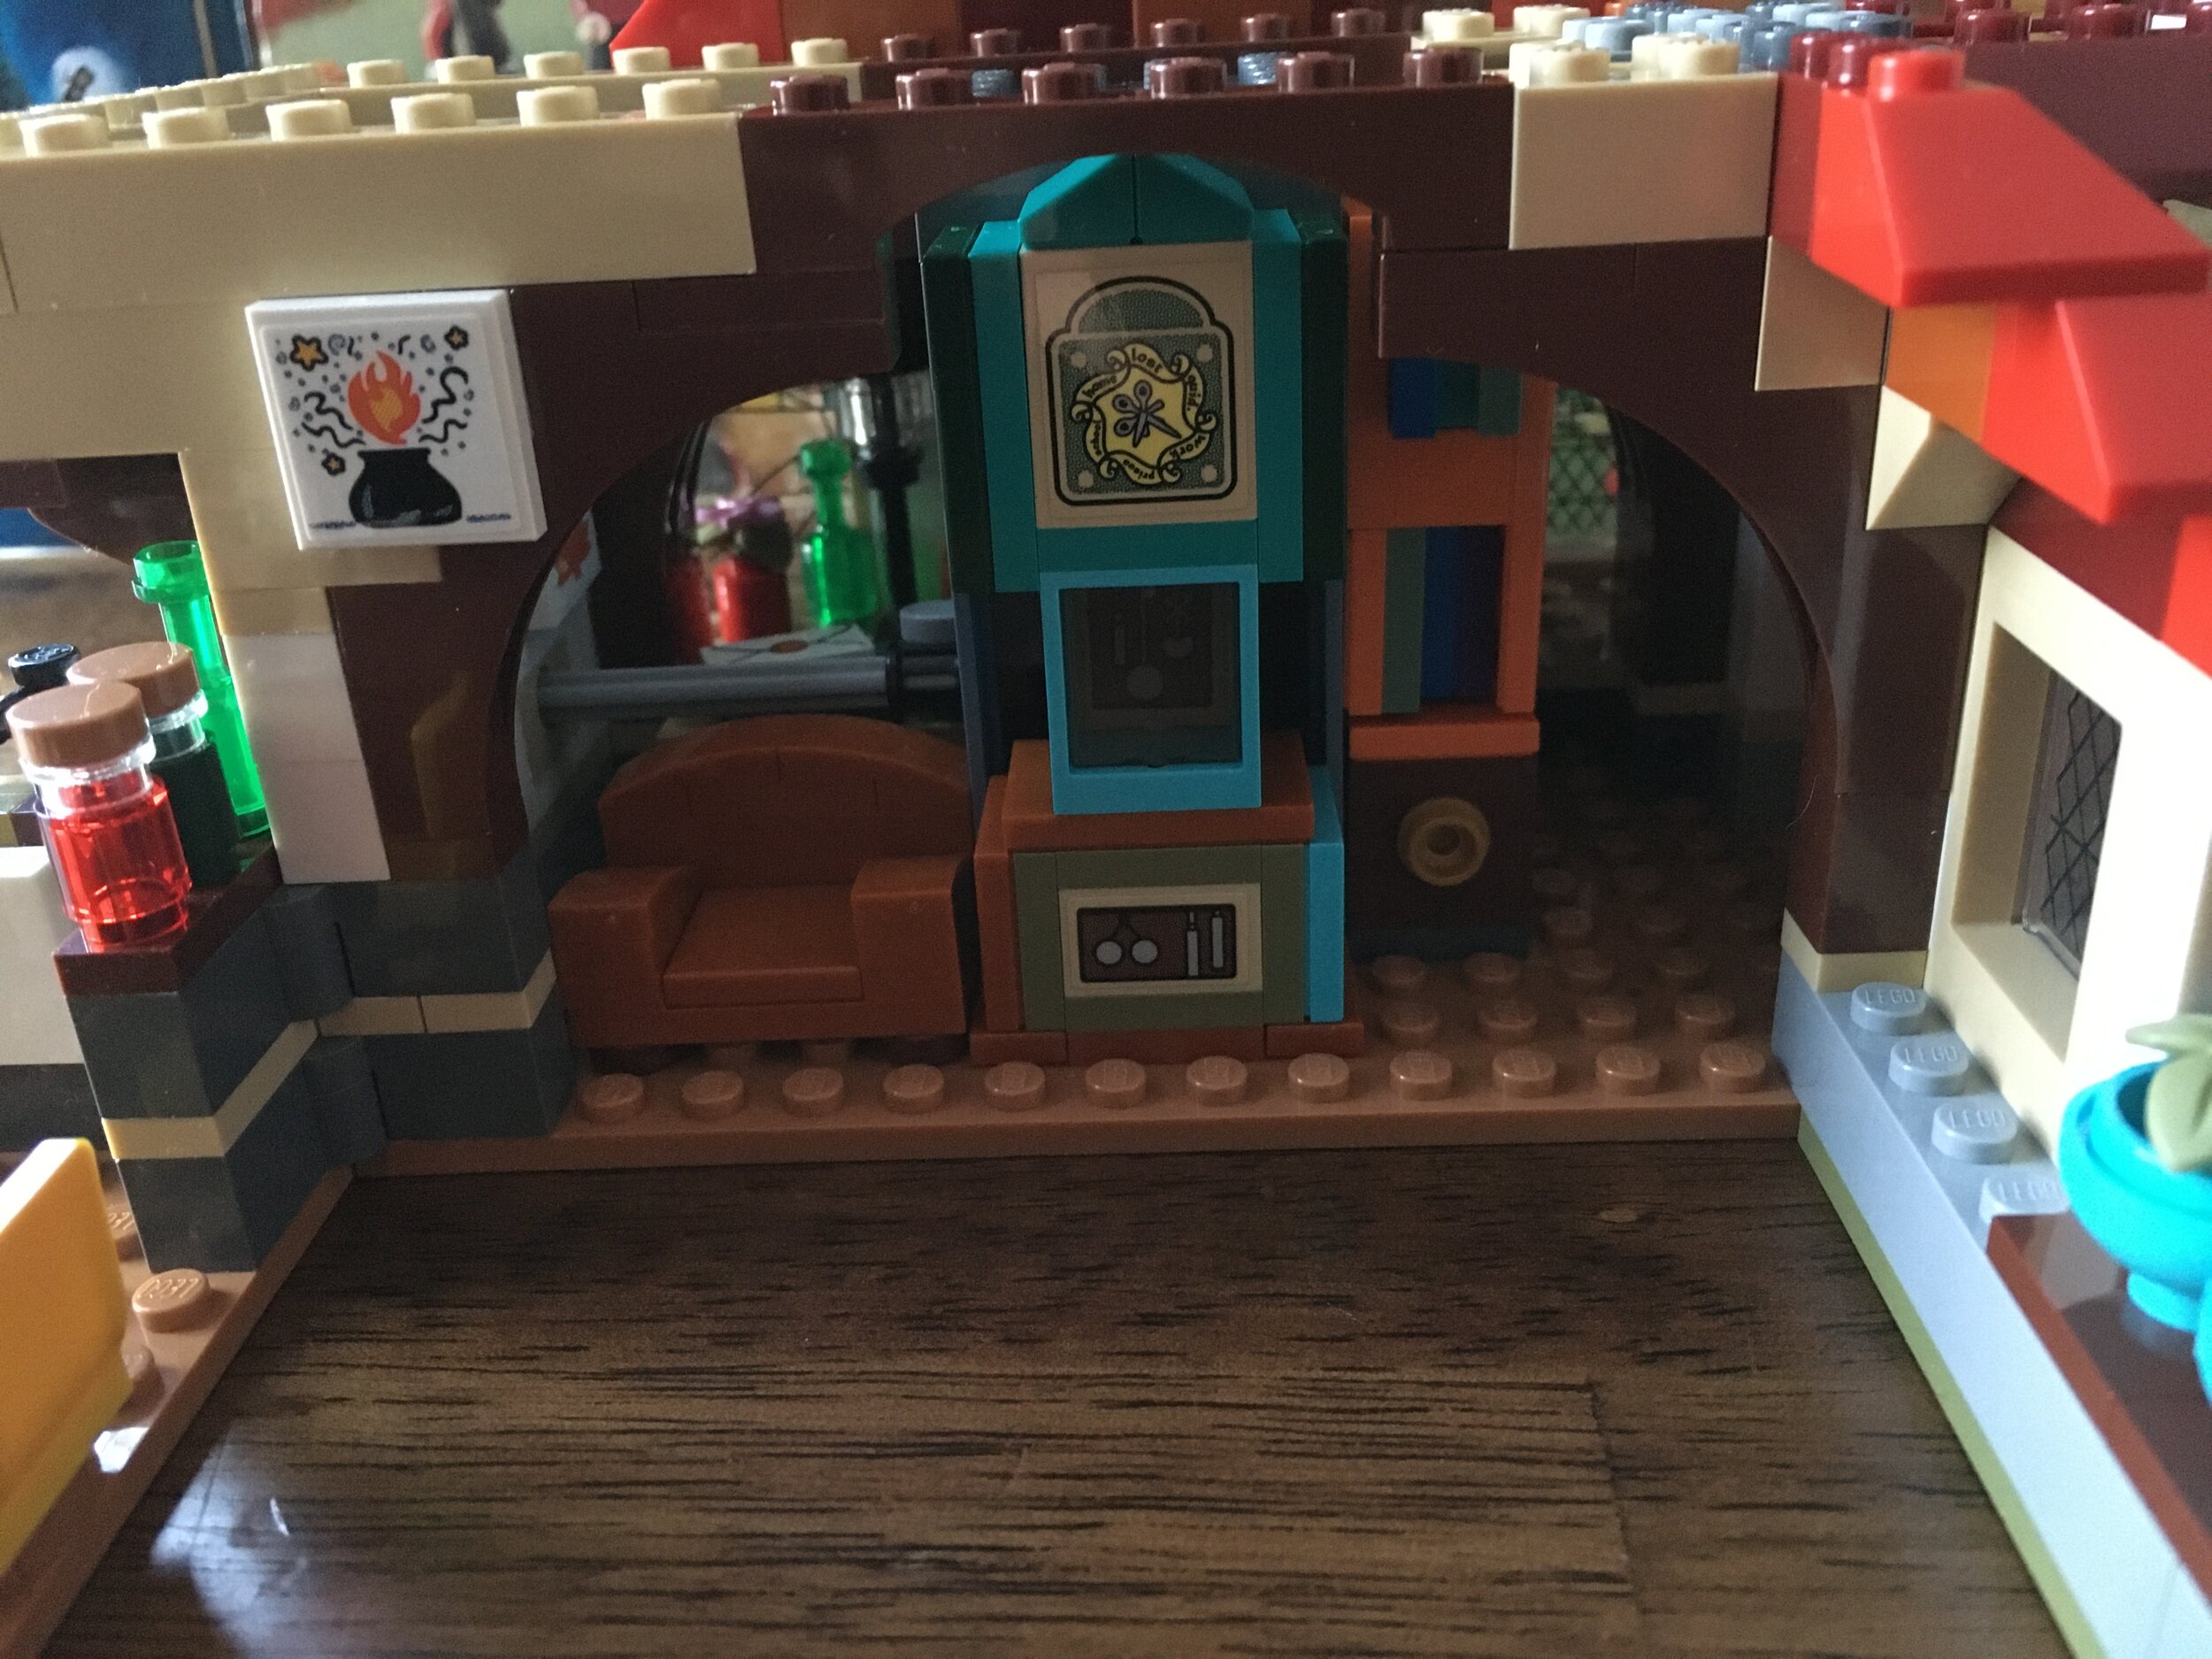
The third bag finishes up the inside of the first floor and starts on the roof. Inside, you can see the fireplace where they enter the floo network. The fireplace is connected to a Technic axle that you can spin between flames and the floo network green. I show it in translucent green here and then in the translucent orange below.

75980_build3a.jpg
75980_build3b.jpg

Here’s the orange, “normal” fire place. On the other side of the fire place, you see a clock which shows where everyone in the family is located. There’s also a picture on the wall and a book shelf.

75980_build3c.jpg
75980_build3d.JPG

Bag four finishes up the roof on the ground floor and adds a room on the second floor. I assume it is Ginny’s room with the hair brush and mirror. The bed has multiple colors and then a sticker that matches the colors. It was tricky to line up the sticker with the parts, but I think I got it close to being right. The downside to this set up is the sticker is smaller than the tile it goes on so there is a gap between the sticker and the sloped bricks which from far away isn’t a big deal, but close up looks bad.

75980_build4a.jpg
75980_build4b.jpg

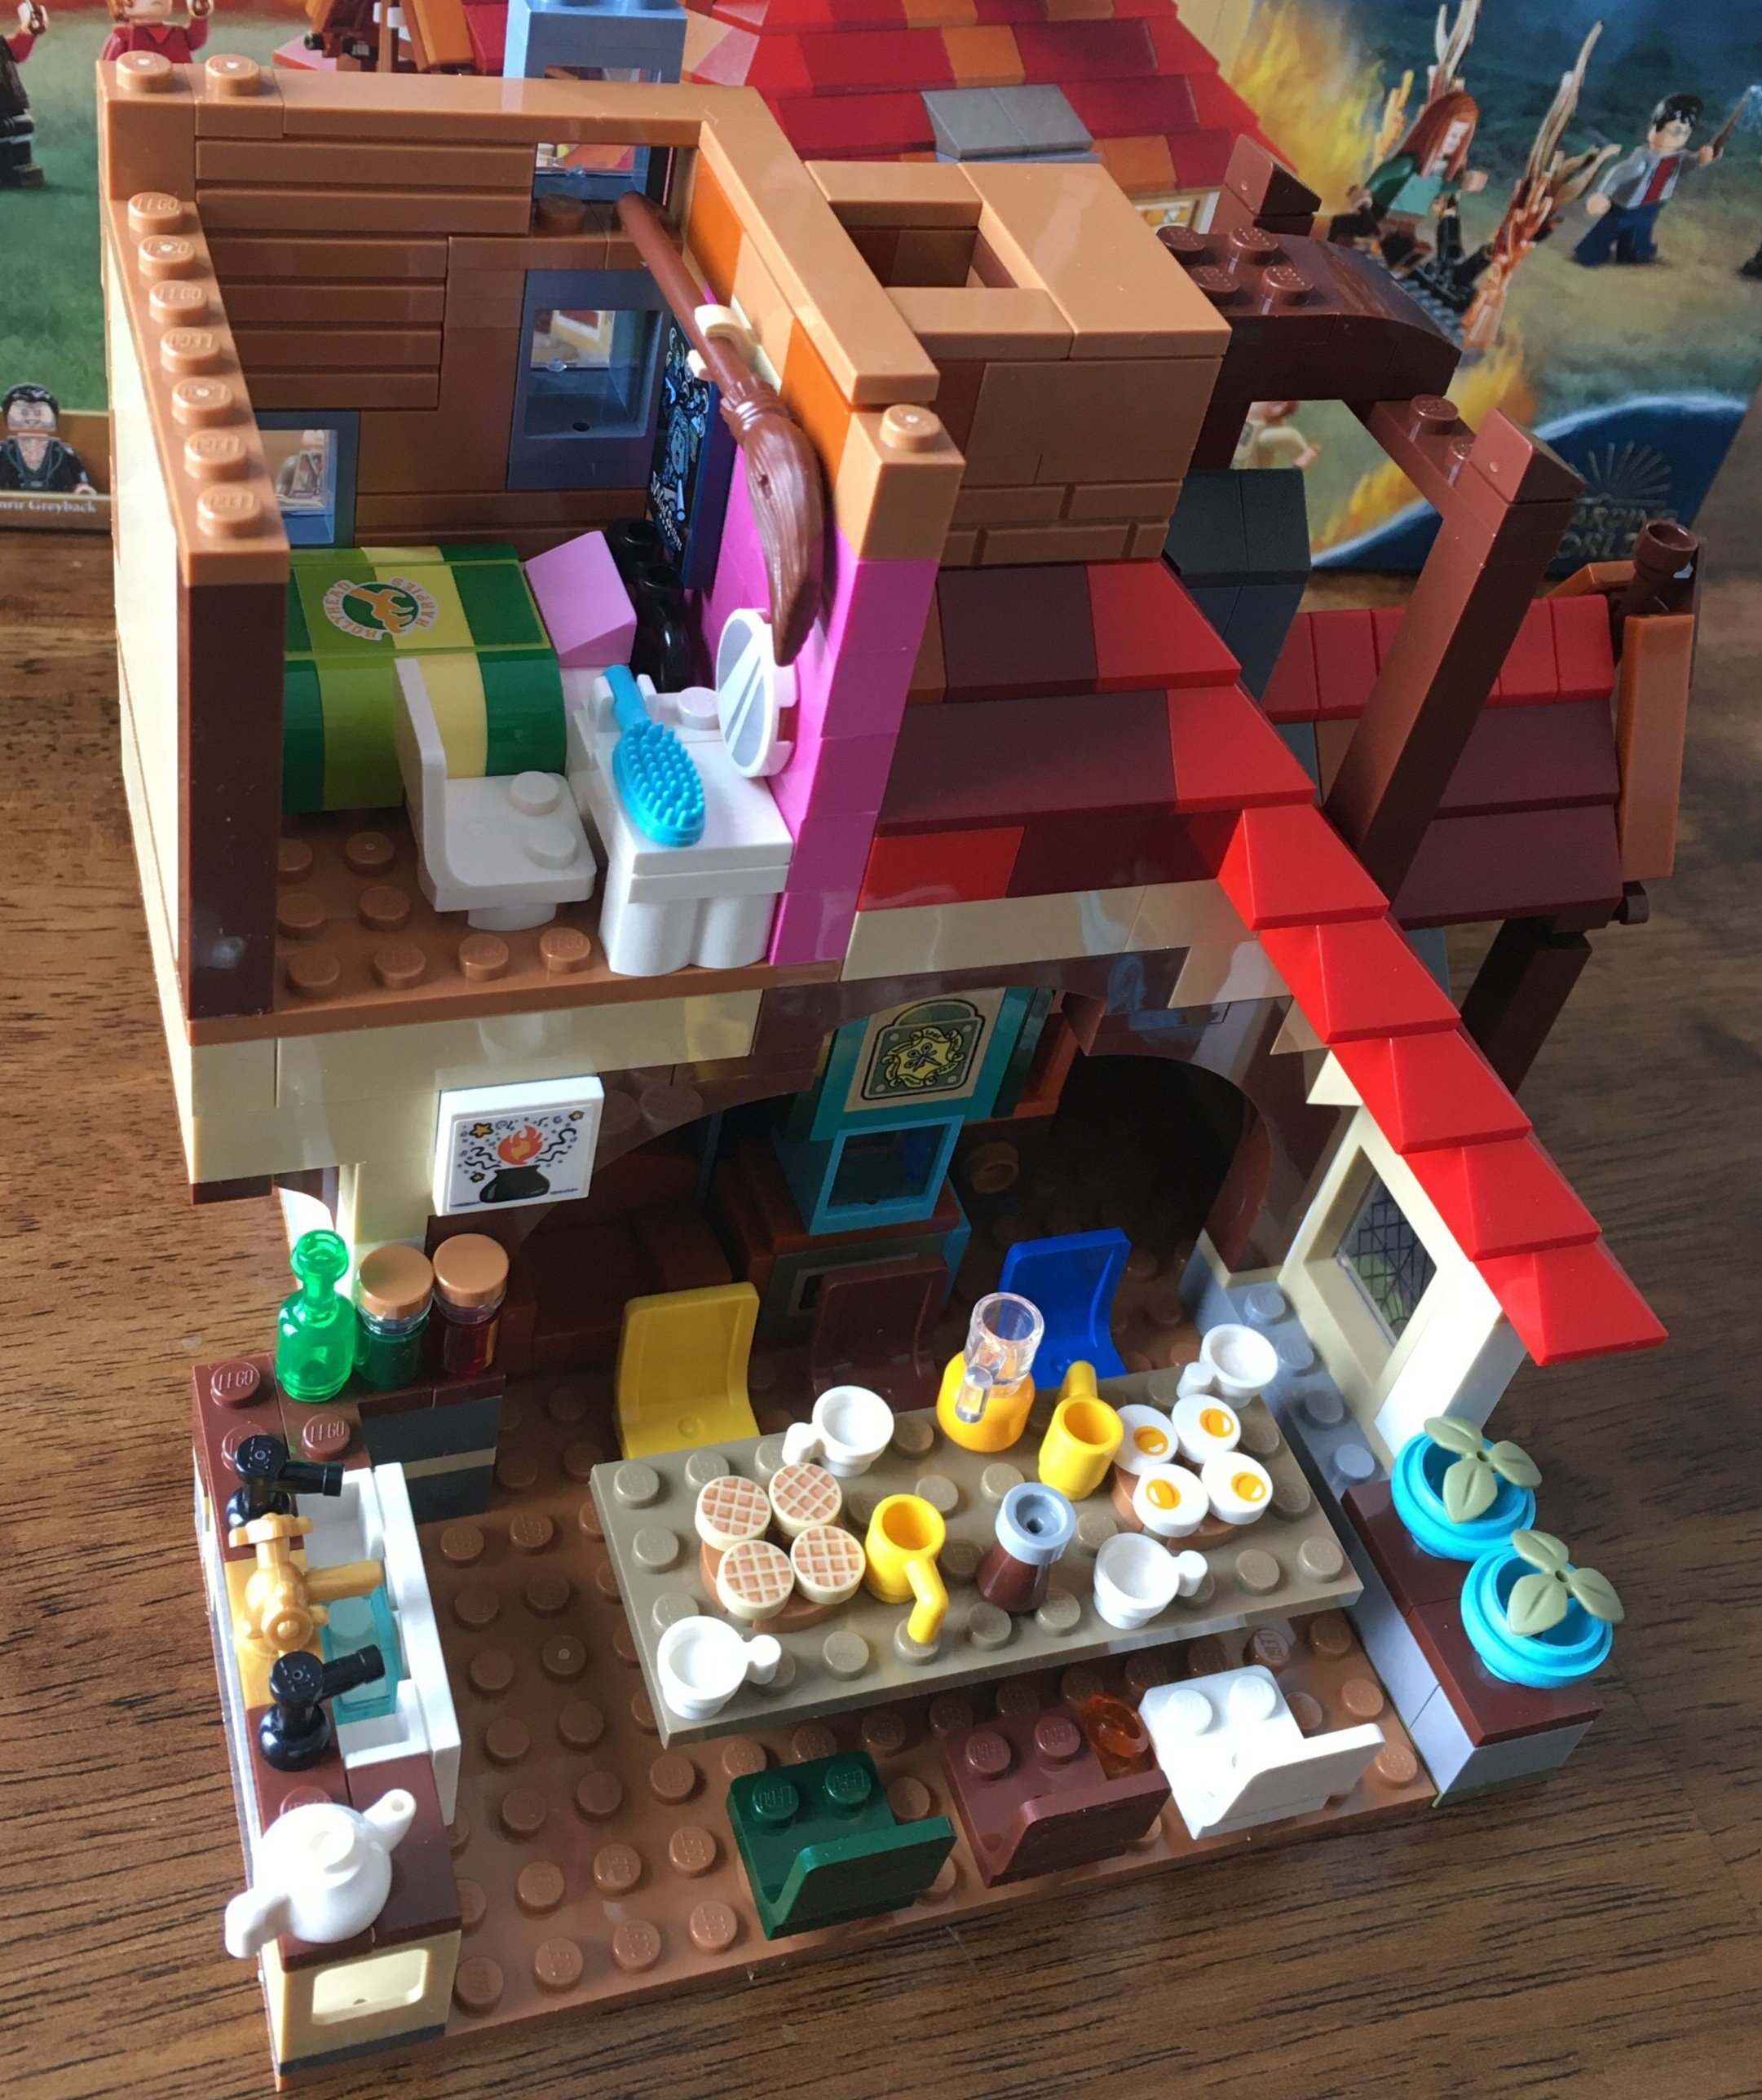
The fifth bag starts the next level. This eventually becomes Arthur and Molly Weasley’s room. For now, there is a chair with some magical knitting going on at it. There’s also a family picture on the wall.

75980_build5a.jpg
75980_build5b.jpg

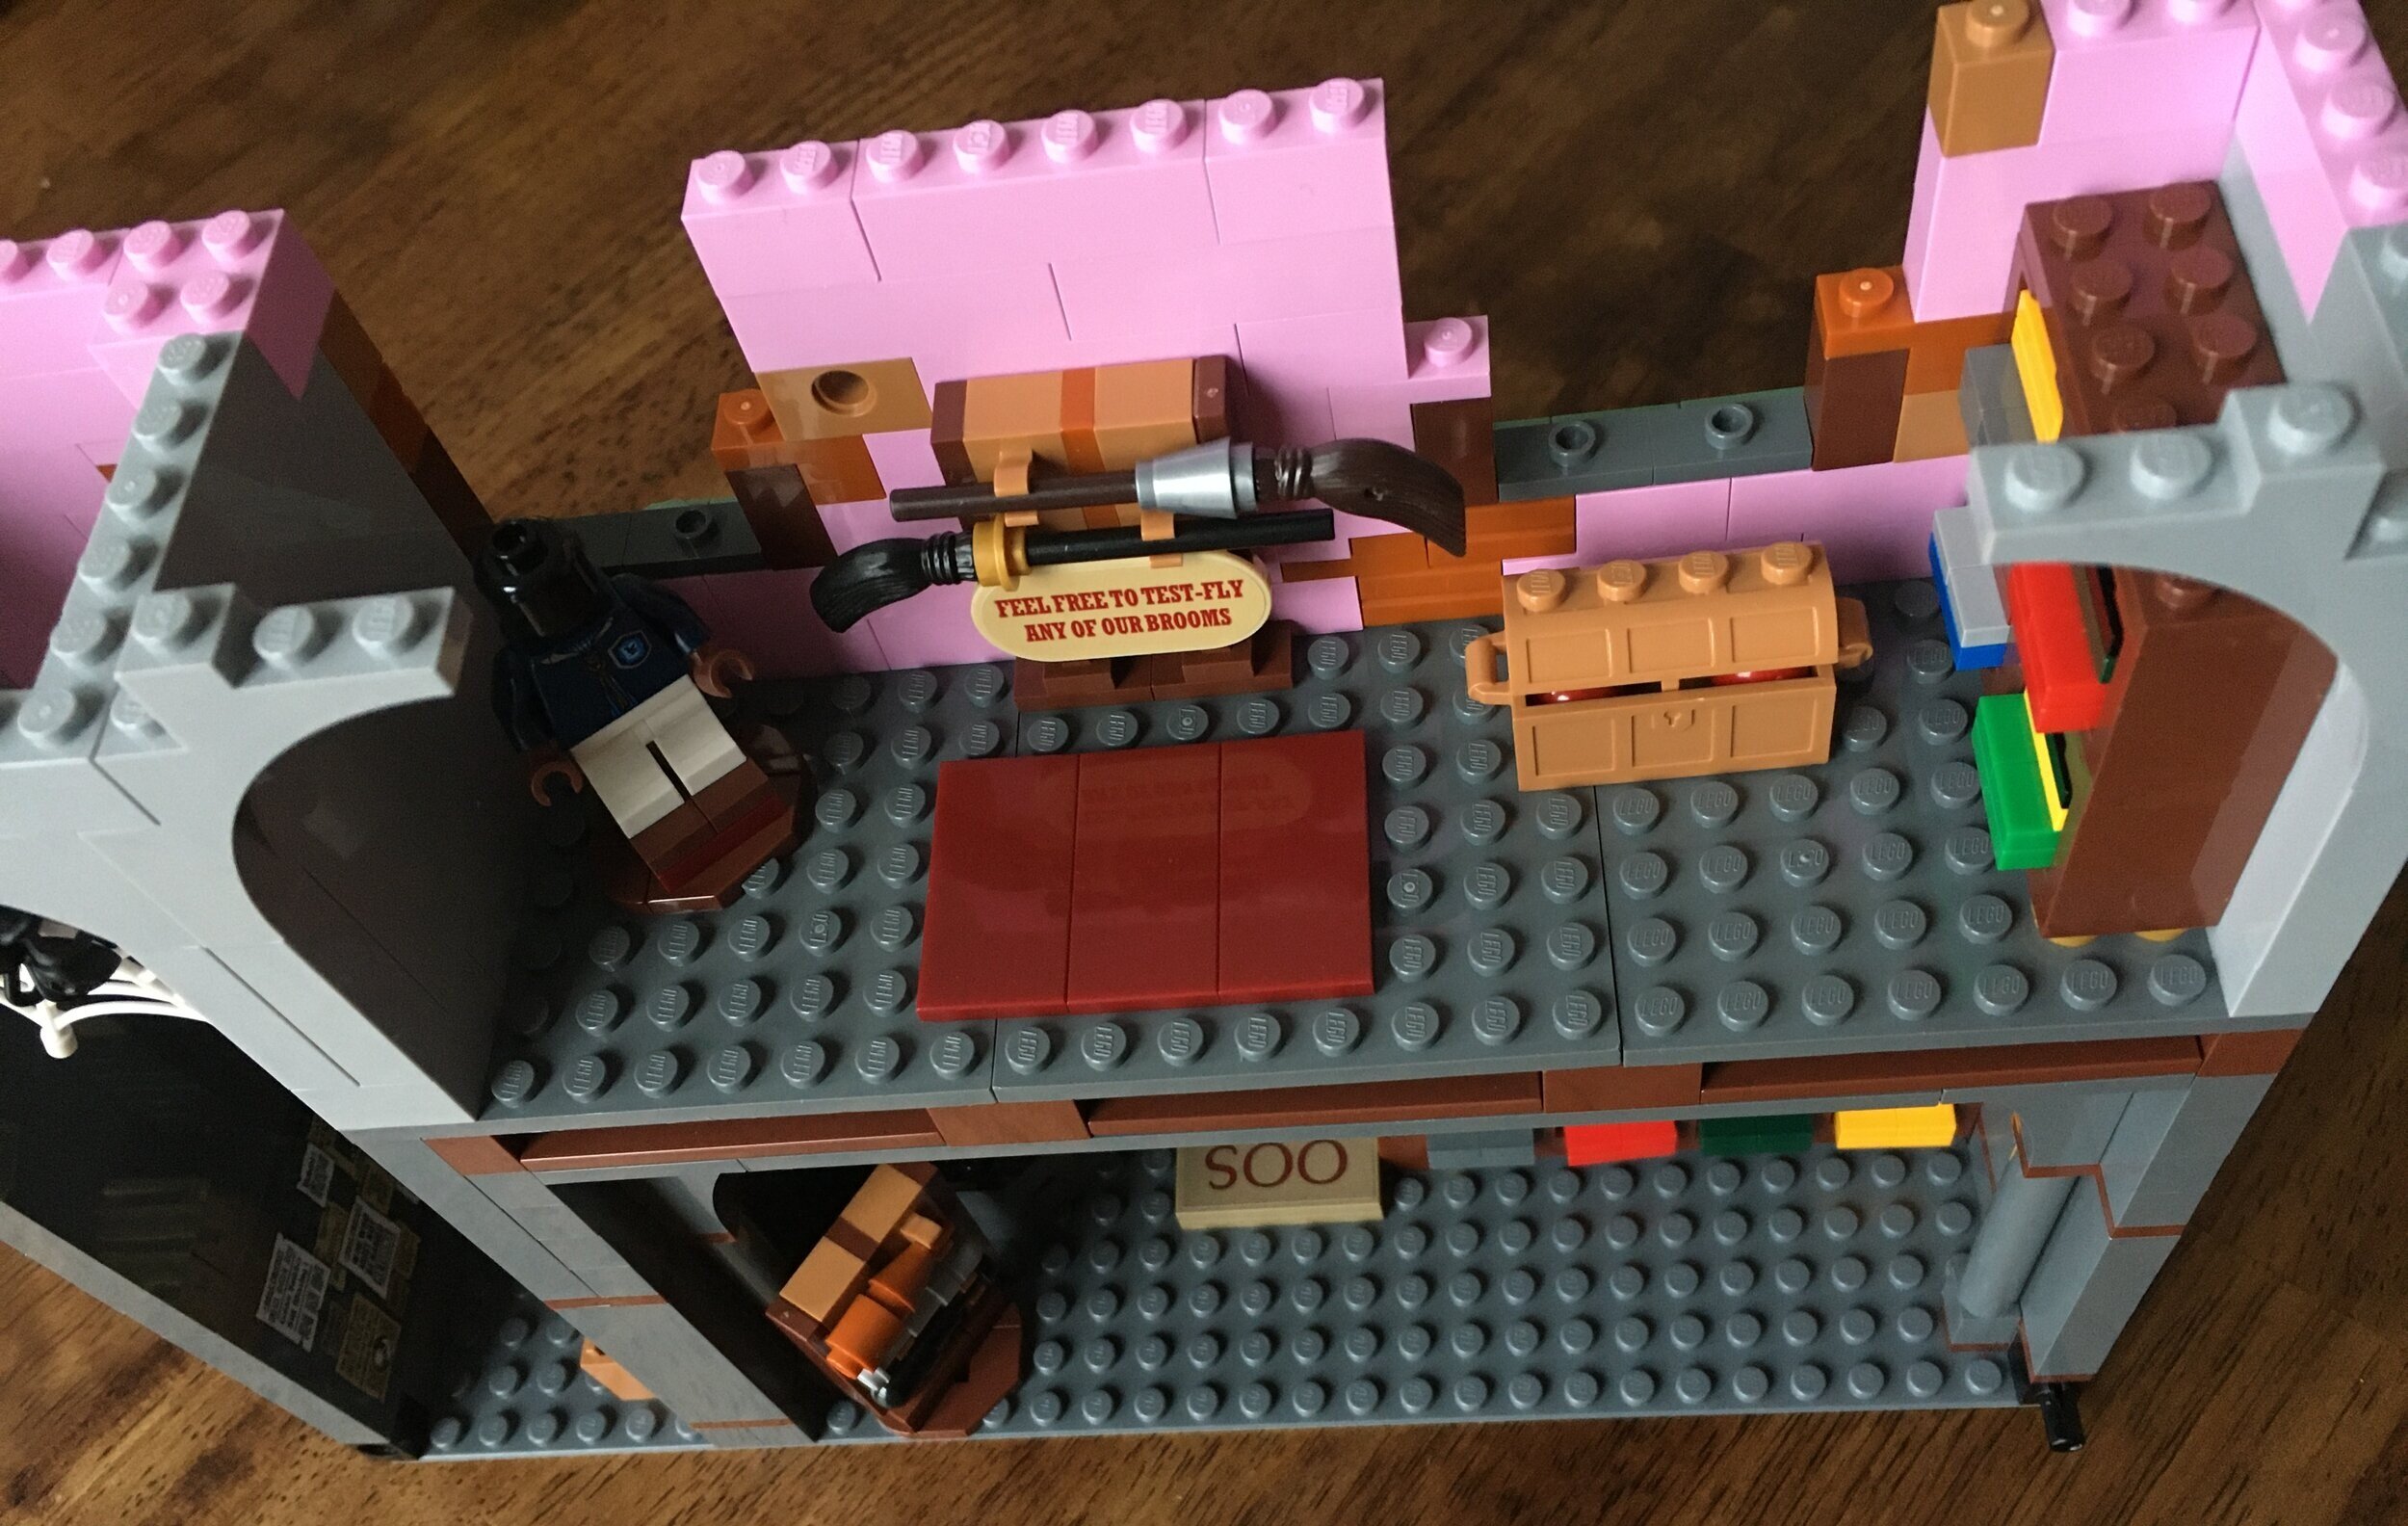
The sixth bag puts a bed in Molly and Arthur’s room with a quilt on it. It also adds in a room above. Maybe Ron’s room? There’s a bed and a picture on the wall, but that’s it. From the room, there’s a small stair way that leads up to a small upper porch area. That area has a broom so you can either sweep it off or fly away from there.

75980_build6a.jpg
75980_build6b.jpg

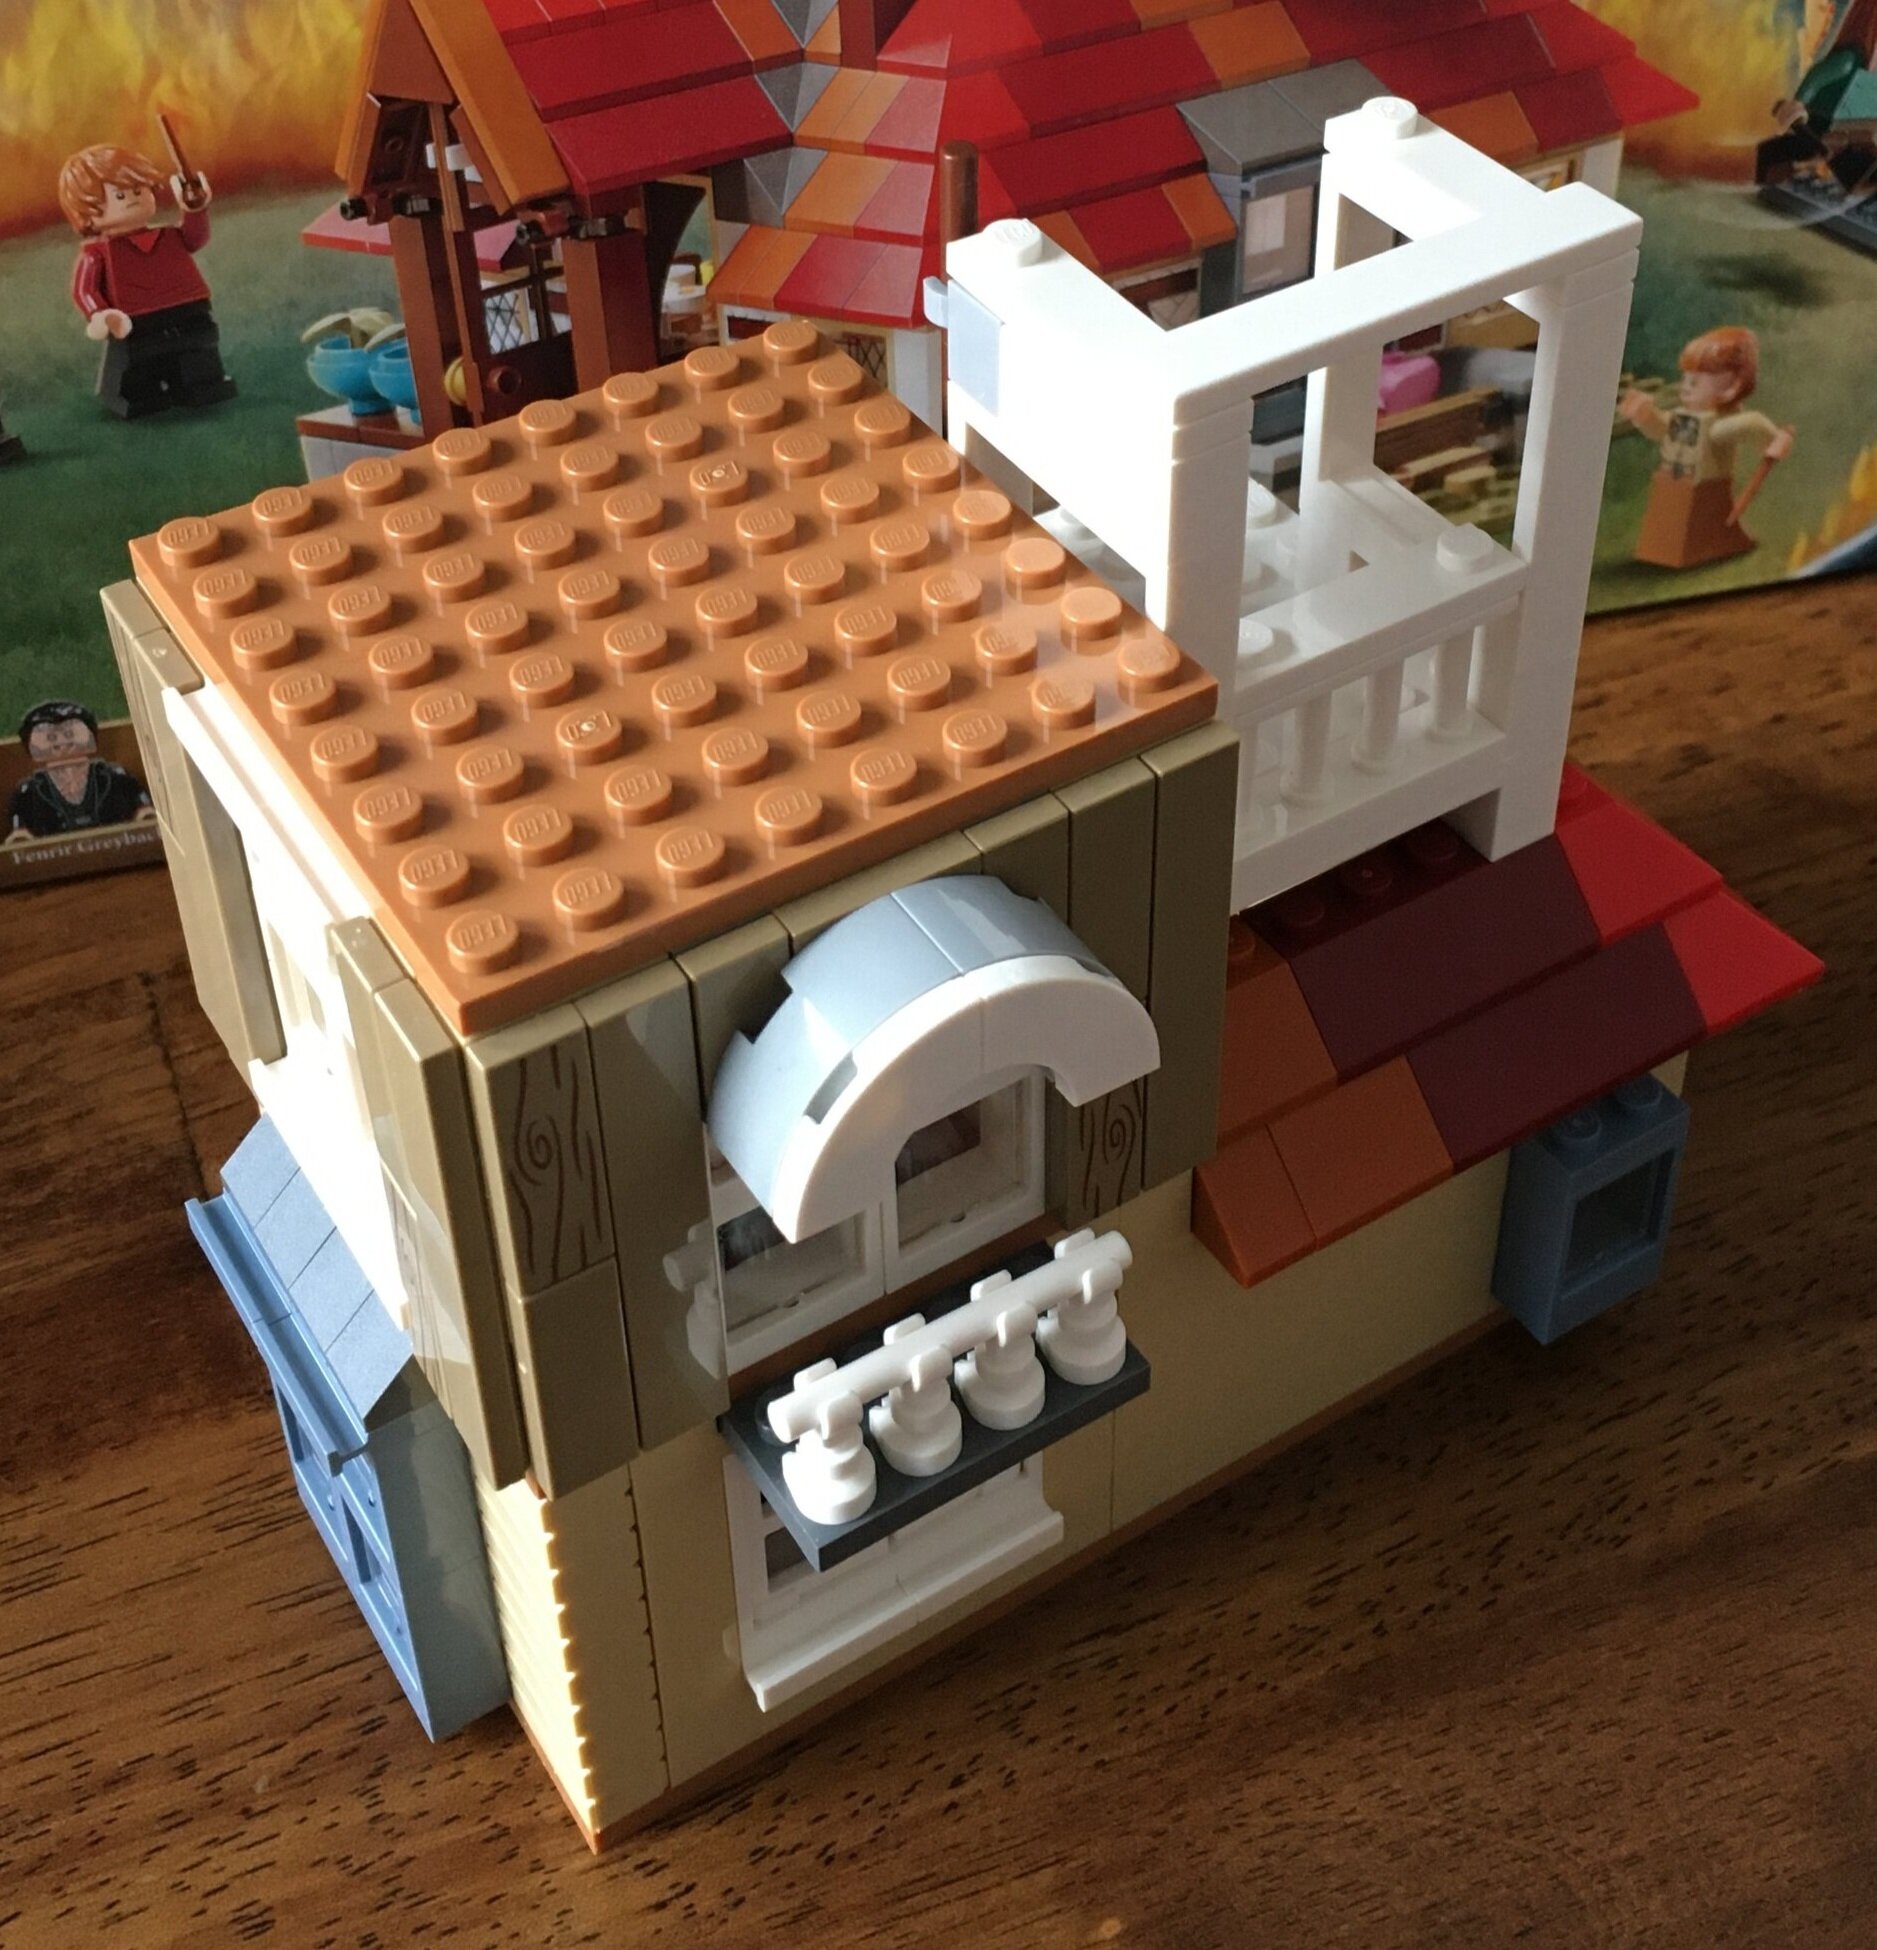
The last bag finishes the roof and adds a chimney. You also get two owls to include Hedwig. The roof is made with 45 degree slopes, but they vary in color so it adds to the design other than just using one color. I’ll cover the last part of this build with the minifigures.

75890_build7a.jpg
75890_build7b.jpg

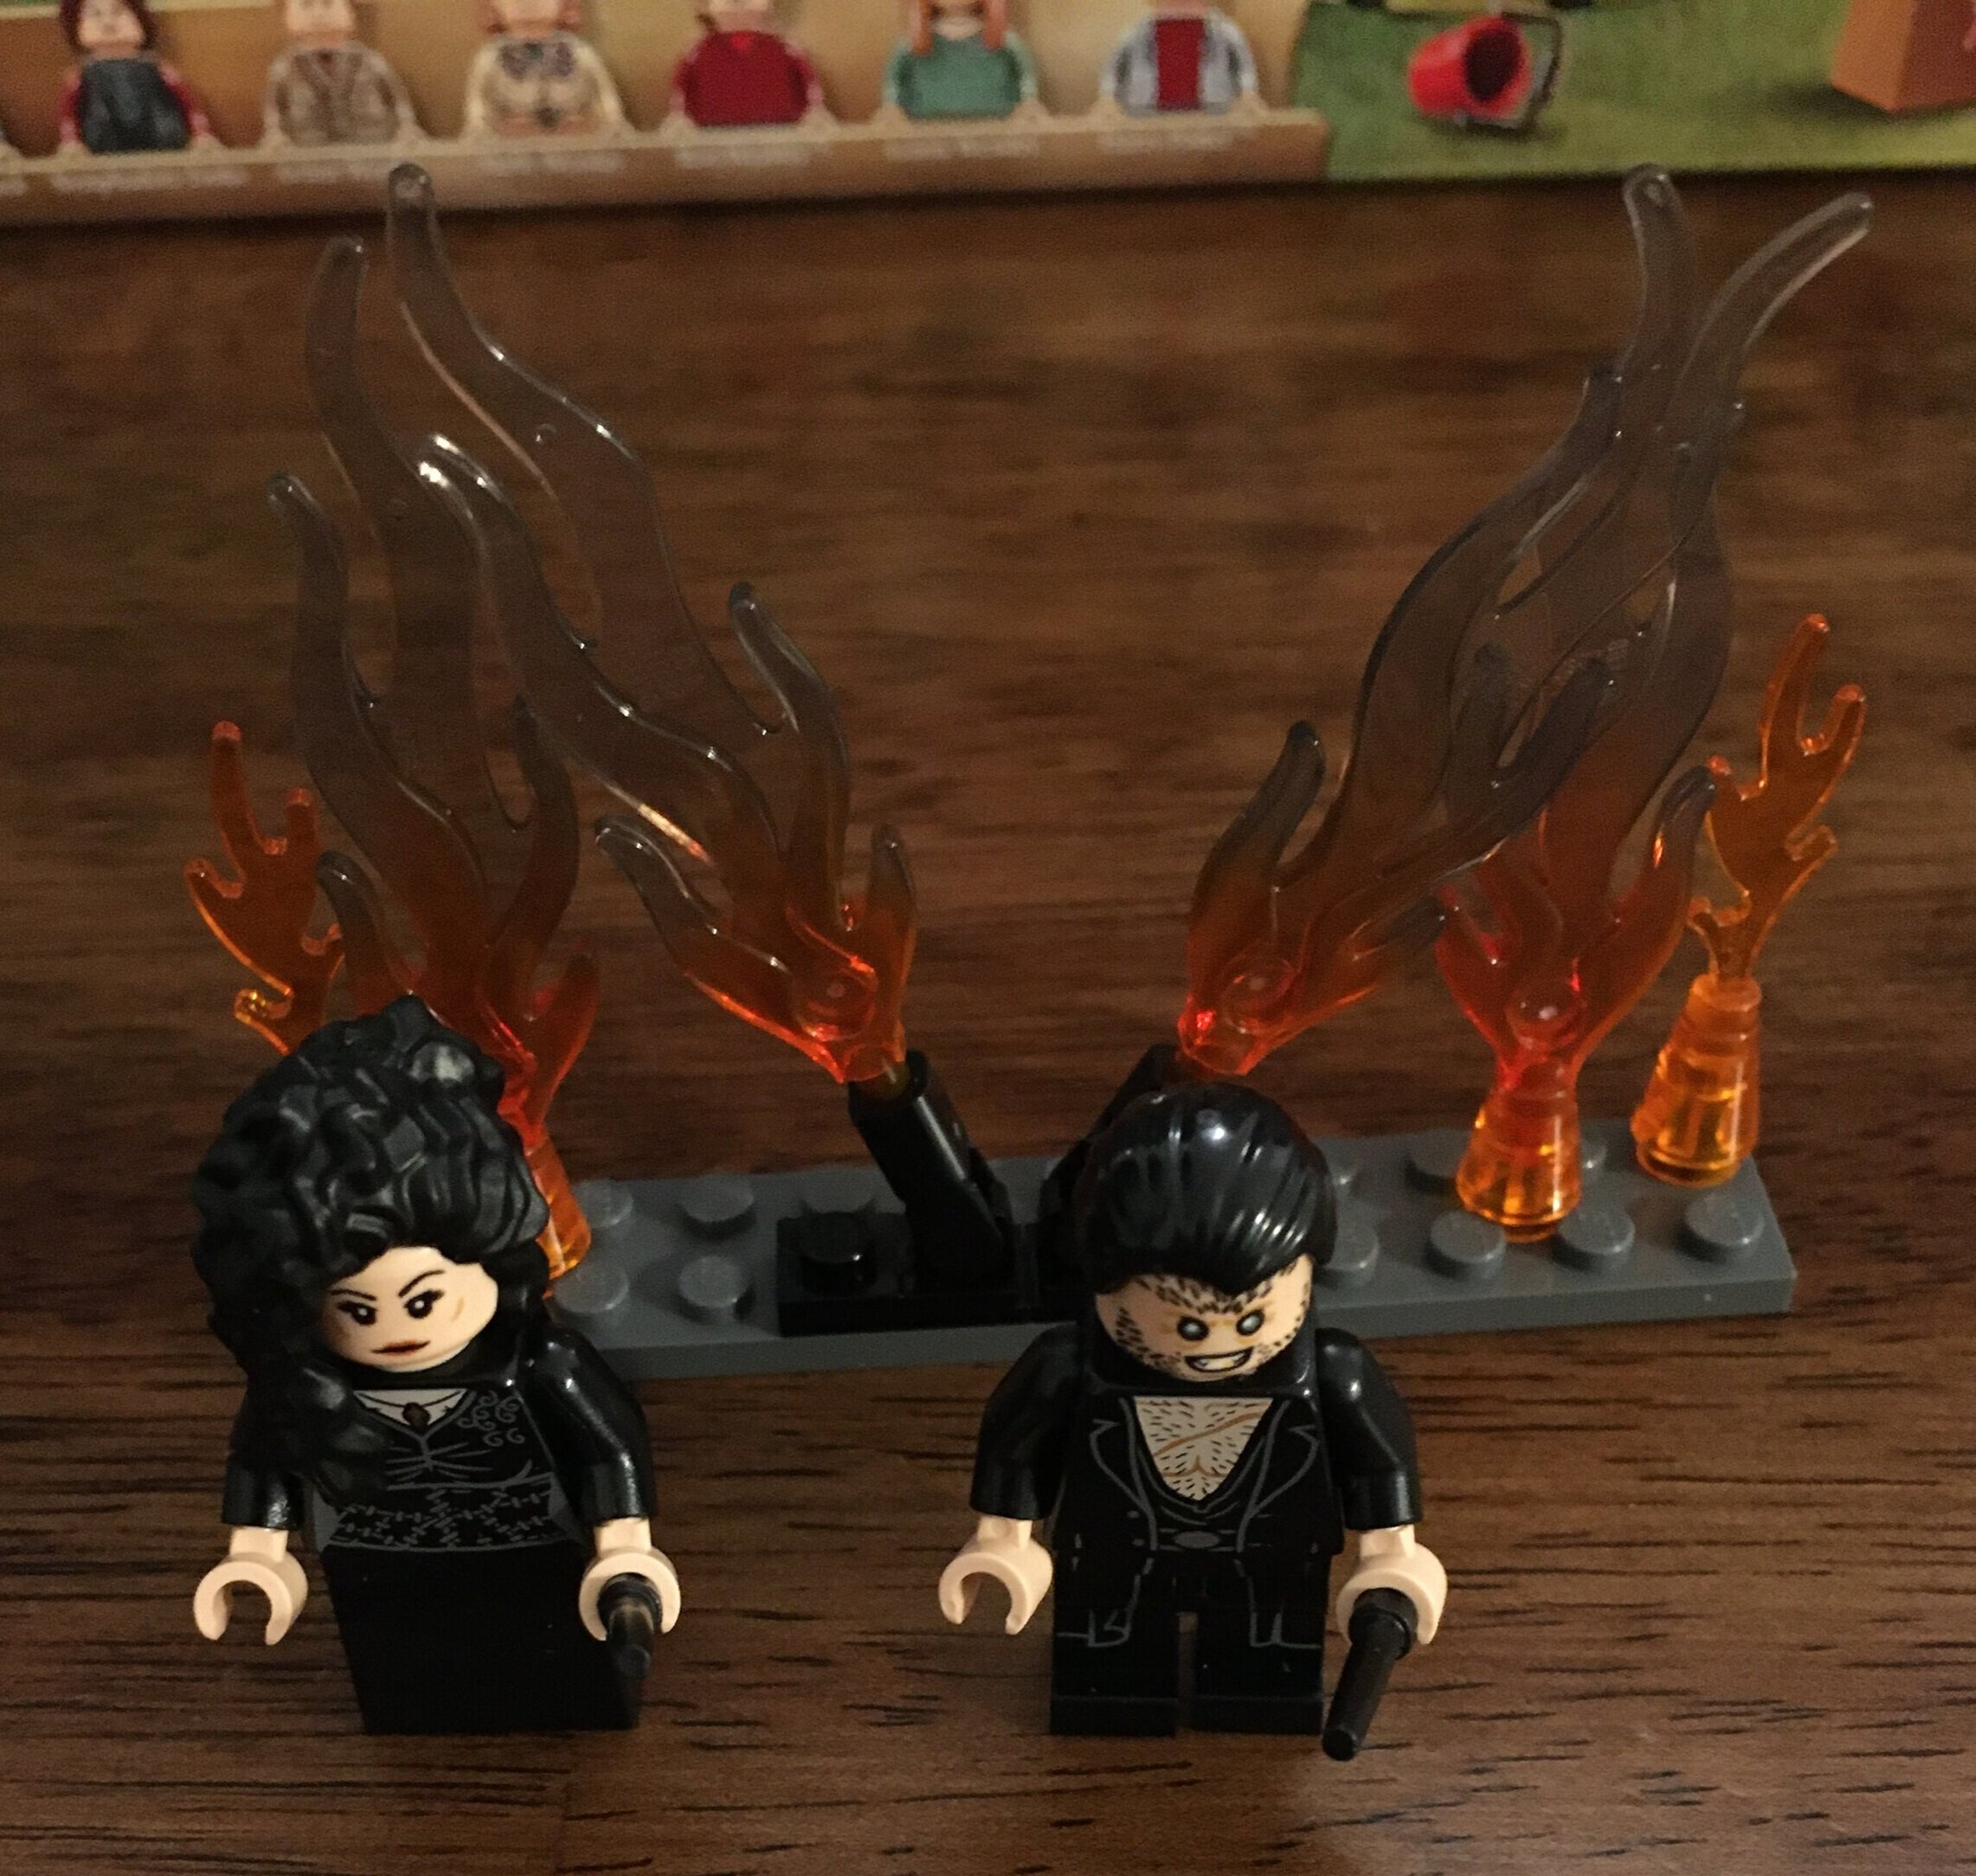
The set comes with eight minifigures. Seven of them are unique to this set and then #8, Harry Potter, also comes in #75967-1: Forbidden Forest Umbridge’s Encounter. As mentioned in the bag seven section, it includes more besides the roof. It also includes a section of flames as can be seen in the sixth movie. The two minifigures included in bag seven are Bellatrix Lestrange and Fenrir Greyback. They both come with wands.

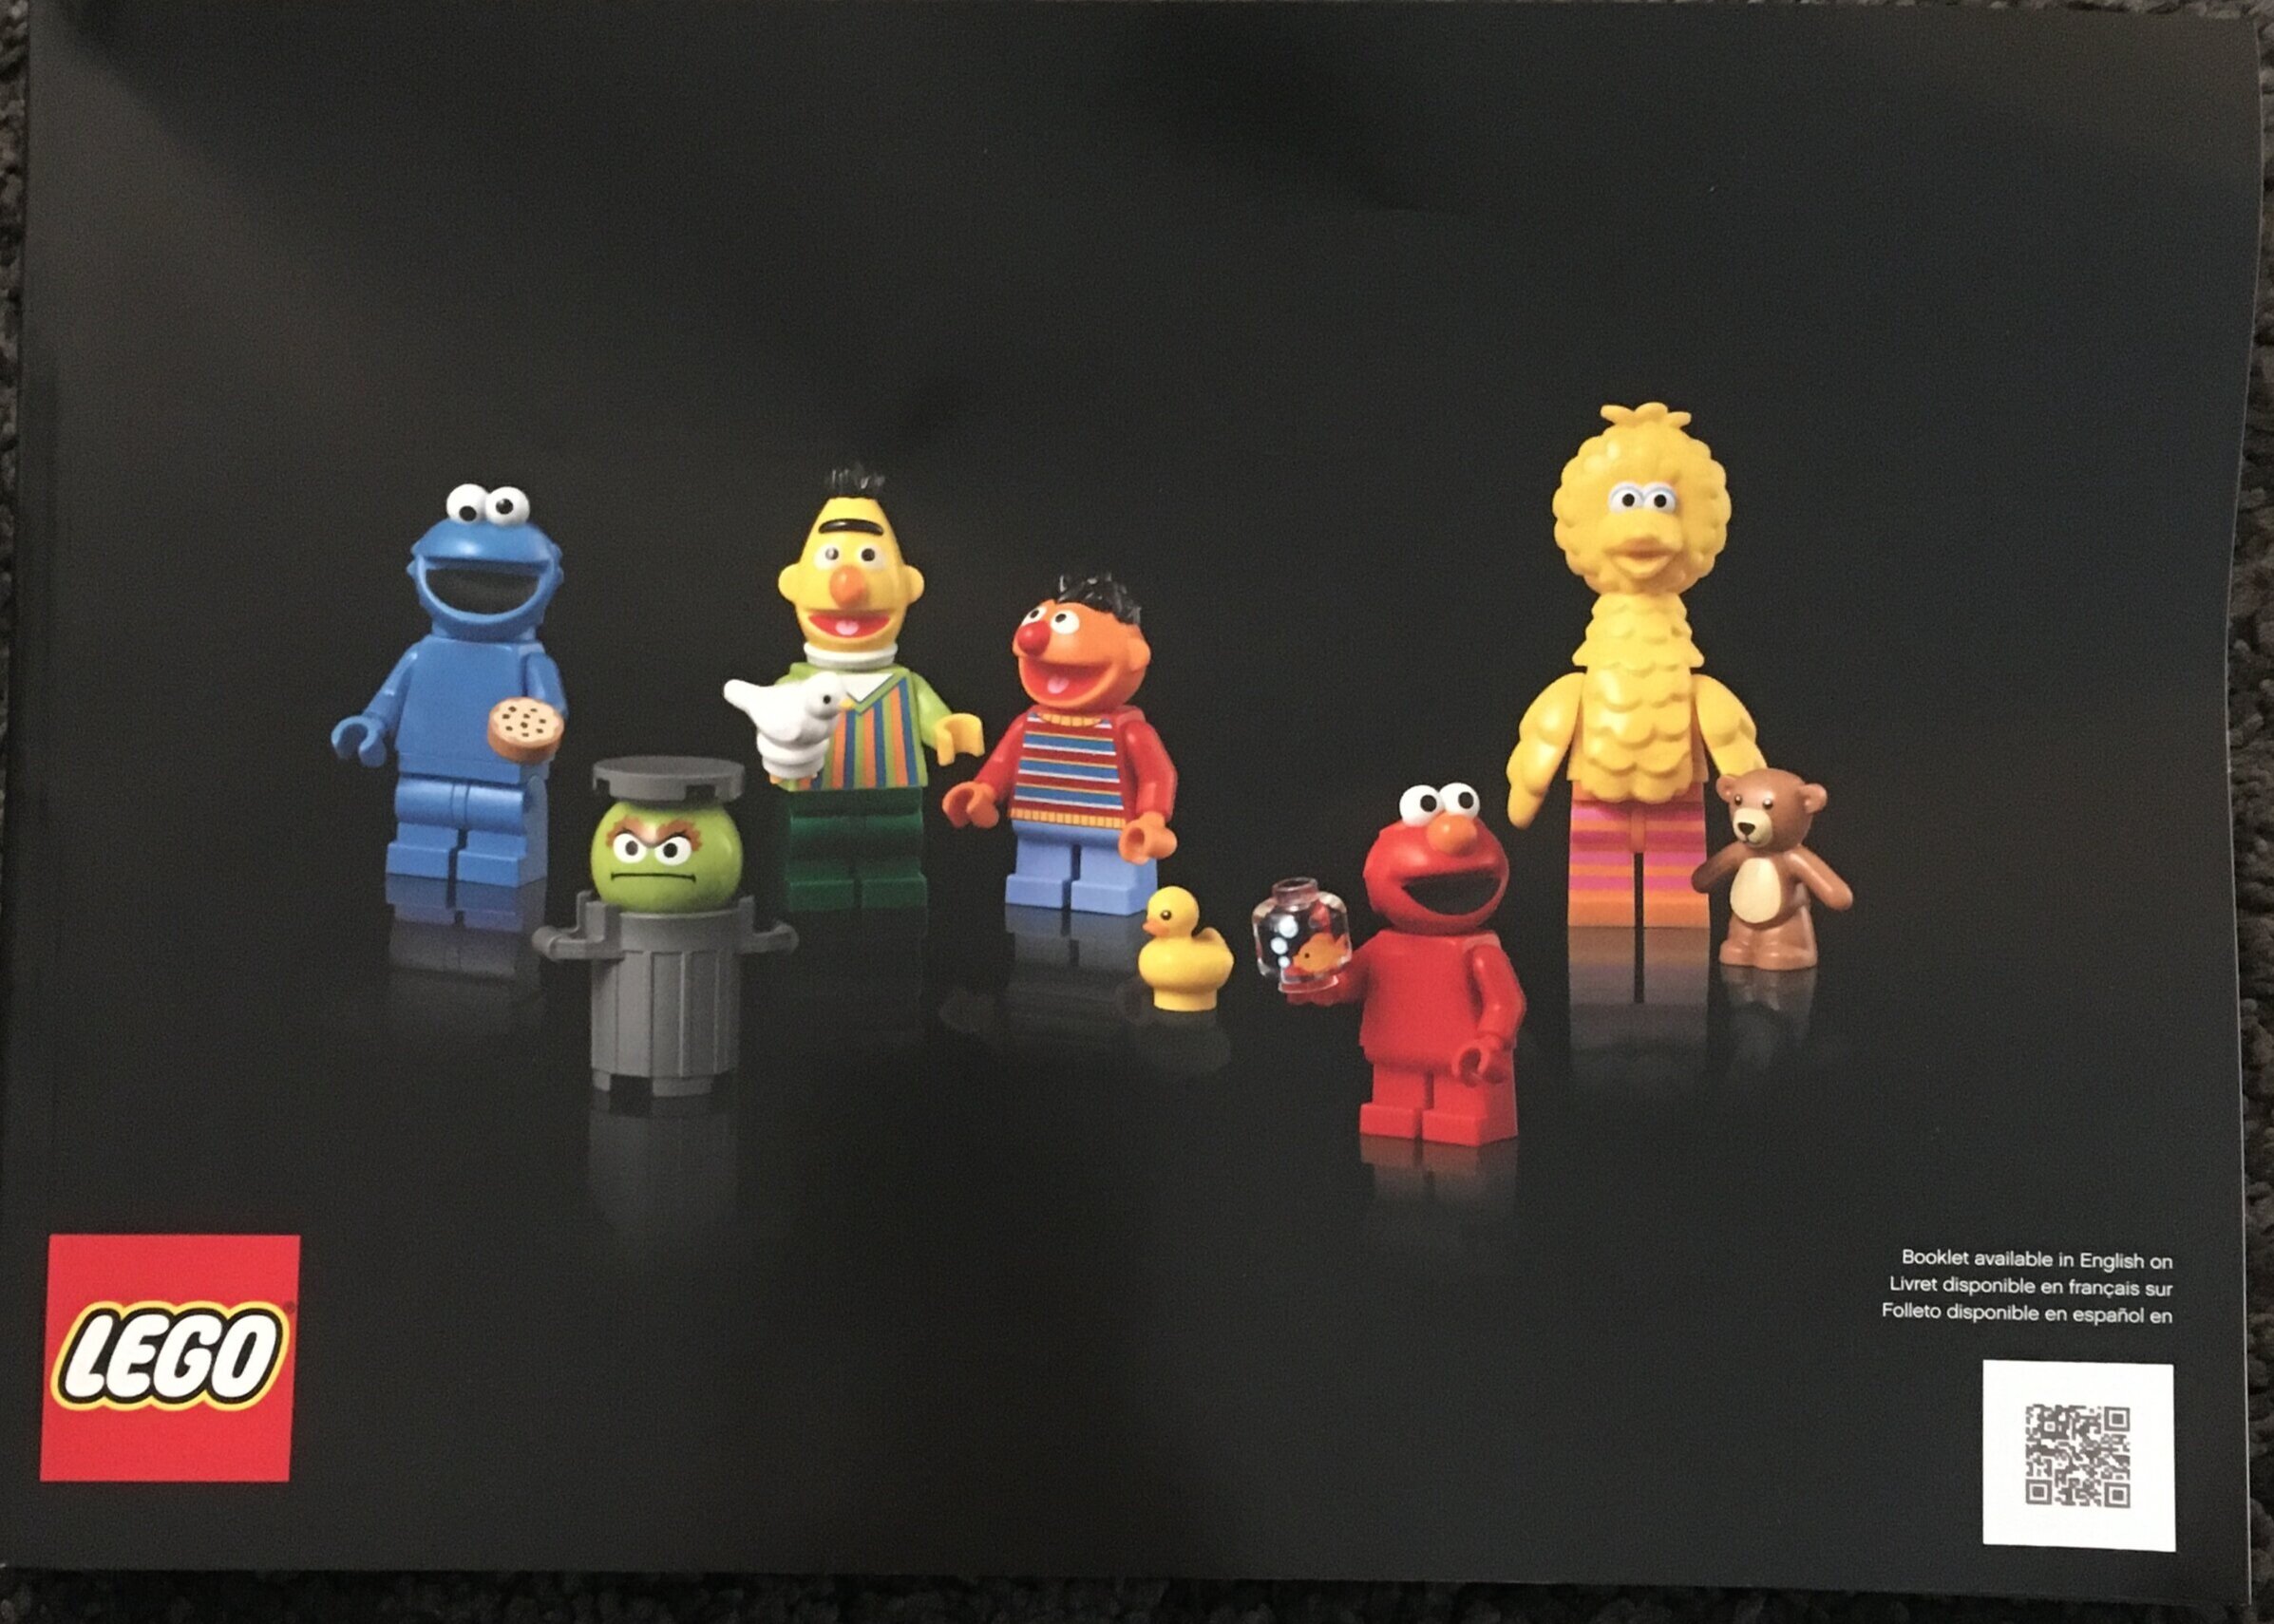
The remaining six as shown in the picture are Nymphadora Tonks, Ron Weasley, Ginny Weasley, Harry Potter, Molly Weasley, and Arthur Weasley. They all come with wands as well.

I think this is a pretty good mix for the set and you get a decent amount. For minifigure collectors, you get seven unique Harry Potter minifigures so not bad.

75890_build7c.jpg
75890_minifigures.jpg

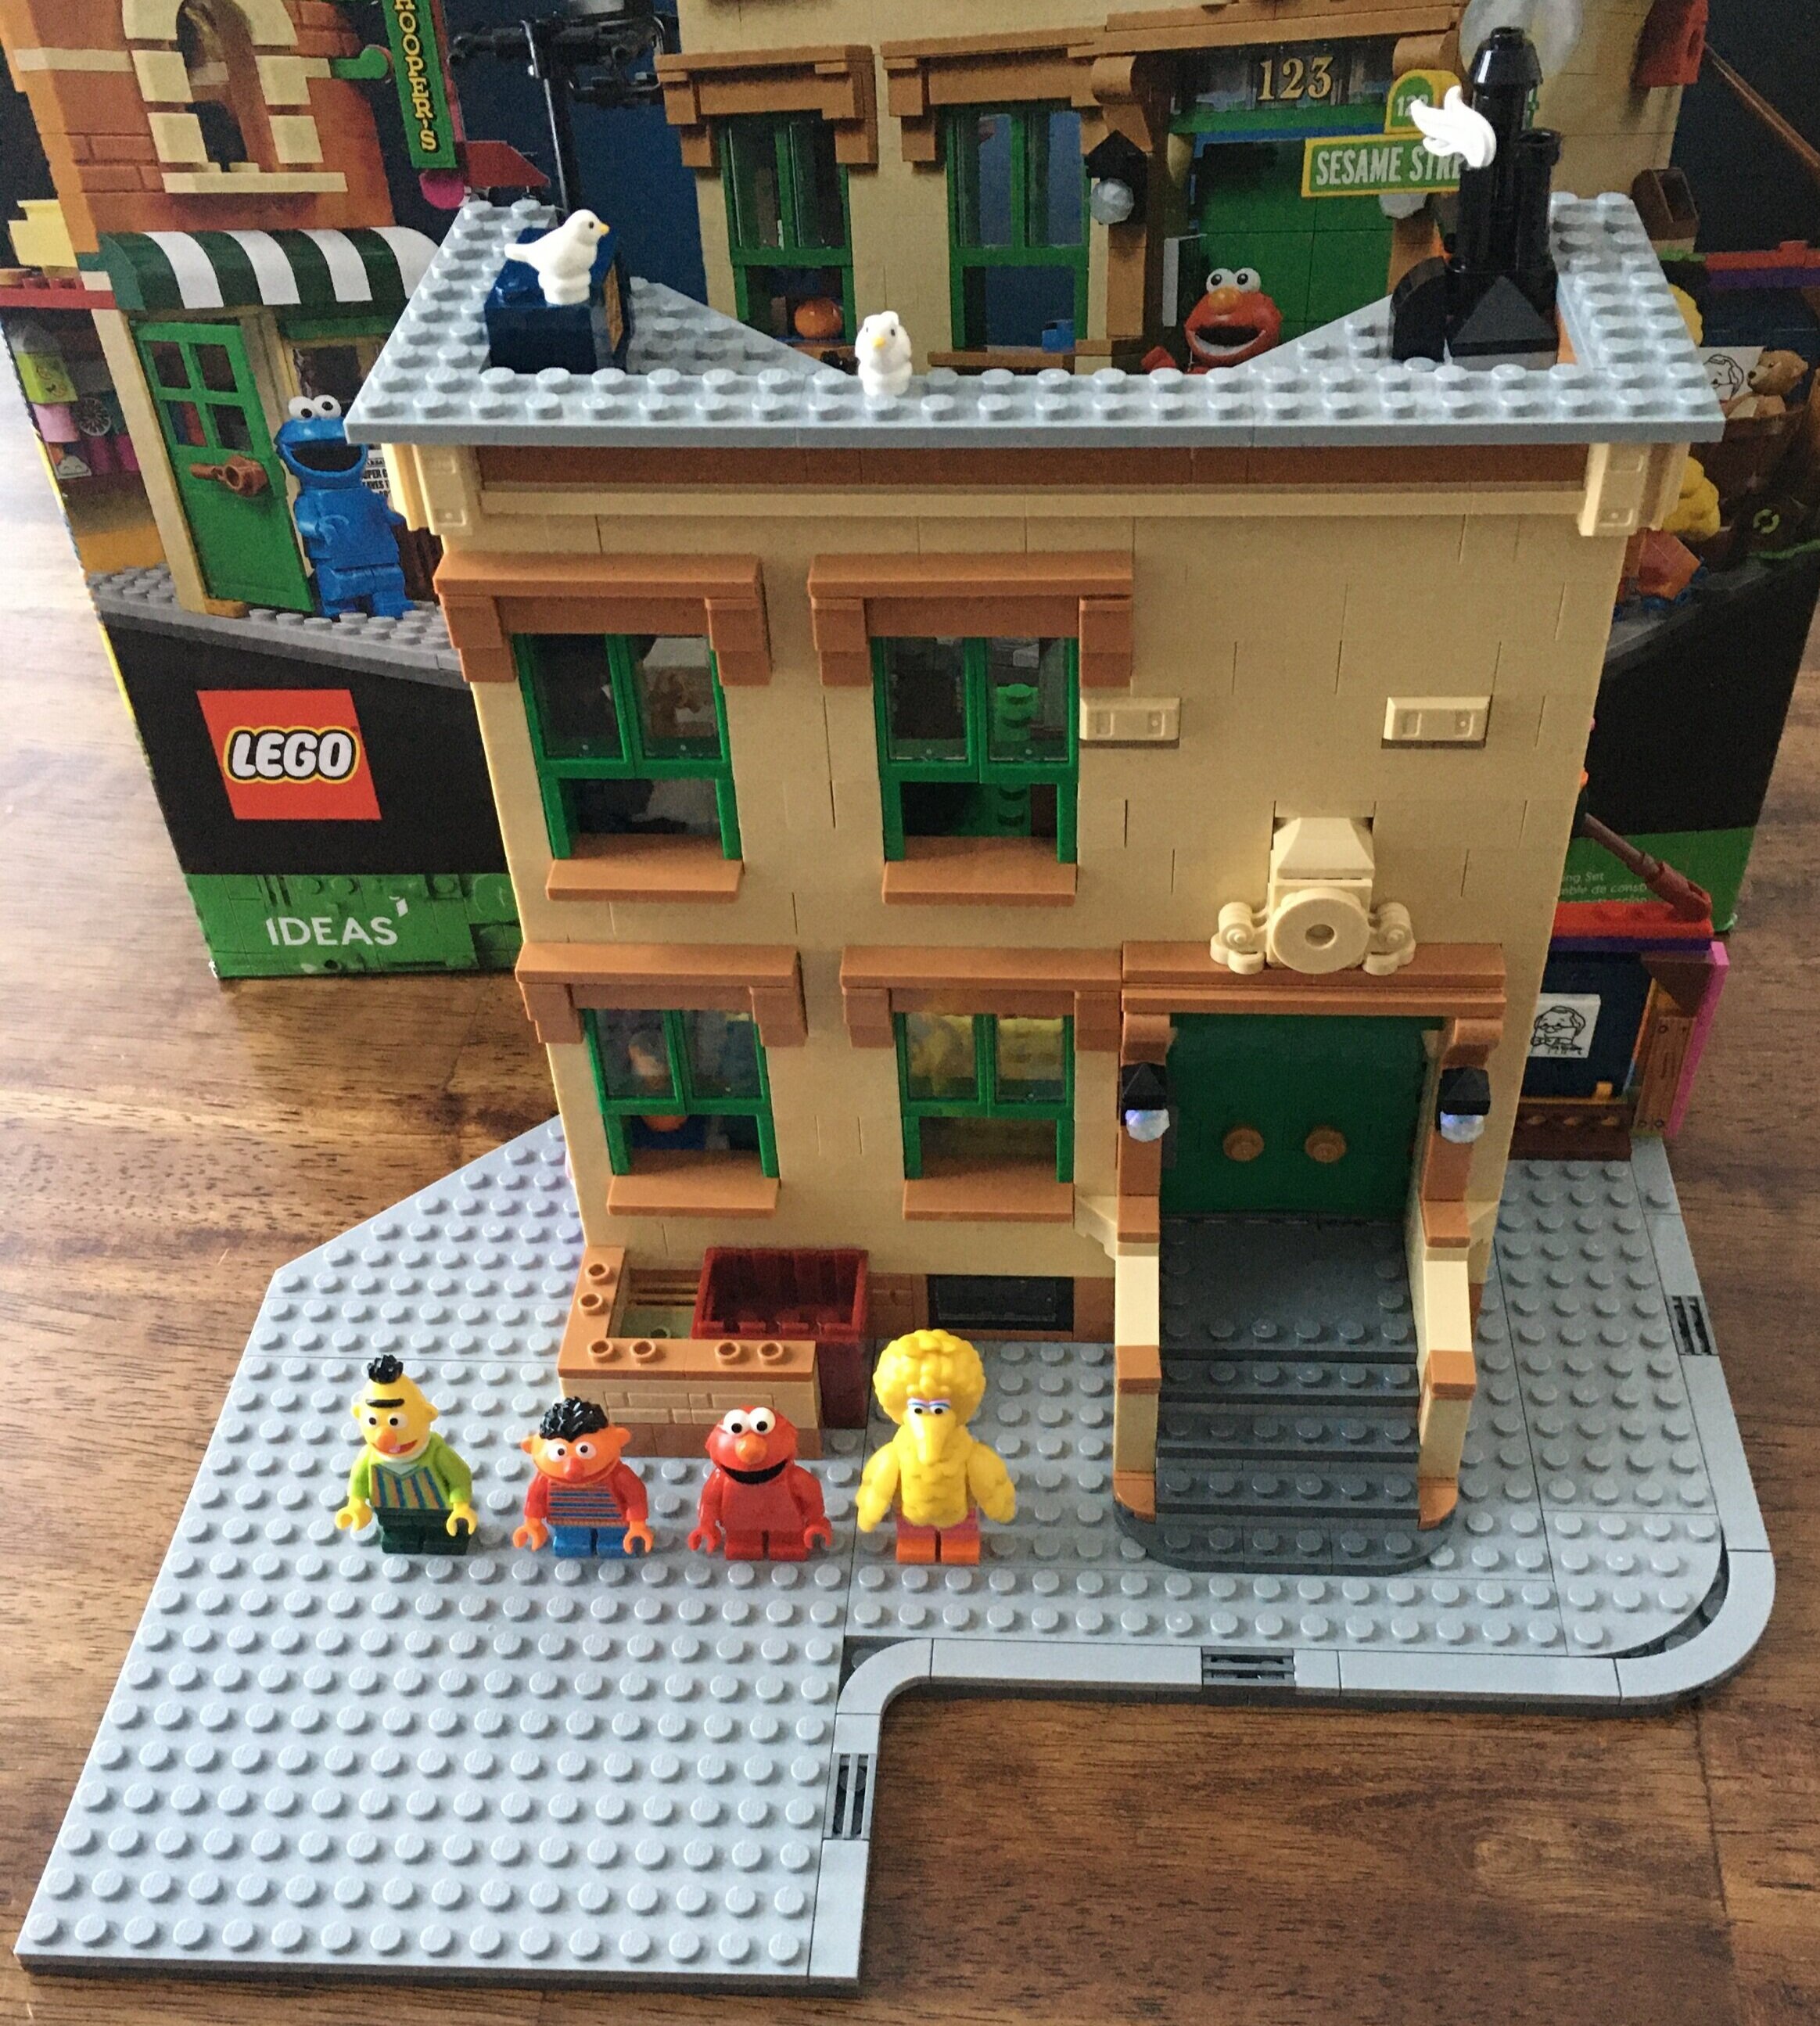
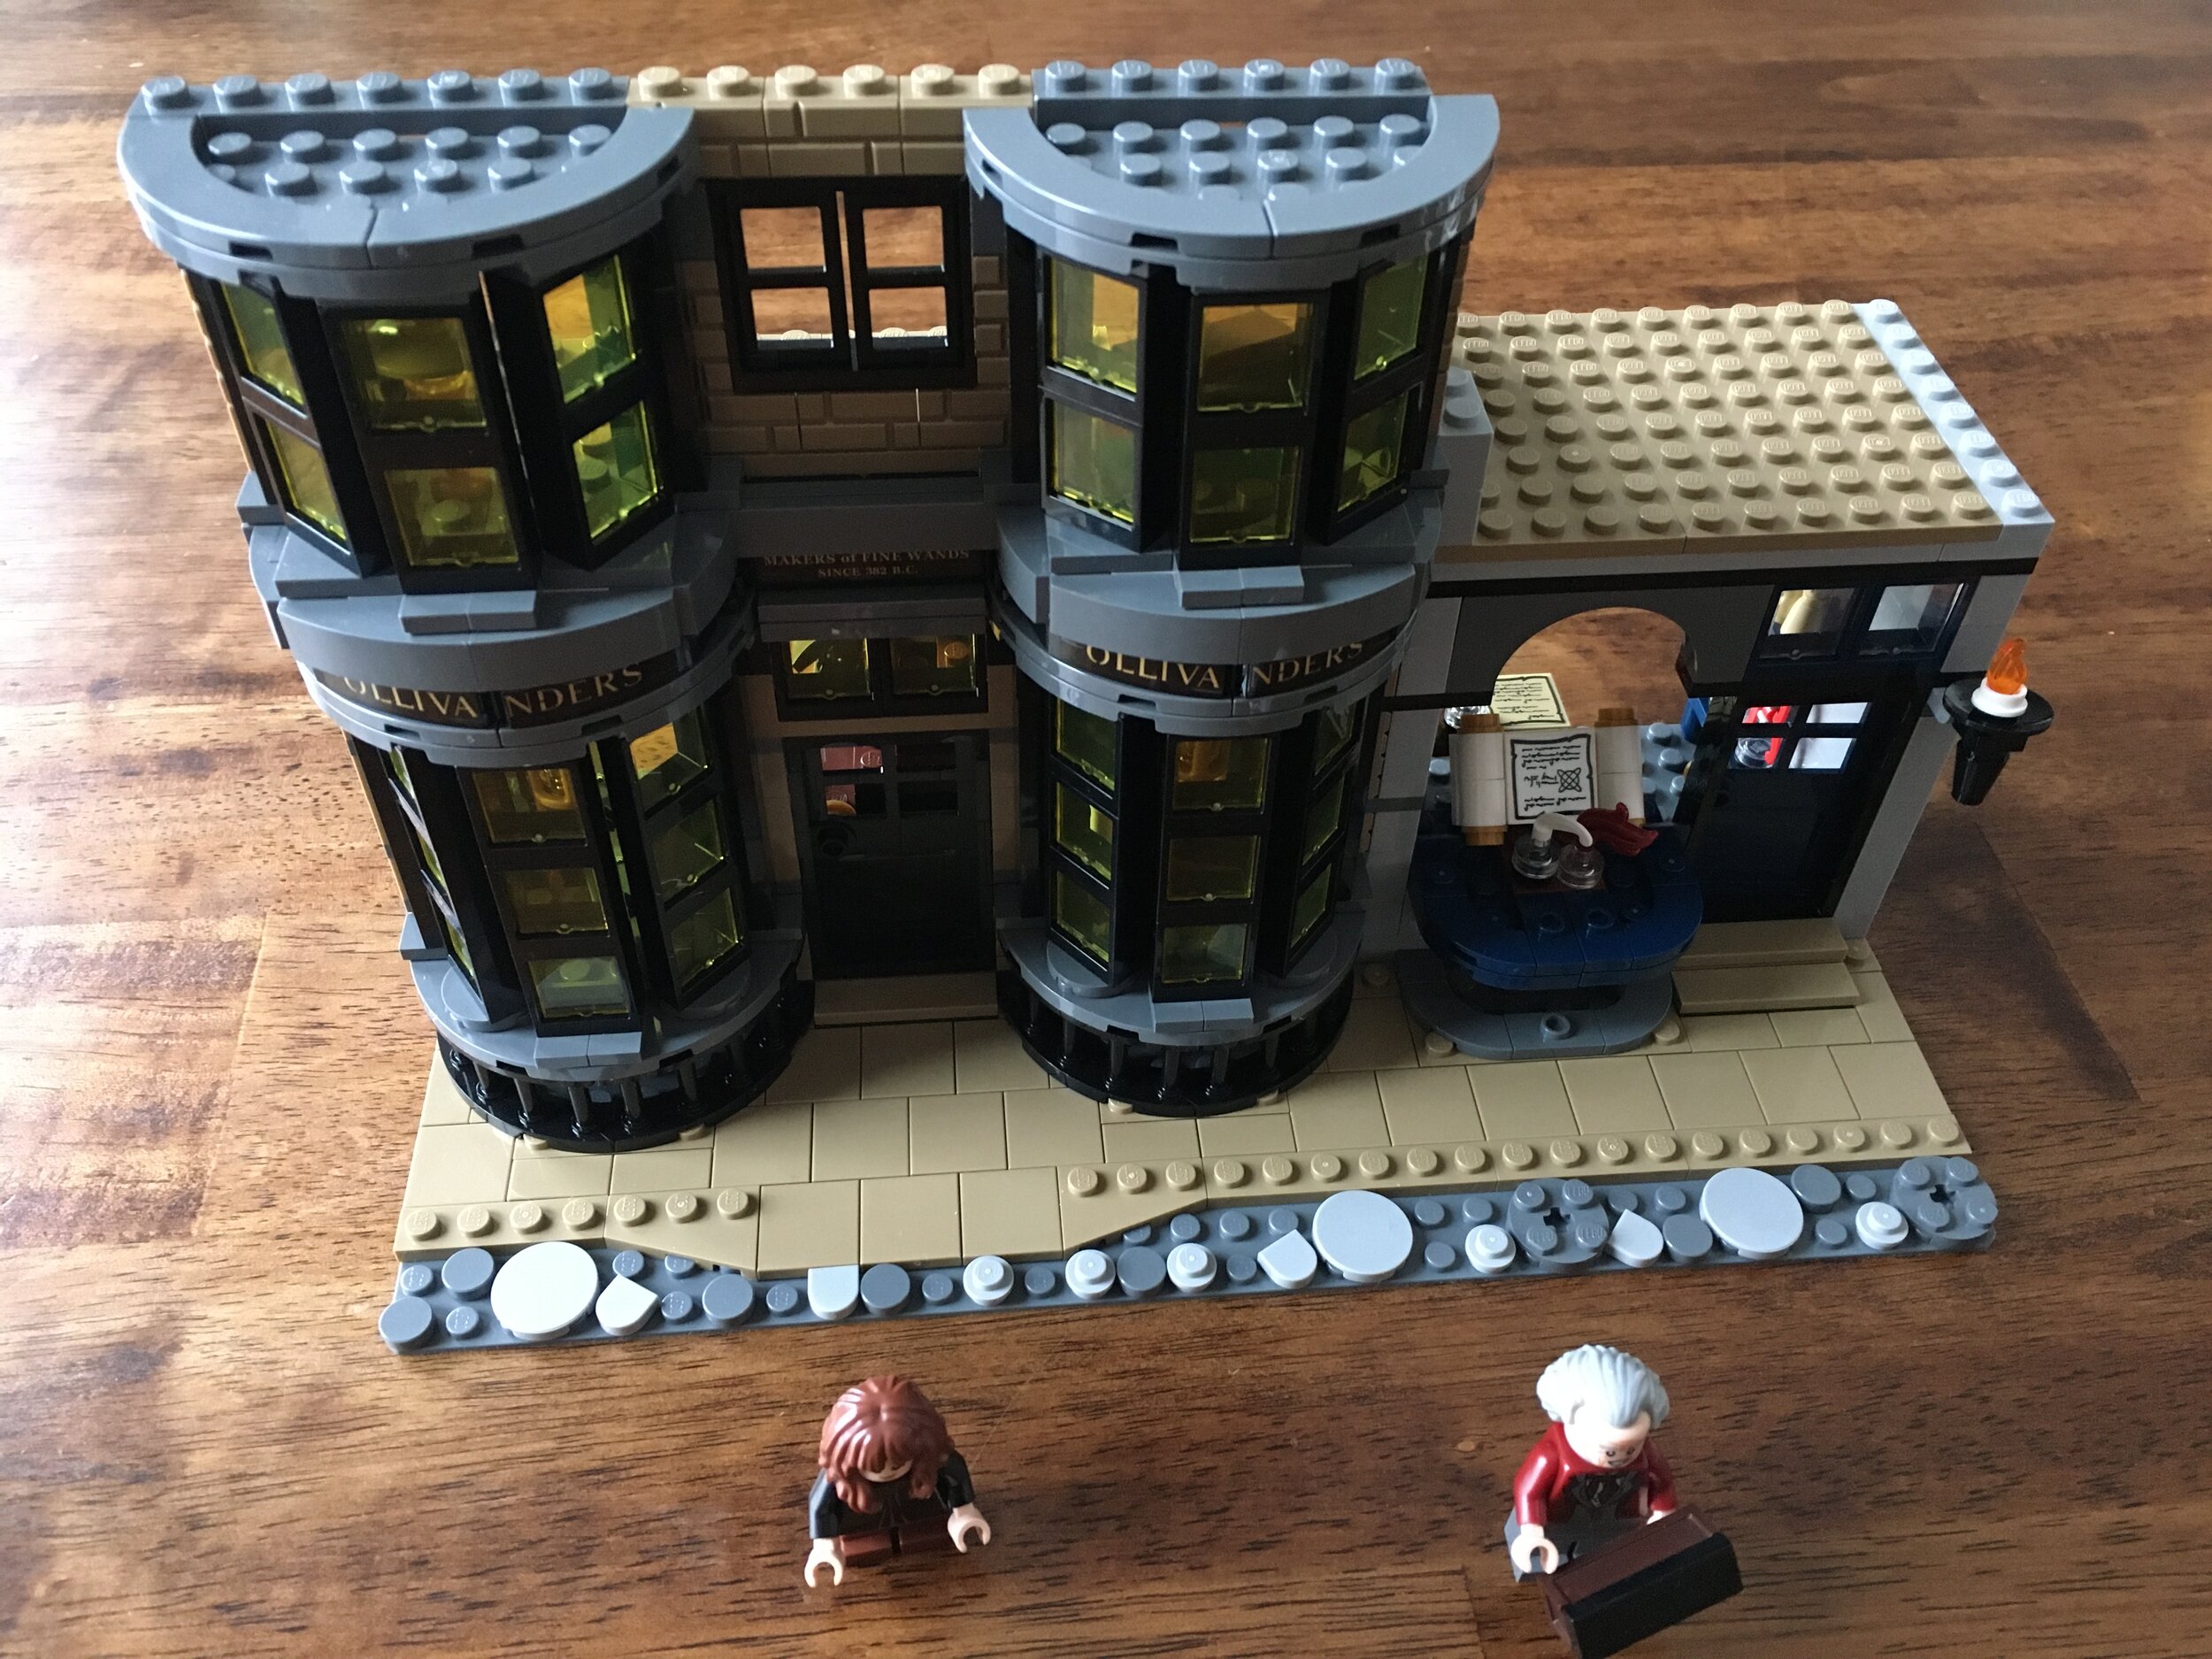
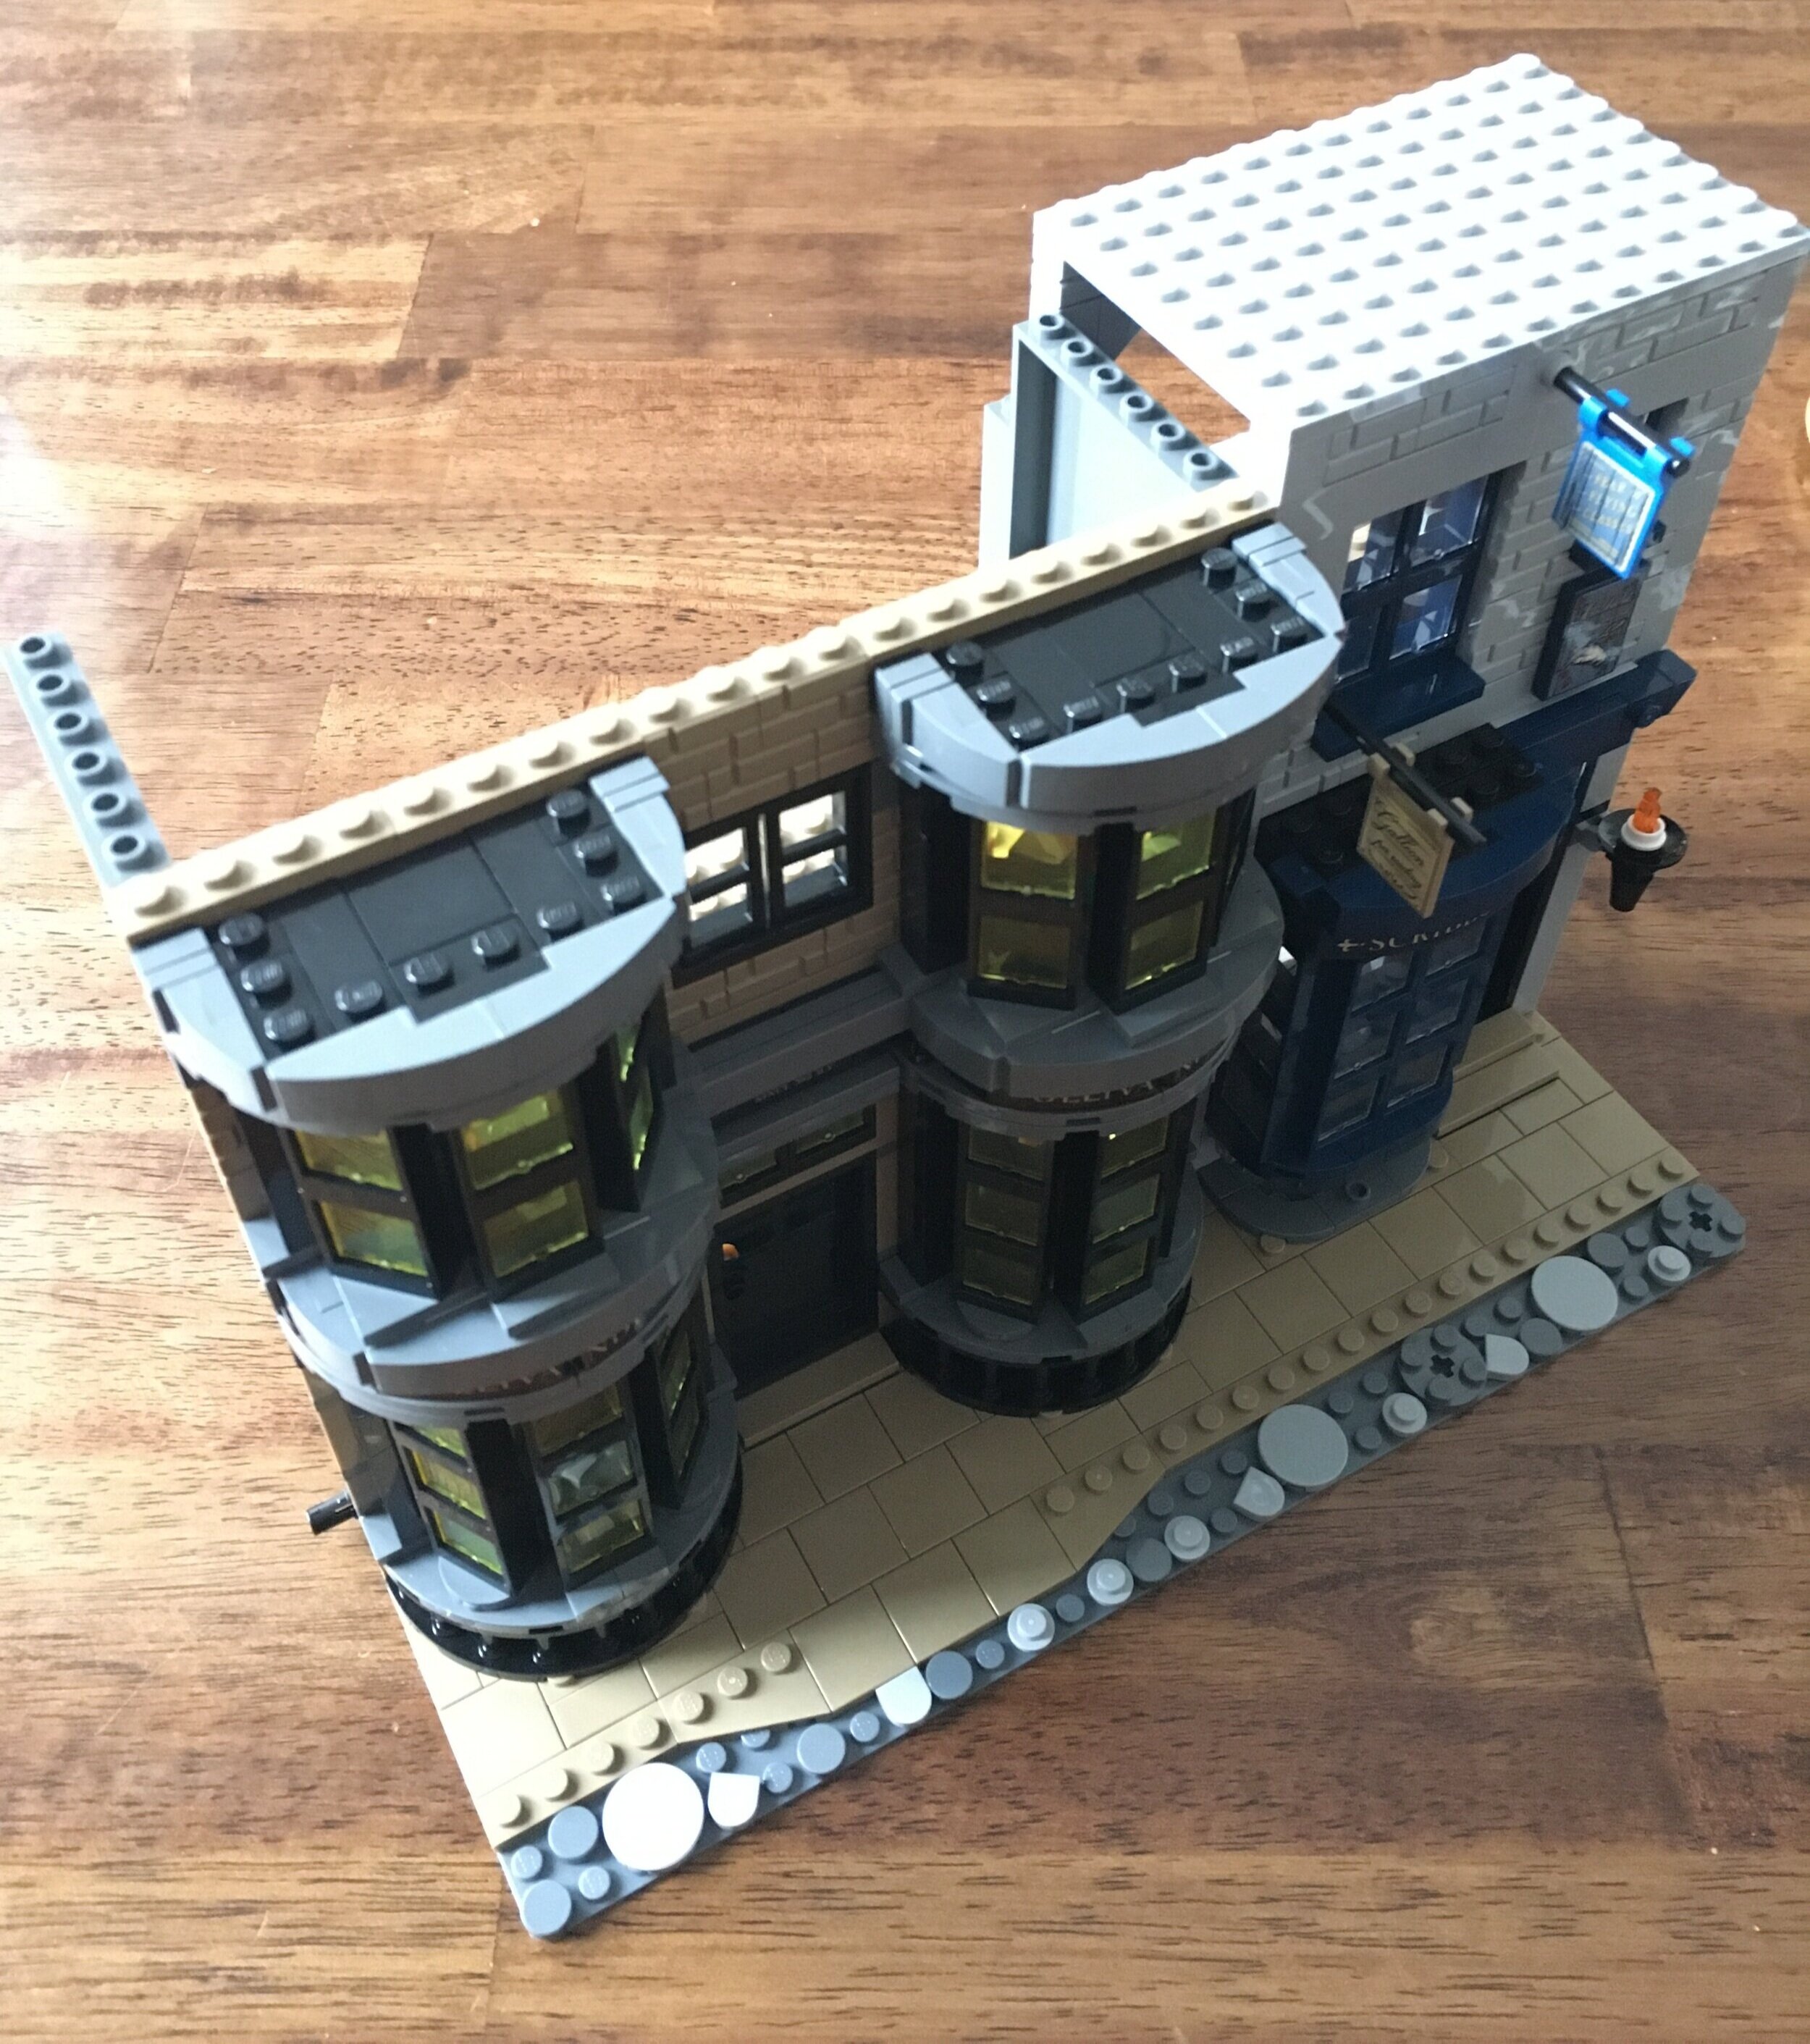
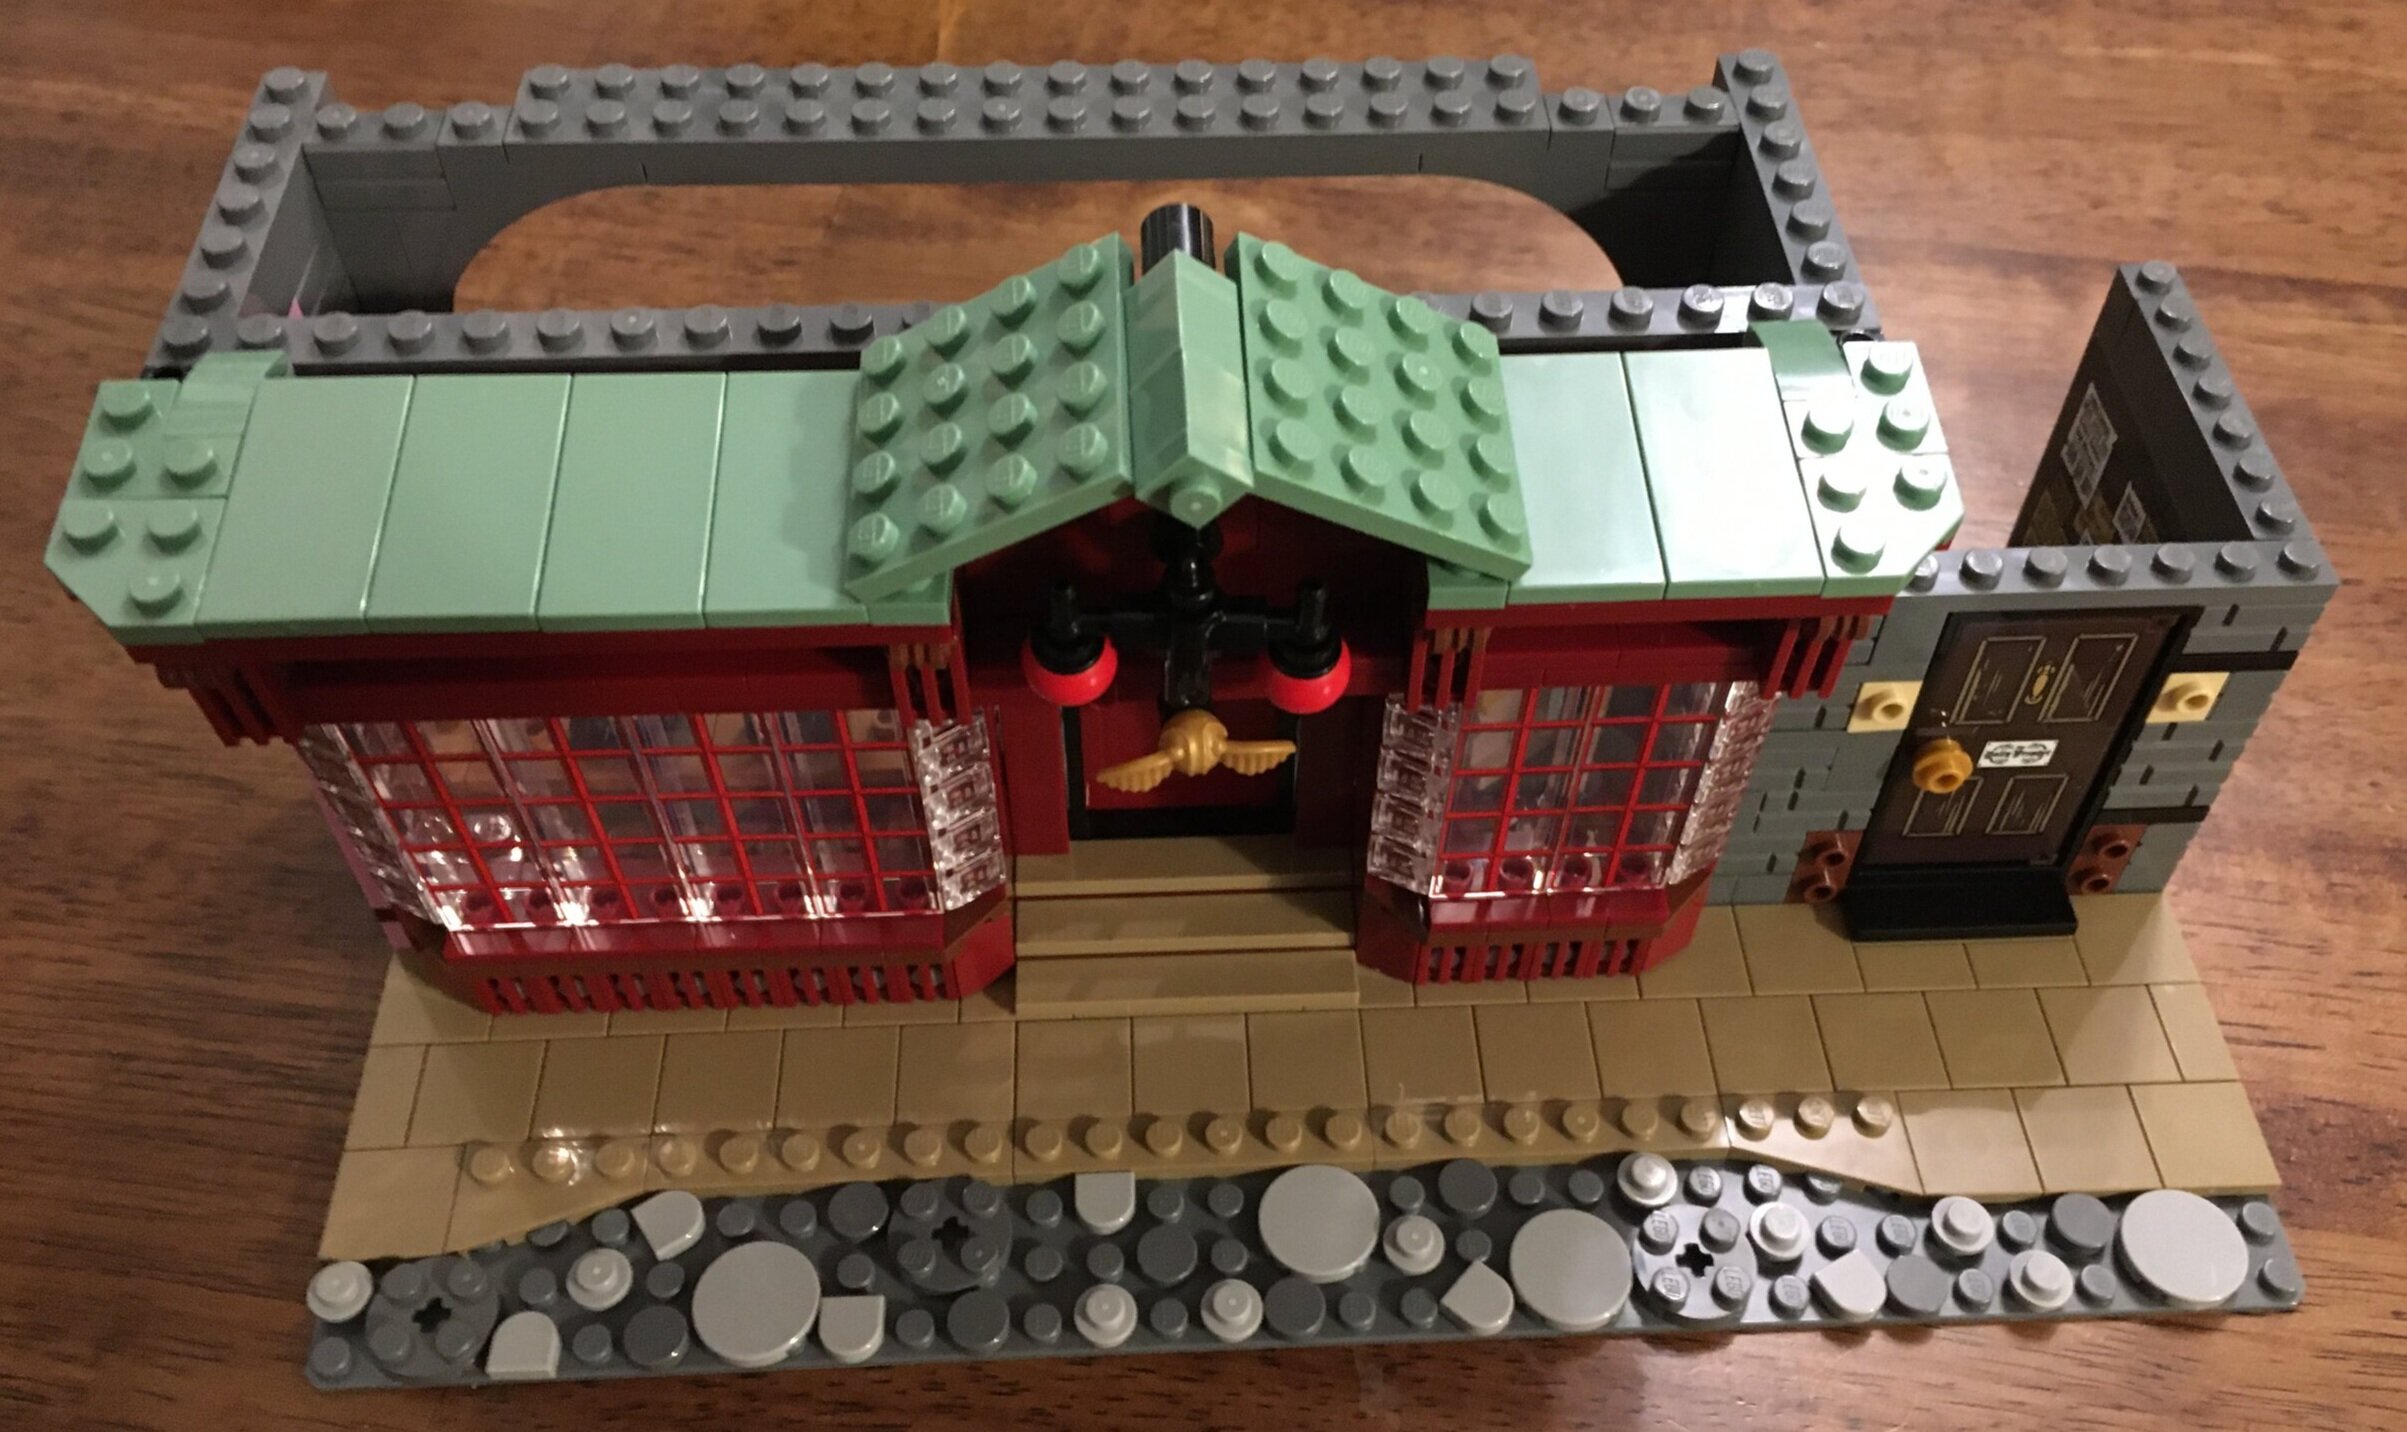
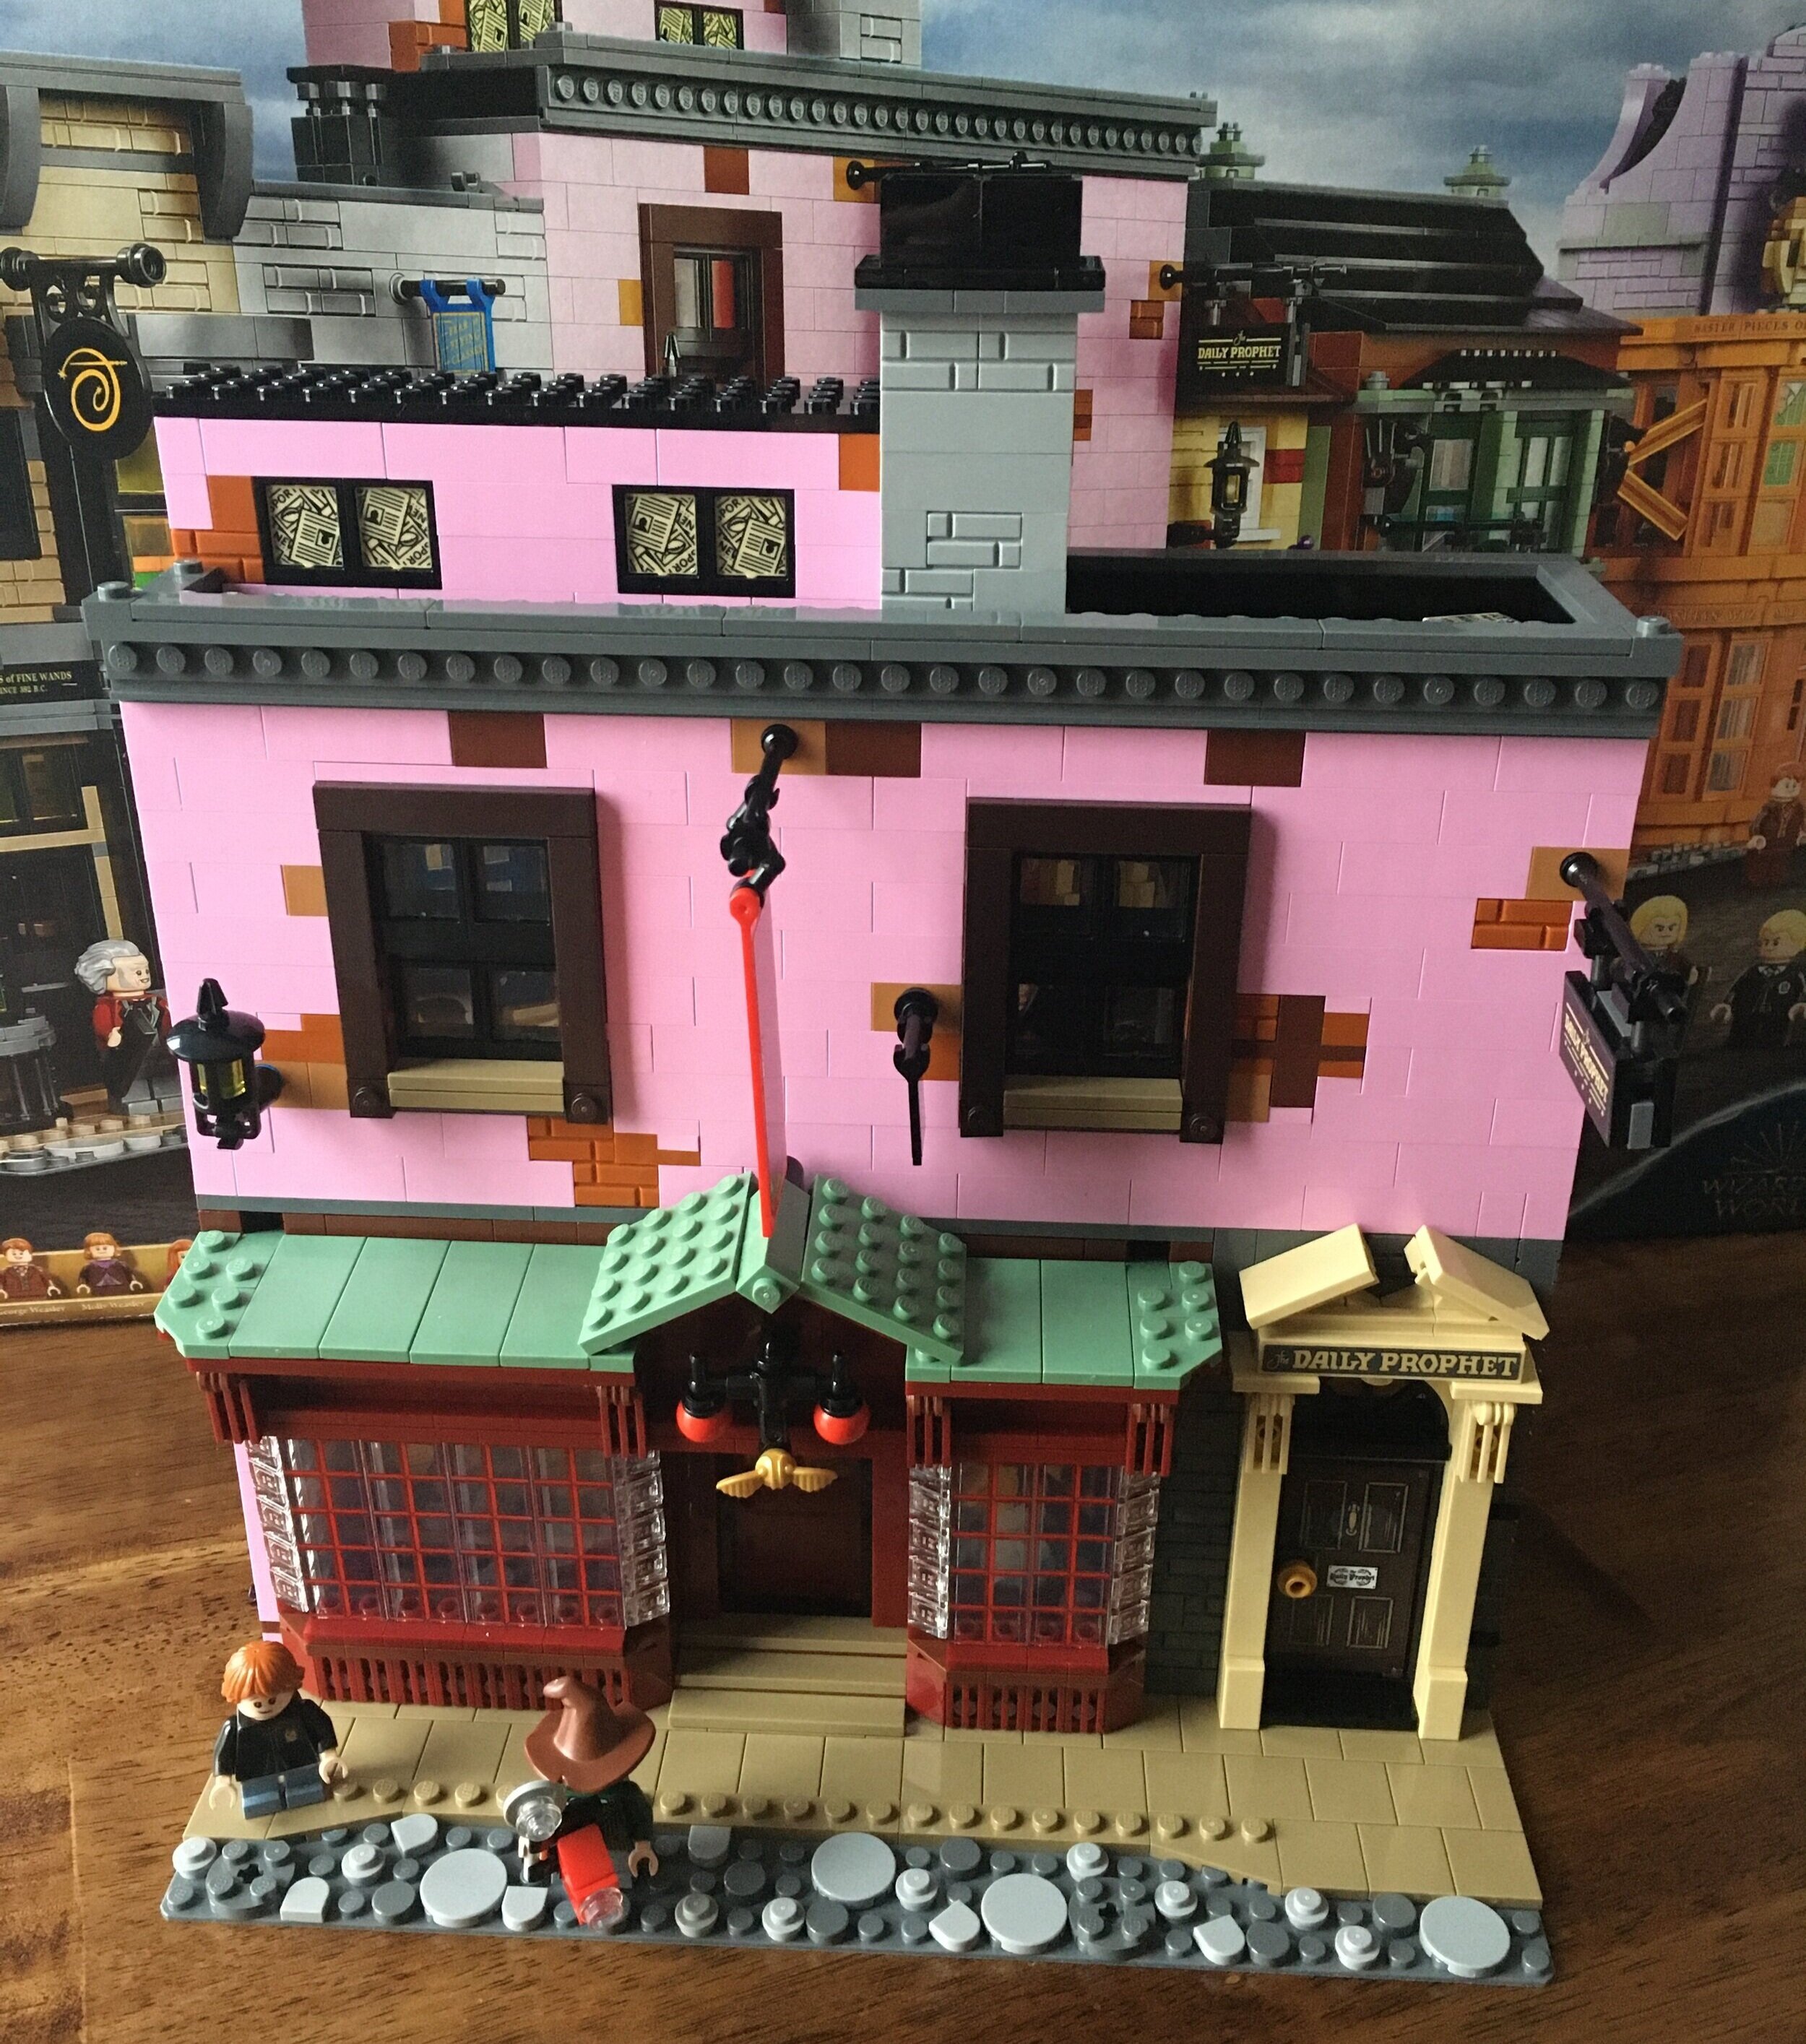
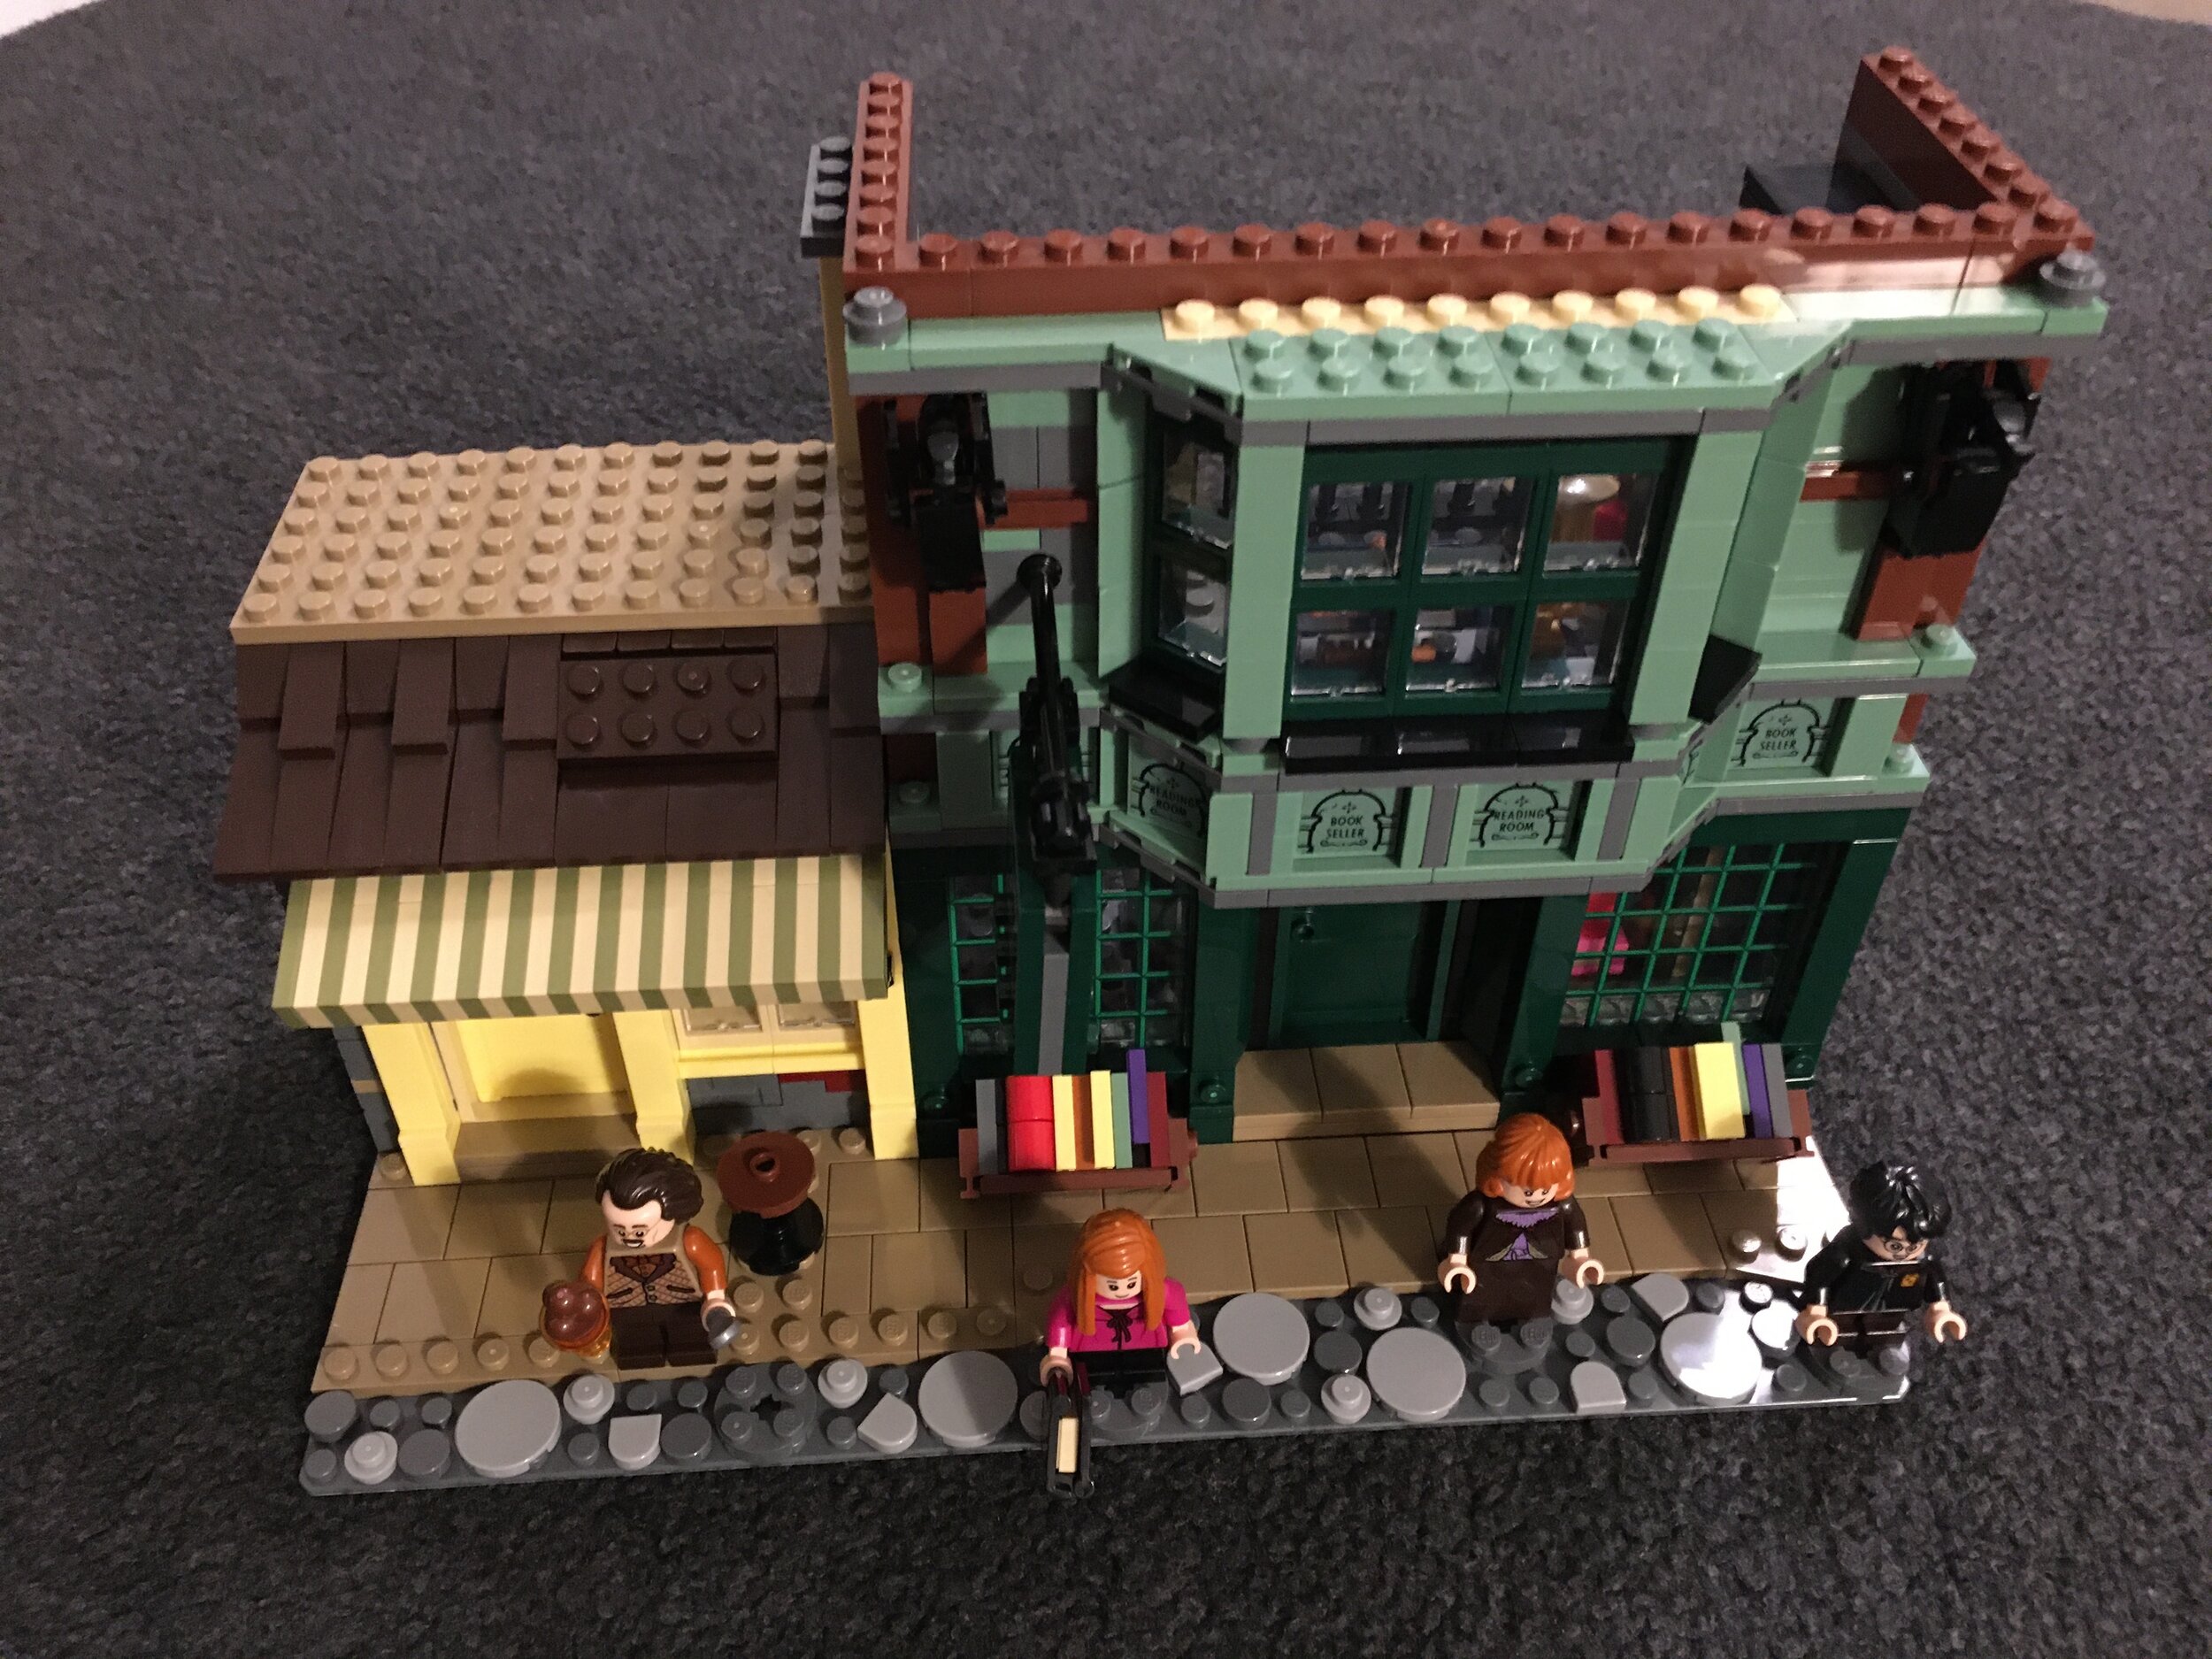
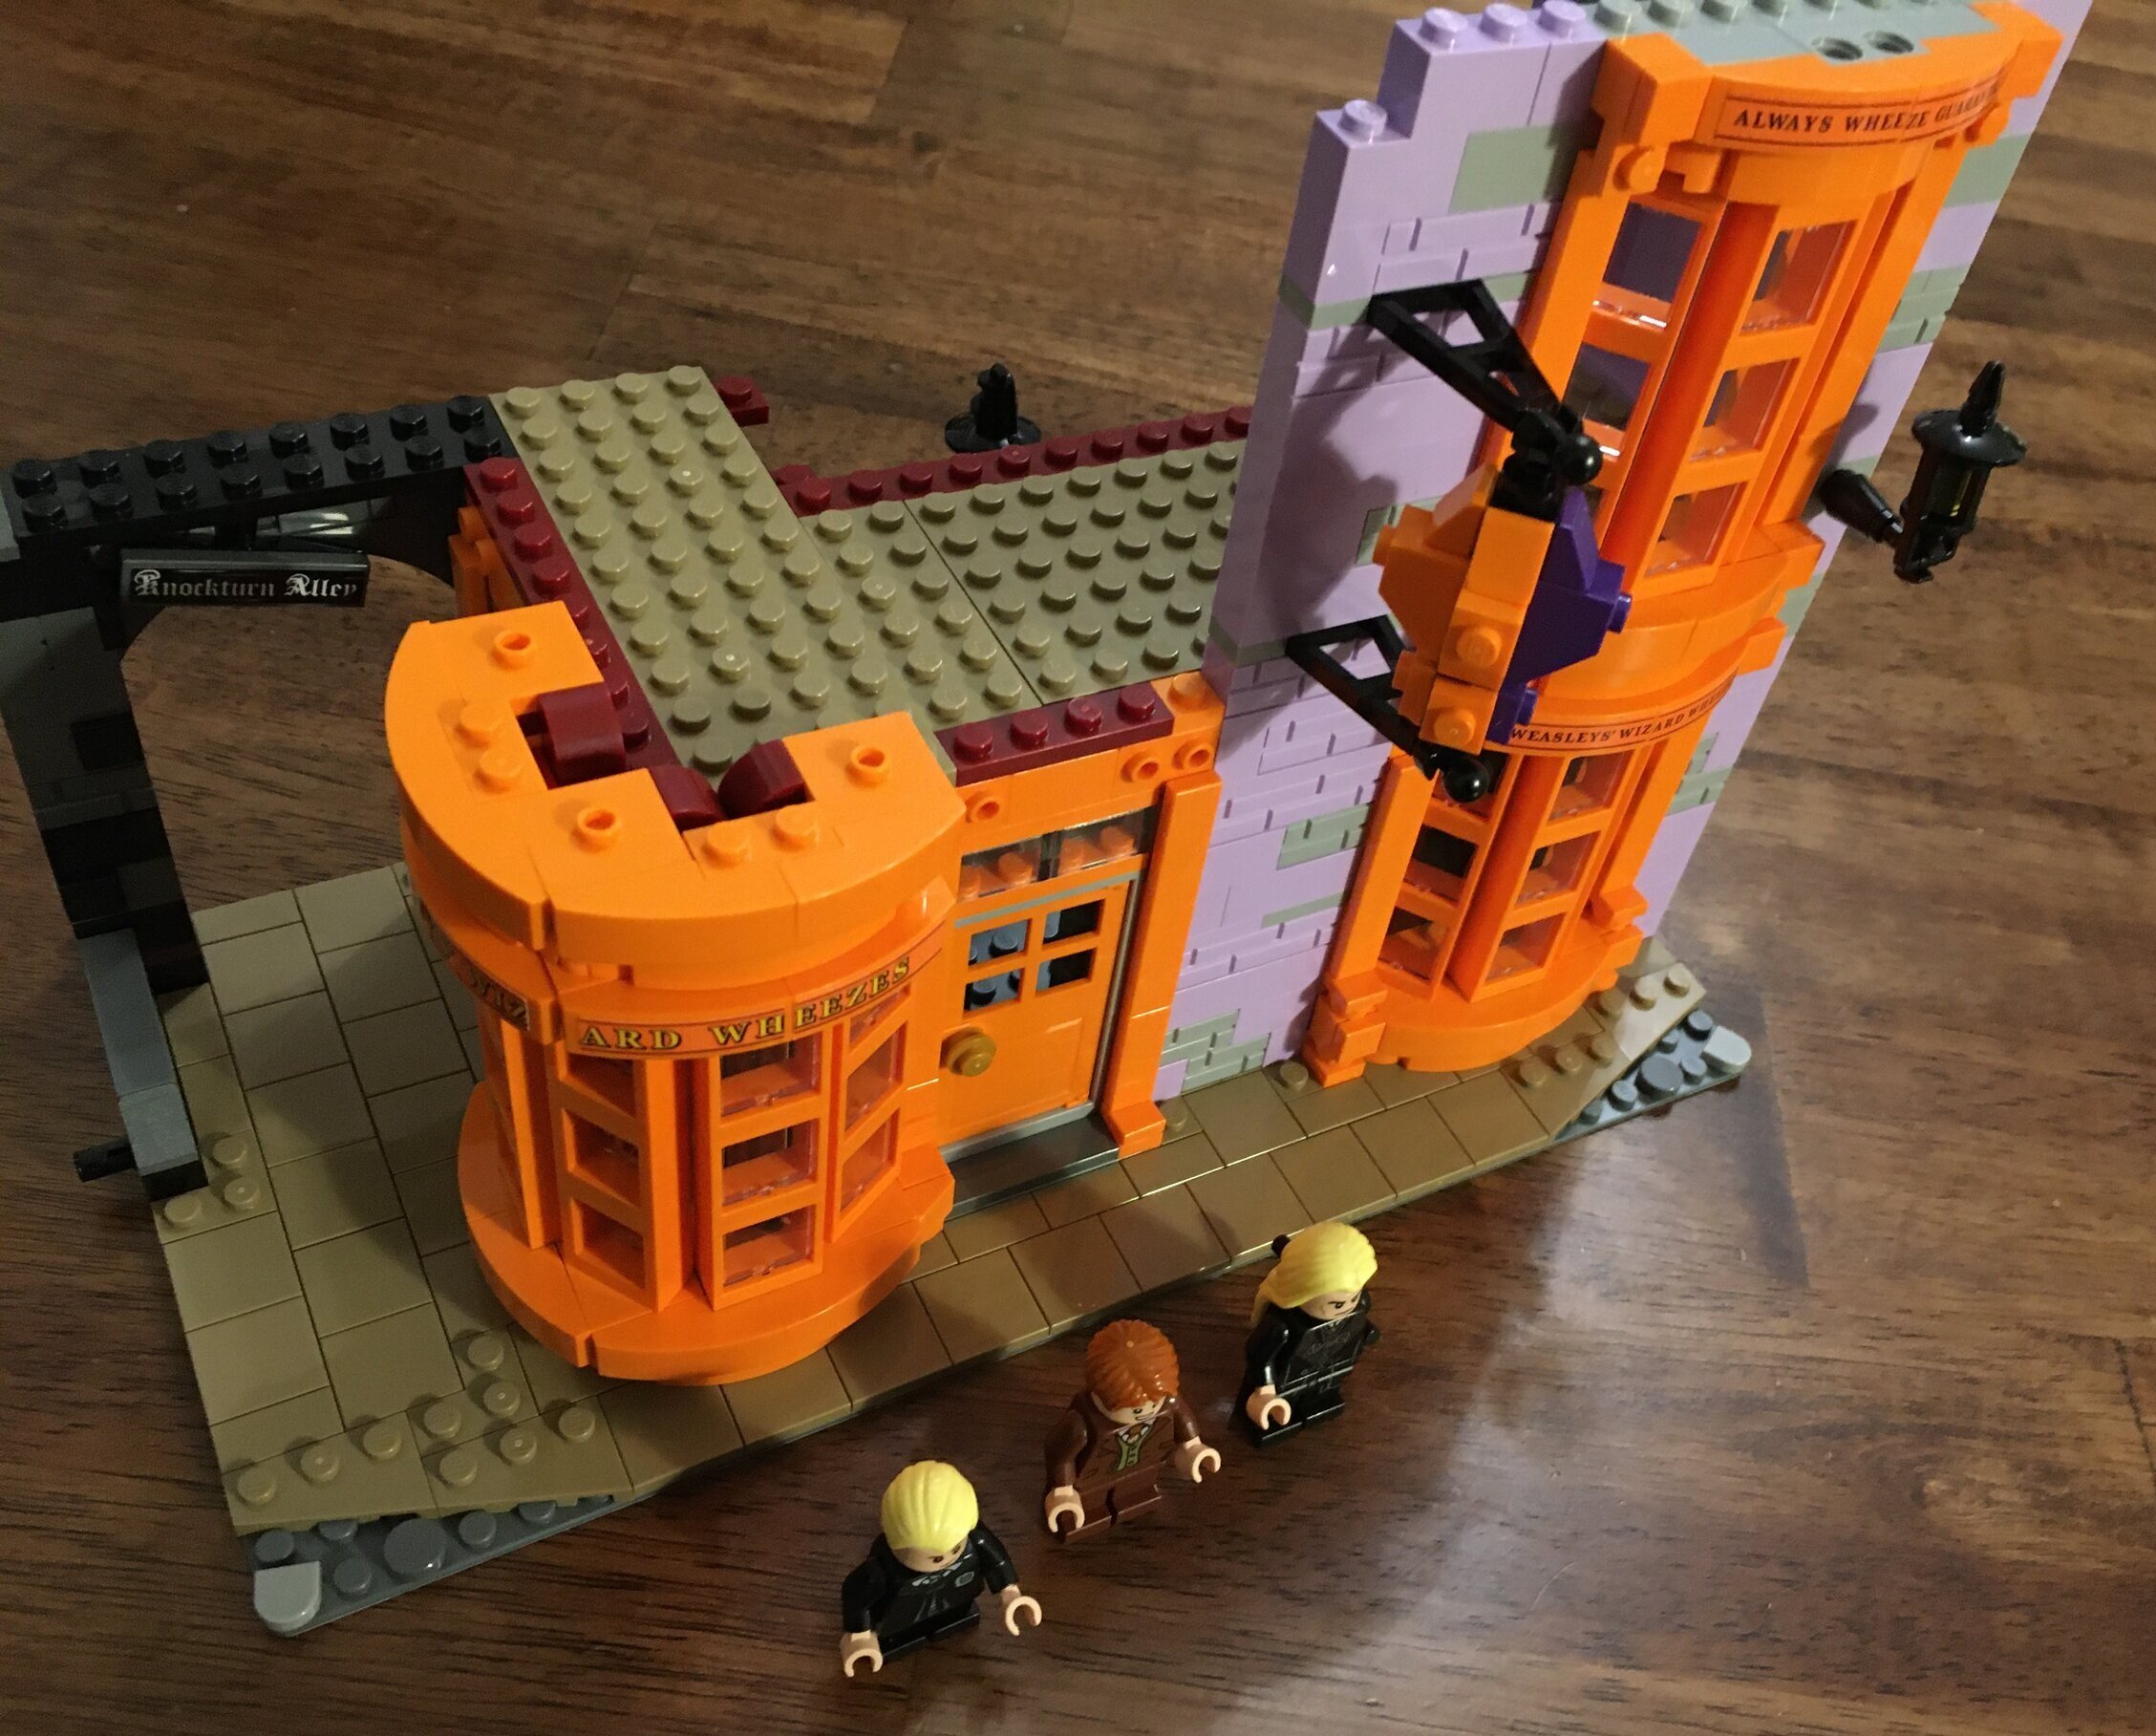
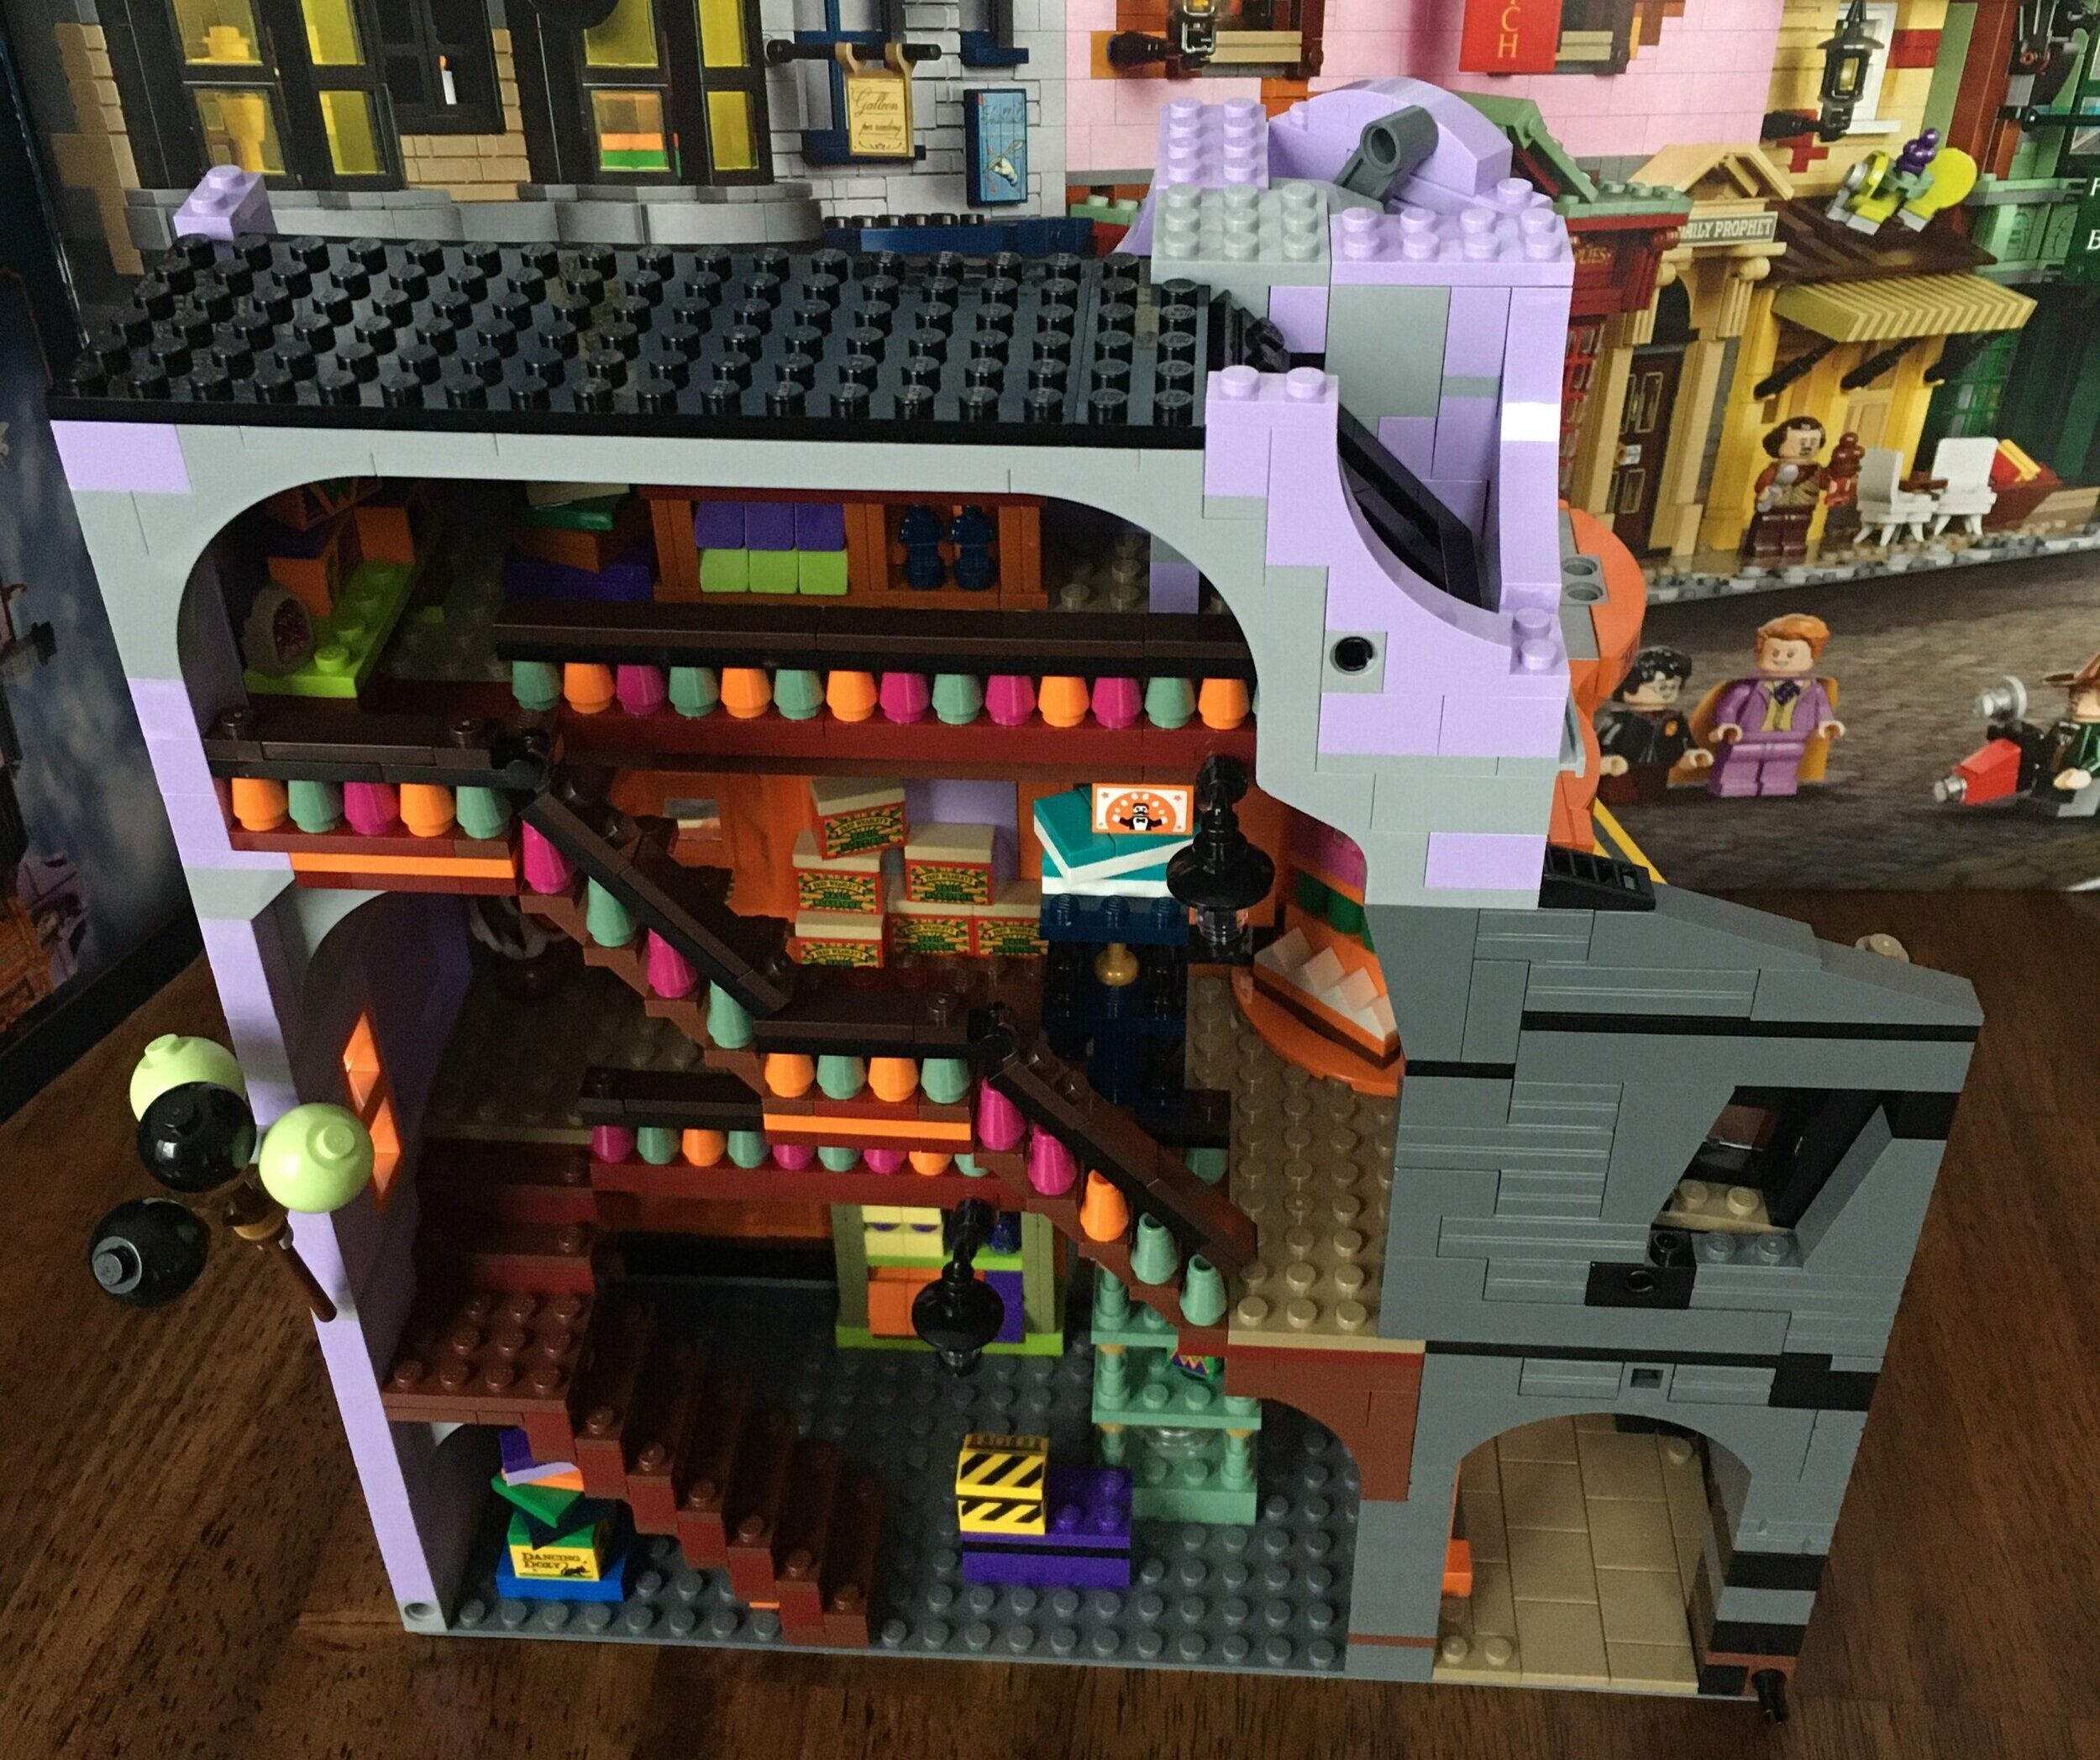
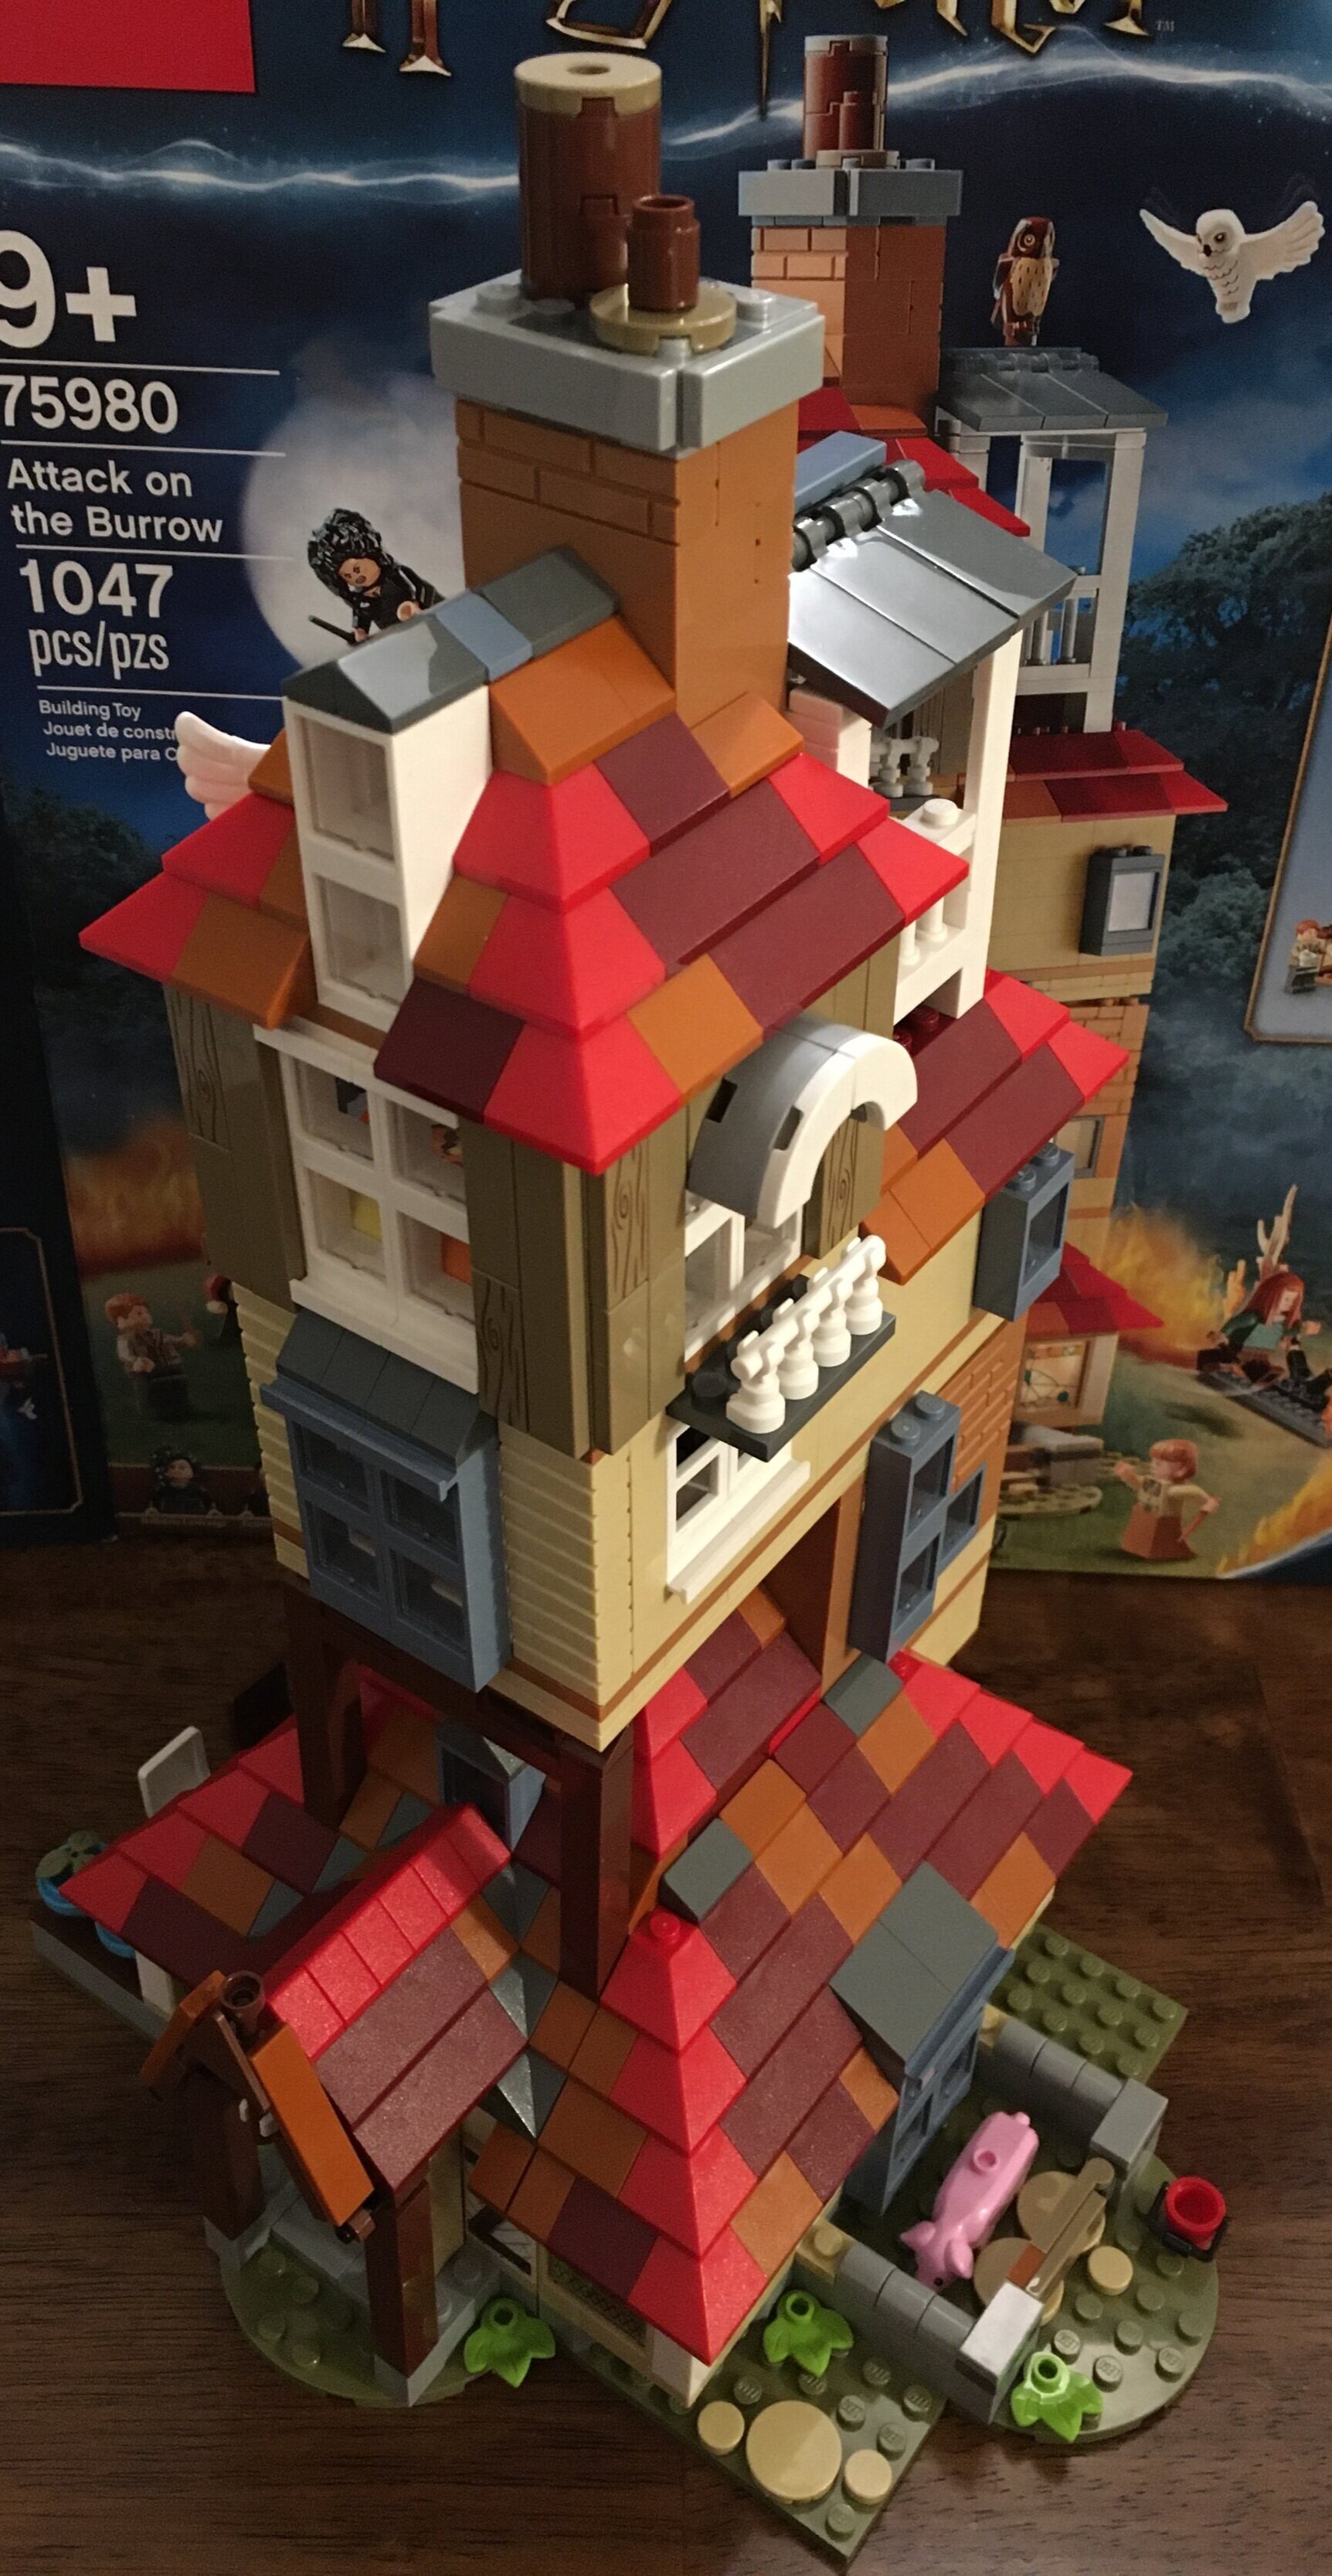
Here’s the final set. I like how they created the offset angle of the upper level. My Non-LEGO Spouse originally saw it and thought I didn’t connect everything. I had to explain that it was built that way. A nice touch.

Overall a good set that closely follows the Harry Potter version from the movie at an age 9+ range with just over 1,000 pieces. There are some good building techniques, but nothing overly challenging. For MOC builders you get some good pieces to pick from for your own builds. Price wise it is not bad, but it could be cheaper. I didn’t find it on sale, but I did get it with a freebie so that helped. If you wait a bit longer, you might be able to pick it up on sale. Just don’t wait too long and have it retire.

And that closes out the 2020 Harry Potter line for me. What are your thoughts on this set?

Happy building!

IMG_2024.jpg
IMG_2025.JPG

Set Review - #71029 - Series 21 - Collectible Minifigures

Yeah, yeah… I complained about them and now I finished the collection thanks to SteineHelden.de. These 12 minifigures were released on 1 January 2021 and are still available at the time of this post. I had a not so fun time trying to get all of these, but I finally managed. Supposedly the new box of 36 has three full sets. Only where do you get a full box?

I paid the full $4.99 from LEGO Shop @ Home, I bought a few from LEGO.de for ~$4.84 and then SteineHelden’s price worked out to about $4.50. Not my ideal price, but I can’t complain as compared to prices in the US.

If you’ve read any of my Collectible Minifigure reviews, I’m a big fan of the non-licensed versions. I think the designers come up with some creative minifigures that can be used in individual scenes, in cities, or whatever MOC you are working on. Series 21 is no different. Despite having only 12 in this go around, I think the mix of minifigures is good between costumed minifigures, fantasy and historical minifigures, and modern day city people.

If you’re a fan of Collectible Minifigures, definitely pick these up. Try and find sales if you can as these things are not cheap in my opinion.

A quick write up on each figure is below. What are your thoughts?

Happy building!


71029_1.jpg

Two costumed minifigures in this set. Ladybird Girl as Brickset refers to it comes with the ladybug wings, 2 1x1 round tile printed ladybugs, and a hat with antenna. This one is pretty cute.

Pug Costume Guy is a fun dog that comes with two toy bones to hold onto. I like the ears on the dog helmet.


71029_2.jpg

The Paddle Surfer is decked out with a lot of gear. You get a surf board, a paddle, a life jacket, and a dolphin. The minifigure head is either sun glasses or without on the other side. This one is good for any beach scene and the dolphin is a great add for any city beach or even a pirate scene.

The Shipwreck Survivor has his bottle to put a note in and a small hermit crab to go with the minifigure.


71029_3.jpg

Two kids in this series. Violin Kid comes with a kid sized violin and then he uses a wand as his bow. This one is pretty creative and I like the idea of minifigures with instruments.

Airplane Girl come with a full up airplane costume along with a helmet and goggles. She also comes with a hair piece if you want to use her without the costume. Has anyone seen the Amelia Earhart gift with purchase release coming out? I wonder if these two are tied in?


71029_4.jpg

The Beekeeper is a fun concept. I could see someone making some bee hives to go with a farm scene.

Space Police Guy is a nod to the space fans from back in the day. I still have some of the original space police sets and it’s cool to have another more modern figure to go with them.


71029_5.jpg

Ancient Warrior seems to be from the Aztec type days. Or maybe Mayan? I’m not sure, but it’s cool looking.

Alien comes with a crystal and a crow bar. Your chance to be creative here to come up with what that alien could be doing.


71029_6.jpg

The Cabaret Singer comes with a microphone stand, a microphone, a giant head piece, and a cape. This picture is big only because of the next minifigure and I couldn’t fit them in together…


71029_7.jpg

The Centaur Warrior is cool looking, but my only complaint with the set. She comes with a quiver of arrows for her back, but if you put the quiver on, you can’t put her hair on without her head sticking up. I tried to angle the head slightly, but the hair still doesn’t fit. The simple answer is to take the quiver off. Then why have the bow and arrow? Maybe she can just hold the apple…


Set Review - #71028 - Harry Potter Series 2 - Collectible Minifigures

I ranted last week about Collectible Minifigures and this week I can stop complaining. I placed an order with SteineHelden.de (sorry USA, they only sell in Germany) and finally was able to complete this series released in the US back on 1 September 2020 and since retired at LEGO Shop @ Home.

This series has 16 total minifigures which differs from the first series where they had 22 total. Pricing is still $4.99 each in the US. The extended German lockdown has made it impossible to go to stores for the “feel” check so you have to buy a bunch online and hope for the best. I got a few on sale here for around $3.45 each which was great, but the rest ranged from $4.70 to the US retail price of $4.99. Apparently the days of sales on these things where they are around $3.50 or less are gone.

I won’t spend a ton of time going over these minifigures as they are already retired and I’m late to the game. I will say that I appreciated how the minifigures could be mixed in with some of the 2020 Harry Potter sets. For example #75969-1: Hogwarts Astronomy Tower includes a scene from the sixth book/movie where they are at the Slug Club Christmas party. The Ginny minifigure can be added to that scene. Also the astronomy tower has part of the green house where Professor Sprout teaches. So good job LEGO on that one.

Onto the minifigures…


71028_1.jpg

Ron Weasley and Hermione Granger are in the outfits from book/movie #6 (“The Half Blood Prince.” They go to The Three Broomsticks for butter beer with Harry. They each come with wands and a mug of the beverage.


IMG_1971.jpg

Harry’s parents, James Potter and Lily Potter always appear in flashbacks or as ghosts in the books/movies as they are no long alive. In minifigure form, James comes with a picture that Harry has and Lily has a baby Harry which is wrapped up tightly.


IMG_1972.jpg

As mentioned, Ginny Weasley is in her Slug Club Christmas party outfit. Harry has the potions book from “The Half Blood Prince.”


71028_4.jpg

Fred and George Weasley have their tricks to sell other students from the sixth book/movie (I think) and the Marauder’s map which they gave Harry. Fred is on the left and George is on the right in the picture. Or at least that’s what Brickset.com says.


71028_5.jpg

Griphook is a goblin who works at Gringotts Bank. This figure is from the last movie where he helps the gang break into a vault. He comes with a key (actually a set of 2) and then the sword of Gryffindor (which is cool looking). Next is Moaning Myrtle. She comes with a copy of Tom Riddle’s diary from the second book/movie. I like how they added the poseable stand so you can make it look like she is floating as she is a ghost.


71028_6.jpg

I’m not sure which book/movie he first appears in, but Kingsley Shacklebolt is a member of the Order of the Phoenix and comes here in his full robes with a wand and broom. As mentioned already, Professor Pomona Sprout is decked out to teach students how to re-pot mandrakes from book/movie #2 (“Chamber of Secrets”). I like how they created the mandrake plant by printing on a 1x1 round brick.


71028_7.jpg

Neville Longbottom comes with a Monster Book of Monsters and a wand as depicted in “The Prisoner of Azkaban” (book/movie 3). Luna Lovegood is decked out in her quidditch lion hat to show her support for Gryffindor. She also comes with a blond hair piece if you want to switch them out. This is from book/movie #5.


71028_8.jpg

Next is Bellatrix Lestrange in her Azkaban uniform. She has a wand, hand cuffs, and her prisoner number on a 1x2 tile. This is from “Order of the Phoenix” (book/movie 5).

Albus Dumbledore is last in my review with a wand and Fawkes his phoenix. Fawkes first appears in the second book/movie (“The Chamber of Secrets”).

Now that I finally collected them all, it’s a good mix of characters from various parts of the book/movie series. I like the mix and the ability to use them in other sets.

Now LEGO needs to figure out how to sell them to allow you to get all of them without going through great pains or spending a lot of money.

Set Review - #21324-1: 123 Sesame Street - LEGO® Ideas

Can you tell me how to get to Sesame Street? If not, don’t worry because LEGO can. Ideas set #32 is #21324-1: 123 Sesame Street. Released on 1 November 2020 in the US, it contains 1,368 pieces and 6 minifigures. At $119.99 this set works out to $0.088/piece. This took a while to arrive after I ordered it and then it took me even longer to find time to build it. I’m finally finished so here’s the review.

The box shows the full set on the front and then the back side of the set on the back. It has all of the Ideas logos on it, but the bottom also shows the 18+ packaging. So interesting how it falls into two product categories that LEGO has. The back of the box as well as one of the sides have pictures of some of the actual characters too. I posted a picture of the minifigures on the box as well.

21324_box_front.jpg
21324_box_back.jpg
21324_box_side1.jpg

This set contains 12 parts bags. The bags are numbered one through six with two each number except for bag four. There is one unnumbered parts bag that contains some of the larger plates.

The instructions and stickers are packaged in a bag as well.

21324_contents.jpg

The instruction book is similar to other Ideas sets. It has some info on Sesame Street, info on the LEGO designers, and info on the fan designer.

There are a number of stickers. I’m not a fan of stickers, but there aren’t too many here and they do help add some fun details.

21324_instructions.jpg
21324_stickers.jpg

The first two bags assemble the base and start on the main part of 123 Sesame Street. The base is similar to Architecture themes or some of the recent Ideas themes. Instead of a big base plate, a number of plates are attached together. This makes sense for this set as it allows you to create the corner of the street.

You don’t build much of the base of the first building. It is mainly the foundation with a start to a few details on the outside to include Big Bird’s nest area, the front stairs, and the area where Oscar lives. There’s a spider and web that you bury in the foundation area. I’m not sure of the reference to Sesame Street or if it is just included for fun, but it’s there. You also get some fun colored pieces in the bottom that you can substitute out for other uses if you want.

The minifigure is Big Bird. Big bird is taller than the rest as expected, but the torso and head is rubbery versus the ABS plastic. Not really a complaint in my mind. Just an observation.

21324_build1a.jpg

The second set of bags builds up the first floor of 123 Sesame Street. You get a bedroom which we can assume belongs to Elmo (the minifigure included in these bags). It includes some pictures of Elmo and his Dad and Rosita and Zoe. There’s a lamp and the standard 2x2 printed tile with a picture of a bridge on it that appears in a lot of sets. There’s an old fashioned phone on the wall. The floor includes a large 6x6 tile piece as a rug. There are some additional details which are completed later.

21324 build 2a.JPG
21324_build_2b.JPG

The third set of bags builds up the second floor which is where Ernie and Bert live. On the outside, the window pattern is the same as the first floor. It adds in the doors to the first floor, the lights on the sides of the door, and an architectural design above the door.

Inside the second floor, you build up the tub along with Rubber Duckie. Additionally, there is a book shelf along the wall and a rug on the floor. More details will be built later.

Ernie comes in this set of bags and he is smaller than Elmo. I think the show portrays Elmo as smaller, but I’m not sure. I realize LEGO has limitations when designing and probably not a huge deal, but I would think Ernie would be larger. Although you have to watch proportions as then you’d have to make Big Bird even bigger.

21324_build_3a.JPG
21324_build_3b.JPG

The fourth bag finishes up the second floor. Included are beds for Ernie and Bert, a picture of Ernie and Bert, some toys on shelves to include a dinosaur and ball, and Bert’s paper clip collection. You also add in the chair Bert usually sits in. The roof is not a complete cover, but two triangular plates. I’m not sure why this is, but it can easily be fixed if you have your own parts stash. You add in a chimney, a TV antenna, some birds, and a cage area. Maybe the cage is for Bert’s pigeons?

The Bert minifigure comes in this bag. He is taller than Ernie so that is good and they accurately portray the outfit he is always found in.

21324_build_4a.JPG
21324_build_4b.JPG

The fifth set of bags builds Hooper’s Store. The first floor is the small store area with a few food items to buy, and a counter to sell from. Outside is a box with some veggies and the recipe to Bert’s oatmeal. The second floor has a small sitting area with a chair, an old fashioned TV showing Guy Smiley, a portrait of The Count, a bus picture on the wall, and a gold frog and minfigure statue on the shelf. There is a bat on the roof for The Count. The roof here also has a triangular section like 123 Sesame Street. It has a small air conditioning unit/ventilation unit. Lots of details here… very fun and nostalgic. I like the VCR and 1x2 tiles used as video tapes.

Cookie Monster comes in this build. He has 2 cookies in his hand to go with another one you can attach to the floor.

21324_build_5a.JPG
21324_build_5b.JPG
21324_build_5c.JPG

The sixth set of bags wraps this set up. The final minifigure is added which is Oscar the Grouch. Oscar is really just a head that is added into some pieces with the trash can. It’s not a full minifigure which I’m okay with as usually you only saw his head and hands anyways.

Details are added in the corner to include a seating area for Hooper’s Store and a lamp post. On the side of 123 Sesame Street is a fire escape, a small garden near the sticker of Abby Cadabby (this was added earlier), and a sticker advertising Biff and Sully’s Construction company.

21324_build6b.JPG
21324_build6c.jpg

At this point the build goes in a few directions. Additional details are added on the first floor to include some toys for Elmo. Big Bird’s nest is built up and Radar, his bear is added in. Trash is added near Oscar’s can. A UFO is placed on the roof for the aliens that say “yep, yep, yup,” and the mailbox that can walk around is placed on the street.

The famous 123 Sesame Street sign is added with the green lamp post. Thankfully this is not a sticker. I failed to pay attention to the clear minifigure head used inside of the light. Take note that there are two and one has Elmo’s fish Dorothy on it.

I’m probably missing a bunch of details here. There are a lot in the set and the designers definitely tried to capture as many as they could to truly make it Sesame Street.

Overall, I think this is a great set, but then again I grew up watching Sesame Street and I’m sure that’s why. It might not be a big hit for non-Sesame Street fans. Pricewise, it’s not too bad at just under 9 cents per piece. I doubt you will find this one on sale in the future, but you can get it on a future double VIP point day or with a cool gift with purchase deal in the future. I definitely recommend this set for current or past Sesame Street fans. For MOC builders, there are some cool parts to use elsewhere too. If you aren’t into Sesame Street, then I would skip this one as you probably won’t enjoy all of the details.

One final note… I saw this on another review… the edges of the buildings have holes for Technic pins. One thought is just so you can attach this to other buildings you create or have as desired. The other is that potentially there will be more coming from Sesame Street in the future. You never know if they will have more of a licensed theme, but I like the idea of being able to attach it to City themed buildings, MOCed buildings, or even modulars.

What did you think of this one? Did they capture the aspects of Sesame Street? Did they get the minifigures right or should they have included others?

Happy building!

21324_build6a.jpg
21324_build6d.jpg

Set Review - #75978-1: Diagon Alley - Harry Potter

I’ve had this one for a bit and finally got it finished and a blog post ready to go. #75978-1: Diagon Alley from the Harry Potter line is built! The last big one for the Harry Potter theme was #71043-1 - Hogwarts Castle in 2018 and this is the next big set in 2020. It was released on 1 September 2020 in the US. It contains 5,544 pieces and 17 minifigures. The set retails for $399.99 in the US which works out to $0.072 per piece.

I’m a Potter fan and decided to pick up the set. I got it before Christmas along with two free gifts (#634602: Buildable Teal brick and #40410-1: Charles Dickens Tribute). I also got 10% back on Rakuten versus their normal 2.5% so $40 back is awesome (you can see post about it here… and no I am not getting paid to advertise for them). I also had a $50 gift card so $90 off and two gift with purchase sets work for me.

Onto the review… It’s a giant box. The box is labeled as a 16+ set. The front shows the full set and the back shows some details, lists out the separate buildings, and shows the insides of the set. On the side of the box you can see all of the minifigures as well as some of the scenes you can create.

75978_box_front.jpg
75978_box_back.jpg
75978_box_side.jpg

The box has a large white box in it as well as some parts bags. Those bags are numbered 9 through 20. Opening the white box reveals bags 1 through 8, box 21, the instructions and stickers, the base plates, and an parts bag without a number. I count 41 bags of parts, a box, and the base plates. I might be off a bag or two.

75978_contents1.jpg
75978_contents2.jpg

There are four instruction books. Each book is tied to what is built on one of the 16x32 gray baseplates. The books have some good write ups about the set to include details on each building, info on the designers and product team, and info on the minifigures.

75978_instructions.jpg

Each building comes with a sticker sheet. As you can see, the Weasley’s Joke Shop has quite a few. I am not a fan of stickers, but these really do add some great detail to the set. The only downside is how some stickers are split up between pieces. A sign should have a smooth flow, but instead is broken up between two or three pieces. If you center the stickers, it looks weird, but if put two closer together, the third may look odd. Has anyone built the set without stickers? How does it look?

75978_stickers.jpg

The first buildings are Ollivanders™ Wand Shop and Scribbulus.

The first bags start the base. This build and the rest have a sidewalk made mostly with tiles and then part of the street made up of various plates and tiles. Bag one starts the front of Ollivanders and then the first floor of Scribbulus. I don’t recall Scribbulus being in the movie at all so I will assume the designers got this shop correct.

75978_build_1a.jpg
75978_build_1b.JPG

The second bag includes Garrick Ollivander. He is holding a wand box with a wand on the inside. I don’t recall seeing this item before. The box allows for a 1x3 tile to be placed on the top and it fits the standard Harry Potter wand size. Throughout the build, there are numerous versions of these boxes to show the stock of the store along with some plates and bricks to look like boxes on the shelf. This part of the build includes a set of stairs. The stairs are on a hinge and can fold in. This allows you to place the buildings back to back versus all connected in a row.

75978_build_2a.JPG
75978_build_2b.JPG

Bag 3 starts work on the second floor and adds in windows on the first and second floors. The tiles in the windows are translucent yellow which adds a nice touch to the building versus just using clear. I also like the use of all of the textured bricks to add some detail/texture to the building façade.

The windows appear to be round with the use of curved plates and tiles. This style of build has been done before and I think it fits in good here.

Hermione Granger comes with this bag.

75978 build 3a.JPG
75978 build 3b.JPG

The fourth bag adds a sitting room with a fireplace above Scribbulus. It looks like it would fit for any wizard who needs it. It adds to the second floor of Ollivander’s too.

75978_build_4a.jpg
75978 build 4b.JPG

The fifth bag finishes this build with the roof and chimneys, another room of wands in Ollivander’s, and some owls. The chimney that is slightly crooked is a nice touch. The hinge pieces don’t exactly fit in asthetically, but the chimney seems to fit the magical world of Harry Potter. The second floor of Ollivander’s has a desk, a ladder, a chair, and another shelf of wands. You get 3 owls with this build. Hedwig and then two others. Hedwig is connected with a clear pole piece and he is flying a copy of the Daily Prophet. The other two are perched on Ollivander’s.

One last item is the various flags/signs on the buildings to advertise for the stores. I like how they are done and think they look cool, but the stickers are a pain. One on each side of the piece. It really put my sticker applying skills to the test.

75978_build_5c.jpg
75978_build_5d.JPG

The sixth set of bags start Quality Quidditch™ Supplies and The Daily Prophet™. The sidewalk and road are similar to the previous building. The Quidditch shop has some fun details inside to include brooms, minifigures displaying uniforms, and various uniforms stacked on shelves.

The Daily Prophet seems like an after thought. Or there weren’t a lot of details available. It’s just an empty space with 2x2 tiles of the newspaper laying around.

75978_build_6a.JPG
75978_build_6b.JPG

The seventh bags add the front façade to the first floor of the Quidditch shop. The brick red with the greenish color fits in well. I love the printed red on the clear bricks to create the windows with the added clear cheese slopes. It almost has an Asian/Chinese Festival look to it. The Quidditch equipment above the door looks cool too.

I forgot to throw him in the picture, but Ron Weasley’s minifigure comes in this bag.

75978_build_7a.JPG

The eighth bags build the second floor of the shop to include more gear, clothes, and then a minifigure displaying a uniform. The pink color brightens things up after the dark grey and tan-ish color from Ollivander’s

75978_build_8b.JPG

The ninth set of bags finishes the set up. As mentioned, the Daily Prophet leaves a bit to be desired. A large spider web, stacks of papers, a rat eating cheese. and more newspapers. A desk or a magical printer maybe?

The Daily Prophet photographer shows up in this bag with a camera.

This one is another great building for the set. The Quidditch shop is the main selling point for me with the design of the first floor exterior. The interior details are cool too. No minifigure to work in the shop though.

75978_build_9a.JPG
75978_build_9b.jpg

The tenth bags build Flourish & Blotts and Florean Fortescue’s Ice Cream Parlor. Flourish & Blotts is used in the second book/movie “The Chamber of Secrets.” They actually go inside the store so I’m sure the designers had a bit more to go on than just some quick movie stills.

This part of the build includes Mrs. Weasley. It also starts to build Flourish & Blotts. A similar window type piece is used for this one as the Quidditch shop only it is green colored.

75978_build_10a.JPG

The eleventh set of bags builds the first floor section of Flourish & Blotts with some book shelves, a book display, and the stairwell. The stairs are on a hinge and they fold up if you want to put the buildings back to back.

This section also starts on the Ice Cream Parlor with the black and white checkered flooring, a shelf with some ice cream dishes, and the fun sticker with flavors on the wall.

Ginny Weasley’s minifigure comes with this bag to include a copy of Gilderoy Lockhart’s book “Magical Me.”

75978_build_11b.JPG

My pictures of build 12 are awful. Sorry about the bad lighting.

Here you build the counter in the ice cream parlor, some books on display outside of Flourish & Blotts, the first floor ceilings, the façade of Flourish & Blotts, and the awning of Florean Fortescue’s Ice Cream Parlor. There are some interesting build techniques. The awning is rather simple, with 1x3 plates stacked with clip pieces mixed in. They clip onto the building and then some lipstick type pieces are used to hold the awning up. The Flourish & Blotts façade with the signs is all brick built and stickers. I like how the angles were achieved and I’m glad they didn’t use a big piece to get it all done. The use of different sized slopes to achieve the roof of the first floor present a cool effect as well.

Florean Fortescue comes in this set of bags.

75978_build_12a.JPG
75978_build_12b.JPG

Bag 13 adds Harry Potter.

You also build the second floor of Flourish & Blotts. There is a window section that matches the signage below and then inside you get a book shelf, a lamp with a book on display, and another book display on the floor. Externally there is a simple, yet cool dragon head like gargoyle on either side of the windows. You also build the main sign and attach more stickers.

75978_build_13a.JPG
75978_build_13b.JPG

Bag 14 finishes up this section. You get Gilderoy Lockhart with another copy of his book, the desk for him to sit behind to sign books, a seating area outside of the ice cream parlor, the seating area display on the roof area of the ice cream parlor, and a lamp on the front. Inside the second floor of the ice cream parlor is a small sitting room with an arm chair, coffee table with tea set, lamp, and rug. The roof is completed for both buildings. The roof on the ice cream parlor matches the one on the first floor. Flourish & Blotts has a simple set of slopes.

As mentioned, there is a seating area outside of the ice cream parlor. The table is attached by studs, but the chairs are not. No big deal really unless you need to pick the set up. The desk is another story as it really doesn’t fit inside. I guess you could put it outside or build up a scene with additional bricks in the back? It kind of seems out of place.

I like this building with the different green colors of Flourish & Blotts and the roof and awning pieces of Florean Fortescue’s Ice Cream Parlor. So far, I’m enjoying the build. Even if there are a ton of stickers…

75978_build_14a.JPG
75978_build_14b.JPG

The last of the four buildings is Weasley’s Wizard Wheezes & Knockturn Alley. This one helps to mix up the movies/books a bit as Flourish & Blotts was spotlighted in the second book/movie and Weasley’s is from book #6. Knockturn Alley shows up a few times. Either way, I’m okay with the mixing of books/movies. You can set it up as desired and include/exclude buildings as you want.

Bag 15 starts off the Weasley’s store with some bright orange bricks to contrast some of the other buildings in the set. Knockturn alley is started too with an archway.

This bag contains Draco Mallfoy’s minifigure.

75978_build_15.JPG

Bag 16 helps build out the first floor with a lot of details and items for purchase on shelves and display. This also means a lot of stickers too so get ready. You build a stairwell to the next level as well.

Lucius Malfoy comes in this bag. Unlike other Harry Potter sets, the minifigures don’t come with accessories here. Most of the other ones include wands for characters. Here they do not, but Lucius comes with his cane that he walks around with.

75978_build_16a.JPG
75978_build_16b.JPG

Bag 17 finished up the first floor. I like how they achieved the rounded section of the building while building up the windows to be at different angles. You also start work on the second floor. In the picture, I show the side of the building to highlight some of the larger stickers. The stickers for this build are numbered up to 41 and that doesn’t count where there are multiples of some stickers. Thankfully, the largest one is shown and the rest are smaller.

The George Weasley minifigure comes in this bag.

75978_build_17a.JPG
75978_build_17b.JPG
75978_build_17c.JPG

Bag 18 continues work on the second floor and completes the two story rounded window section. They use some clever techniques to fill up the corner and then put the figure in tipping his hat. Putting the brick built figure in was a bit challenging. I had to give it a few tries to get it right and it wasn’t exactly clear to me on the instructions.

Lots of stickers go on the outside of the building. As mentioned before, it was a challenge for me to space them out properly. This was especially hard on the orange curved pieces. I didn’t want the words to look disconnected, but I didn’t want there to look like there were large gaps in the lettering either. It would be nice if the stickers more closely matched the size of the brick you were putting it on. That way you wouldn’t have to guess as much.

Fred Weasley comes with this bag. If you can tell him apart from George that is…

75978_build_18a.JPG
75978_build_18b.JPG

Bag 19 finishes up the second floor and gets you stairs to the third level. The stairwell has a very colorful railing to brighten things up. You also add some balloons which need to be removed if you want to put the sets back to back.

On the outside, you build up Knockturn Alley with a “window to nothing” above the alleyway. I guess you could take it upon yourself to build up a building behind it. No complaints from me though. I like how the designers were able to achieve a crooked, angled window look without huge gaps.

75978_build_19a.jpg
75978_build_19b.JPG

Bag 20 wraps it up. The head is added to the figure in the front and there are some Technic elements used to make the character “tip” his hat. In the movie, a rabbit appears every other time he tips his hat. Obviously LEGO didn’t create that effect, but it’s cool to have some motion with the building. The hat doesn’t tip up too high for me, but I’m sure I could adjust it more if I wanted it to.

This building is a bit taller and the third floor has some inventory as well. The color contrast with the black and light purple/lavender color looks pretty cool.

You get another small build with this bag. It is a table where you can buy love potions as highlighted in book/movie #6. It’s a fun addition to the building, but like the desk for Flourish & Blotts, you can’t fit it in the building. So either extend the building or just set it behind the building with some of your own bricks.

This building was fun to put together with lots of different building techniques, colors, and elements. So many stickers though…

75978_build_20a.JPG
75978_build_20b.JPG

Then there’s box 21. It says “Silencio! Keep it between us.” I guess this is supposed to be a secret box so pretend you’re not reading this section. Although the instructions are included in book for so it’s not really secret. The box includes another Harry Potter minifigure. He has two faces with the other not pictured having dirt and dust from when he went through the flue network incorrectly during the second book/movie. It also includes Hagrid with his pink umbrella. You build a small stand for them to stand on and then behind them you attach a plate with a printed sign. It has the LEGO and Harry Potter logos along with a quote from the movie (and book?) from Hagrid to Harry. I think this is a nice addition to the set. Especially if you want to use this set as a display piece.

75978_build_21a.JPG
75978+build+21b.jpg

Besides the Harry and Hagrid minfigures in box 21, you get another 13 characters from the book/movie. I think it’s a good collection of minifigures to include some of the more popular and some of the ones we don’t normally see. They don’t come with too many accessories, but I think that’s okay. In the movie, you don’t see them with wands or other items unless they are buying things.

minifigs.jpg

Here’s a picture of the final build all lined up. They are similar to the modular building series in that you can connect them, rearrange them, and for these you can put them front to back. No corner buildings or anything, but I guess that leaves it up to you to build them. I’m okay with the backs being open so you can see the details inside. I understand these are not modulars.

$400 is pretty steep for this set so definitely look for opportunities to get gifts with purchase or double VIP point bonuses. I got cash back and had a gift card so that helped.

Should you buy this set? I say this set is for Potter fans. A great addition to the world and a fun build if you know some of the details. This set is also for MOC builders. There are a ton of great pieces and great colors in this set. For about 7 cents a piece you can get some great parts. I’d love to see what some of the pro builders out there could do with this set.

If you aren’t a Potter fan or don’t want the pieces, I’d consider other sets first. Just my opinion.

I’m a Potter fan and I think the set was great. On a YouTuber I follow, it was mentioned that it would be great for the 2021 Potter sets to add onto Diagon Alley. What if they did a Gringots set you could add to this street? It would be pretty awesome!

What did you think of this one? Better or worse than Hogwart’s Castle?

Happy building!

75978_final.jpg

Set Review - #75551-1 Brick-Built Minions and Their Lair - Minions: The Rise of Gru

We had the original “Despicable Me” movie, then the sequels, then spin offs, and now that we have brick built Minions, we’re all set, right? Released on 27 April 2020 in the US, this set contains 876 pieces and 3 minifigures. It retails for $49.99 in the US which works out to $0.057 per piece. I found it for 20% off on Amazon.com so $10 off which helped although five cents a piece is pretty good.

This set contains minifigures for the three main Minions who are Kevin, Stuart, and Bob. Then you can build larger versions of all three. Unfortunately you can’t build all three at once. You can build Stuart and then Kevin or Bob. You need another version of the set or some of your own bricks to have all three at once. Is it worth it? Onto the review…

Here is the front and then the back of the box. The front shows the larger Stuart and Kevin with all three minifigures. It also shows how the larger Minions open up in the back to show their lairs. The back shows the internals of all three, it shows you how the eyes spin, and then shows that you can switch Kevin to be Bob.

75552_box_front.jpg
75551_box_back.jpg

The set contains five parts bags. Two are labeled with a 1 and three are labeled with a 2. One of the first bags contains a piece separator. There is a sticker sheet with a bunch of stickers and then two instruction booklets. The first booklet builds Stuart and the second builds Kevin and Bob.

75551_contents.jpg

The first two bags build Stuart. He is distinguishable by his sole eye. The outer body is a similar build for all three minions except for some minor differences (height, eye color, hair, and the mouth piece. The eye and mouth are all printed pieces so if you just wanted the Minions without all of the internals, you could get away with out using any of the stickers.

One thing that doesn’t quite work with this build is the torso and head of the Minion is not even with the top part of the head. There is a slight break where the curves are not quite even. Considering it’s built with LEGO bricks, we can’t complain, but it does make me wonder if there’s another way to make the head seem a bit more smooth.

Stuart has a cool pad to hang out in with a sound system, dart board, boomerang, and a fold down bed. Above his bed and connected to his eye is a 2x2 round brick to spin his eye around

75551_build1a.jpg
75551_build1b.jpg

The second set of bag builds Kevin (listed first in the instructions). Kevin is built similar to Stuart only he is a few studs taller. Additionally, he has two eyes versus the one. There are gears in place so both eyes can spin. He has a small smile compared to Stuart’s open mouth. Additionally, he has a small sprig of hair versus Stuart’s hair.

Inside Kevin has his command center with various screens and dials. He also has his fire extinguisher and some tools along with a banana to snack on. Lots of stickers, but not too bad to assemble. The minifigure is pretty similar only smaller.

75551_build2a.jpg
75551_build2b.jpg

The second set of instructions starts from scratch again. It doesn’t give any guidance as to whether you should disassemble all of the parts of Kevin or certain parts. I kept the bottom intact and then parts of the top, but the internals are all swapped out so you are forced to make take apart most of the pieces.

The assembly of Bob is similar to that of Kevin only he is shorter. Inside he has some weapons and a few posters. Also one of his eyes is green versus two brown like Kevin.

75551_build3a.jpg
75551_build3b.jpg

Overall it’s a good build. The three Minions are built mostly the same, but they have enough differences to make it interesting. You get some decent pieces as well. The larger Minions have some good play features and while you can have all three assembled at once, you can easily switch them out. The minifigures are pretty good too and you get some hats to put on them as well. With a 20% discount, I couldn’t complain with the price. Definitely a must buy for any brick and Minion fans.

What are your thoughts on this one? We saw a larger character with #75979-1: Hedwig. We also have the larger sized Minions. Will there be more? Should they have put all three larger Minions into the set? Will it force people to buy two sets so they can get all three?

Happy building!

How I Got an Orange Classic Space Minifigure

I attended BrickCon 2020 virtually back in early October 2020 and finally got to building the convention model (I was building something else). You can see my other posts here and here. If you look at the post about SWAG you can see all of the stuff I got (for a fee). The set came in this small box with a printed sticker on it. The sticker has the Convention logo and some views of the set.

One of the big highlights is the minifigure in the set. It’s an orange classic space minifigure. If you’re reading this after 2020, this was the year the orange spaceman joined the crew which could be found in the LEGO Minifigure: A Visual History. Instead of buying the book to get the minifigure, I got this set. The difference is the minifigure cranium. The one from the book is the classic yellow with two dots for eyes and the single line smile. The one in the BrickCon set is a female with some eyebrows and lipstick. Anyways, this adds to the other recent additions to include the ones found in #70841-1: Benny’s Space Squad (2019) and then the LEGO Ideas #21109-1: Exo Suit from 2014.

BrickCon_box_front.jpg
brickcon_box_side.jpg

Since it’s not an official set, it comes with some instructions and a standard plastic bag filled to the brim with parts. No piece separator here and the instructions don’t have anything about the designer. By the way, the designer was Chris Malloy. He’s the managing editor of The Brother’s Brick and designed a great set. His page is here.

brickcon_contents.jpg

Here’s the completed set. There are four 8x8 stud plates. Each one is connected to the others with Technic pins. It is designed so that you can add additional plates to the set as well. From left to right, you start with the the ladder from the space ship that the spacewoman climbed down. Then the next one is part of a castle wall with a deceased guard next to his spear and flag. There are a few pumpkin like plants with some leaves growing out of them. The final plate has part of a façade that has fallen over. There are some plants growing on them and the paint is wearing off (from white to gray).

Unlike official LEGO sets, there are some connections that wouldn’t fly. They are a bit flimsy and you have to be pretty delicate when assembling everything.

Also, the parts selection is pretty impressive. Besides the orange spacewoman, there are some less common parts. The pumpkins, the plants, the yellow and black branches, a silver curved tile, and a few others. Even if you don’t like the model, there are plenty of parts for other sets.

Did you attend Virtual BrickCon 2020 and did you get the set? Did you like it?

Happy building!

brickcon_set.jpg

Set Review - #42115-1 - Lamborghini Sian FKP 37 - Technic

There are a few themes LEGO has sucked me into. One is modular buildings. The other is the Technic "super cars.” The first one was #42056-1: Porsche 911 GT3 RS back in 2016. The second was #42083-1: Bugatti Chiron released in 2018. The third car was released on 2 June 2020 in the US. It’s #42115-1: Lamborghini Sian FKP 37. It contains 3,696 pieces and retails for $379.99 in the US. This works out to $0.103/piece. Considering a lot of those pieces are tiny Technic pins, this car is expensive! Thankfully, I found it locally for ~$286 which I think is a much more reasonable price for the set. So if you live in the US, now is the time to complain as the Europeans get some discounts that you never see.

Like the previous cars, the box is unlike your standard set. The top half of the box looks like the hood of the car with the Lamborghini logo. The bottom part is a picture of the completed set with the name logo in the upper left. Unlike the Bugatti which was labeled as 16+, this one is labeled as 18+.

42115_box_front.jpg
42115_box_back.jpg

The sides of the box continue on the car shape with the front and back of the vehicle on the box.

42115_box_sidea.jpg
42115_box_sideb.jpg

Taking the top of the box off reveals six boxes in the shape of the engine covering in the back of the car. The boxes are numbered 1 through 6. After removing the boxes, there are two instruction books on the bottom. When you put the books next to each other, you can see the completed model.

For reviews, I normally pull out all of the bags so you can how many parts bags there are in the set. I didn’t do that here as the parts bags are all contained in the numbered boxes. I didn’t count as I opened them either. Sorry…

42115_box_open.jpg
421153_box_contents.jpg

The instructions are similar to previous Technic super car models with a lot of details and extras on the actual vehicle and the model. I found the extra details interesting. You are also given some QR codes that you can scan to take you to YouTube videos about the design process. The videos were interesting with some interviews of LEGO and Lamborghini personnel. I tried to watch while building, but couldn’t focus enough on the build so I watched them separately. I think I would have rather had one longer video versus a bunch of shorter clips, but not a major issue to me.

I bought my set in Germany so the instructions came in English and German. Not the North America version in English, French, and Spanish.

42115_ins1.jpg
42115_ins2.jpg

Box 1 - Gearbox and Rear Suspension

Each box is split up in the instruction book with a write up on that section and a corresponding video. Box one builds your transmission and where the back wheels go. The transmission is a challenging thing to build. I really had to pay attention to part types, angles, sizes, and how things were linked up. I made a few small mistakes, but thankfully caught them before I went too far.

The transmission is open on the bottom of the car so you can see the movement as you cycle through gears. This is different from the previous cars. While not realistic, it is a nice touch to see what is going on I guess. Also it’s on the bottom so it’s not like you see it all the time unless you flip it over.

I didn’t time myself on the build, but I think this part took a while for me. Might have been just because I was taking my time with it to make sure I got it right.

42115_build1a.jpg
42115_build1b.jpg
42115_build1c.jpg

Box 2 - Engine and Front Suspension

With box two you can attach all the wheels now and the engine is installed. You can also shift the car into drive, neutral or reverse now. The wheels have a pretty solid suspension. One of the things from the videos is the car actually has some bounce to it. It is not much, but is way more versus the Bugatti.

42115_build2a.jpg

The engine has 12 cylinders that you can’t see working, but you get to install them all anyways. It’s not a big deal that you can’t see them in my opinion. I think it’s more about the build experience. The engine covering includes some printed tiles which add to the detail. I like the ones with the Lamborghini name on them. Super thankful there are no stickers on this one.

42115_build2b.jpg
42115_build2c.jpg

Here’s a closer shot of the front of the car at the end of box 2. I didn’t take a before step picture so you can’t see the details underneath. It’s a challenging part to assemble, but it comes together well. There were a few instances where I really had to stare at the instructions and compare it what I built to make sure it was all right. Some trial and error too. No mistakes so far…

42115_build2d.jpg

Box 3 - Interior Details and Seats

This box adds some details as mentioned, but also adds some movements. You install the initial parts of the scissor doors to come later and the mechanism to raise and lower the spoiler.

42115_build3a.jpg

The steering wheel is installed and like the previous vehicles, the wheel is functional. The other picture shown is the passenger side where you can see the Technic part used to raise and lower the spoiler. You can also see how some System pieces are added to the Technic pieces for detail purposes.

42115_build3b.jpg
42115_build3c.jpg

A quick look at the back. Not a lot of detail is added. Mostly structure to install other parts later.

42115_build3d.jpg

Box 4 - Rear Spoiler

Now the car is starting to look more like a car. We’ve got a roof over where the passengers sit, a covering over the engine in the back, coverings over the rear wheels, and the spoiler. If you’ve seen anything about this car, you know that LEGO has had some issues with parts and colors. This is the part of the build where those issues became readily apparent. The spoiler itself has multiple shades of green on it. While the design of the spoiler is cool and fairly accurate compared to the real car, the color is disappointing. With a $380 price tag, you would expect a much higher quality.

42115_build4a.jpg
42115_build4b.jpg

Here’s a closer view of the back of the car. You can see the System tiles used to create the Italian flag which is a fun detail. I’m also a big fan of the brake lights. They used more System pieces mixed in with Technic pieces. If you look closely at the spoiler, you can see the color differences. The rear also has a cool “Lamborghini” tile in the lime green with black lettering.

42115_build4c.jpg
42115_build4d.jpg

Box 5 - Scissor Doors

The fifth box finishes up the majority of the car. This includes the front hood, the lights, the front bumper, and the doors. I found a few parts a bit challenging to put together as the instructions just show the assembly next to the spot it is supposed to go.

42115_build5a.jpg
42115_build5b.jpg

Here’s another view of the front of the car. It seems like the front dash is quite large compared to the rest of the vehicle. I’m not sure if it is proportioned correctly, but perhaps there is a reason.

The scissor doors have a piece you can push in behind the “cab” of the car. The doors pop up like a real Lamborghini. No complaints here. It’s a fun detail.

42115_build5c.jpg
42115_build5d.jpg

A few close ups from this part of the build. I’m not sure how I’d re-design the light bars, but I’m not a fan of how they were built. They do look similar to those of the actual car and I understand that the geometry is tough to re-create. I’ll have to think on this one…

I like the brakes with the printed brake calipers. I’m also glad they are not stickers. It’s a small detail that you really can’t see with the vehicle completed, but I’m a fan.

42115_build5e.jpg
42115_build5f.jpg

Box 6 - Rims and Tires

The lime green color issues with this model are disappointing, but the gold rims are awesome. They really make the vehicle stand out. It’s the same wheels as the Bugatti and there’s a small 1x1 round tile with the Lamborghini tile on it.

42115_build6a.jpg
42115_build6b.jpg

This second part of the build for this box is a brief case. The previous two cars had cases as well. This one has the fewest details of the three so far and in my opinion it seemed like a last minute add. The brief case doesn’t have much to it. It’s rather plain and bland. I would have rather done without the bag.

42115_build6c.jpg
42115_build6d.jpg

The last part of the build is a display plate. It’s a 4x6 plate with some studs. Impressively it is all printed on unlike a lot of the UCS type sets where there is a large sticker. It’s a nice addition to the model and for people who want to display it. They have it mounted on some Technic pieces so it can be angled up. A nice touch in my opinion.

42115_build6e.jpg

Here are a few pictures of the final product with the wheels on . Overall, it’s an impressive model. I enjoyed the build process and getting away from System builds. I enjoyed all of the details and the mechanical connections. I didn’t enjoy the price originally posted. I was super thankful to see the price come down in Germany and to get it at a substantially lower rate, but I have yet to see it go down in the US. I’m hoping LEGO can adjust pricing in the future… either more car/build experience or lower price. We’ll have to see what LEGO does in the future. In the meantime, what do you think? Is it worth it?

Happy building!

42115_final1.jpg
42115_final3.jpg
42115_final2.jpg
42115_final4.jpg
42115_final6.jpg

I have the Porsche in storage, but here is a picture of the Lamborghini and Bugatti together. The Lamborghini is slightly longer. Any thoughts on cool ways to display them? Here’s a Beyond the Brick clip where someone shows off his LEGO room and he has two of the cars hanging on the wall.

42115_42083.jpg

Set Review - #60203-1: Ski Resort - CITY

#60203-1: Ski Resort was release on 1 September 2019 in the US. It retails for $89.99 and contains 806 pieces and 11 minifigures. This puts it at $0.112/piece. As I write this, it shows as sold out in the US on LEGO Shop @ Home so I may be too late to the game. It still shows available here in Germany. I purchased it in Germany for around $54 which was a much better price, Why are the CITY sets so expensive all of a sudden?

While not an advertised sub-theme, the CITY theme had #60222-1: Snow Groomer back in 2019 as well. We’ll see if they add more in the future or not.

Onto the review…

The box is pretty standard with the full set displayed on the front and some of the play features on the back.

60203_box_front.jpg
60203_box_back.jpg

The set contents are eight parts bags, the instructions and stickers in a sealed package, and then an 8x16 white plate. Bag one has a piece separator.

60203_contents.jpg

The first bag builds a snow mobile, a trailer to carry a stretcher, a snowman, a dog, and 4 minifigures. The snowmobile is pretty simple, but it gets the point across and has some playability. The snowman looks pretty similar to ones in the past with a top had, red scarf, and a broom as arms. The dog is the standard CITY dog figure.

The minifigures are pretty good. There are two snow patrol figures with a male and a female and then two kids with the shorter legs.

60203_build1.jpg

The second bag is a helicopter design. I seem to have accumulated a bunch of these through the years and they all look very similar. In terms of realism, LEGO CITY helicopters lack some realism, but they must be popular as LEGO keeps repeating them. There is one minifigure who is the pilot.

One difference on this chopper is the tail piece. Instead of building out a tail with bricks you get a BURP. I’m not sure if this is a new thing or not. It looks better, but takes away from the build experience as you just attach one piece.

60203_build2.jpg

Next up is bag three with this SUV and snow plow. It’s a pretty tough looking vehicle with space for gear in the back, some skis, poles, and the ability to store some equipment. The plow in front is pretty large too. The bag comes with a female minifigure in a ski patrol uniform. I like this vehicle and am pretty impressed with how it looks despite being a CITY set.

60203_build3.jpg

Bag four gives us a small snack stand with hot chocolate and goodies to eat. You also get some trick gear to include a small rail to ski/board on and then a mini-half pipe. The half pipe is rather small. You could get maybe one trick off of it if you did it right. I get the point though and that it is meant as a play feature. You get two more female adult minifigures to eat at/work at the snack stand.

60203_build4.jpg

Instead of going by bag, I decided to go by the remaining parts of the build. Next up is a winter gear shop. It’s a small store front with snow shoes, snow boards, skis, a hat, a helmet, and poles for sale. The store is only the front part, but I like the design. The front is designed to make it look like it is built as a log cabin with printed tiles to look like the ends of logs. The stickers help with detail to include the store logo and a board out front listing the sales. I like the snow board over the door as a decoration. This one comes with a store worker and then a snow boarder and skier all decked out with helmets and gear.

The inside of the store has some inventory, a check out stand, and the display areas. Not bad considering the size and easily expandable as desired.

The top of the store has a large plate with clips. It comes with a large sticker and is supposed to be a screen you can use to watch your favorite minifigures ski. I chose not to attach the sticker as I thought it was too big and looked kind of silly there. I’ll remove the large gray part before making it a part of a city scene some day.

60203_build5.jpg
60203_build5.jpg

The last part of the build is a small chalet type building used as ski patrol HQ. Like the store, it is only the front half, but I like the design of the front and think it would look fun as a full up building if you wanted to expand it. The inside has a medical area, an office area, and a work area on the upper level.

I also like the stickers on the side with the route map for skiers and then the name of the ski area “Mount Clutchmore.” Very clever.

60203_build6a.jpg
60203_sign.jpg
60203_build6b.jpg

That wraps it up. This is a fun set in a great sub-theme of CITY, but is way too expensive at its original price. I’m glad I found it at the discount I did and recommend you look for the same. Since the set is retiring, you might be able to find a good discount out there. If you find it at a discount, this is a great start a future MOC for a ski area/resort. Lots of fun details and some good play features.

What are your thoughts on this one?

Happy building!

60203_final.jpg

Set Review - #60253-1: Ice Cream Truck - CITY

I’m not sure when the first one was, but LEGO CITY has done a few food trucks over the years. The last one I can recall is #60150-1: Pizza Van. That was from 2016. #60253-1: Ice Cream truck was released on 2 January 2020 in the US. It retails for $19.99 and contains 200 pieces. That works out to roughly $0.10/piece. I purchased mine locally for just under $17.

The box is your standard set up with the full set on the front and some play features on the back. This set is meant for the 5+ age range and it shows in the build. Onto the review…

60253_box_front.jpg
60253_box_back.jpg

This set contains two parts bags (both numbered), two instruction booklets, a sticker sheet, and two 2x16 light gray plates.

60253_contents.jpg

Bag 1 starts building the truck. The back comes with a few cones and some ice cream. The back side of the truck has hinges so it can open up for playability. Not much else here… it’s a pretty simple build.

There are two minifigures. A female figure who is the truck operator and then a male minifigure who is on a skateboard. The skateboarder comes with a purple skateboard, a blue helmet which can be switched for a black hair piece. It also comes with a black hair piece.

60253_build1.jpg

Bag 2 wraps up the build. The other side of the back has a sliding window for the minifigure to serve out of. It also adds the cab and all of the decorations. There are a lot of stickers to include the menu, some signage, and the face on the ice cream bar on top. I failed on the sticker for the ice cream bar as I centered it. If you zoom in, you can see there is a gap between the brown part and the brown drip on the sticker. I should have placed it in line with the brown. Not a big deal, but lesson learned I guess.

Overall, not a bad set. It fits in well with a city scene and adds some different vehicles besides the usual fire and police activity in LEGO CITY. The build is very simple, but to be expected for the 5+ range. My little guy tried to play with it, but the ice bar on top fell off easily and the front cab does not remain on well. Not a big deal for an AFOL thought. I’m glad I found it on sale and recommend waiting for a sale if you’re looking to pick this set up.

Happy building!

60253_build2a.jpg
60253_build2b.jpg