Set Reviews

Set Review - #910013-1 - Retro Bowling Alley - Bricklink Designer Program

Here’s another one from the second round of the 2021 Bricklink Designer Program sets. You can check out the Bricks for Bricks store on Bricklink to see some of the Bricklink Designer Program sets I have for sale. This one is #910013-1: Retro Bowling Alley. It contains 2,779 pieces and retailed for $229.99 pieces. This worked out to $0.083 per piece. Given the limited production run of the set, don’t count on finding this set for that price. You probably could try to piece it together. I’m not sure what the cost for that would be and you’d miss out on the stickers.

Onto the review…

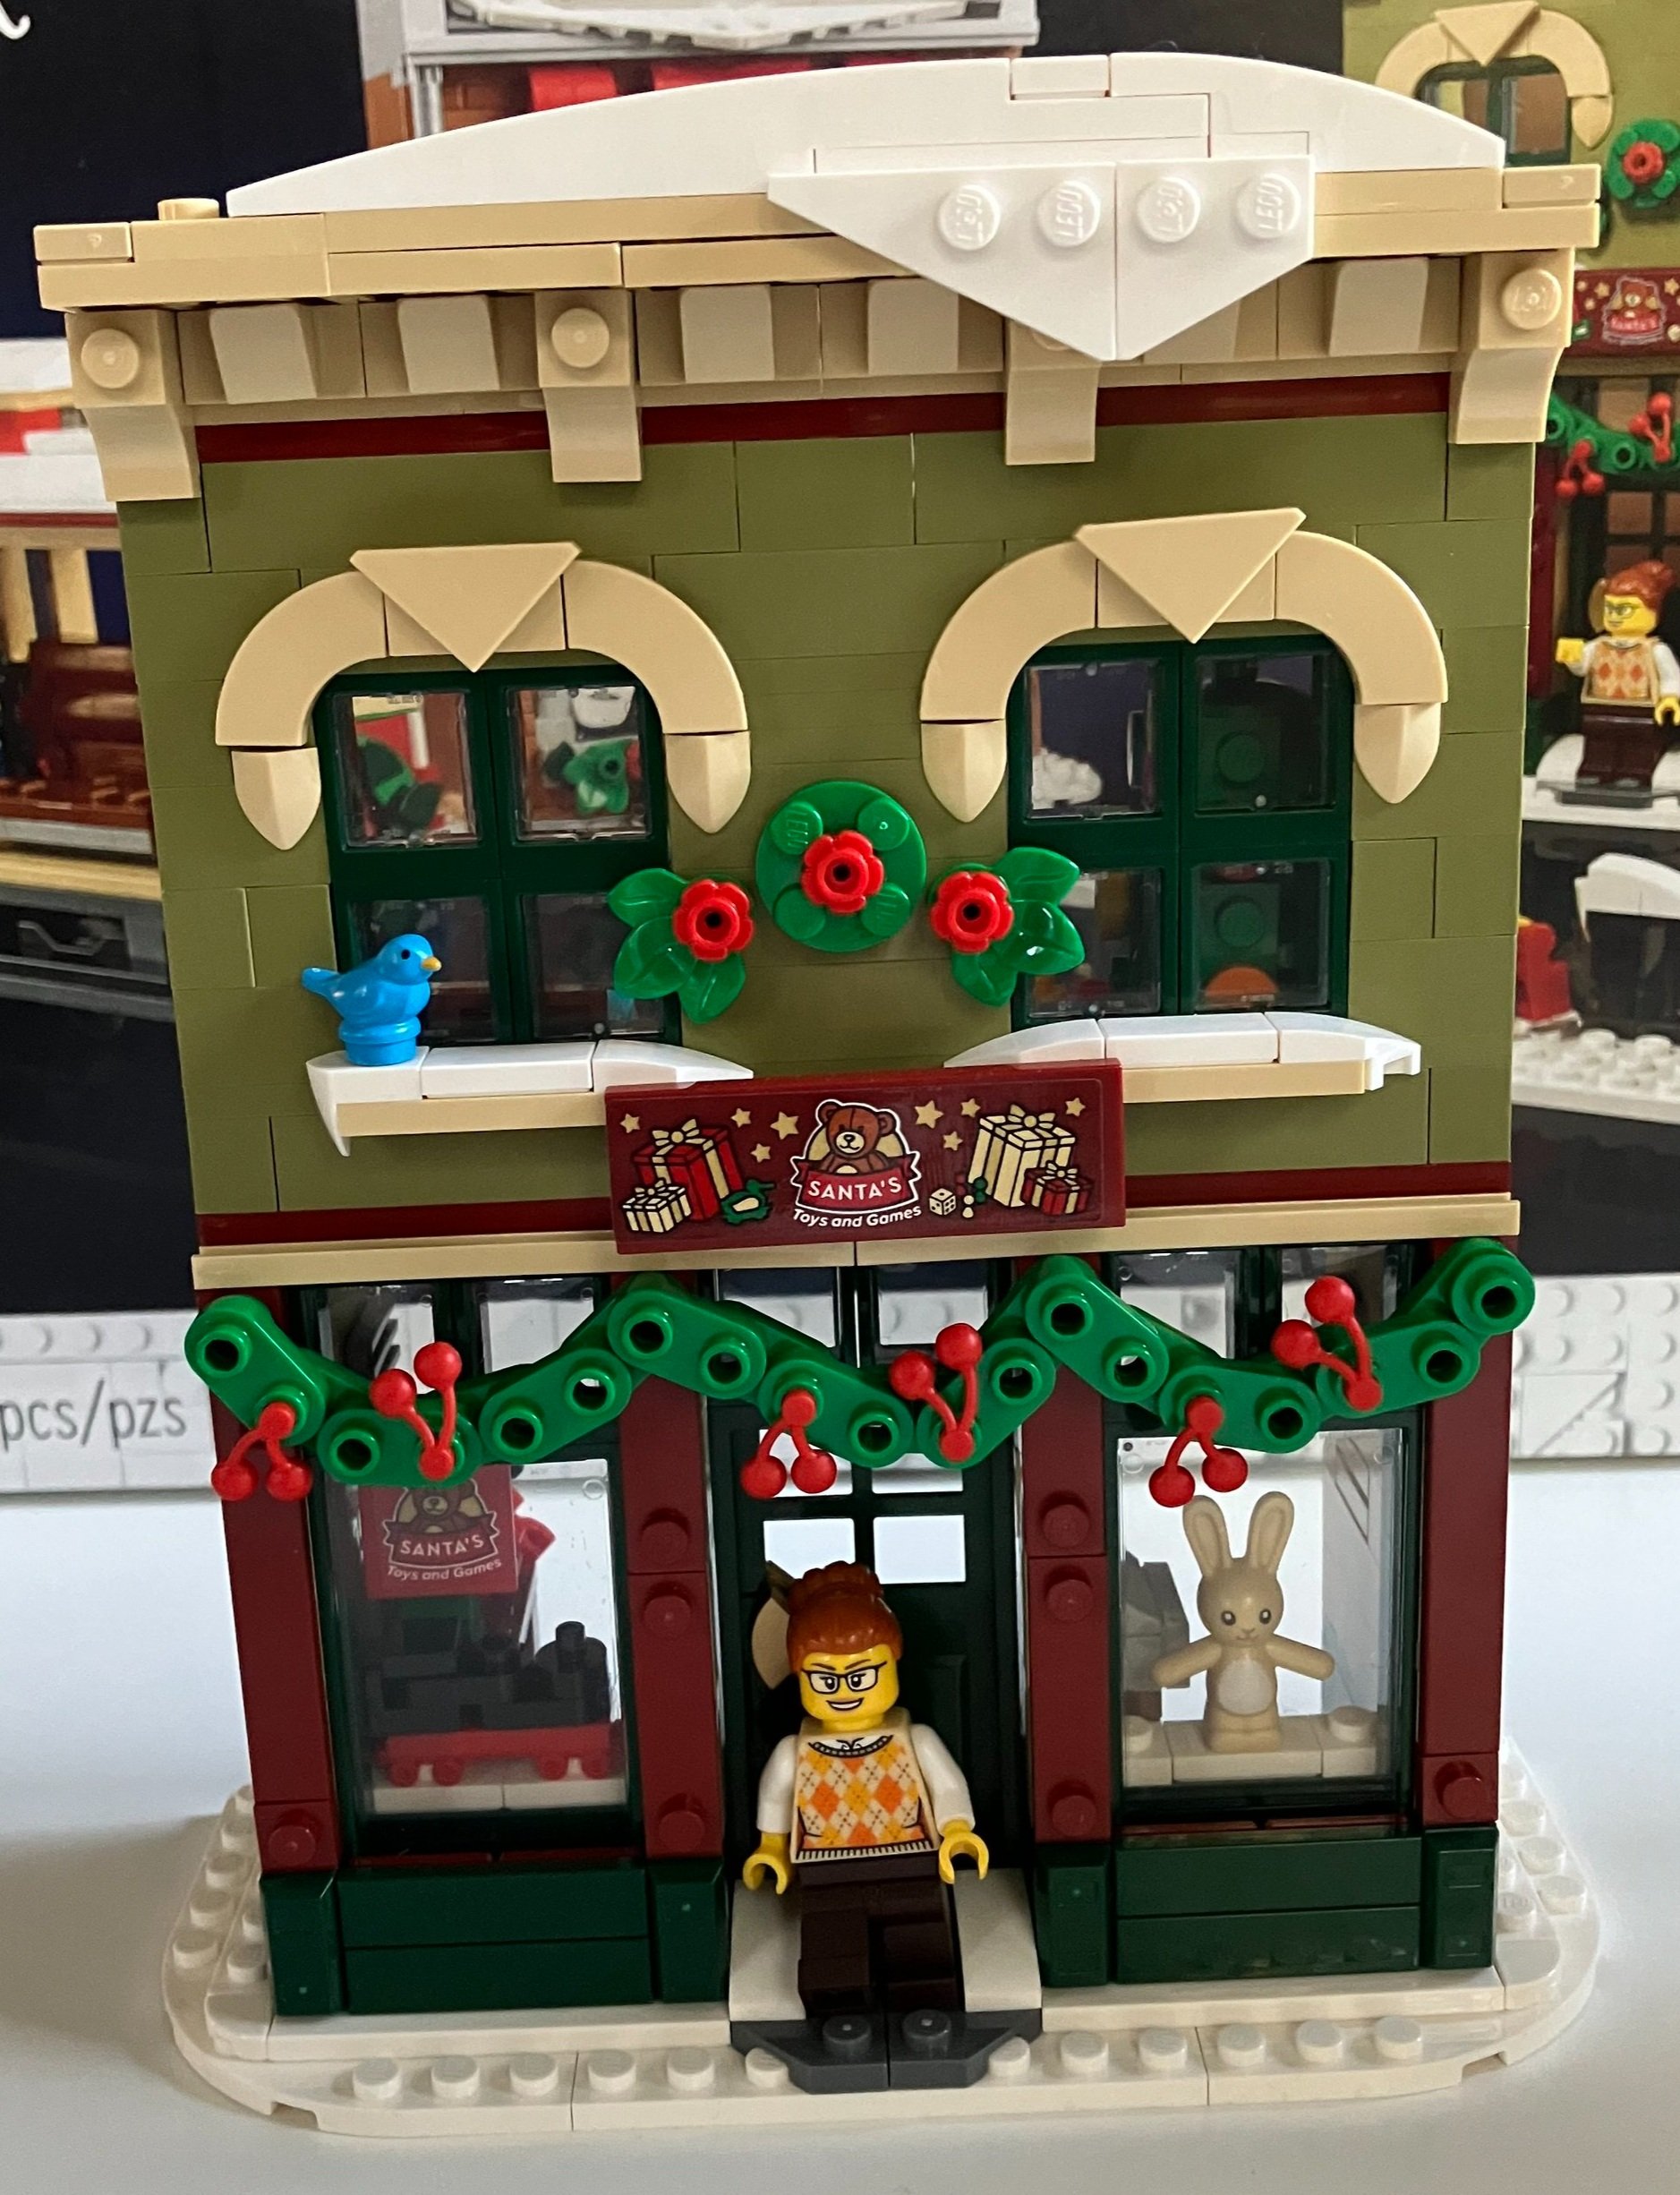
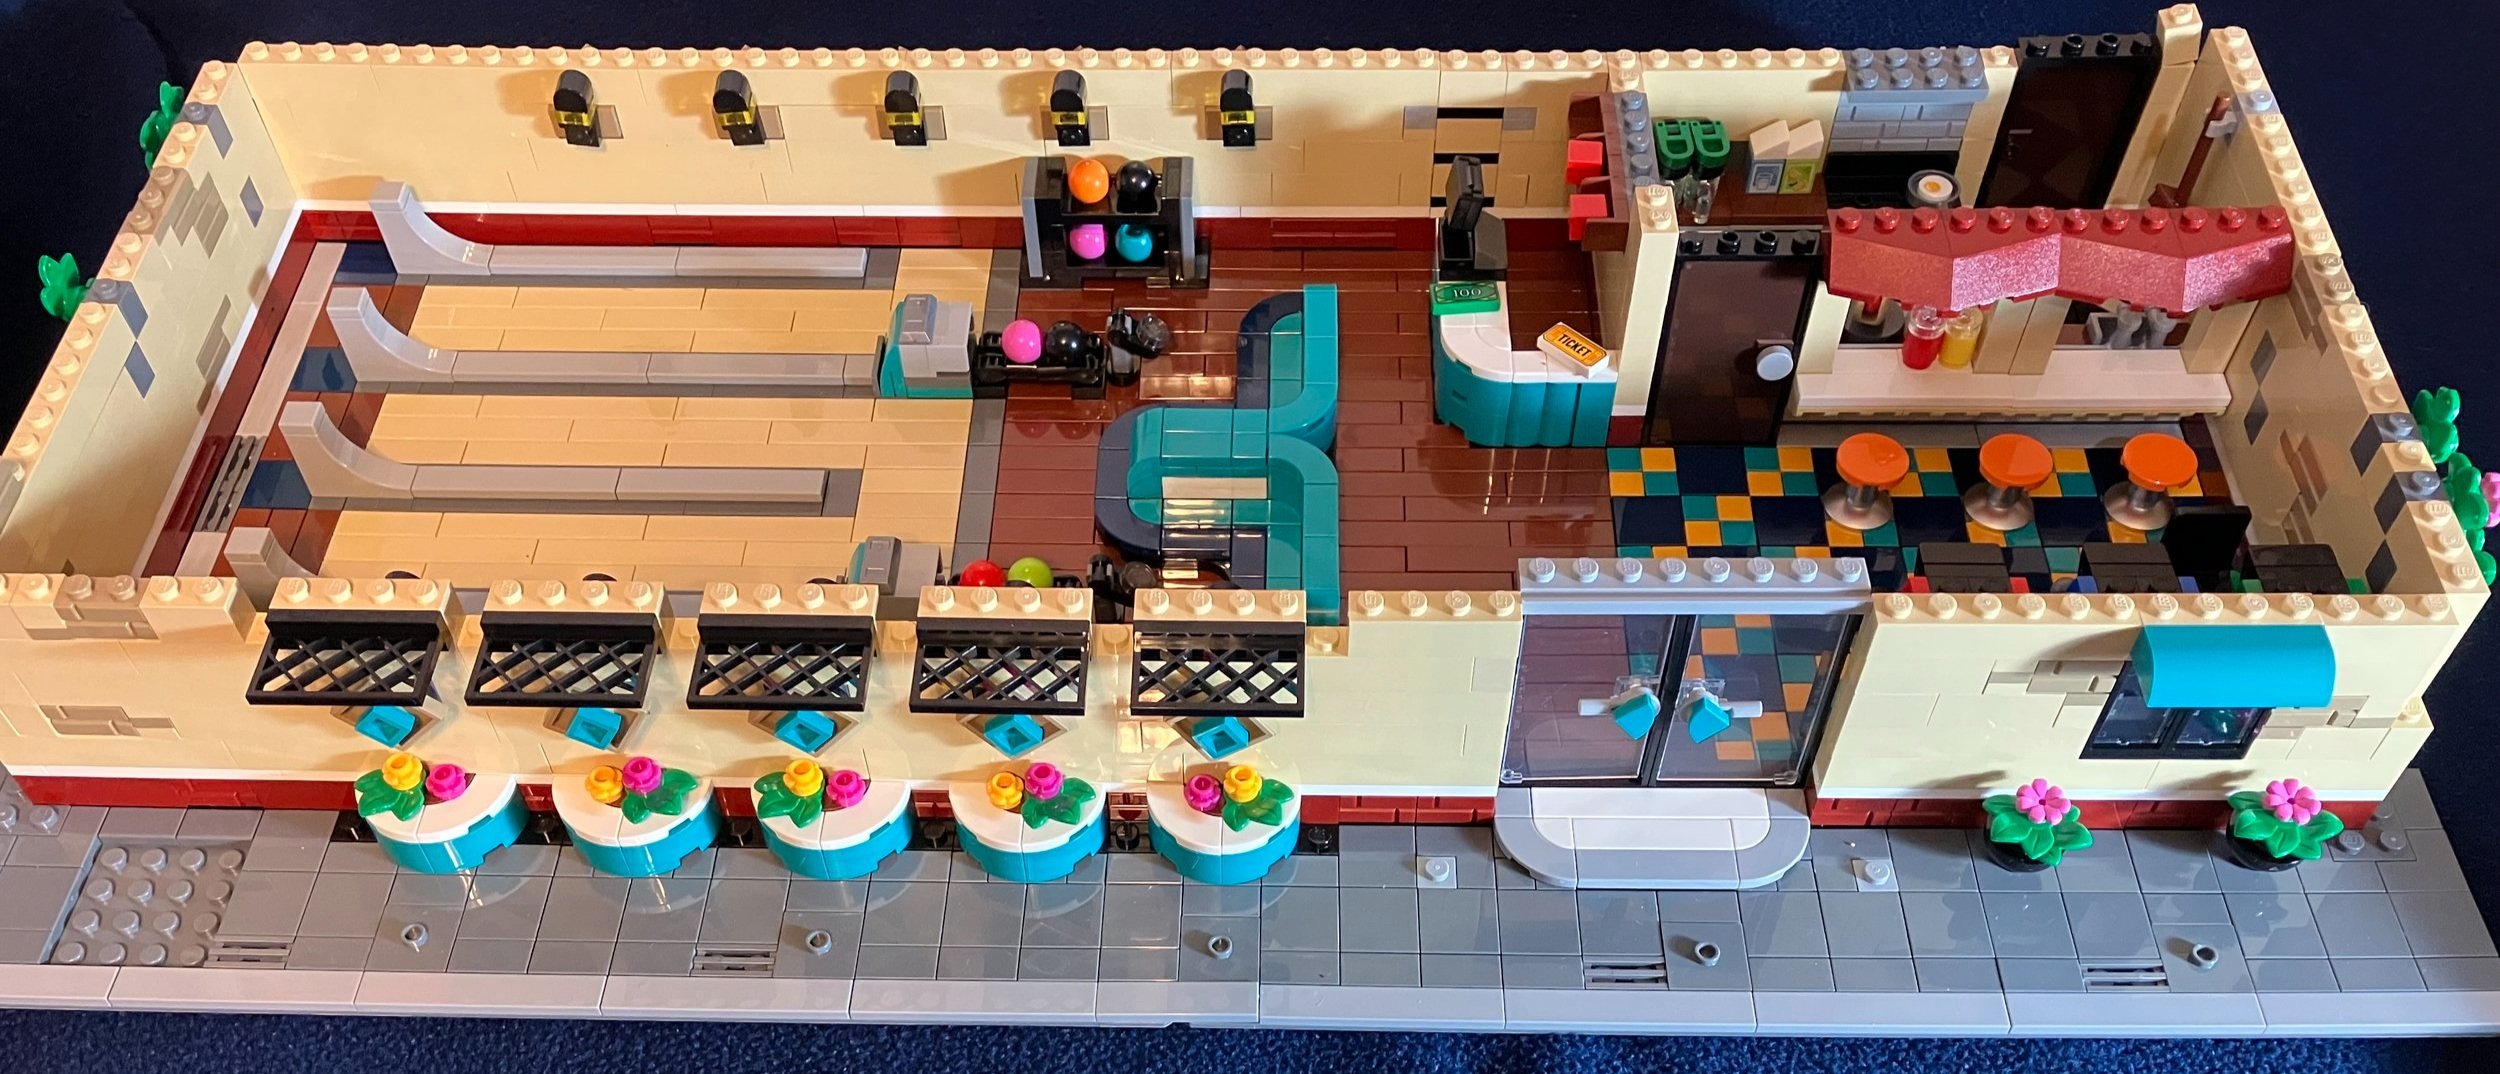
The box is similar to other Bricklink Designer Program sets. It’s white with the Bricklink logo on the front and back. The LEGO logo is on the side. The front shows the full set and gives the standard information you’d expect to see on a LEGO set. It also states the designer’s Bricklink name which is avlia (Alan Avila from California, USA). The design is in line with #10260-1: Downtown Diner and in the retro 1960s US style. The back shows the set from a different angle and with the roof removed.

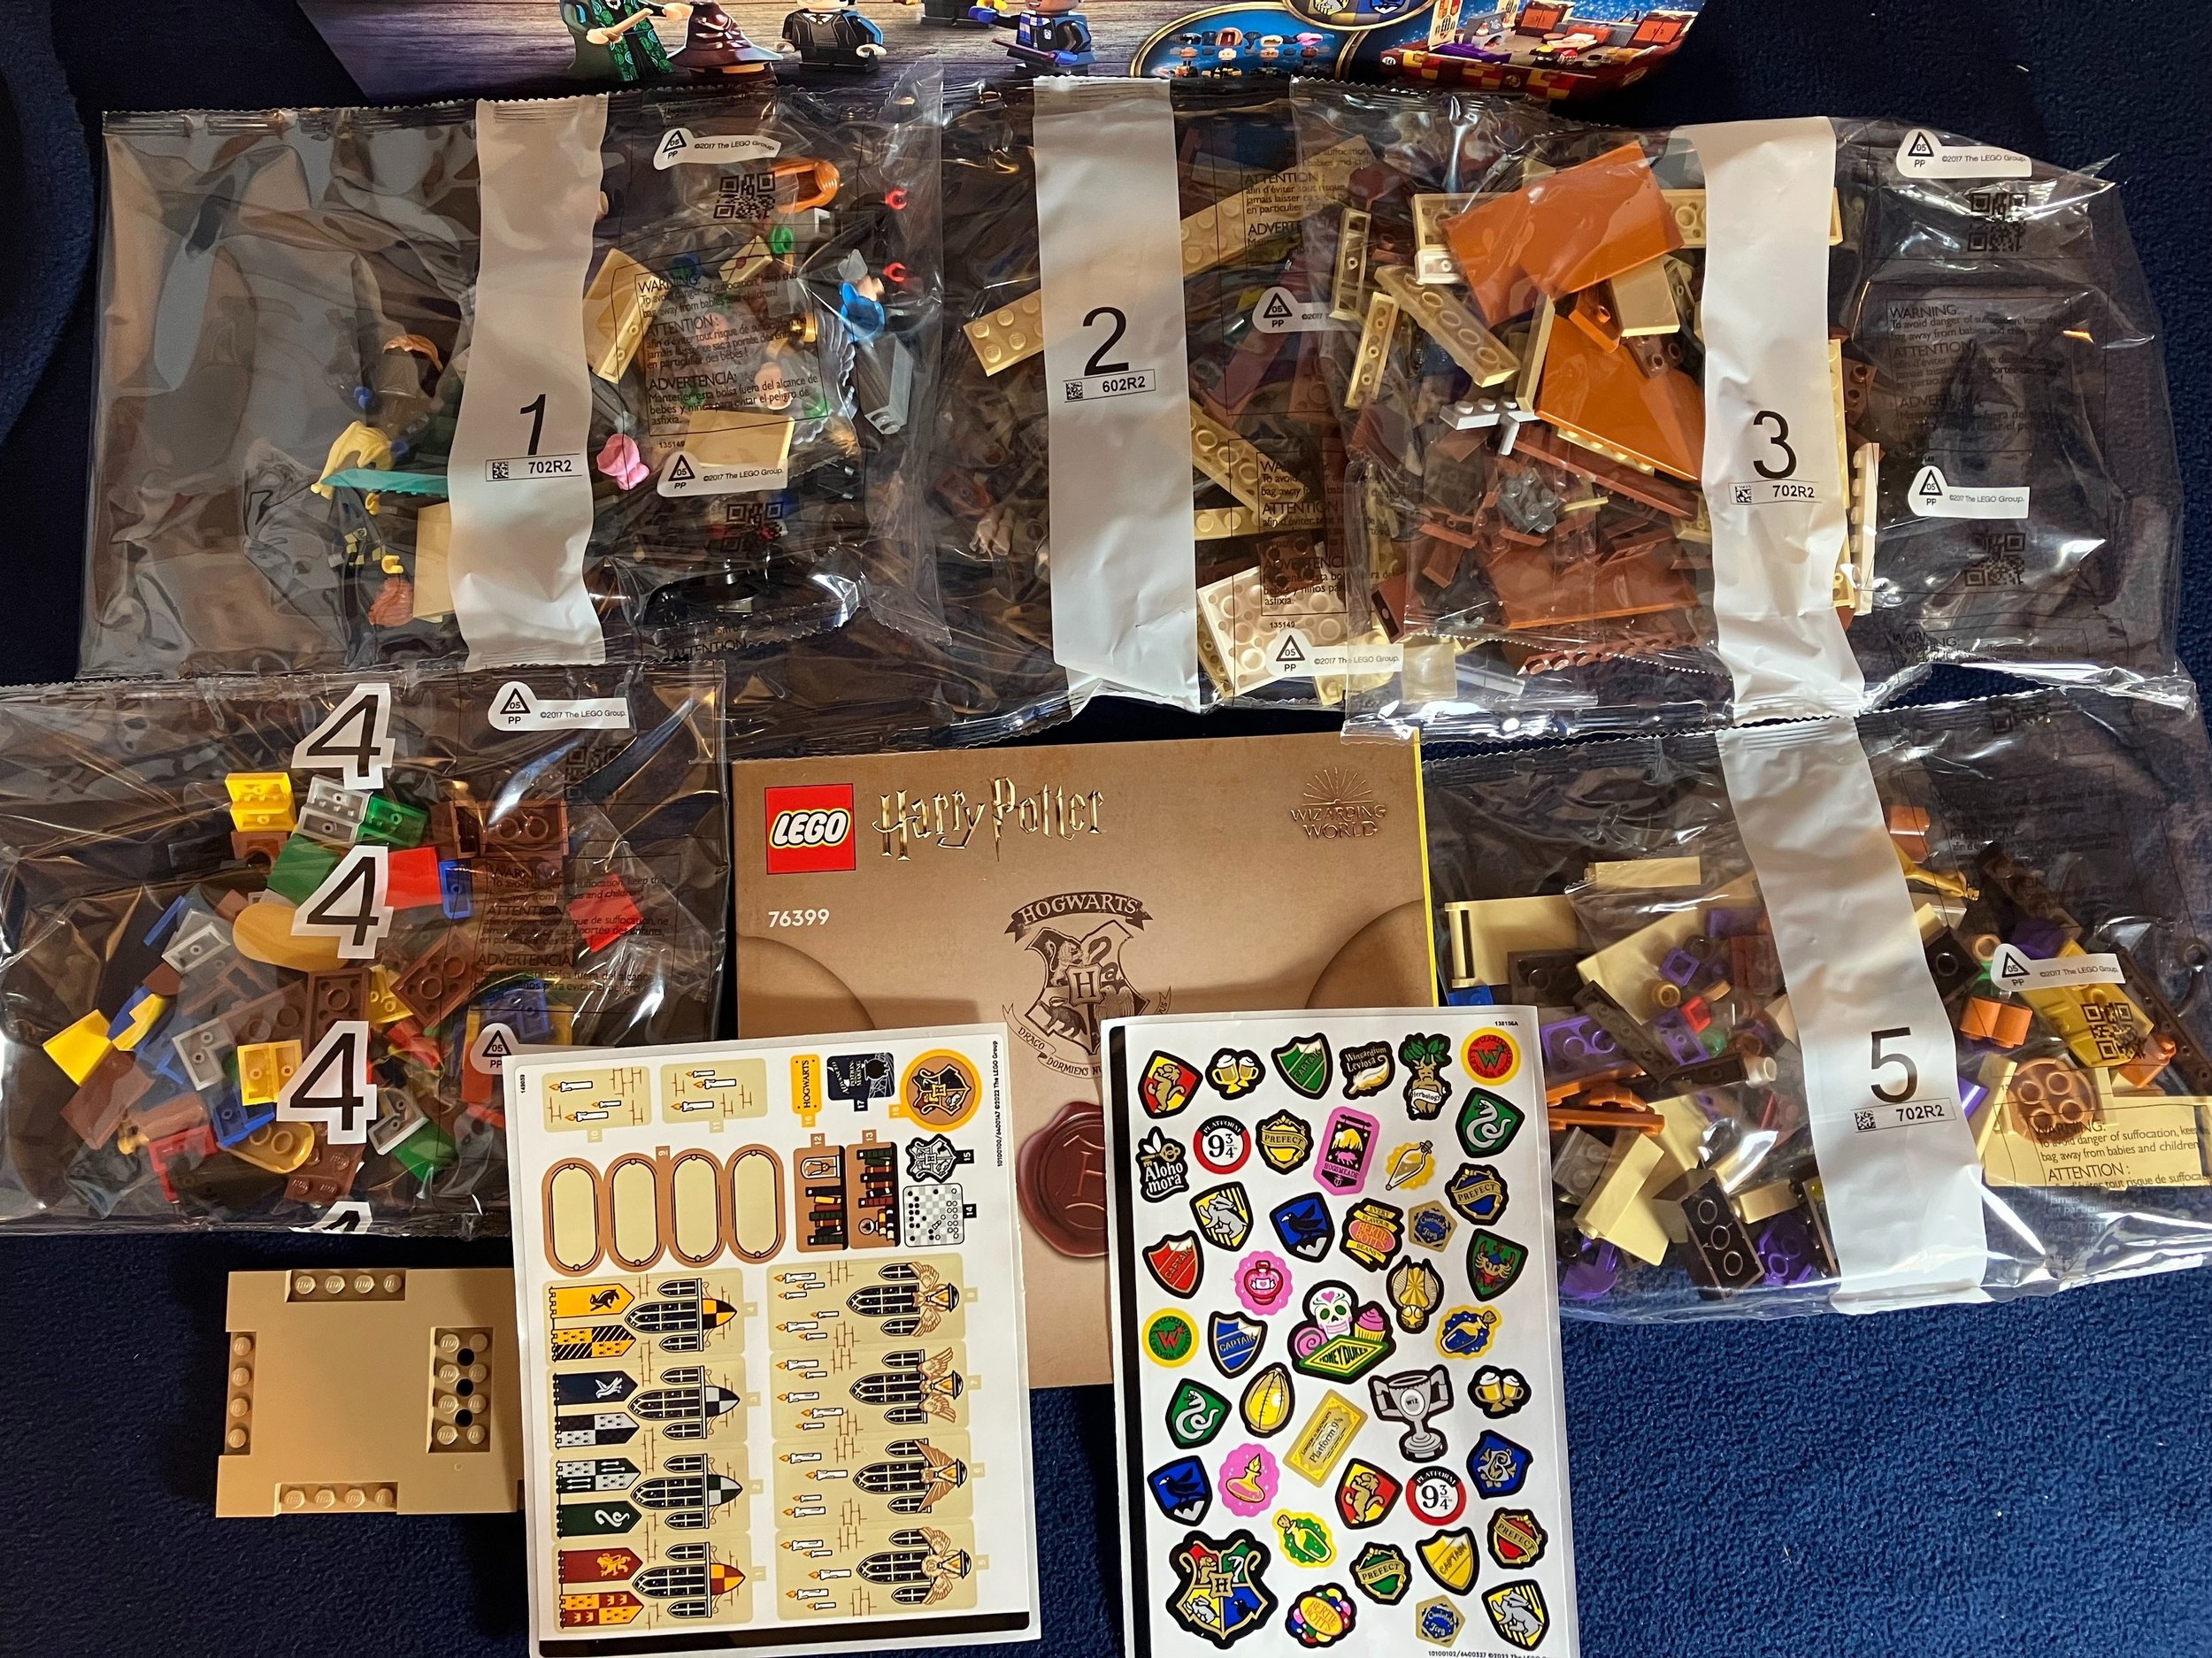
The set contains 15 number parts bags with one or two bags per number. There are three bags that are not numbered. The set also comes with a sticker sheet, two 32x32 dark gray baseplates, and a card explaining the instructions.

I started this build outside when it was still nice outside, hence the table in this picture.

Here is a picture of the stickers. Thankfully, there were only a few, but my sheet was stuffed in the box and got bent a bit. In the end, the stickers went on fine so I guess I can’t complain.

Also, the Bricklink designer sets come with a special seal to show that they haven’t been opened. Only my set came without the seal attached so… thanks! Everything was there, but it lost a bit of the exclusiveness when I saw that.

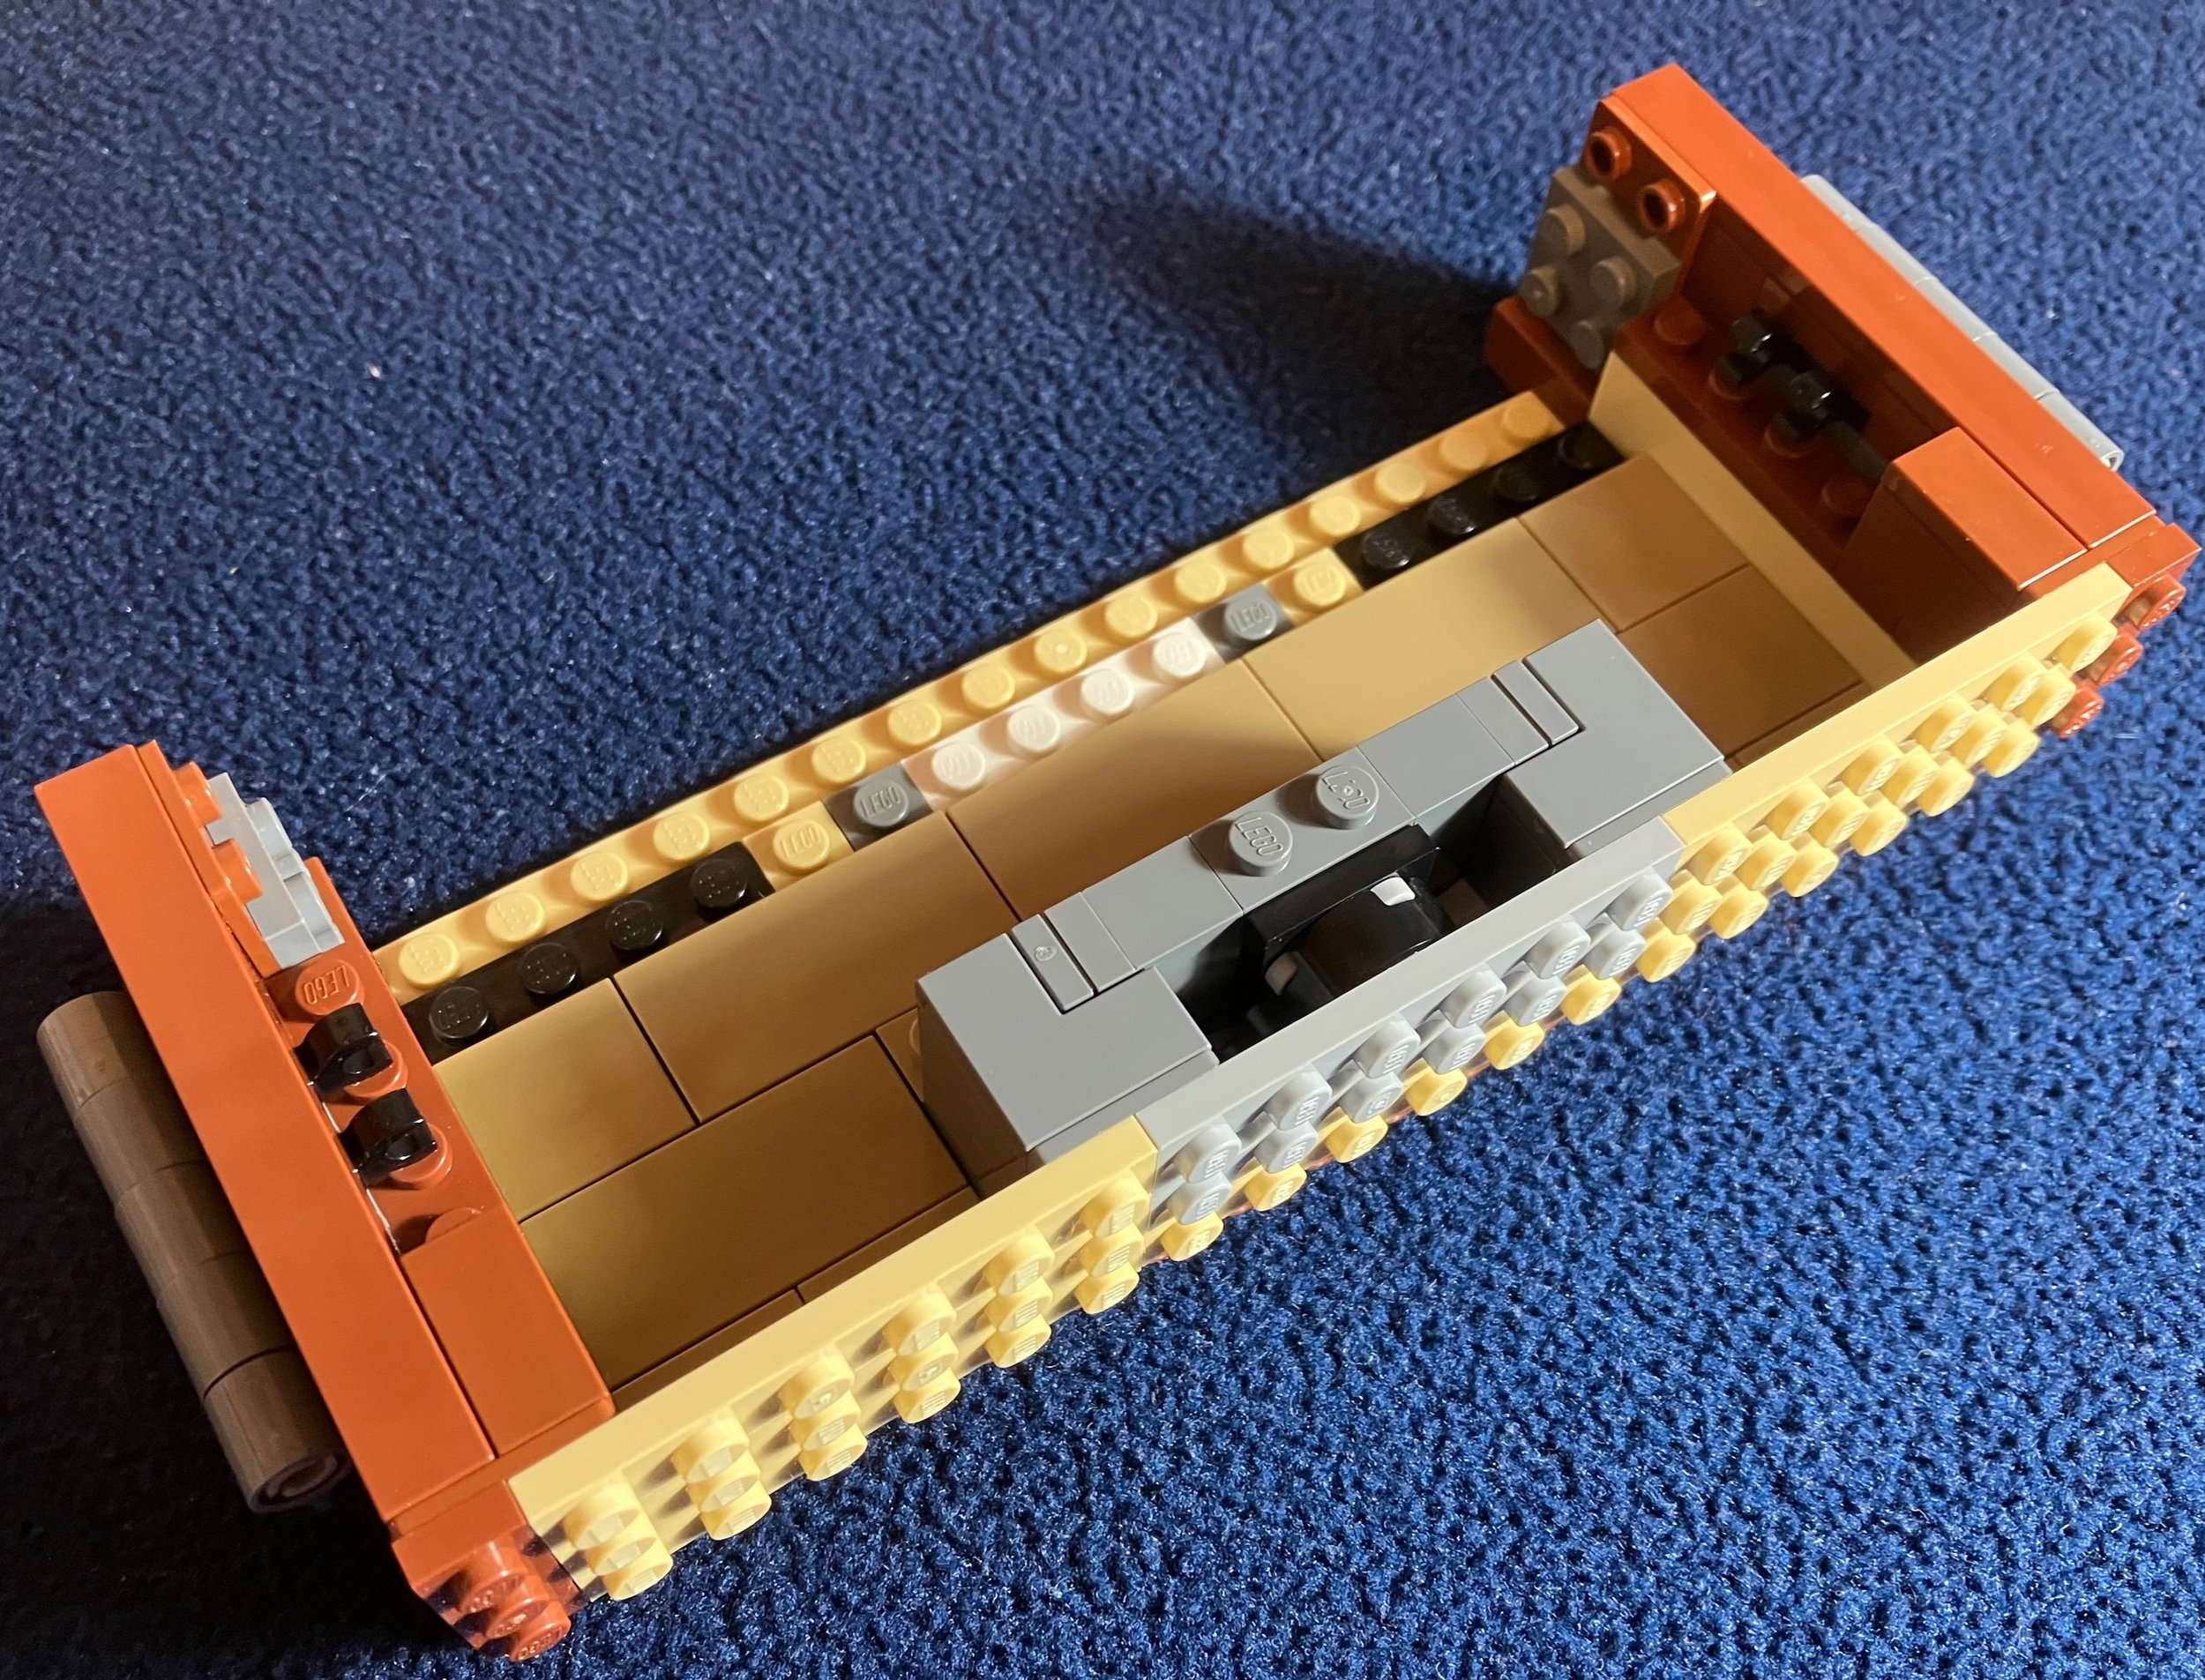
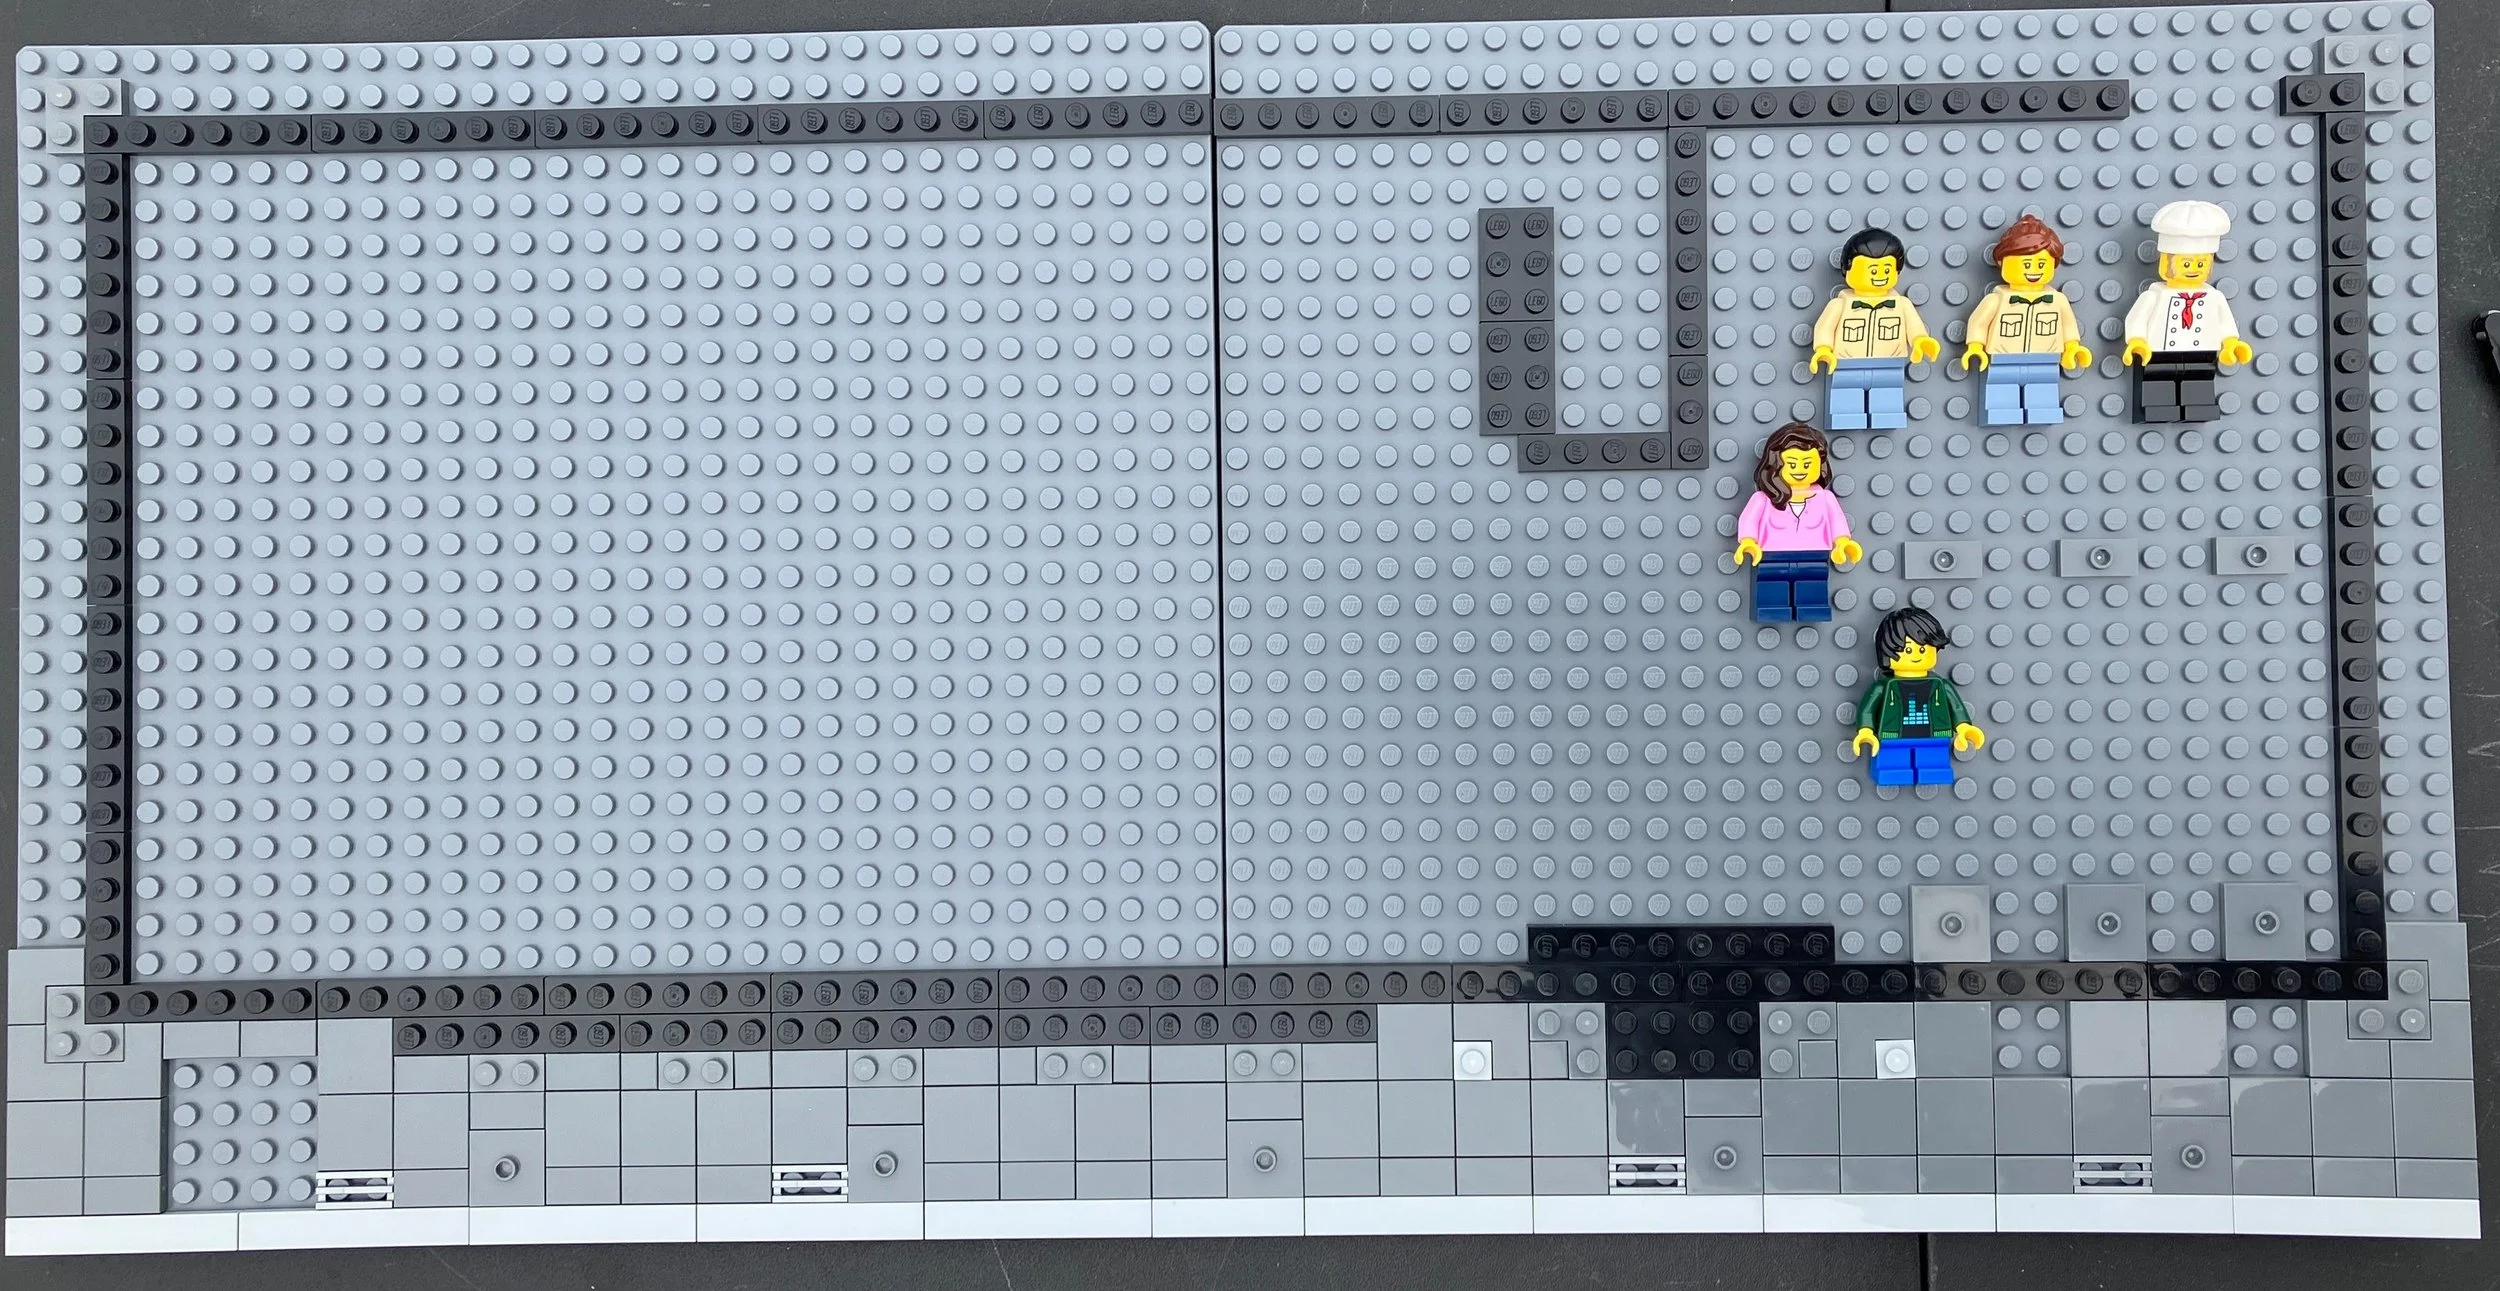
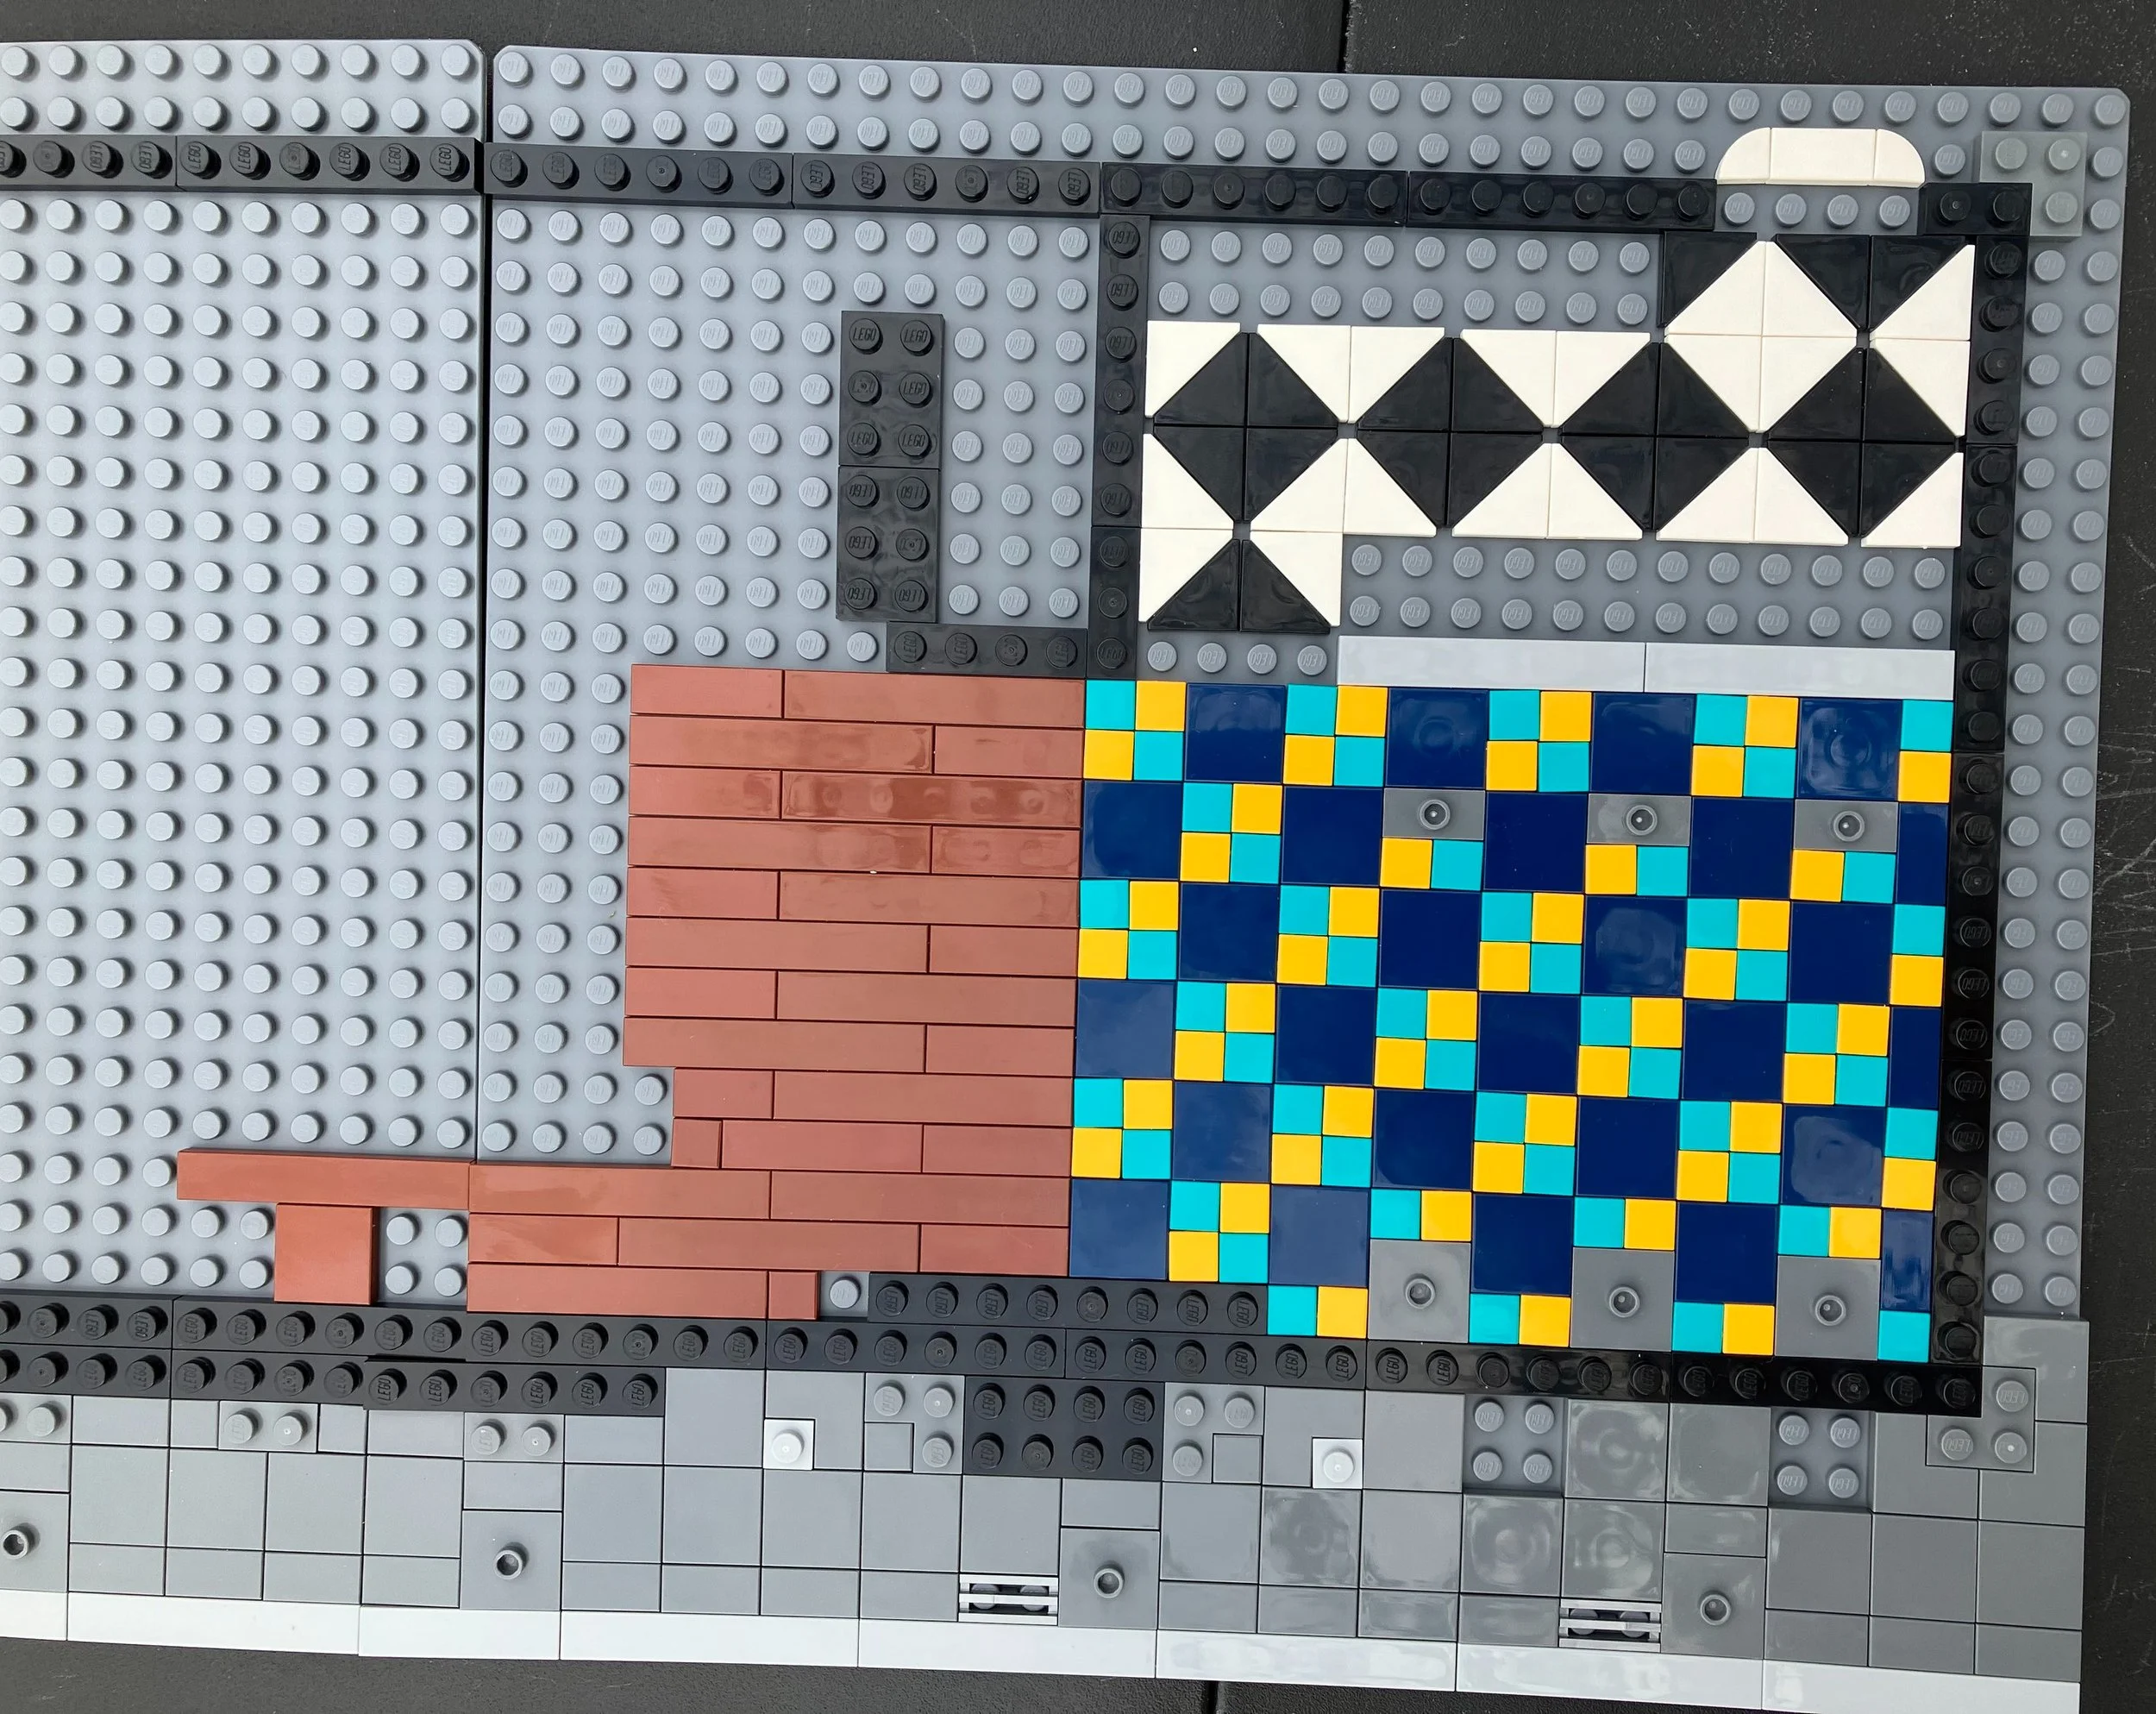
The first bag starts similar to a modular building with the construction of the sidewalk and then the outline of the building. I originally thought it was going to be built so you could easily separate the two baseplates, but eventually you lay a piece down that connects the two.

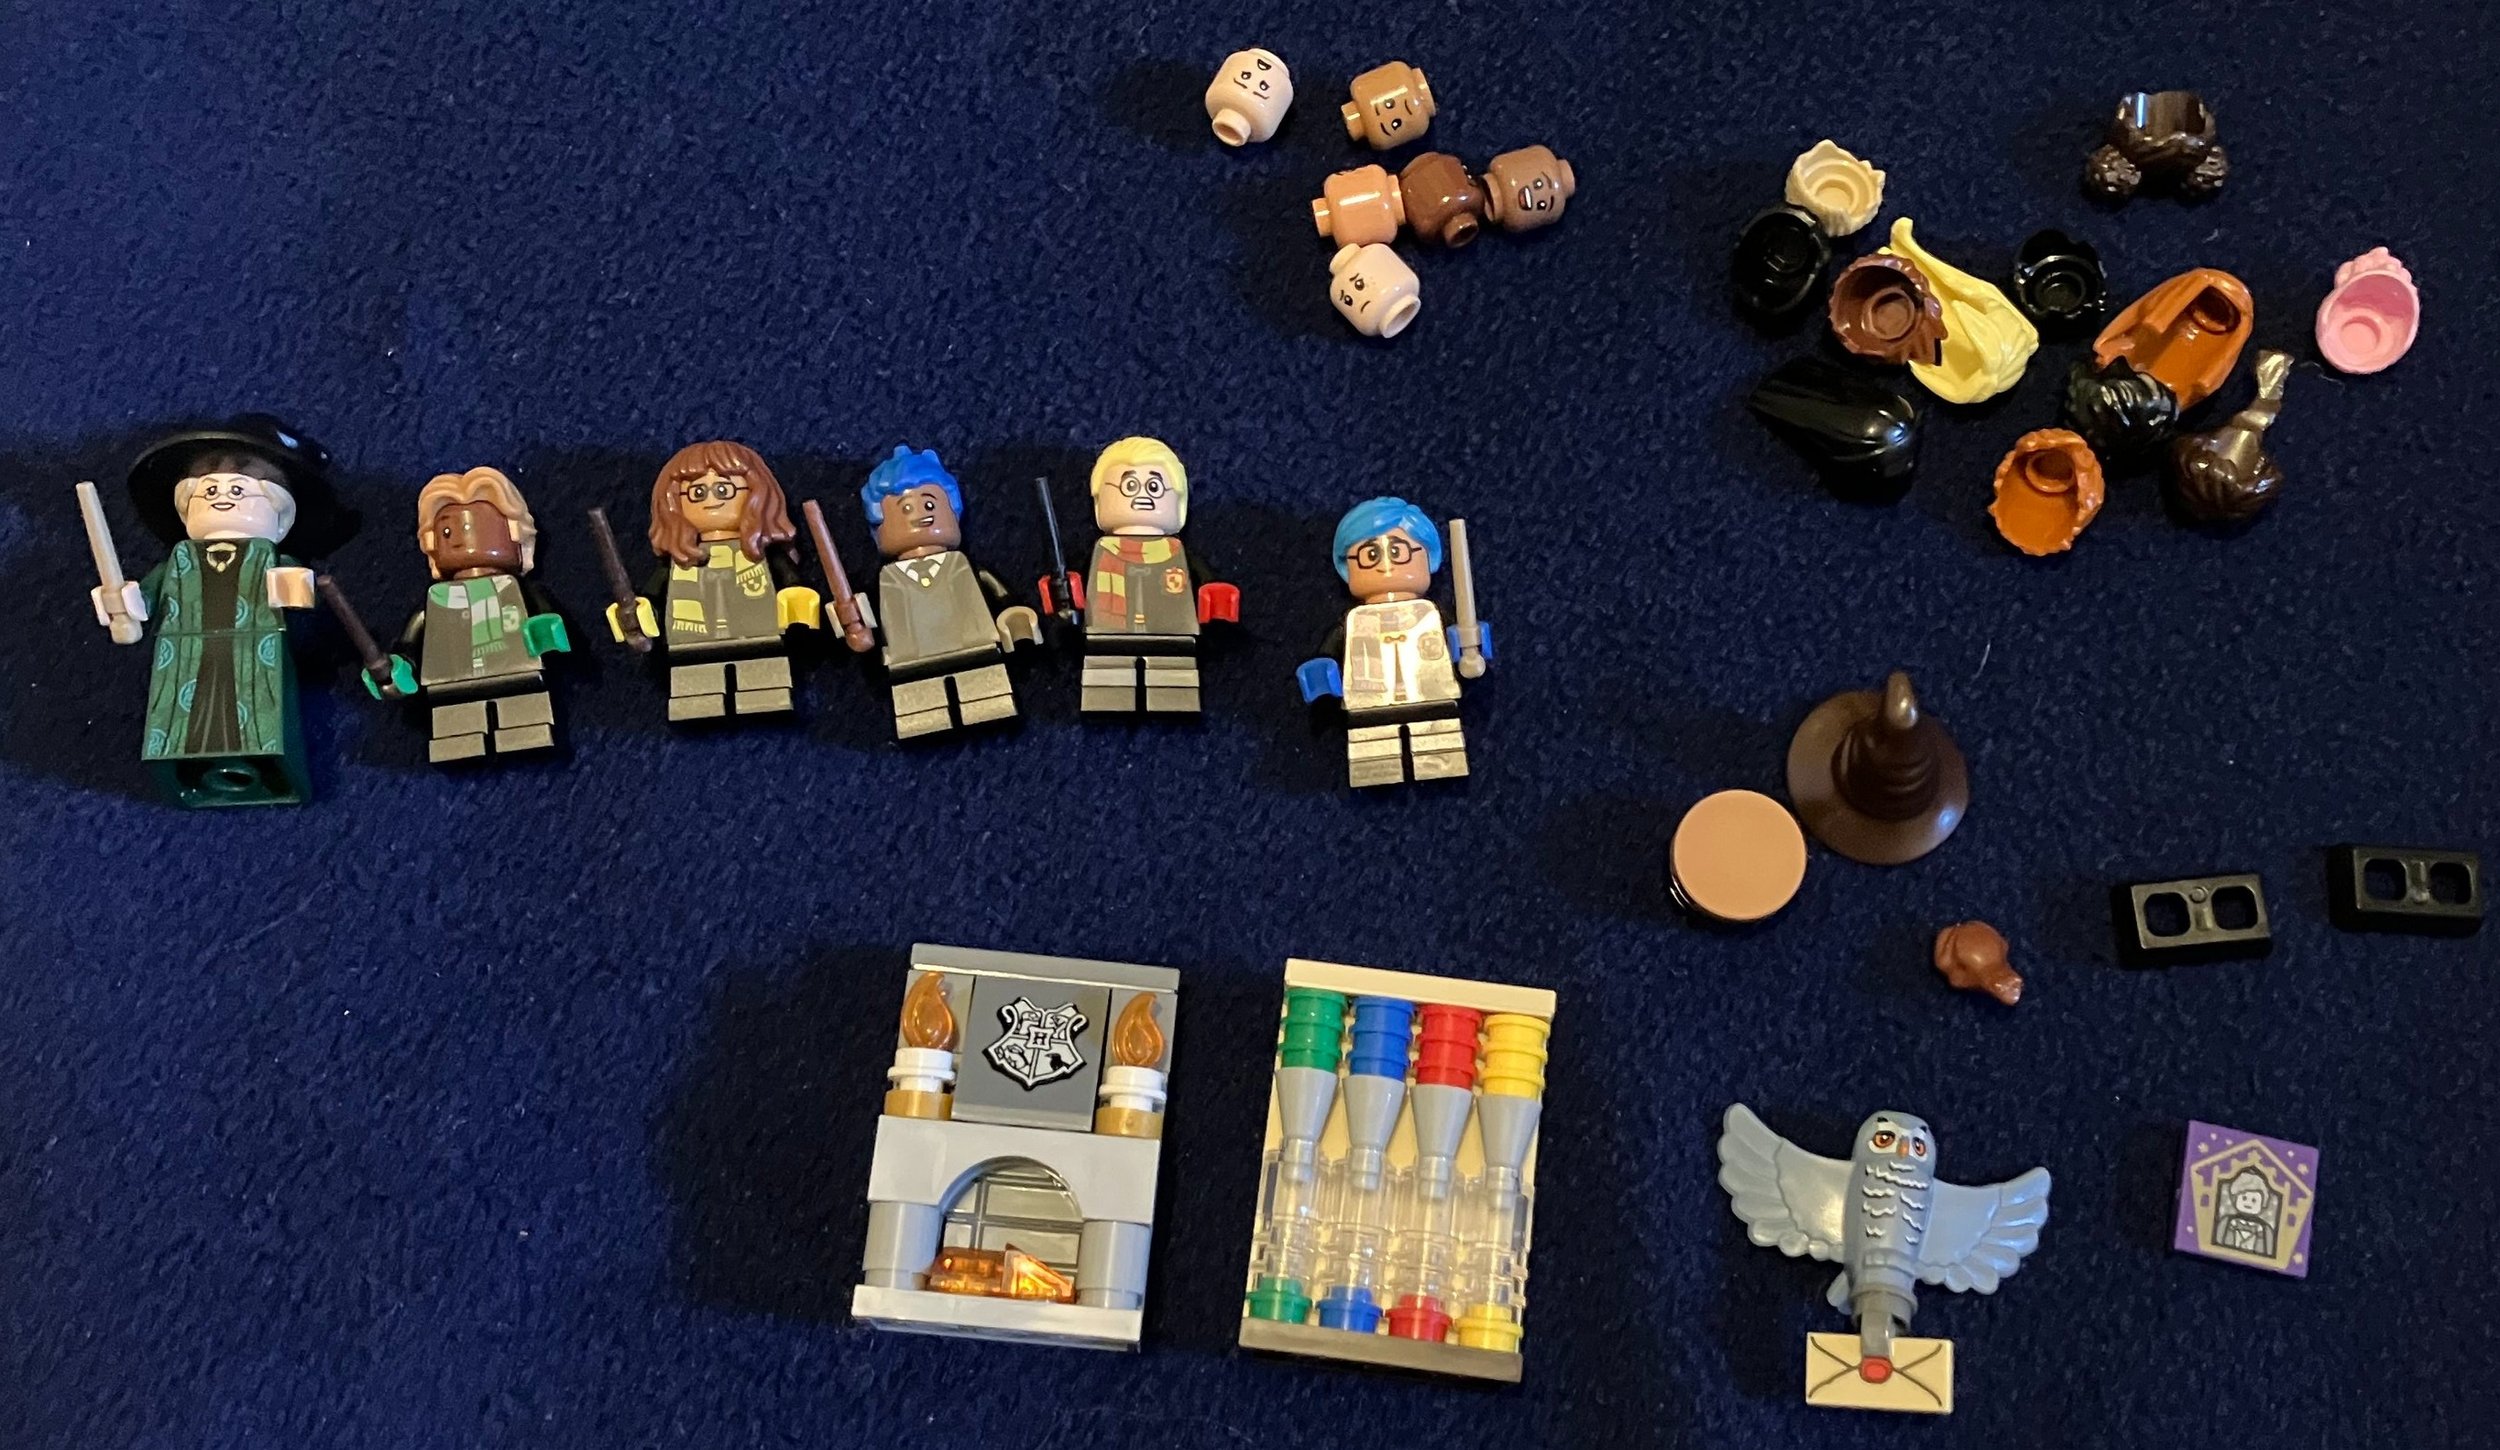
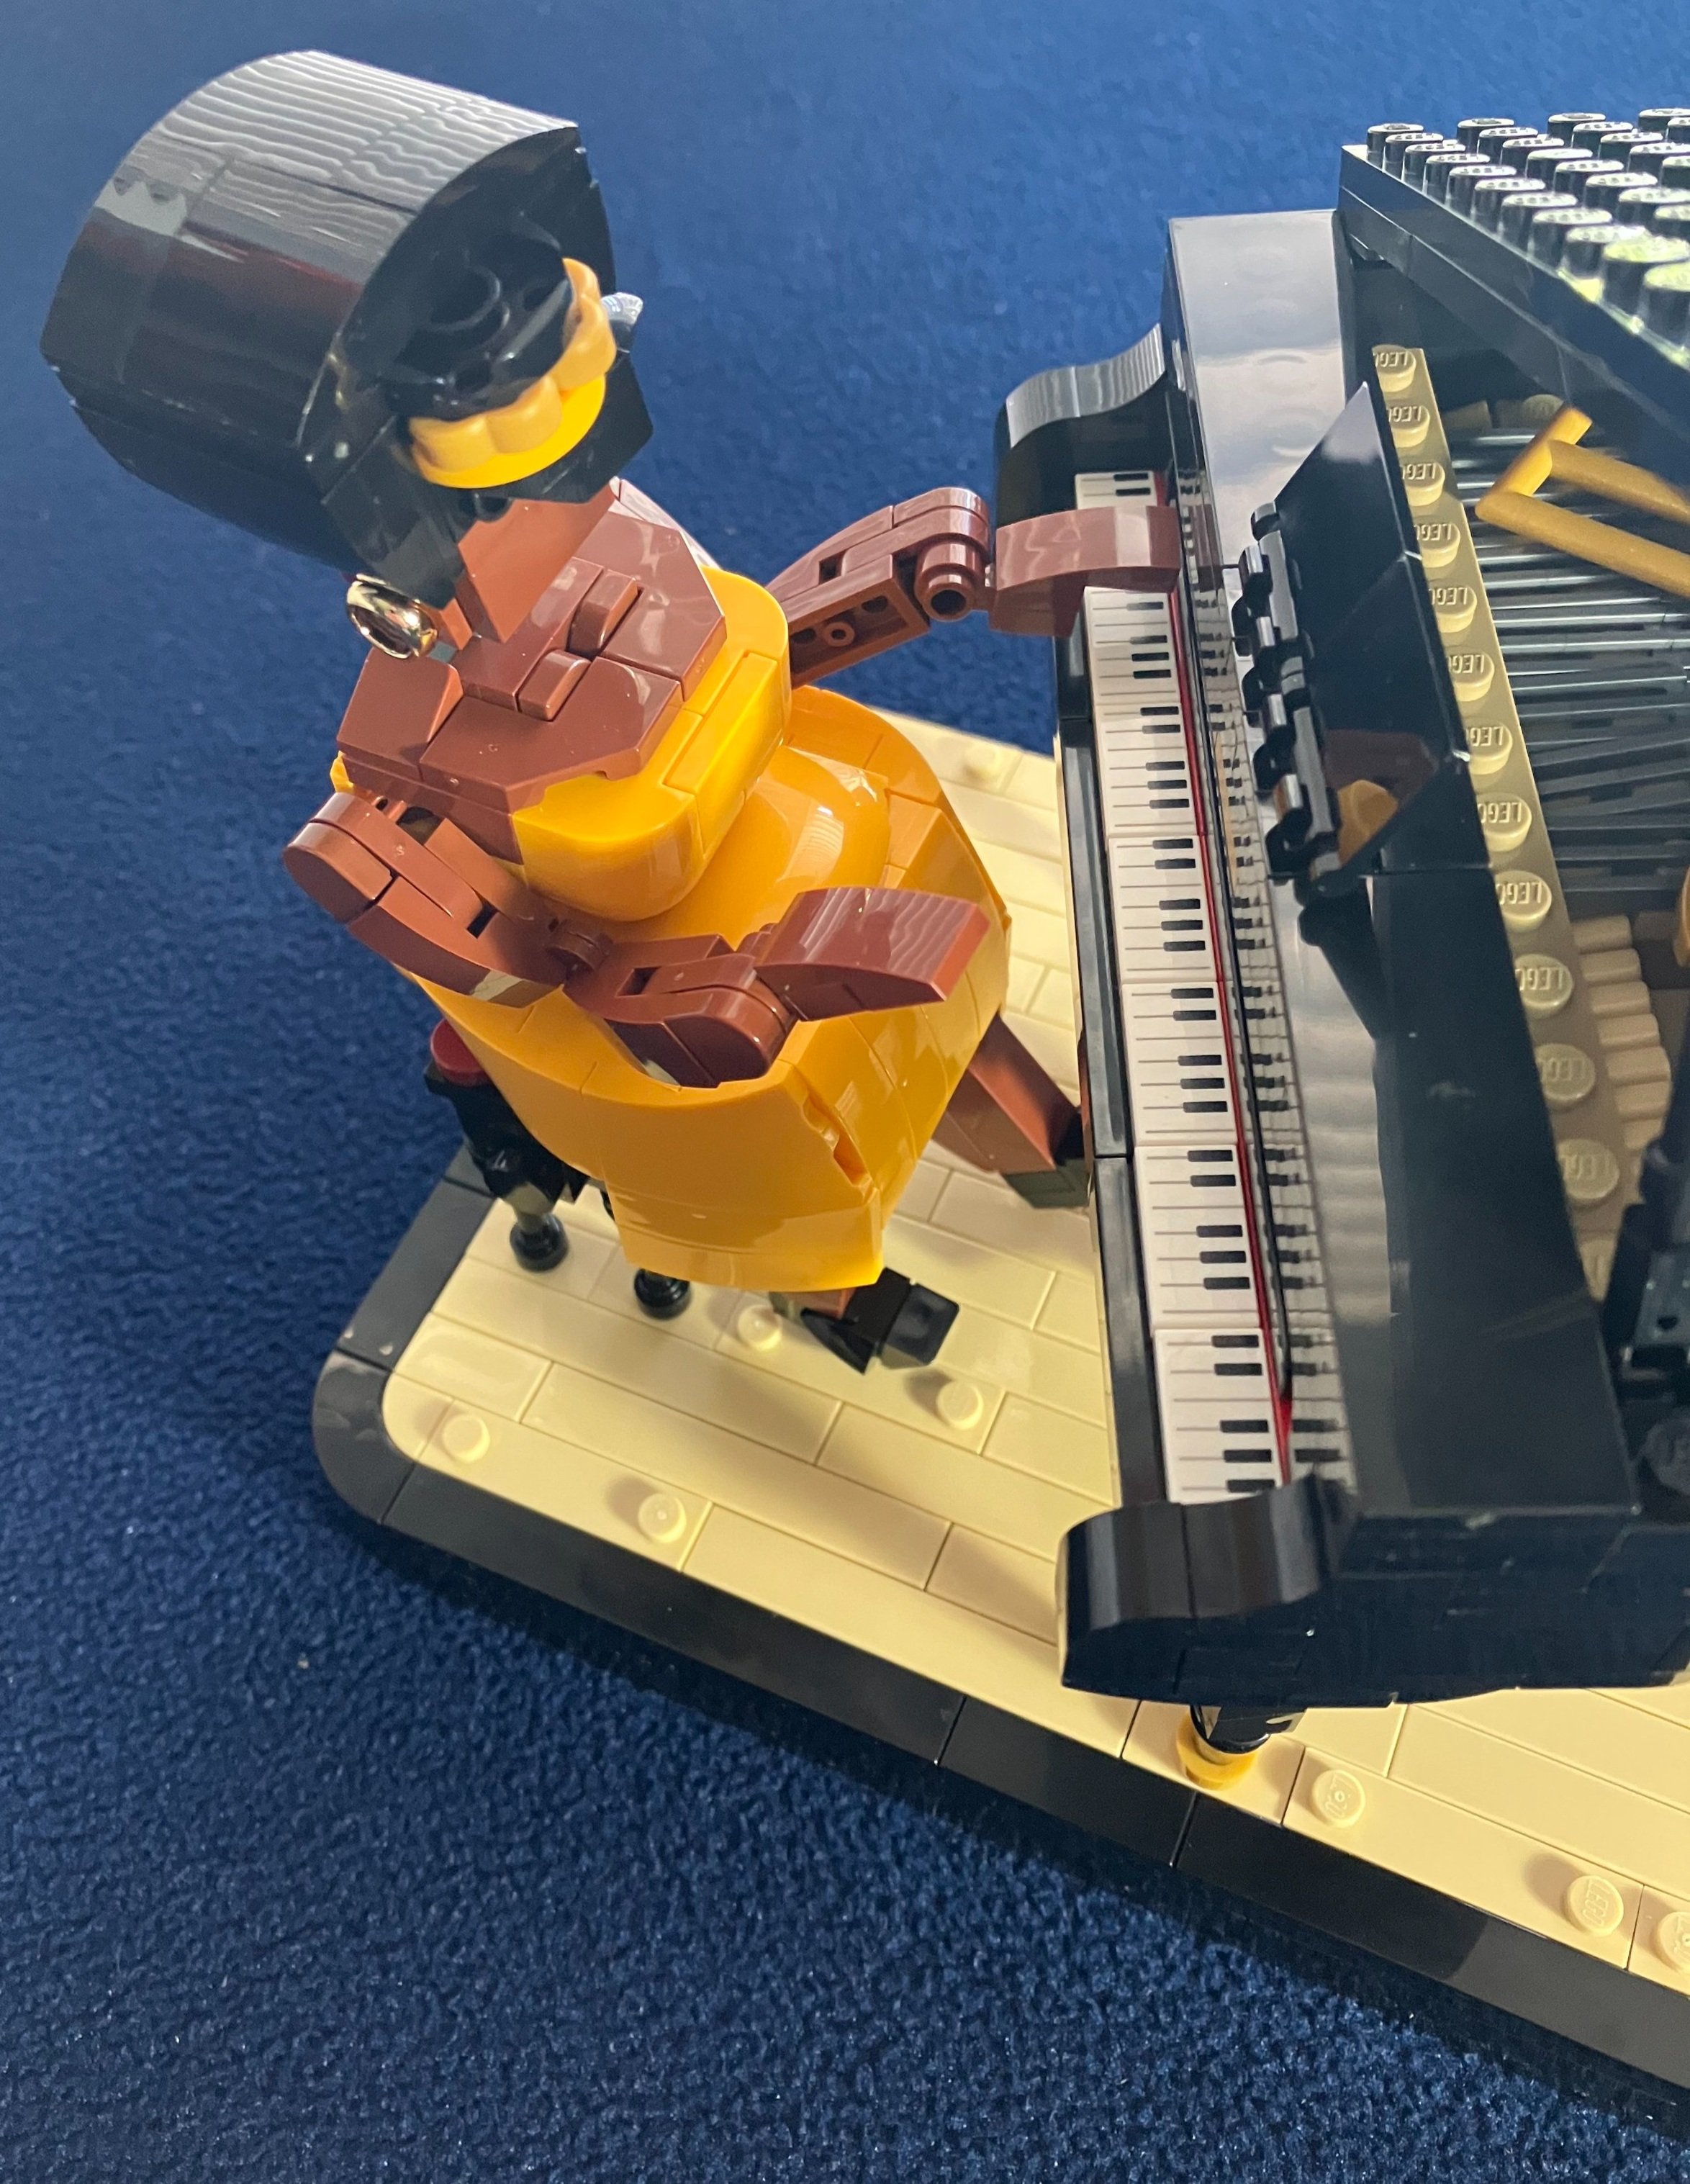
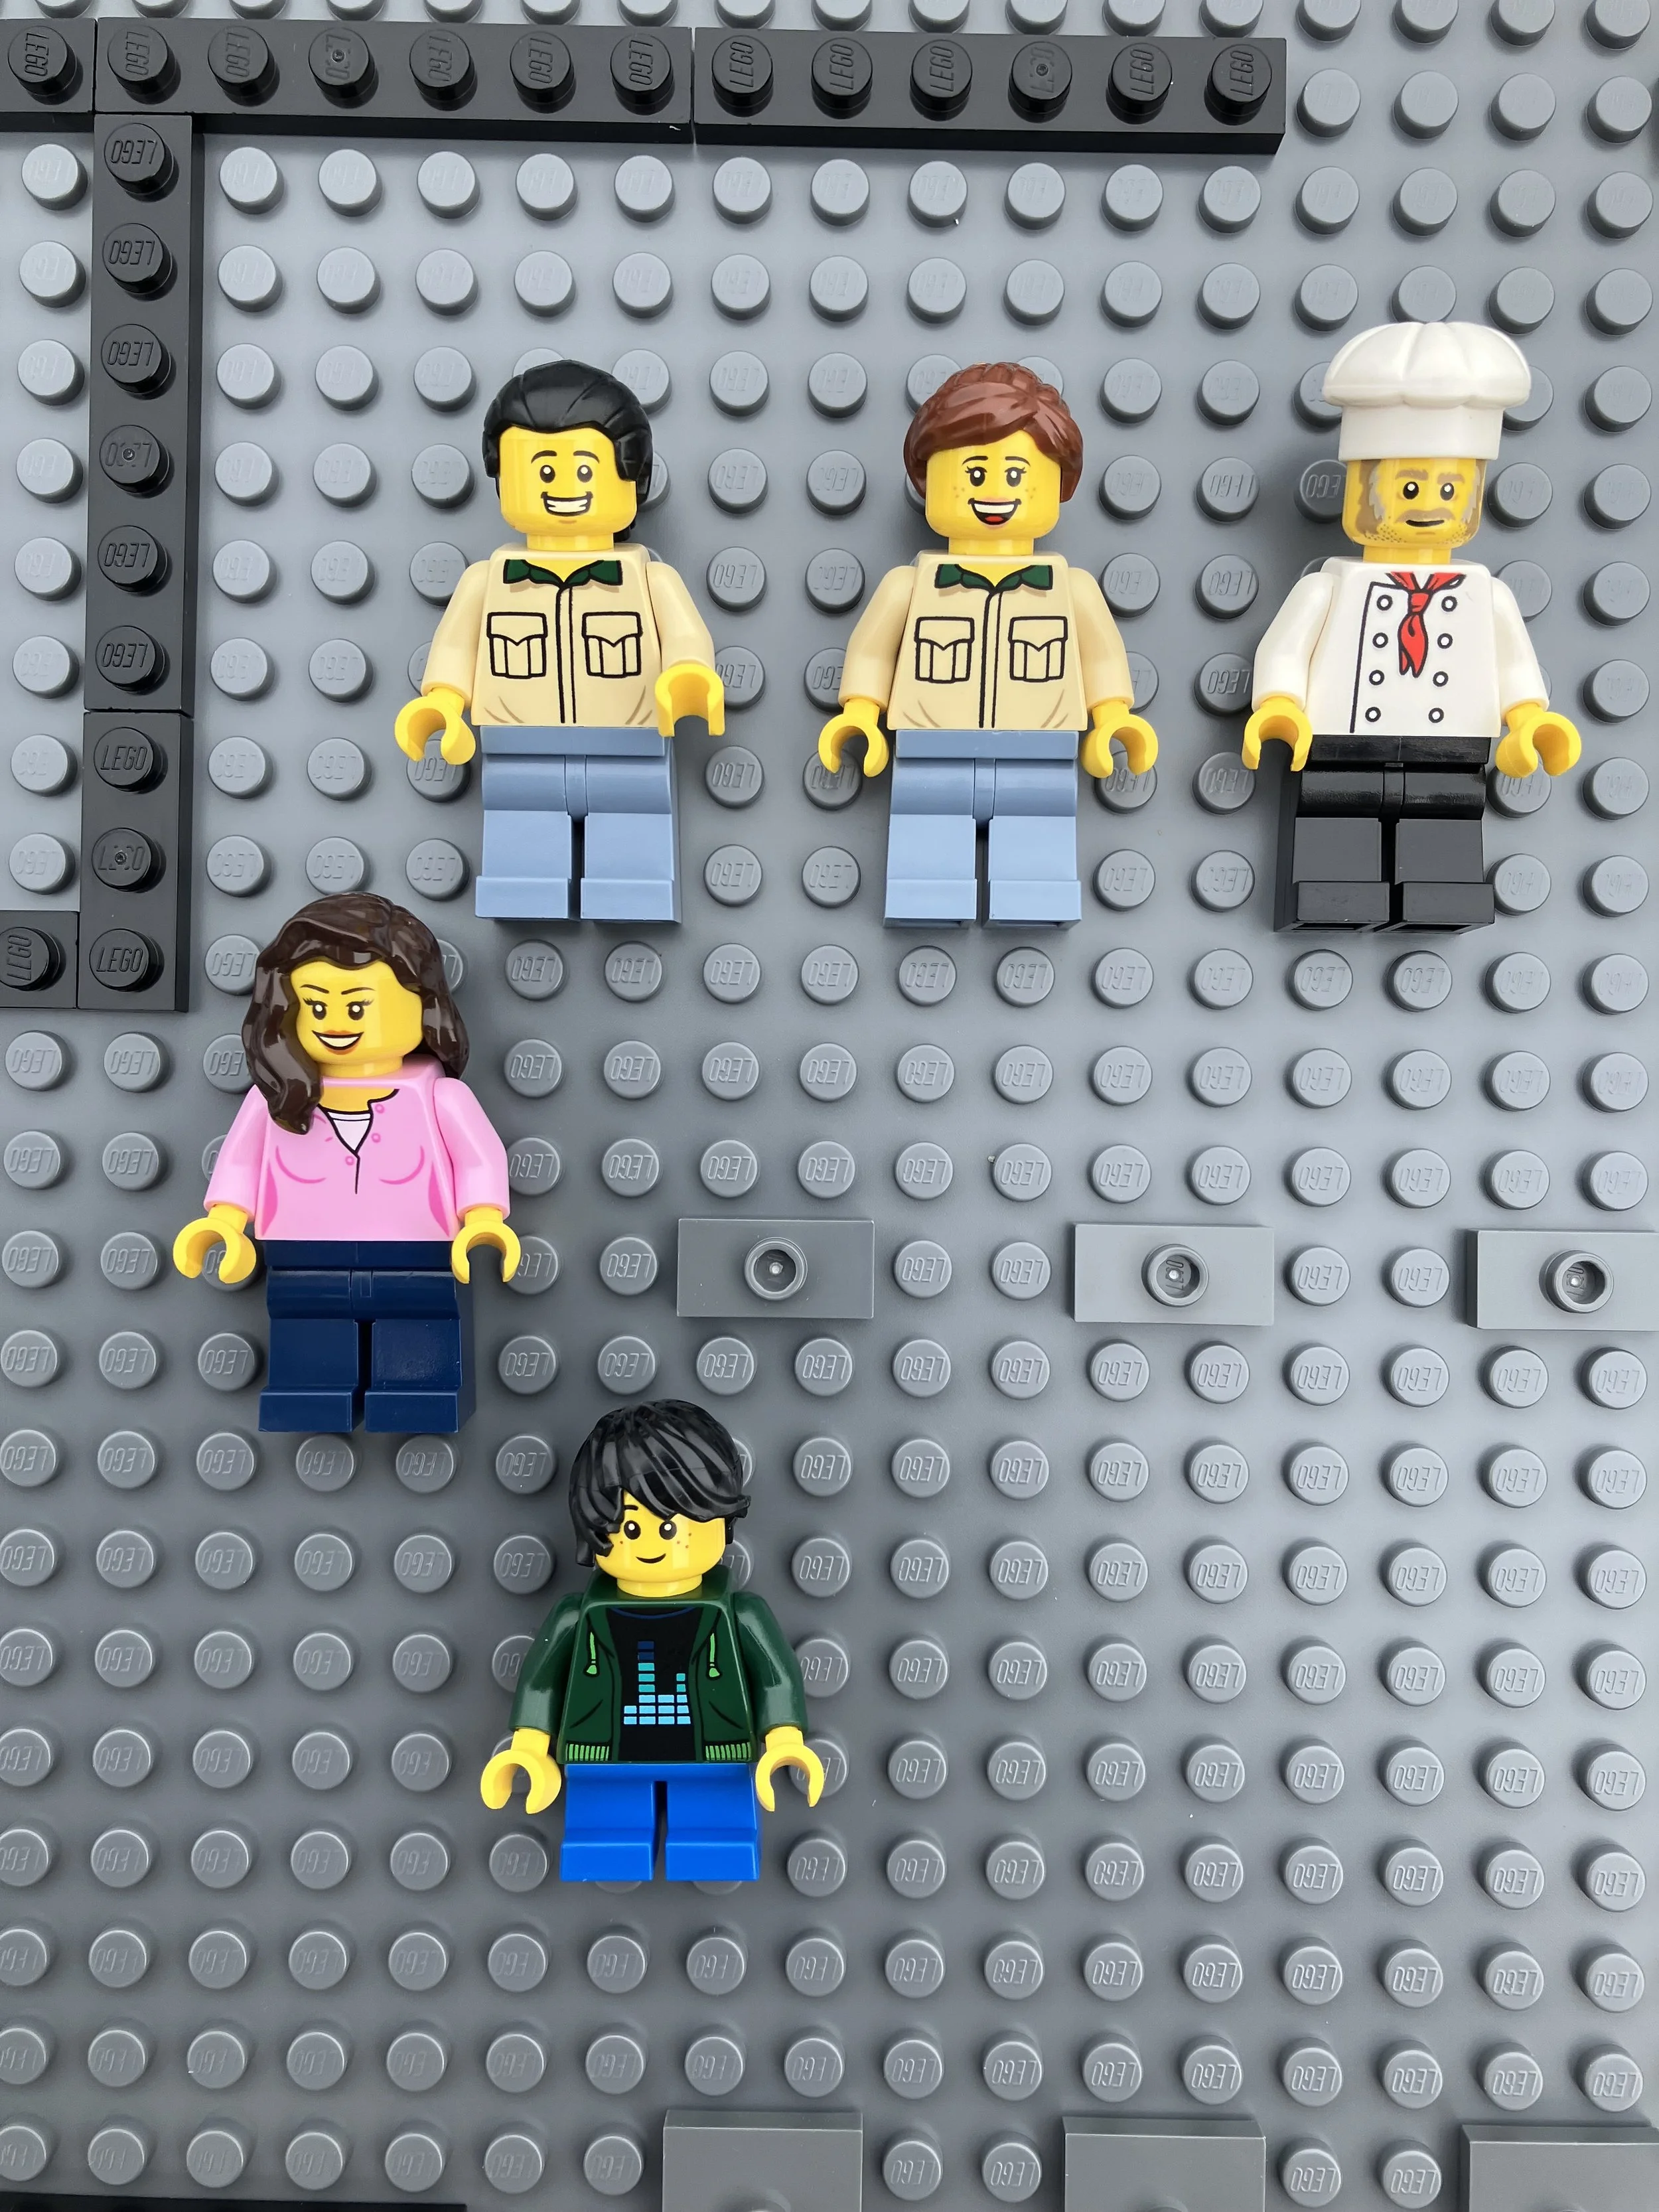
This bag also builds the five minifigures for this set which seem to fit well. I’ve never been to a bowling alley with a chef, but you never know.

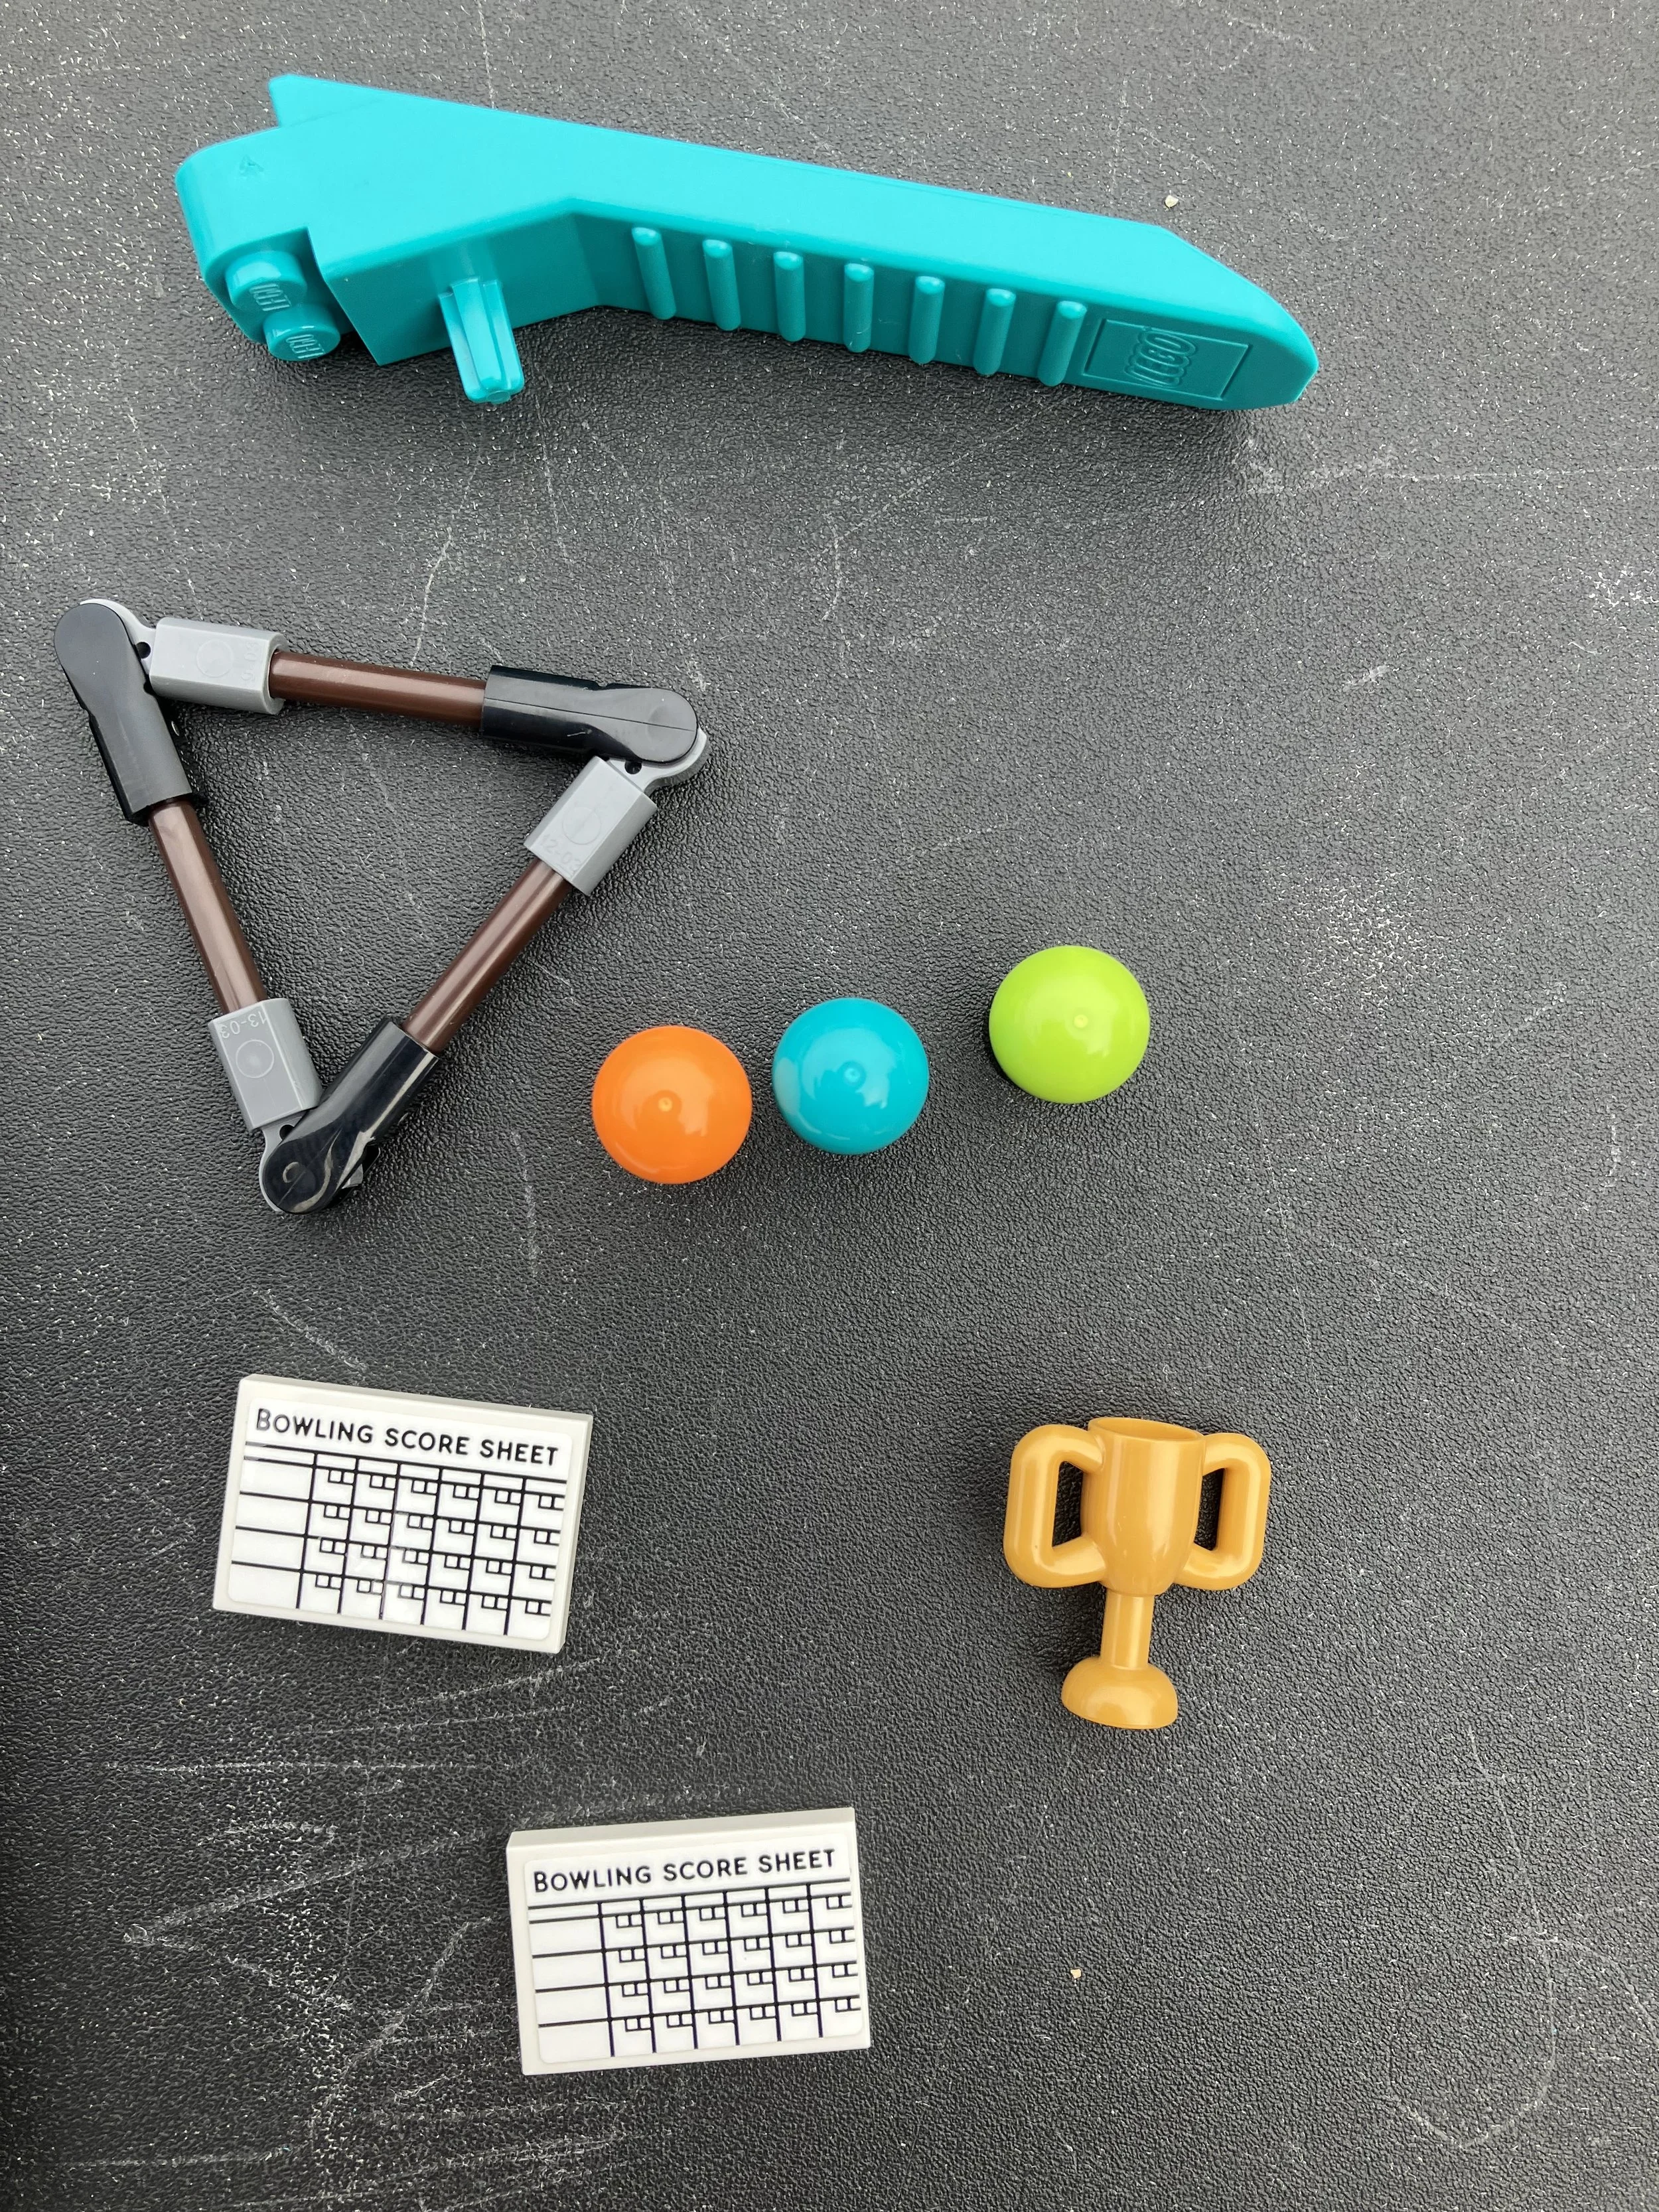
You also attached a few stickers to some tiles to make score sheets and put some pieces together to make a triangle for… I’m not sure what the triangle is for. Then there are a few bowling balls which are not really balls as they have a hole on the bottom to attach a Technic axle, but they get the job done. Finally there is a trophy to give to the winner of your brick bowling tournament.

It’s usually a given for a set this size, but a brick separator comes in this bag.

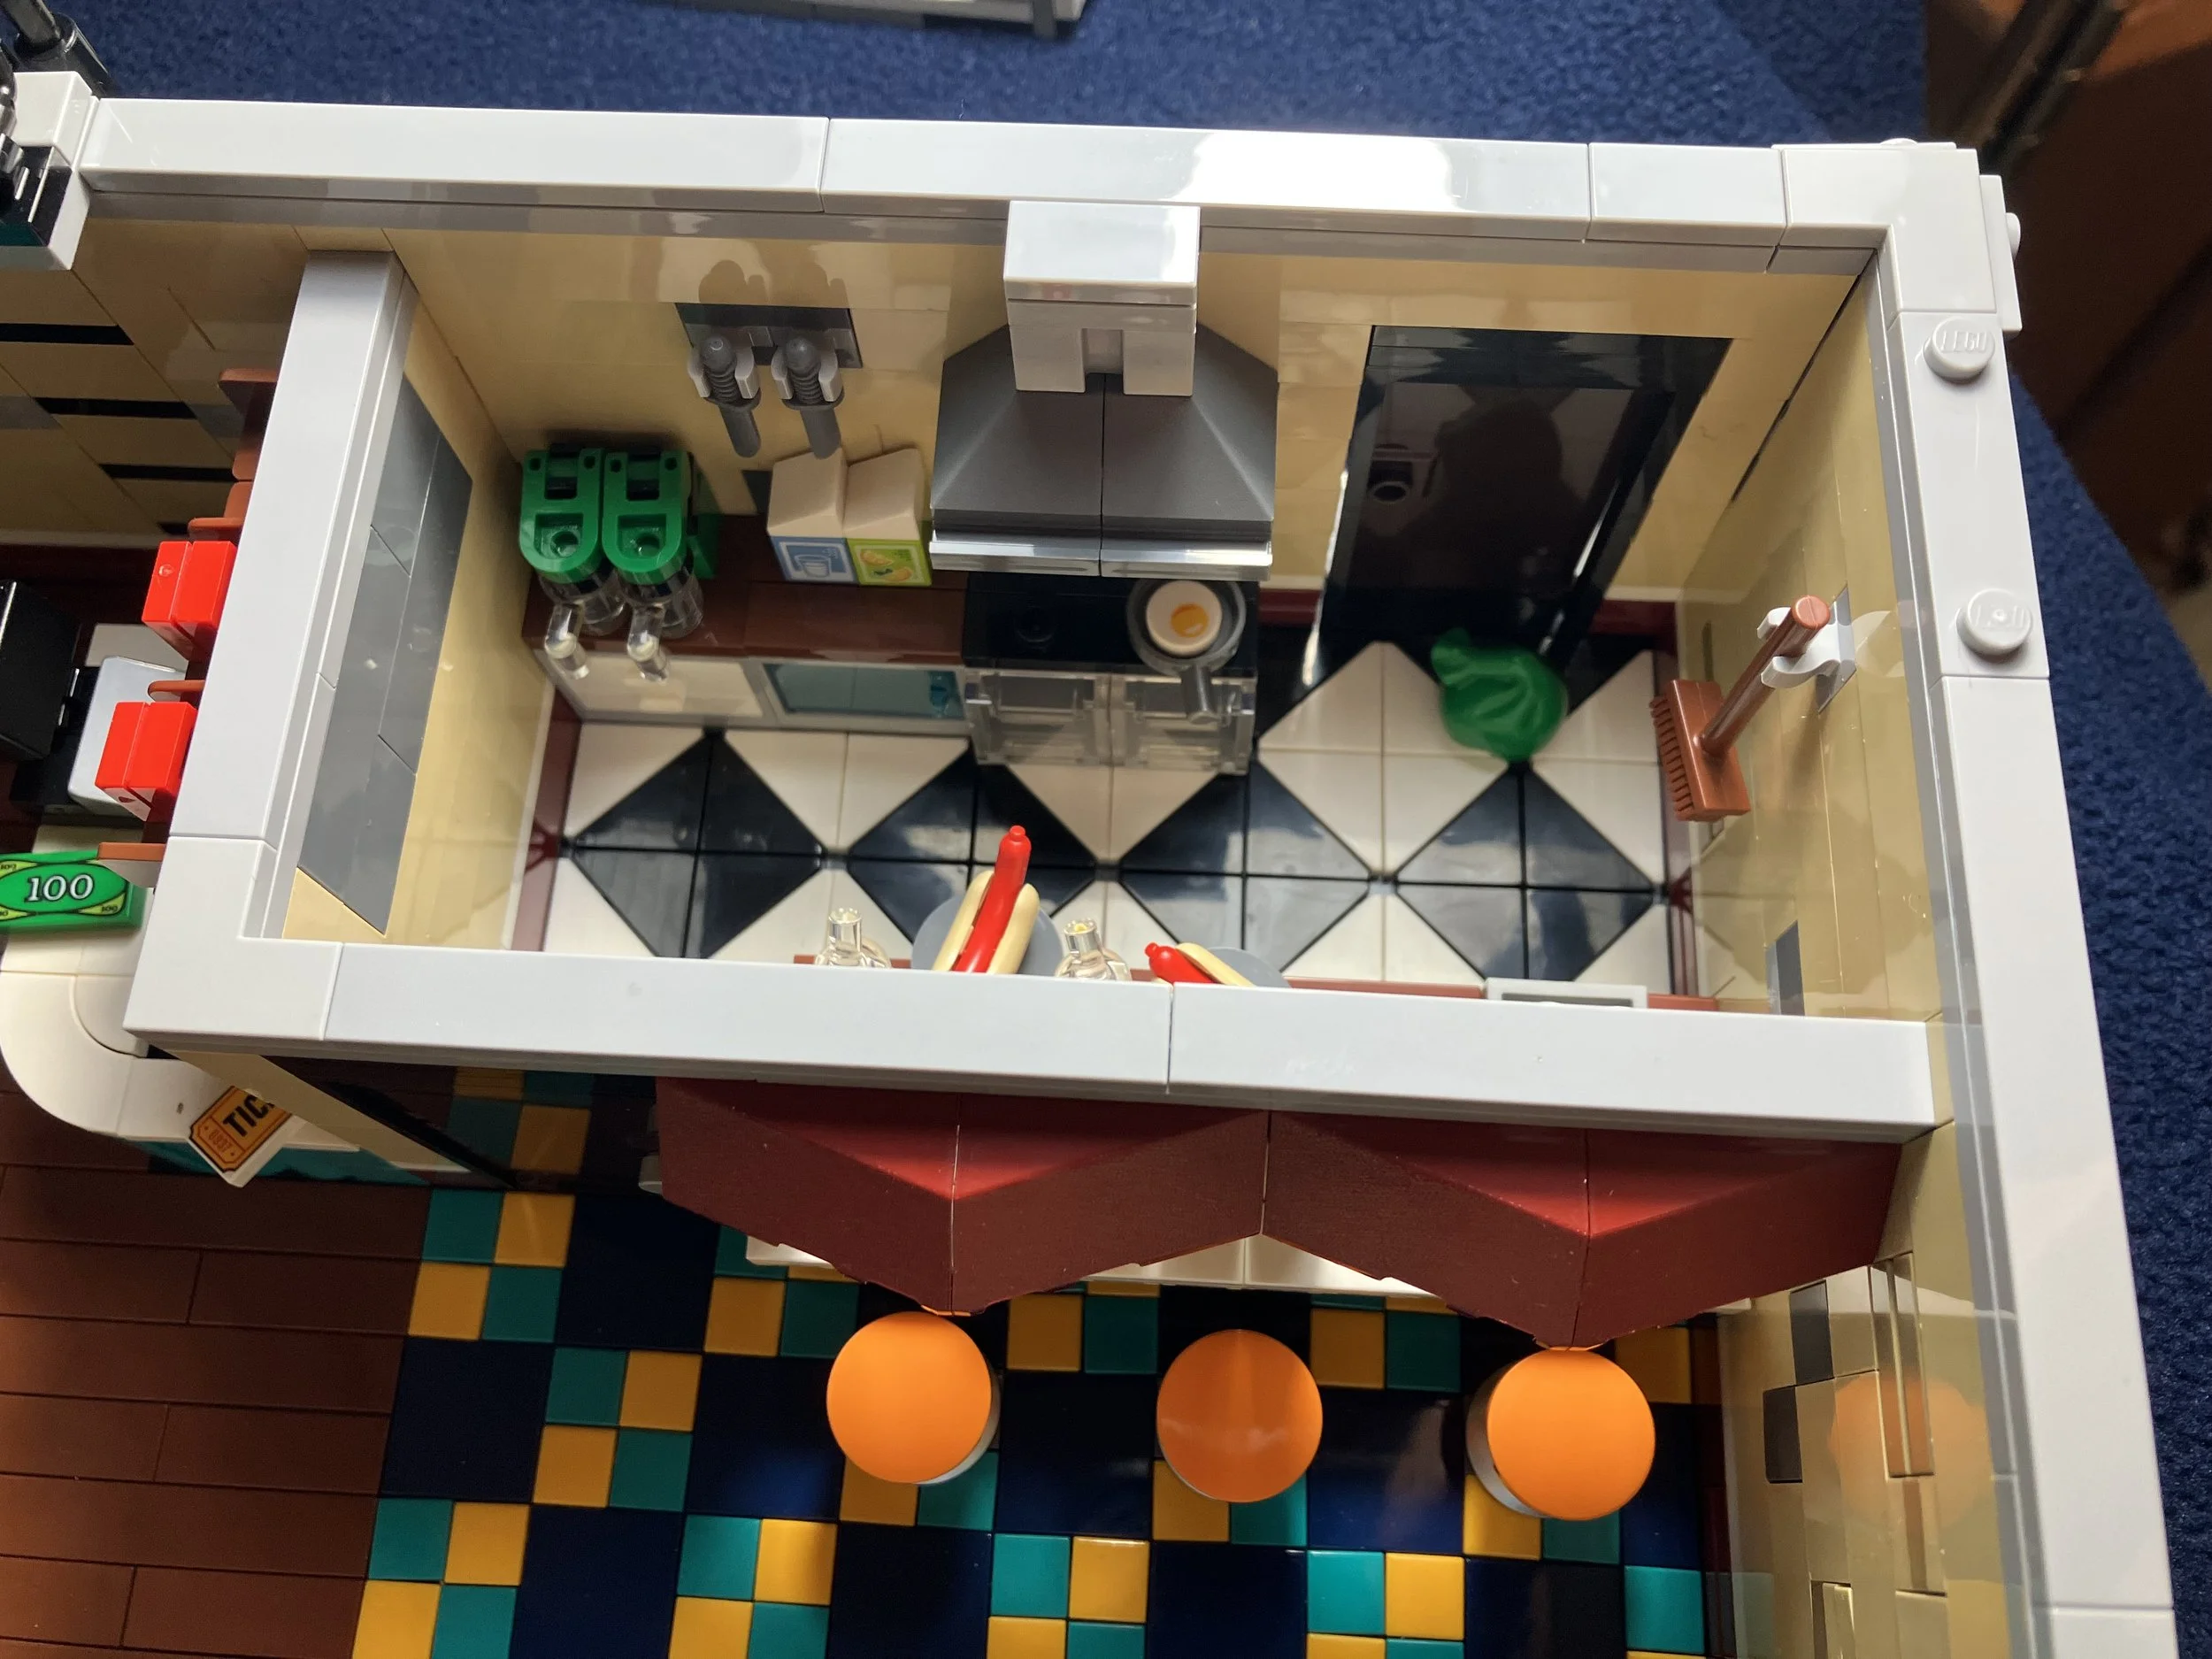
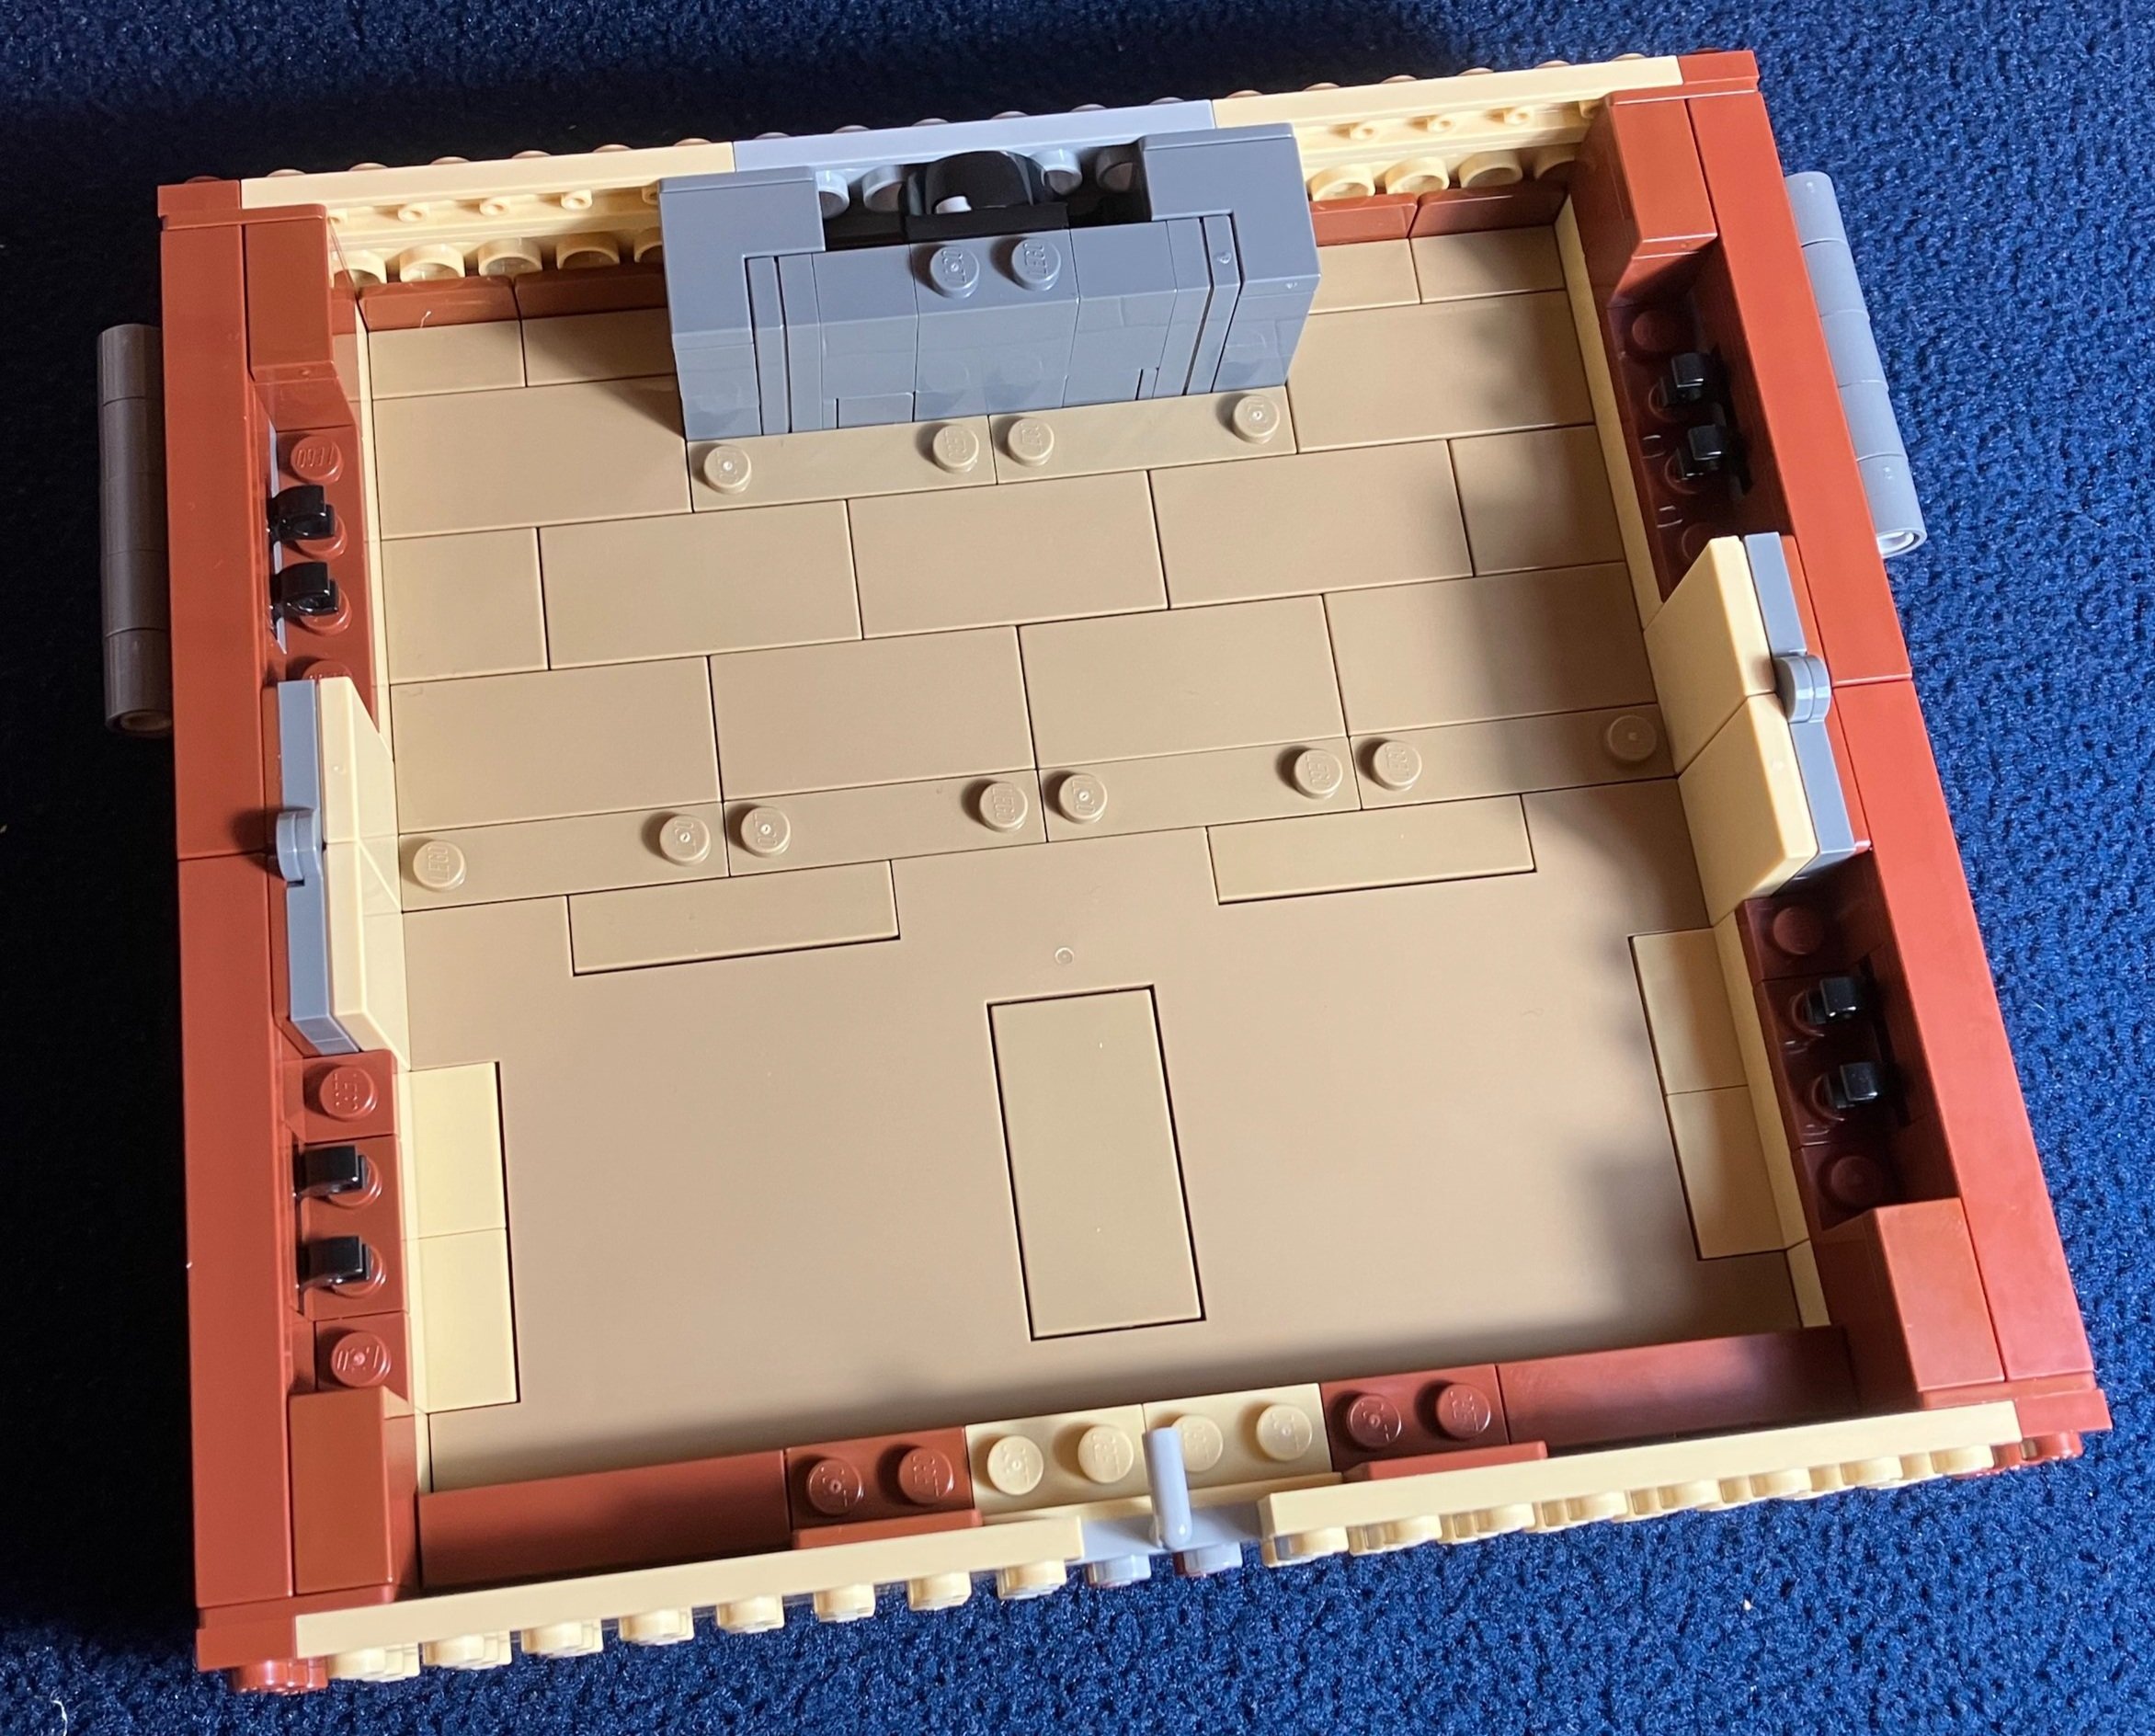
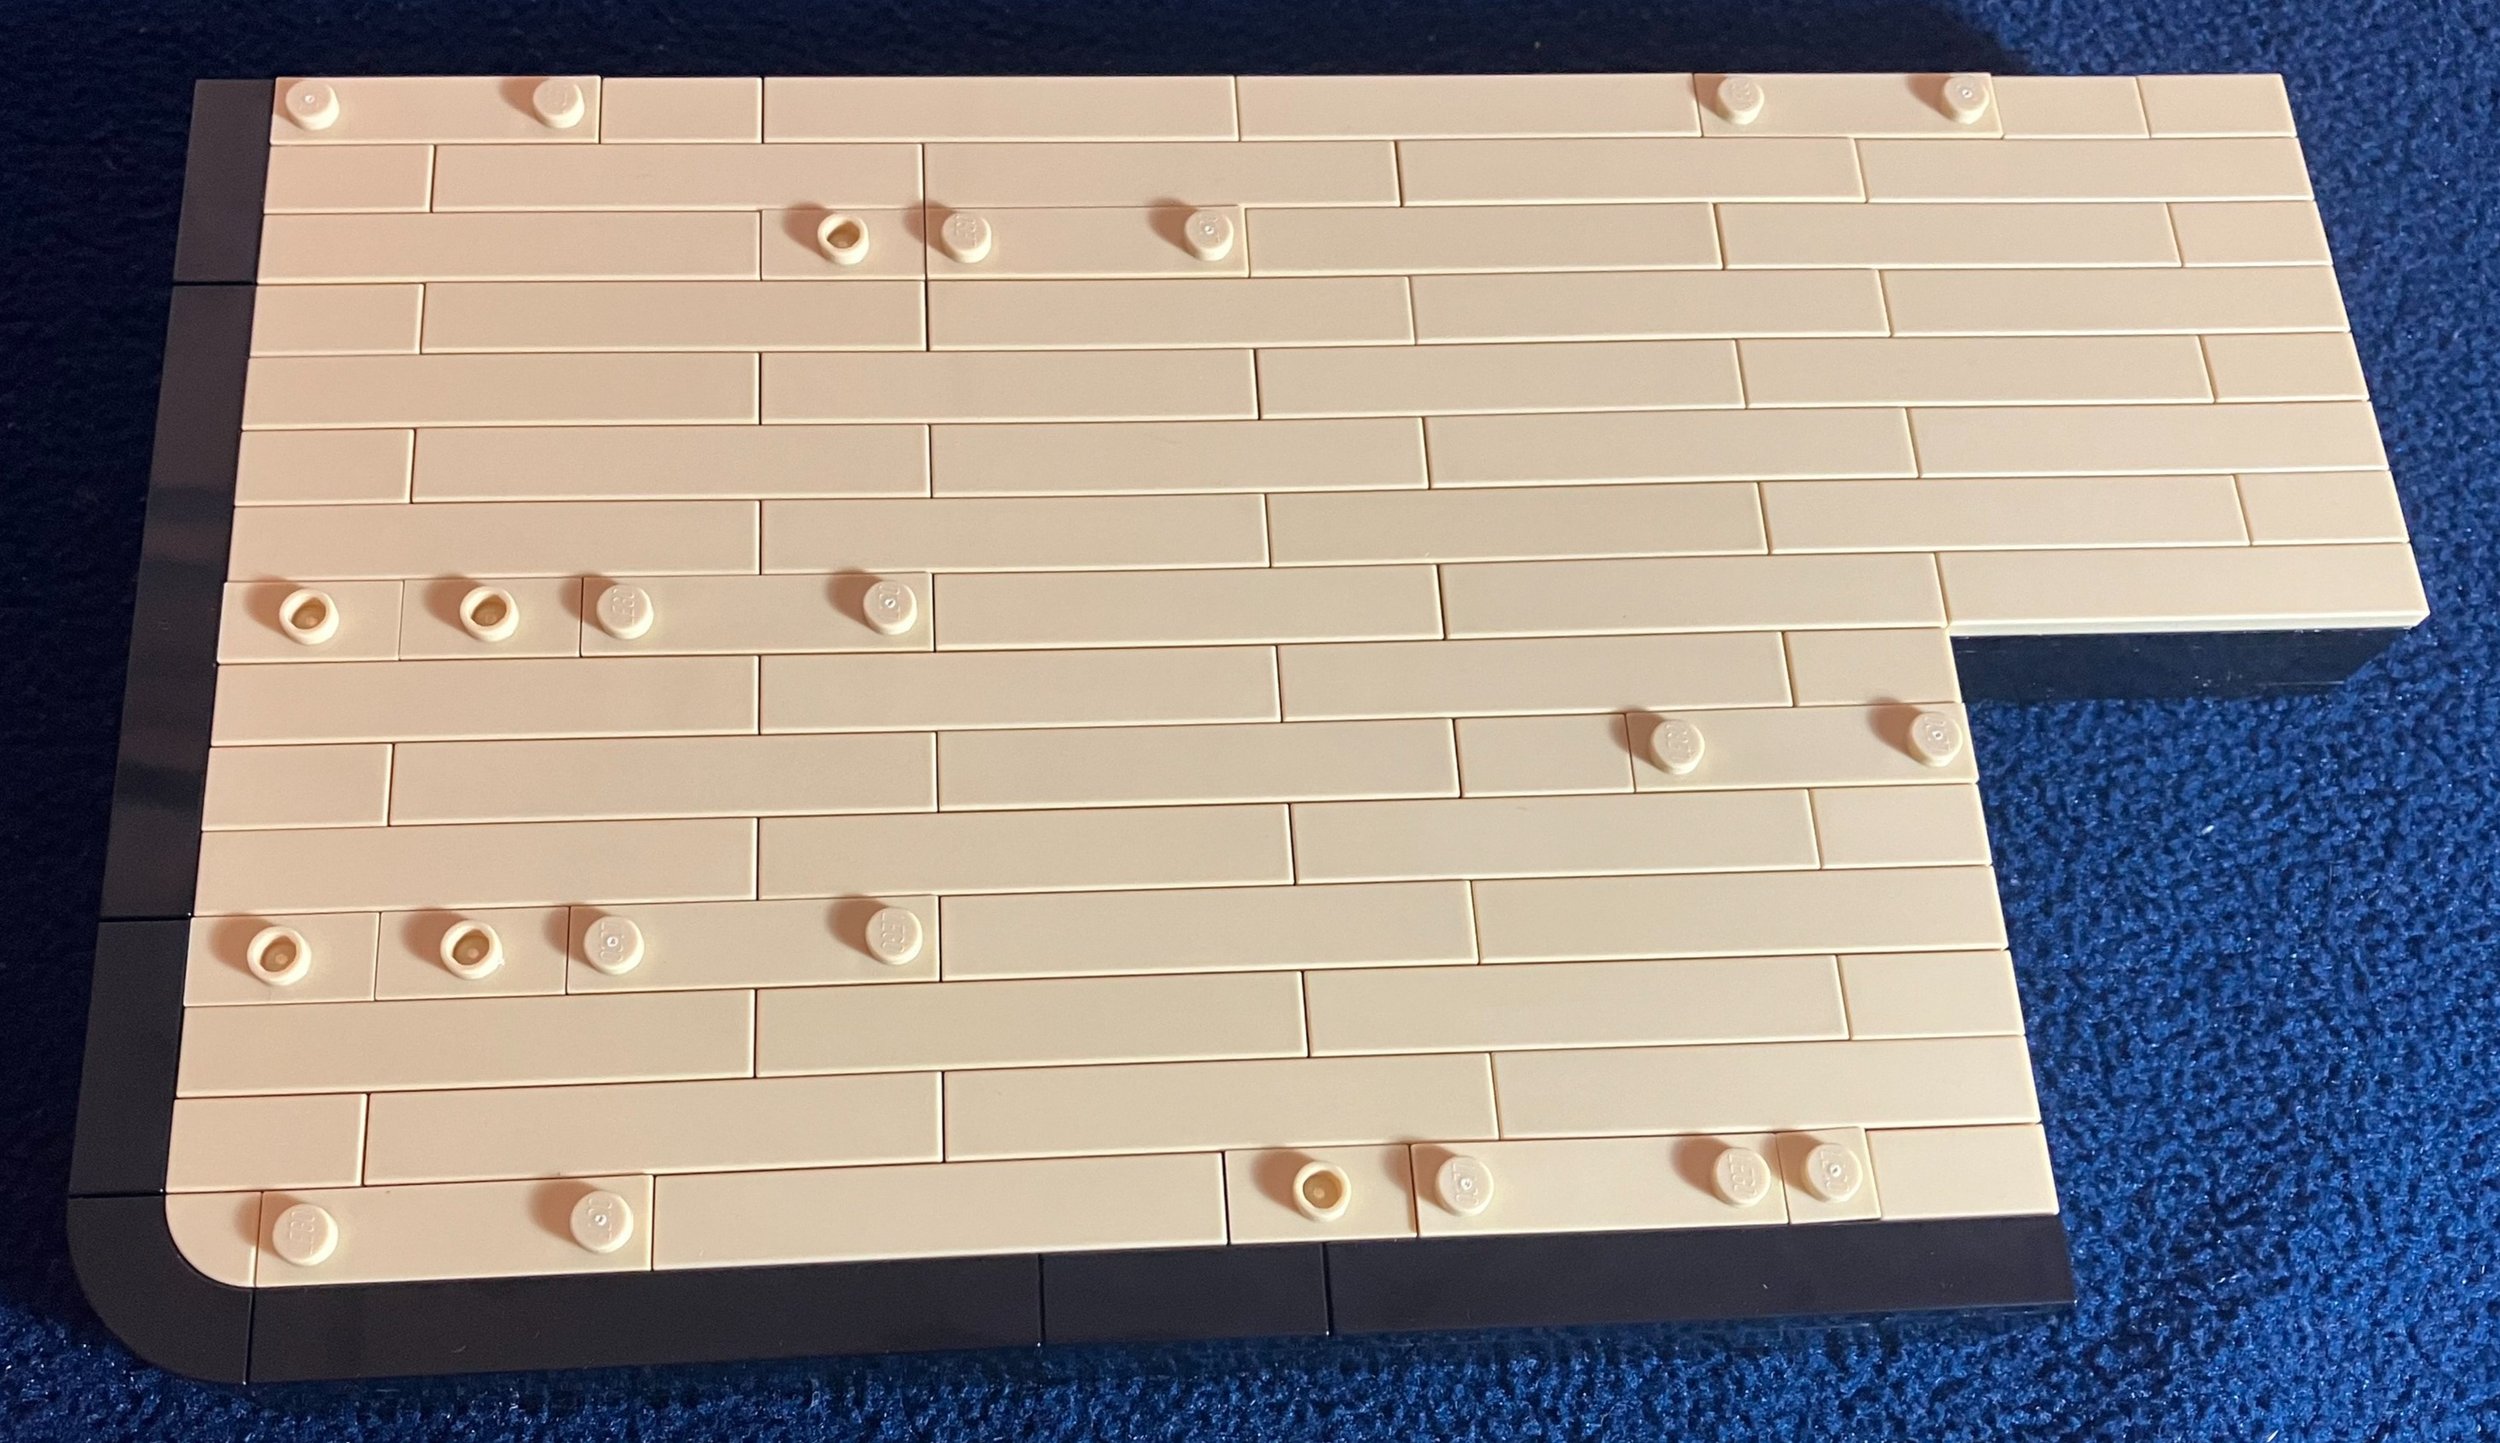
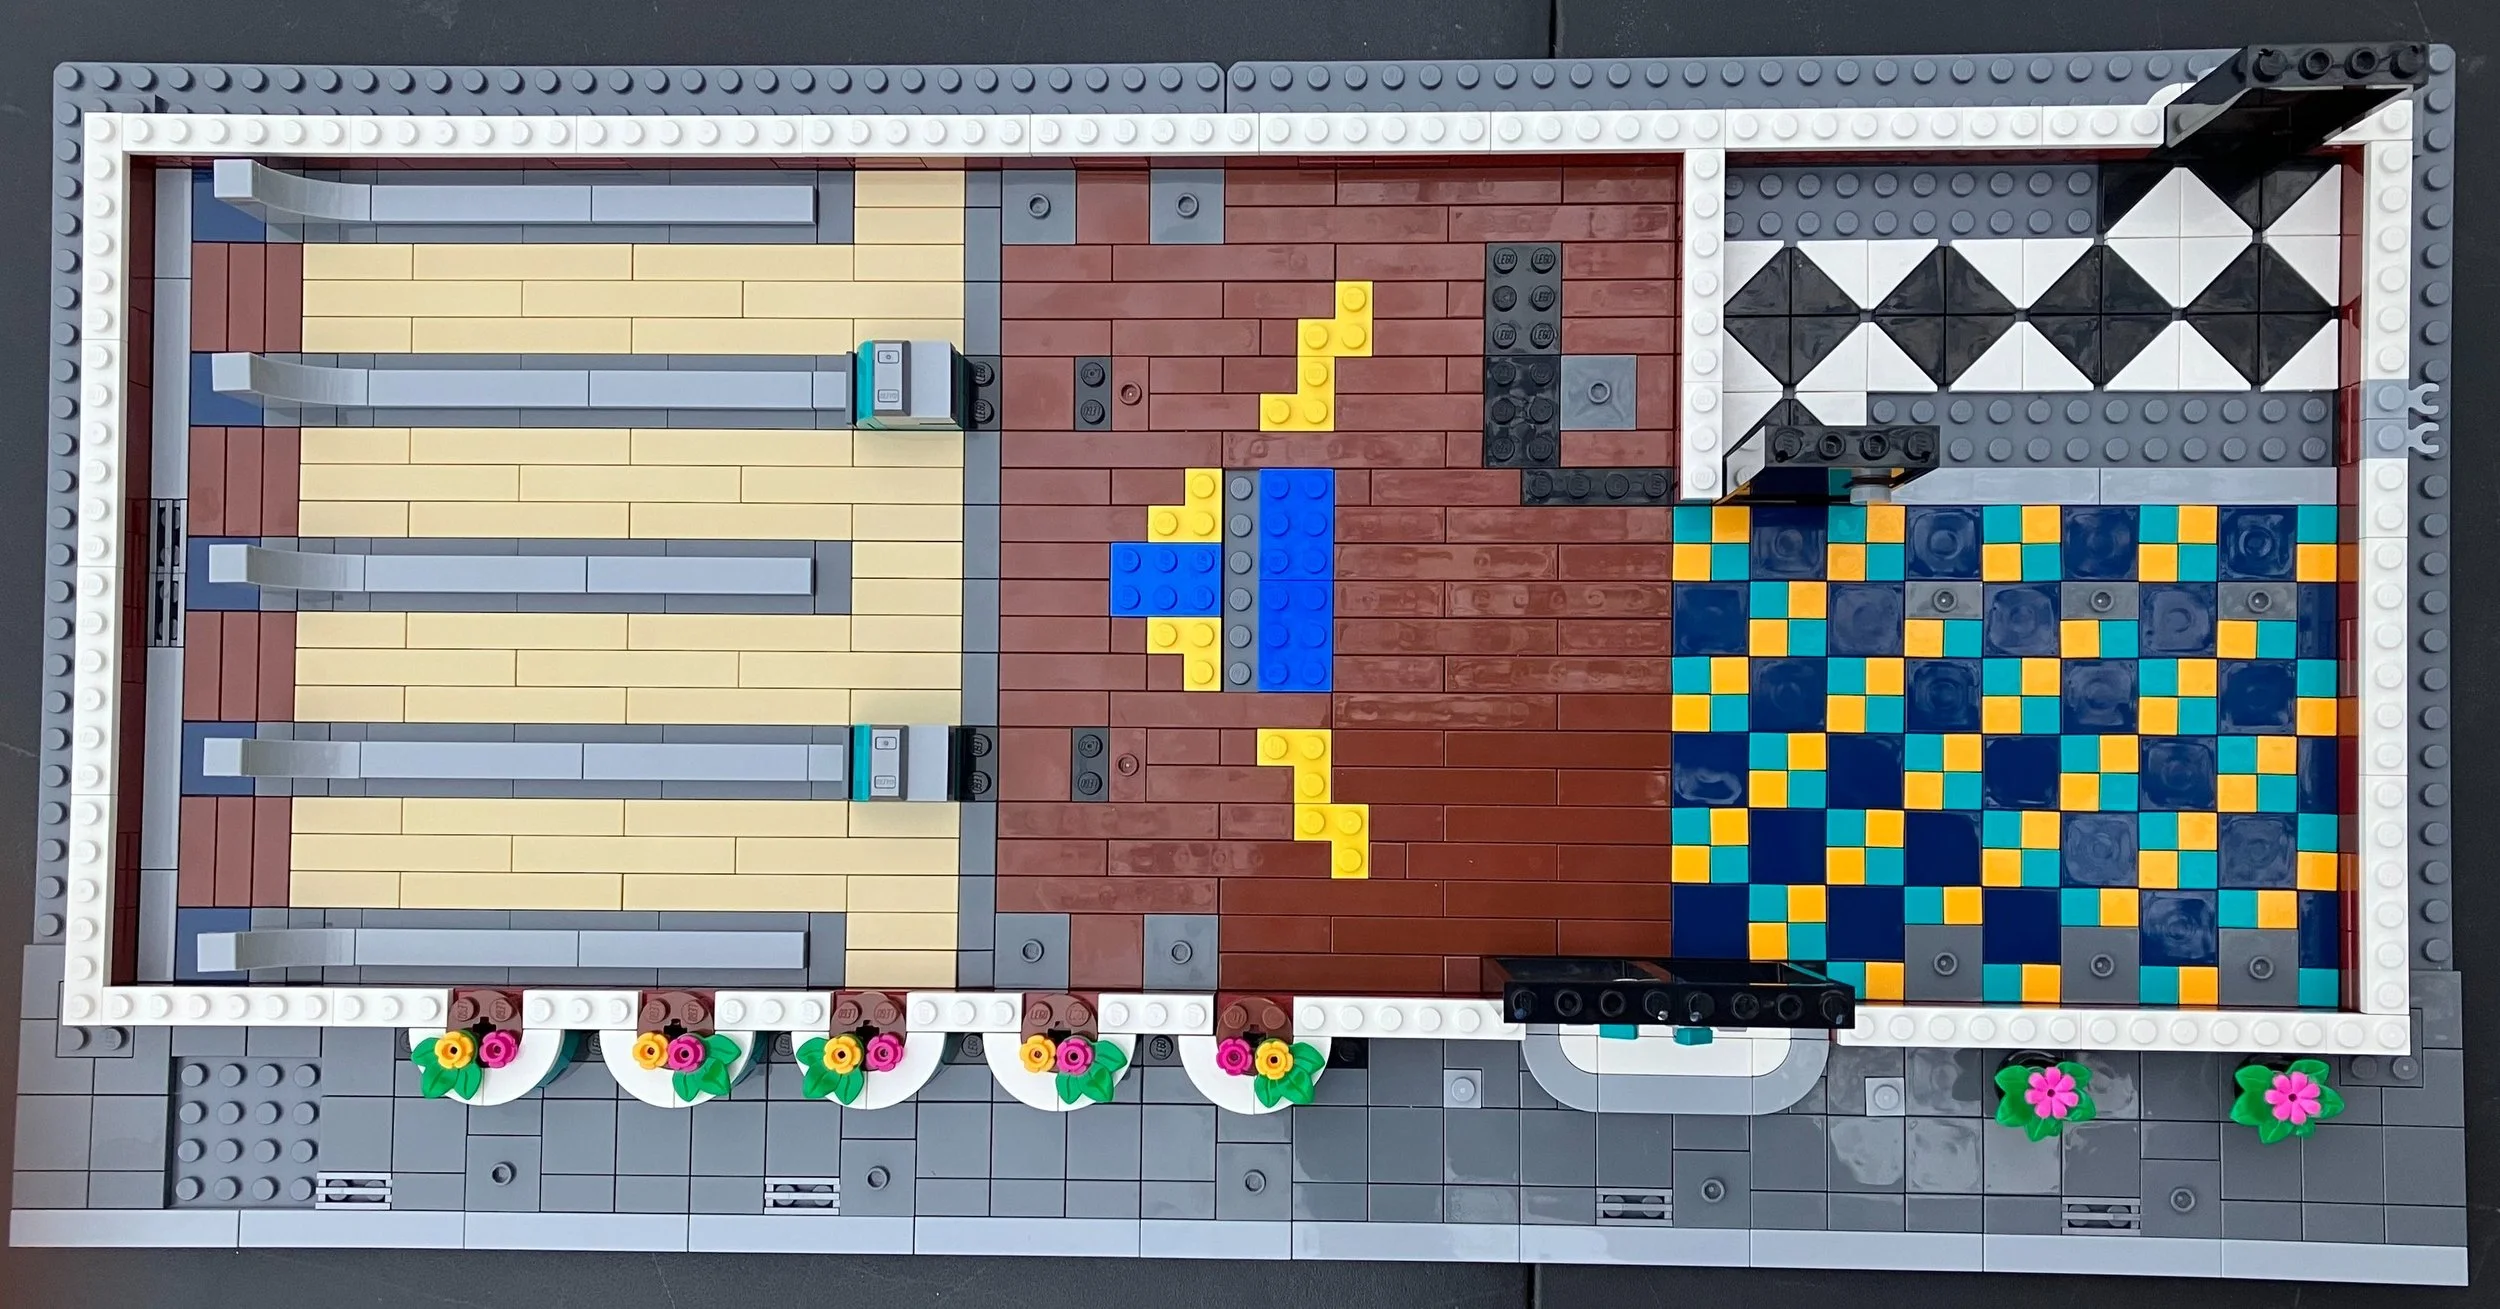
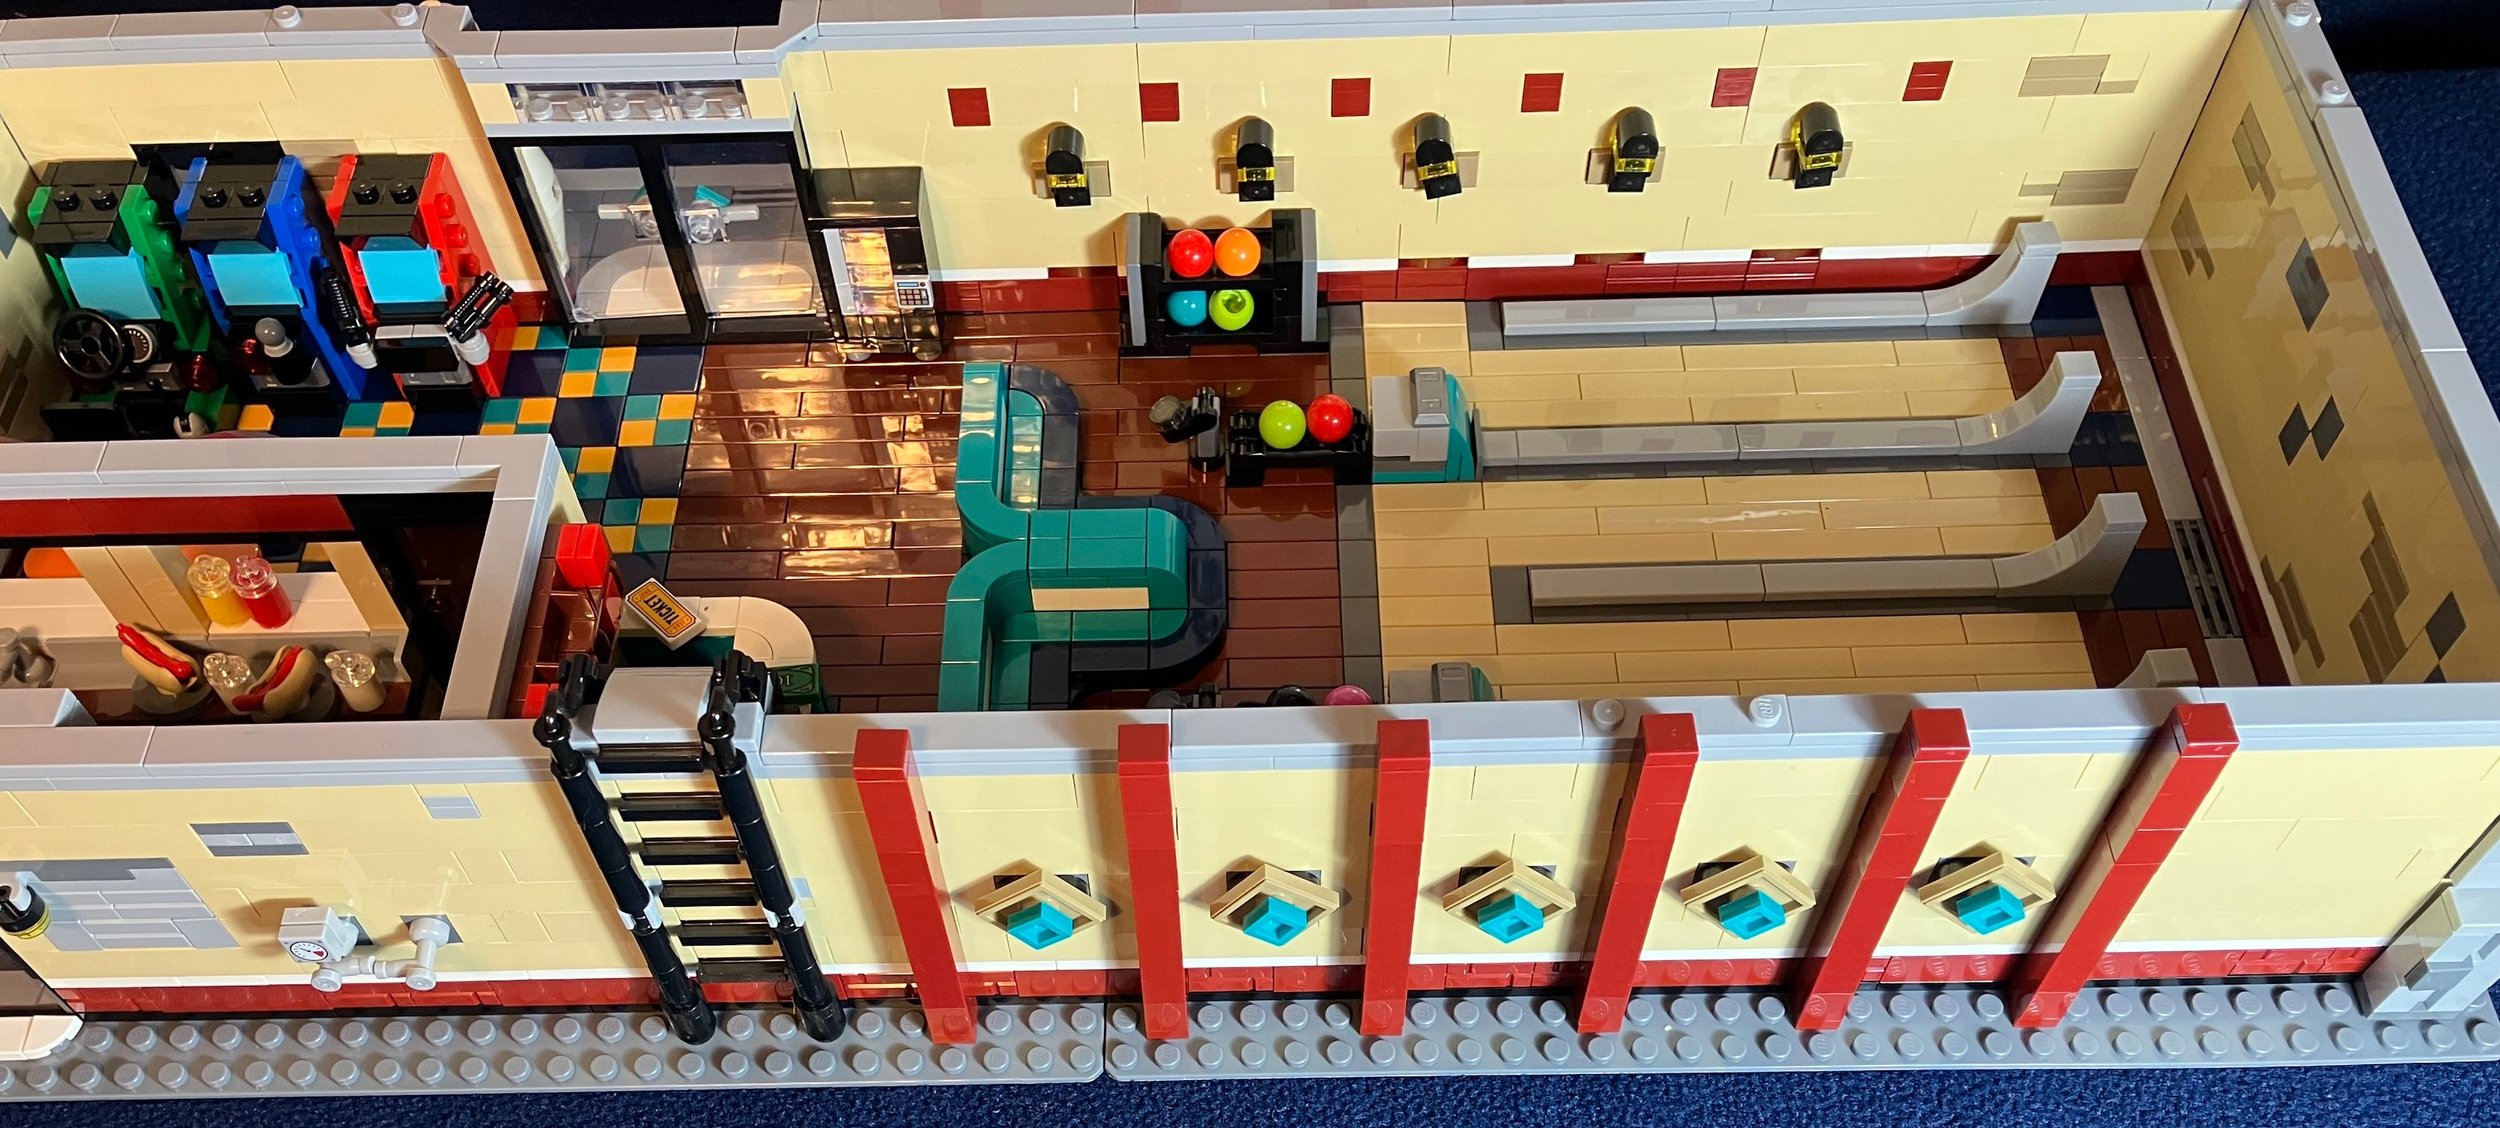
Bags two and three build the tiling for the inside of the bowling alley. Bag two builds the arcade area with a fun, colorful pattern. It also assembles the kitchen and some of the flooring for the bowling area. Bag three finishes up the brown and then puts down the base of each lane. Lots of great tiles in these two bags.

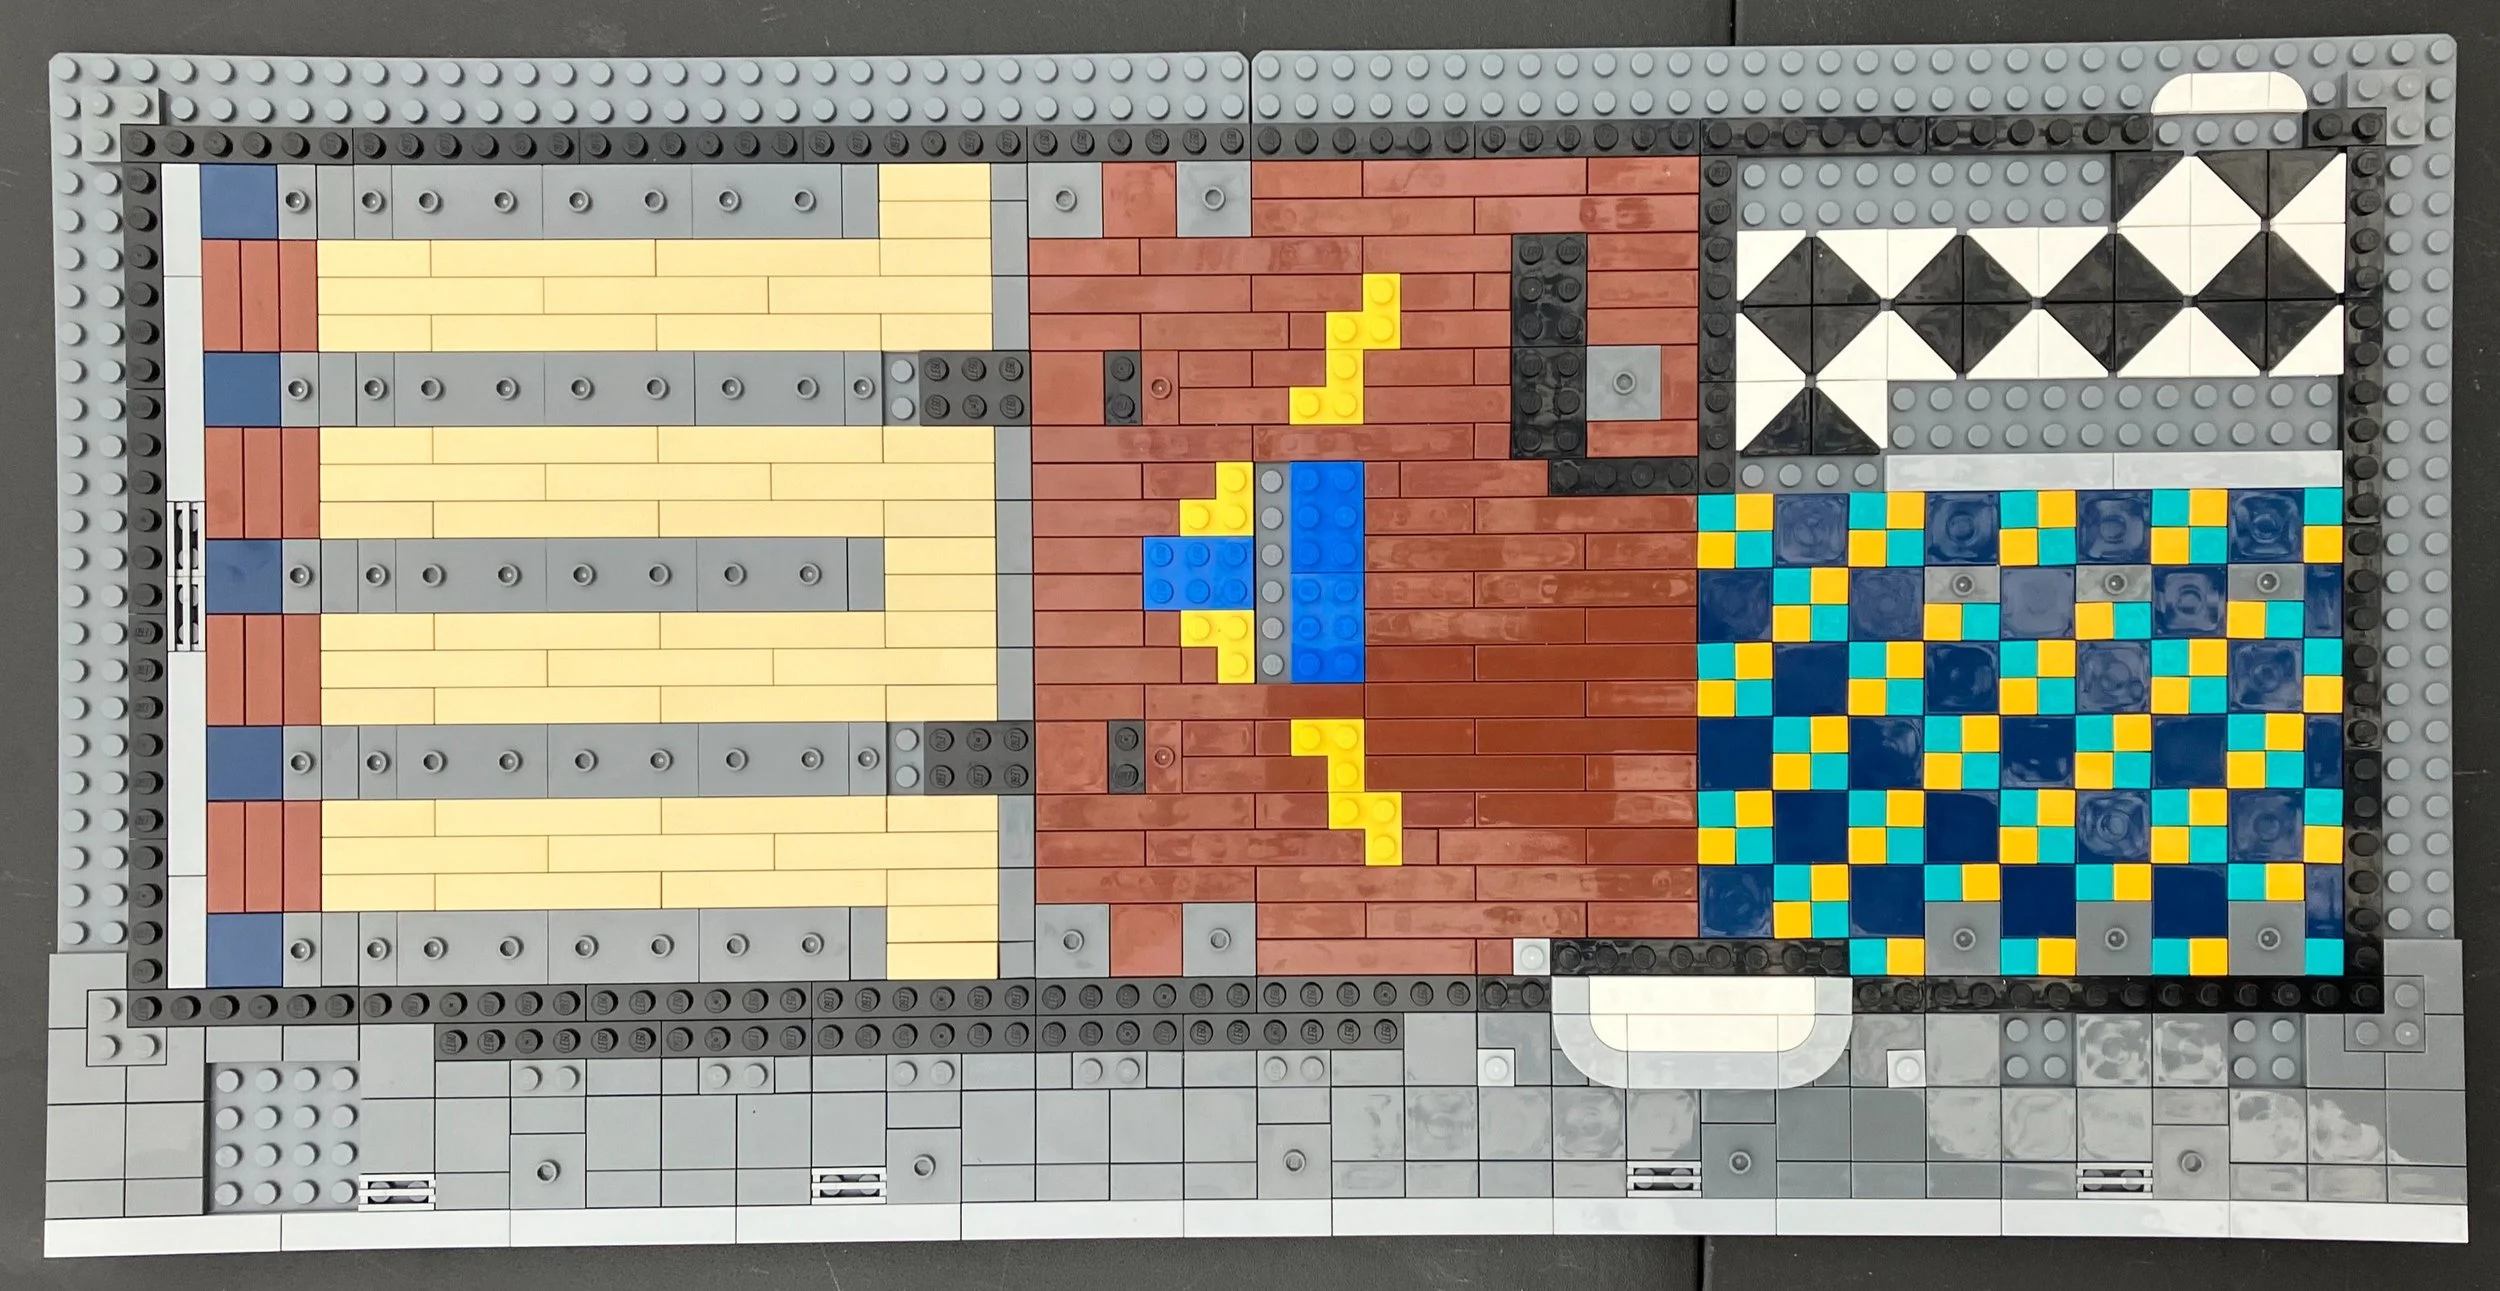
Bags four and five build up the walls. Bag four sets down an initial layer, adds in some doors, and installs some flowers and greenery in the front. Bag 5 continues to build up the walls and adds some details to the interior to include ball returns, the front desk, and seats for bowlers to sit in.

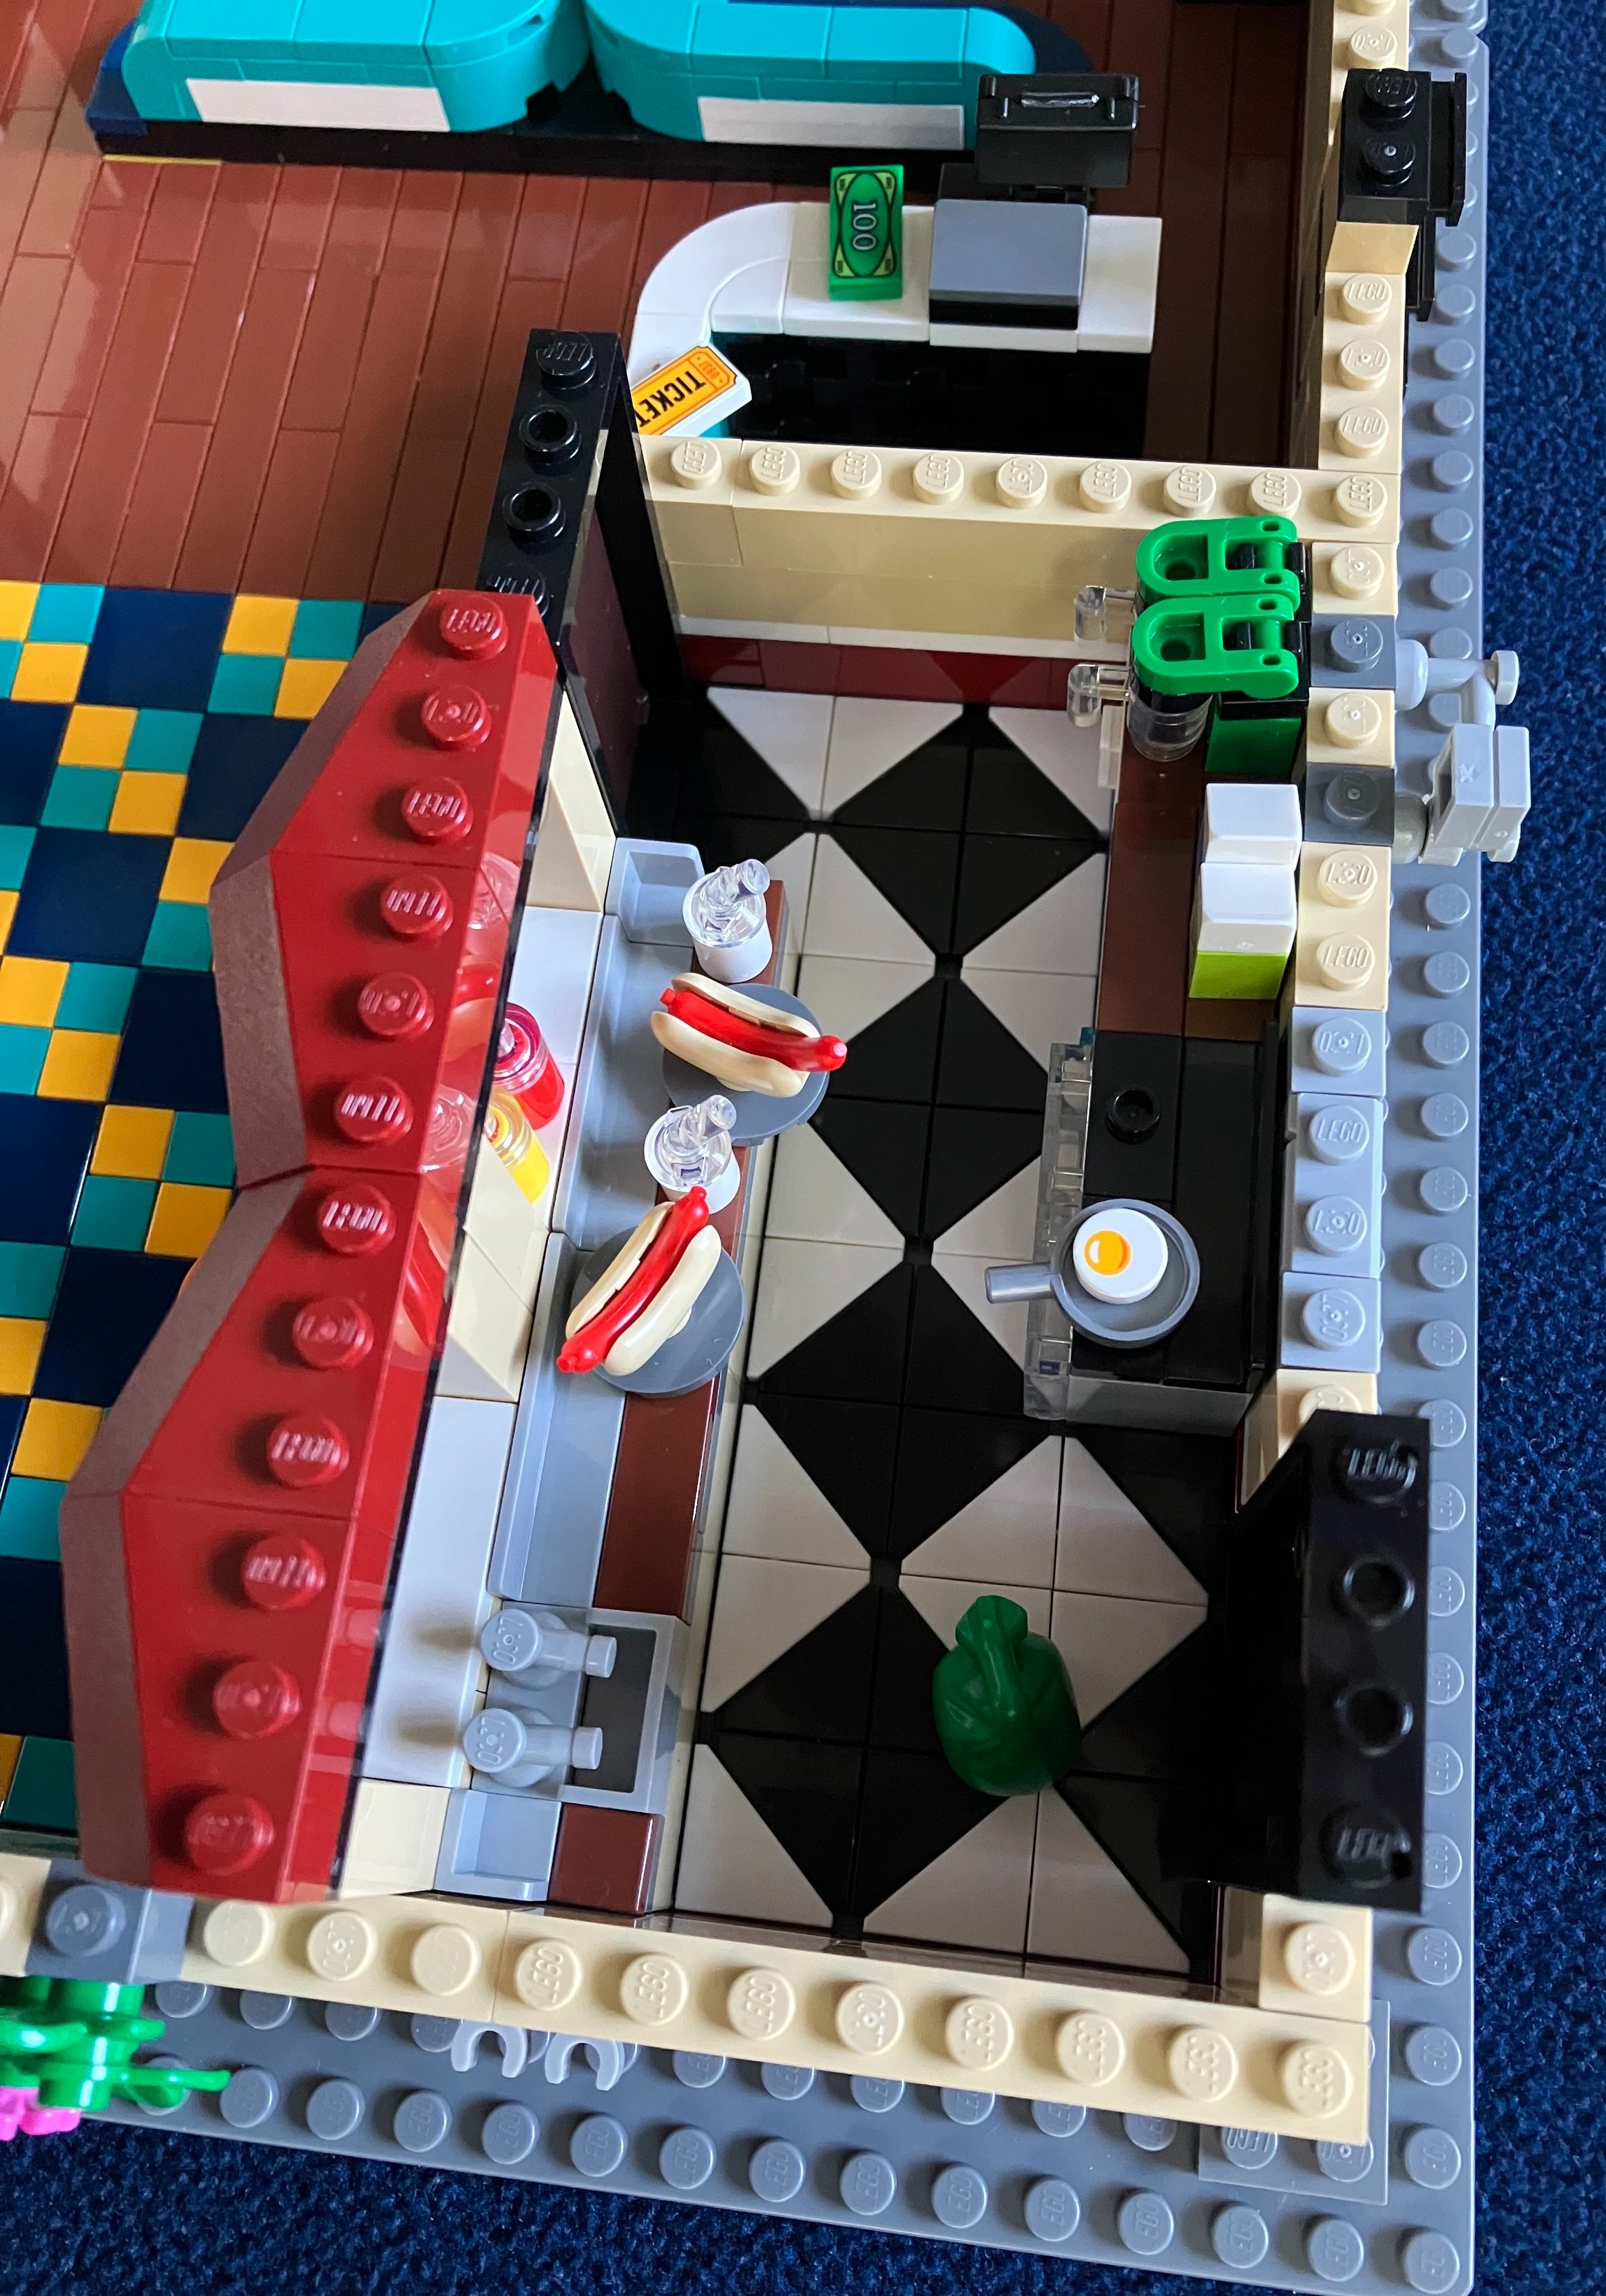
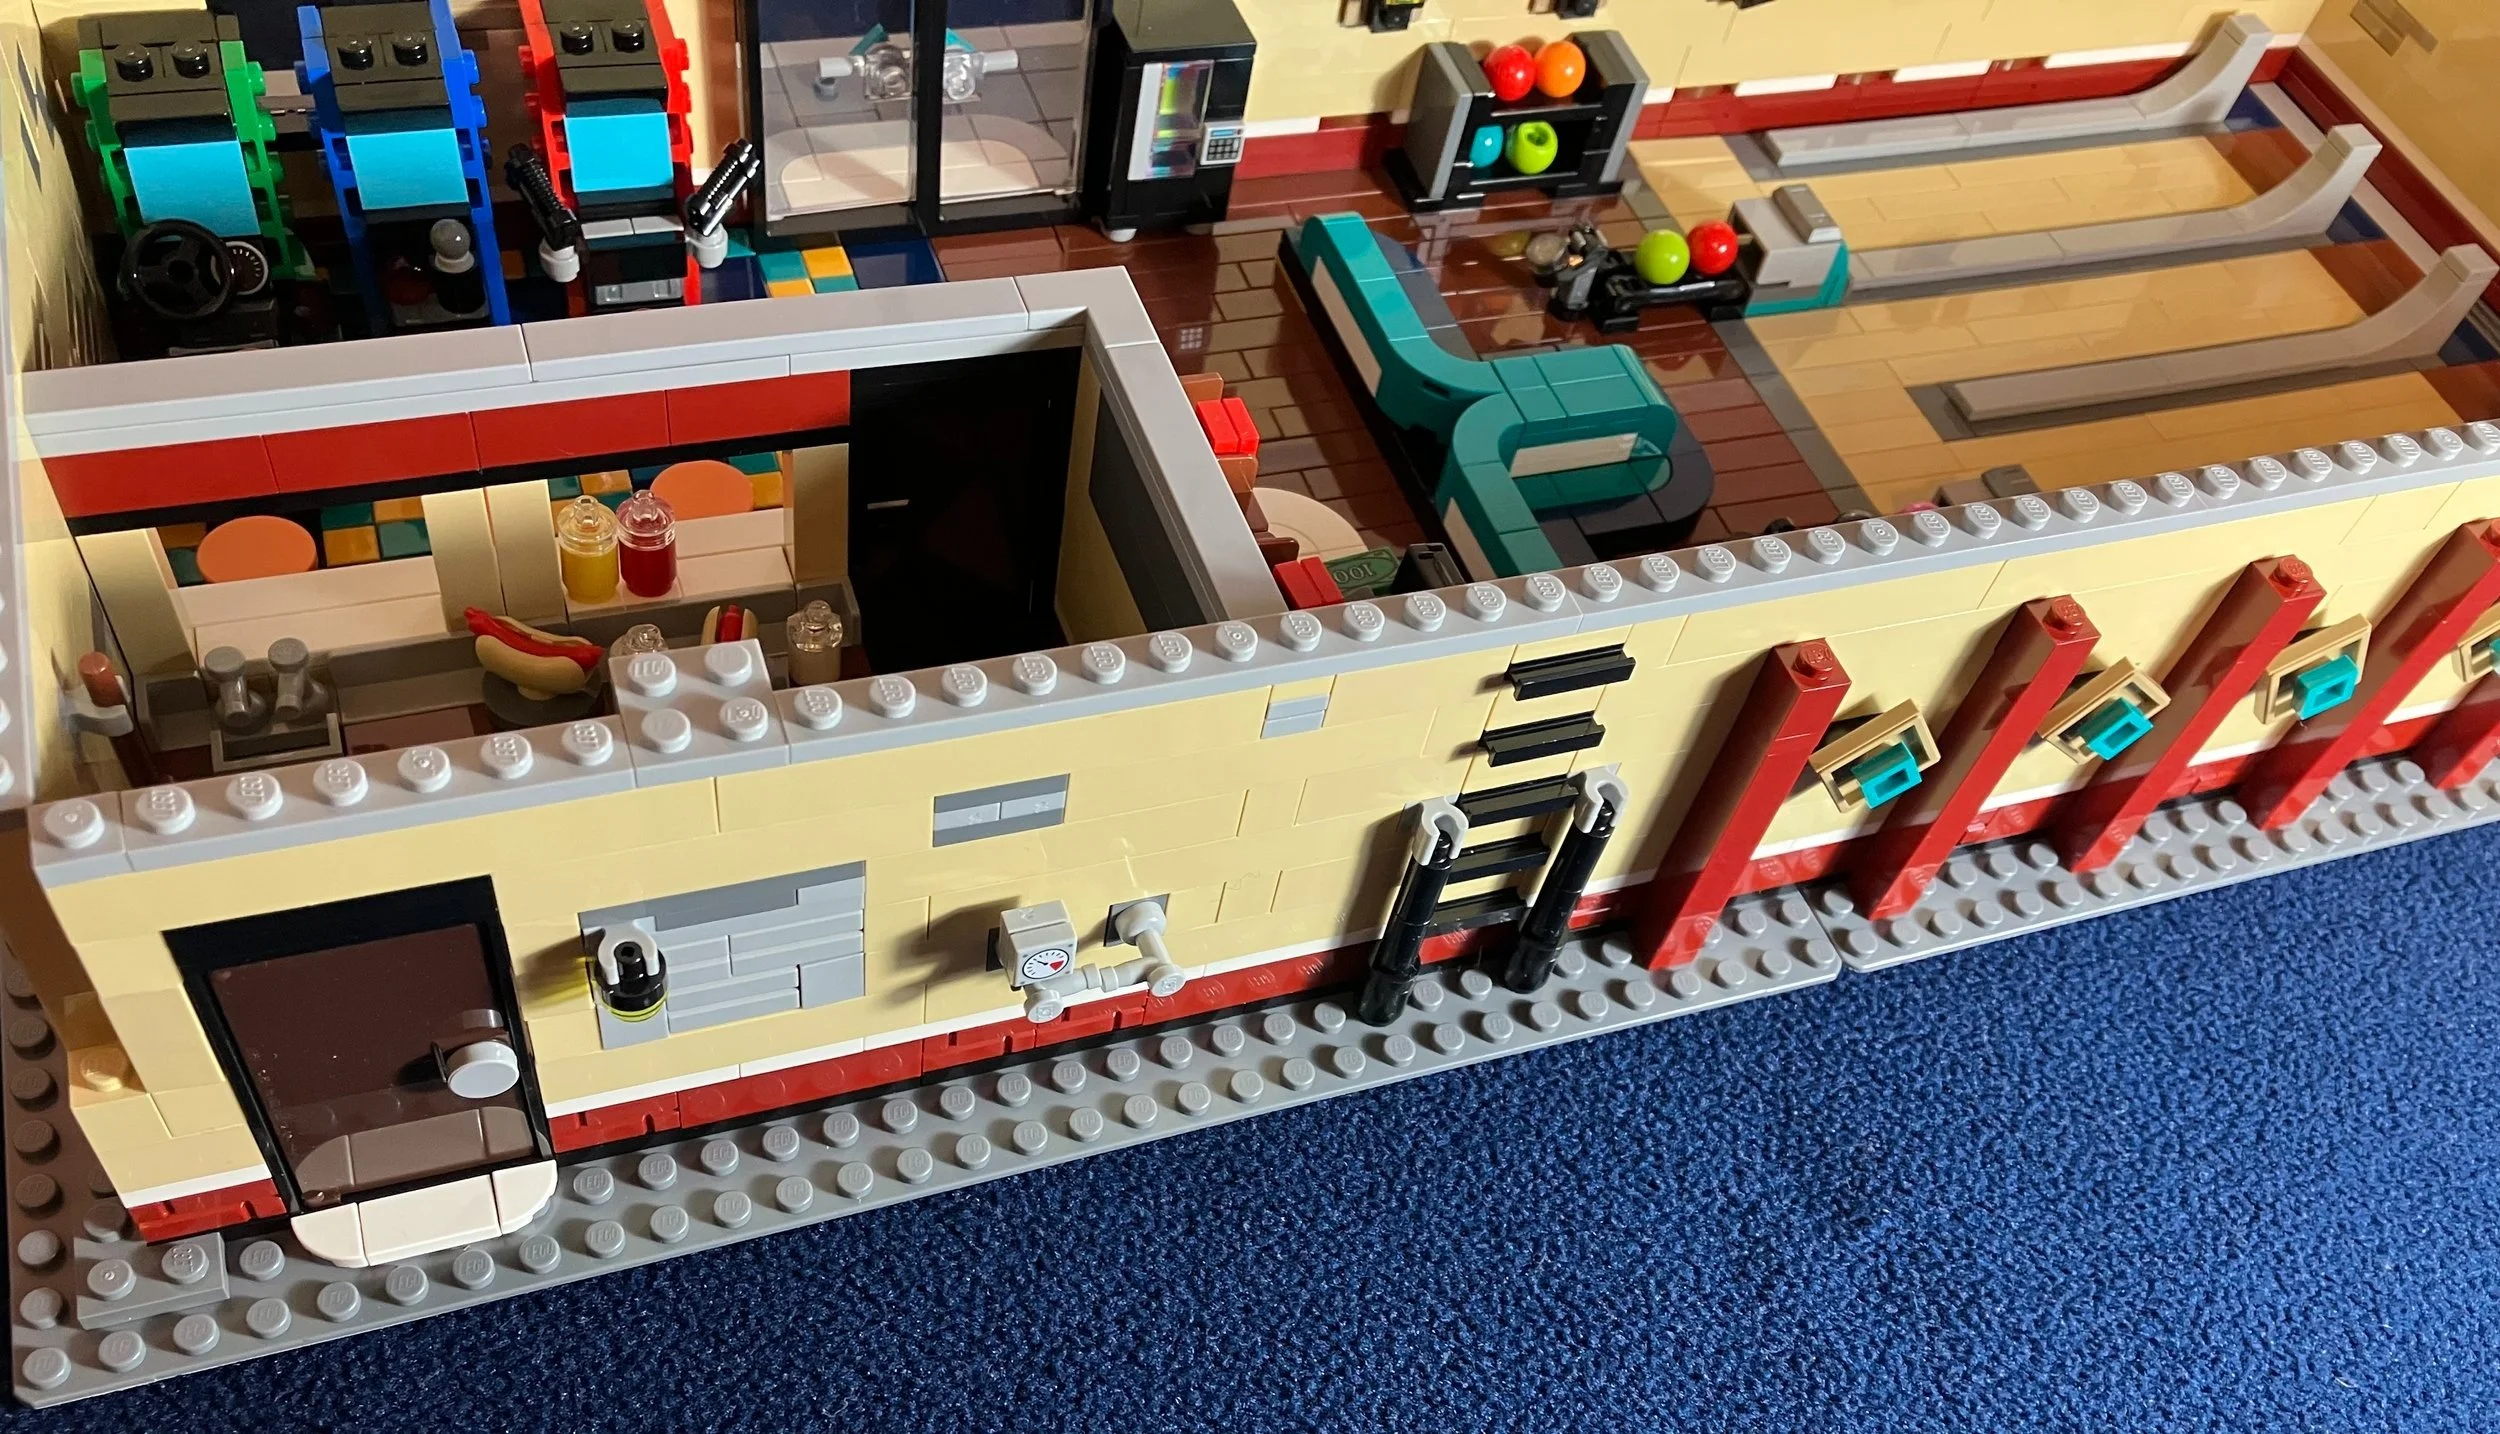
Bag six adds a bit to the walls and then focuses on the kitchen. It’s not overly detailed, but I like the addition of a few cooking areas and some of the food details. The hot dogs seem appropriate for a bowling alley, but I’ve never seen one do fried eggs before. Maybe they did in the 1960s?

Bag seven builds up the walls and adds in some of the decorations. There are patterns on the outside and then lights on the inside.

You also add some details to the pay counter. You connect a red 1x1 plate to a red 1x1 tile and put them on a shelf behind the desk. I’m not sure if they are supposed to be boxes of shoes or what, but it is hard to get them to stay on the shelves. Any slight movement and they fall on the floor and you have to try and dig them out from behind the desk. It’s a nice detail, but it isn’t very practical. Later on, you add a second shelf and more of these red plate and tile stacks. Those fall as well.

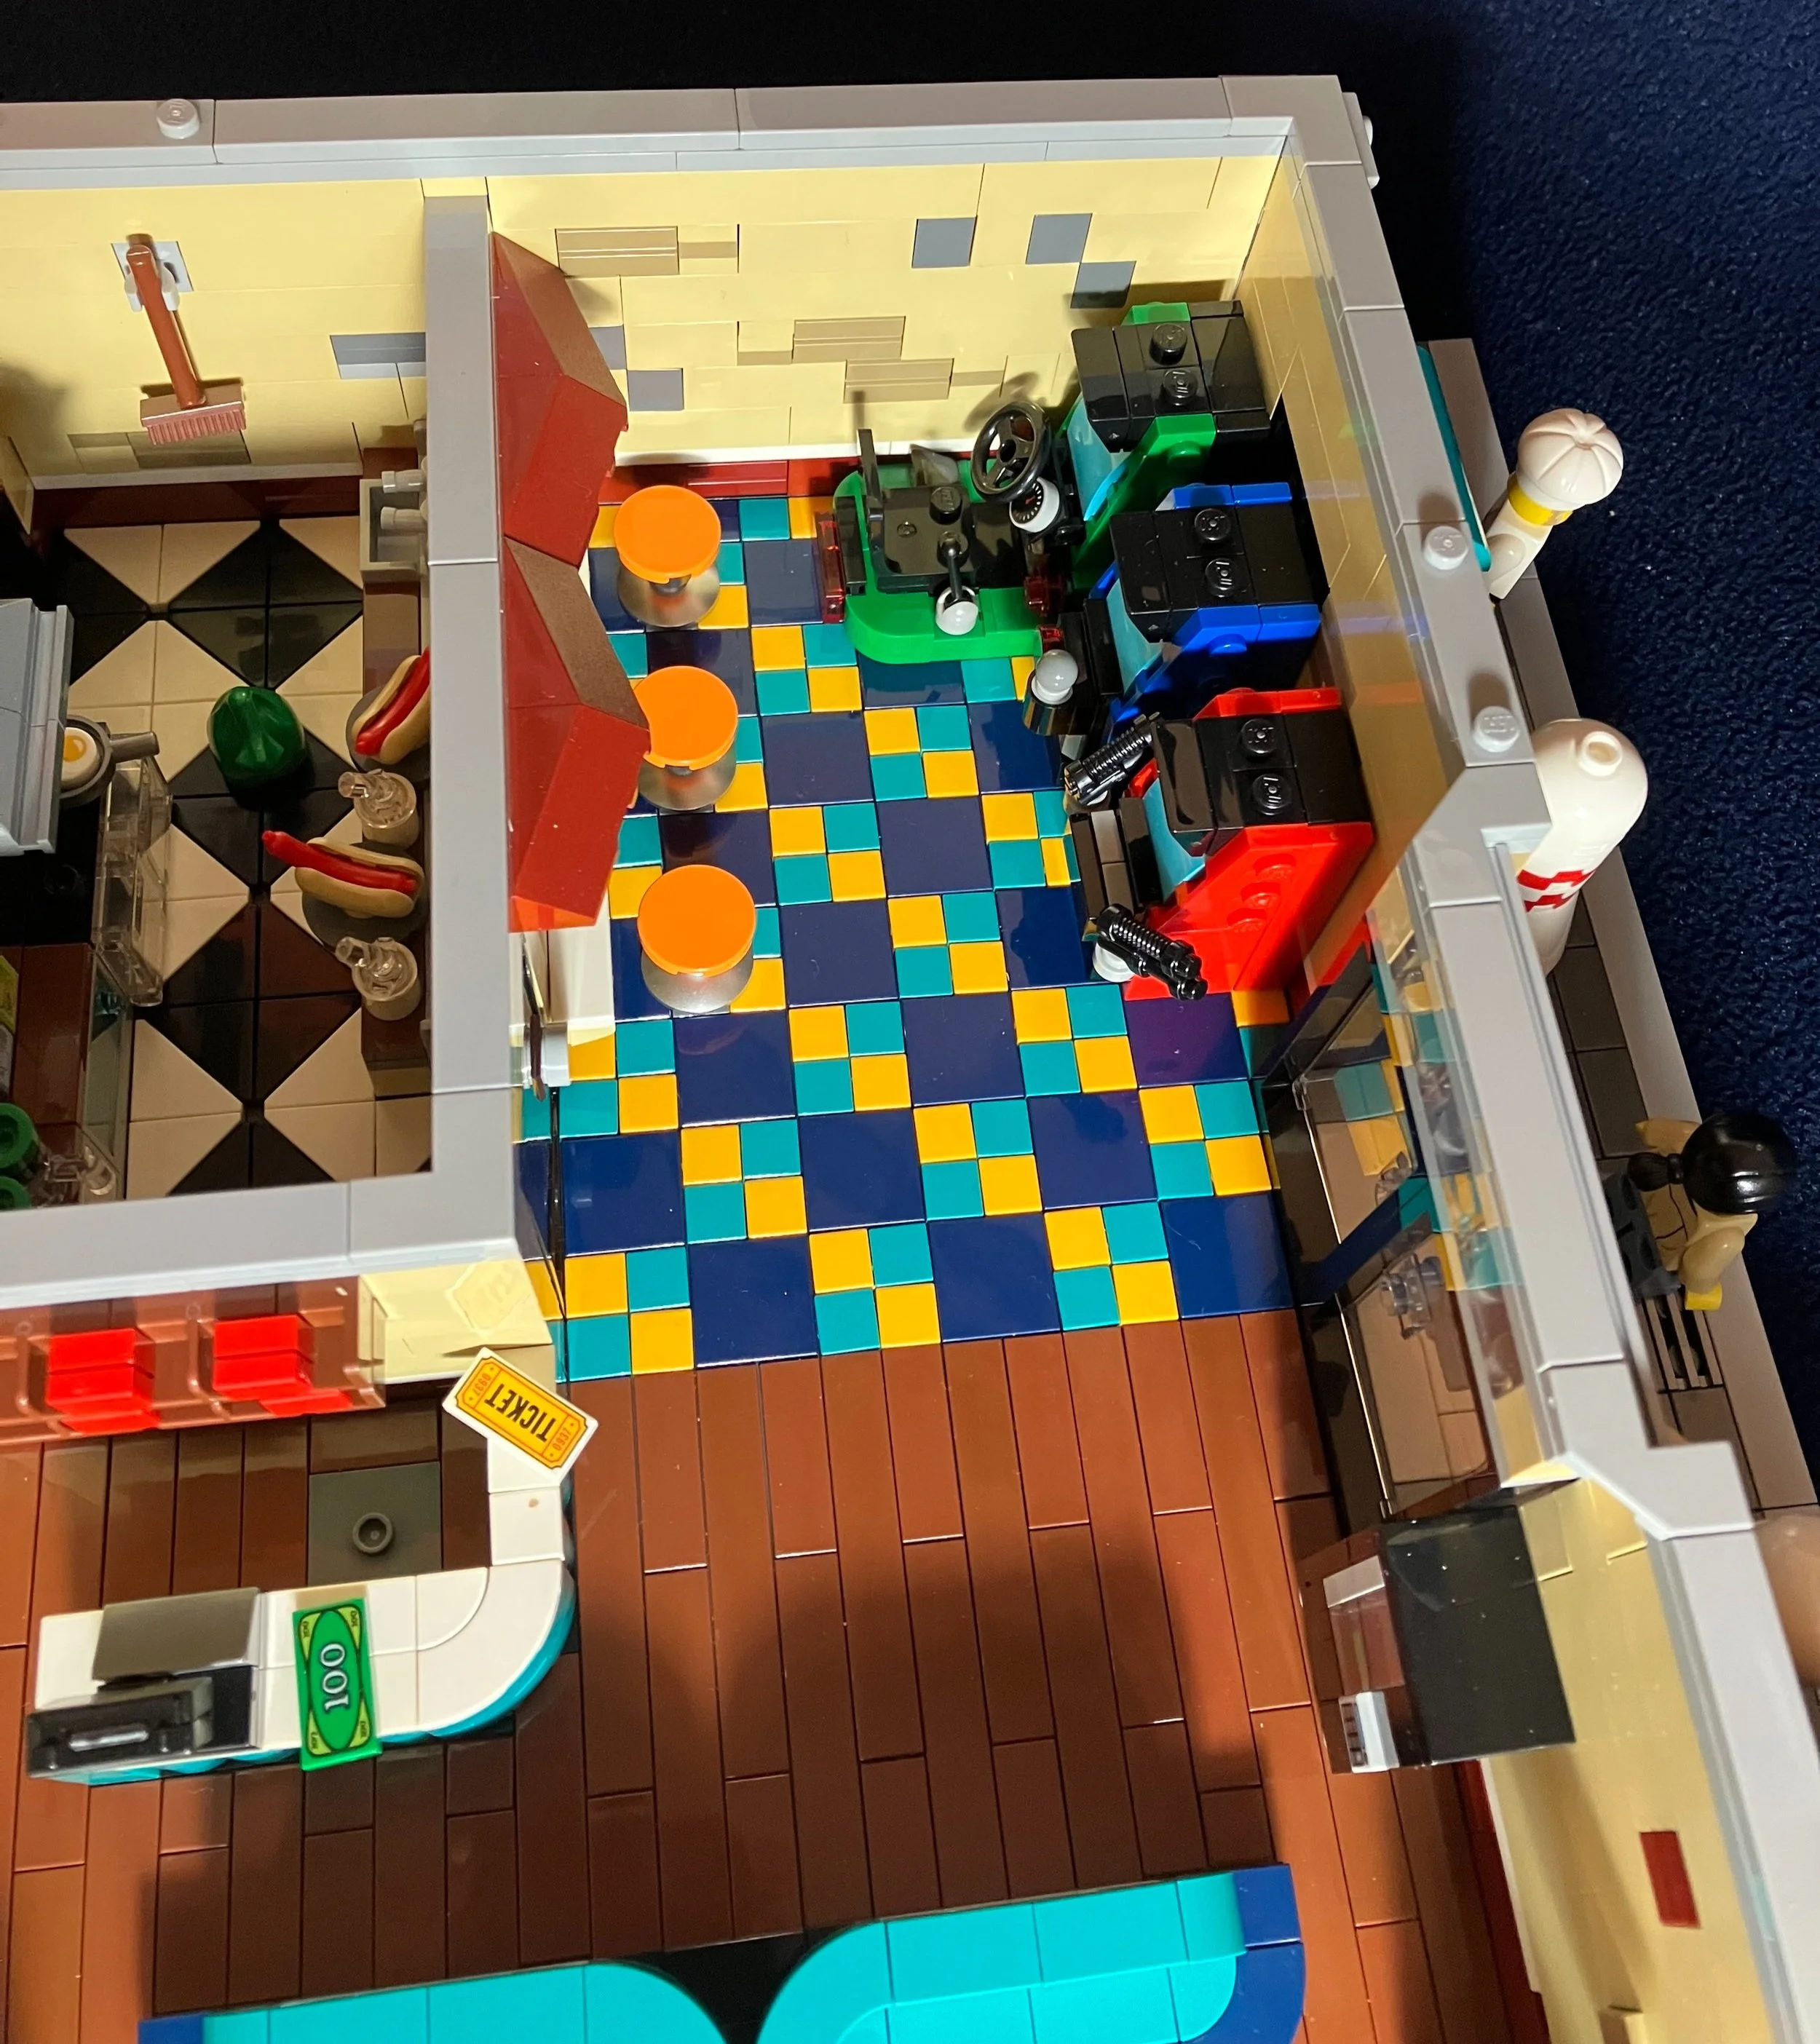
The eighth bag adds in some fence pieces near the entrance as part of the decoration on that part of the building. Additionally, you build the arcade games. There are three games and they have a decent amount of detail considering the scale. One appears to be a driving game, one has small shooters to be some sort of game where you shoot at things on the screen, and the last one is maybe more of a Pac-Man type game.

I didn’t get a good picture of them, but you add in some stools in front of the food area.

Bag nine adds in some tiling over the walls of the cafe area. It also adds in some brick red pieces for the building design by the outside planters and then in the back of the building. Lastly, you add in some plant and flower pieces along the outer walls of the building.

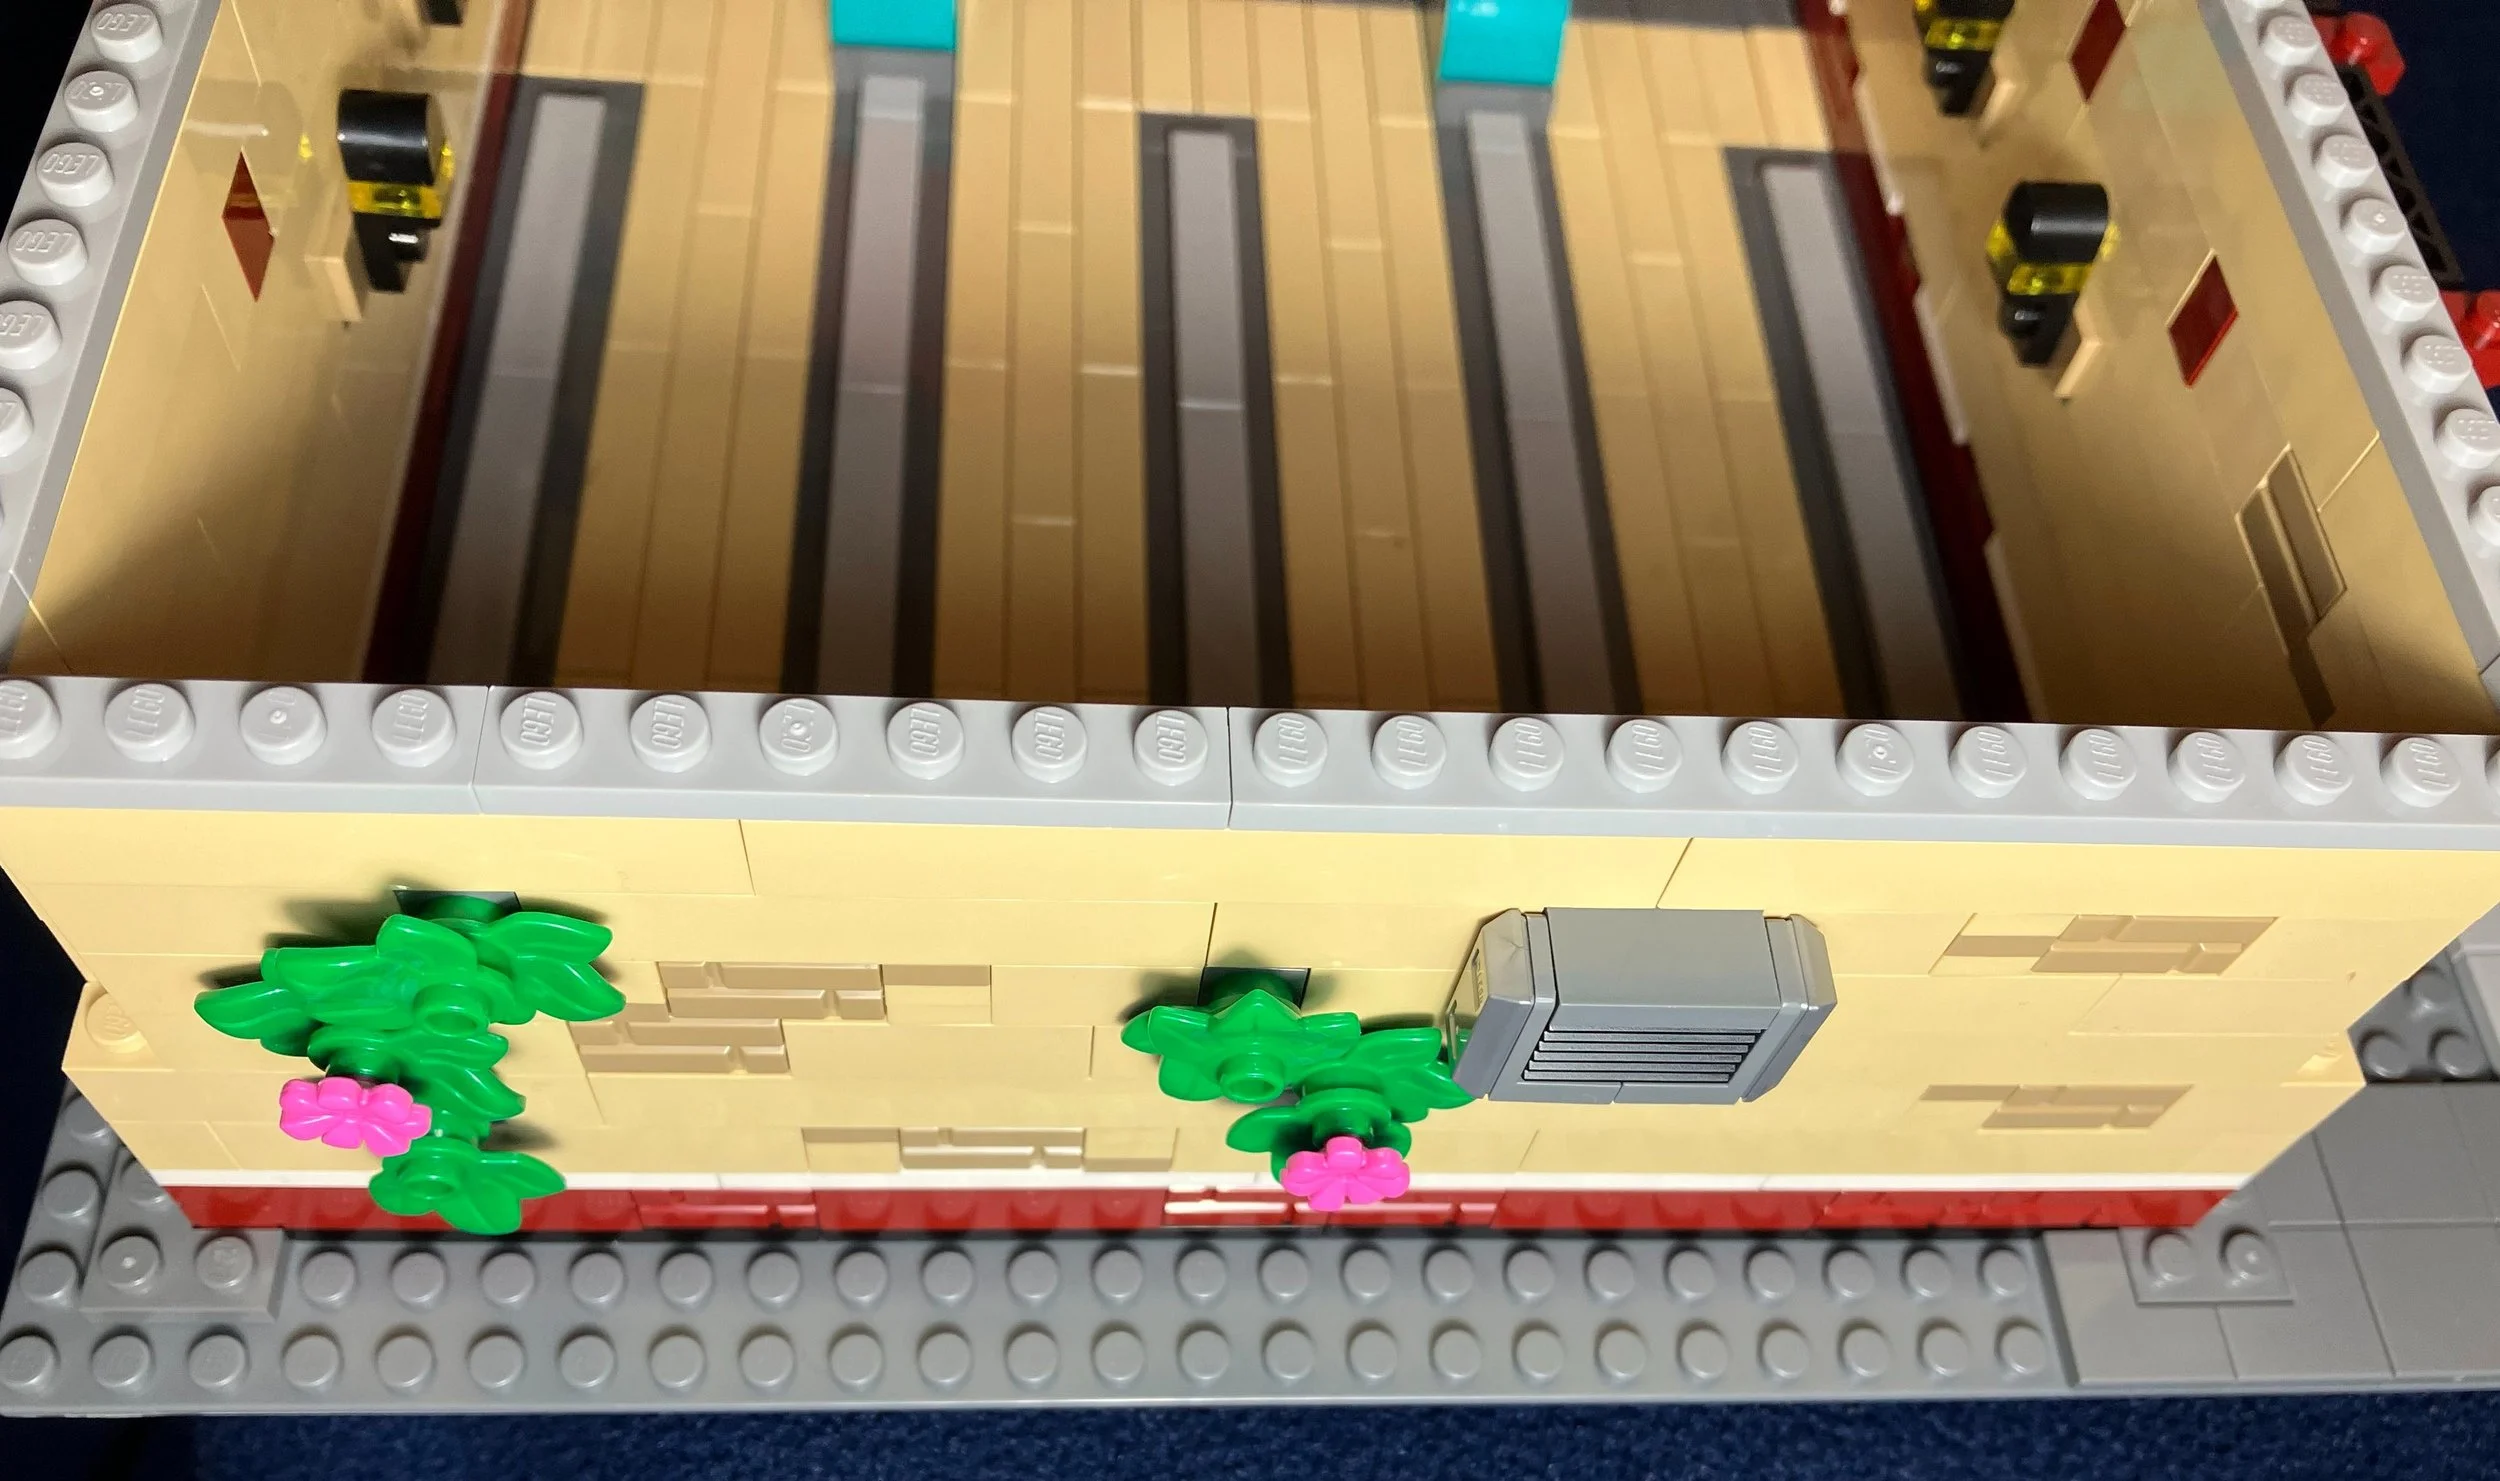
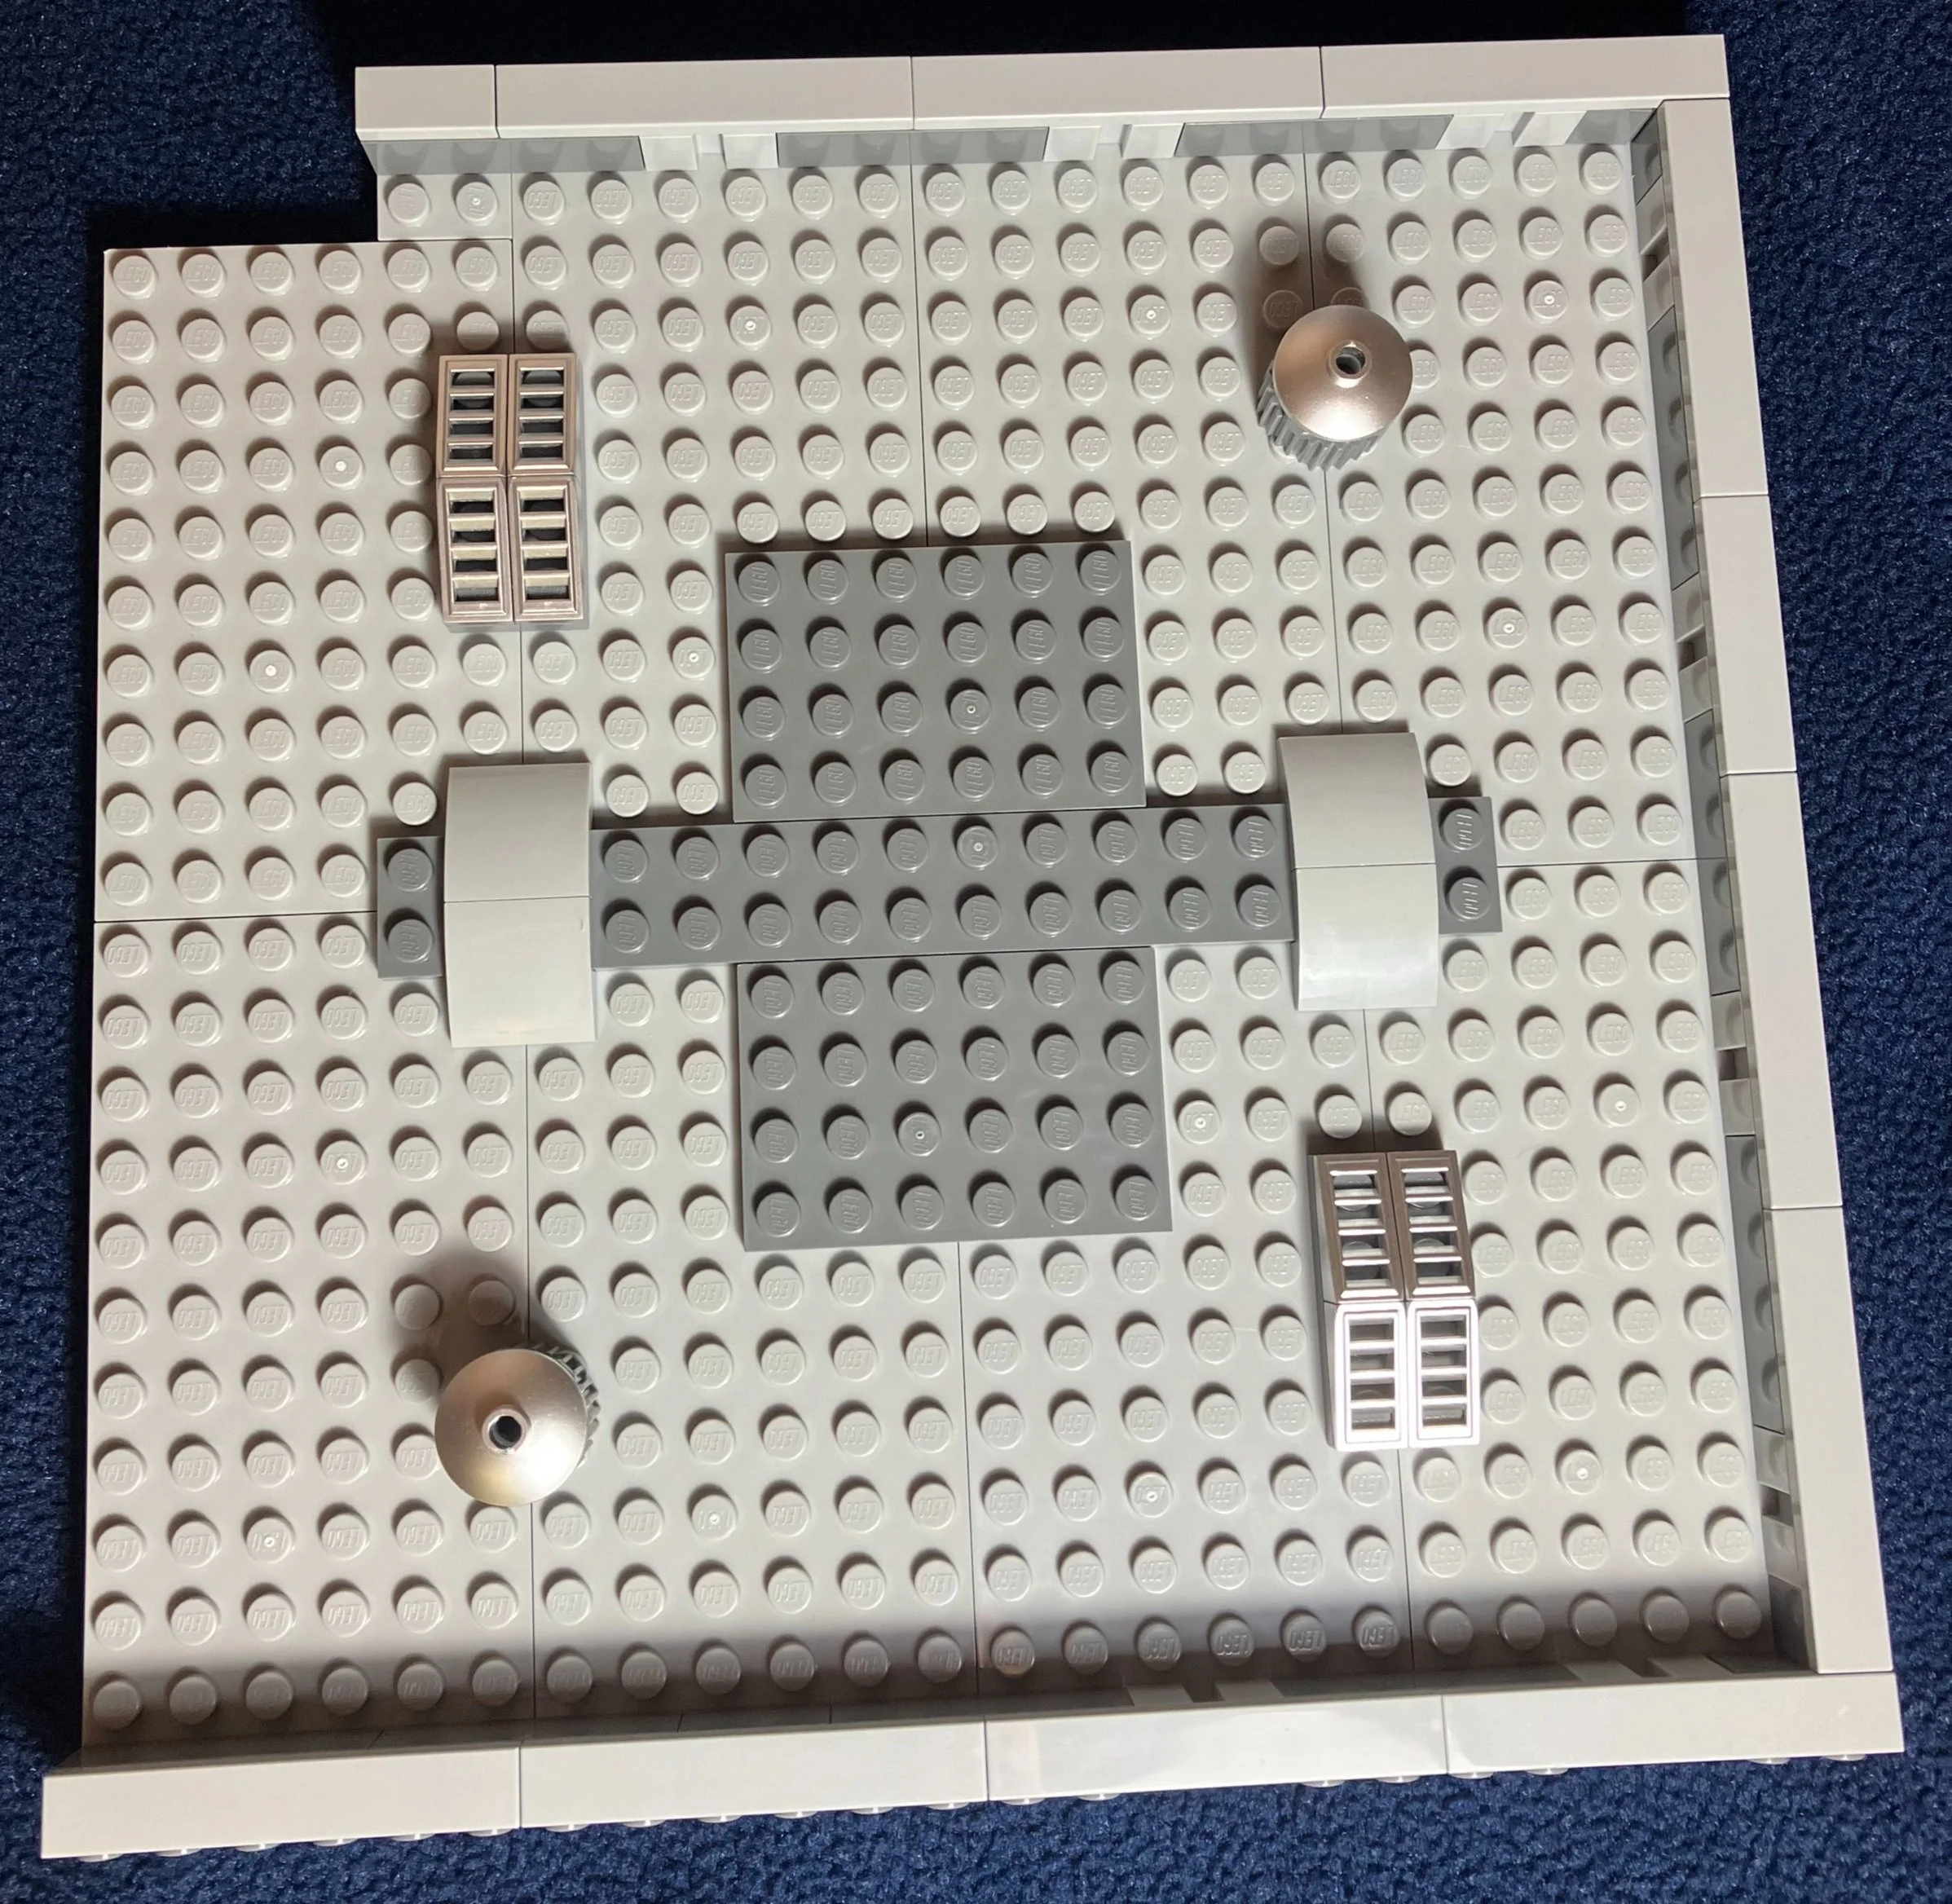
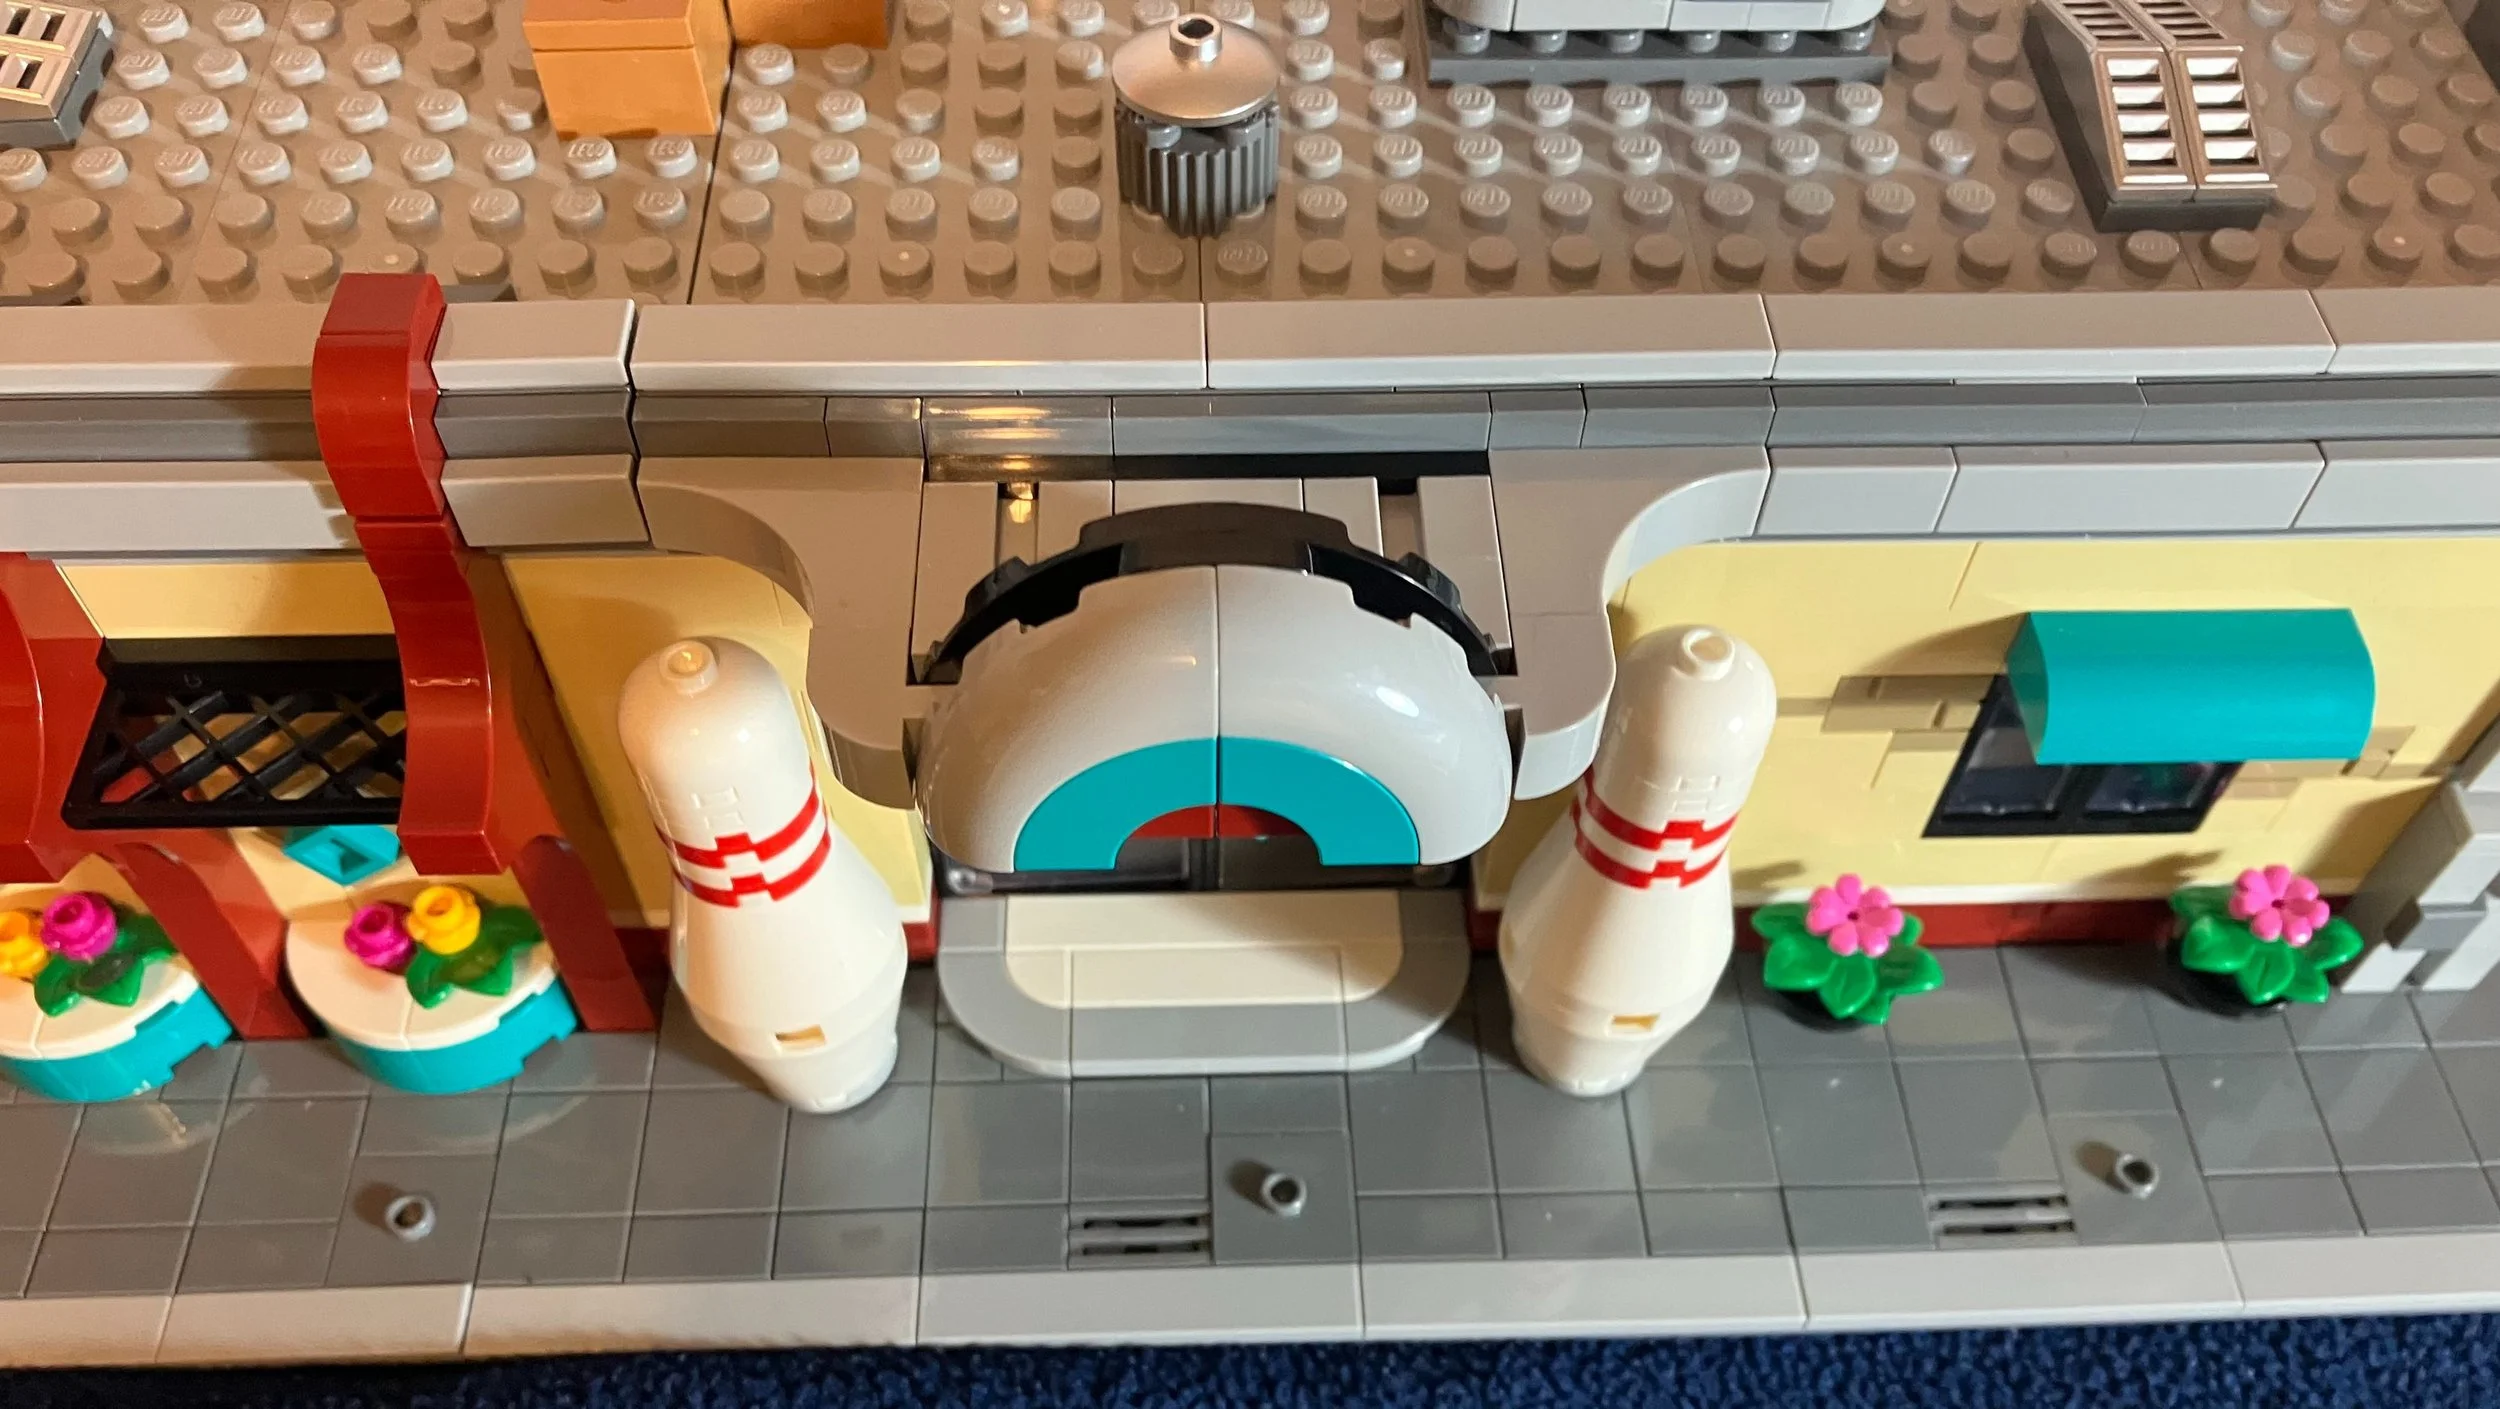
The tenth bag adds in tiles above the walls of the bowling alley. Much like a modular building, they are set up so there are some studs so the roof stays down, but not enough where it makes it a challenge to remove the roof. Additionally, each corner of the building adds in some gray pieces for a bit of architectural design there. It’s a simple design, but it makes the building look better over just having brick corners. Lastly, you add in the bowling pins on either side of the front doors. There is a Technic axle in the center of the pin and then the pieces stack on it. The pins look great and are a nice addition to the set design.

Bag 11 adds the bowling pins and the tops to each of the lanes. There are only 6 pins per lane, but based on the scale, I can’t complain too much about this. The pins are free standing so you have to be careful when moving the build to not knock them down. It also makes them a challenge to set up. Perhaps they could have used jumper plates to arrange the pins so you could attach them and they wouldn’t fall over.

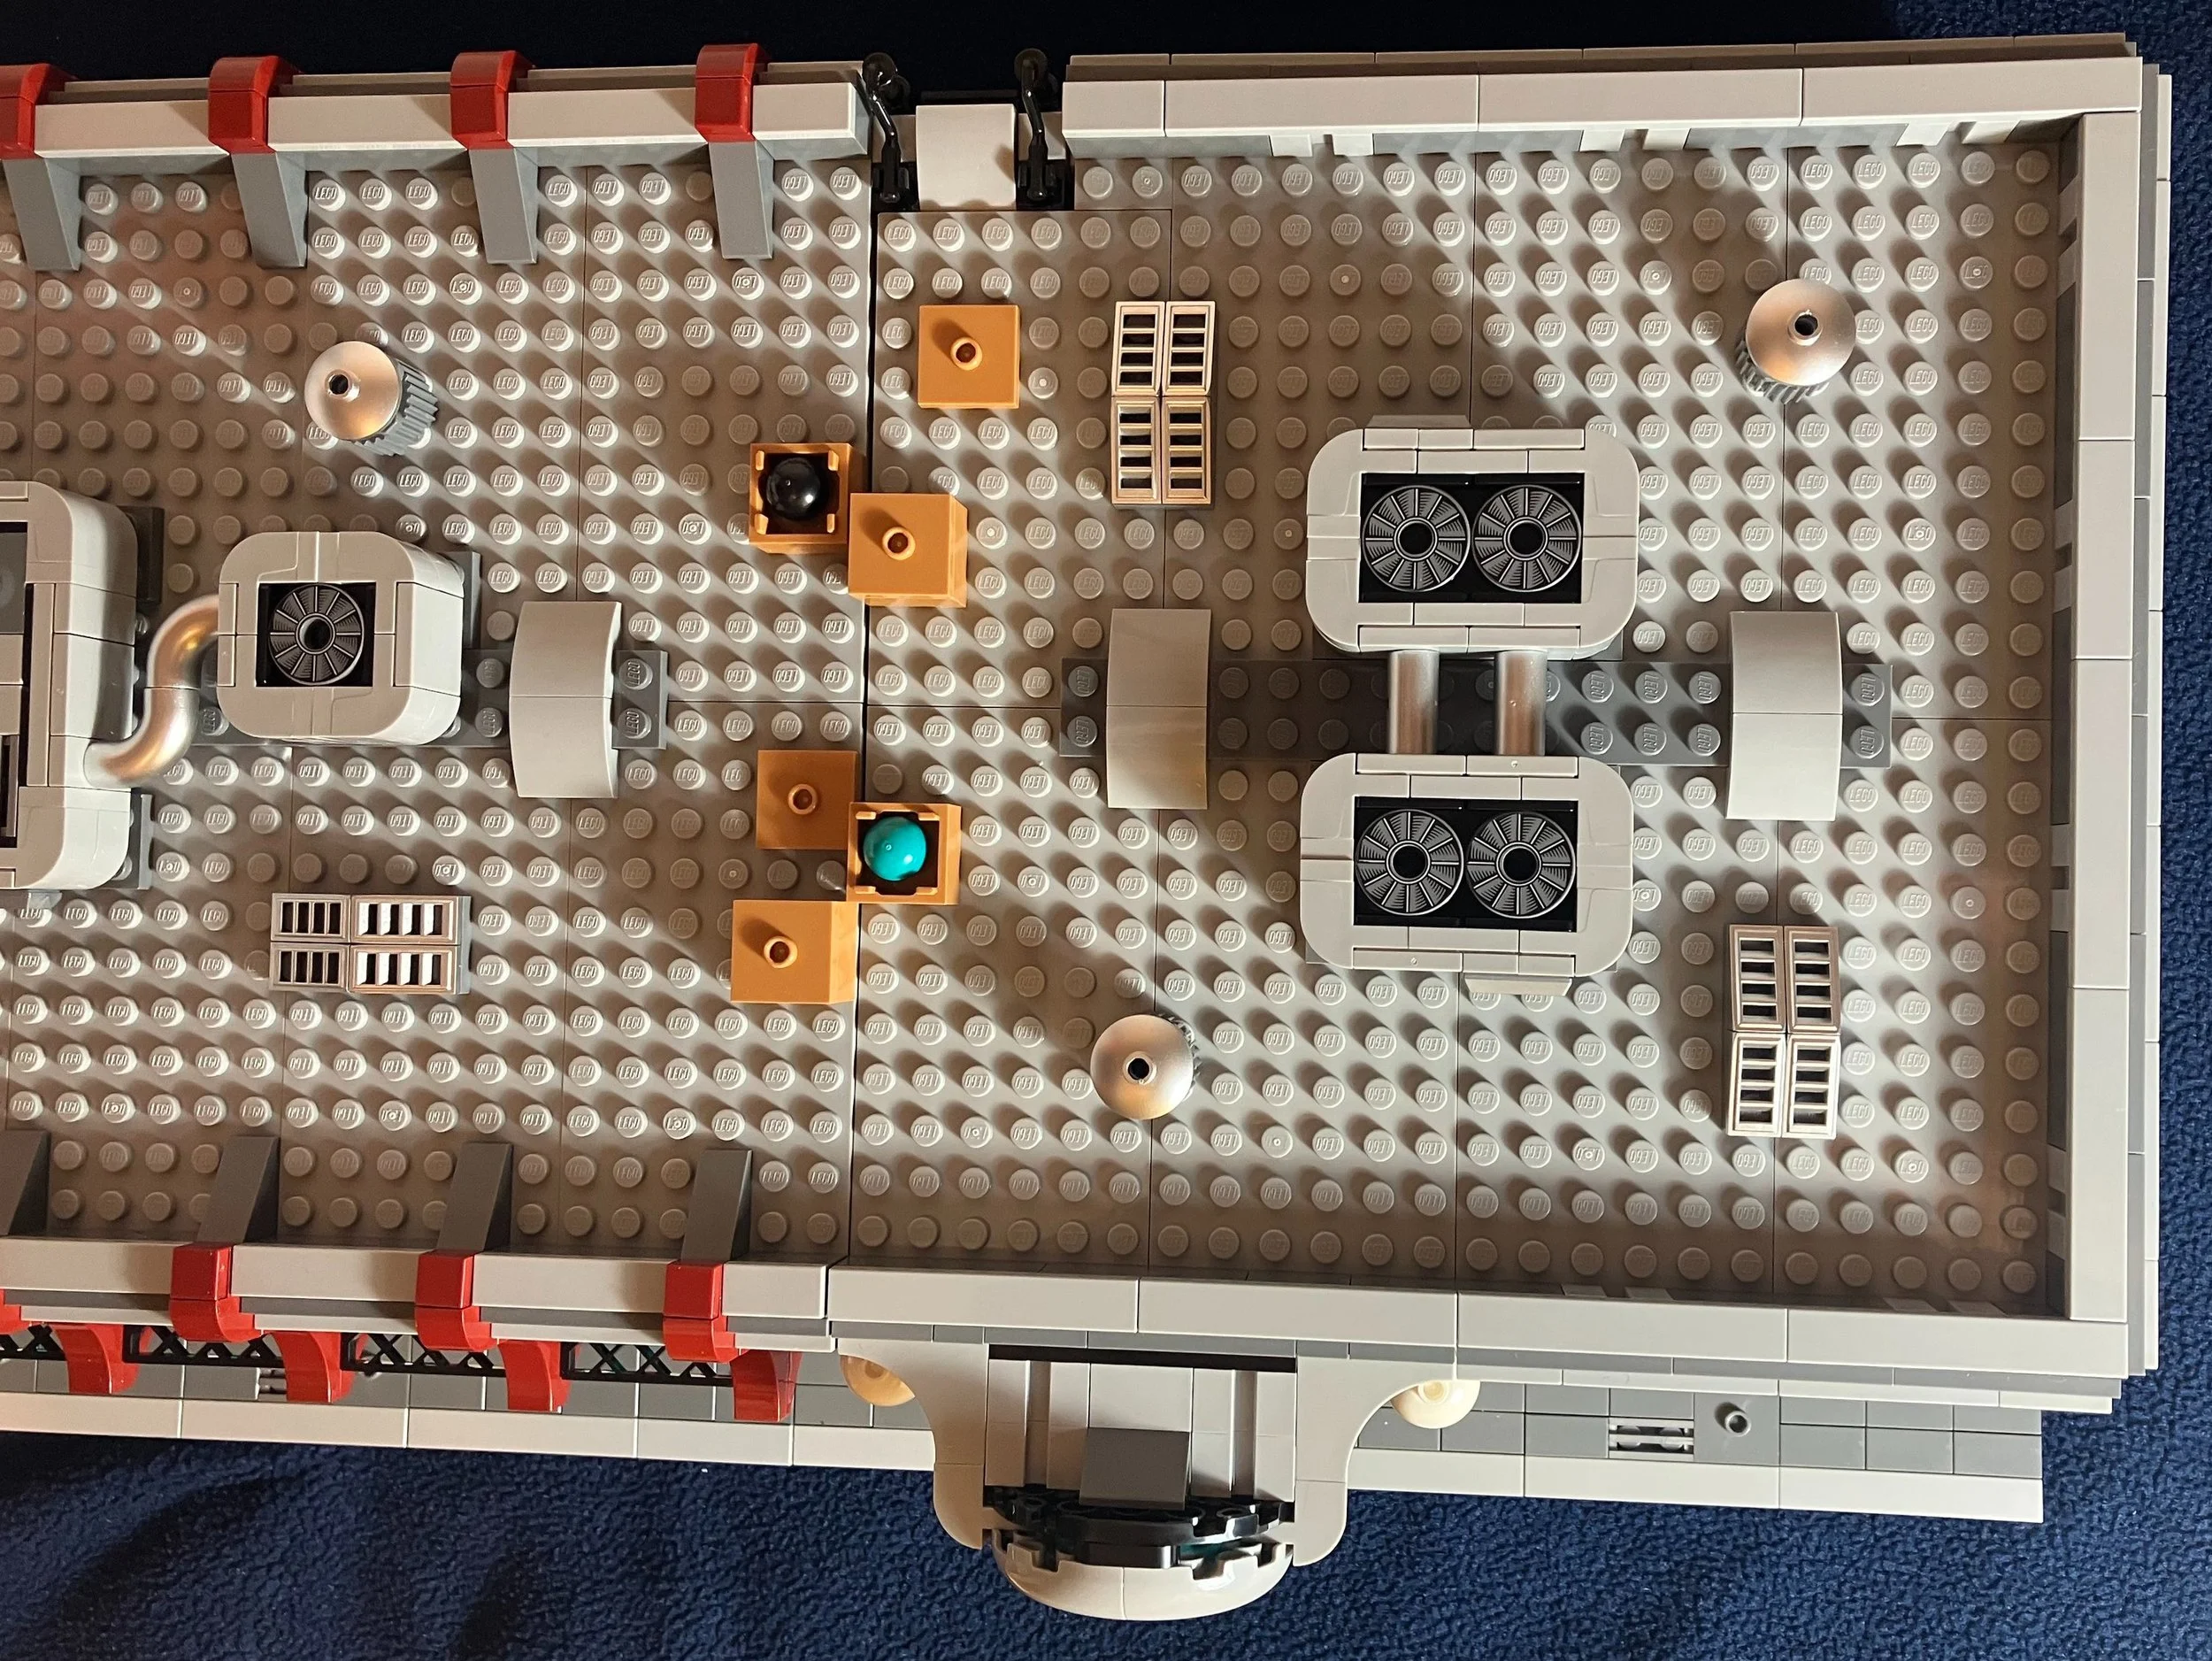
Bag 12 starts half of the roof. It continues the design from the walls and then there’s some ventilation units. I like the use of the silver pieces.

Bag 13 finishes that section of the roof and then adds some additional detail along the sides. Then you start on the other half of the roof.

You add some boxes to the roof. One is just a box with a jumper plate top. Then there is a jumper plate and an open box. That box has a black ball with a hole for a Technic axle. I’m not sure if this is supposed to be a part of the roof or if it’s just a place to store bowling balls. Any ideas?

Bag 13 starts the other section of the roof.

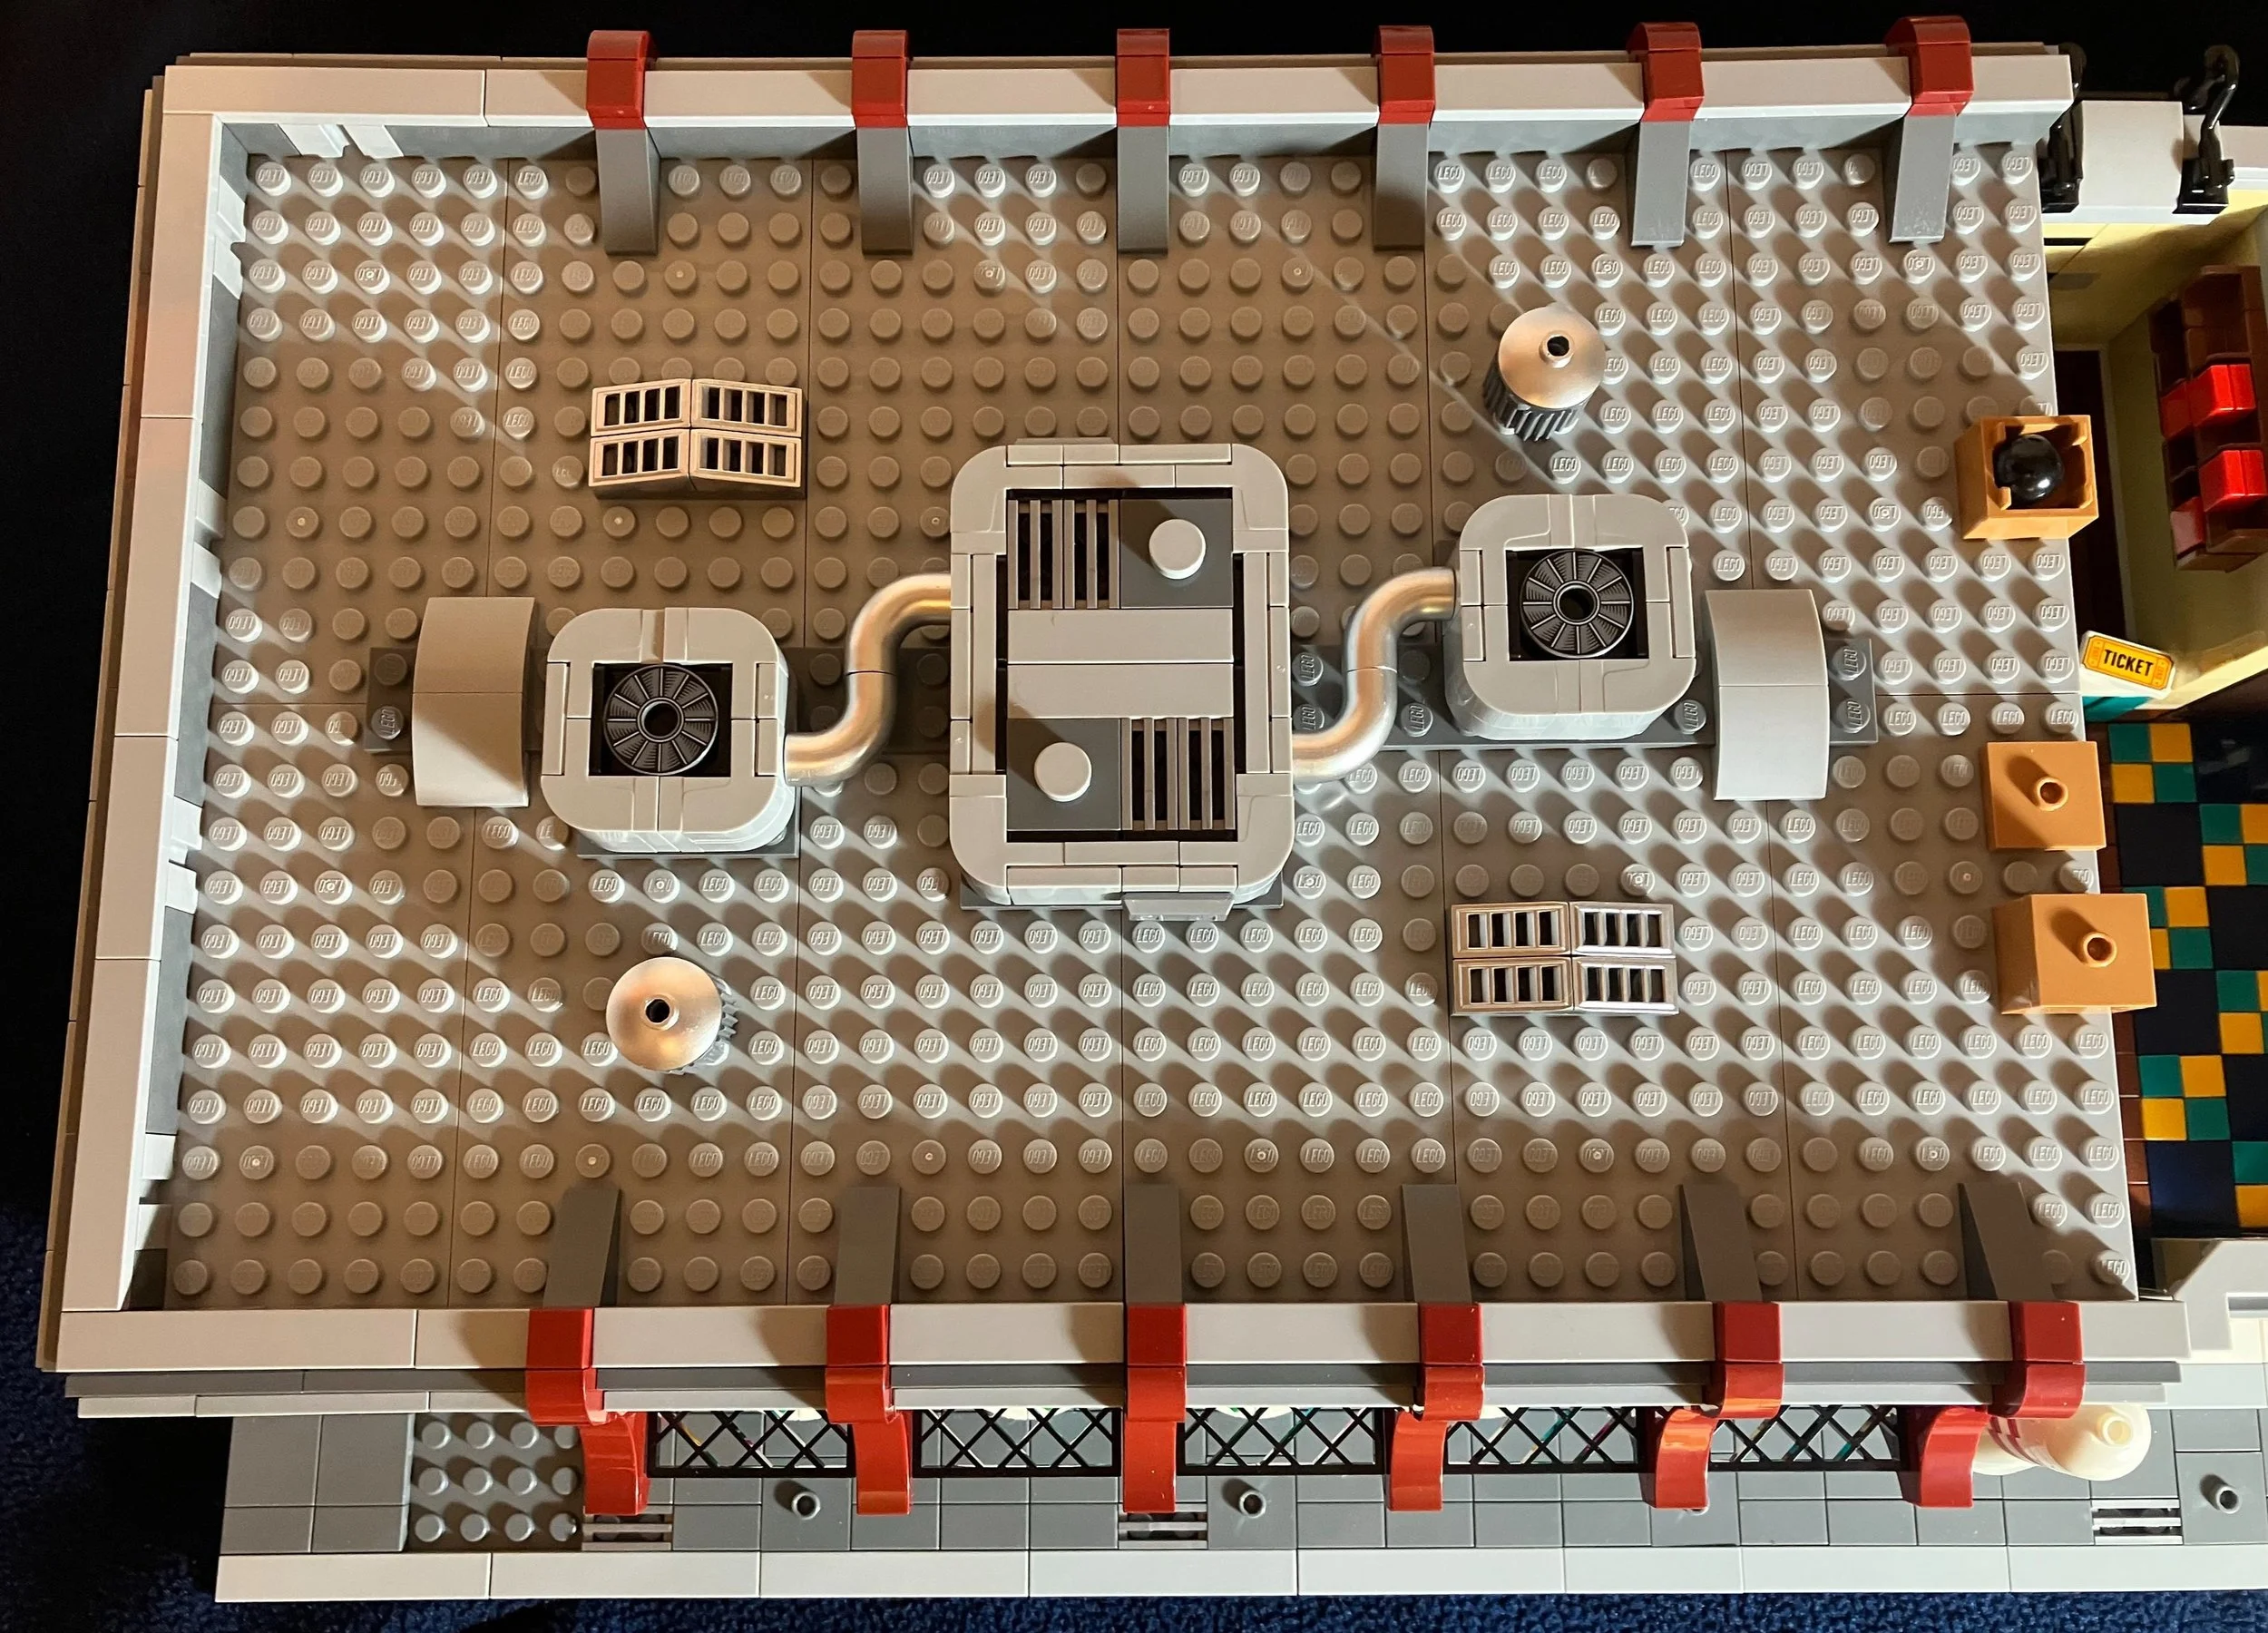
Bag 14 finishes the other half of the roof. This section fits around the ladder to the top in the back. It also includes another box with a “ball” in it. I don’t know…

You add an awning over the entrance to the alley which is a cool curved design. I like the techniques used and the curvature.

Bag 15 finishes the build. You attach a sign to the baseplate. The sign is very colorful and the stickers actually look pretty good. The only downside I found to this portion of the build is that you use 2x2 round bricks stacked together with a long Technic axle inside. This works fine only my Technic axle came bent and so the sign looks like it’s leaning over. I’m not sure the best way to fix this. Any ideas?

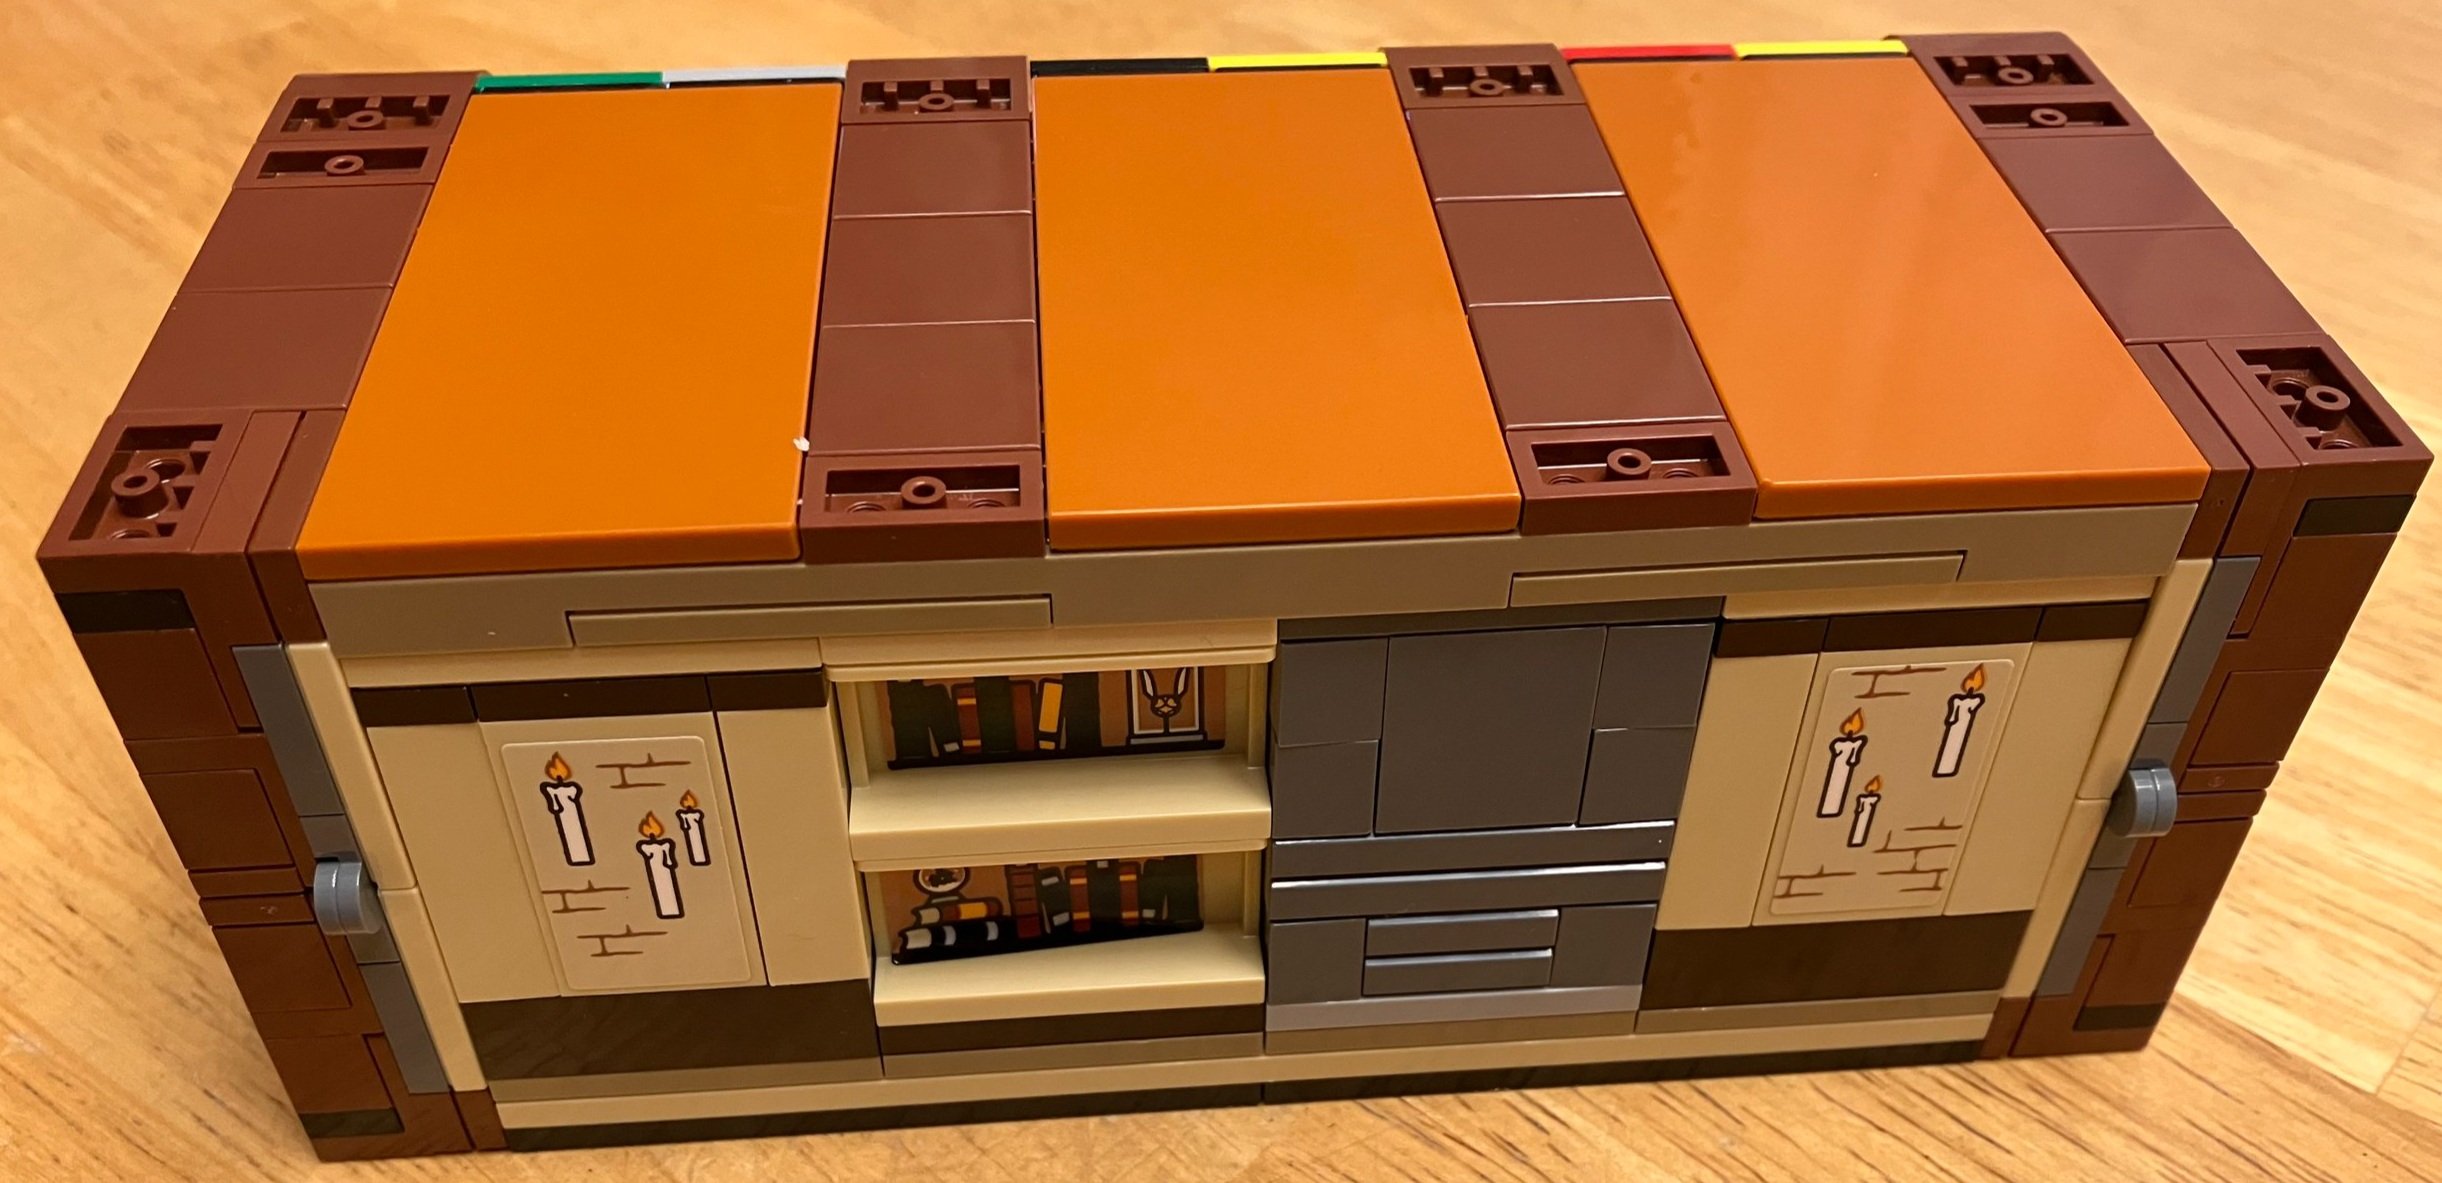
Here’s the final build. It’s a large, one-story modular building that isn’t modular. You can’t easily disconnect this set for storage or to move it around. I wish I had my Downtown Diner Modular building still assembled as I think this would look great next to it and I look forward to someday building a MOC with the two or having both in a city layout next to each other.

Overall, it’s not a bad set. The build was fun with only a few repetitive parts. There were a lot of great details and the color scheme was great. There are also a lot of great pieces if you want to tear it apart for MOC pieces. The minifigures are okay. Nothing too exciting, but they fit the set well. The price per piece is decent although $230 is pretty steep to pay. Due to the limited production run, you won’t find this one for $230 anymore. Sorry.

Happy building!


Set Review - #76399-1: Hogwarts™ Magical Trunk

The 2022 wave of Harry Potter themed sets have been out for a while and I finally purchased a few as the sales have started to occur and prices have gone down. #76399-1: Hogwarts™ Magical Trunk was released in the US on 1 March 2022. It contains 603 pieces and retails for $64.99 in the US. This works out to $0.108 per piece. I picked it up on sale for $52 and I will say up front that for the overall size and amount of pieces that you get, it still seems expensive.

This set is a little different from some of the past sets. Many of the Harry Potter themed sets focus on a specific scene in a movie that you can re-create in brick form. This one has you build a trunk that you can customize the outside and then you can re-create multiple scenes from the movies as listed in the instructions or you can free play/build as desired.

Let’s dig into the set… The front of the box shows the trunk, some minifigures, how you have options for switching up the minifigures and an example of how you can set up the trunk. The back shows the three different scenes you can make using the examples in the instructions.

The set comes with five numbered parts bags, a larger plate/tile piece, and two sticker sheets. One sticker sheet is the standard sheet you’d expect in a set where you place the stickers where the instructions tell you to. The other is for you to place stickers where you want around the set. I chose to put the bare minimum stickers on in the event I decide to break the set down and use it for parts at a later date.

The first bag assembles a fire place, a… I’m not sure what it is… some sort of colored thing with tubes/cups… and a small stand for the sorting hat. You also get an owl that can deliver a printed tile letter, and a 2x2 collectible tile started in 2021. There are six minifigures. One is Professor McGonagall who comes with a wand. The others are various students that you can assemble as desired. You can create them to be the characters you recognize or make them into whatever random students you want. My 5-year old assembled the students. I like the use of the bright blue hair. Especially with the student with blue hands. Given the recent push into diversity and inclusion in the US and the world, I suspect this is one of LEGO’s responses. You can build whatever student you want and that student doesn’t have to be a white person like many of the characters in the movies. Not a bad thing in my opinion. Plus you get some great minifigure heads and hair pieces to use. I’m sure this will be useful for those looking to create Harry Potter themed MOCs who have a ton of minifigures of Harry Potter, but not a lot of the others.

The second bag starts to build the trunk. The build itself is actually pretty interesting with the use of SNOT techniques to help get the shape. This section of the build also puts together the locking mechanism which you’ll see later.

The third bag assembles the other half of the trunk so you can now open and close the trunk as the hinge pieces are in place. The mostly tiled surface on the inside is where you can assemble your various scenes from the movies.

The fourth bag assembles some of the outer decorations on the trunk. You are given a number of pieces to add color to it so it will look like a student from one of the houses. I chose to use all of the colors so my trunk doesn’t represent just one. Feel free to mix and match as you want.

The trunk doesn’t have a bottom/back side yet. It does have some decorations on the side to include the locking mechanism cover, some trunk “clips,” and some handles to help carry the trunk.

The fifth bag wraps up the build. You add in some tables with food items (which can be converted into a bed), a couch that can be turned into chairs and a table to play chess, some banners to attach to the sides of the trunk to show the house colors, 2 small closets to store items with candles on the back, and some other accessories like a cauldron, a smaller chest/trunk, a newspaper, and some candy items.

For this set you assemble a key on a key chain for the lock. I’m not exactly sure where each of the pieces came from for the key, but I like how it looks and you can actually use it to lock and unlock the trunk. Both of my kids enjoyed playing with that mechanism and then figuring how how it works. The lock holds pretty well considering it is plastic LEGO pieces. Eventually you would break the set apart if you applied enough force, but it holds with the gentle force that you would use to open the trunk assuming the lock wasn’t engaged.

Overall, I wasn’t super impressed with this set. For how much the set costs and for what you get, I thought it was a bit underwhelming. The six minifigures and the ability to change them around are useful to MOC builders so that is a benefit, but the rest wasn’t all that thrilling. There are some good pieces to use so that helps. My recommendation would be to not get this set.

On the other hand, my 5-year old had a blast with this set. He enjoyed setting up random scenes even though he’s never read the books or watched the movies. We spent quite a while putting different foods on the tables and then we did the modification of the tables into a bed. He also enjoyed seeing what he could fit into the cabinets. He wasn’t as thrilled about adjusting the minifigures to have different heads or hair pieces, but that’s okay. His biggest complaint was that you build a bunch of tables and chairs, but then the minifigures in the set have the short legs so they can’t actually sit in any of the seats that you build. They all have to stand on the tables, the couch, and the chairs.

So not a great set for adults in my opinion, but a good set for at least one younger kid (so much for the 8+ age range). The price is a bit high, even with the sale, but it does contain a lot of play features and customization options. What are your thoughts? Have you built this one?

Happy building!

Set Review - #10308-1: Holiday Main Street - Winter Village

It’s become a tradition in the world of LEGO sets with the Winter Village theme returning every year in the fall timeframe. While I am not a complete addict, I have purchased many of these sets. #10308-1: Holiday Main Street was released in the US on 23 September 2022. This one contains 1,514 pieces and retails for $99.99 in the US. This works out to $0.066 per piece.

The set this year includes a trolley, a toy shop, a music shop, and a small trolley stop with a mailbox, street sign, and street light. Let’s dig into the set.

The box shows the full set built on the front with the set title on the top left. The bottom has the 18+ greebling in white. The back of the box shows the back of the set, some of the details up close, a drawing showing the dimensions of the set, and it mentions that you can take the set, buy more parts, and motorize the trolley.

The set contains seven parts bags, a 6x16 plate, and the instruction booklets. The instructions are set up so that you can build the set with other people. My family split this up where my NLS built the music shop, my daughter built the toy shop, and my son and I built the trolley and trolley stop.

This set contains a sticker sheet. Thankfully it’s not a ton of stickers, but you still have to apply these details to the set.

The first bag comes with three minifigures and builds a number of items. One of the items that seems to come standard in Winter Village sets is a Christmas tree. This one is about the same size as previous ones, but is a completely different design. I like the use of plates to make this one. It’s a fun new design. You also build a small waiting area for the trolley. This area comes with a mail box some fence pieces, and a lamp post. The lamp post has clocks on the top and the street signage.

Bags two and three build the trolley. My initial look at it led me to believe it would be a simple design, but it’s actually pretty detailed and fairly accurate looking. The top easily comes off so you can place minifigures inside and it comes with a trolley operator. You put a sticker on a tile for each side to advertise the stores you build later on which is a fun addition. The instructions show you how to add a motor if you buy the extra parts. I haven’t done that nor do I plan on it at any time soon, but it’s nice that they factored that in for those interested in doing so.

This set comes with two building facades that are two stories high each. This is very similar to #76388-1: Hogsmeade Village from the Harry Potter theme. I disassembled the Hogsmeade Village set, but I’m sure you could put the two together to add to the village theme. Bags four and five assemble H. Jollie’s Music Store. The front of the store uses the brick textured bricks along with some good color choices to make the store stand out. There’s some white plates as snow on the roof, some Christmas decor, and a sticker for the store shop sign. This building comes with one minifigure to work at the shop.

Inside on the ground floor is the shop. It has a drum set, violin, guitar, saxophone, and a keyboard on the wall. There’s a small cash register on a counter as well. Upstairs is a small kitchenette with a table, chairs, and a tea kettle, oven/microwave, and some cabinets. The table is set with some mugs, treats, and a candle. On the wall is a picture of #10267-1: Gingerbread House.

Bags six and seven assemble “Santa’s Toys and Games” shop. The outside of the building has some simple designs, but again, they are enough to make the building stand out and the build process not as boring. I like the colors, especially the green of the second floor. You get some more Christmas decor, a sign, and a small blue bird.

The ground floor is a toy shop with minature toys on sale to include a robot, train, building, roller skates, and a rabbit. There is a counter with a cash register as well and someone even left $100 on the counter for us. This store comes with one worker minifigure.

Floor number two has a small apartment bedroom with a small Christmas tree, a bed, a night stand, a rug, and some gifts under the tree.

This set comes with six minifigures. It’s a decent mix of figures and parts in my opinion. Not really anything super new, but that’s okay in my opinion.

Here’s the full assembled set. I like this addition to the winter village theme and I wish I had the rest of my sets together so I can put them all in the same spot for a larger photo. Someday… This is priced reasonably in my opinion if you look at the price per piece. I’m okay without the motor and track being included and I’m glad there is no light brick as I typically don’t use them anyways. Hopefully the lack of a light brick kept the cost lower.

What are your thoughts? Are they running out of set ideas in the Winter Village theme or does this one fit right in?

Happy building!

Set Review - #21334-1: Jazz Quartet - Ideas (#42)

We’re at LEGO Ideas set #42 already!?!?!?! What?!?!?! When did that happen?

This is #21334-1: Jazz Quartet. It was released on 29 June 2022 in the US for $99.99. The set contains 1,606 pieces which works out to $0.062 per piece. This set is very different from any other we’ve seen. I don’t think we’ve had a set with figures that look like this ever (or at least that I can recall) and the jazz/music theme is something out of the ordinary from what we usually see. Let’s dig into this set…

The box has a fun design with the 18+ banner and then a cool looking neon light style title in the top left corner of the front of the set. Then it shows the set and it looks like there’s a spot light on the them as if they are performing. The back shows how you can break apart the stage to re-arrange how the figures are positioned. The back also shows the dimensions and how the set looks in an actual room.

The set contains 11 numbered parts bags and two 16x16 black plates. The instructions are in a cardboard envelope for protection which is great as you can recycle the envelope and the instructions aren’t bent. There are five booklets in the envelope. The first one describes the set, talks about the fan designer, and gives information about the LEGO designers. The remaining booklets build each figure from the set and the figure is pictured on the front of each booklet.

The first bag assembles the start of the trumpet player. The build is fairly similar for each of the parts of the stage. The top uses a mixture of tiles and tiles with studs. There is also a slot for where the trumpet playing figure will be attached. I like how the edges of the stage are made of black and there are curves without studs. Also, the step down is cool to mimic a real stage.

The second bag assembles the trumpet playing figure. Initially, it doesn’t make sense what you’re building, but then as you put it together you realize what is a leg, arm, head piece, etc. The details are great with the suspenders, tile for a tie, jumper plate as the mouth as if he is blowing out into the trumpet, and the use of sloped pieces for the hair to show his hair style. The trumpet is a pretty simple assembly, but it looks pretty realistic for a brick built version.

Bag three builds the small section of stage that the bass player is on and then the bass player himself. The figure is great with the bow tie and slick hairdo. The ball and joint pieces are gray so they look a bit out of place, but I don’t think they completely detract from the figure. The slicked up hair above the forehead is great, but the open studs on top look a little off. I’m not sure of the right way to fix that? Maybe a reverse stud tile piece? I’m not sure they even make a 1x2 version of a reverse stud tile like that.

The fourth bag builds the bass itself. I think the designers did a great job recreating the shape using existing pieces in the LEGO world. The curves look great and even the S shaped pieces to show the holes where the sound comes out (okay, I don’t know the technical names of everything… sorry) looks awesome. The minor issues of the open studs and gray ball joints don’t really stand out when you put the full set together.

The fifth bag assembles the stage for the drummer. It’s a much larger section of stage, but still follows the same pattern and style as the other sections. Instead of the drummer being attached to the stage, you connect him via studs on the stage. This part was a little tricky to follow as I had to make sure I put tiles and jumper plates in the right spots. It matters as you need the drum set, seat, and drummer to fit on the stage.

The sixth bag assembles the drum set without the cymbals or high hat. The base drum has a pedal to play it and gets the round shape well to include allowing it to hold up the tom-toms. The tom-toms, snare, and the… I’m not sure what it’s called, are all round with the use of round bricks, plates, and tiles. The shapes of everything match what a drum set would look like quite well in my opinion. It’s not a large drum set with all kinds of extra drums, but it does the trick. You also build some stands which will hold up the cymbals.

Bag seven adds the cymbals. They are gold in color and look pretty accurate. I like how they did the high hat. It looks like you could actually hit the pedal to make it work and they use the cymbals in opposite directions to create the looks of a high hat.

The drummer looks pretty swank. The hat is simple, but gives him a cool look and the beard and bow tie add to it. Interestingly enough, none of the figures have eyes, but it doesn’t seem to matter with how these are built. The pants are gray so the connectors for the legs to the torso don’t stand out, but the shoulder sockets are gray. Not too big of a deal in my opinion. I’m a big fan of the drummer!

Bag eight builds the stage for the piano and piano player. I again had to pay attention to where the jumper plates and plates with studs on them went as it helps to make sure the piano and seat attach to the stage.

Bags nine and ten build the piano. It’s almost like a mini version of #21323-1: Grand Piano. I appreciated how the large one kept the shape of a grand piano and this one does the same only at a smaller scale. The piano isn’t as smooth as the larger Ideas set, but the outer edge is smooth. I like how the keyboard is printed tiles and you can still see the keys. The bench/seat looks like it belongs to a piano and the reddish colored tiles on top help to give it the look of a cushion.

Bag 11 builds the piano player and I think this design is awesome. Everything from the big poufy hair and the yellow headband to the yellow dress and heels really make her look like quite the soulful pianist. I also like the use of the gold rings as earrings. The way she’s built, she fits on the seat well and looks like she’s jamming away on the piano.

Here’s the final assembled set. In just looking at it, it looks like they are jamming away on stage. There isn’t any actual movement, but the poses really do add life to the set. I’m a big fan of this set and can’t wait until I have a place where I can display it. At $100 and over 1,000 pieces, the price works out pretty good for what you get. Plus there are no stickers and a few printed elements. If you don’t like the set, you get a bunch of great pieces for MOCs.

From my viewing of the fan media, this one came and then left the spotlight quickly which is too bad. I hope you enjoy it if you get to build it. Maybe we’ll see LEGO do more like these someday. What are your thoughts? Am I too positive on this one? Is it not as great as I make it out to be? Let me know what you think in the comments.

Happy building!

Set Review - #40560-1: Professors at Hogwarts™ - Brickheadz - Harry Potter

Here are Brickheadz numbers 170 to 173. Can you believe we’ve had that many already? #40560-1: Professors at Hogwarts™ was released in the US on 27 June 2022. It retails for $39.99 and contains 601 pieces. This works out to $0.067 per piece which isn’t too bad. The set contains four of the professors who teach at Hogwarts to expand on the Harry Potter characters that have been offered in BrickHeadz form besides the three main characters.

Onto the review…

The front shows the 4 figures with the BrickHeadz and Harry Potter logos. It also gives the number of each character. The back then just shows the same figures and that you can remove them from a base that you build out of plates.

My set showed up damaged (thanks FedEx). There was a big hole tear in the box and one of the parts bags was open. Thankfully nothing ended up missing during the build.

The contents are four numbered parts bags with two bags each for eight total. Each numbered bag is tied to an instruction booklet so you could build this set with other people if desired.

Bag number one is tied to Brickheadz number 170 Severus Snape™. The design seems to capture the character pretty well. You get a few 1x5 tile pieces which is fun if you are like me and still enjoy seeing them. He also comes with a flask for building potions. The unique printed tile is a purple tile in the front that is his shirt.

Next up is bag two which builds number 171 Minerva McGonagall™. My daughter built this one and realized she clipped the hat on wrong as compared to the instructions, but I’m okay with the large feather pieces being in the back so we left it. Are the feather pieces from Ninjago? Or Monkie Kid?

This one has two printed tiles in the front as part of her robe and also a gold ring attached as a necklace. The set comes with an extra one which is a bonus if you are trying to create a “Lord of the Rings” scene. There is a gold cup that the figure holds which is also a nice addition. I don’t think it’s too rare, but they are often clear versus gold.

Bag three builds number 172 Alastor Moody. There was some interesting SNOT work to get the brown band on his forehead. While building it, I wasn’t sure how it was going to work, but it looks good in the end. You get a printed eye piece element and then his shirt/jacket is a printed tile. There are a few 1x5s as well. The hair portion is fun to assemble with the various curves and angles. I think they did a good job trying to recreate the movie character here.

Lastly, bag four builds number 173 Sybill Trelawney. I like how they integrated the cloth headband the character wears and the glasses are fun with the nose bridge in the middle incorporated into the face as a brick. The hair is another fun section to build with all of the angles and curves that end up coming together in the end. There’s a printed tile in the front as her shirt and she’s holding a tea cup.

Here they are all together. Not a bad bunch if you are a fan of Brickheadz or the Harry Potter theme. I am not a collector of Brickheadz and I only purchase sets that interest me. I’m a fan of the Harry Potter stuff and I added these to my collection of previous Harry Potter Brickheadz. For the price per piece the cost isn’t too bad and if you wait until closer to the end of this set’s shelf life, you might be able to get it on discount.

Happy building!

A Place Where Minifigures Can Go to Drink Adult Beverages

Or maybe this post title should have been: Set Review - BrickCon 2022 - Convention Model - The Wooden Duck

If you scroll back in the blog a bit, you can see my posts about attending BrickCon 2022 virtually. As a virtual attendee, I was able to order SWAG and a convention model just like they physical attendees. My order arrived quickly after the event was over. You can see more on the SWAG here.

I ordered the convention model from 2020 as well and you can see that review here.

“The Wooden Duck” was the name of this model and it contains 346 pieces. You can see my write up about a talk Chris Malloy did at BrickCon 2022 here. I tried to summarize the process he went through without typing it out word for word. I don’t remember how much I paid for the model. Maybe $30? I thought the cost was reasonable and BrickCon mentioned that they don’t make a profit on the model. It’s assembled by volunteers and they just pass along the cost to us.

The box has a distinct look to it with a design also made by Chris of the model. The front also has the BrickCon logo and the number of pieces. The back has the BrickCon logo and the year. My box got crushed during shipping and the seal came undone. Not a big deal for me as I intended to build it and not keep it sealed or sell it.

One side of the box has Chris’s name on it. Another had a hand written number stating that I purchased #184 of 250 total models. I’m not sure I've ever owned such a rare product.

The contents were a plastic bag with parts in it and then the instruction booklet. BrickCon used the LUGBulk program to source the parts and then the volunteers went through and helped to put the parts in each bag. The instructions are printed which is nice, but there are a lot of steps crammed into each section. BrickCon assumes the buyers of these models are AFOLs who build regularly so this won’t be a big deal. It probably wouldn’t be great for kids or newer builders.

The set comes with one minifigure who is a bartender. He has a glass and what has been used as a cast, but is being used as a cloth. His face has two prints. The side I took the picture of and then a laughing face. I like the torso with the suspenders and tie.

The set comes with 3 printed tiles. One is an art piece from #10297-1: Boutique Hotel. One is a mirror from… um… I’m not sure. Then the last one is a custom tile, unique to this set. It has the infamous wooden duck, a reference to the 90th anniversary of LEGO and its start in 1932, and finally the number 21 in reference to the 21st BrickCon.

Onto the final build… this design is jam packed with a ton of details considering the size and piece count. Plus, it was designed knowing a lot of great pieces would be used for AFOLs who want to take it apart for MOCs. The brick red color along with the sand green pieces are two colors that aren’t super popular and they’re great to see. The various items used as bottles are very creative and it really looks like how you’d picture a bar. The balls used as lights hanging on the top are all glow in the dark pieces which is cool and one of the bottles glows in the dark too.

Chris threw in a squirrel. I’m guessing it was so you had another opportunity to get a squirrel. I’m not sure why there would be one at the bar. Maybe it’s eating the pretzel?

Overall, it’s a great build. I like the piece usage and the cost was very reasonable considering what you get. There is some play functionality in that you can add more minifigures or add the bar to another scene. If I attend BrickCon again, I hope to have the ability to get the convention model. Nice job Chris!

Set Review - #10311-1: Orchid - Botanicals - 18+

2021 saw the release of #10280-1 Flower Bouquet and since then the Botanicals Collection line has been pretty popular. In 2022 we saw two more sets in the theme get released. The first one is #10311-1: Orchid. This one was released in the US on 15 April 2022 for $49.99. It contains 608 pieces which works out to $0.082 per piece. The good news is that at the time of this post, a few retailers in the US have had it on sale as of late. I purchased it from Target and was able to get the VIP point offering from LEGO too. It’s not as many VIP points as buying direct from LEGO, but it’s better than nothing and the set was on sale.

The box looks similar to the Flower Bouquet with the black coloring and and 18+ greebling. The front shows the front side of the set. The back gives another view, dimensions of the flowers, a picture of the actual flowers, and a few close up shots.

The set comes with four numbered parts bags, two longer Technic axles, and an instruction booklet. Bag one contains a piece separator.

The first bag builds the internals of the pot for the plant. It is a good example of how to make something round out of bricks that are typically square. You build an internal structure using plates and then connect the outside with Technic beams and pins.

The second bag adds the design to the outside of the pot. I’m not sure of the official name of the blue color, but I like the shade of blue. If you end up not liking the set, getting some of this blue color is a decent perk. Repeating the step a bunch of times isn’t exactly fun, but my NLS and I built it together so we shared the load.

The third bag builds some leaves, stems, and roots. Like the flower bouquet, this one has little blurbs in the instructions that explain what you are building or where a piece came from in the LEGO world. The instructions can be challenging to follow all of the angles of the stems, but in the end it doesn’t matter a whole lot as you can have the stems grow in whichever way you want them to grow.

Here’s the final build. The last bag builds 6 flowers and then 2 of the smaller ones. The design of the larger ones is pretty cool. I especially like the frog piece that is mixed in. You can place the flowers wherever you want on the stems, but we did our best to follow the instructions.

Definitely a fan of this one. It looks pretty realistic and my NLS was even willing to set in the house as she was glad to not have to water it (still have to dust it).

Definitely look to pick this set up on sale. I’ve seen it a few places for $41 at the time of this posting. Maybe it’ll go down further for Black Friday sales.

In the meantime, happy building!

Set Review - #910023-1: Venetian Houses - Bricklink Designer Program

The 2021 Bricklink Designer Program Round 2 sets made it a little while back and I finally got to put one together.. I was most excited about #910023-1: Venetian Houses. It contains 3,470 pieces and retailed for $289.99 in the US. That works out to $0.084 per piece. While this is a hefty price to pay, you are getting two 32x32 base plates with buildings. Or said another way, you are getting two modular buildings in one set.

Part of my inspiration came from seeing some Venetian styled houses back at a show in Germany in 2019 (scroll down a bit to find them if you go to the link). I have so many ideas of sets I’d like to expand upon and here is yet another one.

I don’t have one of these available in my store (sorry), but I have a few others if you are looking for the Bricklink Designer Program sets. You can see them at the Bricks for Bricks Bricklink store here.

Onto the review…

The box is similar in design to the Round 1 sets. It’s all white with the BrickLink logo on it. The front does give credit to the fan designer so that’s a nice perk for them. Also the Bricklink silver seals are on the box along with the standard LEGO seals.

This set came with a bunch of parts bags and then another box of parts bags. When it’s all done, you get 17 sets of numbered bags, two 32x32 base plates, two 16x16 plates, and an unnumbered bag. Similar to previous sets, there are no printed instructions. You can download a PDF version from the BrickLink site or use the LEGO Builder app. I did both and it worked okay, but I still prefer building without having to stare at a screen.

The first set of bags follows the build of a traditional modular building by laying out the sidewalk area and then for this one, some of the canal. You also get started on a bridge over the canal.

Bag 2 finishes up the bridge by installing antennas as the railings. You also build up a dock area with some barrels and then the floor of the first building. The build starts on some of the walls and a door.

Bag 3 continues work on the first floor. Two walls are built up with a similar pattern used throughout the build that gets a little old, but works for the design. The door isn’t exactly flush with the frame so there is a slight gap, but it’s not overly glaring based on how an outside arch is added in. Inside the building there are works of brick art. I assume it is some sort of art gallery. Additionally you add in a set of stairs built as a spiral staircase. It looks cool, but I’m not sure how practical it is for a minifigure to climb up.

Build 4 wraps up the first floor. It adds in some windows in a nice design which gets a bit old by the end of the build as the same design is used for each set of windows. While I complain, it does look like what I would think a building in Venice would look like. The bag comes with 4 minifigures, but more on them later.

Unlike most LEGO sets, the end of the bag doesn’t end with the floor. Instead, you start on the second floor before finishing up this bag.

The fifth bag continues the second floor. It adds some walls and then inside a tiled floor (single color), a bed, an old fashioned phone, and a small desk and chair. Maybe it’s not an art gallery, but the home to a painter or someone who just likes brick art?

The sixth bag finishes up the second floor by installing the walls, adding a tiled top so you can connect another layer, and adding a few details like the rain spout.

The seventh set of bags adds the roof. This is built by using curved slope pieces. While the walls are all very white, it is nice to have a bit of color variation in the roof with the orange, nougat color, and darker tan-ish color (I know, not the official color names). The roof has a nice gentle slope and I think it goes well with the building.

The eighth set of bags starts the second building on the second baseplate. Similar to the last one, you build out the sidewalk and canal way. Then you get started on the walls.

The ninth set of bags continues work on the first floor. The walls and windows are built similar to the previous building. The door again isn’t flush with the frame, but it works here. Inside, I initially thought it was a hotel with a reception desk, but it ends up being a book store. In this bag, you build the cashier stand, a book shelf, and a table with some chairs for people to sit at. The minifigure who works there comes in this bag.

The tenth set of bags adds more wall. This set comes with a lot of the brick design textured bricks so if you’re a big fan of those, you’ll be pleased with this set as there are a lot.

Internally to this build, there are a few more book shelves added in and a reading area in one of the corners. You get a few printed tiles that are added in as newspapers. The “books” help to break up the build with some additional color. This bag comes with 2 more minifigures. An adult female and a boy who is reading a book about half his size.

Bag 11 mostly finishes up the first floor with walls and windows. You install a door on the back of the building which can be used for people on boats to stop into the shop. Lots more brick textured bricks are used.

Bag 12 is split between two floors so we’ll start with this floor. You wrap up the first floor by topping off the walls with tiles and a few studs so the upper floor will fit on. You also add in the small dock area for a boat to pull up to drop someone off. Then you build a gondola. This includes 2 more minfigures.

As mentioned the other part of bag 12 is the next floor shown in the first picture. Bag 13 then starts to build up the walls and windows with similar techniques from the other floor and building.

Bag 14 adds more of the walls and you get more brick textured pieces.

The inside of this floor isn’t fully furnished, but it is meant to be some sort of music studio. Here you get a minifigure scaled piano along with a piano player.

Bag 15 finishes up the walls and adds a music stand and saxaphone player. I forget where the break was, but you add the tiles on top for modular building stacking purposes too.

Bags 16 and 17 finish up the roof. It is built in a similar style only this one has a chimney and a small window. You also get 2 sea gulls bringing the total that you get with this set to 3. The roof is color similar to the other building which helps to make it stand out from the white and tan of the rest of the building.

13 minifigures total is pretty good for a modular building type set. You get a decent mix of genders, ages, and parts so no complaints there. Many of them have dual printed heads so even better.

$290 for a modular building set is quite a bit, but it’s somewhat in line with #10255-1: Assembly Square. Although Assembly Square comes with more pieces, this set wasn’t as mass produced so maybe it’s tough to do a direct comparison. Either way, I’m a big fan. I think the set was a great build and I look forward to adding it to a city of modular buildings (some day). Some of the structure techniques were a bit repetitive, but in the end, they look great and in the style of a Venetian building.

This is the part where I normally recommend whether you should buy the set or not, but it’s not available from LEGO so you’ll by it on Bricklink or eBay or elsewhere for quite a bit more. The good news is that you can get the instructions online for free and can try to purchase the pieces on your own or use your own collection. I’m not sure which would be cheaper, but it’s an option.

Did anyone else get this set? What did you think?

Happy building!

Set Review: #71034 - Series 23 Collectible Minifigures

We’re at the last collectible minifigure series of the year. #71034: Series 23 contains 12 new minifigures and they were released in the US staring on 26 July 2022. They still retail for $4.99 per bag. This series contains 8 costumed minifigures which is quite high compared to past offerings. Not saying that’s a bad thing, just different from the past. There are also a number of holiday themed minifigures as this series will take us through the end of the calendar year and past Thanksgiving and Christmas LEGO Shop @ Home still gave an initial cap of 16 bags and 2 boxes for 28 minifigures total. We’ll see if that remains or if they end the cap later. I’ve been able to purchase collectible minifigure series offerings from Target and Walmart online with caps on individual orders, but no overall cap.

I don’t see the price changing anytime soon, but of note, I saw Series 22 on sale at Target and Best Buy before it retired so perhaps if you wait, you may see Series 23 go on sale in December closer to when it will come off the shelves.

My comments on the individual minifigures is below. Happy building!


Green Dragon Costume Guy comes with a dragon tail, the wings, a head piece and two horns on top. I think it’s a pretty cool looking minifigure.

Ferry Captain is fun with the giant boat that he’s wearing, but I think the red smoke stack is slightly in the way. I guess you could just remove the one in front of him if you wanted.


Next is two Christmas themed minifigures with Reindeer Costume Girl and a female Christmas Elf. They both come with some extra accessories which is good. The elf is a new torso and hair piece from any of the previous ones so that is a nice addition for anyone looking to add to their Winter Village themed layouts.


Wolf Costume Guy comes with a bag and is licking his lips so he just ate something or maybe hopes to eat something. This one is reminiscent to Series 19’s Fox Costume Girl with the sack and looking for food.

Knight of the Yellow Castle is the name Brickset.com and Bricklink.com list for this one. I’m guessing this is a reference tot he yellow castle of old, but I find it odd that it is colored pink. Wouldn’t it be yellow?


Cardboard Costume girl flashes back to some of the minifigure robots we’ve had in past series. This time, it’s a costumed minifigure.

Popcorn Costume guy has shown up in a lot of great MOCs on line with Series 17’s Corn Cob guy.


Oddly, the Snowman was the hardest one for me to find. I eventually got it and then another so who knows. This one is actually a costumed minifigure. There is a minifigure head underneath the snowman head. Interesting that they chose that option versus just molding a solid snowman head.

Turkey Costume guy is the first Thanksgiving reference we’ve seen in a CMF series, right? This one is pretty fun and comes with a pumpkin.


Lastly we get Sugar Fairy girl. This one is very similar to Series 17’s Butterfly Girl in terms of size and the wings. This one comes with a tutu, candy cane, and a tiara.

Finally, the Nutcracker comes with a sword and a 1x1 round tile printed nut to crack. This figure looks similar to some of the Pirate themed soldiers from the past. You might be able to mix him into a MOC without anyone spotting it.


Set Review - #10497-1: Galaxy Explorer - Icons

About a year ago, LEGO ran a vote for the favorite theme to bring back for the 90th anniversary of the company. The votes were tallied and Castle ended up winning. The #10305-1: Lion Knight Castle was the resulting set from the vote. As a bonus to fans, we also got this set which is #10497-1: Galaxy Explorer. This set is a remake of 1979’s set #497: Galaxy Explorer. The original set had 338 pieces and retailed for $32. The new set contains 1,254 pieces and retails for $99.99 in the US. This works out to $0.08 per piece. The set was released on 20 June 2022 in the US and it is still out at the time of this post. I purchased the set on pre-order straight from LEGO Shop @ Home, but Walmart has had the set on sale for $75 for the past week or so. I’m not sure how long that sale will last, but it’s crazy to see a new set discounted so quickly after it’s release. It makes me wonder if the set isn’t selling as well as LEGO had hoped.

The box is designed after the old box style and is similar to #21322-1: Pirates of Barracuda Bay. It has the 90th anniversary logo on the bottom right on the front and a few other changes like the “18 years and up” for the age versus sets from the 1970s and 1980s. The back of the set shows some of the various play features of the set.

The contents of the set are 9 parts bags, an 8x16 black tile, the instructions (in a sealed bag), and a sheet telling you that some day LEGO will switch over to paper parts bags, but in the meantime you can keep throwing out your single use plastic bags.

The build starts with some inner substructure made of mostly Technic elements. You also build what will become the landing legs that extend down and then retract.

I failed to add it in the picture, but you get a space minifigure in a red suit here as well as a brick separator.

The second bag starts to give the ship it’s shape and adds some of the crew compartment. It’s great to see the printed tiles and bricks from the past return. From the bottom view, you can see the three landing legs. Each of them have a piece that is flat on the bottom and then has studs on top to connect with the rest of the ship. I’m not sure if this is a new piece or not, but it’s a cool use of this part.

Builds three and four help to create more of the shape of the ship. The use of LEGO geometry to create the angles is impressive. Not only are plates used, but the various leading and trailing edges of the ship still match the angles with very little gaps. Well done LEGO design team!

I found the build to be a bit fragile as I was putting it together. There were a lot of parts that kept coming off. This was rectified by the end, but just a note to be careful as you assemble the set.

Throughout the instructions, LEGO included various fun tidbits about the set which were nice to include. You’ll notice the use of colors. The designers only used colors available back in 1979 except for the light gray which was slightly different back then.

Bag three adds another space minifigure. This time it is in white.

Build 5 adds more detail to include the “shooters” on the front, some colored tiles on the top, and the start of the crew compartment. Initially, you attach an assembly of parts to the main structure of the ship with a Technic pin. For a while it just looks awkward as it sits at a weird angle and looks out of place. As you go further, you see that it fits right in and matches the angles perfectly. The fifth bag also includes another red colored space minifigure.

The sixth bag adds more detail to include additions to the crew compartment (beds that support leaving your oxygen tank on), storage for gear, the rear storage section for the space buggy with a ramp that folds out, and the start to where the engines connect.

Build 7 includes a white space minifigure and finishes off the crew compartment. You get additional control panels to add into the back compartment. You also add in the two yellow windscreens. I heard numerous complaints about these screens being scratched, but I didn’t have any issues. The set also comes with more printed parts to include the Classic Space logo and the numbers on the side.

Build 8 completes the rear tail, storage compartment, maneuvering thrusters, and the functionality that lets the rear compartment flip open to let the vehicle out.

This set comes with 4 space minifigures. While we didn’t get any new colors from the past, it’s still great to have additional space suited minifigures to add to the crew. Also included is a robot/droid. It wasn’t in the original set, but was in some of the other Classic Space sets. This one can carry coffee mugs which is fun considering they are in space and the coffee wouldn’t actually stay in the cups.

Here’s the final set. The ninth bag adds the engines. Two are on the sides in the back and two are attached to the back. The two on the sides can be removed and you can stick a minifigure on top to ride them. The ninth bag also adds the space buggy. You can open the rear of the ship, pull out the ramp, and it slides out. This is another cool addition to the set.

I highlighted the landing gear earlier and I took a picture of it extended here. The new piece is great and I like how it extends out to land and then folds up and tucks into the ship to allow it to swoosh away.

Overall, it’s a great set. I think it’s priced well and $75 is an even better deal if you grab it from Walmart. As a Classic Space fan as a kid, I was pumped to see space return and I appreciate the addition of this set to the line. Side note, I voted for the M-Tron theme to return…

I recommend this set for fans into the nostalgia of older LEGO sets as well as new fans. My 5 year old enjoyed playing with the space buggy and minifigures and I’m sure others as well. Also, it’s a great way to get into the 90th Anniversary sets without dropping $400 on the Castle.

Happy building!