Set Reviews

Another Set From the Pirates Theme to Build

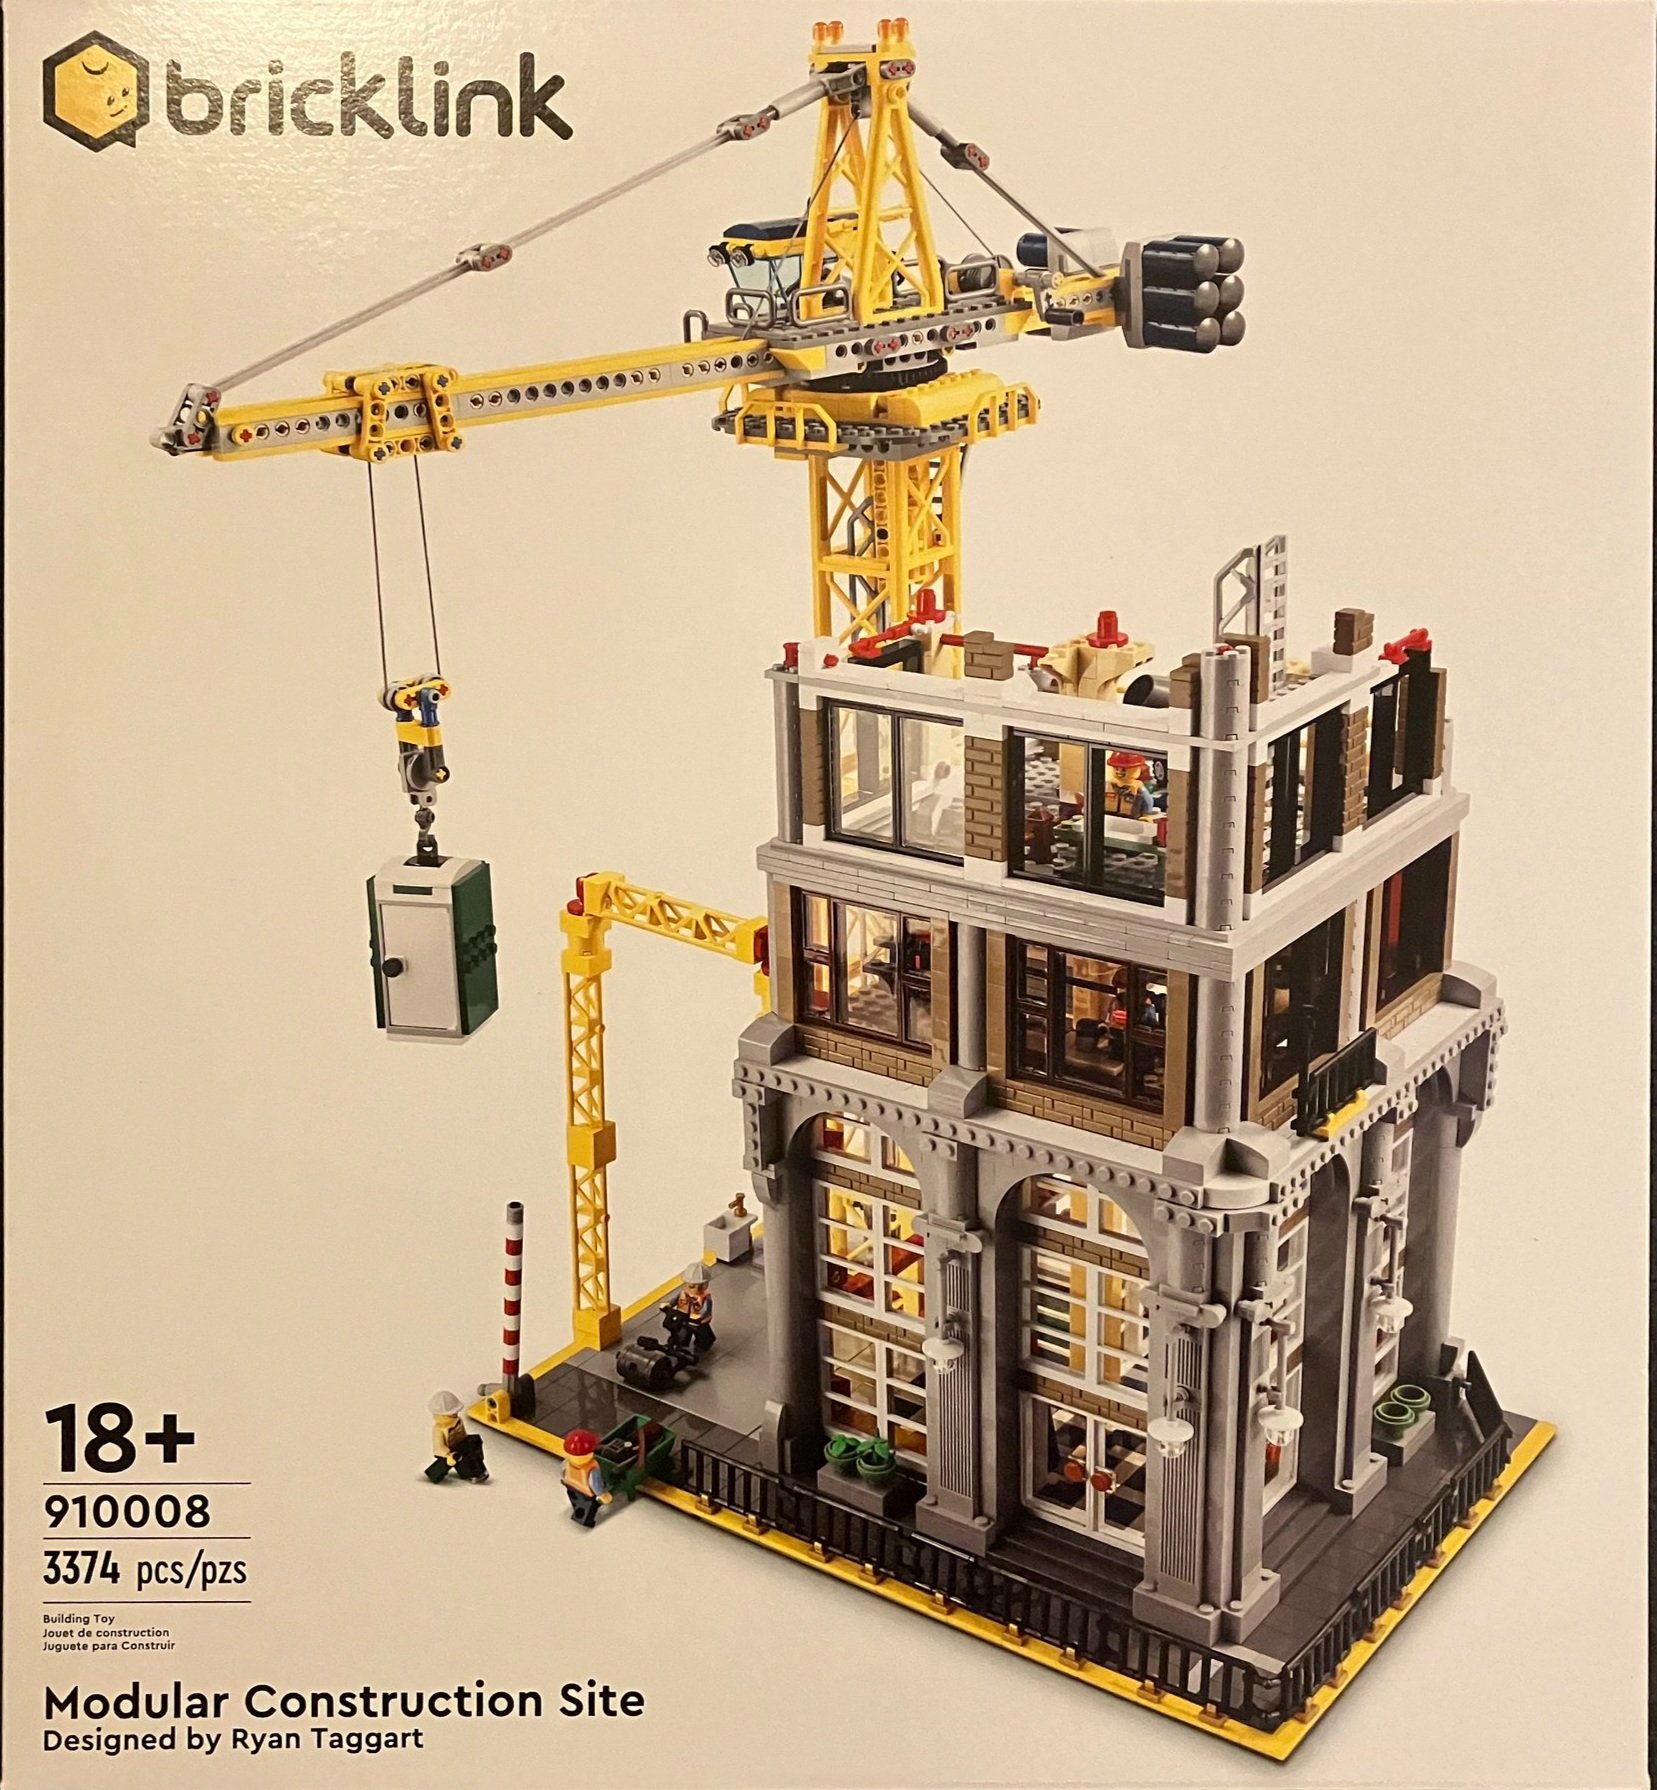
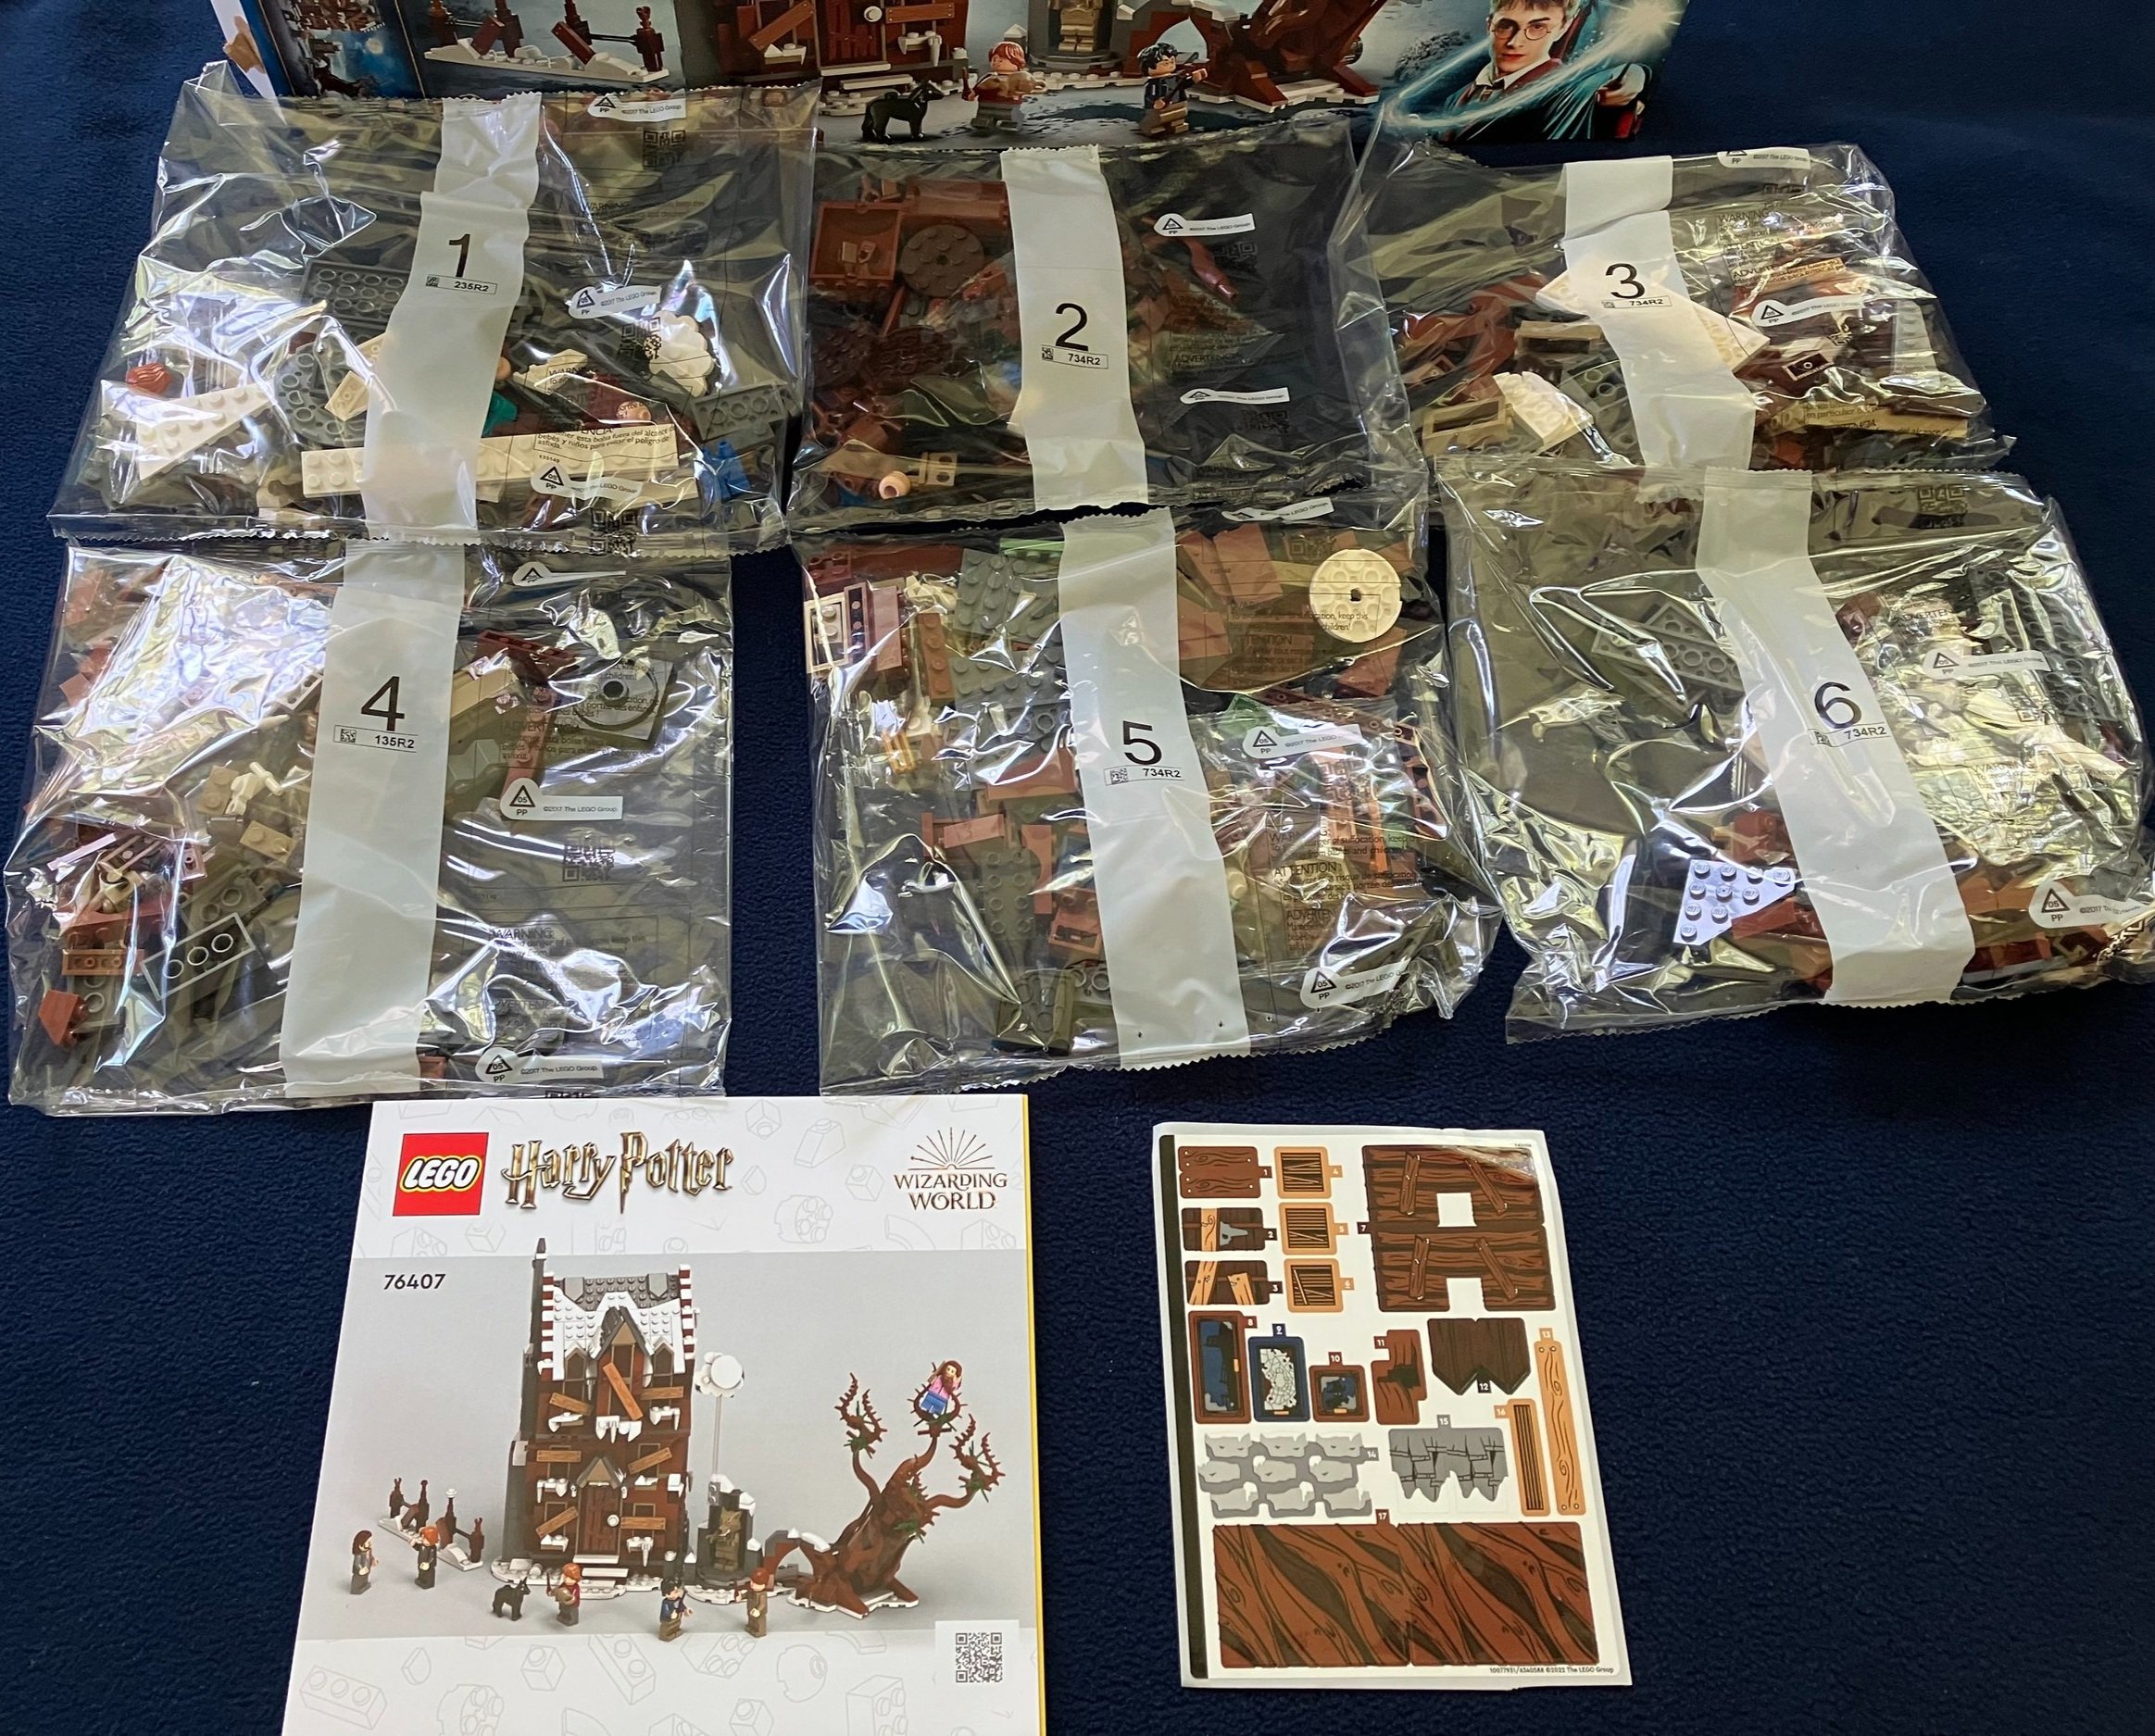
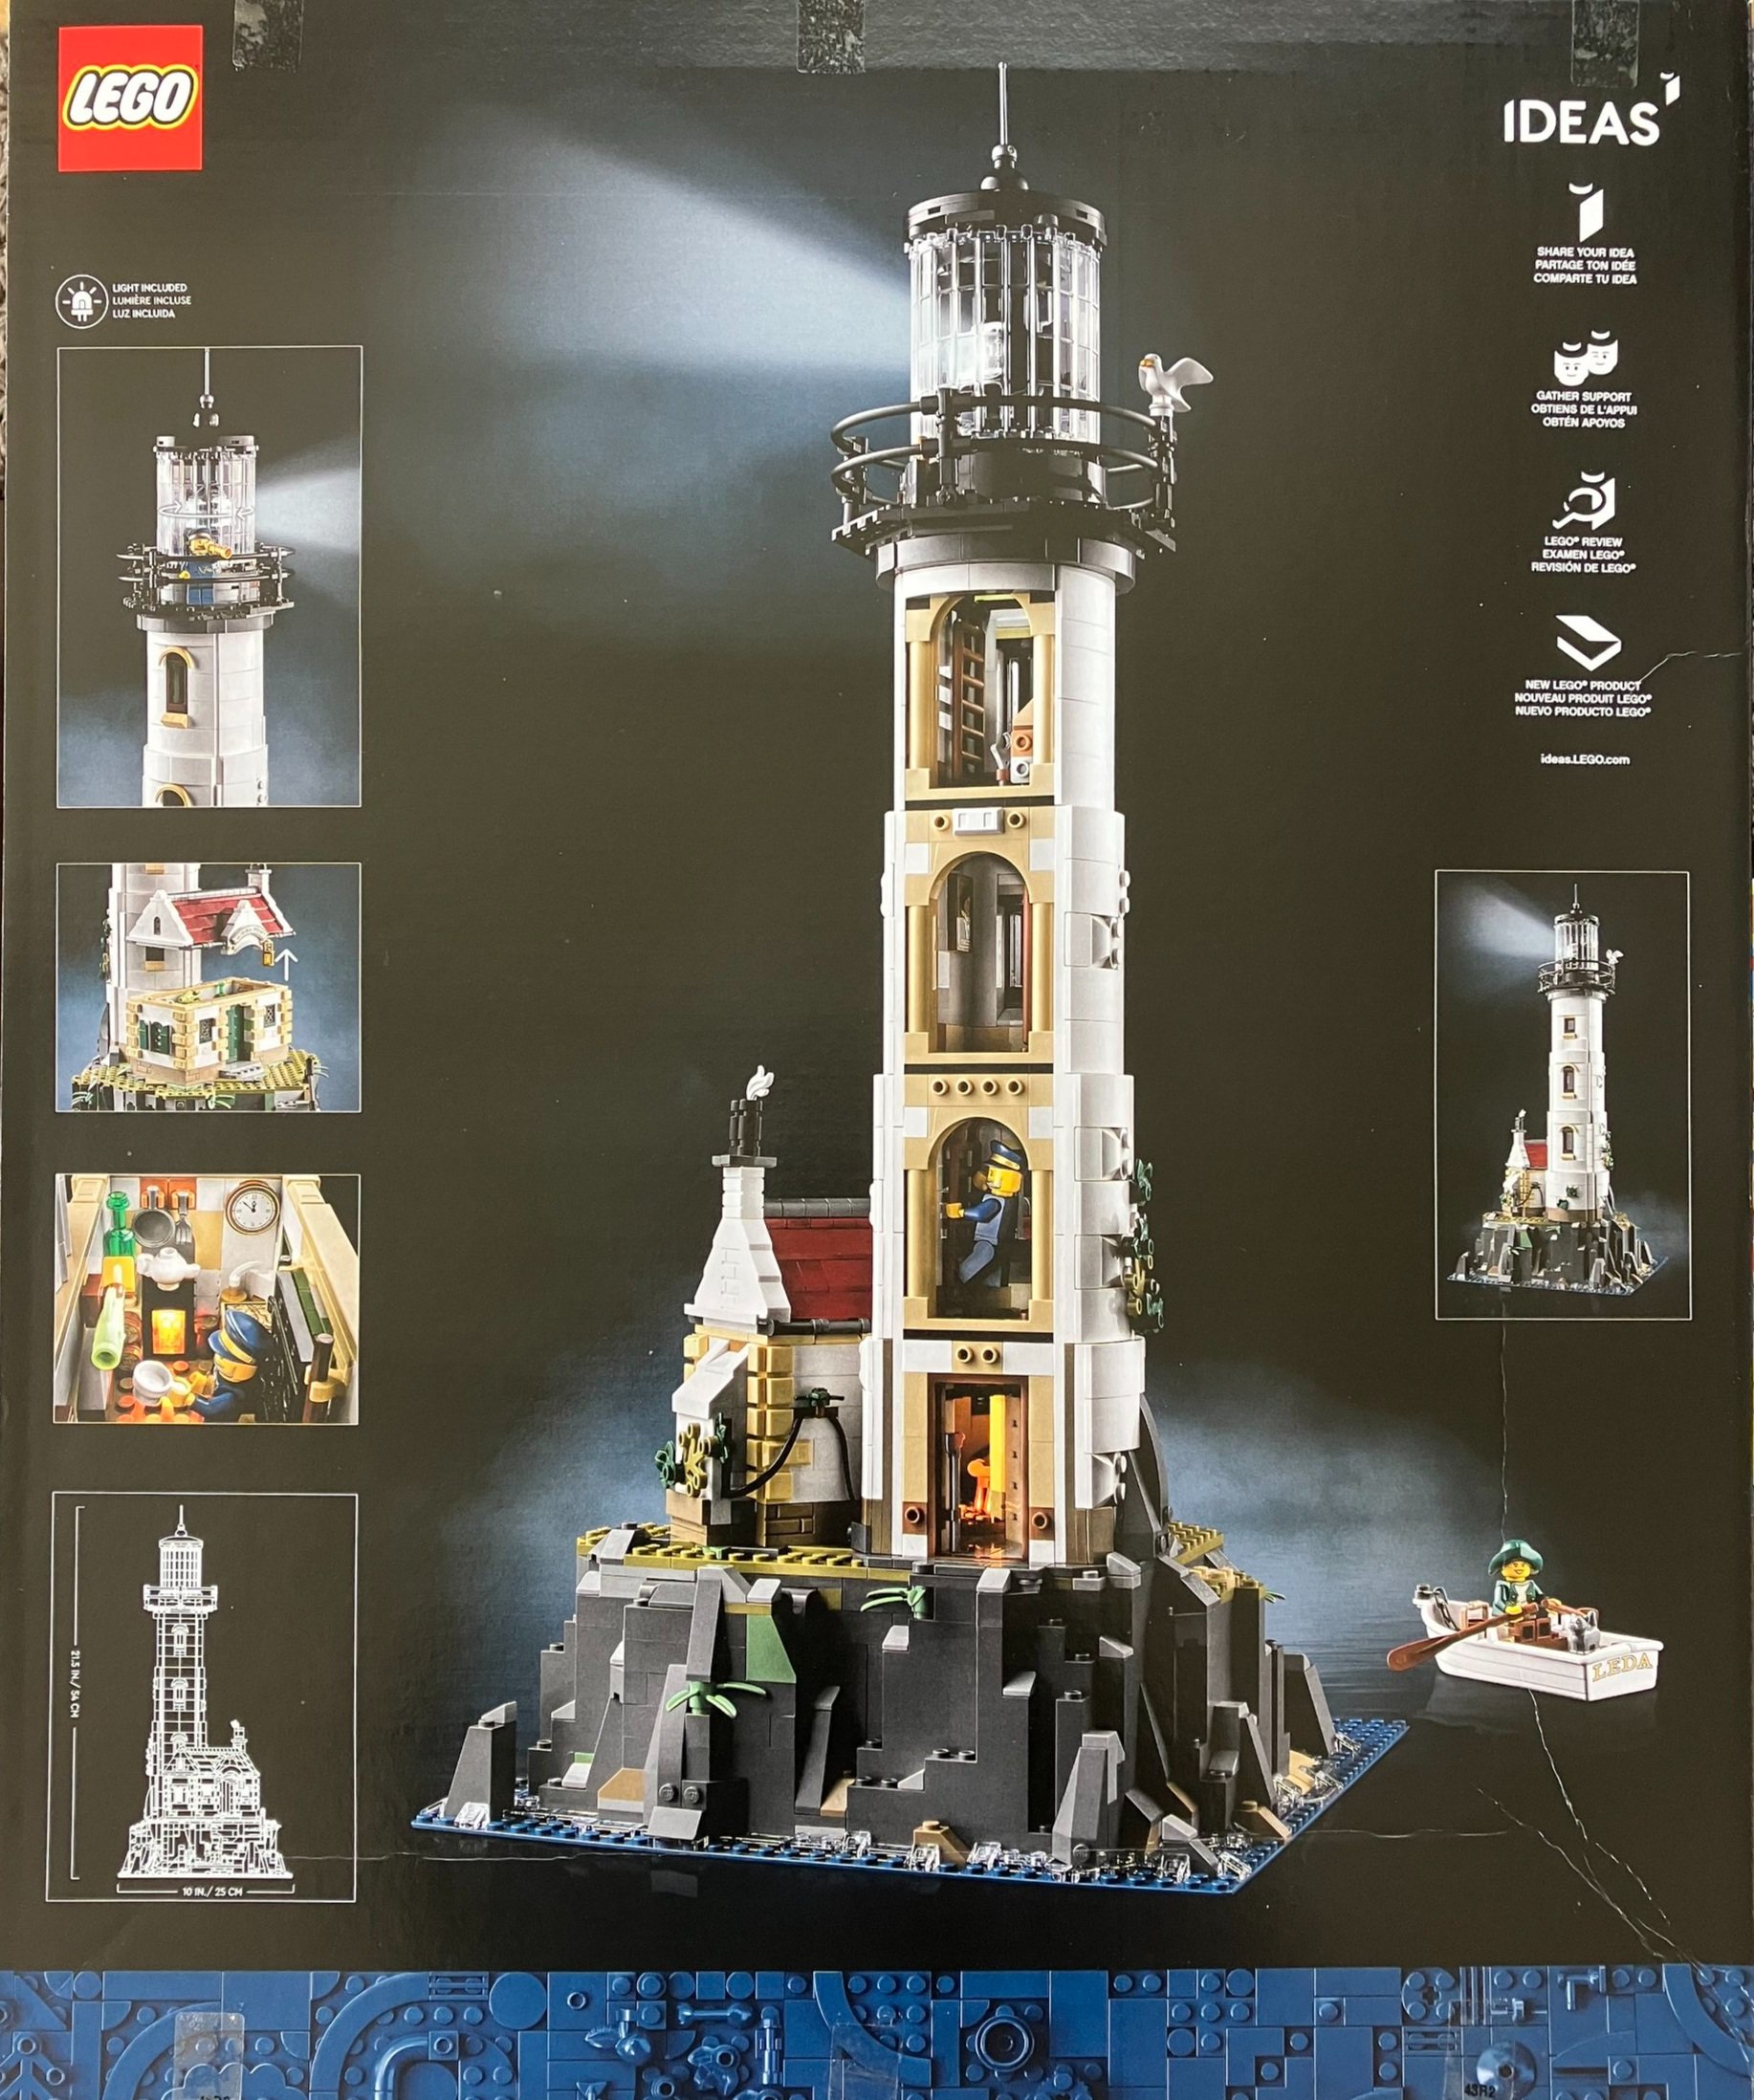
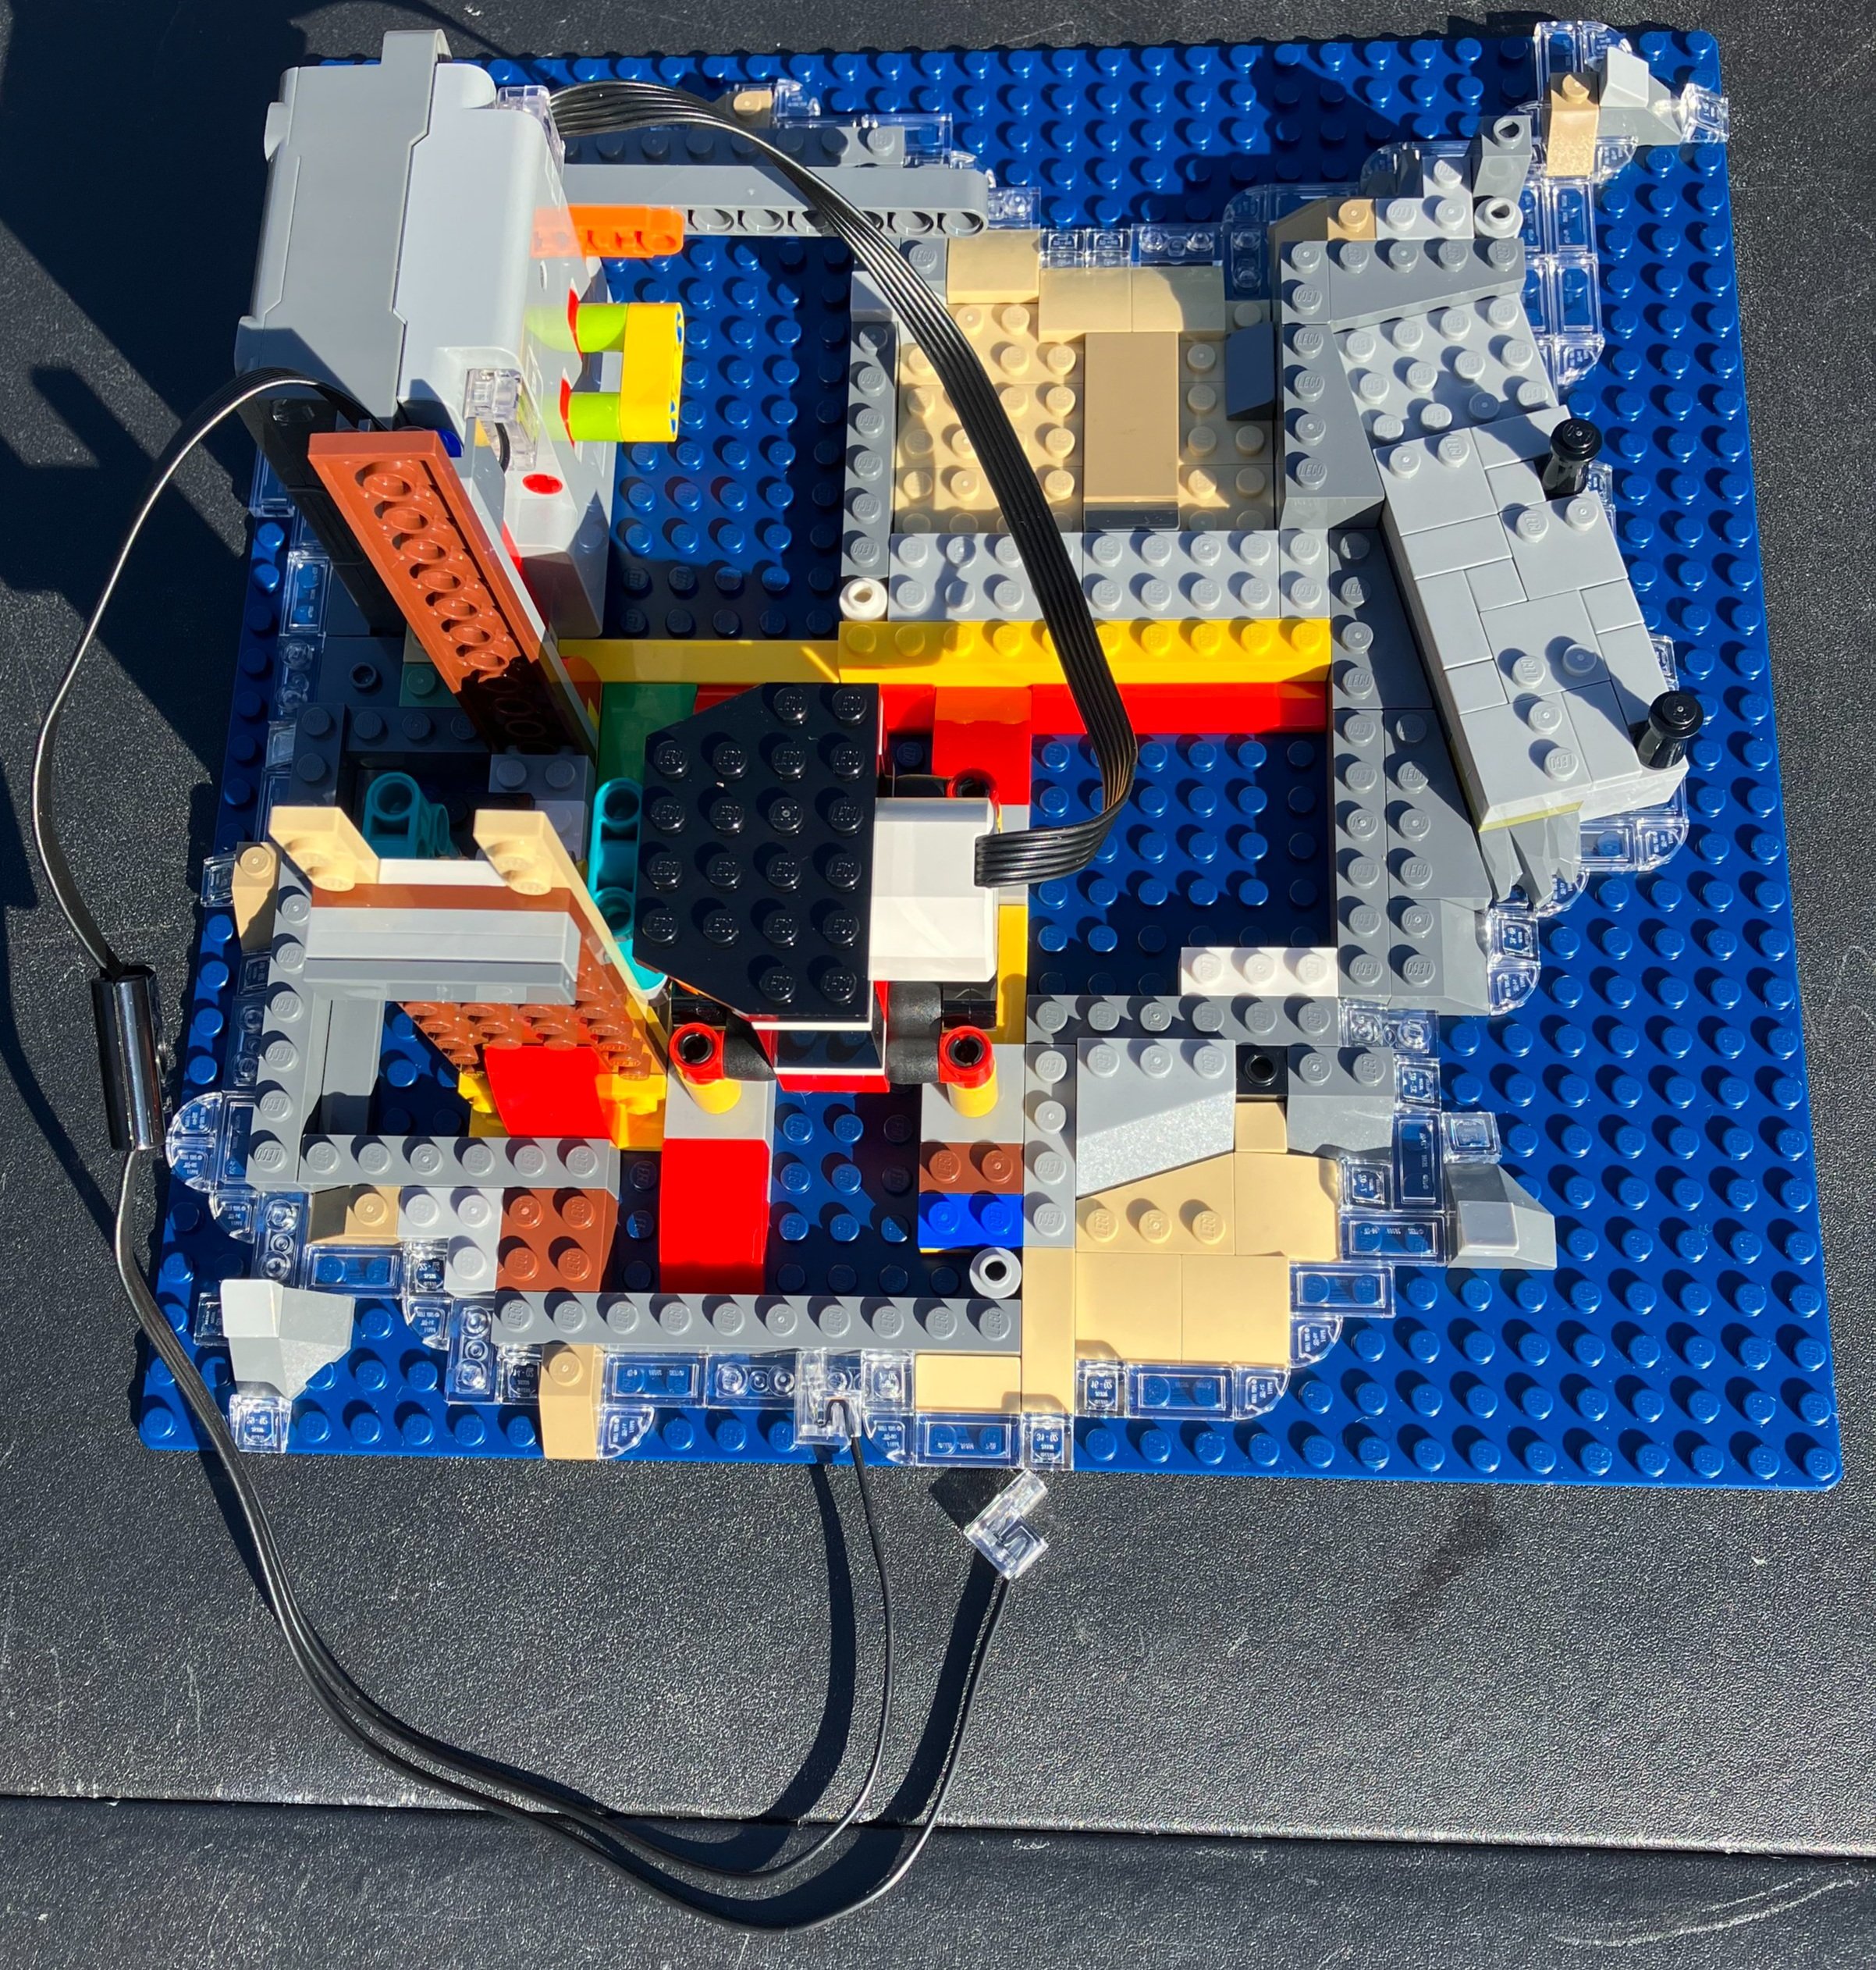
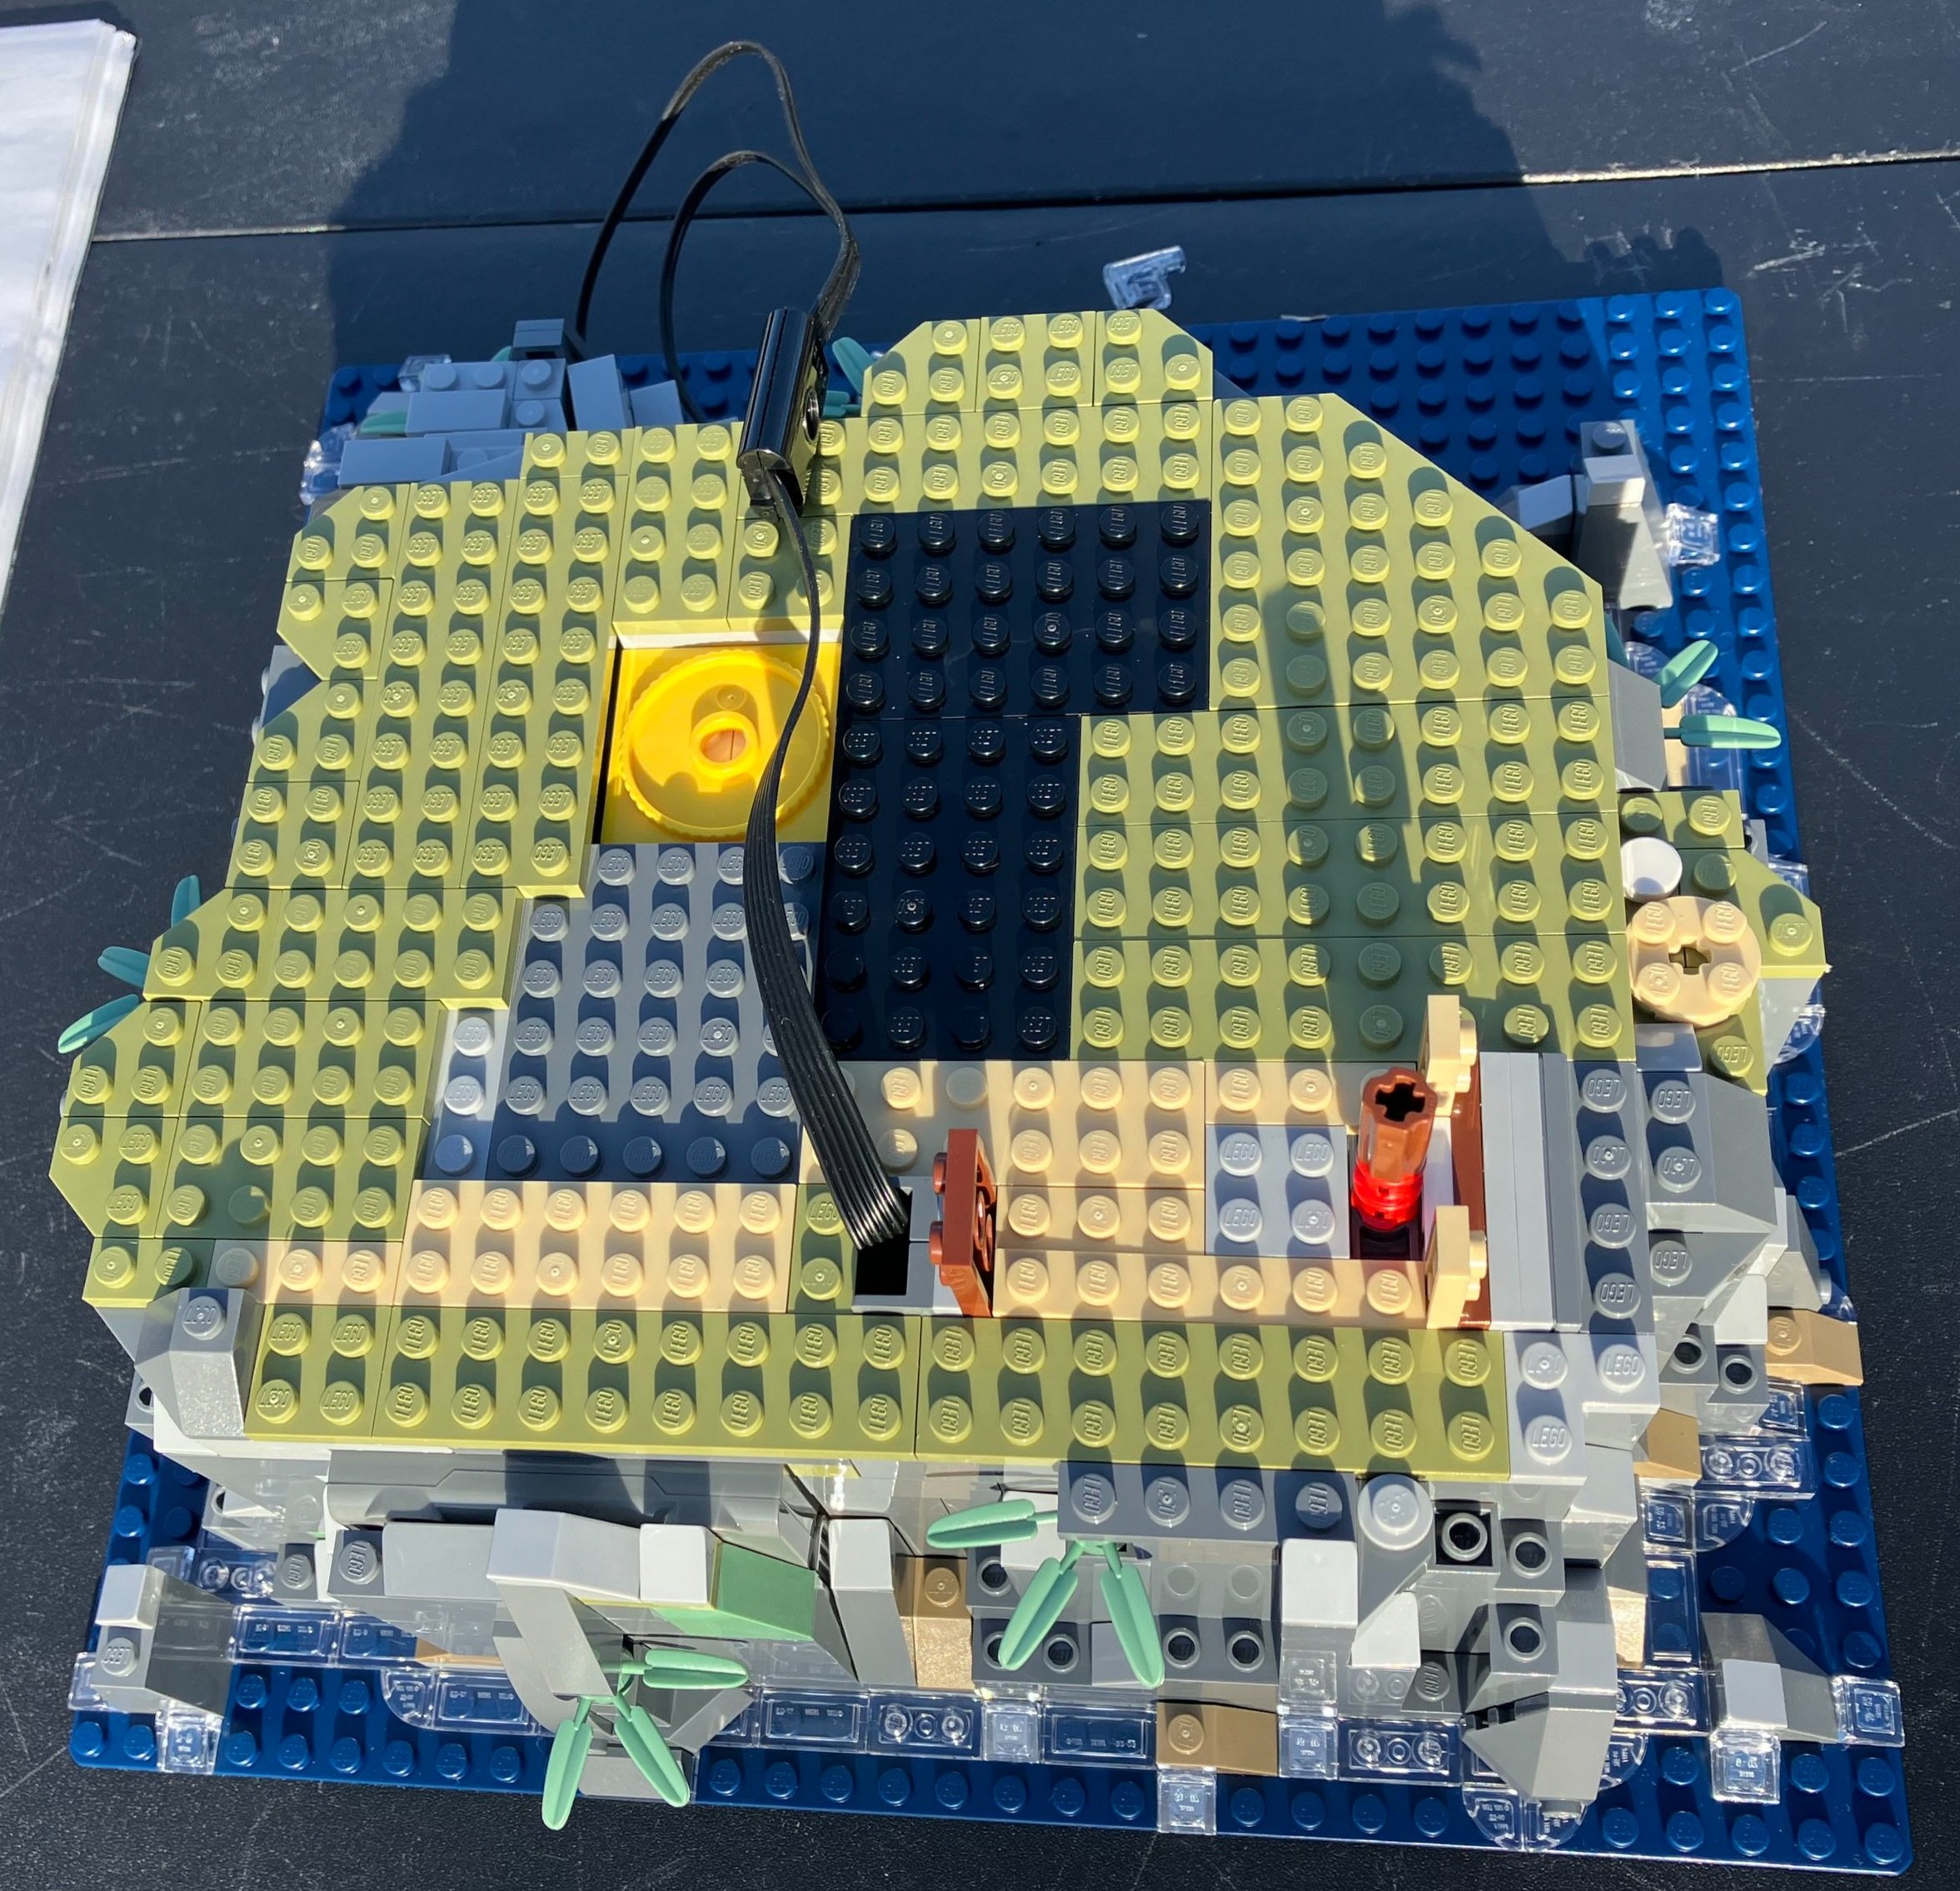
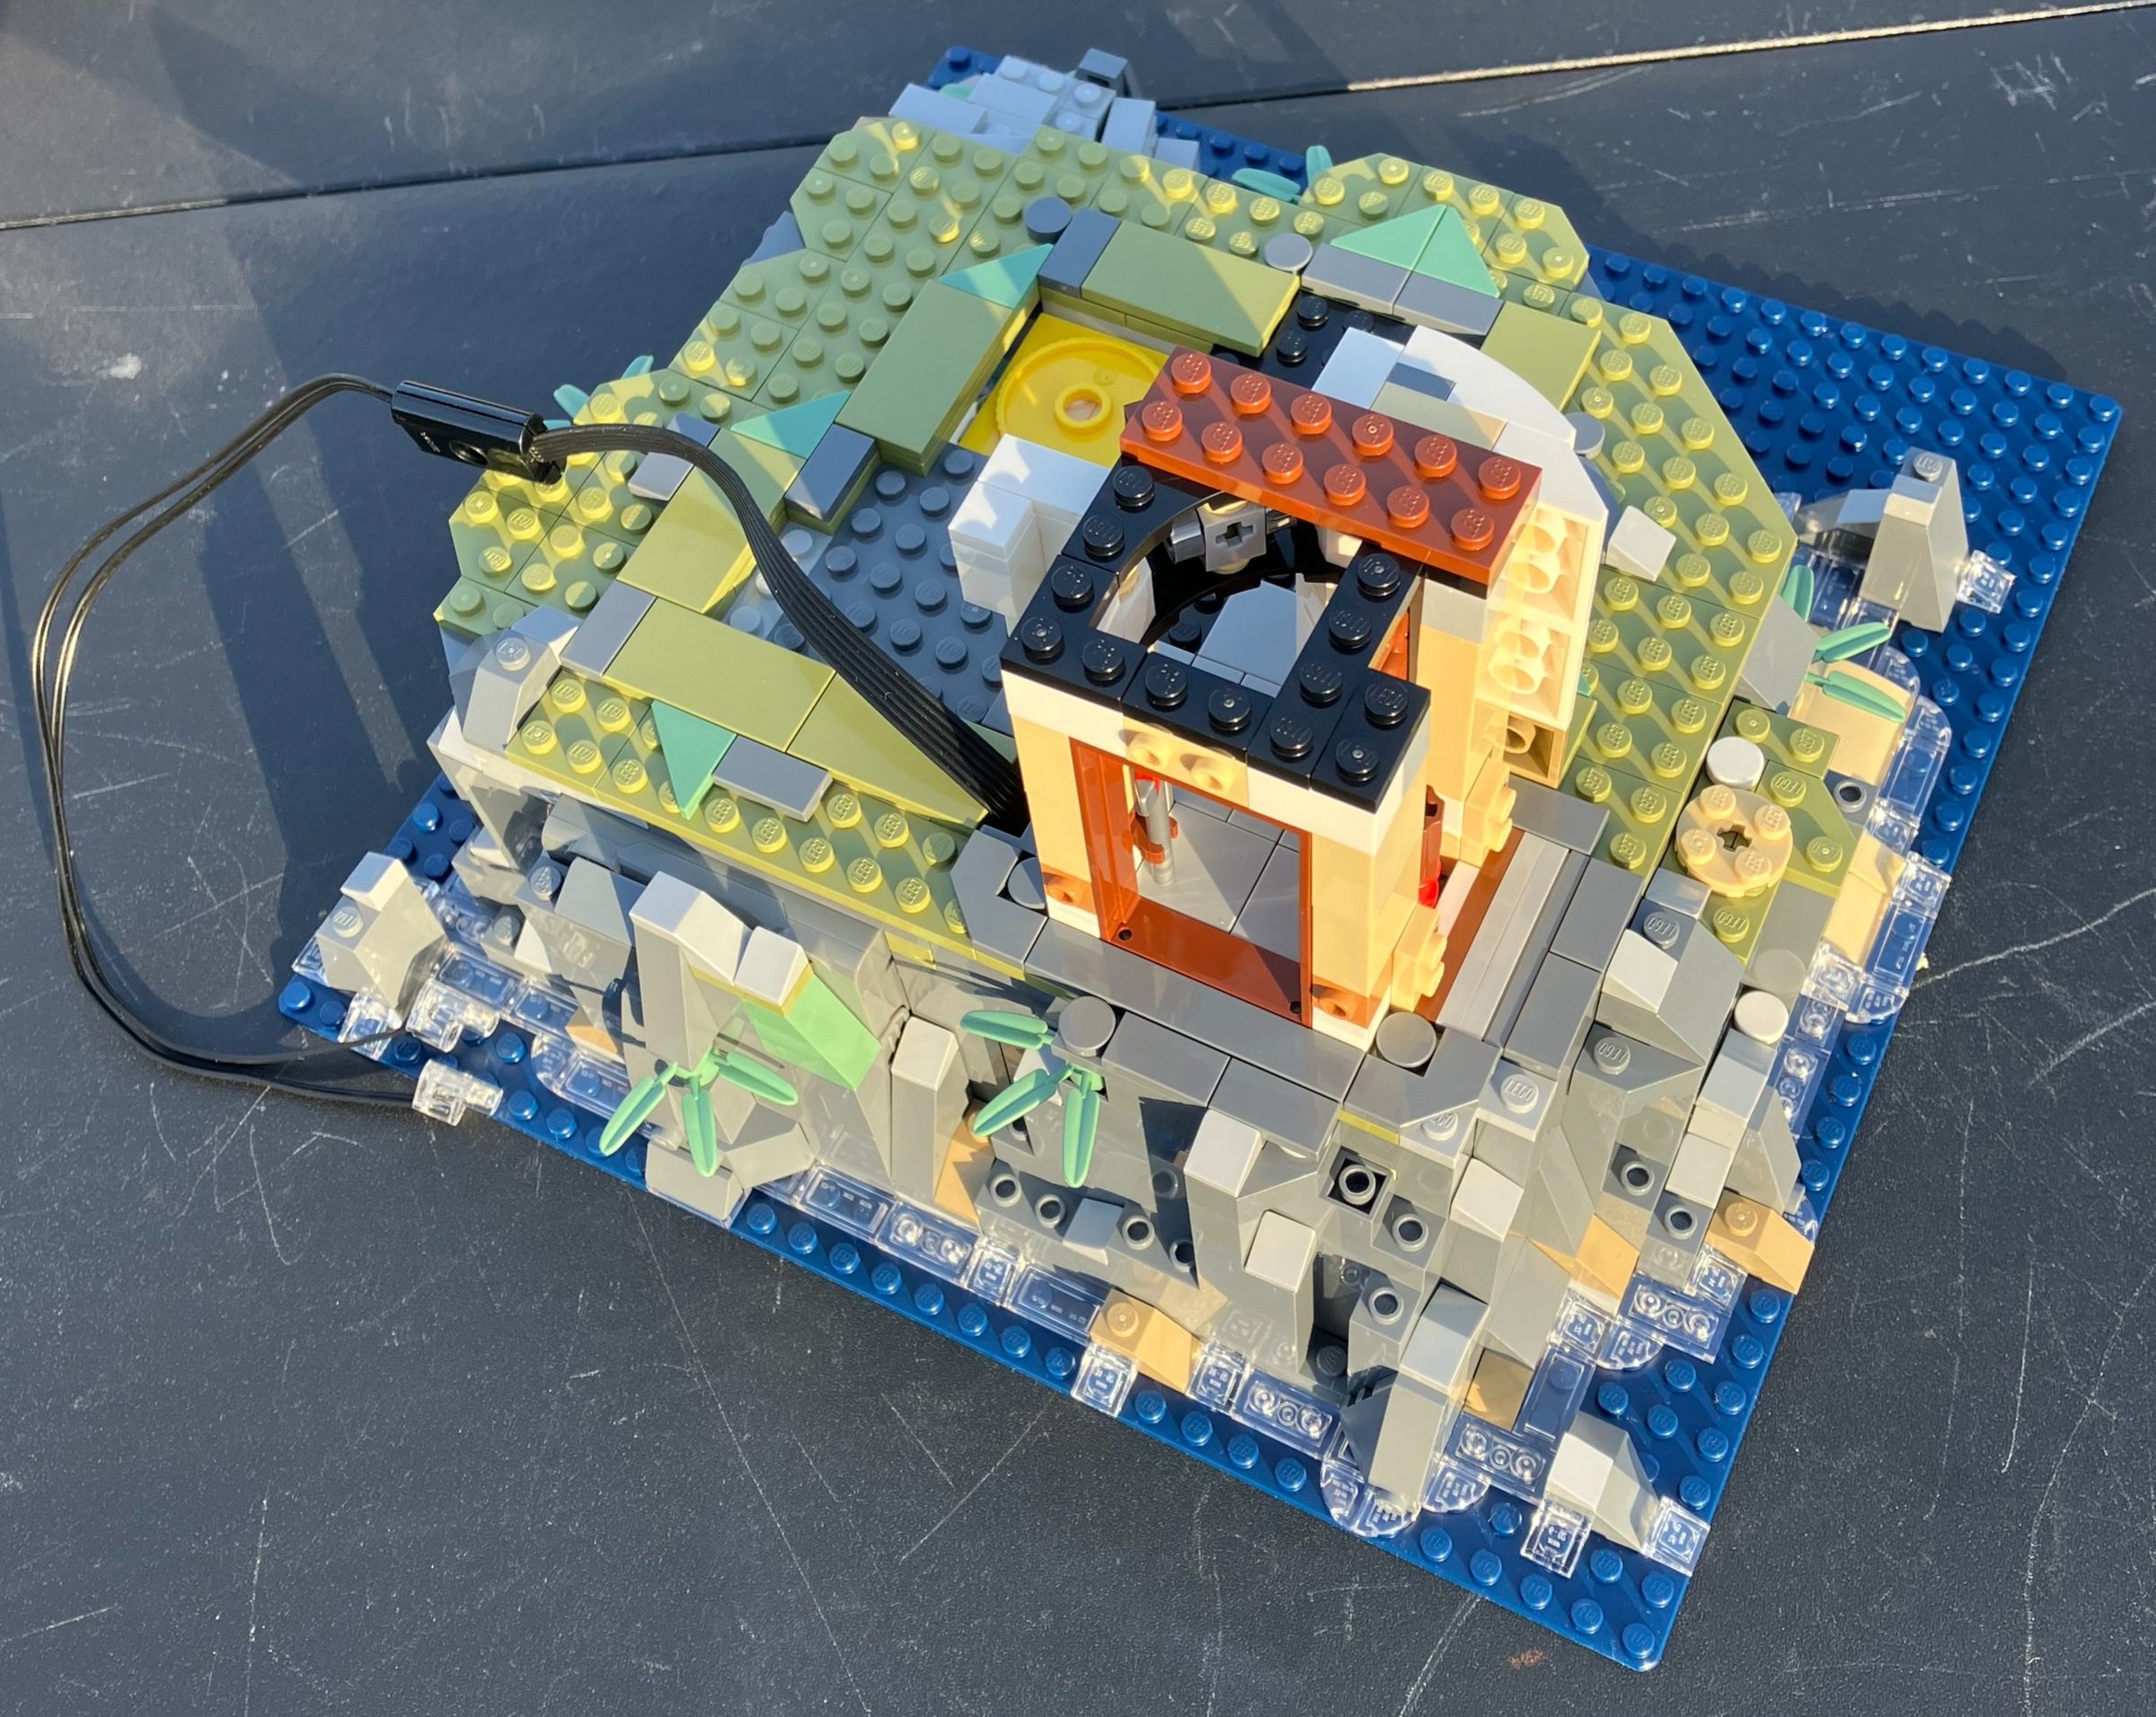
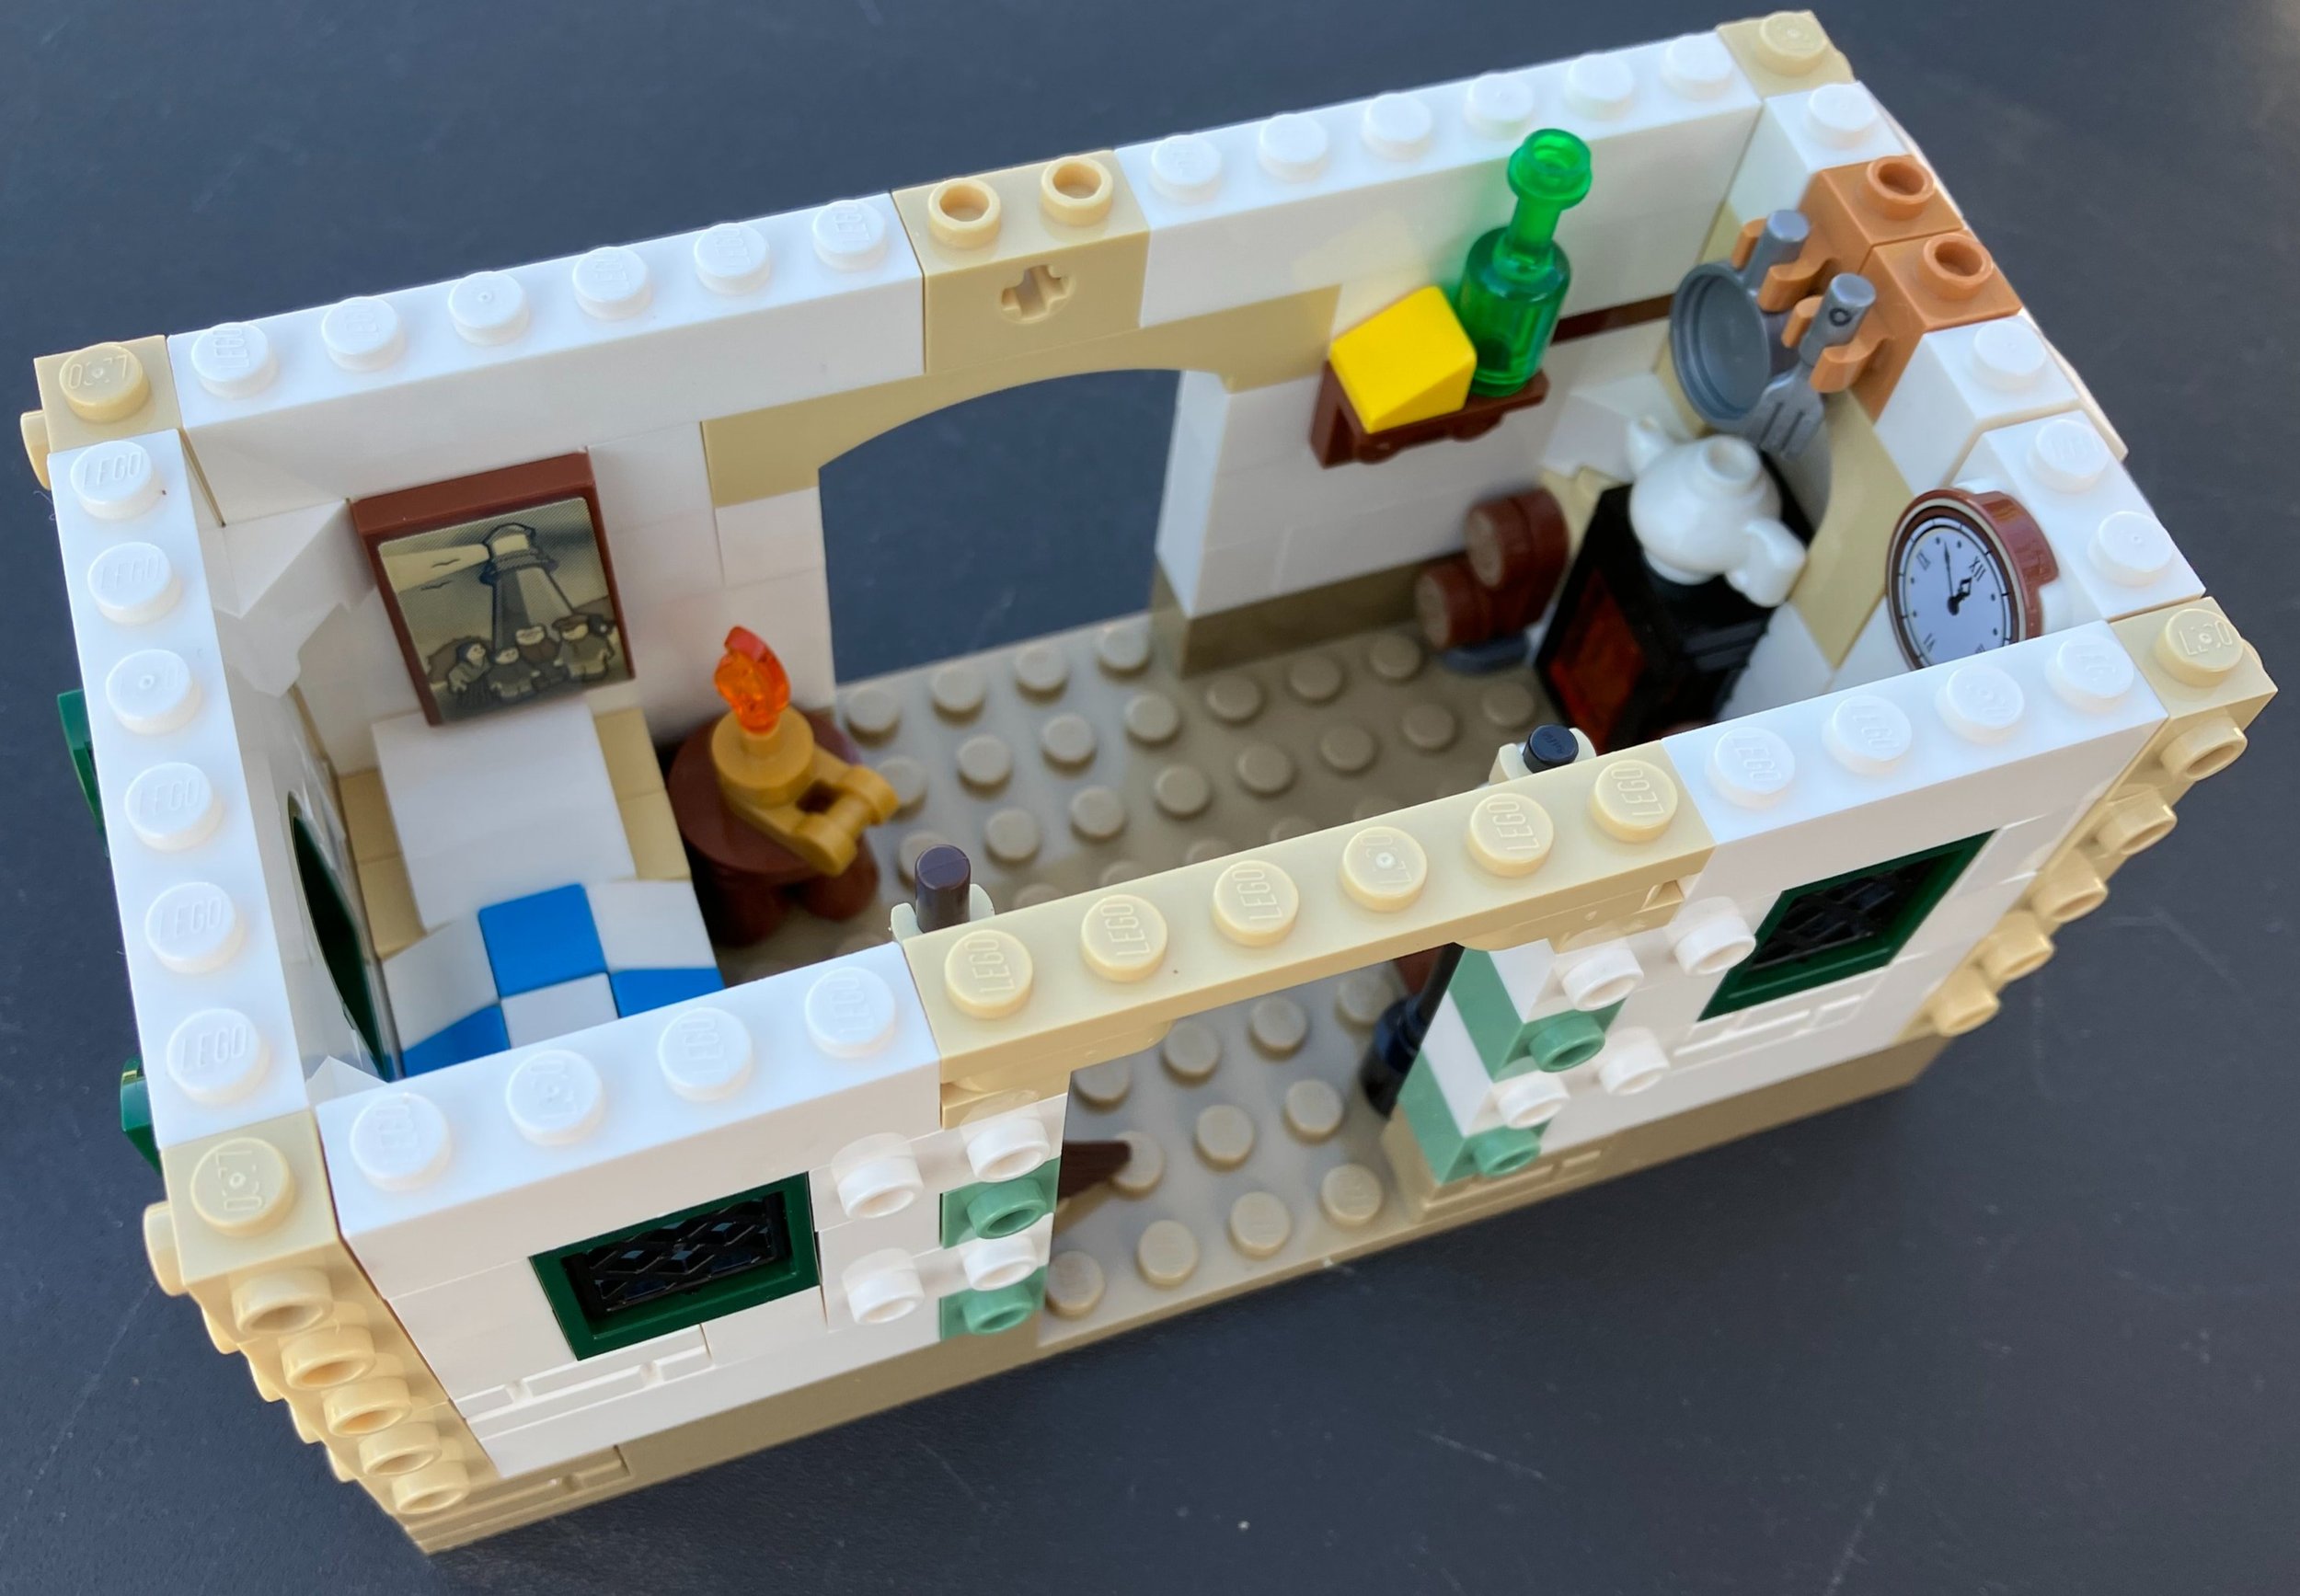
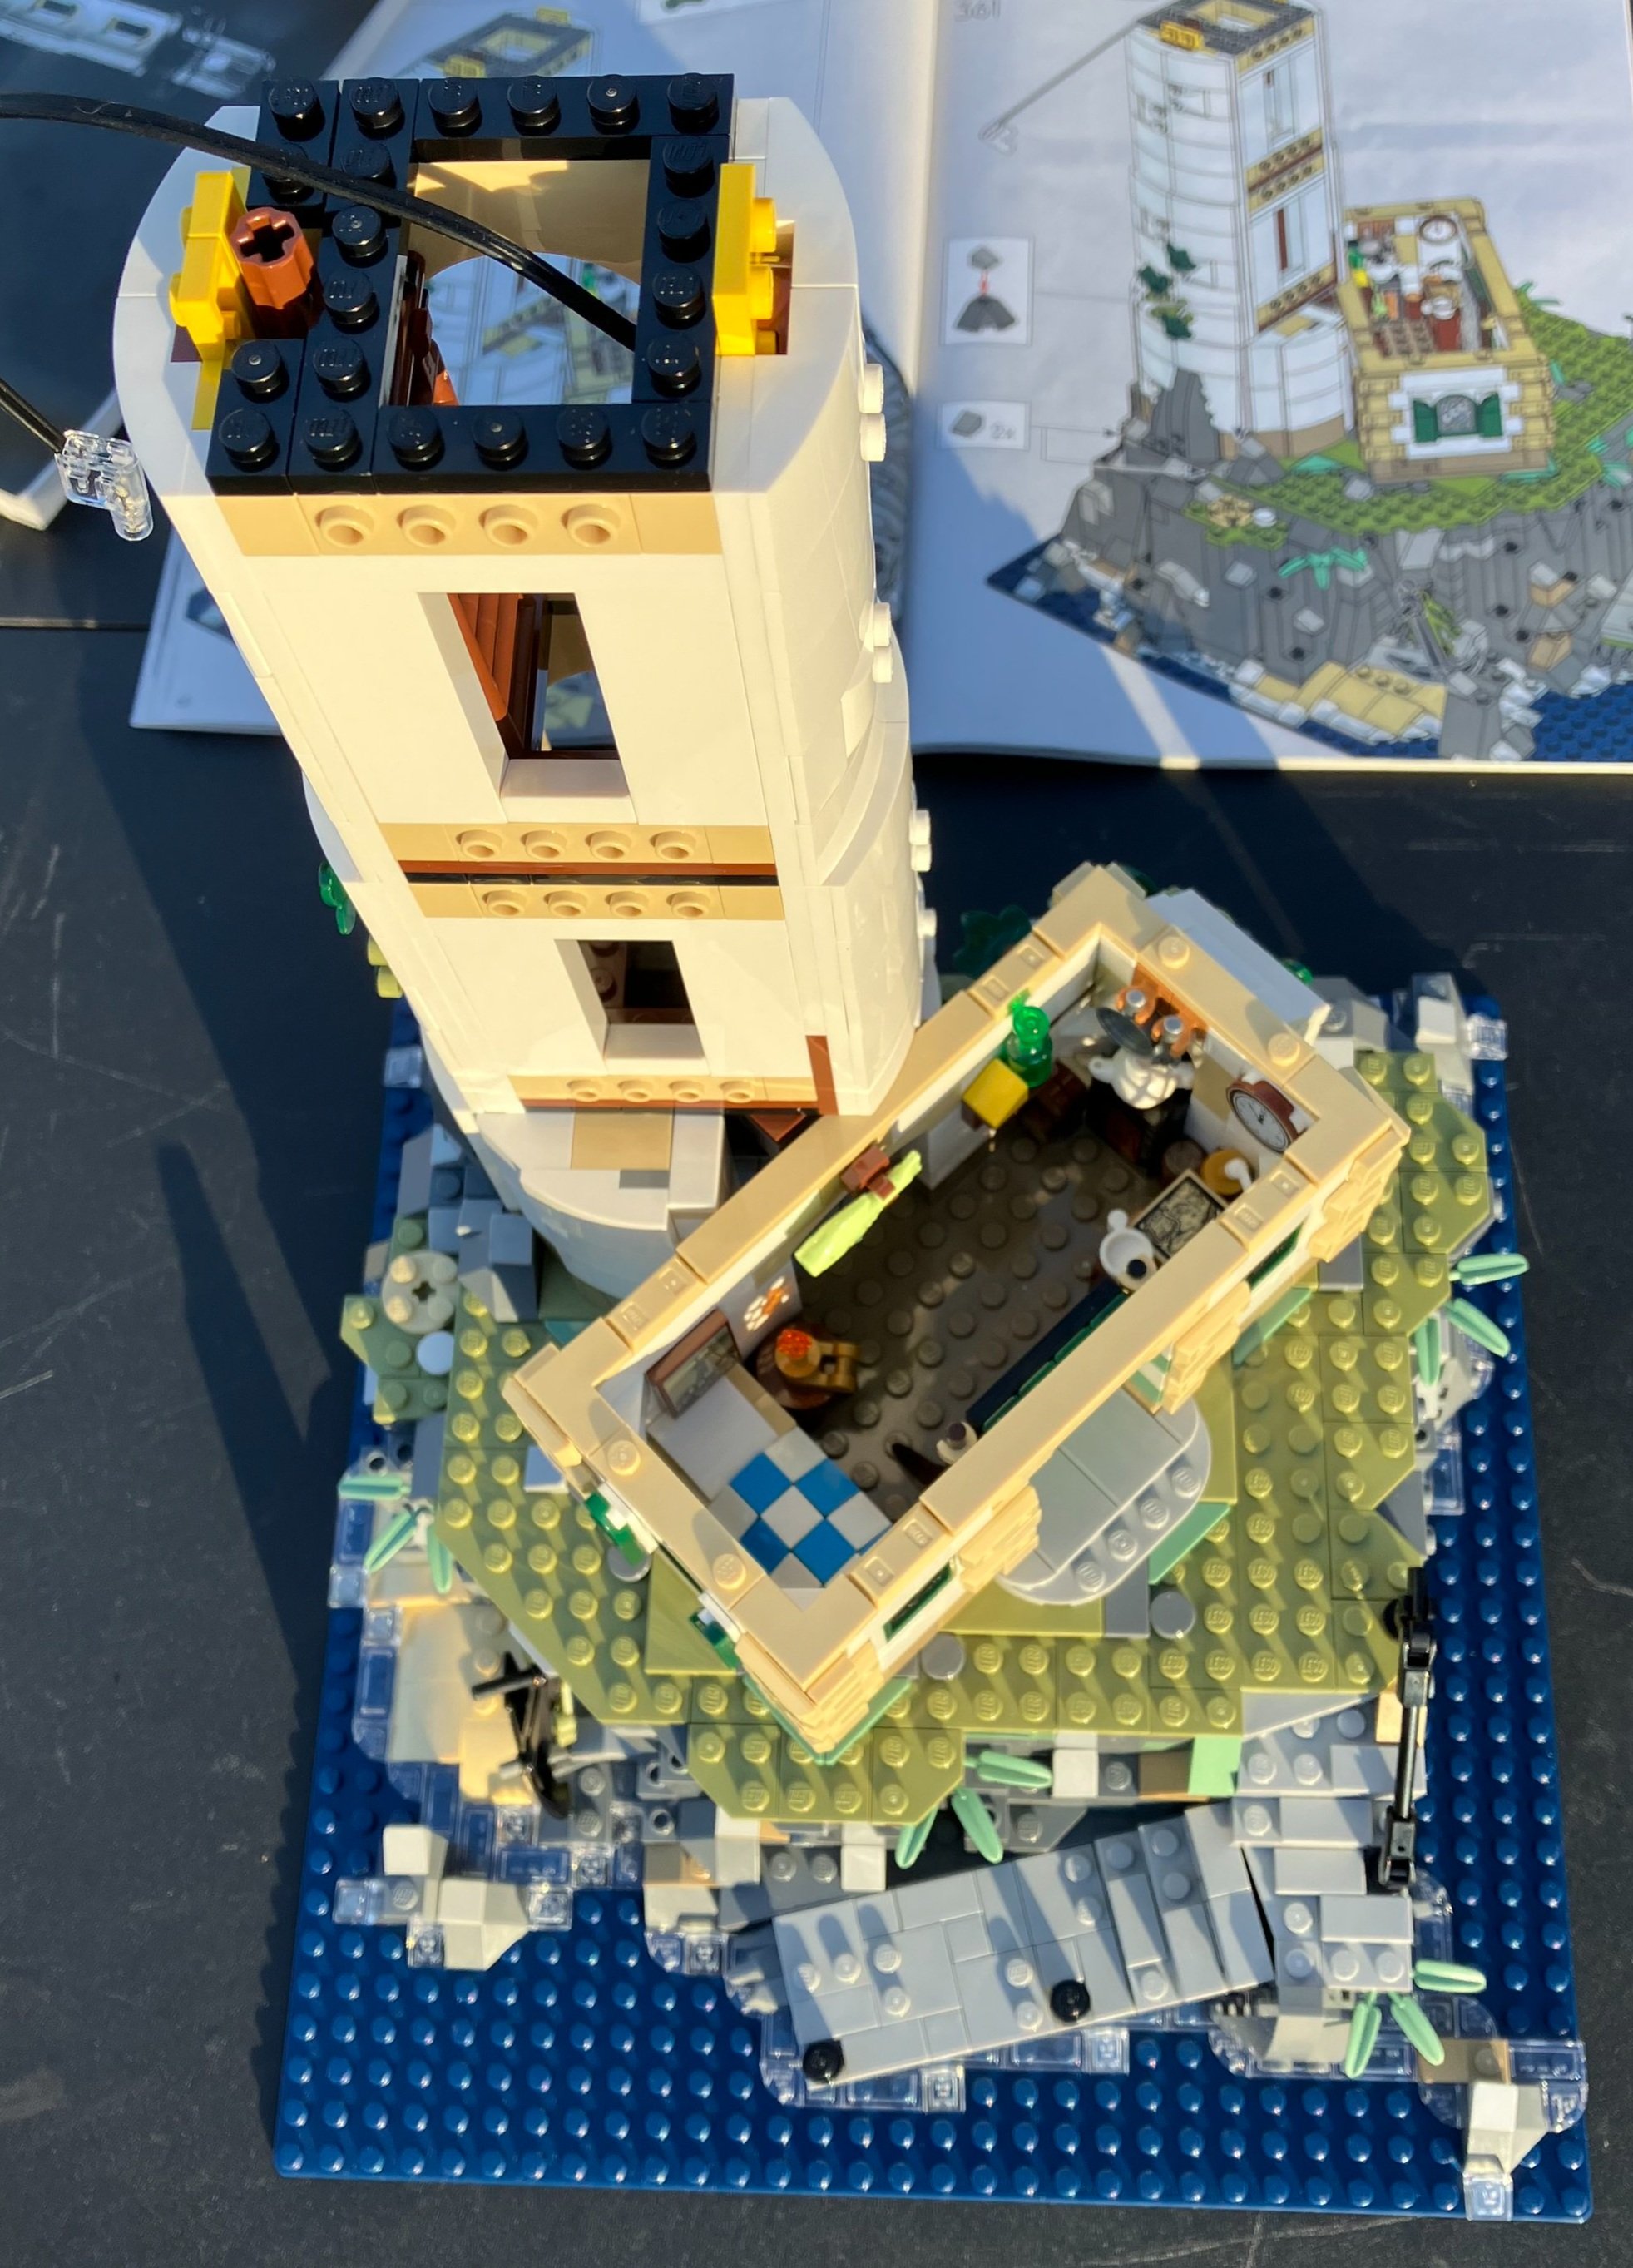
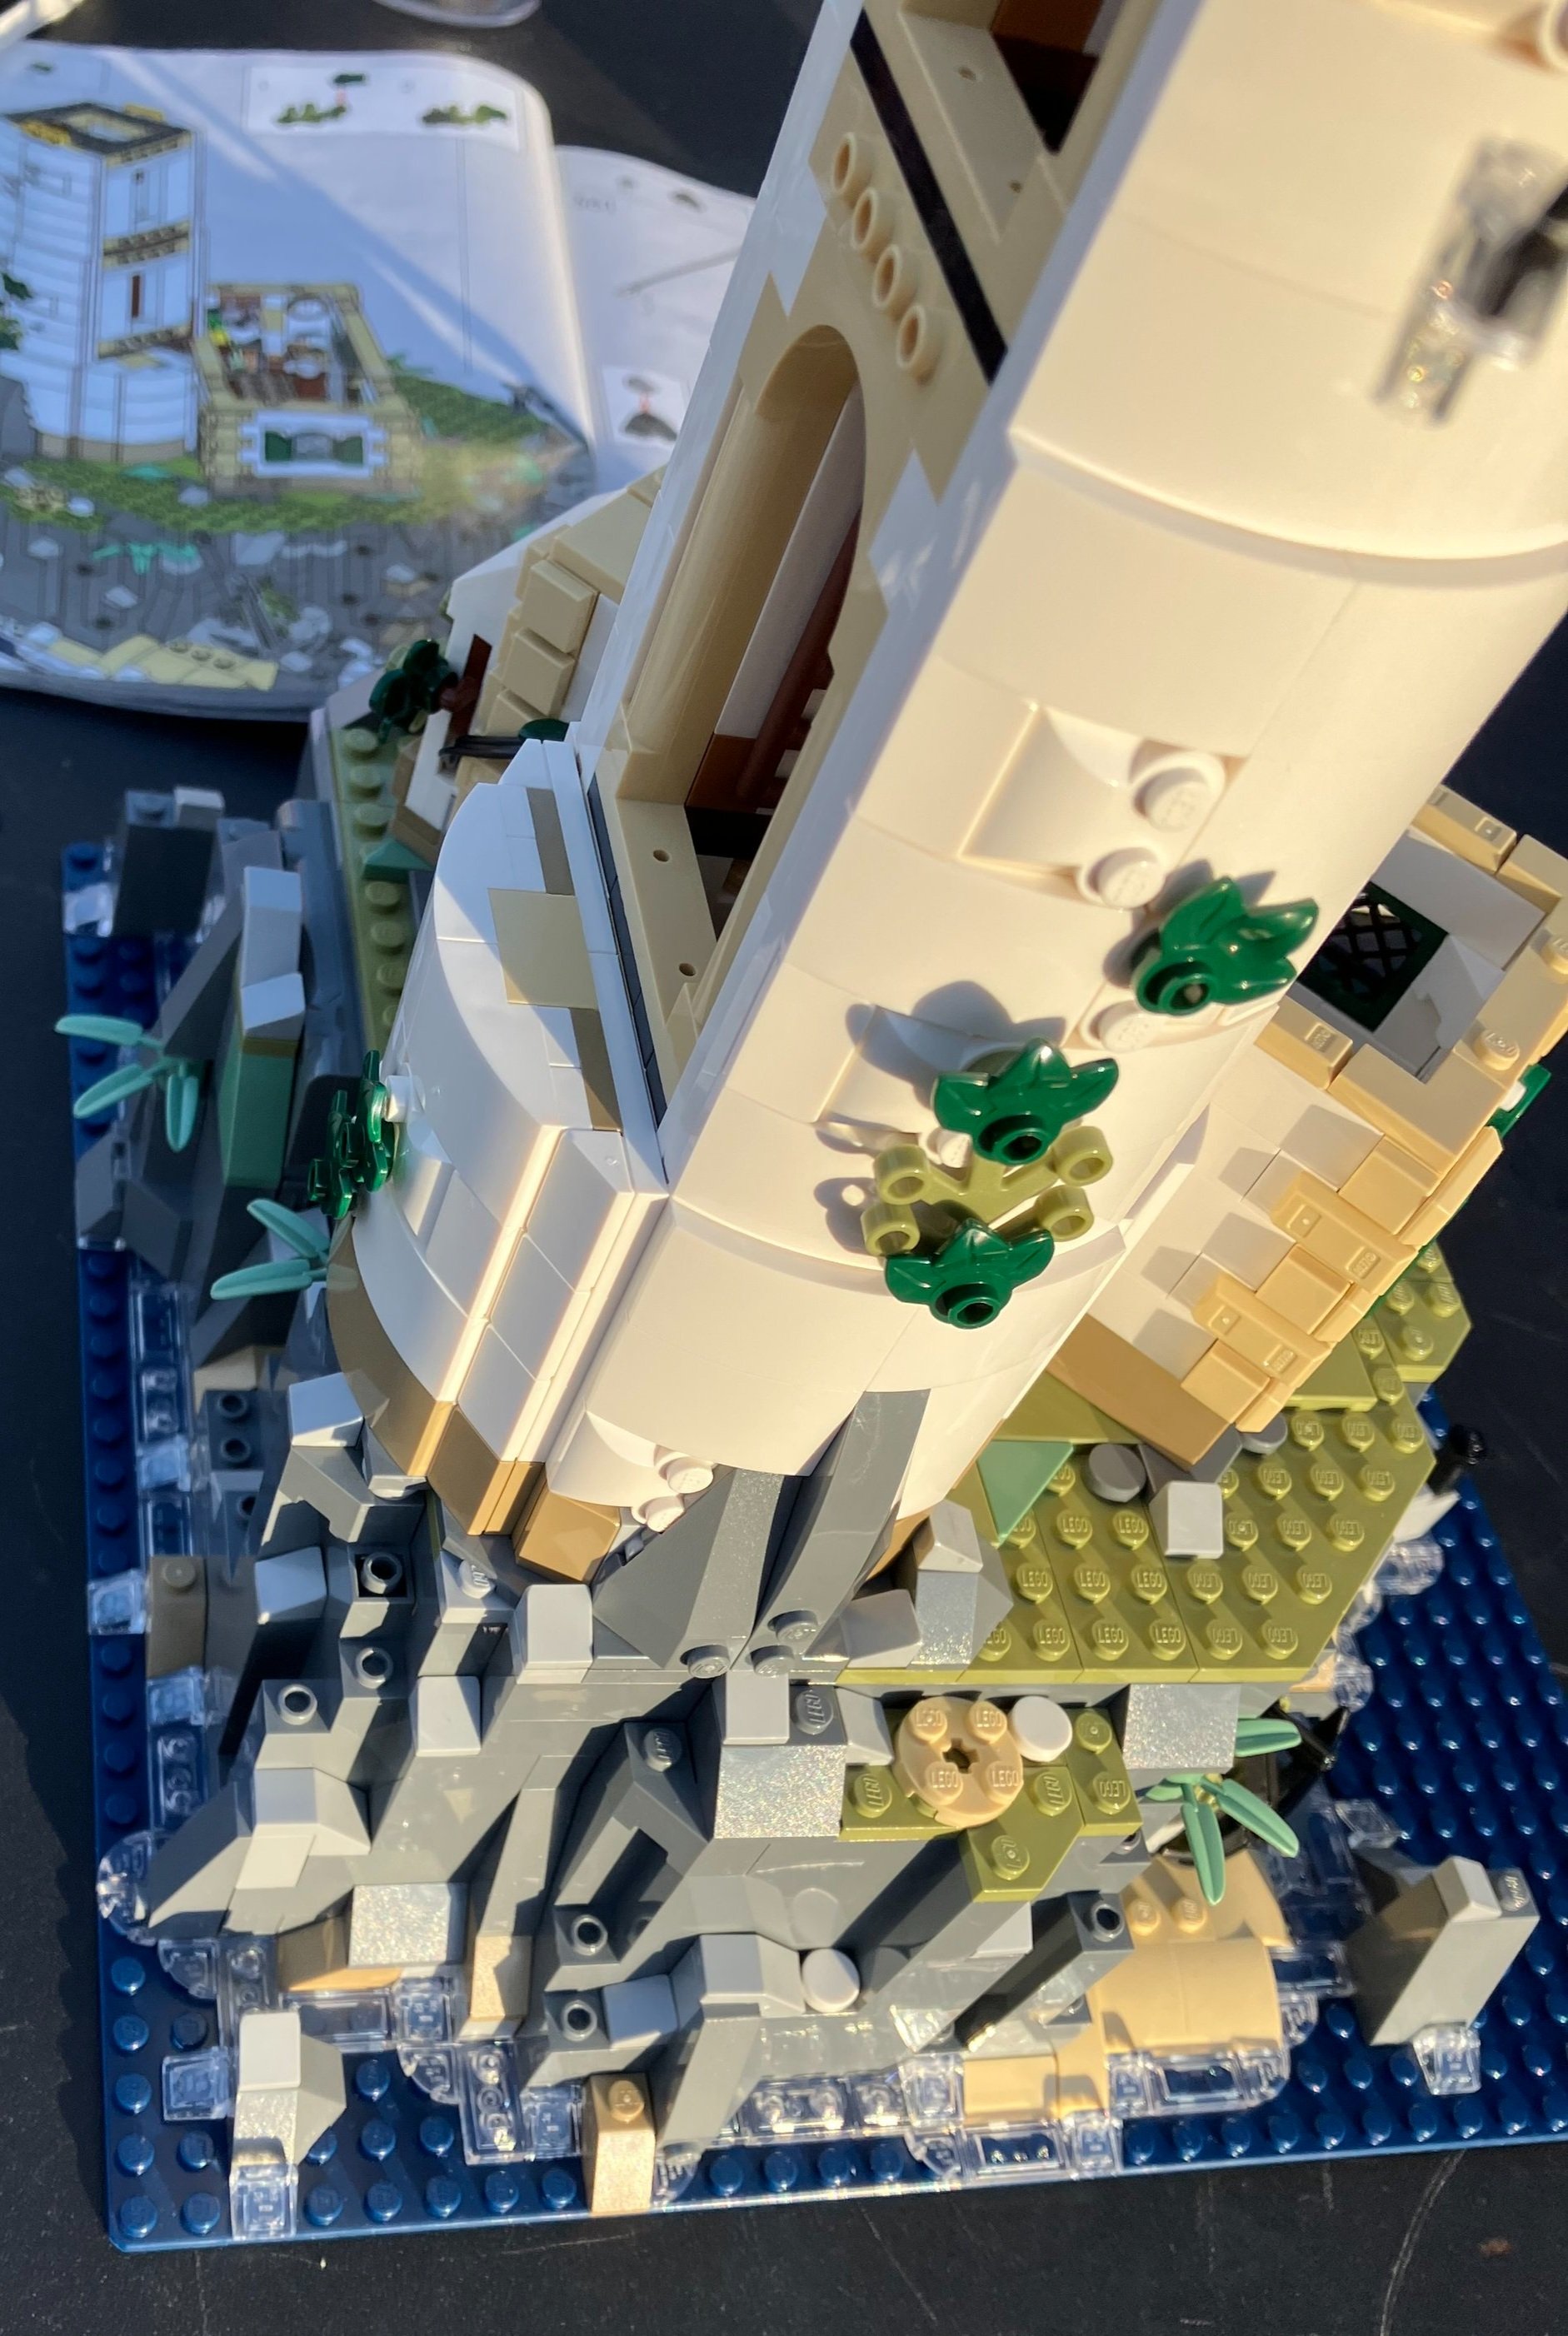
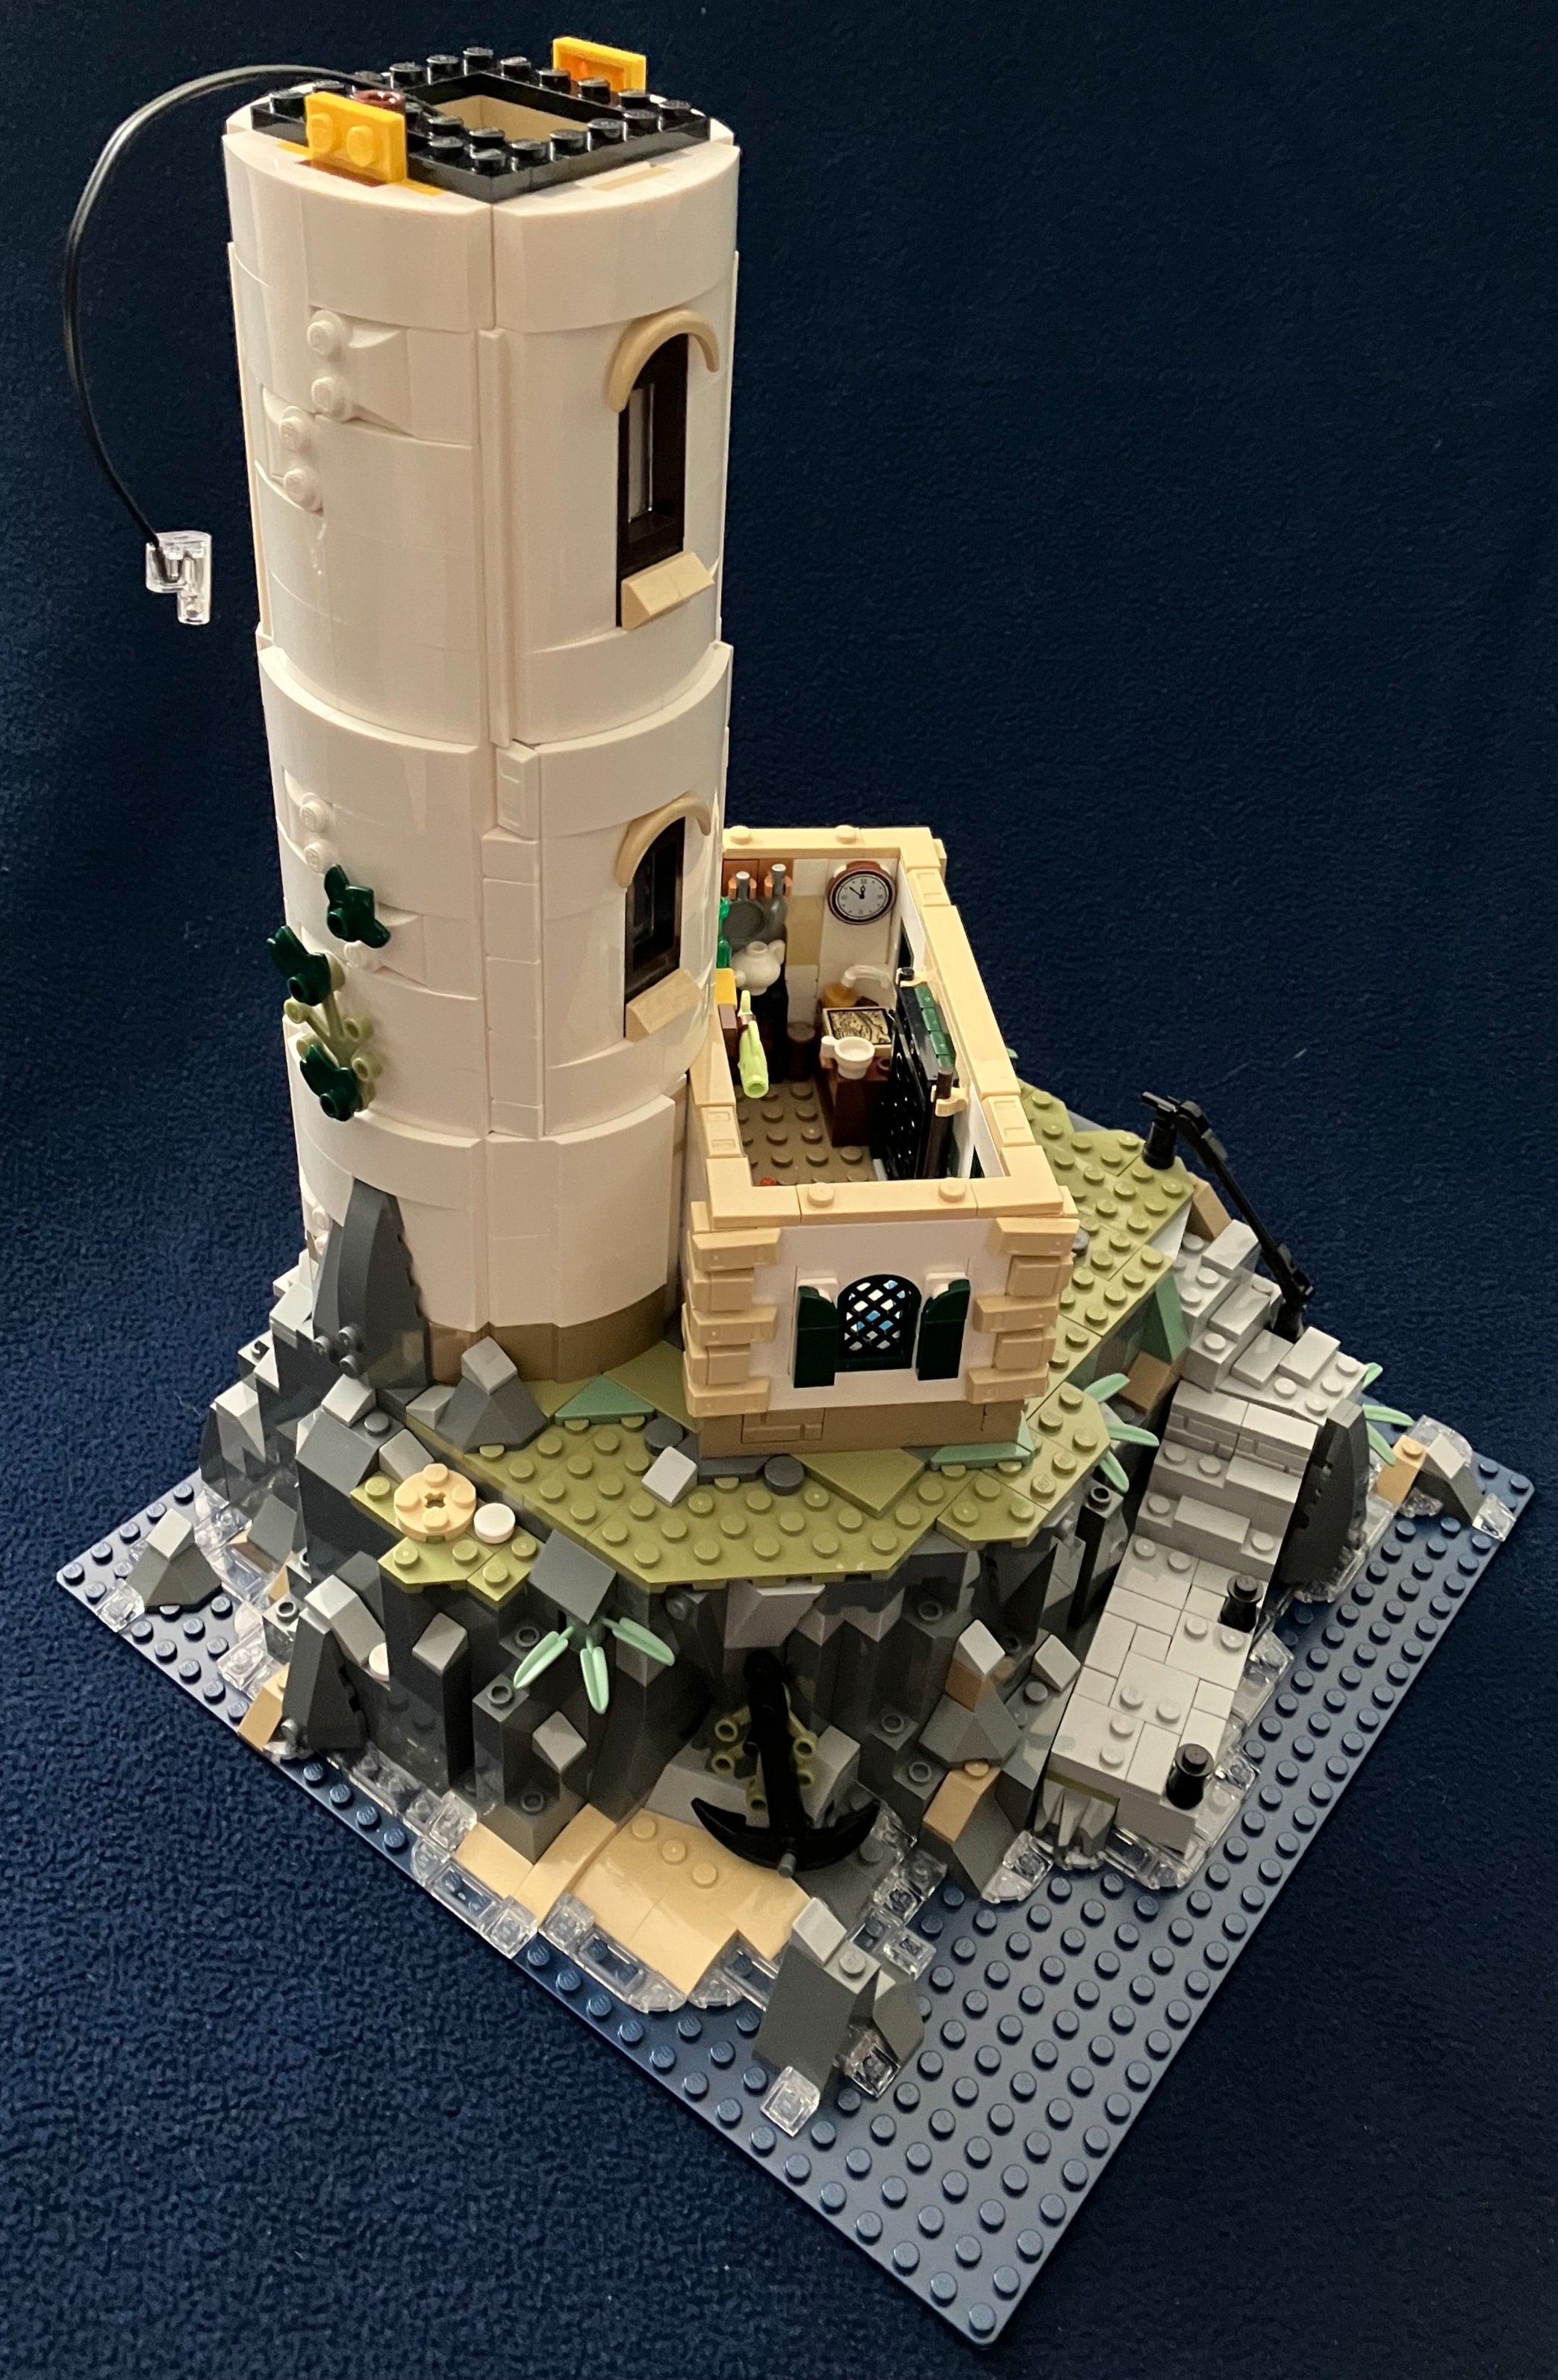
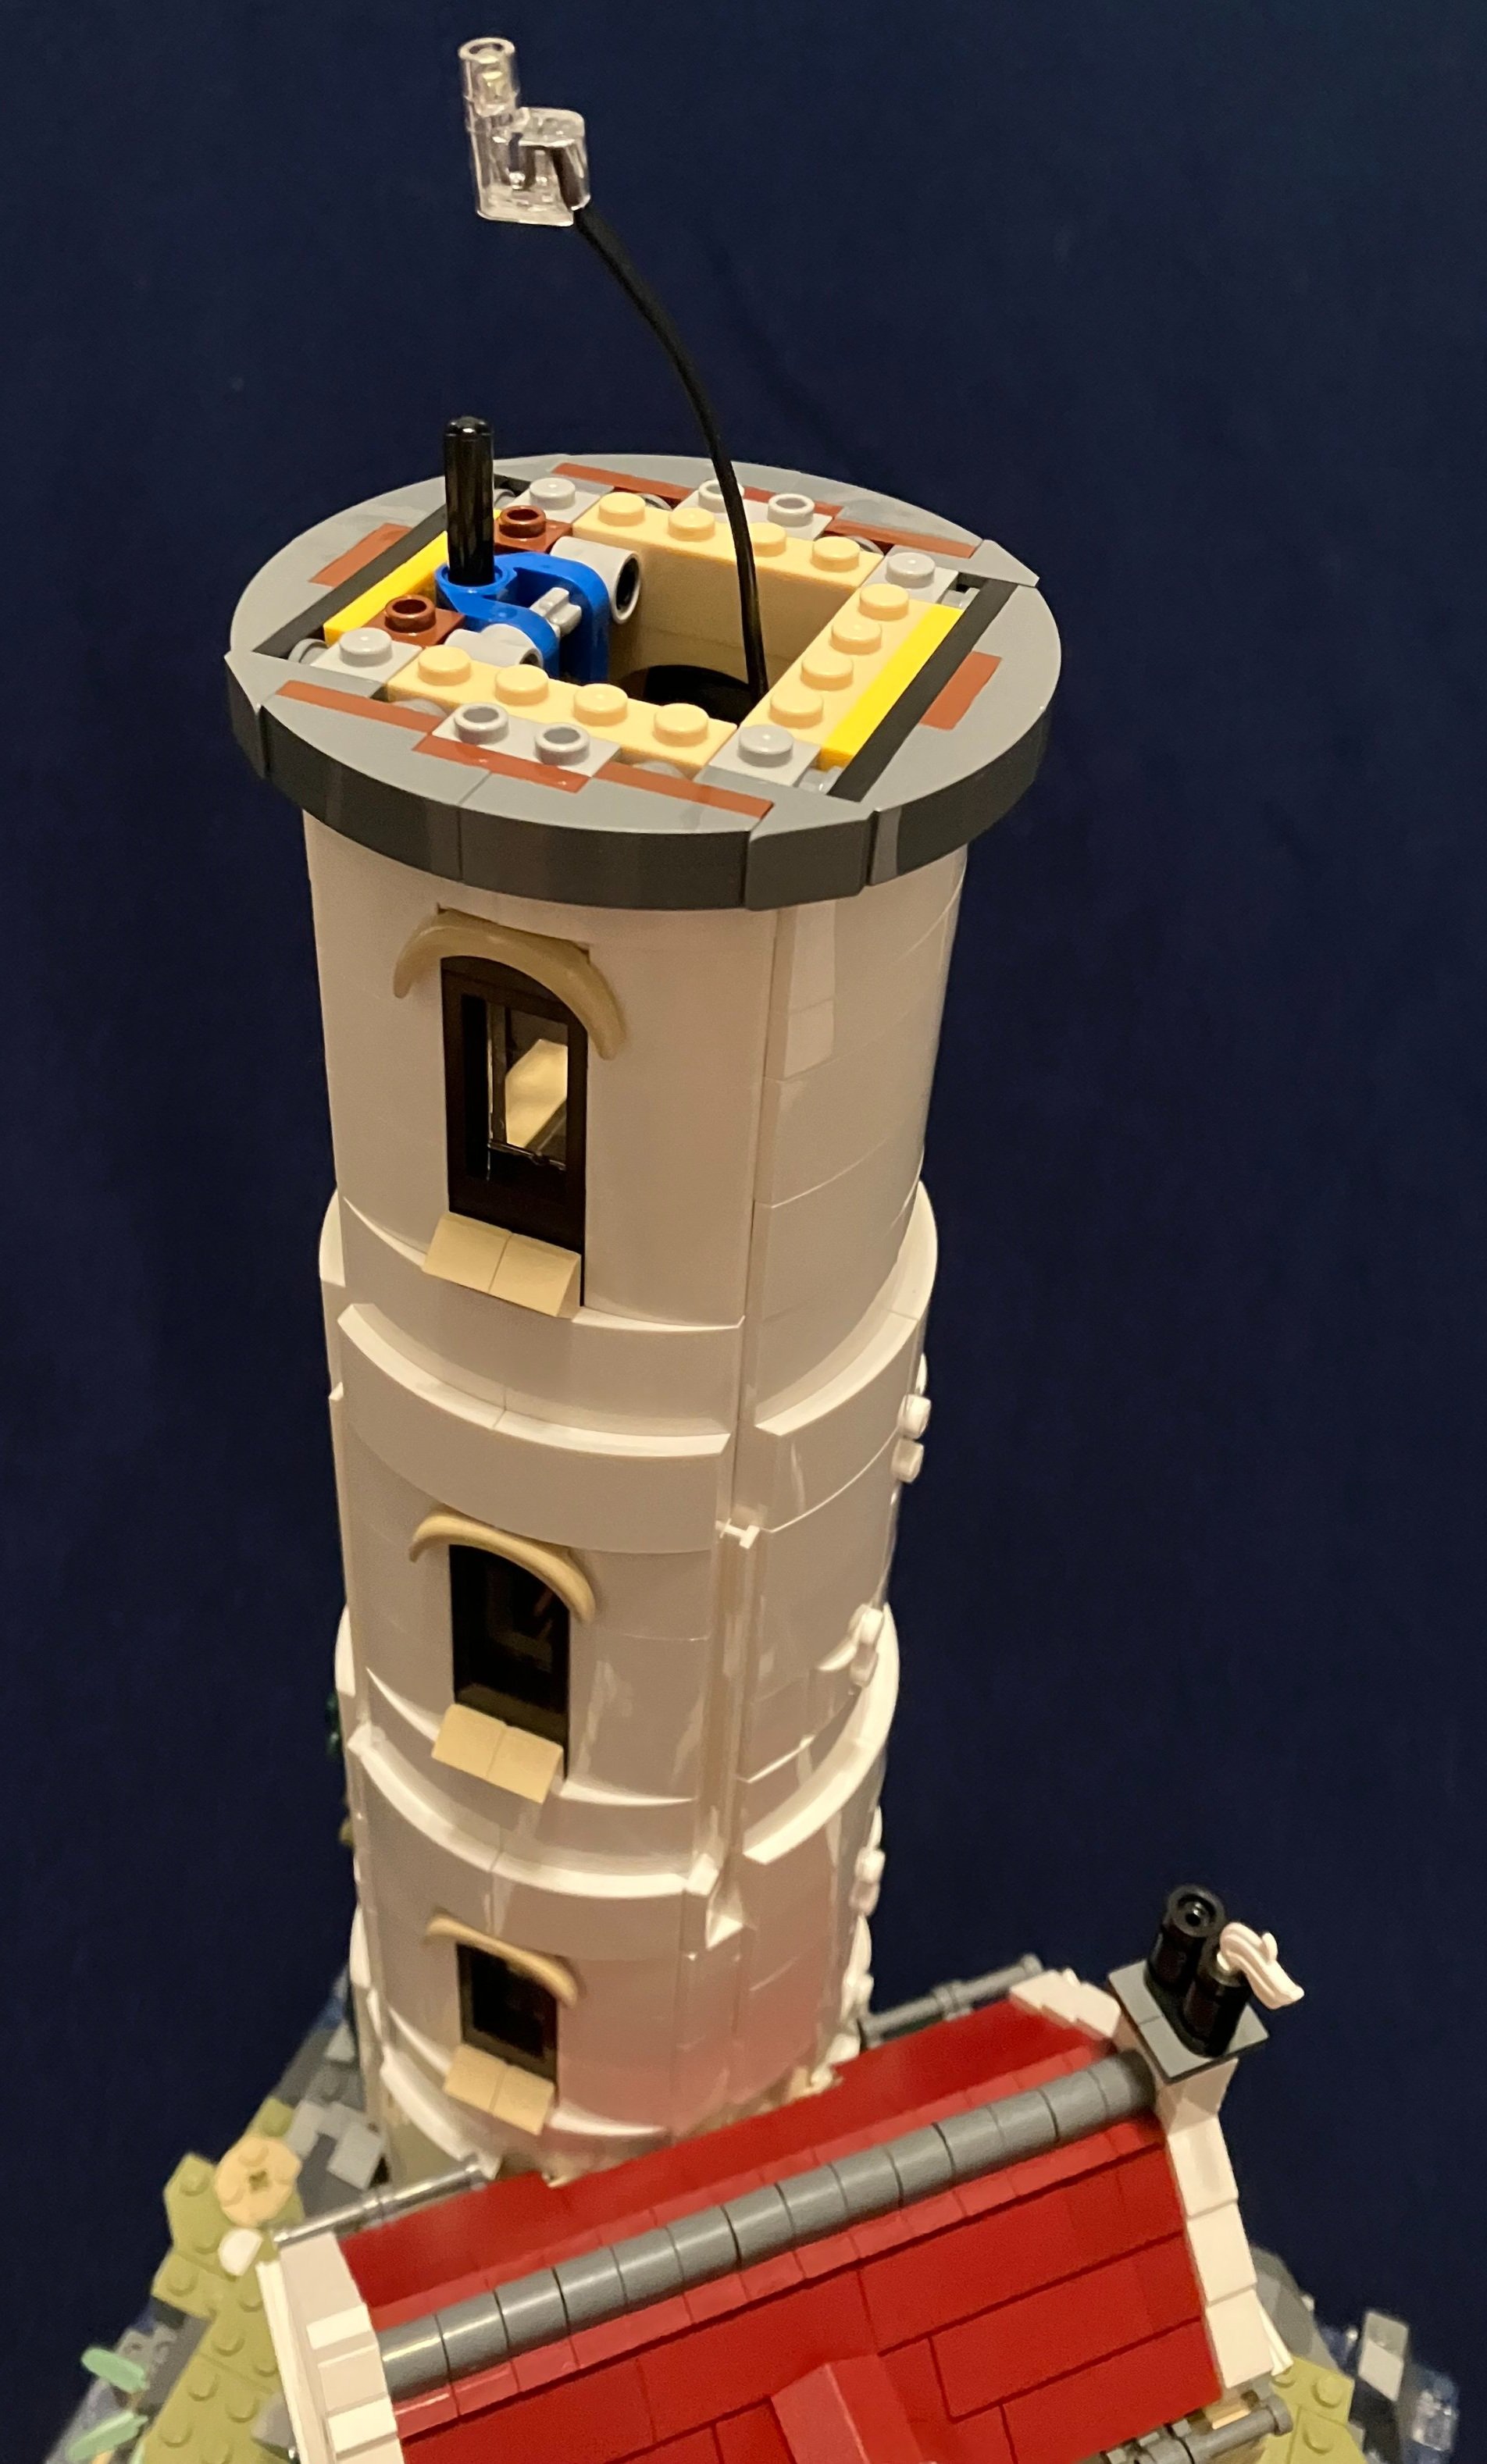
It’s been out since 4 July 2023 and I broke down and put my order in for it. Yesterday, #10320-1: Eldorado Fortress arrived at my home. I didn’t have the original set from back in the day, but I did have some of the smaller Pirates sets and I enjoyed playing with those as a kid. I’m looking forward to building this one and maybe even pulling out my #21322-1: Pirates of Barracuda Bay set, rebuilding it, and making a Pirates scene. I won’t do my full review yet, but I’ll give my first impressions. I like that the box has a similar look to the sets from the 1980s and 1990s with the yellow stripe saying the set name in the corner. I’ve seen a few folks say they are disappointed to not have the raised base plate like the original set. I’m okay with not having it. I’d rather have the pieces.

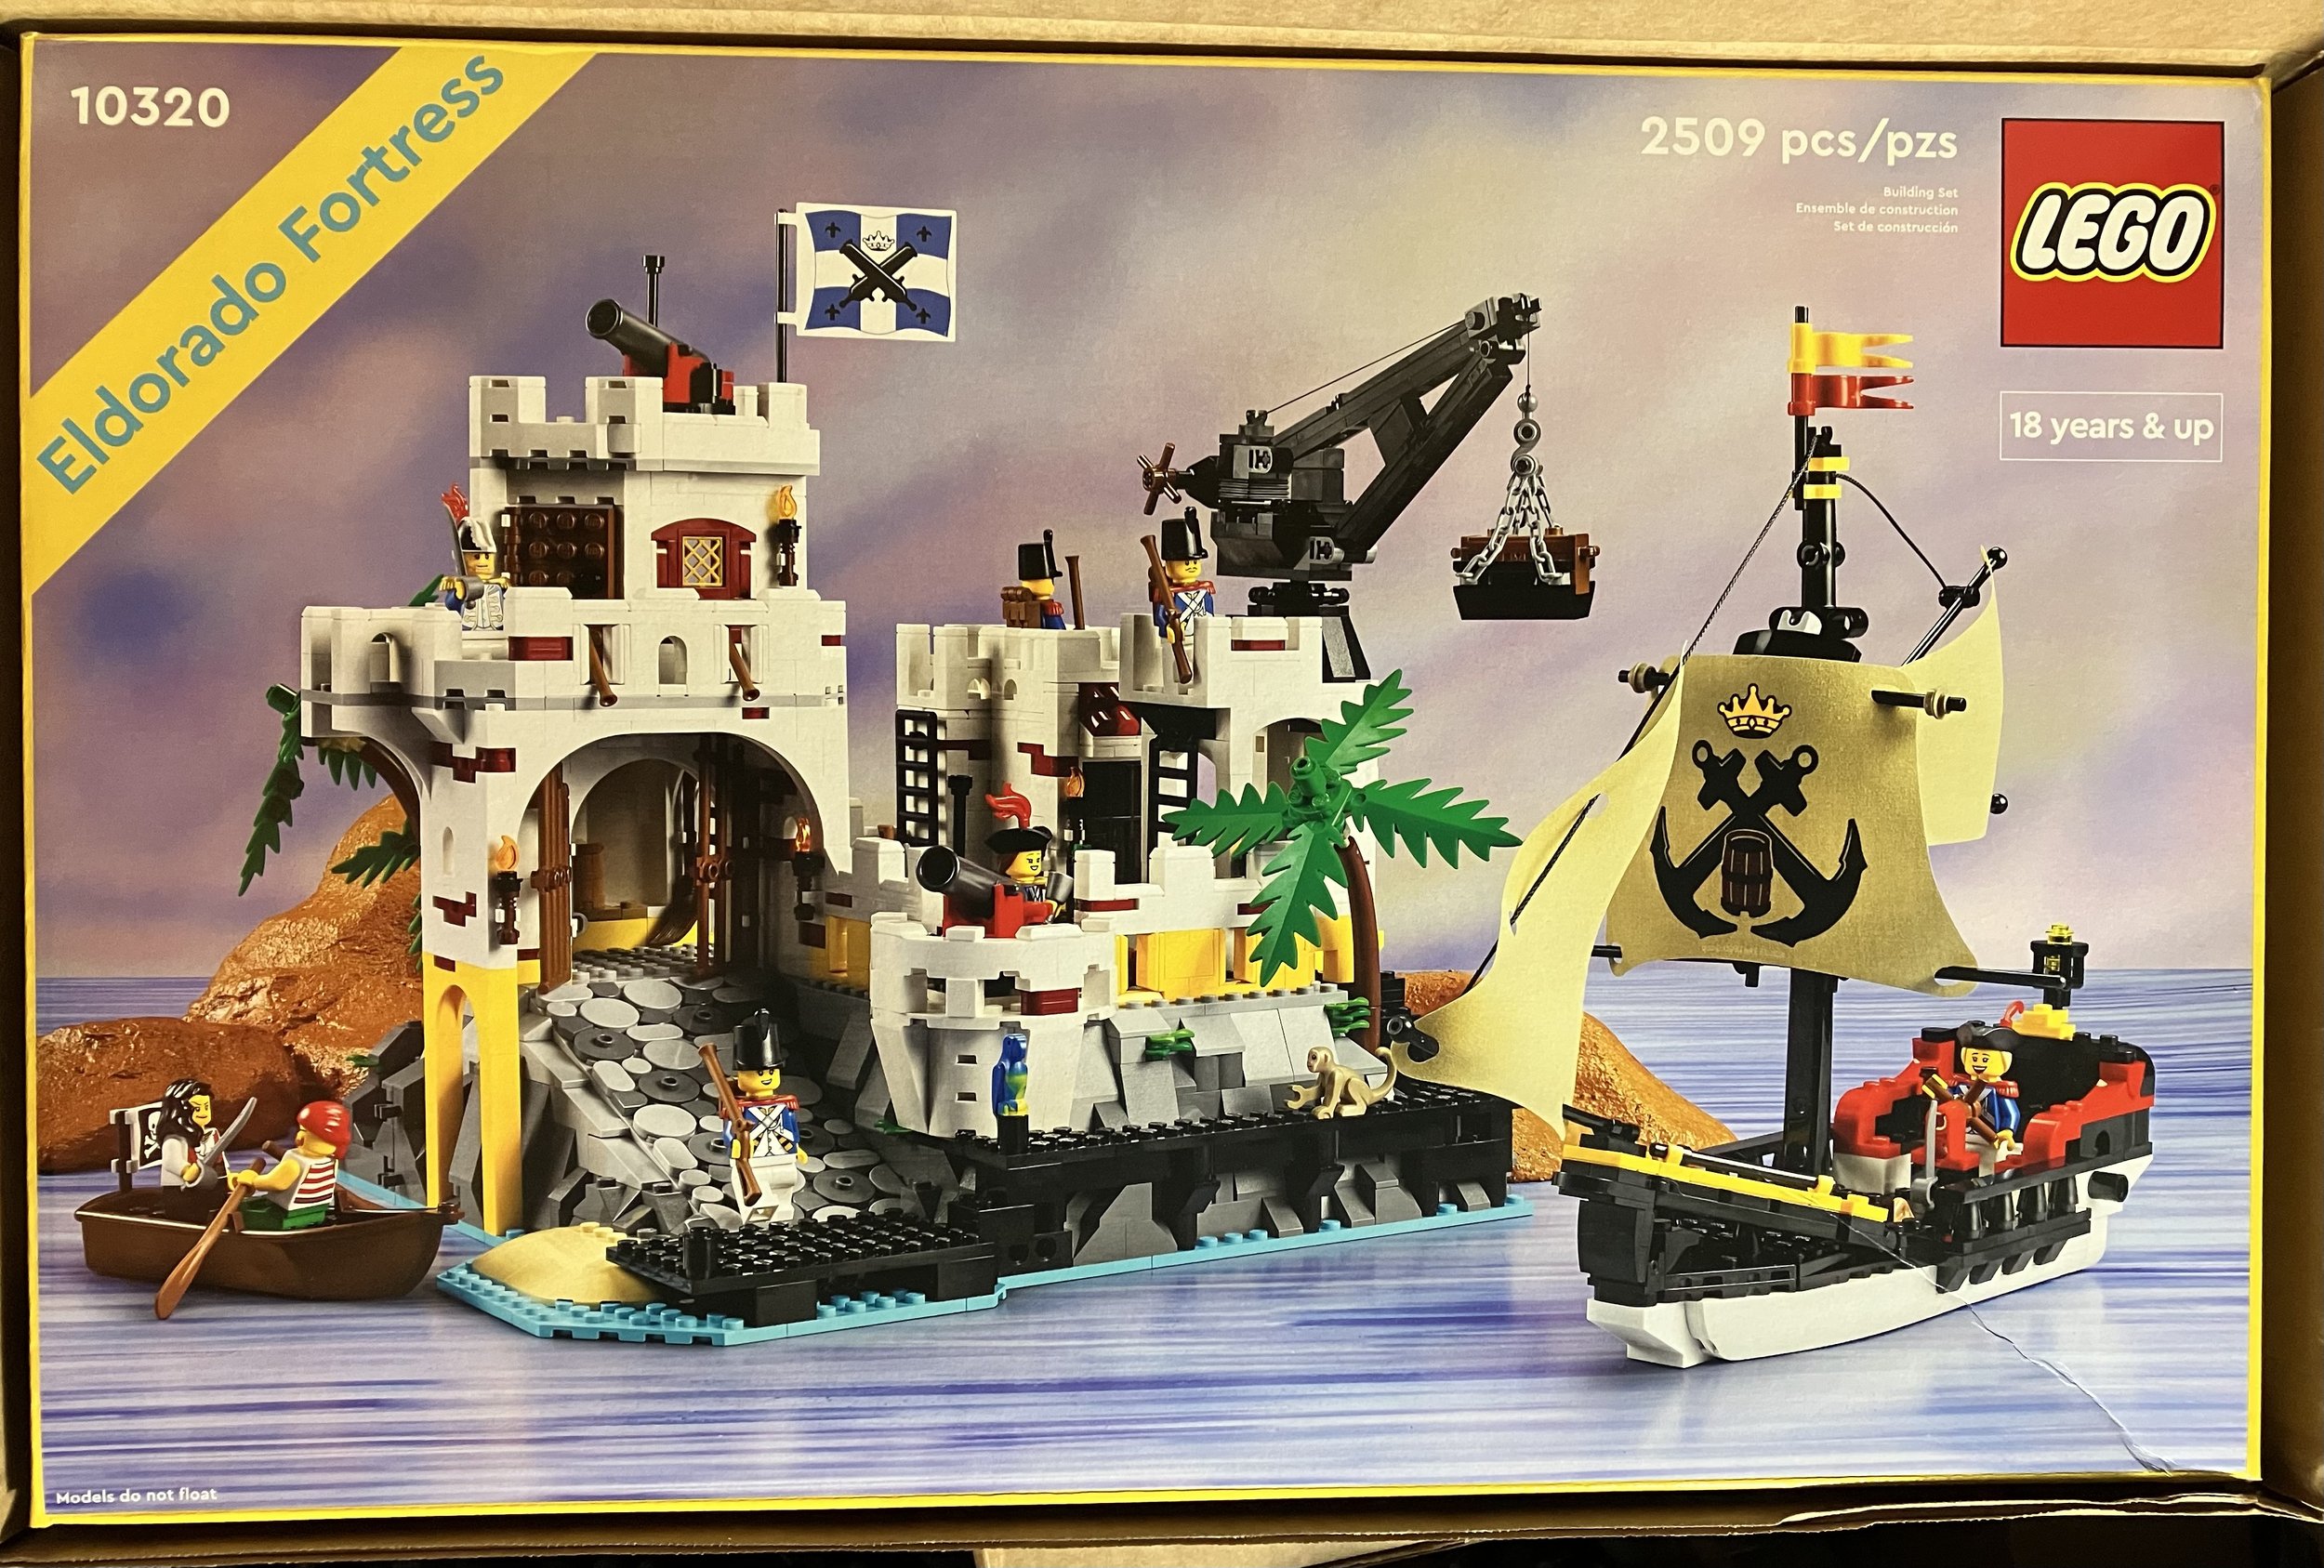
There are a bunch of great looking minifigures too. I’m glad to see the return of the Imperial Soldiers and to get some new ones to include females. I haven’t opened the box up yet, but from the box pictures, it looks like there are two female officers and the tricornered hat has hair attached which is cool.

The other one listed is shown on BrickSet.com as the Imperial Soldier, Governor. I never had one of these as a kid so this is a fun addition.

I’m looking forward to the build and the completed product. Now I just have to find the time to put it all together.

Have you built this one already? What was your take on it?

Happy building!

Set Review - #910008-1: Modular Construction Site - Bricklink Designer Progr

It took a while for me to get to this one, but better late than never. This one is #910008-1: Modular Construction Site. It was from the Bricklink Designer Program that ran in 2021, but the set wasn’t released until 2023. This set contains 3,371 pieces and retailed for $319.99 which puts it at $0.095 per piece. The fan designer was user name ryantaggart which also happens to be his name, Ryan Taggart.

I’m a fan of the modular buildings and I thought this one would be something different to spice up the street with a building under construction. I had a blast building #910002-1: Studgate Train Station so I figured I’d jump into this one next.

Speaking of Bricklink, a quick plug for the Bricks for Bricks Bricklink store. 15% of our profits up through the end of November will be going to Creations for Charity so thanks in advance for your purchase. Onto the review.

The box is similar to the other Bricklink sets with the white packaging and pictures of the set. The front shows the full set assembled. The back shows the modularity of the set… which isn’t a whole lot. You can remove one partial floor off the top, but the rest is still attached. I guess it’s modular in that it can connect to the other modulars only it doesn’t have the usual Technic pin attachments to link up to other buildings.

Inside the box are three smaller boxes and a 32x32 baseplate. Inside those three boxes are 22 numbered bags (most with more than one bag per number), a few un-numbered bags, a 16x32 baseplate, and a card telling you to get the instructions online or in the app. I prefer the paper instructions over the electronic version as I can get away from screens and just build. I think that’s why this build took me a while to complete. I had to get my device set up instead of just opening the instructions and building right away.

The first bag starts off with some of the inside of the building. You build some of the outer wall foundation and then some of the tiling inside. A construction worker is inside with a jackhammer. Nearby are some “extra” tiles to put down and a bucket.

The second bag finishes off the base with the sidewalk outside, more flooring, and the rest of the foundation of the building. There are a few planters outside. One has plants and the other does not.

Bag 1

Bag 2

Bag three adds the 16x32 baseplate. This one is mostly covered in tiles and it contains the base of what will become the crane. There’s also a gate to allow entry into the construction site.

Bag four starts to build up. You add the first section of the base of the crane, you start a stairwell, you add a few beams for the main structure of the building, and you add some tiling inside the building. At this point of the build, I was curious to see how strong the building would be given it’s height. Would it just be stacked bricks or do the long yellow beam pieces really add support?

Bag 3

Bag 4

Bag five adds some windows and structure around the stairwell. You also add some bricks around the tall yellow beams and a few on their own. So far it seems structurally sound. As you build up, Technic pieces are incorporated connecting the beam to the rest of the build.

Bag six adds more beams, more windows, and more building up bricks around the beams. It’s an interesting way to build as most of LEGO’s modulars are just brick built. This one seems to follow what an actual building would have with framing followed by building up around the frame.

Bag 5

Bag 6

Bags seven and eight continue to build up the sides of the building. The main supports get some architectural detailing which is nice besides just having bricks stacked.

Bag 7

Bag 8

Bags nine and ten continue to go higher with more structural beams on top of the previous ones and then stairwell is also built higher. There were a few challenges where higher sections weren’t anchored down well, but they eventually are locked into place with bricks or plates.

Bag 9

Bag 10

Bags 11 and 12 add in arches over the window areas and then some additional detail in bricks. There are a lot of smaller plates used to create the shapes. Then there are tiles added to the top of the walls with bag 12.

Bag 11

Bag 12

Bag 13 starts another floor. It includes another worker set up to paint. There is also a work table with a drill and table saw along with a board to help cut the floor boards. It also continues the stairwell up in a different location.

Bag 14 adds in more windows only these are black. A few of the windows do not have clear panes to help create the look of a building under construction.

Bag 13

Bag 14

Build 15 tops off this floor with tiles and some jumper plates to allow for the floor above to connect to it.

Build 16 assembles the floor of the top floor.

Bag 15

Bag 16

Bag 17 adds some tiles, a few windows, and wall supports. It includes a minifigure with an ax. There’s also a recycle bin, a bucket, a small, portable cement mixer, a table with a coffee cup on it, and then some additional bricks that need to be added to the build.

Build 18 continues the build with some additional framing around the windows, a ladder going up, and some fencing around the edge so workers don’t fall off.

Bag 17

Bag 18

Bag 19 adds in the tower where the crane is attached. The tower works okay, but the ladder in-between the structure doesn’t attach well. It falls off pretty easily whenever you move the tower or shift the building around. You also add in a few containers of… I’m not sure what… oil? There’s a small sink as well. You also build a small structure with supports. I’m not sure what it is supposed to be for. Maybe a future addition to the building? There’s a minifigure as well. This one is a female that looks like a building inspector. She has a camera and briefcase.

Bag 20 starts building the actual crane section. It contains a lot of Technic pieces. It is also on a larger turn table so it can pivot all the way around.

Bag 19

Bag 20

Bag 21 continues the crane build with a cab and minifigure to operate the crane. It also adds in some supports for the top of the crane and then connections to hold up the front and back of the crane.

Build 22 is the final section of the build which adds in the string and “hook” for the crane. You then build a small porta-potty that the crane can then lift up. The crane holds up okay, but it is not very sturdy. I’m not sure how to make it better, but the crane comes off pretty easily as you turn it and move it around. Maybe construction in full Technic pieces instead of using both System and Technic? I’m not sure.

Bag 21

Bag 22

Before we wrap up, there are six minifigures. There are four males and two females. Five are construction workers and one is the inspector or an engineer. It’s a small crew considering the size of the building, but I can’t complain too much. Construction minifigures are fairly easy to get in CITY sets.

Here’s the final set. I enjoyed the build. It’s a challenging build with some great details. It’s a good display piece, but not great for playability as it comes apart pretty easily and parts aren’t really stable. The cost was rather high, but thankfully there are a decent number of pieces. It’s a great option too if you’re looking for parts. The back and one side of the building aren’t finished off with anything. They look like more work needs to be done. It’s hard to say if an additional wall should be added or if the building should be larger. It’s okay to display from the front for a front facing MOC.

Overall, it’s a great build. A little pricy, but it works. There are some areas that could use a re-design. I’ll add it to my long list of sets I’d like to redesign.

This one is off the market now so your chance to get it is on the secondary market at a higher price. The good part is the instructions and bill of materials are online so you can use your own pieces or buy some to re-create this set.

Happy building!

Set Review - #43217-1: "Up" House - Disney

Disney themed LEGO sets have been releasing all year long for the 100th Anniversary. I normally don’t buy Disney themed sets, but I enjoy watching Pixar movies and I thought “Up” was a fun one. This set is #43217-1: “Up” House. It was released on 2 March 2023 in the US for $59.99. It contains 598 pieces which works out to an even $0.10 per piece. Not a great deal, but you can’t complain about it being overly expensive either.

The box is about the size of a breakfast cereal box and is shaped that way as well with it being printed to go the tall way. Not really a big deal, just different from most sets. It probably helped them capture the height of the set. The box shows the set on the front with the Disney and Disney 100 logos. It also has some silver colored bricks which sadly are not a part of the set. The back shows some additional details and play features.

The set contains four numbered parts bags, an instruction booklet, and a sticker sheet.

Here are the stickers. While I always prefer printed tiles, the stickers here do add a bunch of detail to the house and give it some extra life. I guess I can’t complain too much here.

Bag one starts the build with the first floor. My kids built it while I supervised for this review. I had to help them on a few steps and I caught a few steps they didn’t quite follow correctly, but overall they did a good job. The first floor adds the front door and a small portion of the porch. It builds out some of the living room with a few items including a lamp, a record player, and some pictures.

Russell comes in this bag. He has his giant back pack full of gear and it is built so that it touches the ground, but it keeps him upright due to a jumper plate positioned upside down. The torso is printed with all his badges which is a fun detail and I like how his hat is on his head, but you can still see a bunch of his hair on the front of his cranium.

Bag two finishes up the first floor and starts on floor number two. I like how they captured the design of the window space on the front of the house on the first floor. It’s a fun, colorful build and it’s a great shape without a ton of gaps. I added a picture of the inside so you can see some of the details and how the stickers really do fit in well. Just about all of the references are there from the movie to include the change jar with the Paradise Falls label.

The Carl Fredricksen minifigure comes in this bag. I think it matches the movie character well while still being in LEGO form. I’m also glad to see that they were able to replicate his cane. Sadly, it doesn’t have the tennis balls on the bottom, but it’s still pretty close with the roller skate piece.

The third bag finishes up most of the second floor with some interior details, the roofing, and the chimney. Inside you build a bed, a TV, and the adventure book which goes in a crate. The roofing is a fairly simple build, but it still seems to capture the shape of the house from the movie. The chimney is built and then attached to the house with Technic pins. It looks ugly from the back, but you can’t tell from the front.

Dug comes with this bag and he is molded in one piece. I like how they captured his form. Well done designers!

The last bag is mostly balloons. You do add one last window to the second floor and a weather vane with a blue chicken on it. I like how the balloons were done. There definitely is not as many as in the movie, but cost is a consideration here so it’s just about right I guess. Additionally, you get a section of the yard with some air to blow up more balloons, a box of what I assume are balloons, a squirrel, and the mailbox.

Here’s a closer shot of the three minifigures. Again, I think the designers did a good job capturing the likeness of all three characters while still keeping them looking like LEGO minifigures and Dug compatible with studs. If you look close, the clear piece on Russell to hold up the back pack is a bit awkward, but not a huge deal in my opinion.

Here’s the final set and why the box looks like a tall cereal box. You need to be able to show the full set on the front of the box and it’s tall. Overall, it’s decent set. There are some good pieces, some different colors, and the minifigures were well done. The price is okay, but hopefully it will go on sale near the end of its shelf life. I picked it up during a GWP offering so I can’t complain. I recommend this one to Disney and Pixar fans or someone looking for a fun small scene to build. Beyond that, it you could add it to a city scene if you wanted to or maybe a Friends scene with the bright colors. I look forward to seeing pictures of what the fan community does to re-build this set into other things or to see what gets added.

Happy building!

Set Review - #40619-1: EVE and WALL-E- Brickhead

Another Brickheadz aet for review… This one is #40619-1: EVE and WALL-E. It contains 155 pieces and retails for $14.99 in the US. This works out to $0.097 per piece. It was released on 31 January 2023 in the US and so far I have only seen it from LEGO, but not at Walmart or Target. Maybe that will change? This one is not branded for the Disney 100 anniversary, but its release happens to coincide with the anniversary. For those of you not aware, this is not the first WALL-E set. The first was #21303-1: WALL-E from the LEGO Ideas line.

The box is rather small, but this is to be expected for a set containing 155 pieces. The front of the box shows the two Brickheadz characters while the back gives the same shot and shows that there are bases for each character. Also of note, WALL-E is #193 and EVE is #194 in the Brickheadz line.

The set contains three parts bags. Two are #1 and one is #2. There are also two 8x8 black plates which are separate. Instruction booklet one is WALL-E and goes with bag one. Instruction booklet two goes with bag two and is EVE.

And here are the two. WALL-E has his lunch box and the plant in a boot. I think the designers capture the shape well and did a good job making decisions on the details to include or not. The eyes and sockets have the same shape, but they do not move around. Also the neck joint is there so you can have the head look up/down. The tracks are a good representation of the character and they are attached to the side while clear plates are used to keep WALL-E attached to the display plate. Besides the printed eyes, he also has a printed brick with the WALL-E logo.

EVE “floats” on a clear brick and captures the character well. White Nexo Knight shields are used for the arms and she has no printed piece. Interestingly, they added a small plant piece inside to be the space where she is supposed to store plants that she finds which is a fun detail you only know about if you build the set.

I included a picture of the side and back just for awareness, but there aren’t a lot of details you can see there.

Overall, they are good Brickheadz representations of the two characters. I recommend getting them if you are a Brickheadz collector or a fan of the movie or Disney stuff in general. Otherwise, I’d avoid this one as it doesn’t offer a whole lot else.

Happy building!

Set Review - #21338-1: A Frame Cabin - LEGO Ideas - #46

How are we at the 46th set in the LEGO Ideas line? Where has the time gone? This one is #21338-1: A Frame Cabin. It was released back on 14 January 2023 in the US. It contains 2,082 pieces and retails for $179.99. That works out to $0.086 per piece which isn’t too bad. The set is jammed with a lot of details, but still has a lot of playability too. Plus it’s not just a front façade of a building like many sets are as the roof pieces come off for access if you want to play instead of accessing the back of the build. Before getting into the build, I thought this set would go well with #21318-1: Tree House if you wanted to build an outdoor scene or just a MOC of a scene in the woods. I’ll have to add that to my list of things to try someday.

Onto the review…

You get the standard box with the 18+ greebling and Ideas logos. The front shows the full set while while the back gives some additional details and dimensions.

The contents are 15 numbered parts bags with one unnumbered bag of larger pieces. A few of the numbers have more than one bag. You also get two instruction books in a paperboard envelope.

Here’s the envelope with the instructions and the two books. The instructions have some details on the designers, fan designer, and the model itself to read before you get into the build.

Bag one builds the base of the cabin and includes two minifigures.

Bag two adds in some tiles and studded tiles that end up as the front porch. You also add in some Thor’s Hammers for the masonry work in front of the cabin which is a cool building technique.

The third bag starts to pack in details. There is a small kitchen area with a sink, stove, extra wood to burn, storage for dishes, and then the start of some stairs. The other side of the room has a record player and a 2x4 printed tile that says “LEGO” as your floor mat. I believe this is the tile from #10290-1: Pickup Truck.

Bag four builds up the walls and support section for the second floor. The kitchen area gets a few more items to include a stove, chopping blade, and fire extinguisher. There are stairs put in above the kitchen area with a LEGO plate on a step for a minifigure to accidentally step on.

The other side adds in a guitar, shelving, and you can see a printed tile above the front door.

The fifth bag adds in tiles, jumper plates, and some plates as the outer siding of the cabin. Some are offset and they aren’t in any particular order which helps to make it look more like a cabin in the woods than a manufactured building. The front side of the cabin gets one of the newer butterfly pieces above the front door which is a nice addition.

Bag six decks out the front porch with a rocking chair, a small stove to fry an egg, steps up to the porch, a small bench with a lantern and mug, and railings for the porch. Then in the back you get a shower, bathroom materials (shovel, toilet paper), and what appears to be gas hookups for the stove (maybe).

Bag seven adds a tree which comes with a small storage area for extra logs to burn and a bucket with tools. The coloring of the tree is fun with the yellows and reds of a fall like tree. This section can connect to the main cabin with a small Technic axle into a Technic pin hole. This allows it to stay there, but it can easily be removed and placed elsewhere as we’ll see later. This section comes with a small blue bird to sit in the tree.

Bag eight builds the second floor which is a small sleeping area with a bed. It still has a bunch of details to include a book shelf, a map on the floor and some lamps.

Bag nine attaches the second floor to the first floor, adds the siding to the upper level similar to the lower level, puts a peak on the roof, builds up the chimney from the stove, and adds in a little more detail on the second floor.

Bags 10 and 11 build the large sloped roof. Each side is built the same per the instructions (if you want to follow them). Both come with a skylight and a printed tile with wood grain. Bag 11 adds the tiles and studded tiles to finish out the roof and then each piece easily slides on top of the cabin. There aren’t any actual connections which is fine. Gravity keeps it on and I’ve been able to pick up the cabin and move it around without losing the roof.

Bag 12 builds another section of the build that can either be a piece attached to the corner of the cabin or placed separate. It starts with some greenery, a small stream section, and a rock piece. These pieces are assembled with some various plant pieces around them. There is also a small… um… animal… it’s not a squirrel… is it a woodchuck? rat? I’m not actually sure. The set comes with birds and a spider… but I’m not sure on this one.

Bag 13 assembles the stems and branches of the two trees. They are built in a similar fashion, but you can change the angles as desired to make them look different.

Bag 14 adds leaves/color to one of the trees. You get some great fall colored pieces to fill out the tree on this one. There’s dark orange, yellow, gold, and a bright yellow. They make a pretty good color combination for my untrained eye.

Bag 15 puts greenery on the second tree with sand green, dark green, and an olive type color. I like how all three trees in the set have different colors. You can obviously change them as you want, but I just followed the instructions. I’m also a fan of the wildlife with a red bird and butterfly with these two trees.

Below the trees you get a spot to rest the canoe on some Technic parts. Underneath is a crate with some life jackets and a bottle of some sorts. There’s a barrel to the side of the one tree where you can place the oars.

This set comes with four minifigures. I don’t think any of them are unique or have any rare attributes, but they’re a good mix for this set. I’m okay with four adult minifigures versus including minifigures with the kid legs.

Here are some pictures of the final build with the different tree sections attached and then separate. Overall, this was a great build. I enjoyed assembling the set between the different build techniques and all of the little details. It wasn’t super hard to assemble, but it also wasn’t just stacking bricks on top of each other which was good. You get a lot of great pieces as well if you like to break apart sets for MOCs. Lots of printed pieces too and no stickers which was a bonus. I would price this set around $160 instead of $180, but look for opportunities to get it with gifts with purchase or double VIP points or on sale at some other retailer if you can find it on discount.

Another great addition to the Ideas line in my opinion. What did you think?

Happy building!

Set Review - #76407-1: The Shrieking Shack & Whomping Willow - The Wizarding World of Harry Potter

I’m not sure why, but I’ve gotten into collecting the Harry Potter sets. I’ve never read the books, but I have seen the movies a few times. They used to be a bit more reasonable in price, but with the price increases last year, they seem over the top to me. This one is #76407-1: The Shrieking Shack & Whomping Willow. It was released on 7 May 2022 in the US for $89.99. With 777 pieces that works out to $0.116 per piece which is a bit high in my opinion. LEGO recently had it on sale for $72 and with two GWPs being offered at the same time, I couldn’t complain although $0.09 per piece isn’t the greatest either.

The good part is that my little guy is getting into LEGO and he enjoys building with me now. We built this one together… or maybe he built it and I supervised and applied stickers. We sat at our beat up kitchen table so the pictures aren’t the greatest, but it was easier than moving to take pictures as he wanted to build on his timeline and not my blog pictures.

Nothing spectacular about the box. If you’ve purchased a Harry Potter set in the past, you are familiar with how they look. Of note, the back includes a note that you get four Wizard Tiles in this set (Still? I wonder how long they will include them in sets?). All four of the tiles I got were duplicates. I have 14 of the 16, but I’m not rushing out to find the remaining two.

The set contains six numbered parts bags, an instruction booklet, and a sticker sheet.

Here are the stickers. There are a bunch, but they weren’t too bad. My daughter is a pro at putting them on and tackled most of them for us. She was good at applying the stickers on the curved surfaces and getting them to line up easily. I’m somewhat good at applying to flat tiles, but I’m not so good at curves.

Bag one builds a small fence section and then the area where the whomping willow will attach. This section has a rock piece set up so it can rotate along with a cloud. As shown on the box, when the moon comes out (3x3 round, glow in the dark tile), Professor Lupin turns into a werewolf. This is a fun play feature. This bag comes with Ron Weasley and Hermione Granger minifigures… yet another set with the three main characters.

Bag two builds the whomping willow. It’s not an overly detailed build, but for the size and price point of the set, it gets the job done. #75953-1 - Hogwarts Whomping Willow from 2018 was the last time it appeared and I like this one better. This one is at an angle and there is a small gear in the back of the stand where you can make it rotate which adds to the playability of the set.

The Harry Potter minifigure comes with this bag in case you haven’t gotten a set with him in it before.

Bag three starts to build the shrieking shack. I wasn’t optimistic about this part of the build, but it actually wasn’t too bad. It’s not just stacking bricks to make a building, but instead offsetting bricks, using different colored pieces, adding in slopes and textured parts, and making it look like the old building that it is. Along with some of the white pieces to make it look like winter time, I can’t complain here.

This bag comes with Sirius Black and a dog which if you haven’t seen the movie or read the books, Sirius turns into a dog to hide.

Bag four finishes up the first floor. I will show the inside later, but the first floor has multiple boarded up windows, an interesting porch awning, the start of a chimney, and then on top, two pieces to allow rotation which was odd. My kiddo and I both were curious how these pieces would be used later in the build. Professor Lupin comes in this bag.

Bag five starts the second floor in a similar fashion as the first floor. It uses slopes, textured pieces, different colors, and tiles to create the old and abandoned effect.

The Peter Pettigrew minifigure is included here along with Scabbers, the rat belonging to Ron that ends up being Peter in hiding (spoiler alert?). I don’t think he appears often so this is a good addition to the set.

Build six finishes up the set. I like the way the roof was done with the slope, snow effect, and the two smaller windows on each side of the main window. The bottom of the second floor has round plates which connect to the turn table pieces on the top of the first floor. The second floor doesn’t spin. This instead allows you to connect the two floors so they are offset. This makes it look as if the second floor has shifted off of the first floor and is more crooked. A cool feature and interesting way to design this. The chimney is offset slightly as well which bugged my kiddo, but he understood after I explained it.

Here’s my picture of the inside. The designers did a good job decorating with a chair, piano, chest, table, and a few other items. The stickered tiles make up some busted blinds and damaged glass photos/paintings which adds to the scene.

Bag six comes with Professor Lupin as a werewolf. The molded head piece and werewolf legs are a nice touch.

While I think this set is overpriced, you have to admit that it’s not too bad to get seven minifigures and two animals. Plus the werewolf minifigure is something new.

Here’s the final build. Overall, I was more impressed than I thought I would be. It’s not a pretty looking set and to have LEGO put it on sale makes me think it isn’t selling well. I thought the build wasn’t bad and it captures the scene from the movie quite well considering the size and piece count. With seven minifigures and two animals, it’s not that bad. If you’re reading this close to when it posts, take advantage of the sale at LEGO or look for it on sale at one of the big retailers like Target, Walmart, or Amazon as it gets closer to Christmas. This one is scheduled to retire at the end of this year so don’t wait if you are interested. If' you’re not a Harry Potter fan, I’d stay away from this one unless you are looking for pieces or you want the werewolf minifigure parts for a MOC.

What are your thoughts on this one?

Happy building!

Set Review - #910002-1: Studgate Train Station - Bricklink Designer Program

Round Three sets of the 2021 Bricklink Designer Program arrived in 2023. The sets have been delivered for a while, but I had a backlog of builds and then it took a while to put this one together. #910002-1: Studgate Train station contains 4,062 pieces and retailed for $399.99. That worked out to $0.098 per piece so very close to the average of 10 cents per piece that everyone quotes. I’m sure I could have sold it for a significant mark up, but I really wanted to build this one as a train fan and my overall excitement for how the structure looked when the design was released. The fan designer is Pablo Sánchez Jiménez. You might remember him as the fan designer behind #21322-1: Pirates of Barracuda Bay.

I watched a video from Tiago Catarino a few weeks back and someone asked him for his impression of the Bricklink Designer Program sets. He responded that he didn’t like them as they didn’t get the full treatment that LEGO goes through for it’s design process. My response is that he should build this set. Wow! It was an incredible build and was very challenging. I enjoyed the process and I think the end product looks great. There are a few things that wouldn’t pass the LEGO designer test, but nothing major. Let’s dig into the review.

The box matches all of he previous Bricklink Designer Program designs with the white box, Bricklink logo, and LEGO set identification in the bottom left corner on the front. The front also lists the fan designer’s name which is cool My set came well packaged and the seals were all fully attached.

The parts are mixed between three separate boxes on the inside and then there is a large 48x48 stud light gray baseplate. Opening the boxes reveals 23 numbered bags with some numbers having more than one bag per number. There were also a few bags of larger pieces that weren’t numbered.

Like previous Bricklink Designer Program sets, there are no printed instructions. You can either download a .pdf from Bricklink or use the LEGO® Builder app. I used the .pdf. I still prefer printed instructions, but I managed. After working with a computer all day, it’s nice to turn off the electronics and use paper instructions and bricks.

This set comes with a small sticker sheet. While I would have liked printed parts, I can’t complain about 9 stickers total.

The first bag assembles the base of both train cars. You use two of the large train plates and the standard buffers and wheels. Everything else is custom built.

Bag two builds up the train to include seats and windows. Bag three completes the trains with a roof and front wind shield. Overall, it’s a fairly simple train and you can use them as individual cars or combine the two for a longer train. There are no doors on the cars so you either have to modify them on your own or just live without doors. If you want to motorize the train, you’ll have to do some modifications to add a battery box, but it’s possible. Or just use a 9V motor and track if you have it. I would have liked a more detailed train and more cars, but I understand the limitation of the program and realize that the focus of this build was on the station. The train is just an added bonus.

Build four begins the station build with the sidewalk in front of the station and part of the first platform. The sidewalk is pretty simple, but the use of the light and dark gray along with the Nexo Knight shields helps to improve upon the design.

Build five adds the front wall of the station with some windows, stairs leading up to an arched doorway, and a wheel chair ramp.

Build six is already to the second story of the platform. You add in some decorative wall designs and a few seats and a newspaper stand. The front of the station by the sidewalk uses black lamp post poles to hold up the upper level. The pieces are a little awkward as the back section is well attached and it can stay up without all of these pieces attached. I found they came out of place often.

Build seven adds in some details on the upper level to include some tables with umbrellas, lamps, and a clock on the front. The first two minifigures are included which are a younger male passenger with a guitar and a male worker.

Bag eight adds in some decoration on the front of the station to include a sticker with the name of the station.

Build nine adds in some details on the platform to include a bench and ticket machine. You also start the build of the stairs that will allow the minifigures to go to the other side of the platform. This bag comes with two minifigures. One is a janitor cleaning off the station platform. The other is a traveler with a bag and ticket. You then add in the rails. The set comes with eight straight rails, but you only install six so you have a few extras. Then you start to build up the other side of the platform.

One note of the design is the ramp across the tracks for minifigures in wheel chairs. some of the pieces used have studs sticking up. This is good if you want minifigures to pose on the tracks, but it doesn’t allow the engine with the buffer that has a plow-like piece on it to easily clear the tracks there. If you intend to add this set to you train setup, you’ll need to add in some different pieces to allow train clearance.

Bag ten adds in the other side of the platform with a wall with windows, a station sign, a bench, a trash can, and some lights. There are two more minifigures. One is a male with a winter cap, sun glasses, a poofy jacket collar, and 2 bags. The other is a female worker with a purse/bag.

Bag 11 builds the bridge that connects the platforms. It’s not a super sturdy bridge, but it holds up okay. The design is all black pieces, but it works. Bag 12 finishes the bridge, adds the stairs to the upper level, and a support arch to hold up the upper level and dome.

Bag 13 builds the base of the top level. It is put together with plates connected to bricks connected with Technic pins. It’s pretty solid. Bag 14 finishes up the upper level base and starts to add in some detailing.

Bag 15 continues to add in detailing of the upper level with a fence around the outside, two center sections that are a little taller for aesthetics, and then some lounge areas for your minifigures to sit while waiting for their train.

Bag 16 adds in some parts around where the stairs connect and then an embellished section where a clock is placed. This section is cool as there are a bunch of brick arches and you build an assembly for the clock that connects via clips to parts behind the clock. Definitely a cool design choice I wouldn’t have thought of. Also along the outside are some open studs which are used as design throughout the build. Maybe it’s part of the reason why it’s called “Stud” gate.

Bag 17 wraps up the upper section. You add in some umbrellas for shade by the couches, some flowers for decorations, two lookout stands to get a view, a hot dog stand, and a few more decorations along the edges. This section gives you two minifigures. One is the hot dog vendor who comes with a blue baseball cap or a chef’s hat. The other is a female traveler with a camera.

Bags 18 through 21 build the dome like covering of the station. This part got a little repetitive, but I understood why. You start by using Technic pieces to build a piece of the outer frame, then you connect the clear garage door pieces together and connect them to the outer frame, then you build more frame pieces to connect to the clear garage door pieces, and so on. Eventually you get two larger sections of four sections of this type of build.

After each section is assembled, those sections are attached to the top level completed at step 17. This part was very challenging for me. You have to connect the Technic pins into the base of the top level and there are clips to attach the clear garage door pieces. This was not easy to do as the top level has a lot of details already installed. I ended up removing a lot of pieces and then fighting to get everything attached. I’m not sure if there would have been a better order to do this all in, but I eventually managed to get it all together and re-assembled. Whew!

The whole section is then attached to the rest of the station. I use the term attached loosely as it really rests on it. The only true connection is with the stairs. One side of the platform has two small pins that stick up into the Technic holes, but this is more to keep it from sliding as opposed to being a structural support. It works though as I’m able to pick the entire build up and move it around and it stays in place.

The original submitted design used a large single clear piece for the very top dome. Apparently LEGO didn’t agree with the piece choice so it was re-designed with multiple clear pieces. This section starts off with an octagon type shape connected by hinge pieces. Then you clip on some larger windscreen pieces to go around the outside while some clear rod pieces are in the inside to support what will be the top of the dome in the next section of the build.

The final bag, #23, is some smaller wind screens attached to the clear rods from the previous bag. You then use these pieces to hold up the very top spire. There are no actual connections, it just rests there with gravity. From there, you build a chandelier which connects to the top spire by a chain piece. My picture of the chandelier isn’t the greatest, but it was hard to get a picture of it alone as it needs to hang freely to see what it looks like.

This whole dome section was an impressive engineering feat and while it has some gaps and weird angles, I think it looks okay.

This set comes with ten minifigures. There are a good range of travelers and workers and they come with a bunch of different accessories. Overall, it’s a good mix.

Okay, I lied… There are 11 minifigures. The minifigure in a wheelchair rolled off the set in my building area when I took the original picture. Whoops! This is a female minifigure with short hair and a hoodie. She gives you the opportunity to test out the ramps for those that need them.

Here are some pictures of the final set assembled. I think this one looks awesome! Despite some minor design issues and assembly challenges with the upper level, it’s a great set that would look great in any city set. I think it would be a bit small for a larger passenger train to stop at, but one with one or two cars works. I’m glad I picked this one up when I did as I’m sure it’s going to a hefty price on Bricklink or Ebay. Not sure how much it would be to assemble all the pieces and build it on your own, but the instructions are available for free online so you can assemble it if you’d like. Overall, it was a great build and I look forward to adding this to a train layout someday.

Happy building!

Set Review - #71038 - Disney 100 - Collectible Minifigures

We just had two Collectible Minifigure Series of original minifigures and now we’re back to another licensed theme. The Disney 100 series was released on 1 May 2023. It contains 18 minifigures instead of 12 like the previous two series. The price is still $4.99 each per minifigure.

Overall, I’m not a big fan of this series, but I’m also not a big Disney fan so maybe I have a biased opinion. It definitely has a diverse grouping of minifigures from some movies I haven’t seen before. I thankfully didn’t have to buy a ton to get all 18. It took four boxes of six to get to the 18. I bought 6 boxes total so I have some extras, but that’s the good part of having a Bricklink store is I have a place to sell them when I have extras. You should get these if you’re a Disney fan or if you’re addicted to needing each Collectible Minifigure set (like I am). Otherwise, only get them if you really want a part or like one of the minifigures. With any luck, these will go on sale towards the end of their shelf time similar to how some of the previous series have done. Onto my comments on the minifigures…


Oswald the Lucky Rabbit has a different shaped head with ears attached so that’s unique. He also comes with a printed 1x2 tile. I’m not sure what else I’d do with him besides a display of minifigures, but I’m sure someone will come up with something cool

Pinocchio has the normal minifigure head, but has a molded nose which is a first from what I know. He comes with a clear minifigure head with the fish printed on it as a fish bowl. His legs have different coloring which is a nice touch to give a shorter minifigure shorts.


Jiminy Cricket looks a little odd as we’re used to seeing him with a shaped head instead of a minifigure head. For a LEGO minifigure it works I guess. He’s got an umbrella which isn’t new and a collar piece for his shirt. The hat is a nice touch with the yellow band around bottom.

Sorcerer Mickey looks similar to the other Micky figures only with the sorcerer get up. He comes with a pail and mop. Nothing else overly spectacular here.


Tiana comes with a light greenish colored tiara and a frog. She has a 2x3 printed tile as well. The color of the dress is different so that’s good.

Dr. Facilier… um, I haven’t seen the movie so I guess he is okay. I don’t know…The top hat with the skull and cross bones could work as a pirate minifigure in a pirate themed MOC.


Queen of Hearts looks like I’d picture the Queen of Hearts and she even has a heart scepter. The face looks less like a minifigure face and more like a cartoon.

Aurora isn’t really all that special in my opinion, but you do get an owl that is different from all of the Harry Potter owls so a new animal is always a good thing.


Mulan looks pretty tough. I think it’s a good looking minifigure. Nice work here.

Ernesto de la Cruz… I haven’t seen this movie so I have no idea what to say here. The white guitar is fun and the sombrero as well.. Beyond that… I don’t know?


Miguel Rivera… um… looks good I guess. The dog with the tongue to the side must be from the movie so we’ll go with it. You can go with the hood and skeleton face or the printed face and hair. For fun, I have the hair on the minifigure stand which looks a little creepy.

Pocahontas seems to match the character well enough. And you get a few colored leaves which should help to brighten up any plant or garden MOC.


Cruella de Vil seems a little odd with a printed dress on, but not a dress piece. I’m not sure how they could have done this better. A slope piece for the dress would be too long and I think the cloth piece wouldn’t work as she has the long coat on over her dress. We’ll go with it. You get a little dalmatian too which is a nice addition.

Robin Hood seems a little tall for a fox. Maybe they should have done some shorter legs. The head mold looks pretty accurate along with the tail. He has a bow and arrow, but no quiver since it probably wouldn’t fit with the tail piece.


Prince John looks pretty accurate as compared to the movie. The sac he’s holding I assume is a sac of money.

Experiment 626 Stitch is awesome with the 4 arms. I like it!


Baymax… didn’t know who he was… we watched the movie and now I know. I think the minifigure is a little small as he was much larger than the people he was with in the movie. I’m not sure how the designers would have done that though. he comes with his charging pack.

Evil Queen works well for what you’d expect her to be. The mirror is great with the minifigure head printed on it.

Set Review - #10312-1: Jazz Club - LEGO Icons - Modular Building

Thanks LEGO! You’ve hooked me onto the modular buildings and now I’m addicted. 2023’s modular building is #10312-1: Jazz Club. It was released on 15 December 2022 and it contains 2,899 pieces. The set retails for $229.99 and costs $0.079 per piece. It consists of a Jazz Club with an office on the second floor and a practice room on the third floor. To the side of the building is a small pizza parlor. Above it is a tailor shop. At the top of the smaller building is a green house. I’ve heard/read a number of reviews, but tried to go into it with an open mind. So here goes…

The front of the box shows the full set with a black background. It appears to be in a spot light. The set name is in the upper left with a number of architectural type drawn buildings and in small letters it says “modular buildings collection.” The Icons logo is on the bottom with the 18+ greebling in the same brick red color as the top two floors of the jazz club.

The back shows the set placed in-between #10278-1: Police Station and #10297-1: Boutique Hotel. In the upper right is a drawing of the set with dimensions. On the left side shows the different floors of the set. The bottom shows some of the details on the inside of the set.

Onto the build…

The set contains some parts bags and then a white box with parts bags. When you open up the box, there are 22 parts bags numbered one through 15. There is a light grey baseplate and then the instructions are in a cardboard envelope.

The instructions come in a white book which helps you see the set build better versus the previous darker colored instruction books. There is a page about the set inside before going into the build. Throughout this set, there are small references at the top of some pages about how certain parts of the build relate to previous modular buildings. This didn’t do too much for me and I could have done without the connective storyline LEGO tried to build. I like the modulars because they are fun to build and I can connect them up to make a larger city. I don’t need to know how the story goes between the minifigures who live there.

Bag one builds the floor of the buildings. You build the sidewalk and then you start building the flooring of each building.

Bag two adds to the walls of each building and finalizes the floor designs. You also build the stage with a drum set and a drummer. There’s a saxophone on a stand too. In the center of the building is a small bathroom. In this bag you build a small sink and a toilet.

Bag three builds the walls higher all around. You add in a door to the outside and in the back, you build a small case to put in “wood” pieces for the pizza shop store. Inside the Jazz Club, you add in some tables and chairs. There is also a string bass player with a bass, bow, and a backpack case. The pizza place has a wood stove and a chef minifigure who is working on a pizza with some toppings nearby. Instead of a 2x2 round printed pizza tile, the pizza is four quarter rounds placed together which is different from past sets. Above the bathroom are stairs that go up to the next floor.

The fourth bag tops off the walls and adds tiles with a few studs to connect to the second floor. You add in a front façade with windows, structural decorations, an advertisement on a window for an upcoming show, and some space for the entryway in a future bag. The pizza shop adds in some windows, a door, a light, and a small structure on the outside with plants growing on it.

The fifth bag finishes up the first floor. In the front of the Jazz Club, you add in the entryway. Instead of a flat space, you add in a 45 degree offset door area with a ticket booth and signage above. This is a neat design that helps to break away from the flat look of a normal façade. In the pizza shop, you add some awnings over the windows in the green, white, and red pattern potentially reminiscent of the Italian flag.

Inside the Jazz Club, you add the curtains around the stage and some spot lights to shine down on the stage. This section is easily removable if you want to change it up as it just clips into place.

Bag six starts the second floor. On the left side of the picture is the Club Manager’s office. There’s an opening in the floor so you can watch and listen to what’s going on below which is interesting. Not sure I’d want that in my office, but it works okay here. The right side has an opening for the stairs and then an opening to connect to the second floor above the Pizza Shop.

Bag seven continues this floor with some more office details to include a desk, lamp, phone, and record player. The manager minifigure also comes in this bag. I have her placed at her corner desk. The walls continue to get higher and you add in some Technic pins to connect to the other side of the modular. I was trying to figure out why this was done and I can only assume it’s because they wanted to keep the walls the same color on either side. I guess that works as the red and yellow sides are separate, but it’s not super sturdy. When you go to remove the second floor once the whole thing is finished, you need to make sure you grab it the right way or it will come apart pretty easily. The good part is that it’s easy to reassemble if it does come apart.

Bag eight just about finishes up this side of the second floor. The walls are higher, the windows are added in, there are some decorations on the front façade, there are doors between rooms, and then windows on the back.

The ninth bag starts assembly on the tailor shop which can only be reached by going through the Jazz Club section of the building. Not really a big deal, but interesting that they share a stairwell. The tailor shop is the same yellow as the pizza shop. Inside is a big sewing machine, some rolls of fabric, a mannequin, and the chimney from the pizza shop continues through this room. This bag comes with a minifigure to work as the tailor.

Bag ten wraps up this floor. You add tiles and a few studs around the tops of the walls to make for easy connections with the higher levels. You also finish up the front façade for the tailor shop with some windows and plants.

Bag 11 starts the third floor of the Jazz Club. Besides the floor and a start to the outer wall, you build a couch, music stand, plant, and a railing around the stairway entrance. This bag comes with the singer minifigure. She has a dress, microphone, and some big hair. The music stand comes with a printed tile with some music for her to practice.

Bag 12 builds up the walls and adds in some windows. Two of the front windows are made of translucent bricks and plates for a colored glass window. On the inside, you add a chair next to a table and mirror for the singer to use to put on makeup or fix her hair.

Bag 13 adds in some art on the wall of the practice room, the outer hallway gets a ladder to go up to the roof, and the entire floor gets more pieces for the walls, doors, windows, and tiling for the top of the walls. This bag comes with the magician who has a few parts for one of her tricks and a small bunny as well.

Bag 14 builds the roof of the Jazz Club. The details fit right into the rest of the build and while not overly complicated, the build was different using techniques you don’t usually see. For example, you attach a piece in upside down in the front of the roof, in the center section so you can attach a decoration piece. The back corner of the roof has a small nest for a squirrel to live in. A trap door opens up to the ladder in the hallway on the floor below.

This bag also builds the Jazz Club sign. I was thankful that the sign is printed and I like the yellow on the dark blue. The yellow rails along with the yellow sausage pieces really help to make it pop. I’ve seen a few reviews were people didn’t like the colors of the building, but I’m good with it. It looks awesome with the brick red color of the building.

The final bag, bag 15, adds in a small outdoor seating area in front of the pizza shop and includes a driver with a mini motor bike to deliver pizzas to customers. On top of the pizza shop is a green house. There are a few plants inside the greenhouse and then there’s an interesting design using clear door/wall pieces to let in light for the brick plants to grow. I followed the instructions, but there is space and some extra plant pieces to mix things up as desired.

The set comes with eight minifigures. Here they are in case you couldn’t see them well in the earlier pictures.

Here’s the final build. The sides don’t look that great, but that’s to be expected as you connect modulars to each other. The back is pretty boring as well, but that’s not too big of a deal to me. Overall, is this my favorite modular building ever? No. Was it a great build with a fun design? Yes. I enjoyed this one. I actually ended up building it with my 5-year old kiddo. He had some challenges with the harder sections, but he did great with a lot of the areas I didn’t think he’d be able to handle.

As for the price, I am not a fan that the price keeps going up for modulars, but I am glad the price per piece is still fairly reasonable. I used VIP points and purchased the set during a double VIP point period so that helped. If you’re a modular fan, you have to pick this one up. If you’re on the fence, I’d dive into this one. You’ll enjoy the build and if not, you get some fun pieces for future MOCs. Look for great GWPs or double VIP point options to get a better deal.

I think this is the first time that I’ve had another modular still built. Here is the Jazz Club next to #10297-1: Boutique Hotel. I think it looks better with the Jazz Club on the left side, but that’s just my opinion. Some day, I hope to have the time to rebuild them all and the space to put them all together for a photo shoot.

Happy building!

Set Review - #21335-1: Motorized Lighthouse - Lego Ideas

Here is LEGO Ideas set #43, #21335-1: Motorized Lighthouse. This one was released in the US on 19 August 2022 and retails for $299.99. It contains 2,065 pieces and this works out to $0.145 per piece. Yikes! A lot, I know. It does come with a motor, battery box, and lights, but does that really raise the price by that much? I picked this one up during a double VIP point period and used some of my VIP points to discount the price. It’s a bit high in my opinion, but onto to the review.

The box for this one is rather large. The set arrived in a special outer box that UPS still somehow managed to damage so the set box showed up damaged too. Thanks! I think the box could have been a bit smaller, but I’m not a packaging expert. The box is dark with some blue greebling on the bottom for the 18+ design. The dark packaging works so LEGO can show off the light house functionality. I’m not sure the light looks exactly like they picture it, but I get the idea. The back of the box shows some additional set details and gives the dimensions of the set.

The box contains 18 parts bags. The bags are numbered one to 13 with one unnumbered bag for the larger pieces. You get a box for the battery box and the motor comes packaged separate too. The instructions and the base plate come in paperboard envelopes. Don’t forget about the stickers. I almost did.

You get two instruction booklets. There are some details about lighthouses, the Fresnel lens, the fan designer (Sandro Quattrini), and then info about the LEGO design team.

There are two small sticker sheets with 5 stickers total. Not bad I guess.

You get a dark blue baseplate which is a first for LEGO. We’ll see if it pops up again somewhere in the future.

The first bag starts the base of the build with the outline of the island area where the lighthouse is placed. This bag also comes with a male lighthouse keeper with a telescope and then a female lighthouse keeper. I have her in the row boat with the kitten.

The second bag adds up some more details along the base, but also installs the battery box and motor. Initially it looks like the wires are everywhere, but the designers did a good job keeping them contained.

The third bag adds more details and a bunch of the BURPs (big ugly rock pieces) to the build for height. While I’m not a fan of BURPs, I understand the usage of them as I’d probably still be sitting there attaching all the pieces to achieve the height needed to cover up the electronics. Not pictured well here, but there is a cave in the island. It is where the switch is located to turn the light on and then there’s a treasure chest as well.

The fourth bag adds plates to the top of the island covering it all with just an axle sticking up and the wire for the lights.

The fifth bag adds the base of the lighthouse structure and then adds some details to the top of the island which will allow us to install the little structure at the base of the lighthouse. The axle to turn the light is hidden pretty well already which is great.

I could look it up, but I like to call it swamp green. I’m sure there’s an official term for the green color. It’s a nice look for the set.

Bag six builds the small living quarters for the lighthouse. They managed to cram a lot in there to include a small kitchen space, a bed, a desk, and some decorations.

Bag seven adds some details to the outside of the structure and installs it to the lighthouse island at an angle which is a nice touch.

Bag eight builds the internal structure to the lighthouse and takes it up a few floors. There are ladders inside for minifigures to climb up to the top as needed.

The ninth bag starts to round out the lighthouse structure with curved pieces. To break things up a bit, you throw in a few pieces with studs to clip on plant pieces. The structure gets smaller as you get higher so thankfully it’s not a repetitive build.

Bag 10 rounds out most of the rest of the tower and adds in the windows. The lighthouse tower has a good look to it on the outside. It’s not completely round, but it works for being brick built. The placement of the windows with the small ledge at the bottom is simple, yet it fits in well.

Bag 11 adds the roof to the living quarters at the base of the lighthouse. You also add a door and connect a light to the fireplace. I didn’t get a picture of it, but you really can’t see the fireplace lit up well unless you take the roof off. It seems like they could have used the second light on the strand for something else. Maybe a lamp on the front of the building?

Bag 12 completes the lighthouse and starts to add details to the top of the tower. The parts to connect the motor to the top of the lighthouse are added as well. I was curious to see how the light and motor would be integrated in the next step with such limited hardware showing

Bag 13 finishes up the set and I really like how they did this. The railing on the outside with the bent tubes, the garage door pieces for the windows around the tower, and the motorization for the light. The light is installed and it shines on the silver/reflective sticker. That then shines the light through the Fresnel lens (the piece is pictured) and the whole assembly rotates around. The mechanics of this are simple, but they work. Nice job design team. To top it off, you get a lance/sword as the tip of the lighthouse.

Here are a few shots of the final build. Overall, it was an enjoyable build to assemble. Not a lot of repetition and some great parts usage. I enjoyed it despite the BURPs included. I already mentioned the cost as a negative, but it ranks right up there with #10268-1: Vestas Wind Turbine as cool looking, but overpriced. There’s a motor, a light, and a battery box and LEGO increases the price of the set because of this.

Do I recommend this set? This is a tough one. Great build, but high price. I don’t think I would have purchased it without VIP points to cut the price down. $300 for this set is a bit high in my opinion.

What are your thoughts? Pick this one up? Hope there is a sale? Use VIP points?

Happy building!