Set Reviews

Set Review - #75978-1: Diagon Alley - Harry Potter

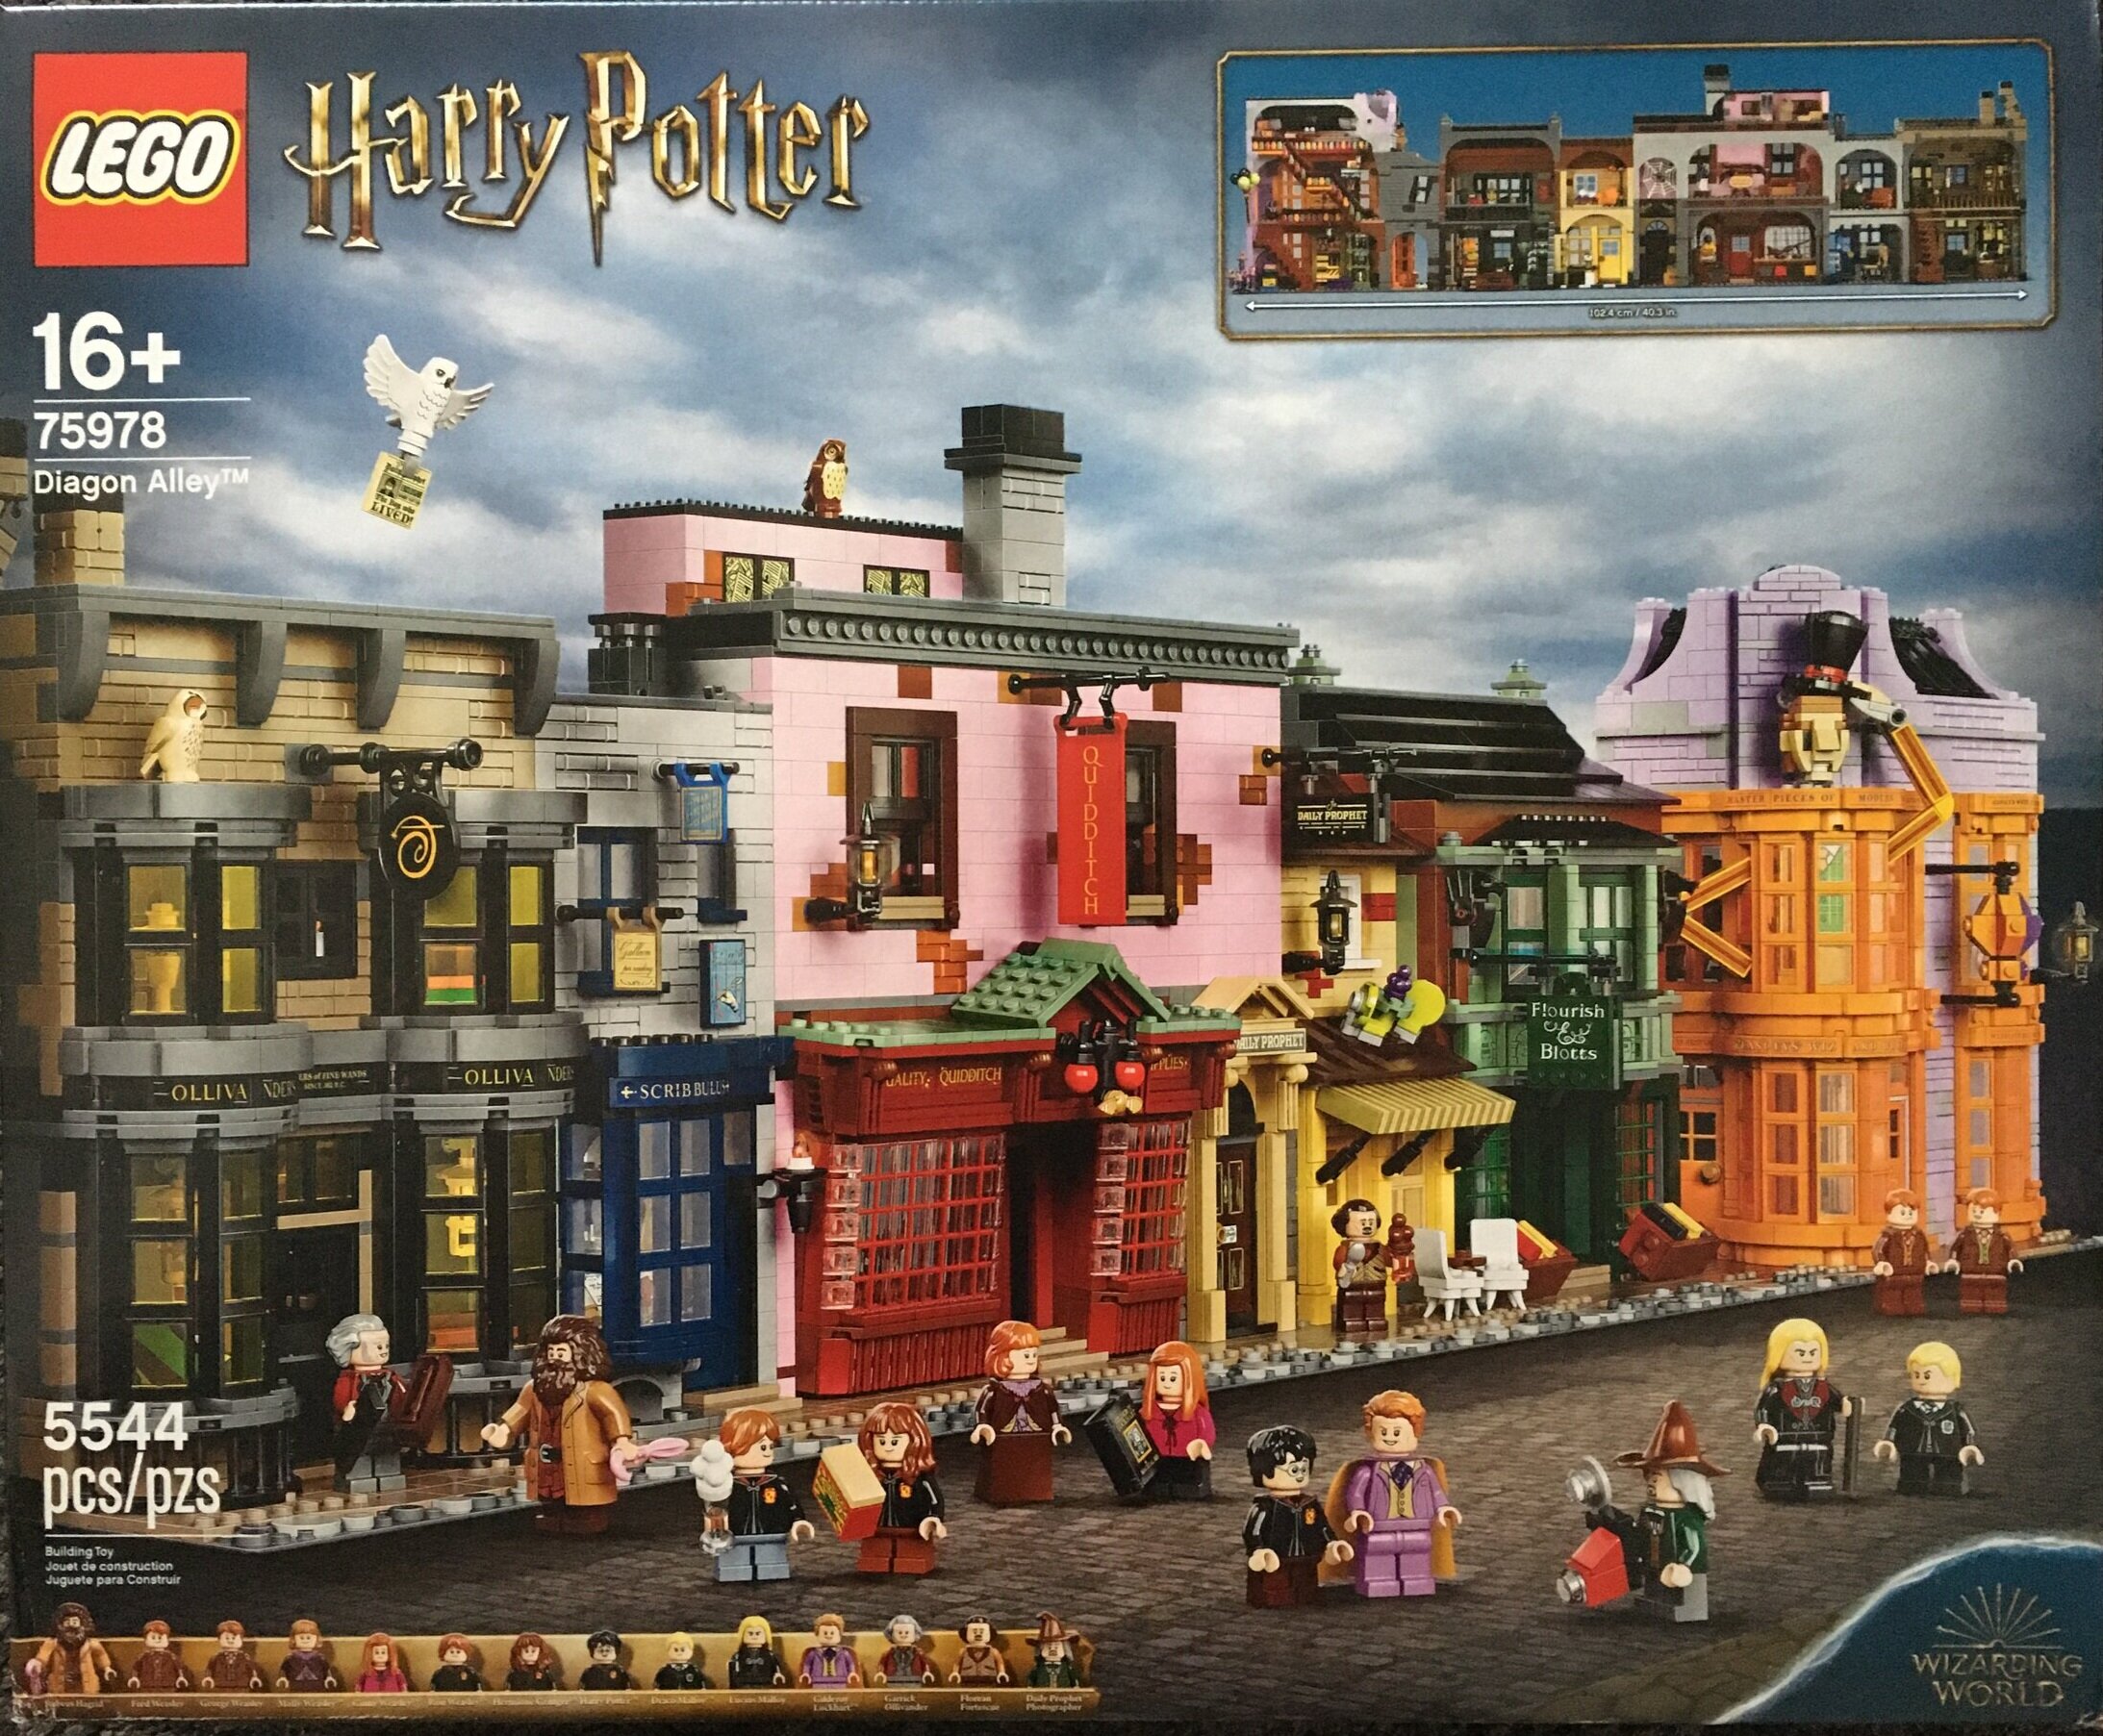
I’ve had this one for a bit and finally got it finished and a blog post ready to go. #75978-1: Diagon Alley from the Harry Potter line is built! The last big one for the Harry Potter theme was #71043-1 - Hogwarts Castle in 2018 and this is the next big set in 2020. It was released on 1 September 2020 in the US. It contains 5,544 pieces and 17 minifigures. The set retails for $399.99 in the US which works out to $0.072 per piece.

I’m a Potter fan and decided to pick up the set. I got it before Christmas along with two free gifts (#634602: Buildable Teal brick and #40410-1: Charles Dickens Tribute). I also got 10% back on Rakuten versus their normal 2.5% so $40 back is awesome (you can see post about it here… and no I am not getting paid to advertise for them). I also had a $50 gift card so $90 off and two gift with purchase sets work for me.

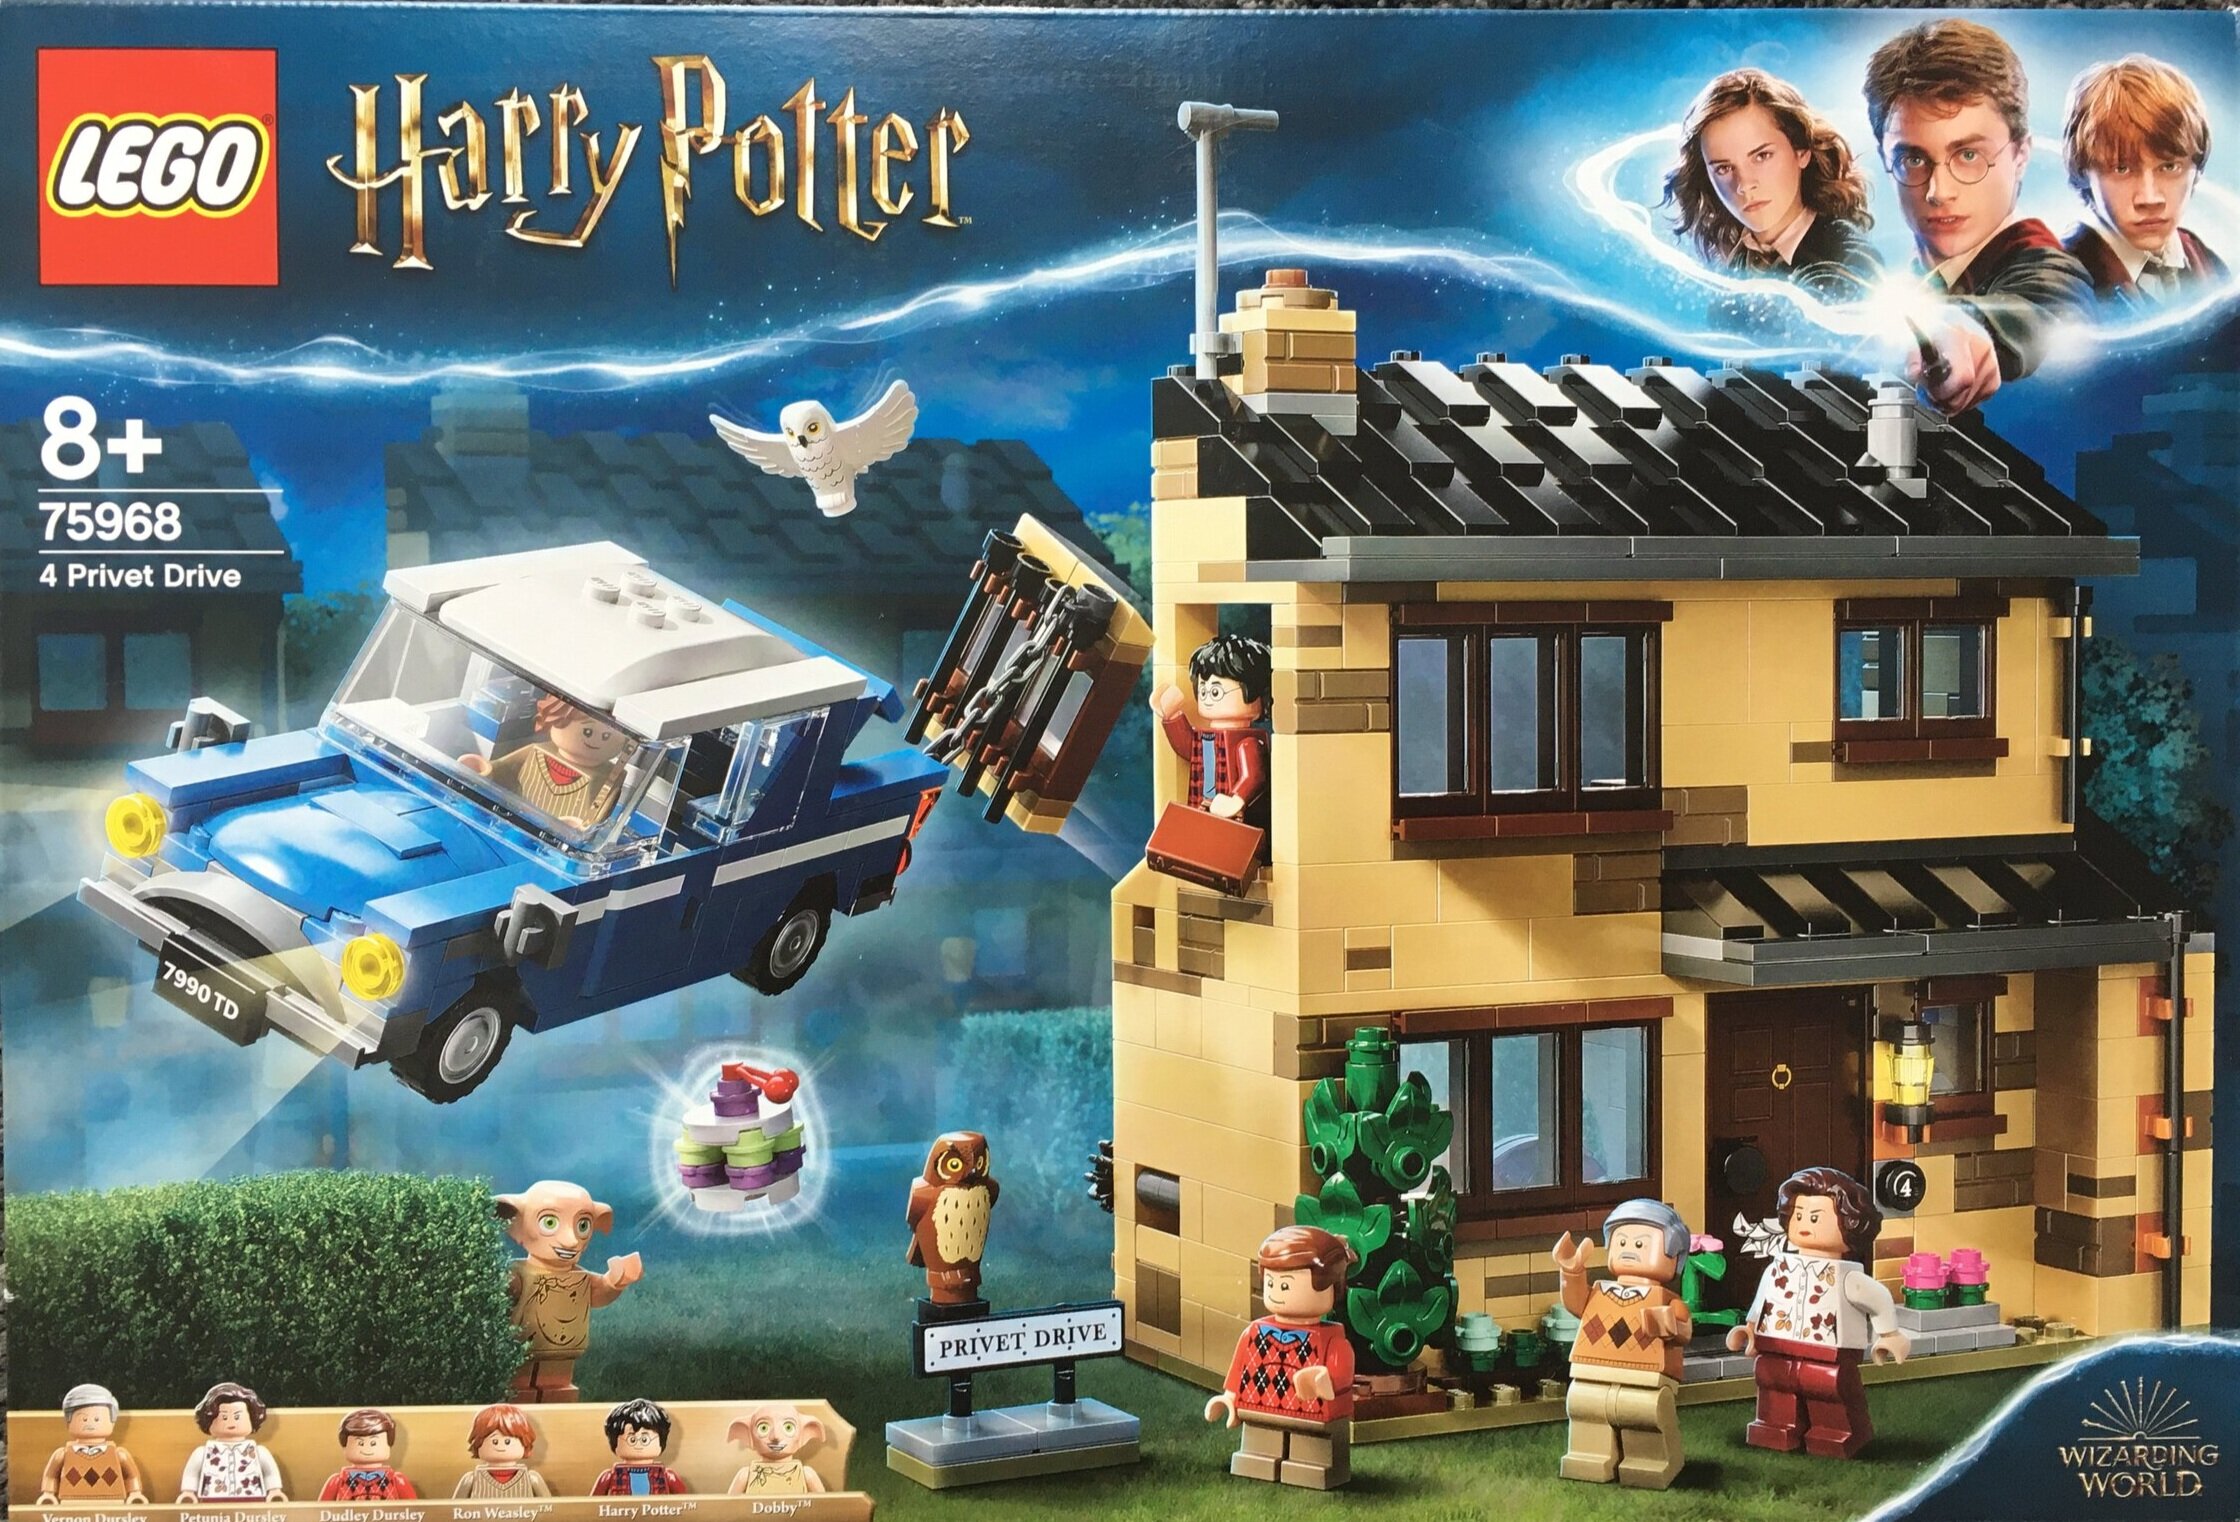
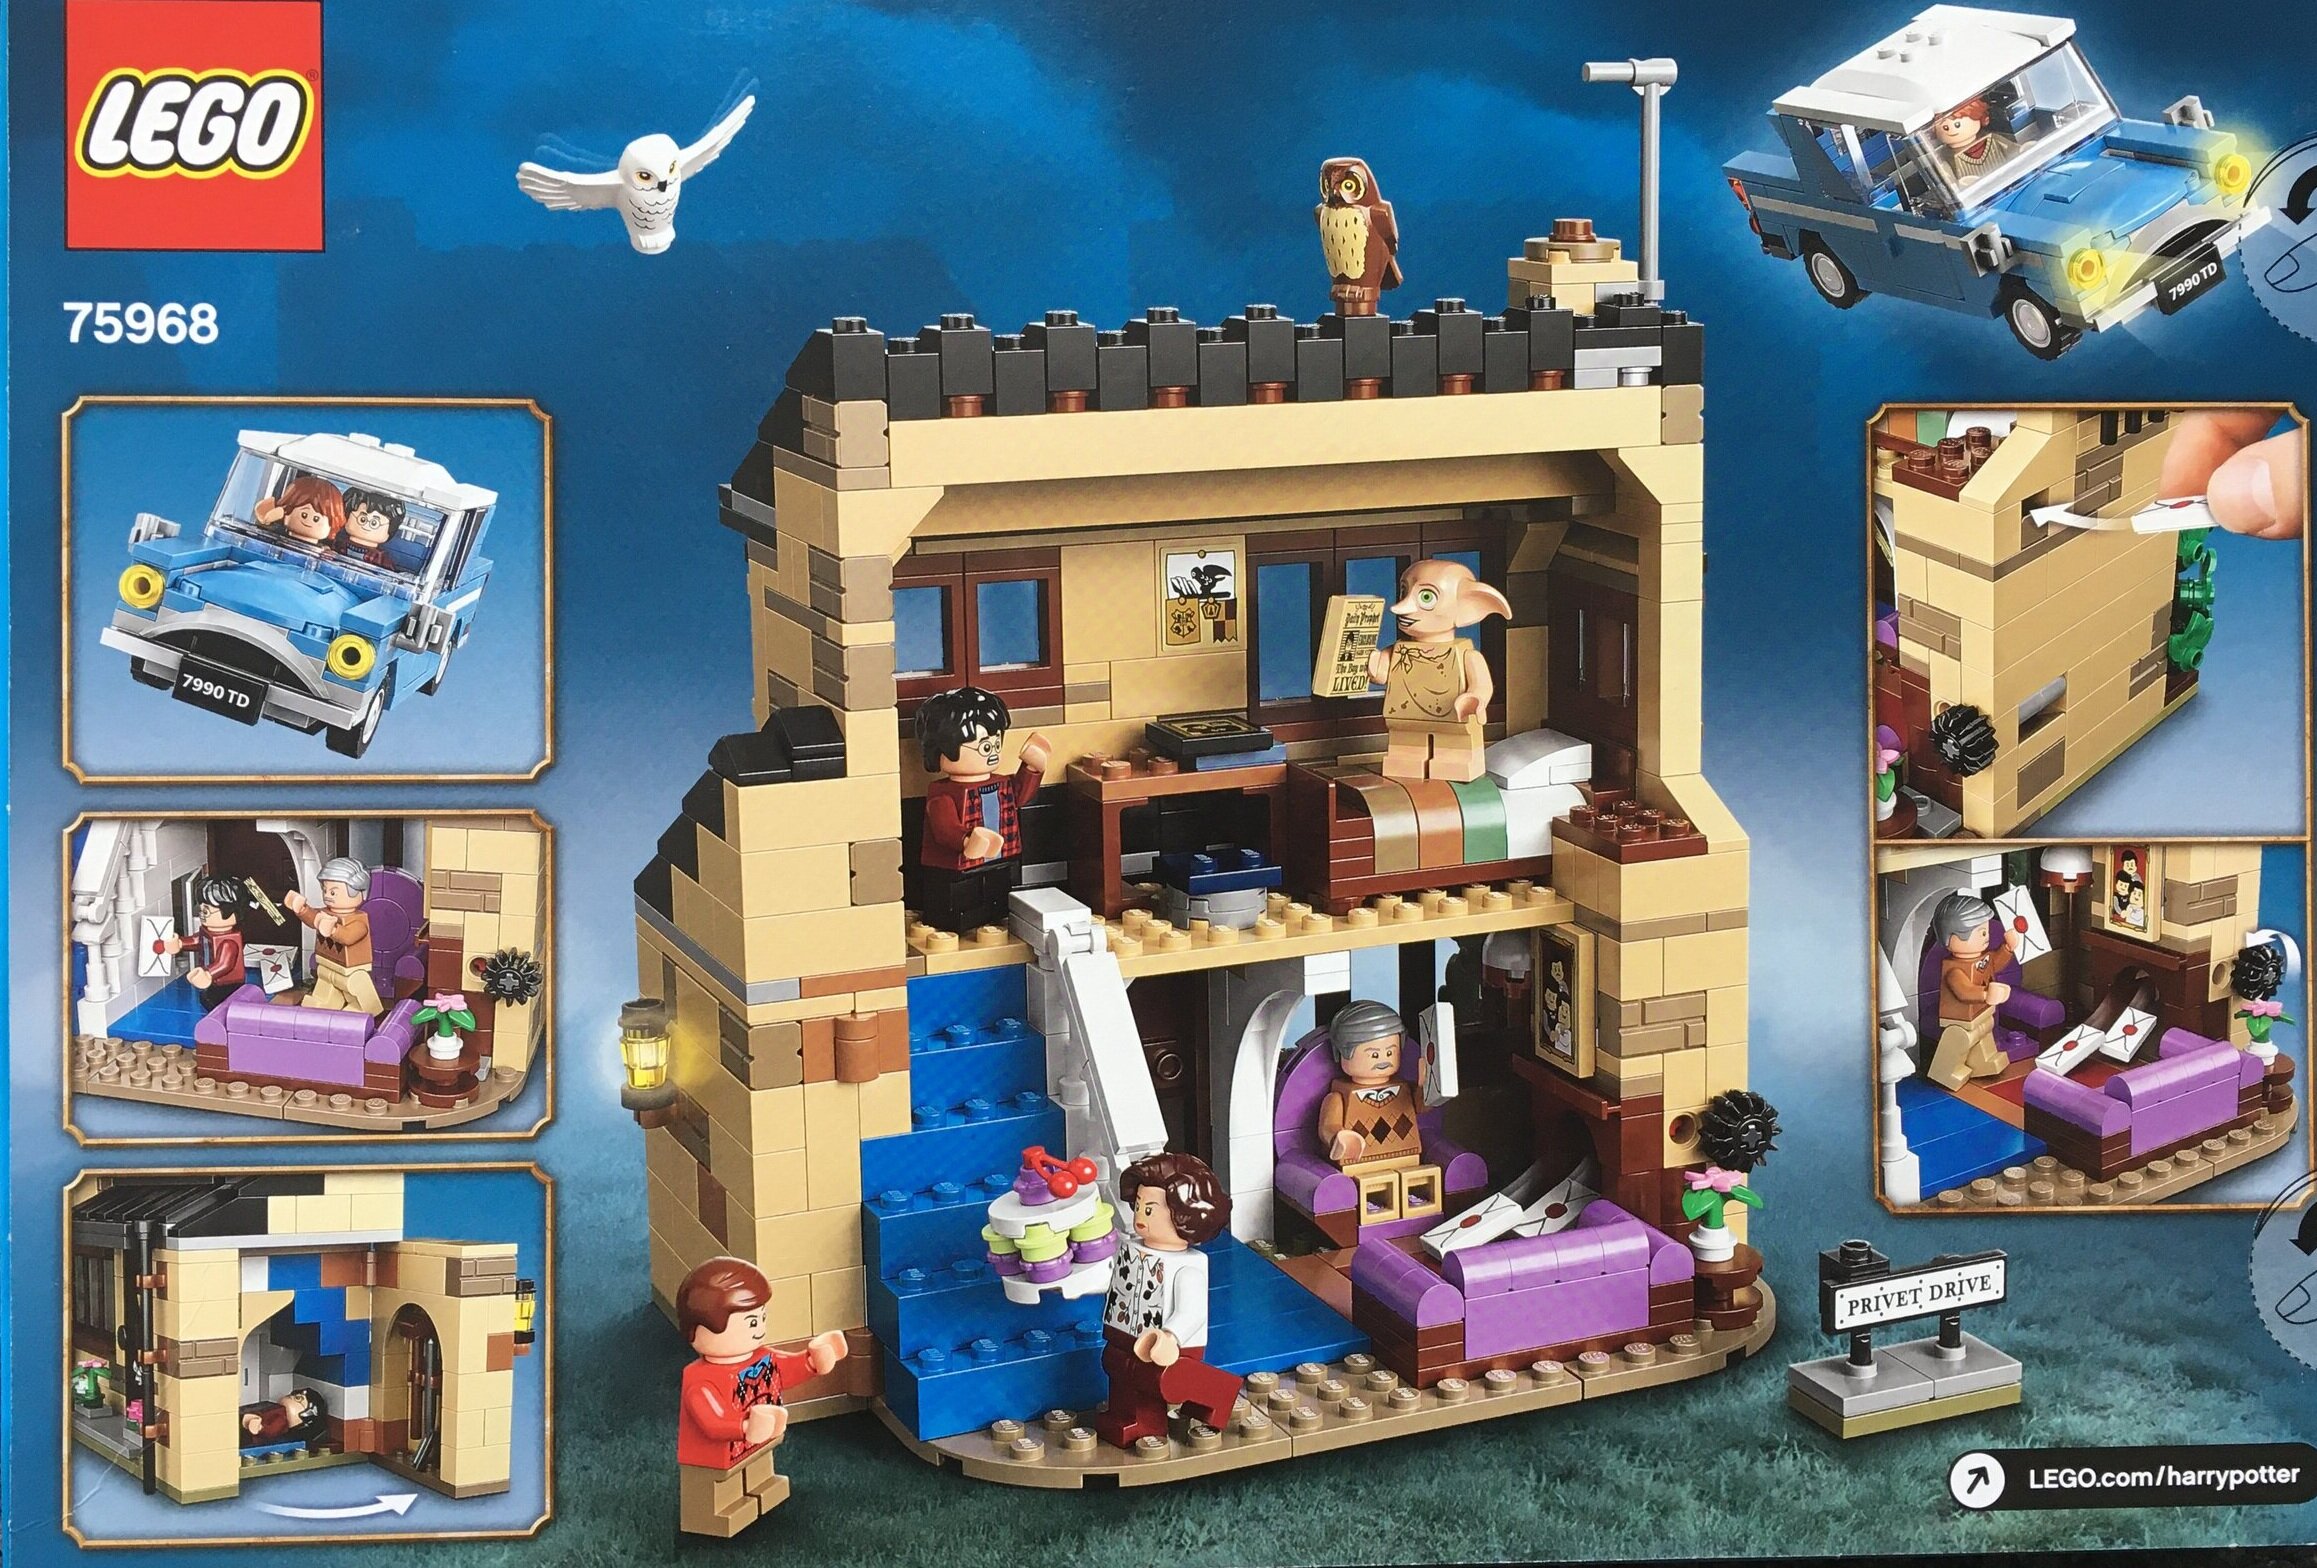
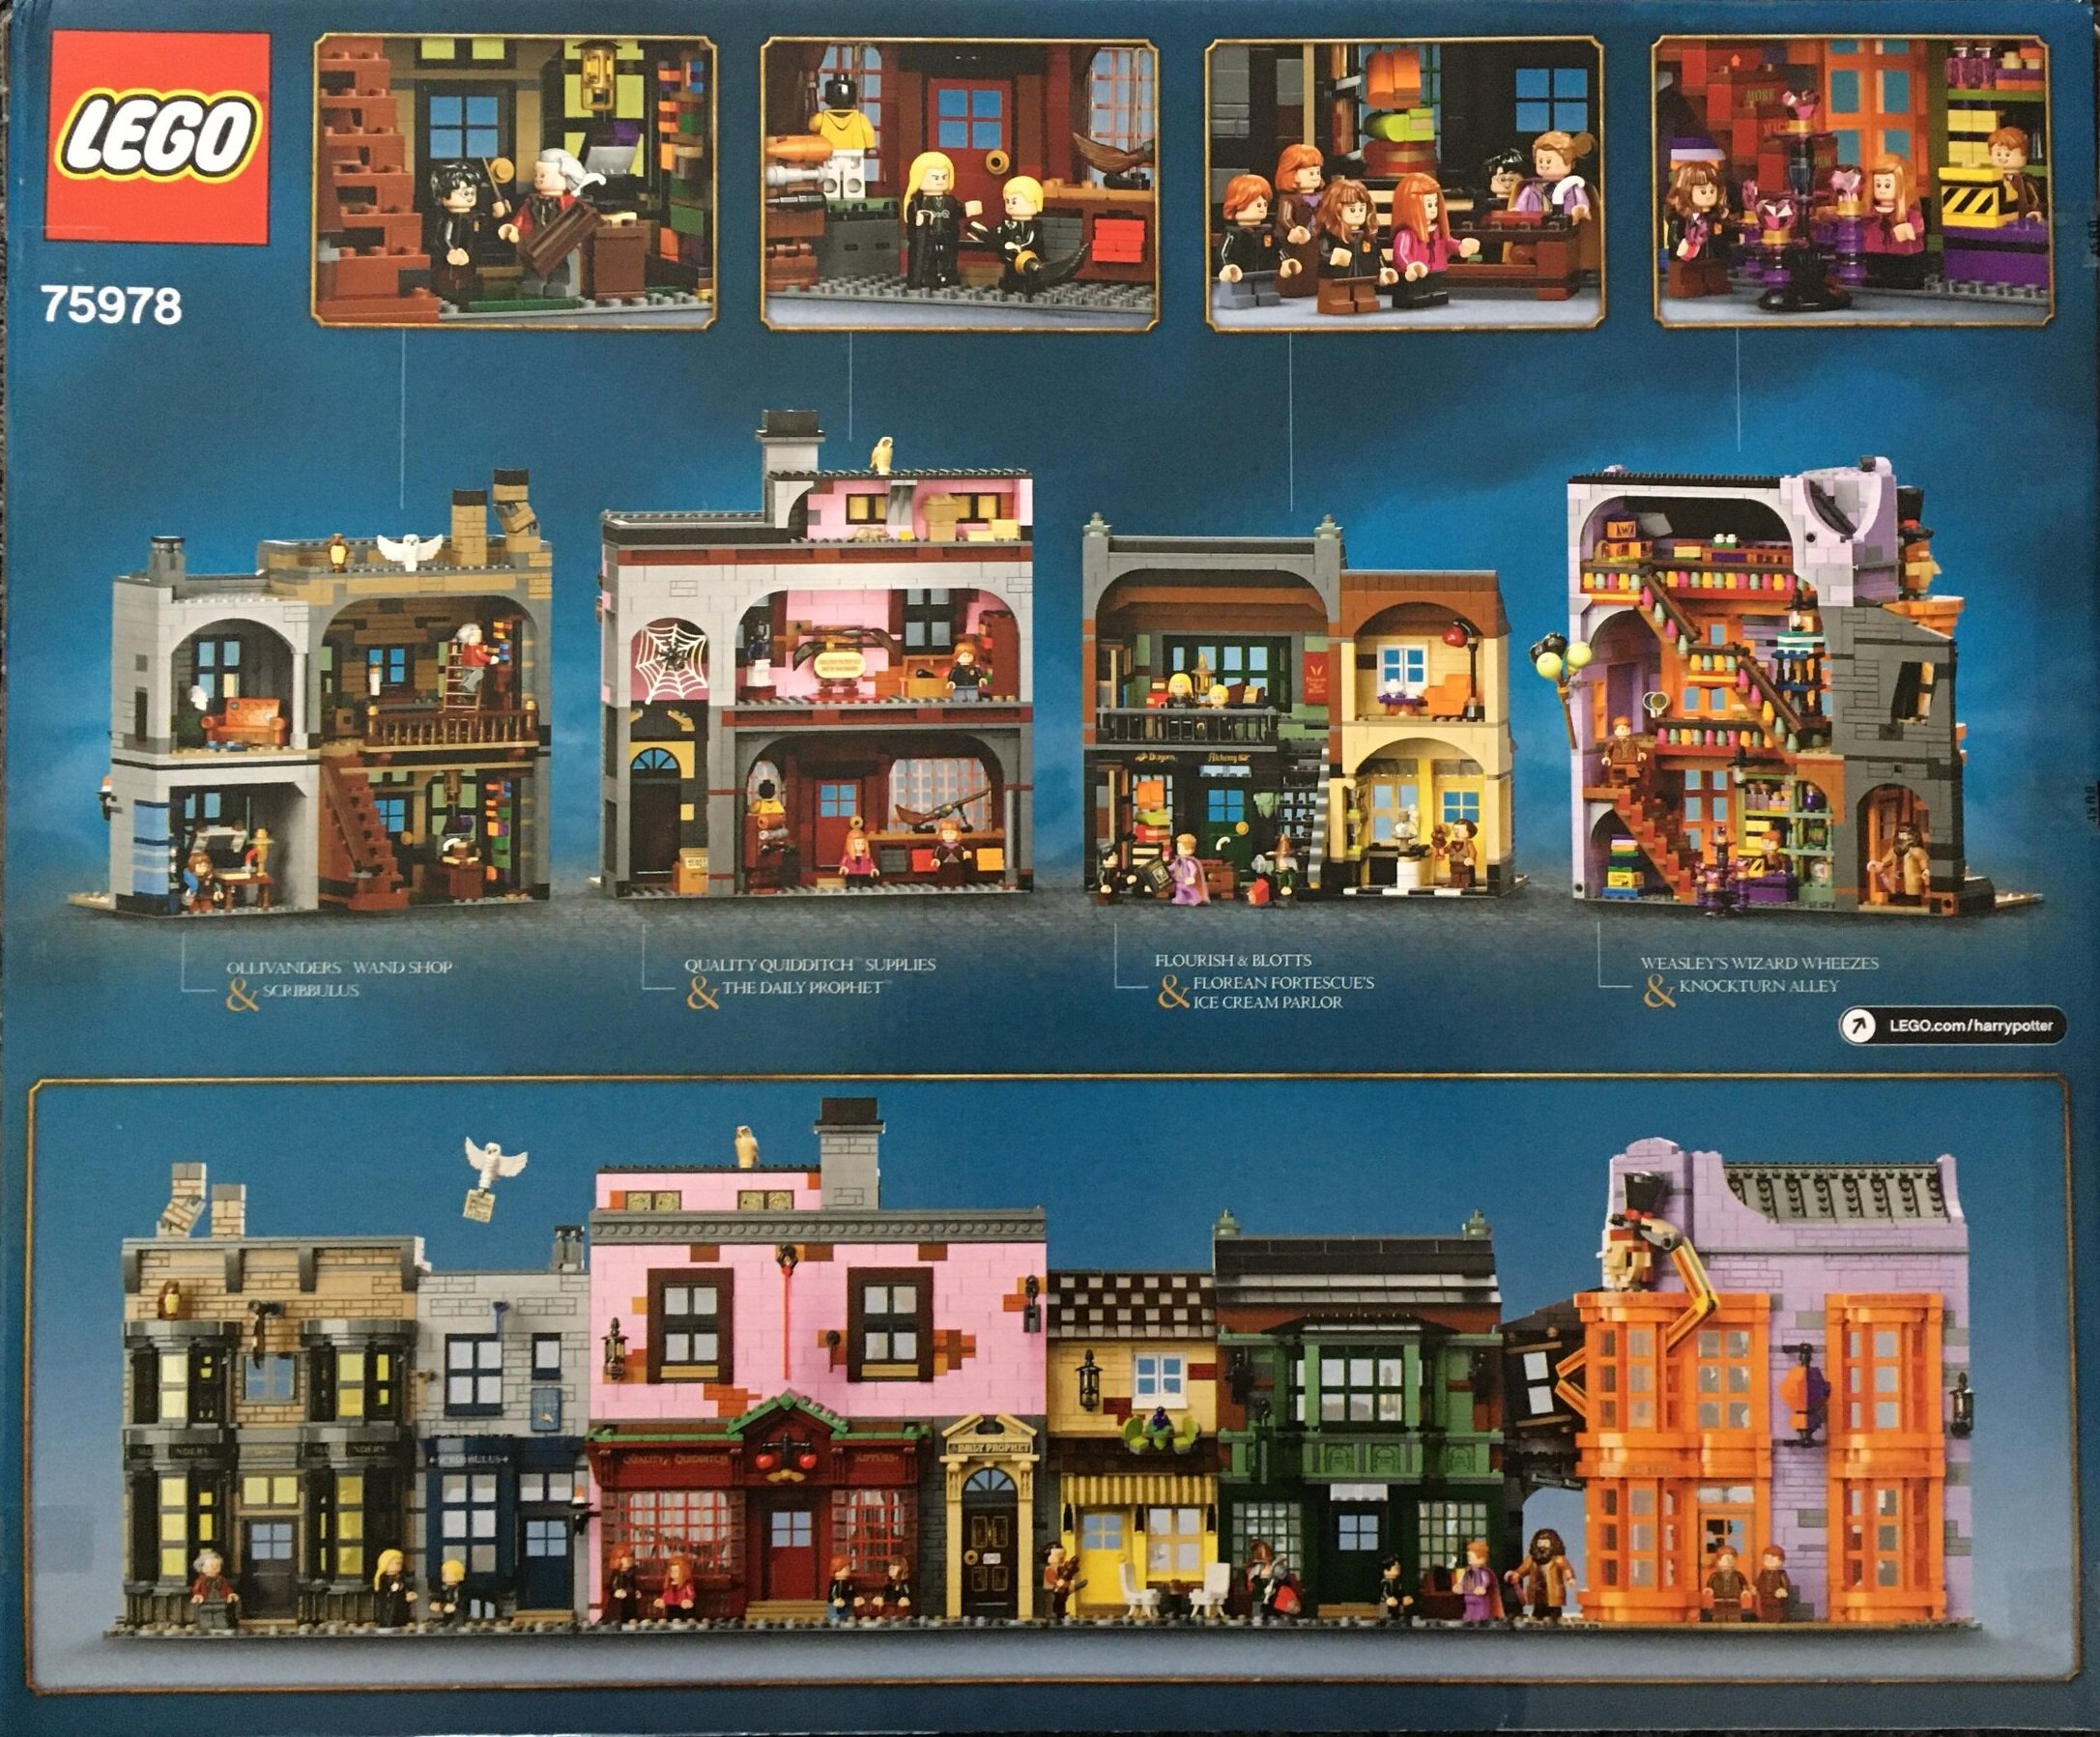
Onto the review… It’s a giant box. The box is labeled as a 16+ set. The front shows the full set and the back shows some details, lists out the separate buildings, and shows the insides of the set. On the side of the box you can see all of the minifigures as well as some of the scenes you can create.

75978_box_front.jpg
75978_box_back.jpg
75978_box_side.jpg

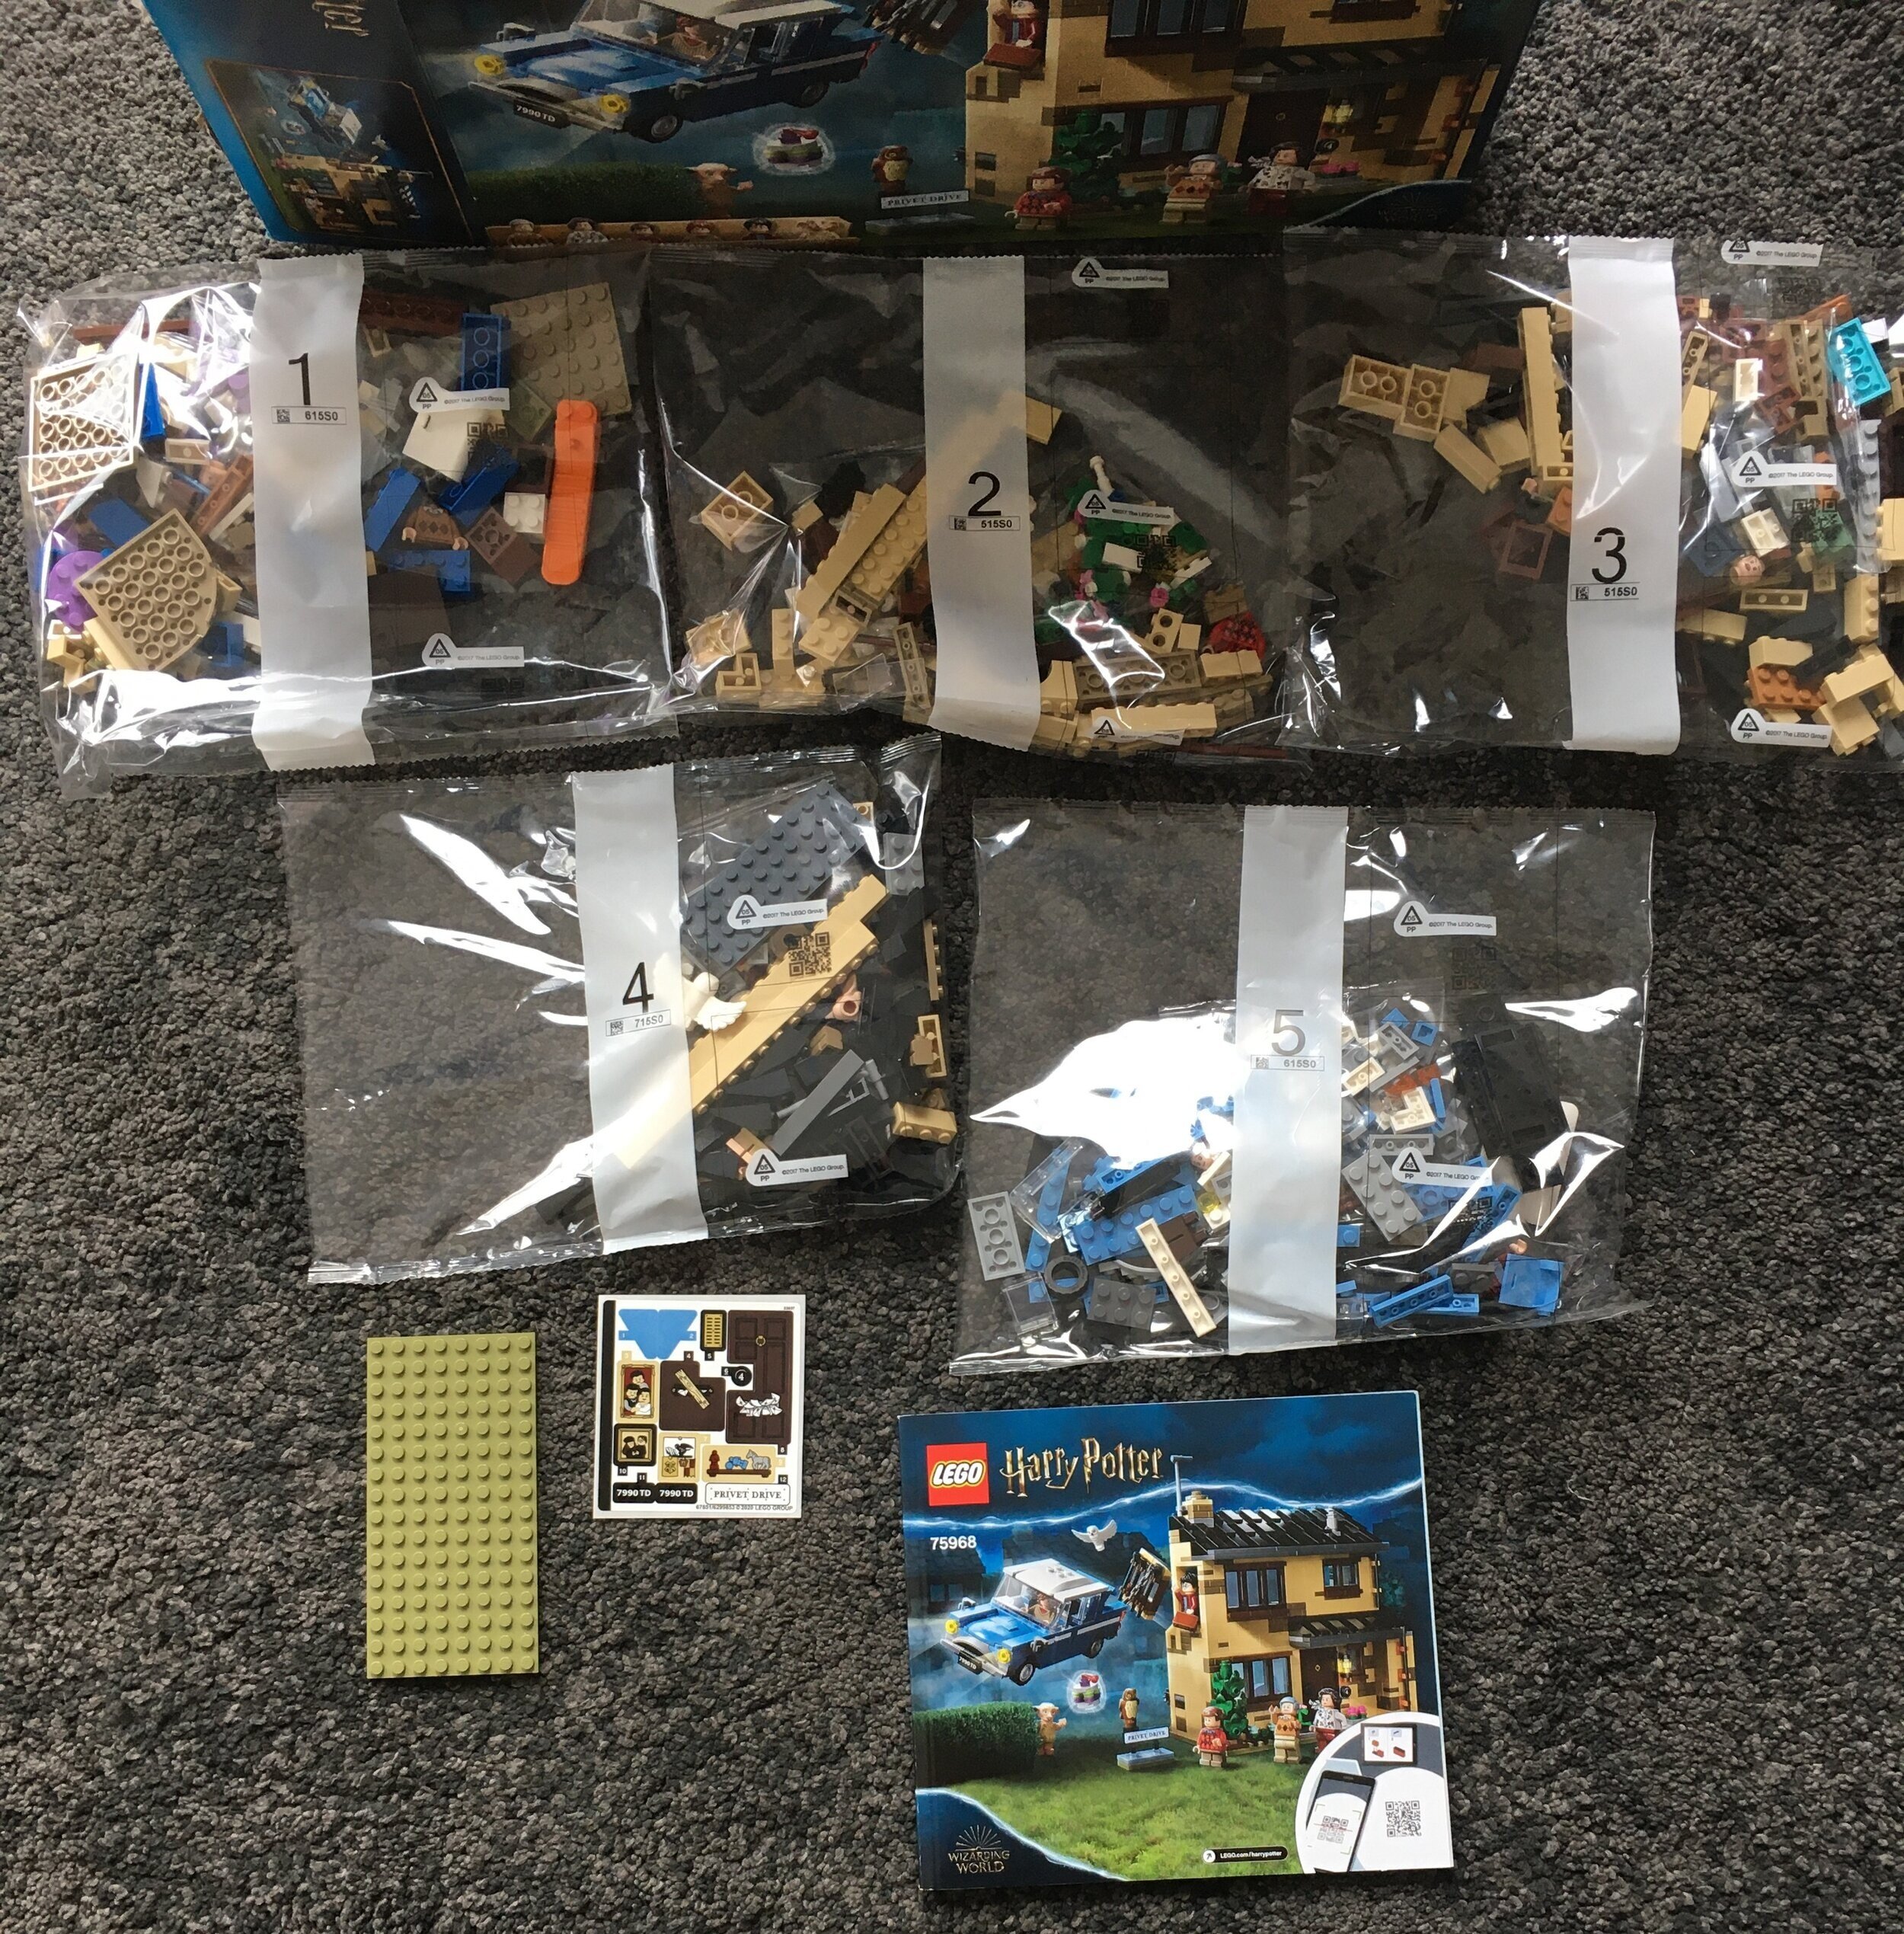
The box has a large white box in it as well as some parts bags. Those bags are numbered 9 through 20. Opening the white box reveals bags 1 through 8, box 21, the instructions and stickers, the base plates, and an parts bag without a number. I count 41 bags of parts, a box, and the base plates. I might be off a bag or two.

75978_contents1.jpg
75978_contents2.jpg

There are four instruction books. Each book is tied to what is built on one of the 16x32 gray baseplates. The books have some good write ups about the set to include details on each building, info on the designers and product team, and info on the minifigures.

75978_instructions.jpg

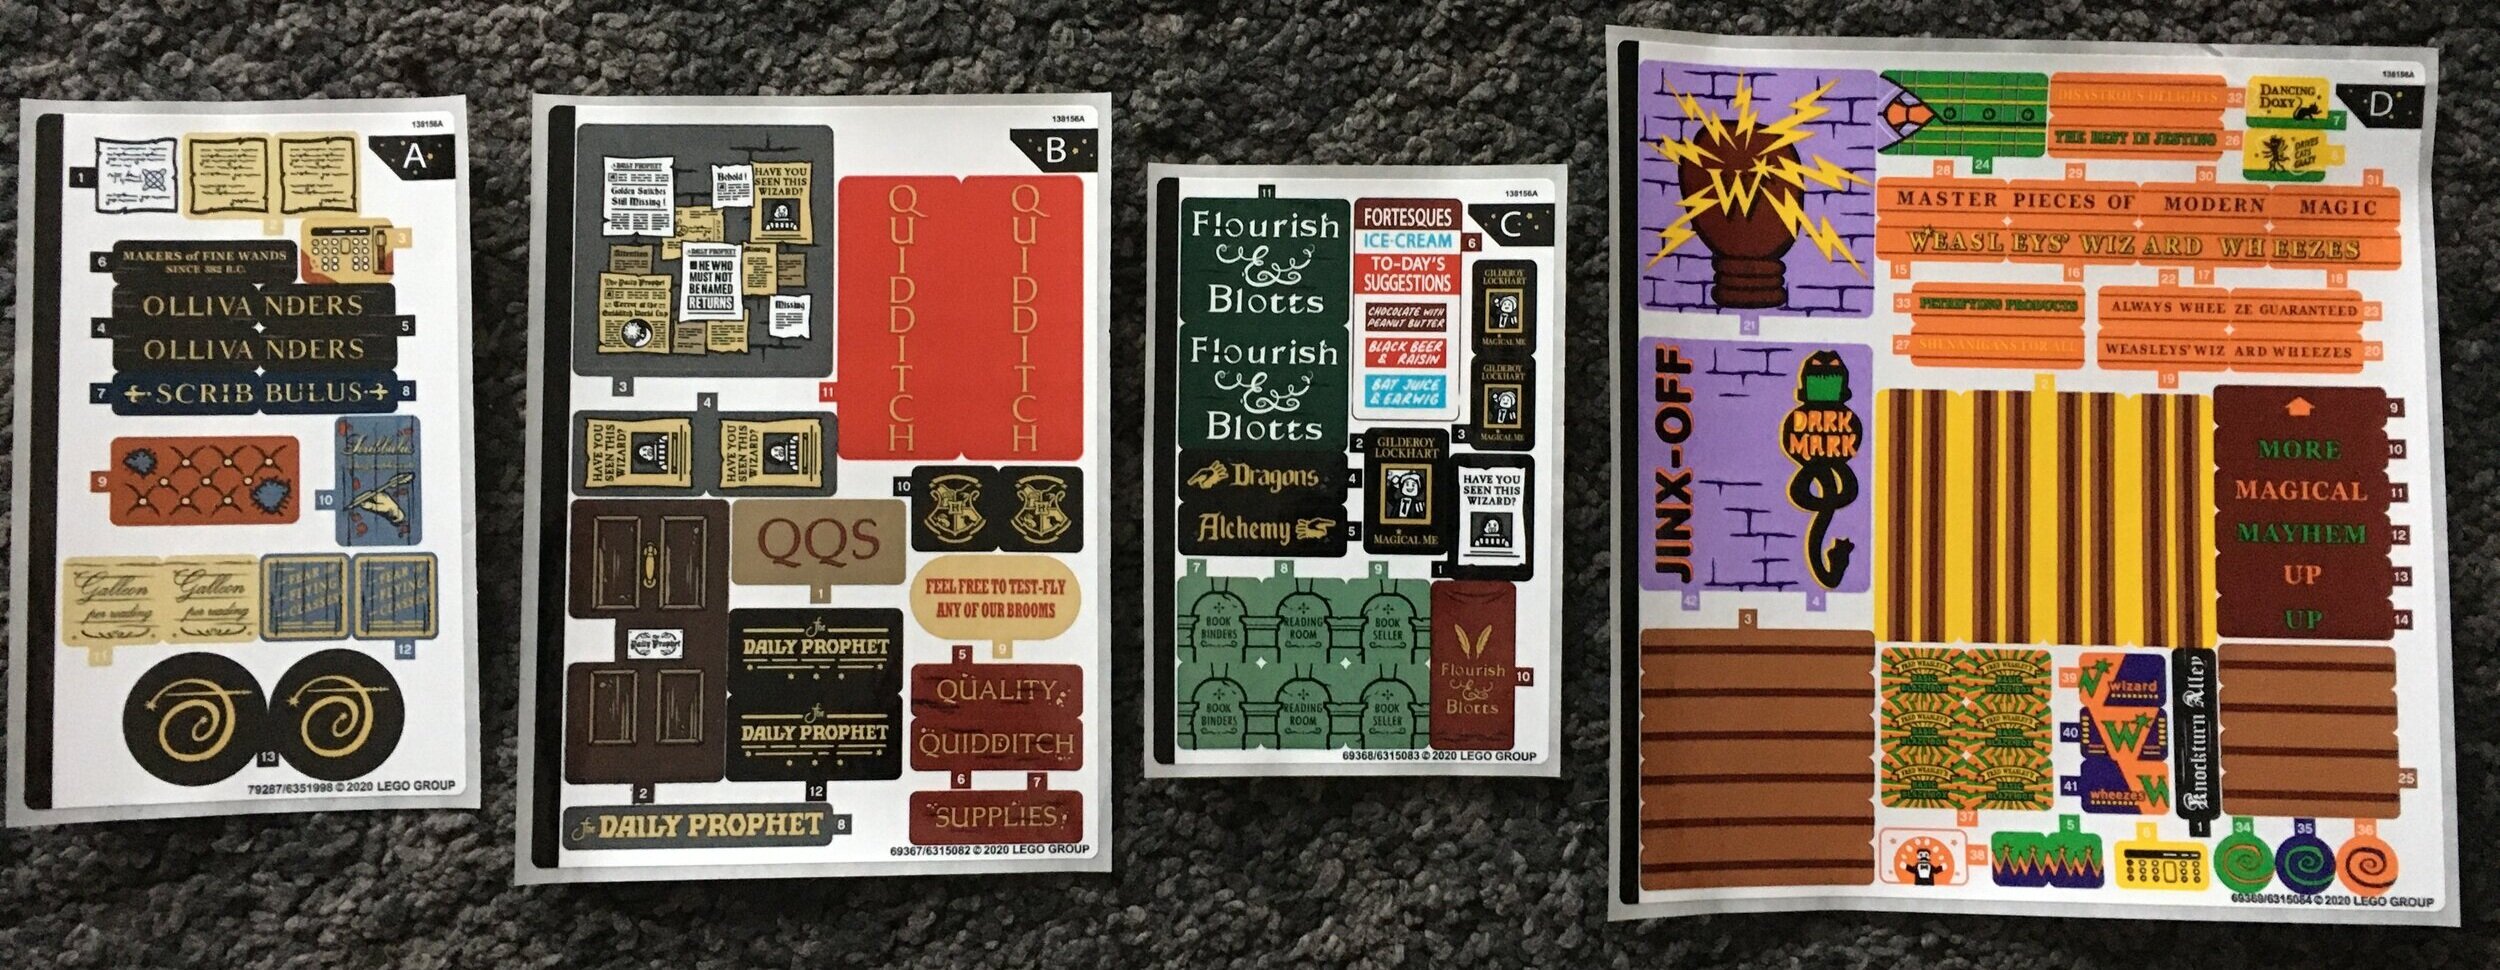
Each building comes with a sticker sheet. As you can see, the Weasley’s Joke Shop has quite a few. I am not a fan of stickers, but these really do add some great detail to the set. The only downside is how some stickers are split up between pieces. A sign should have a smooth flow, but instead is broken up between two or three pieces. If you center the stickers, it looks weird, but if put two closer together, the third may look odd. Has anyone built the set without stickers? How does it look?

75978_stickers.jpg

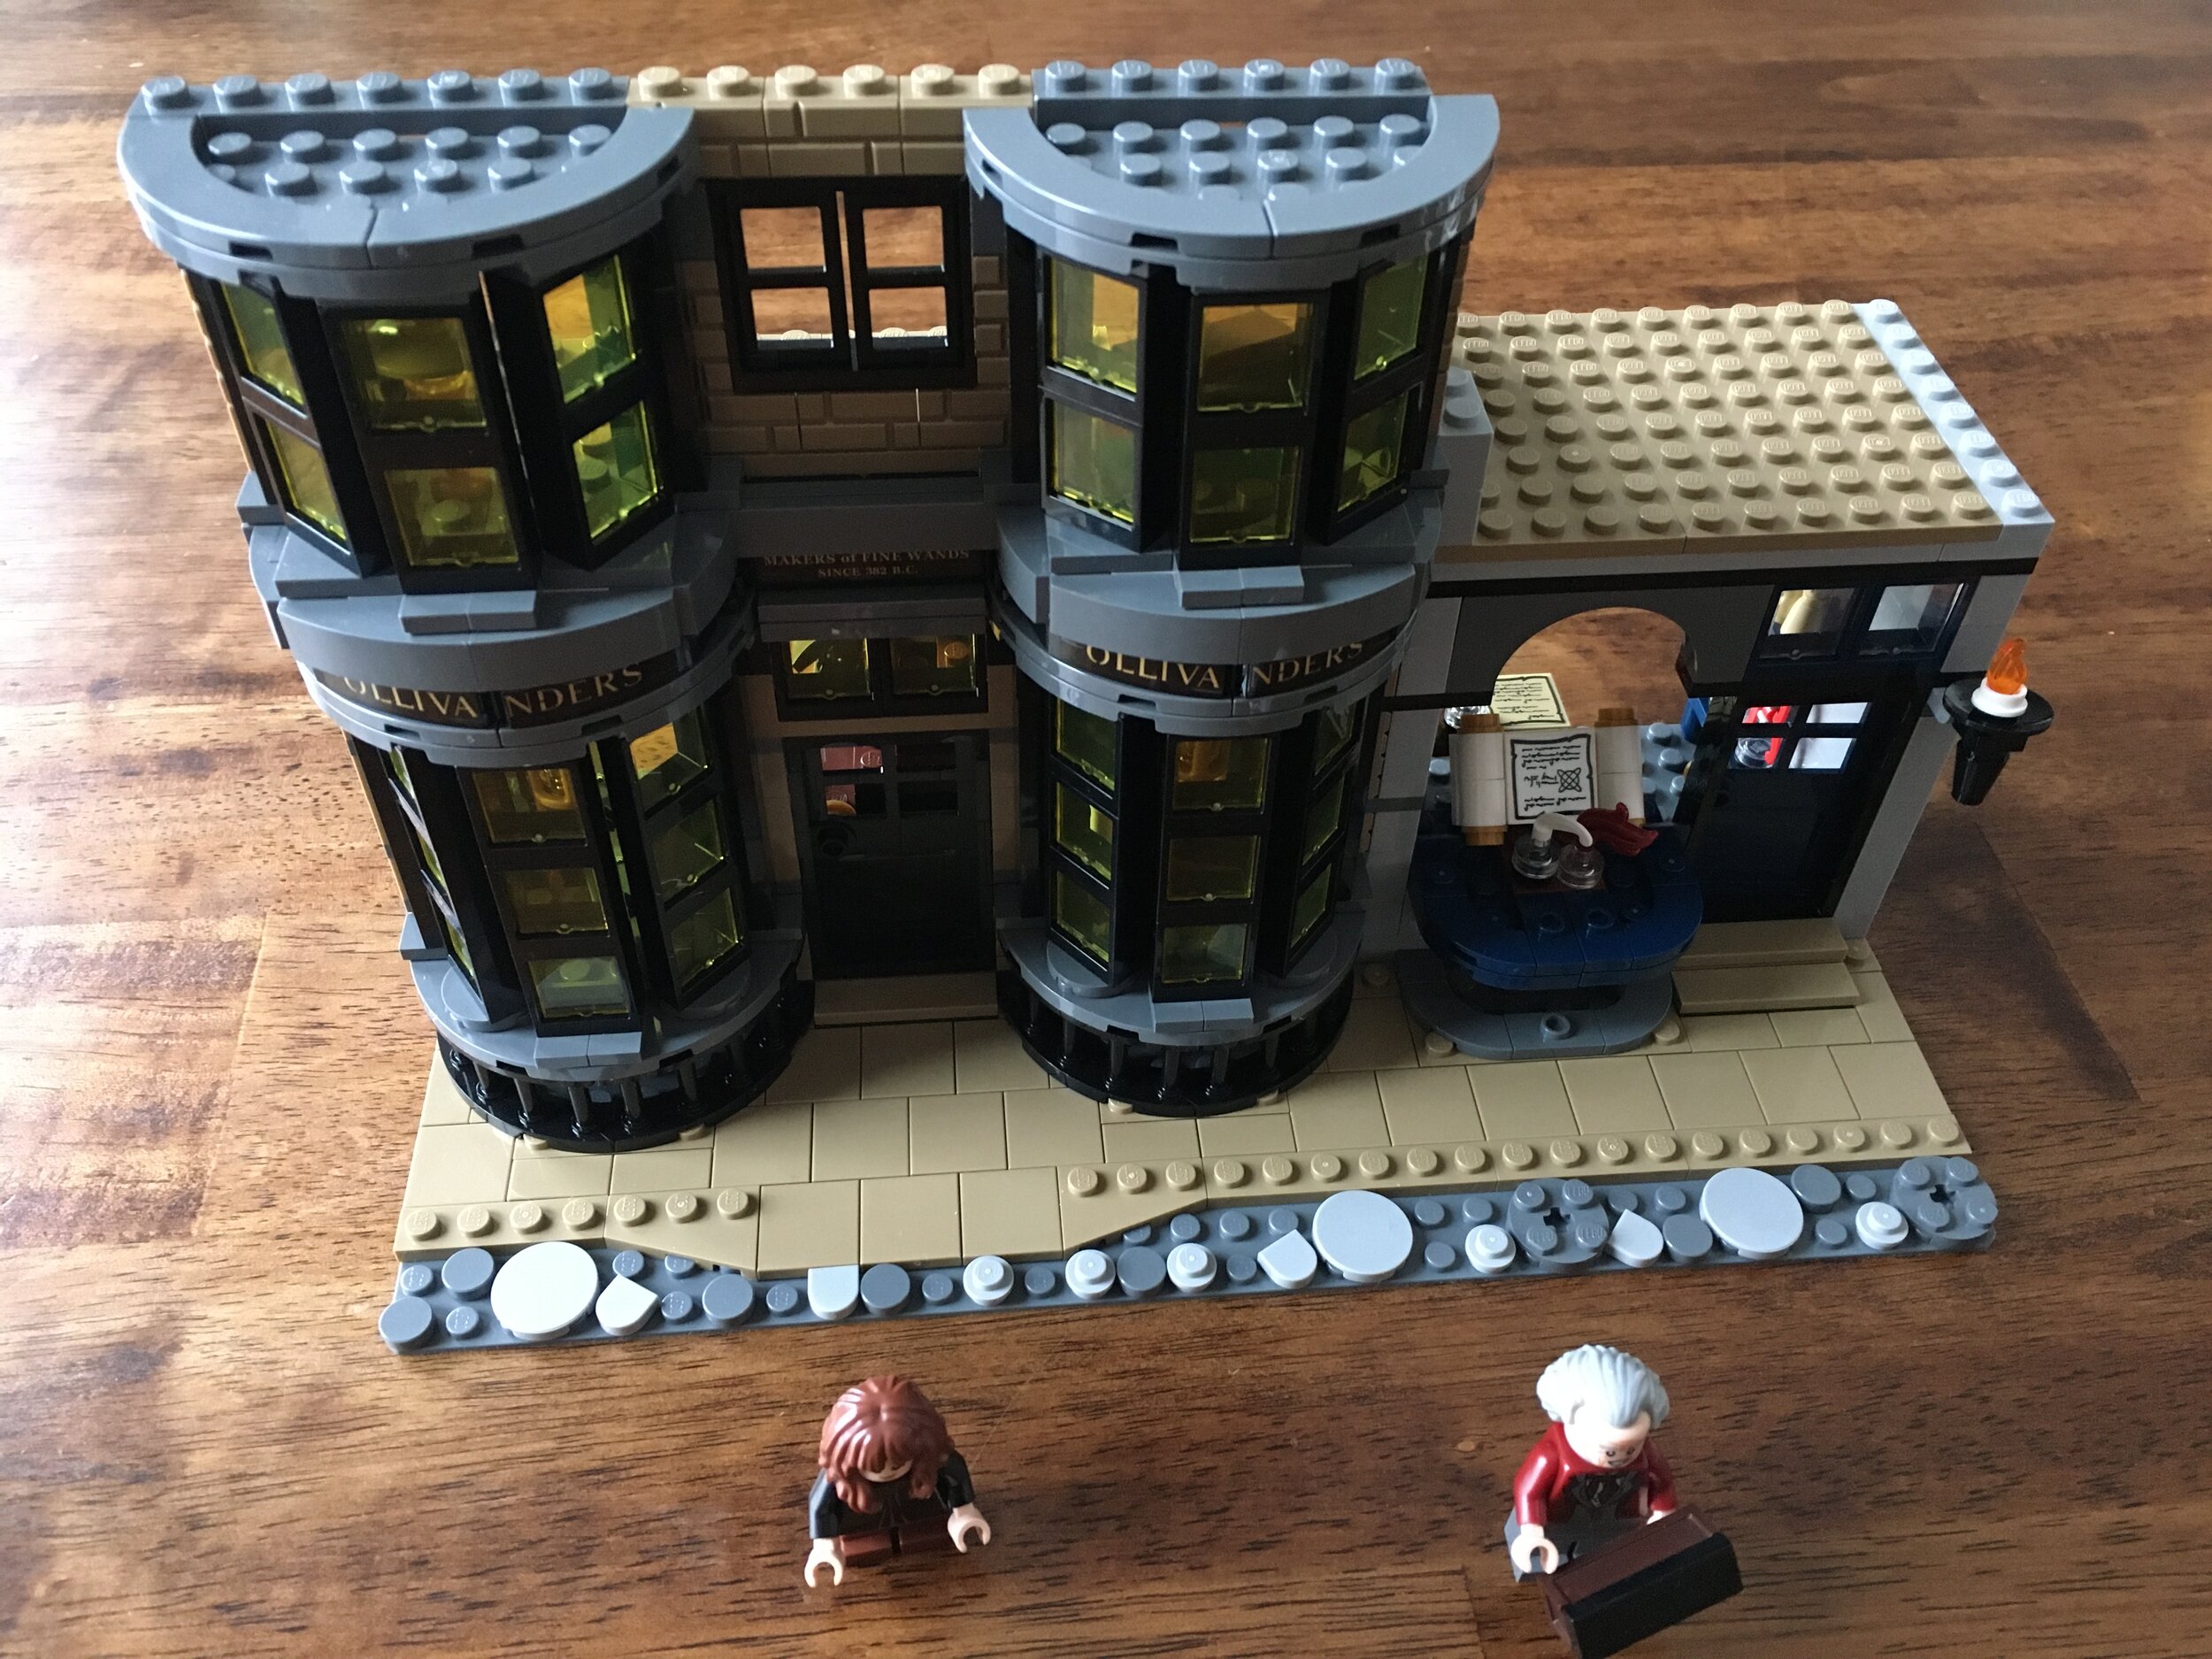
The first buildings are Ollivanders™ Wand Shop and Scribbulus.

The first bags start the base. This build and the rest have a sidewalk made mostly with tiles and then part of the street made up of various plates and tiles. Bag one starts the front of Ollivanders and then the first floor of Scribbulus. I don’t recall Scribbulus being in the movie at all so I will assume the designers got this shop correct.

75978_build_1a.jpg
75978_build_1b.JPG

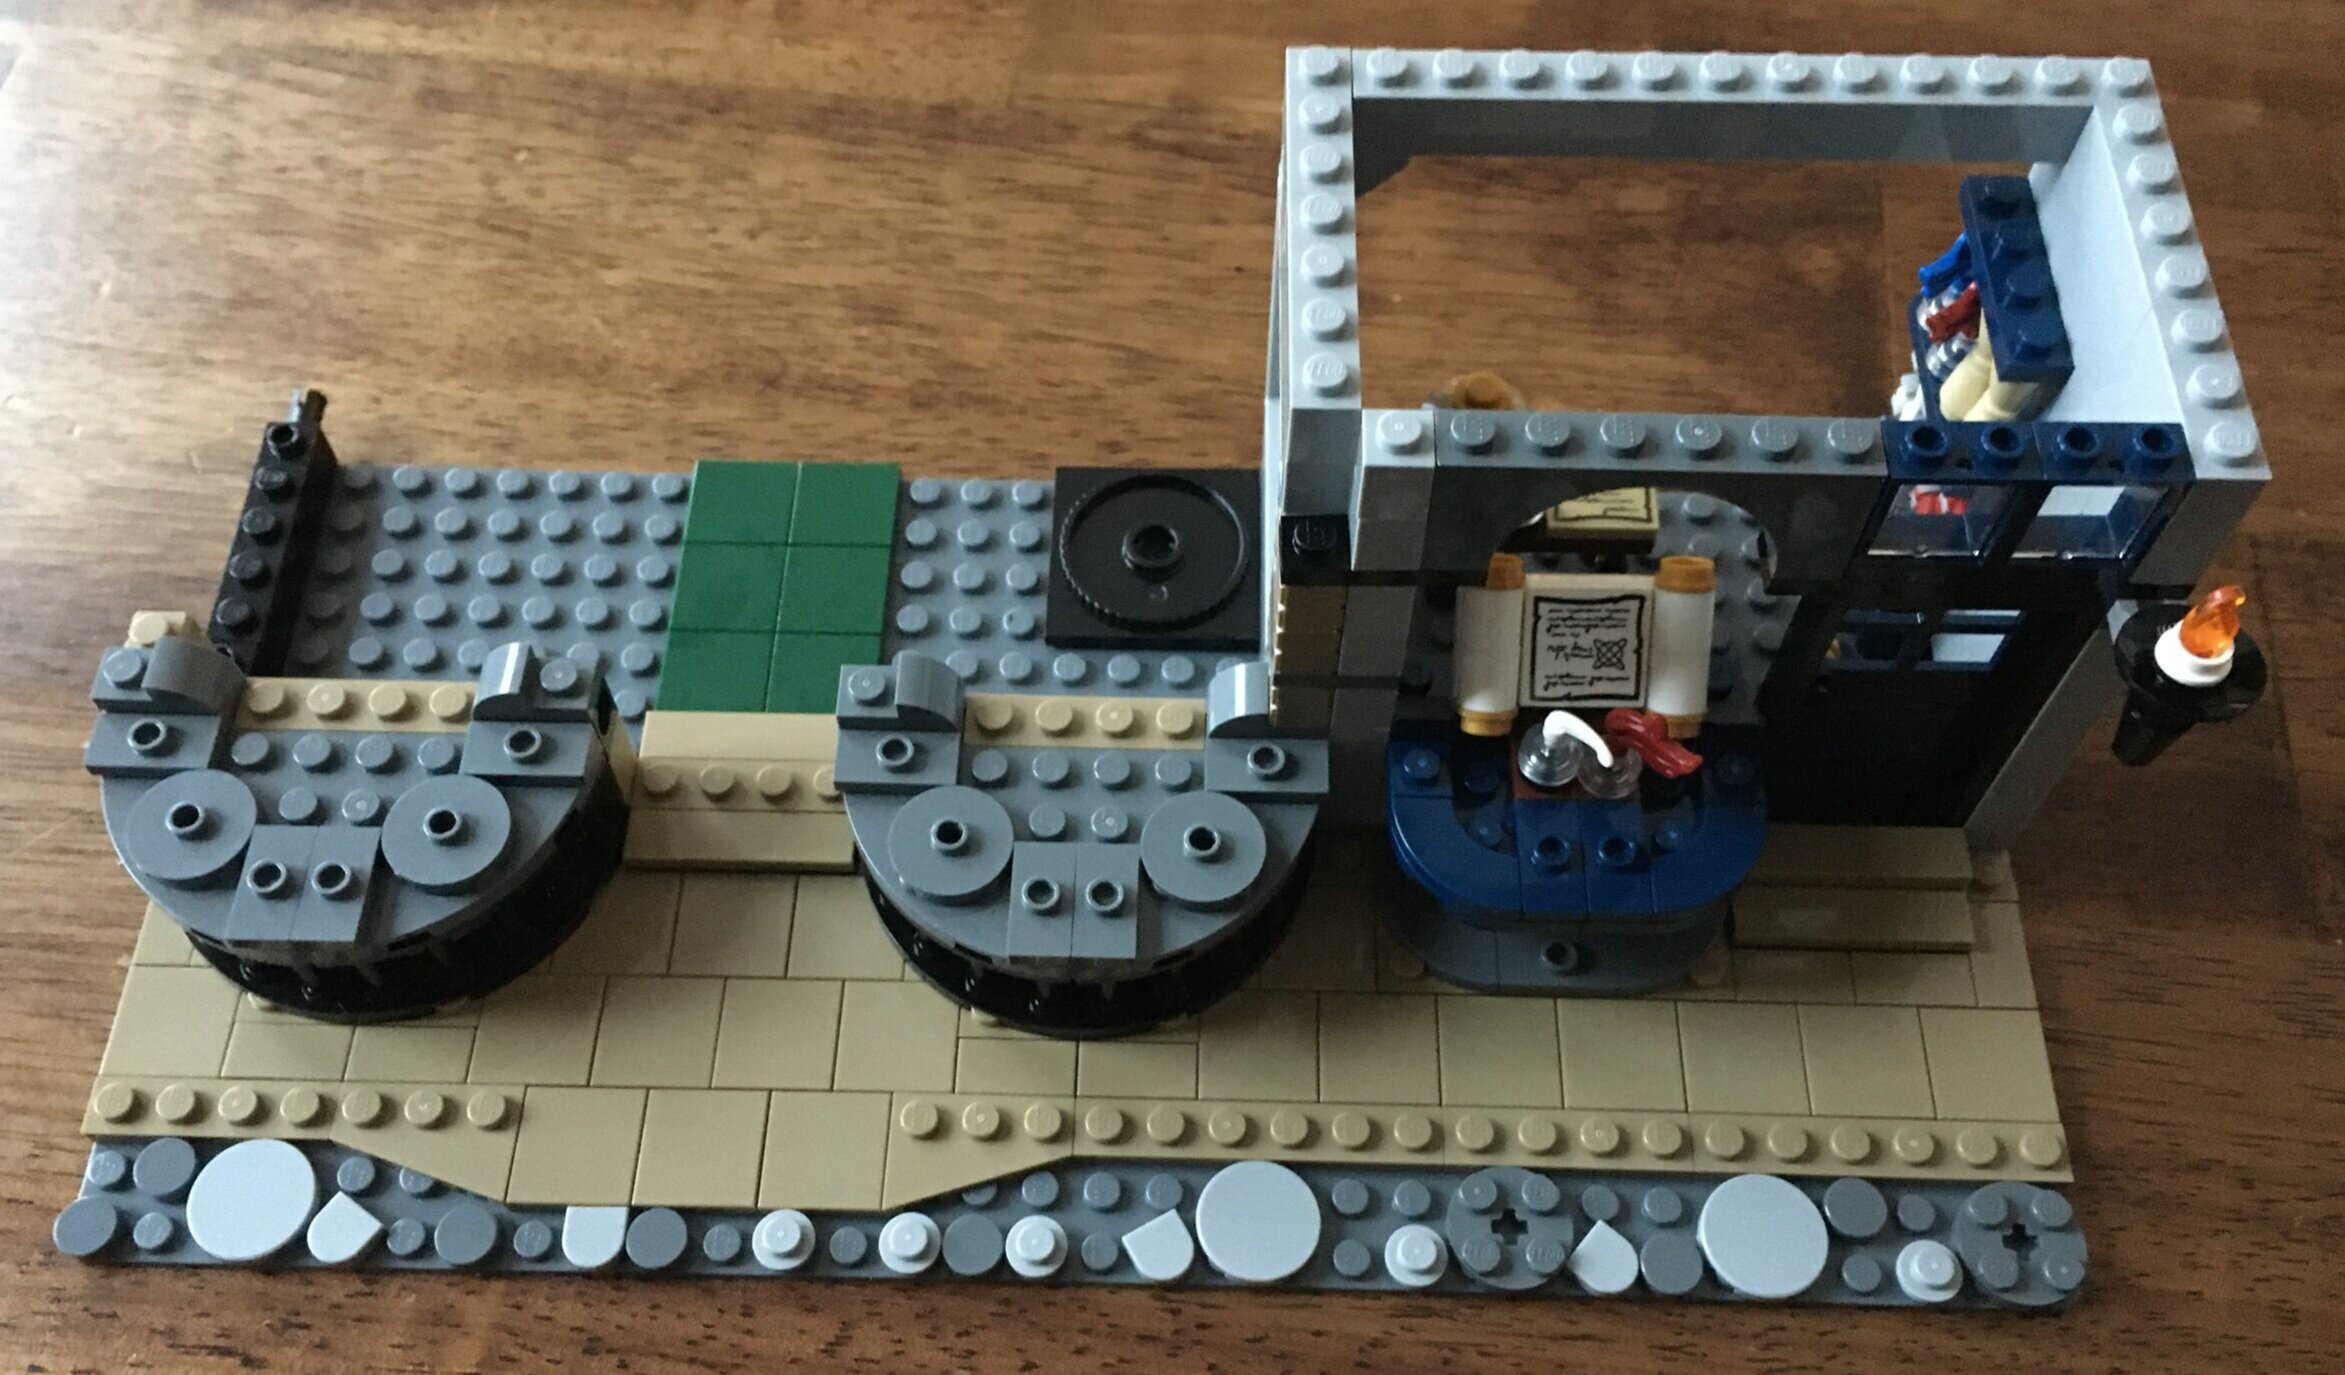
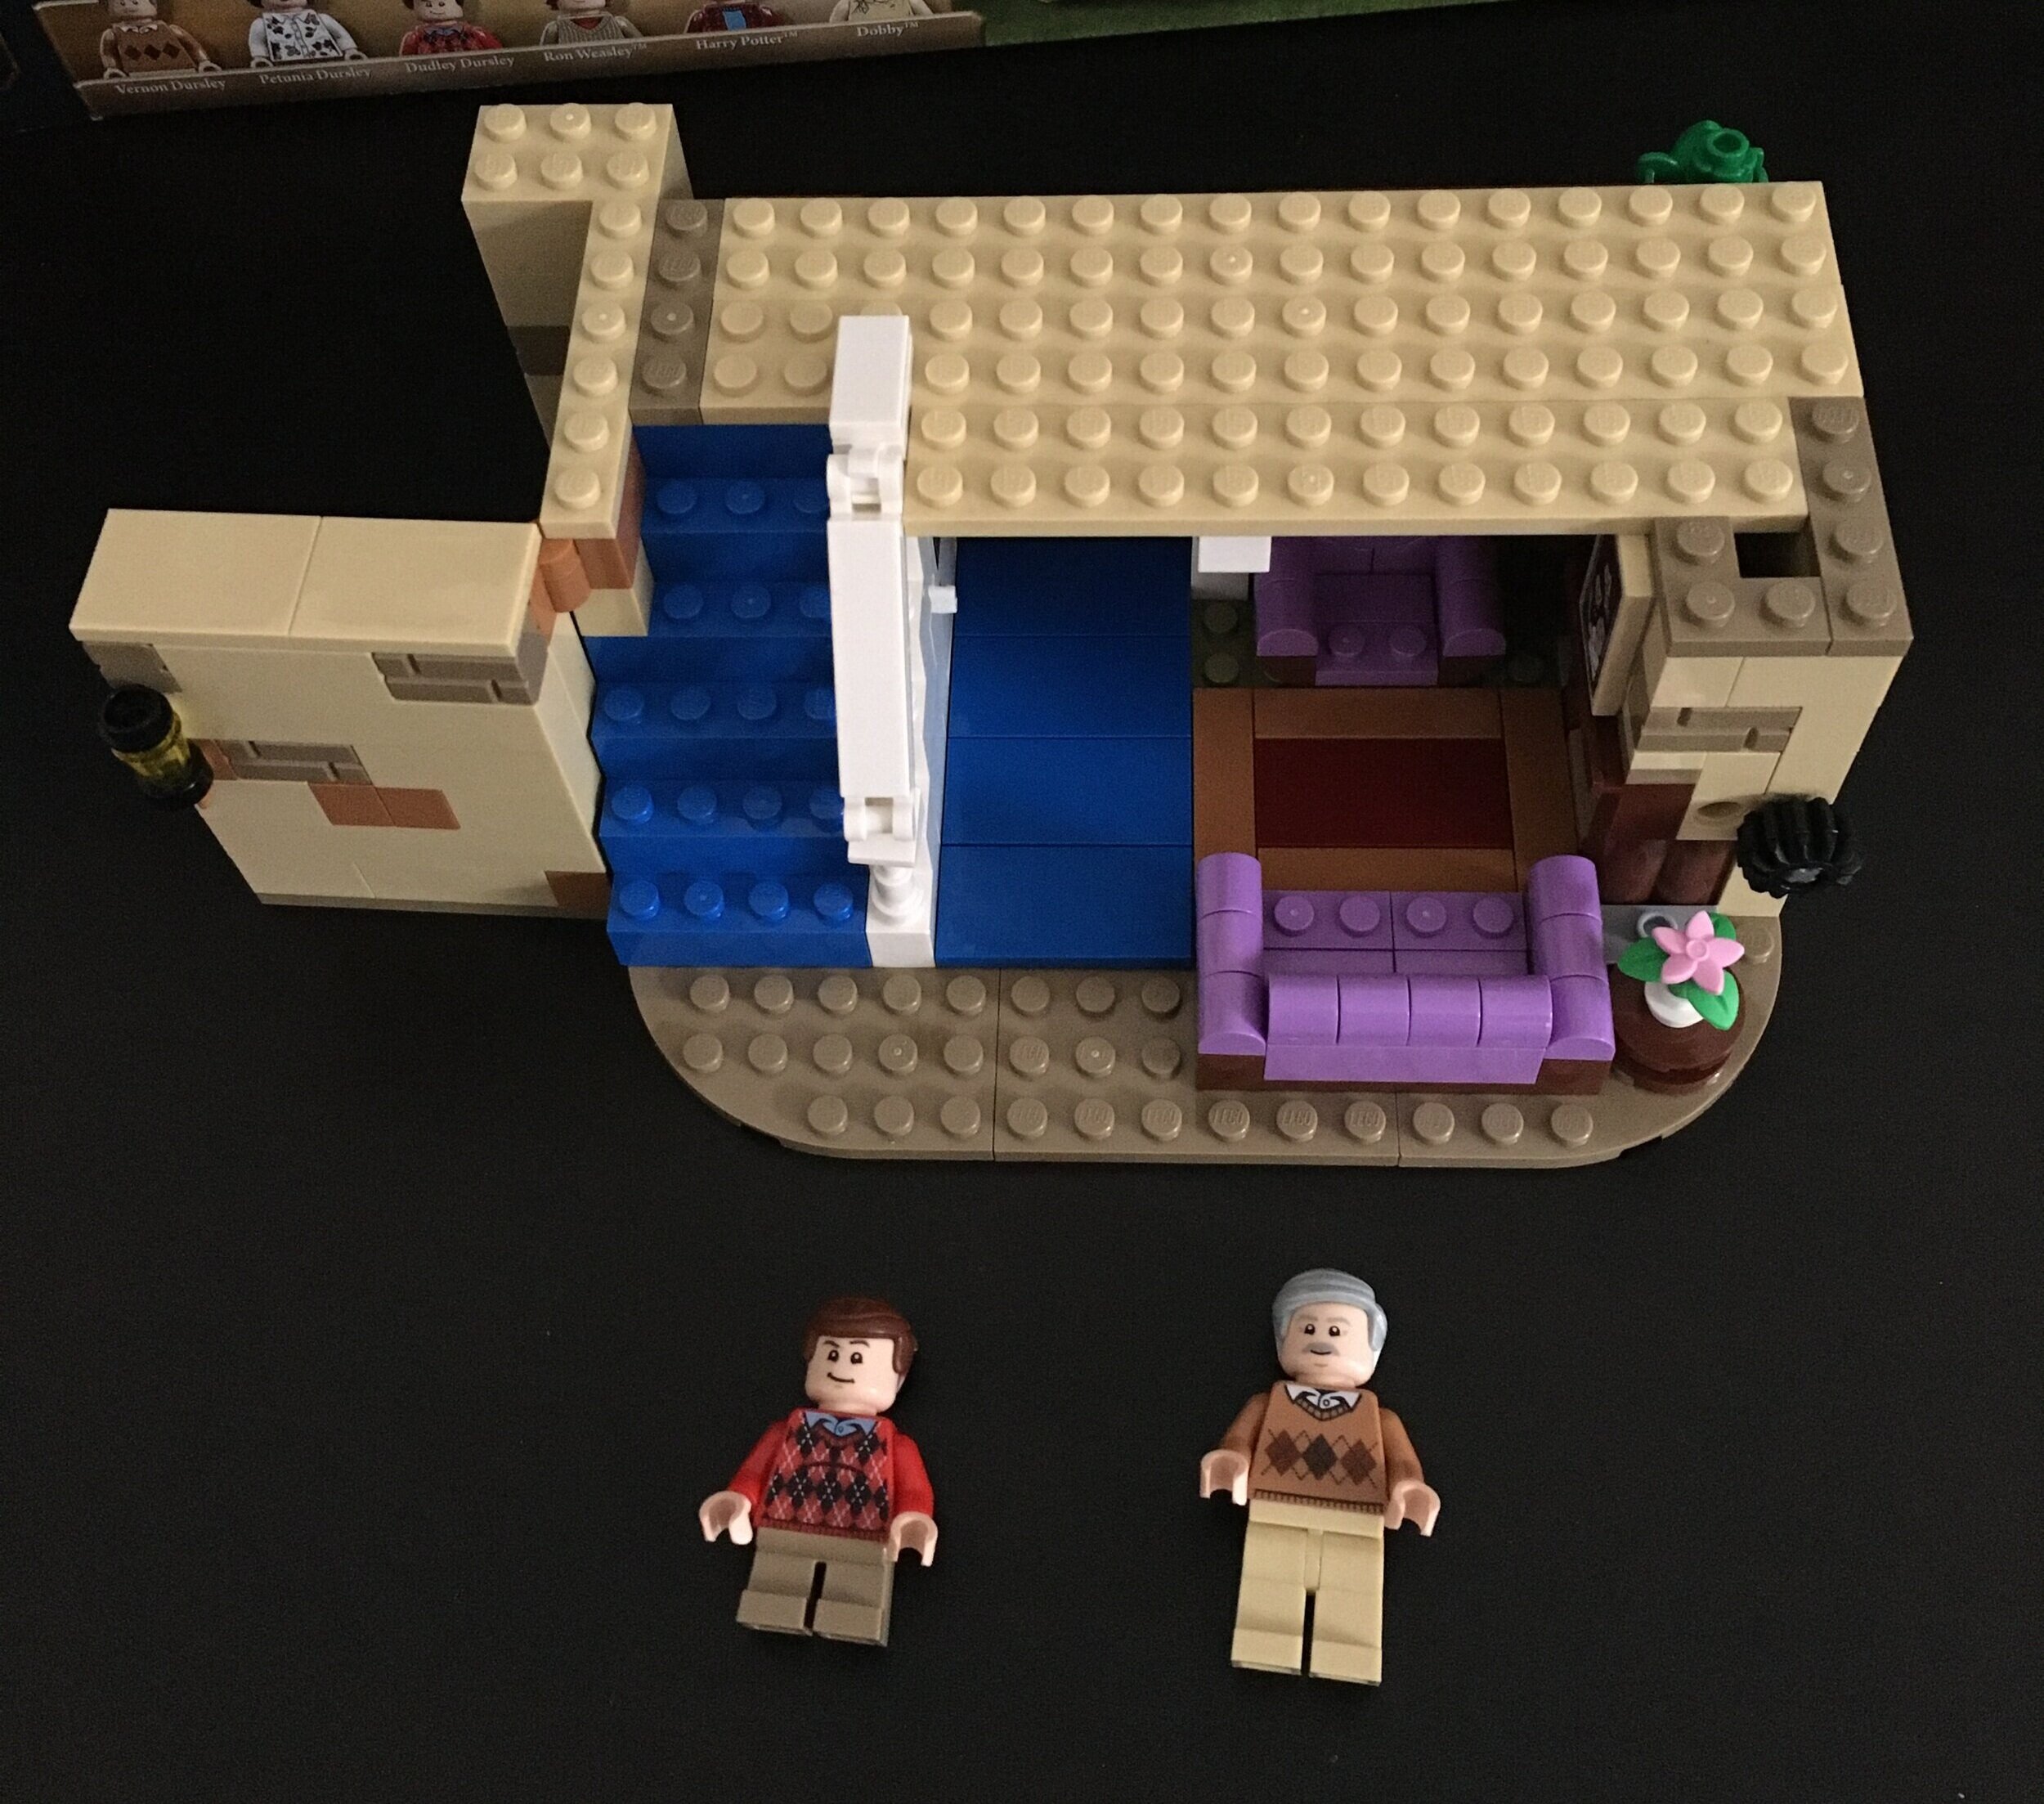
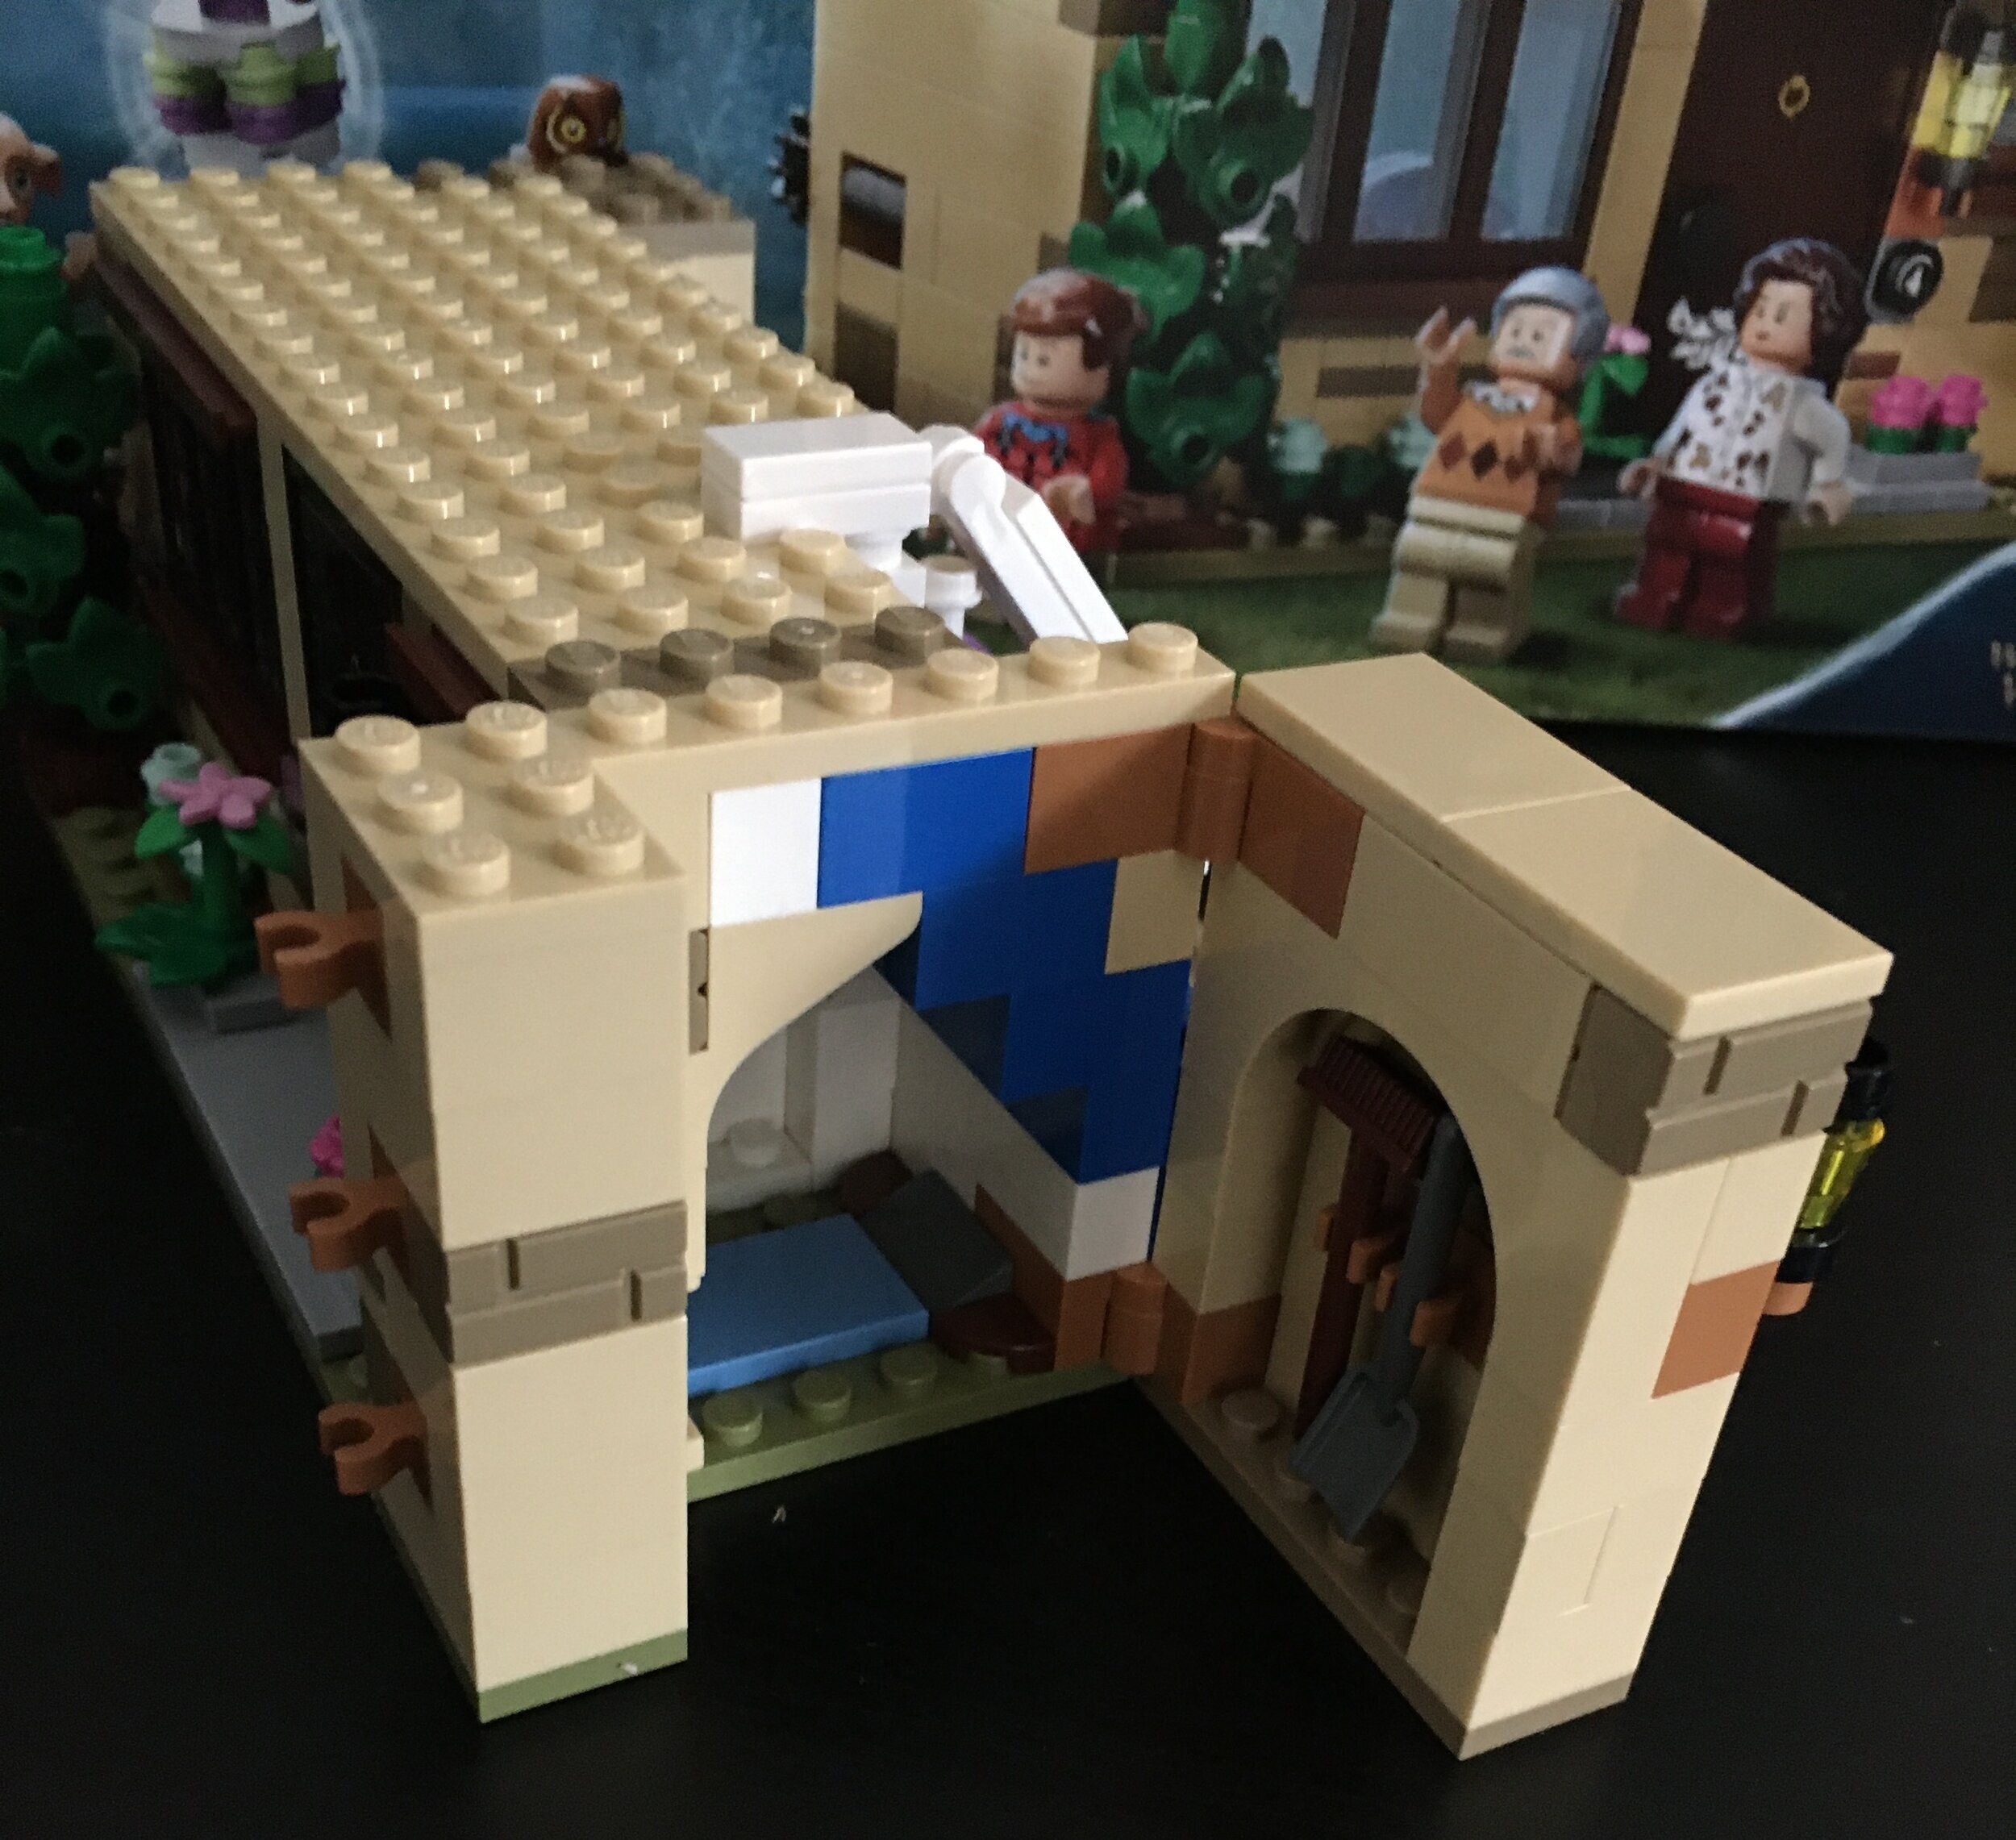
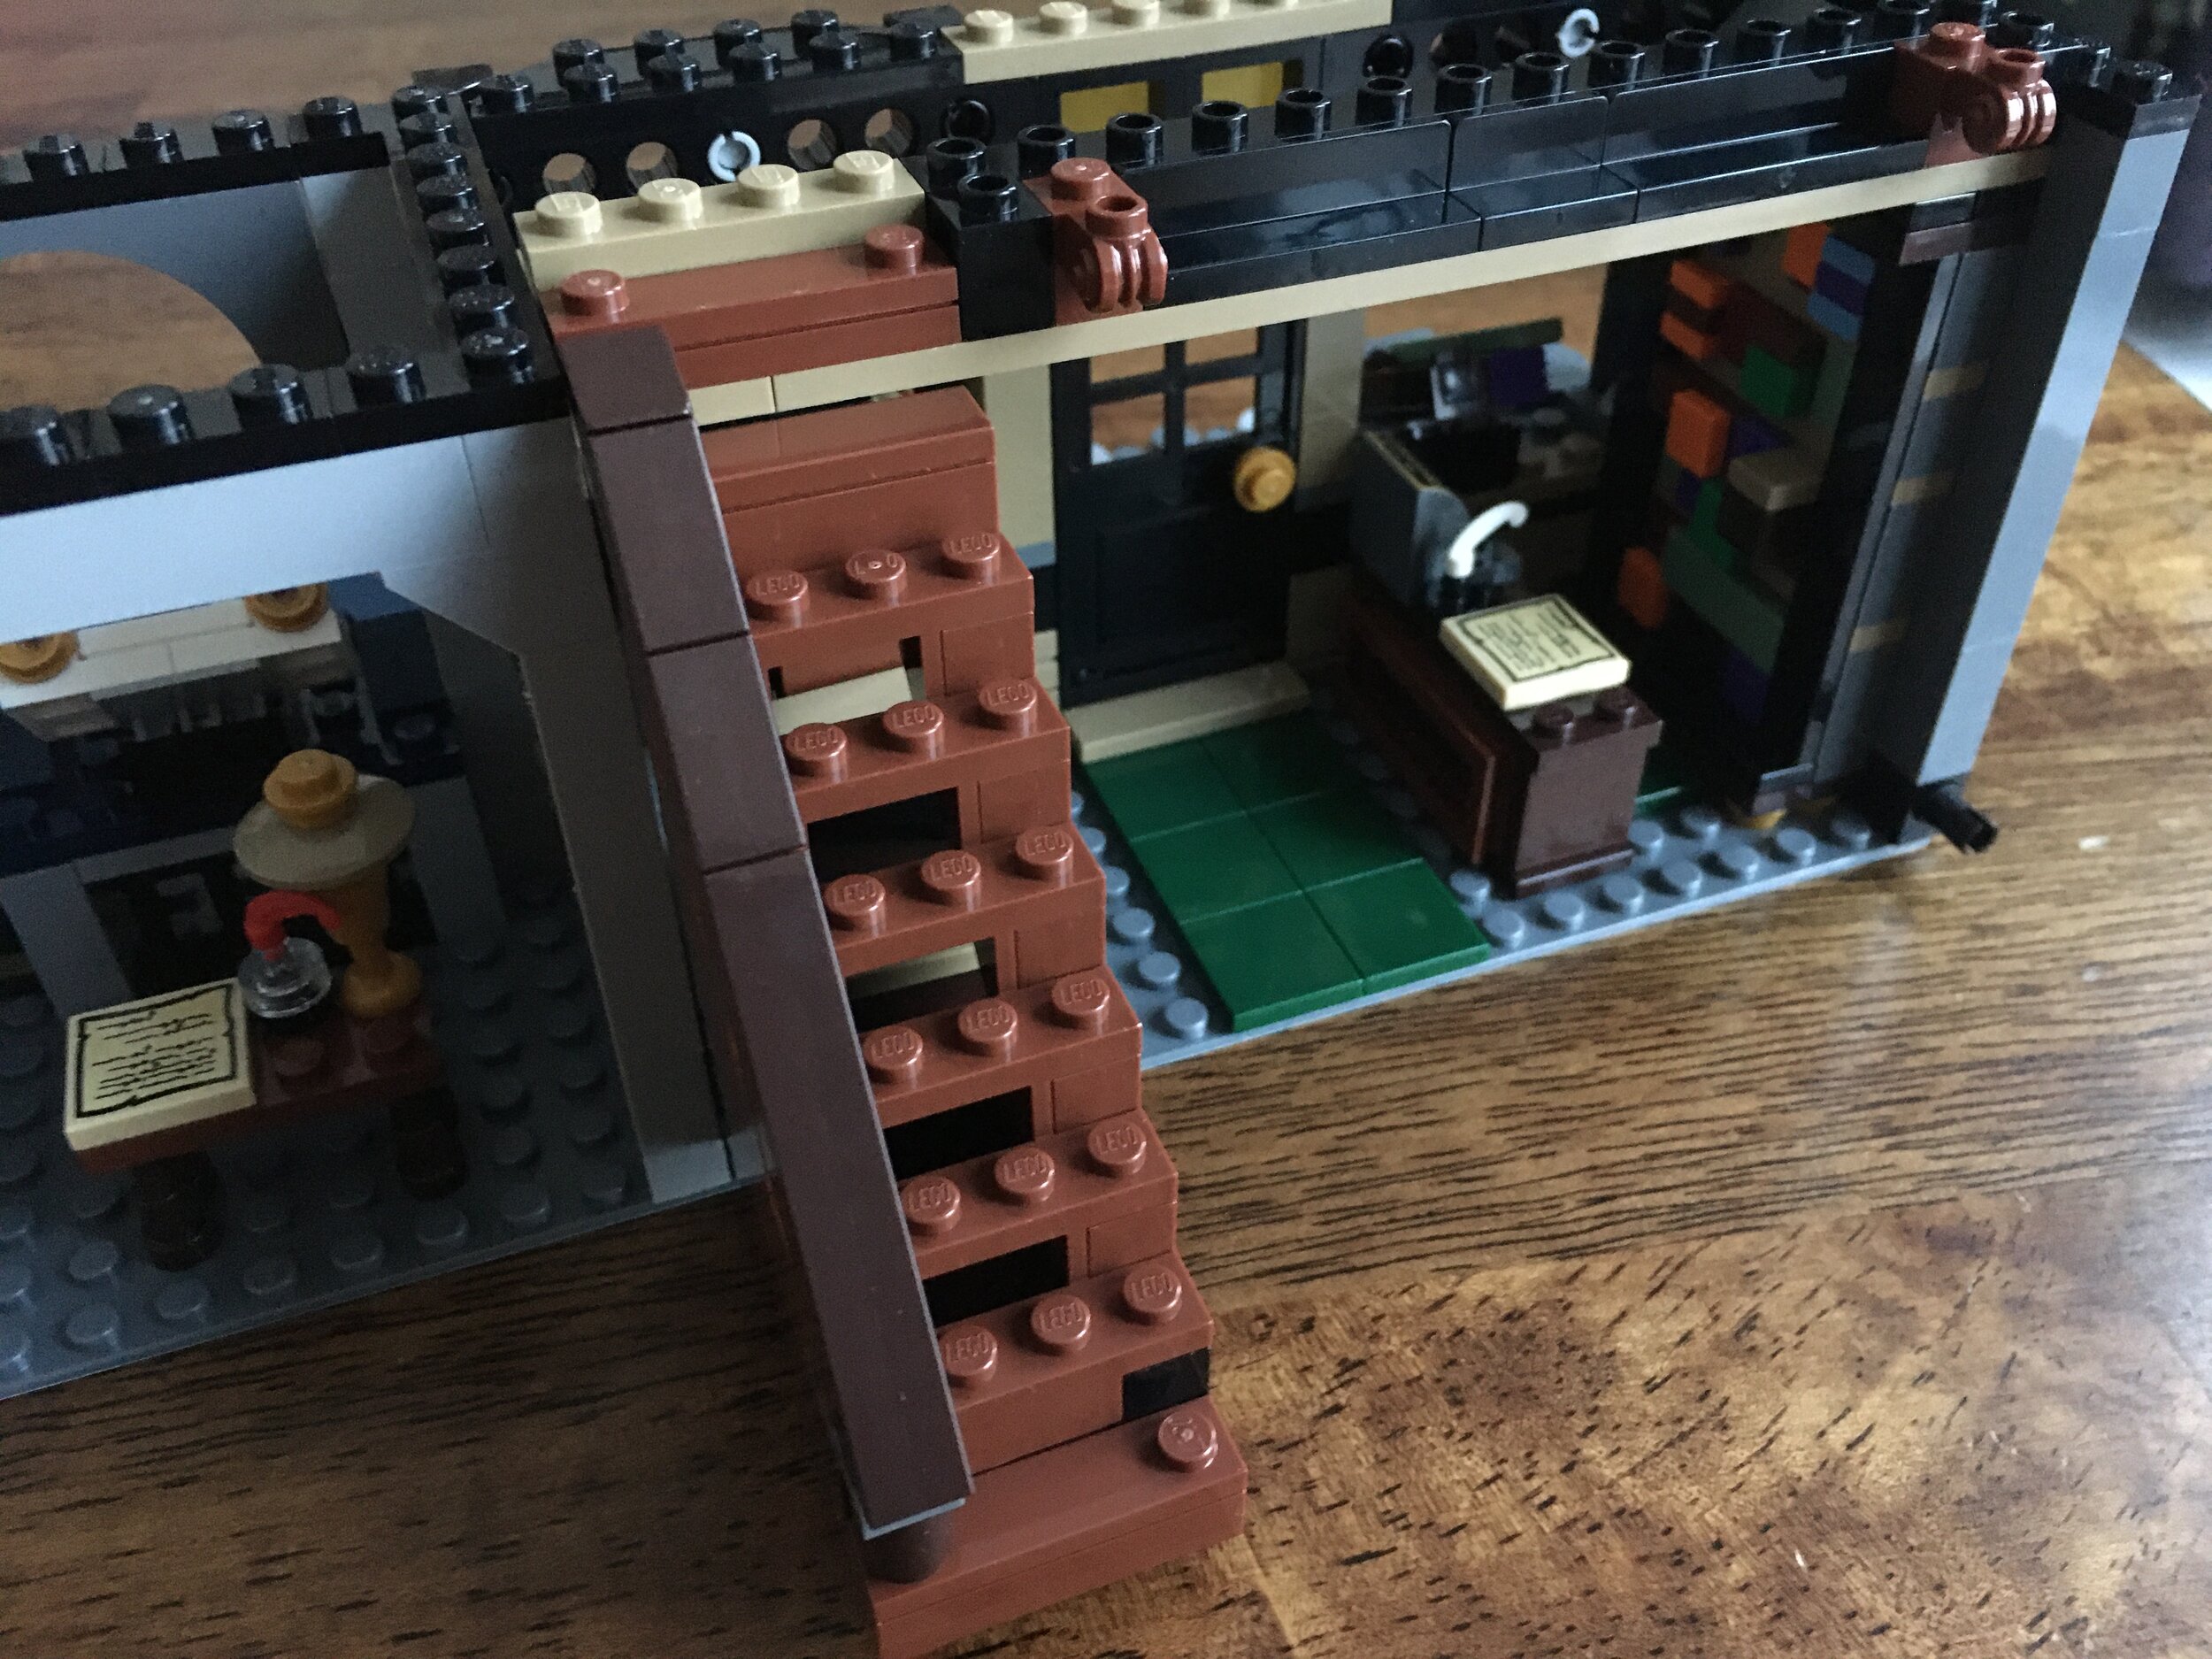
The second bag includes Garrick Ollivander. He is holding a wand box with a wand on the inside. I don’t recall seeing this item before. The box allows for a 1x3 tile to be placed on the top and it fits the standard Harry Potter wand size. Throughout the build, there are numerous versions of these boxes to show the stock of the store along with some plates and bricks to look like boxes on the shelf. This part of the build includes a set of stairs. The stairs are on a hinge and can fold in. This allows you to place the buildings back to back versus all connected in a row.

75978_build_2a.JPG
75978_build_2b.JPG

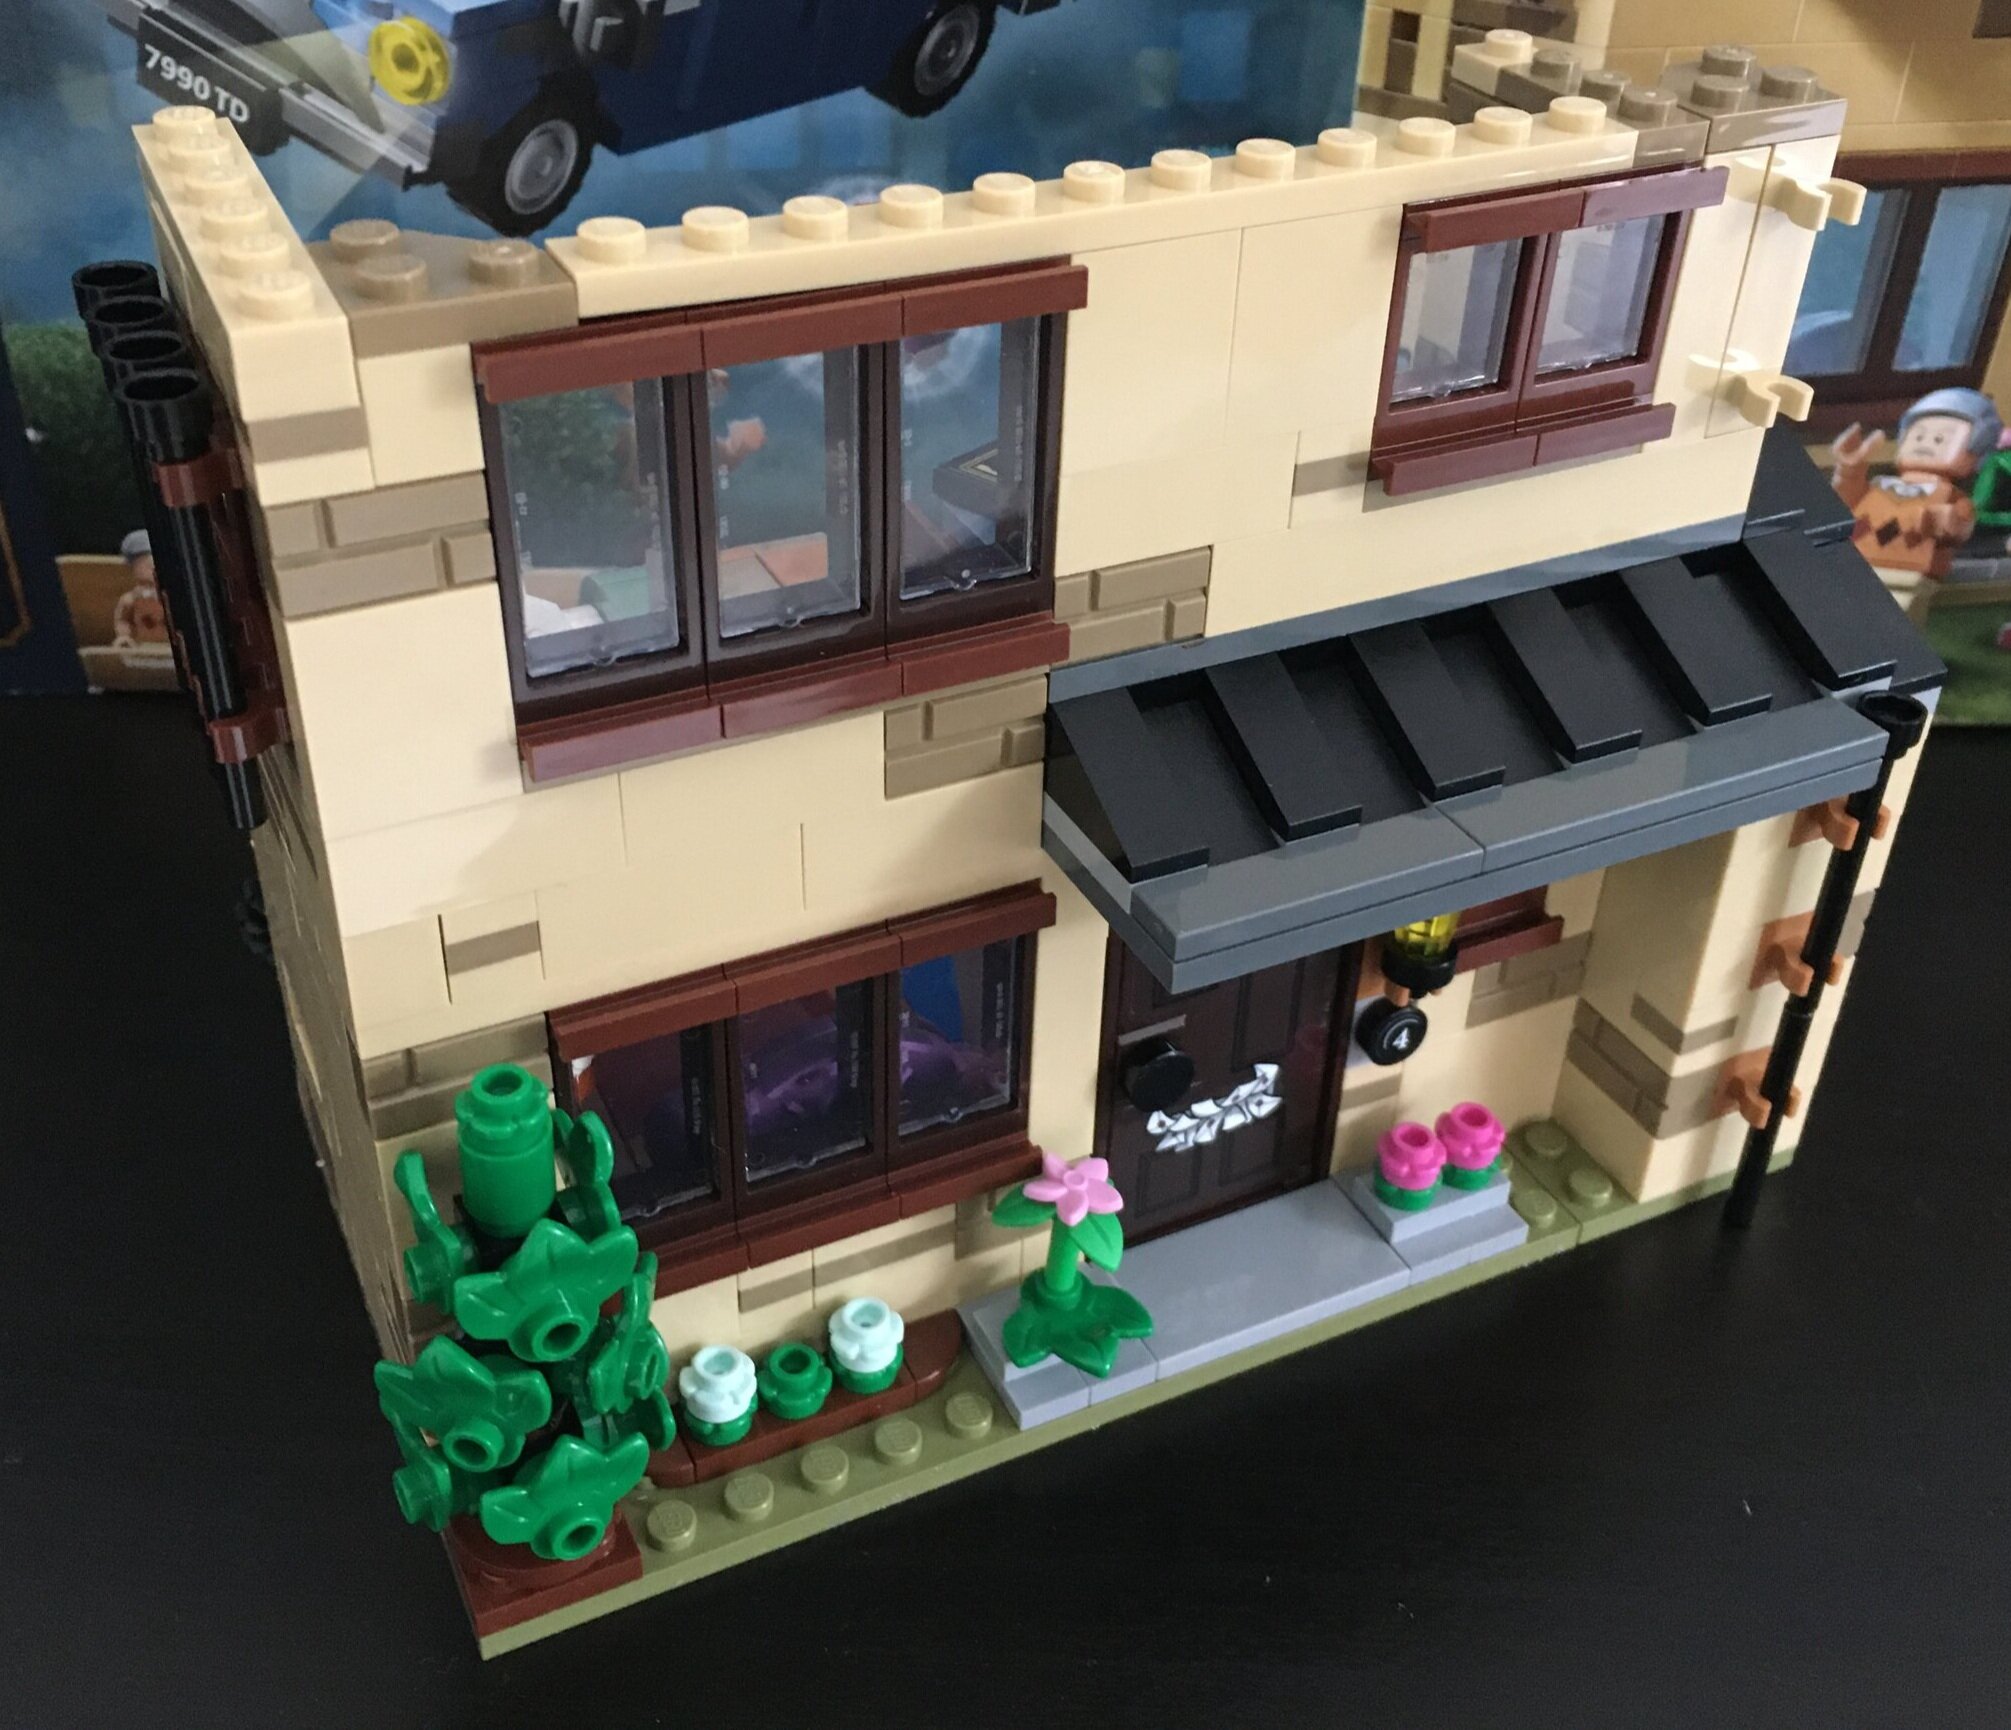
Bag 3 starts work on the second floor and adds in windows on the first and second floors. The tiles in the windows are translucent yellow which adds a nice touch to the building versus just using clear. I also like the use of all of the textured bricks to add some detail/texture to the building façade.

The windows appear to be round with the use of curved plates and tiles. This style of build has been done before and I think it fits in good here.

Hermione Granger comes with this bag.

75978 build 3a.JPG
75978 build 3b.JPG

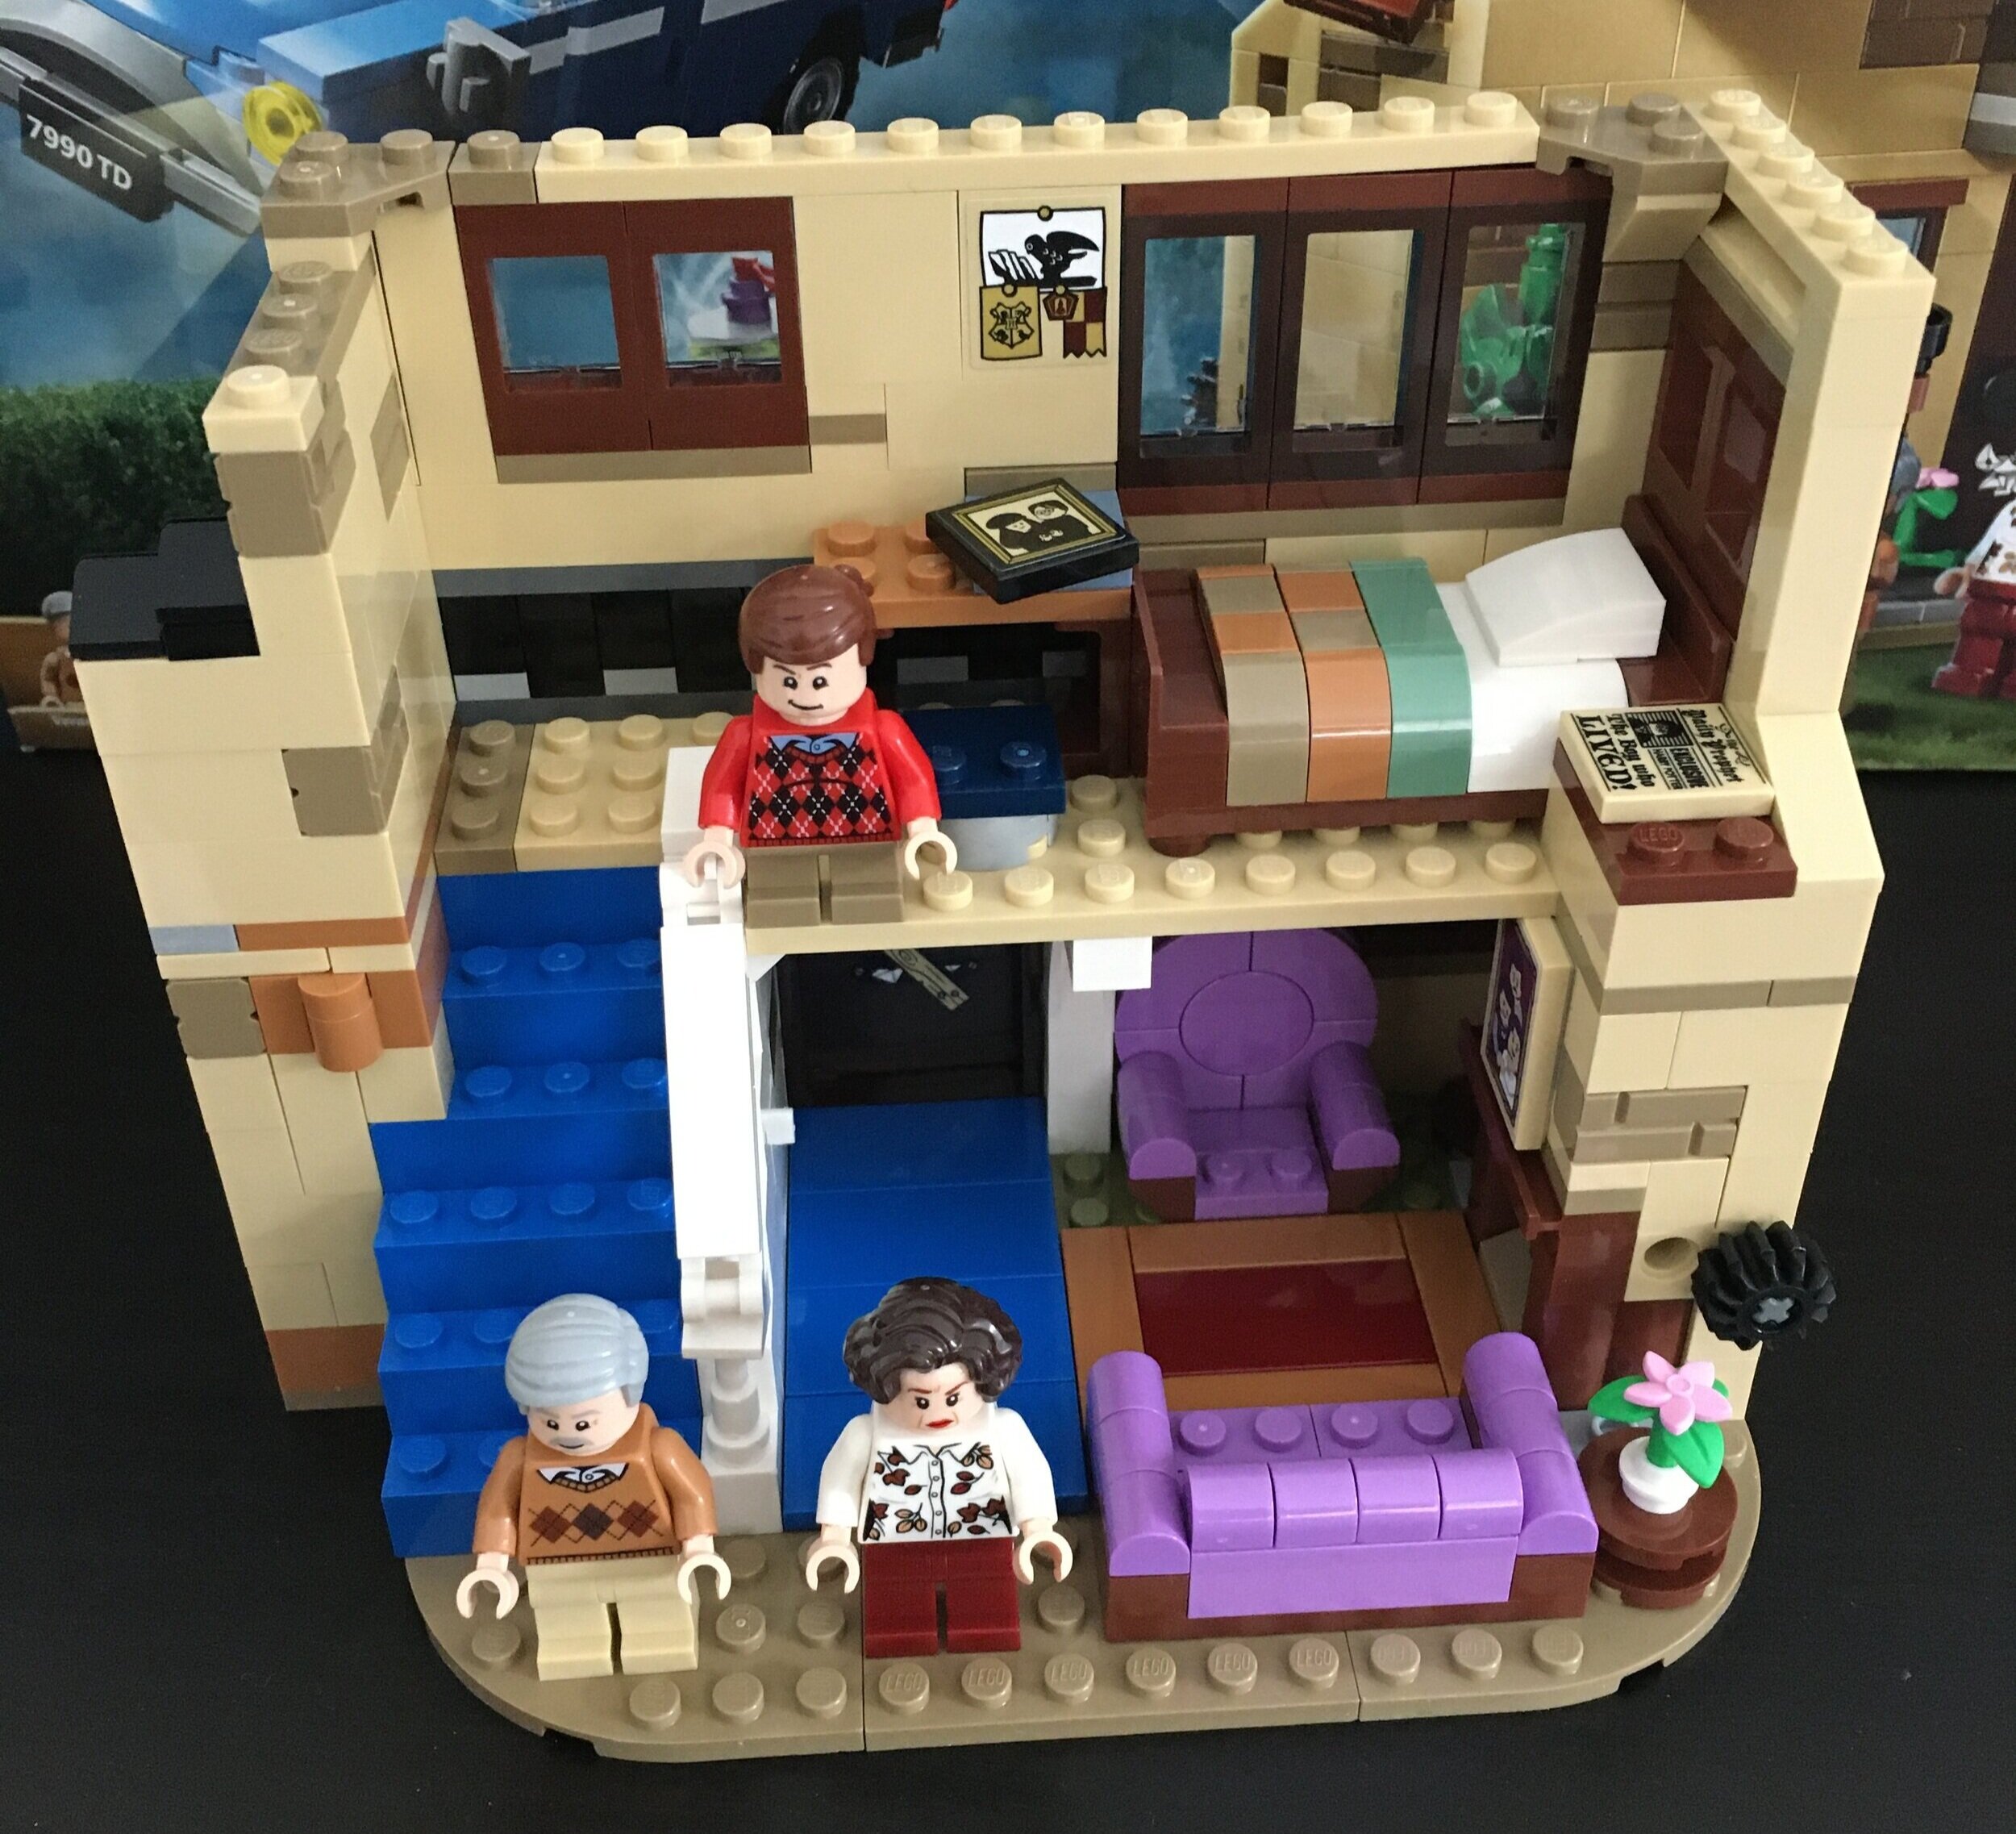
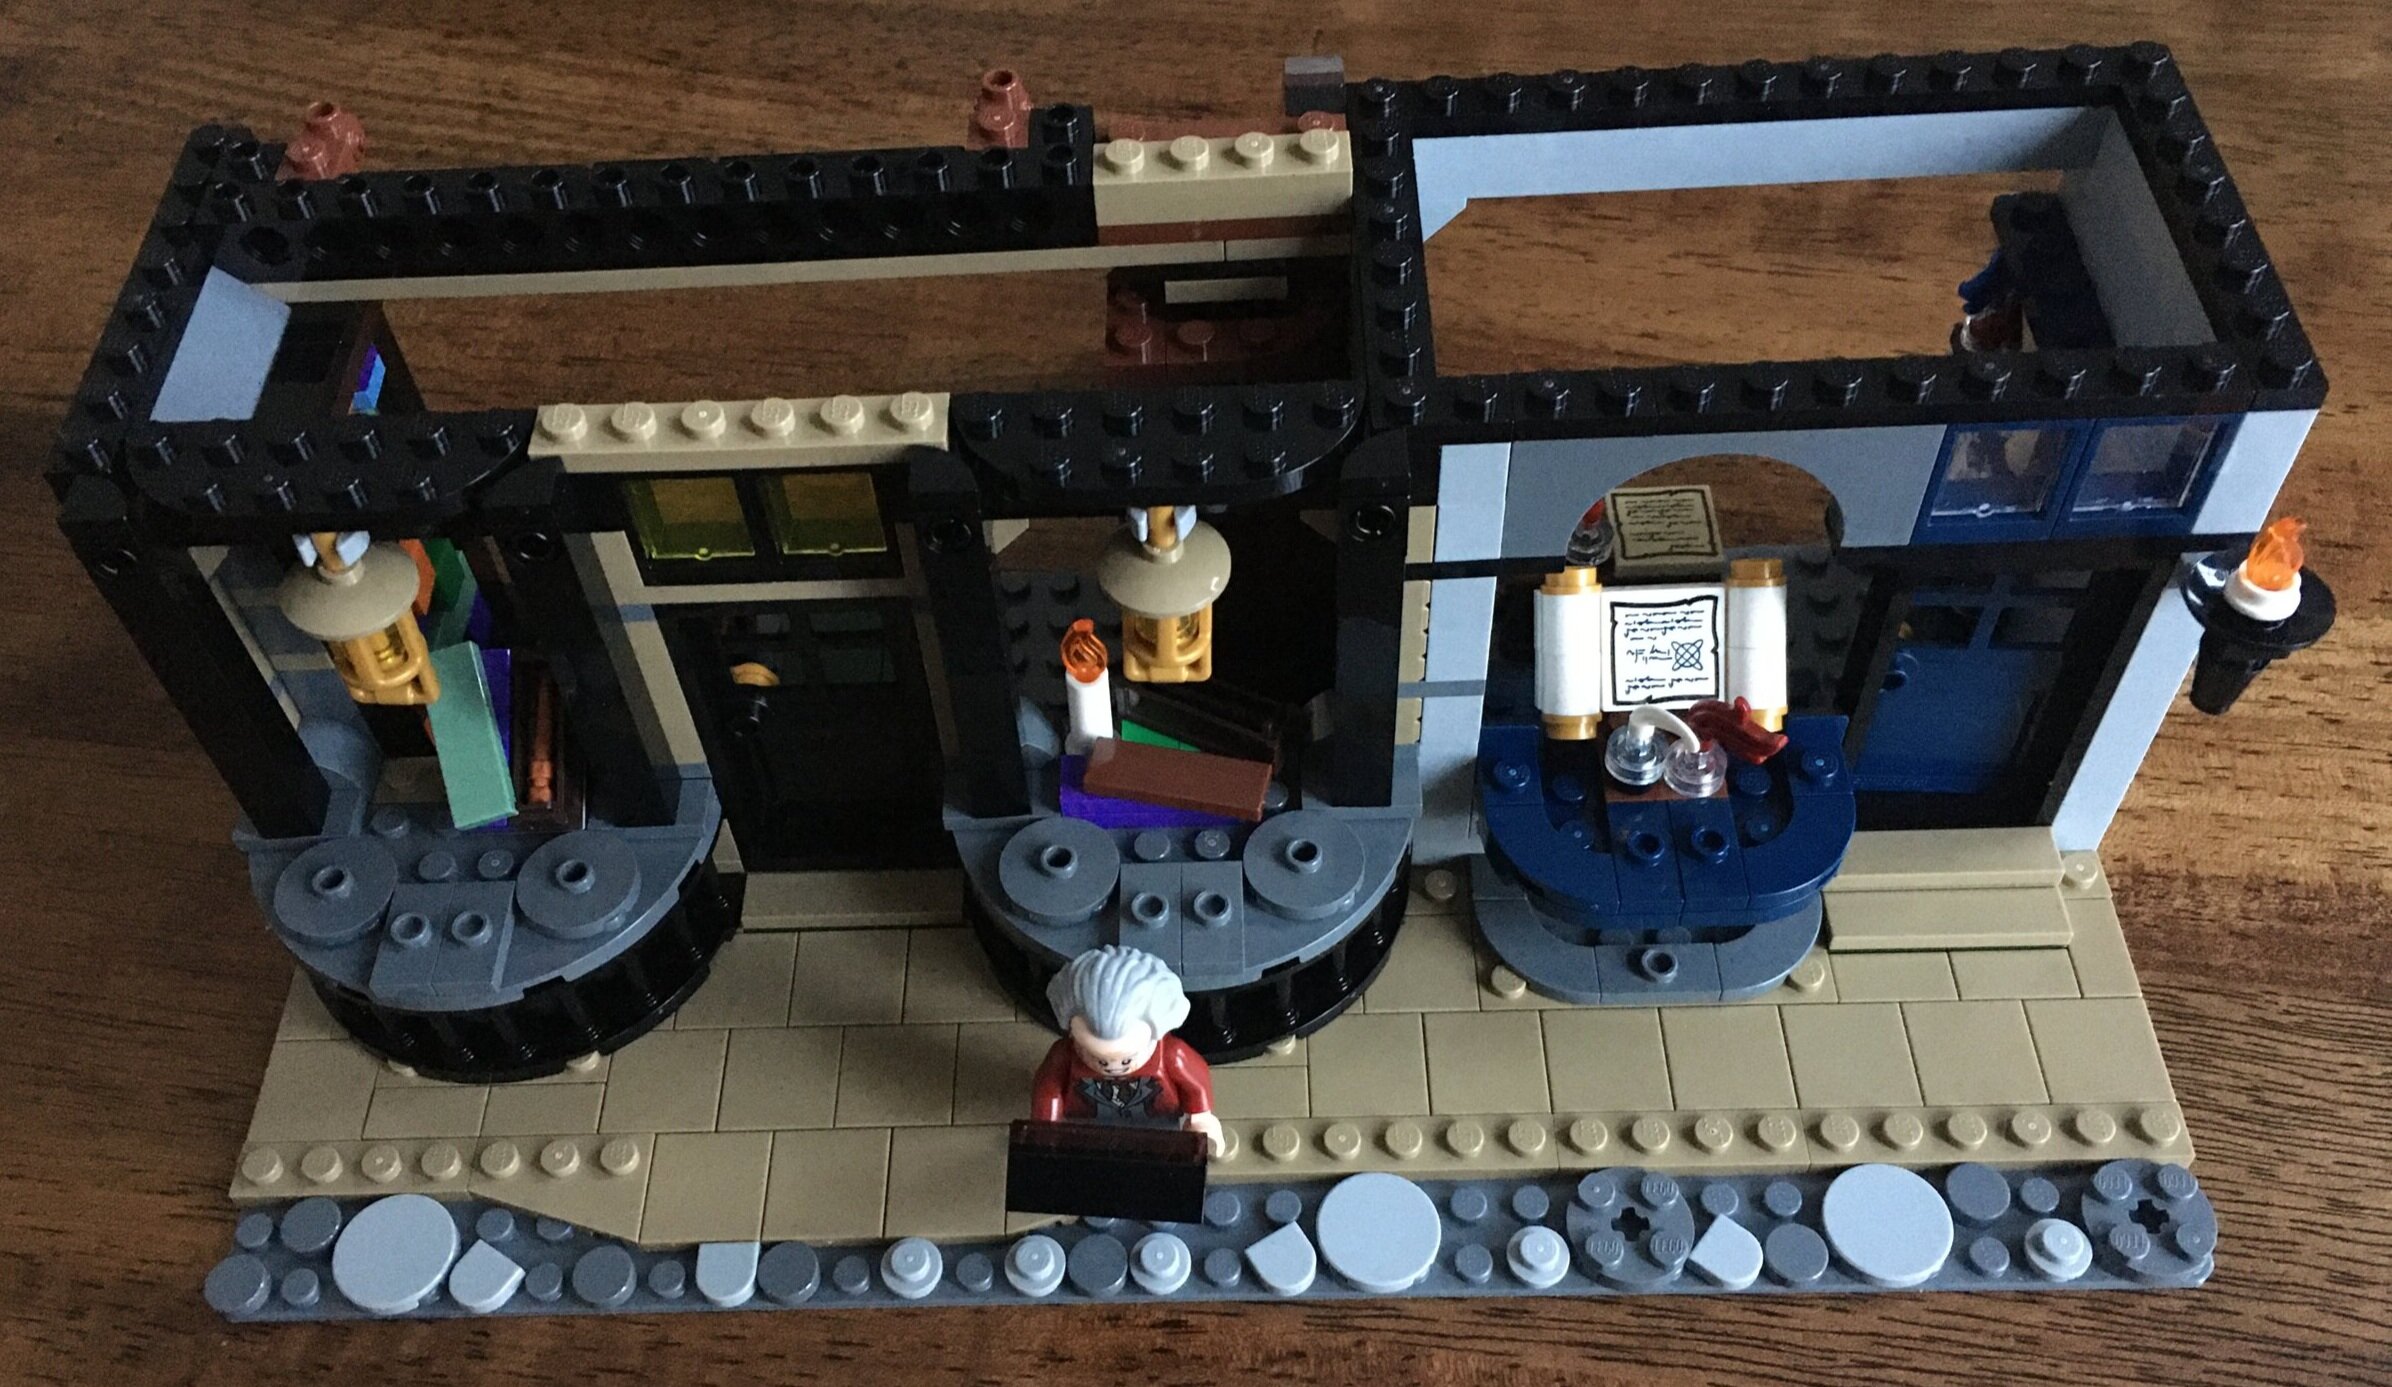
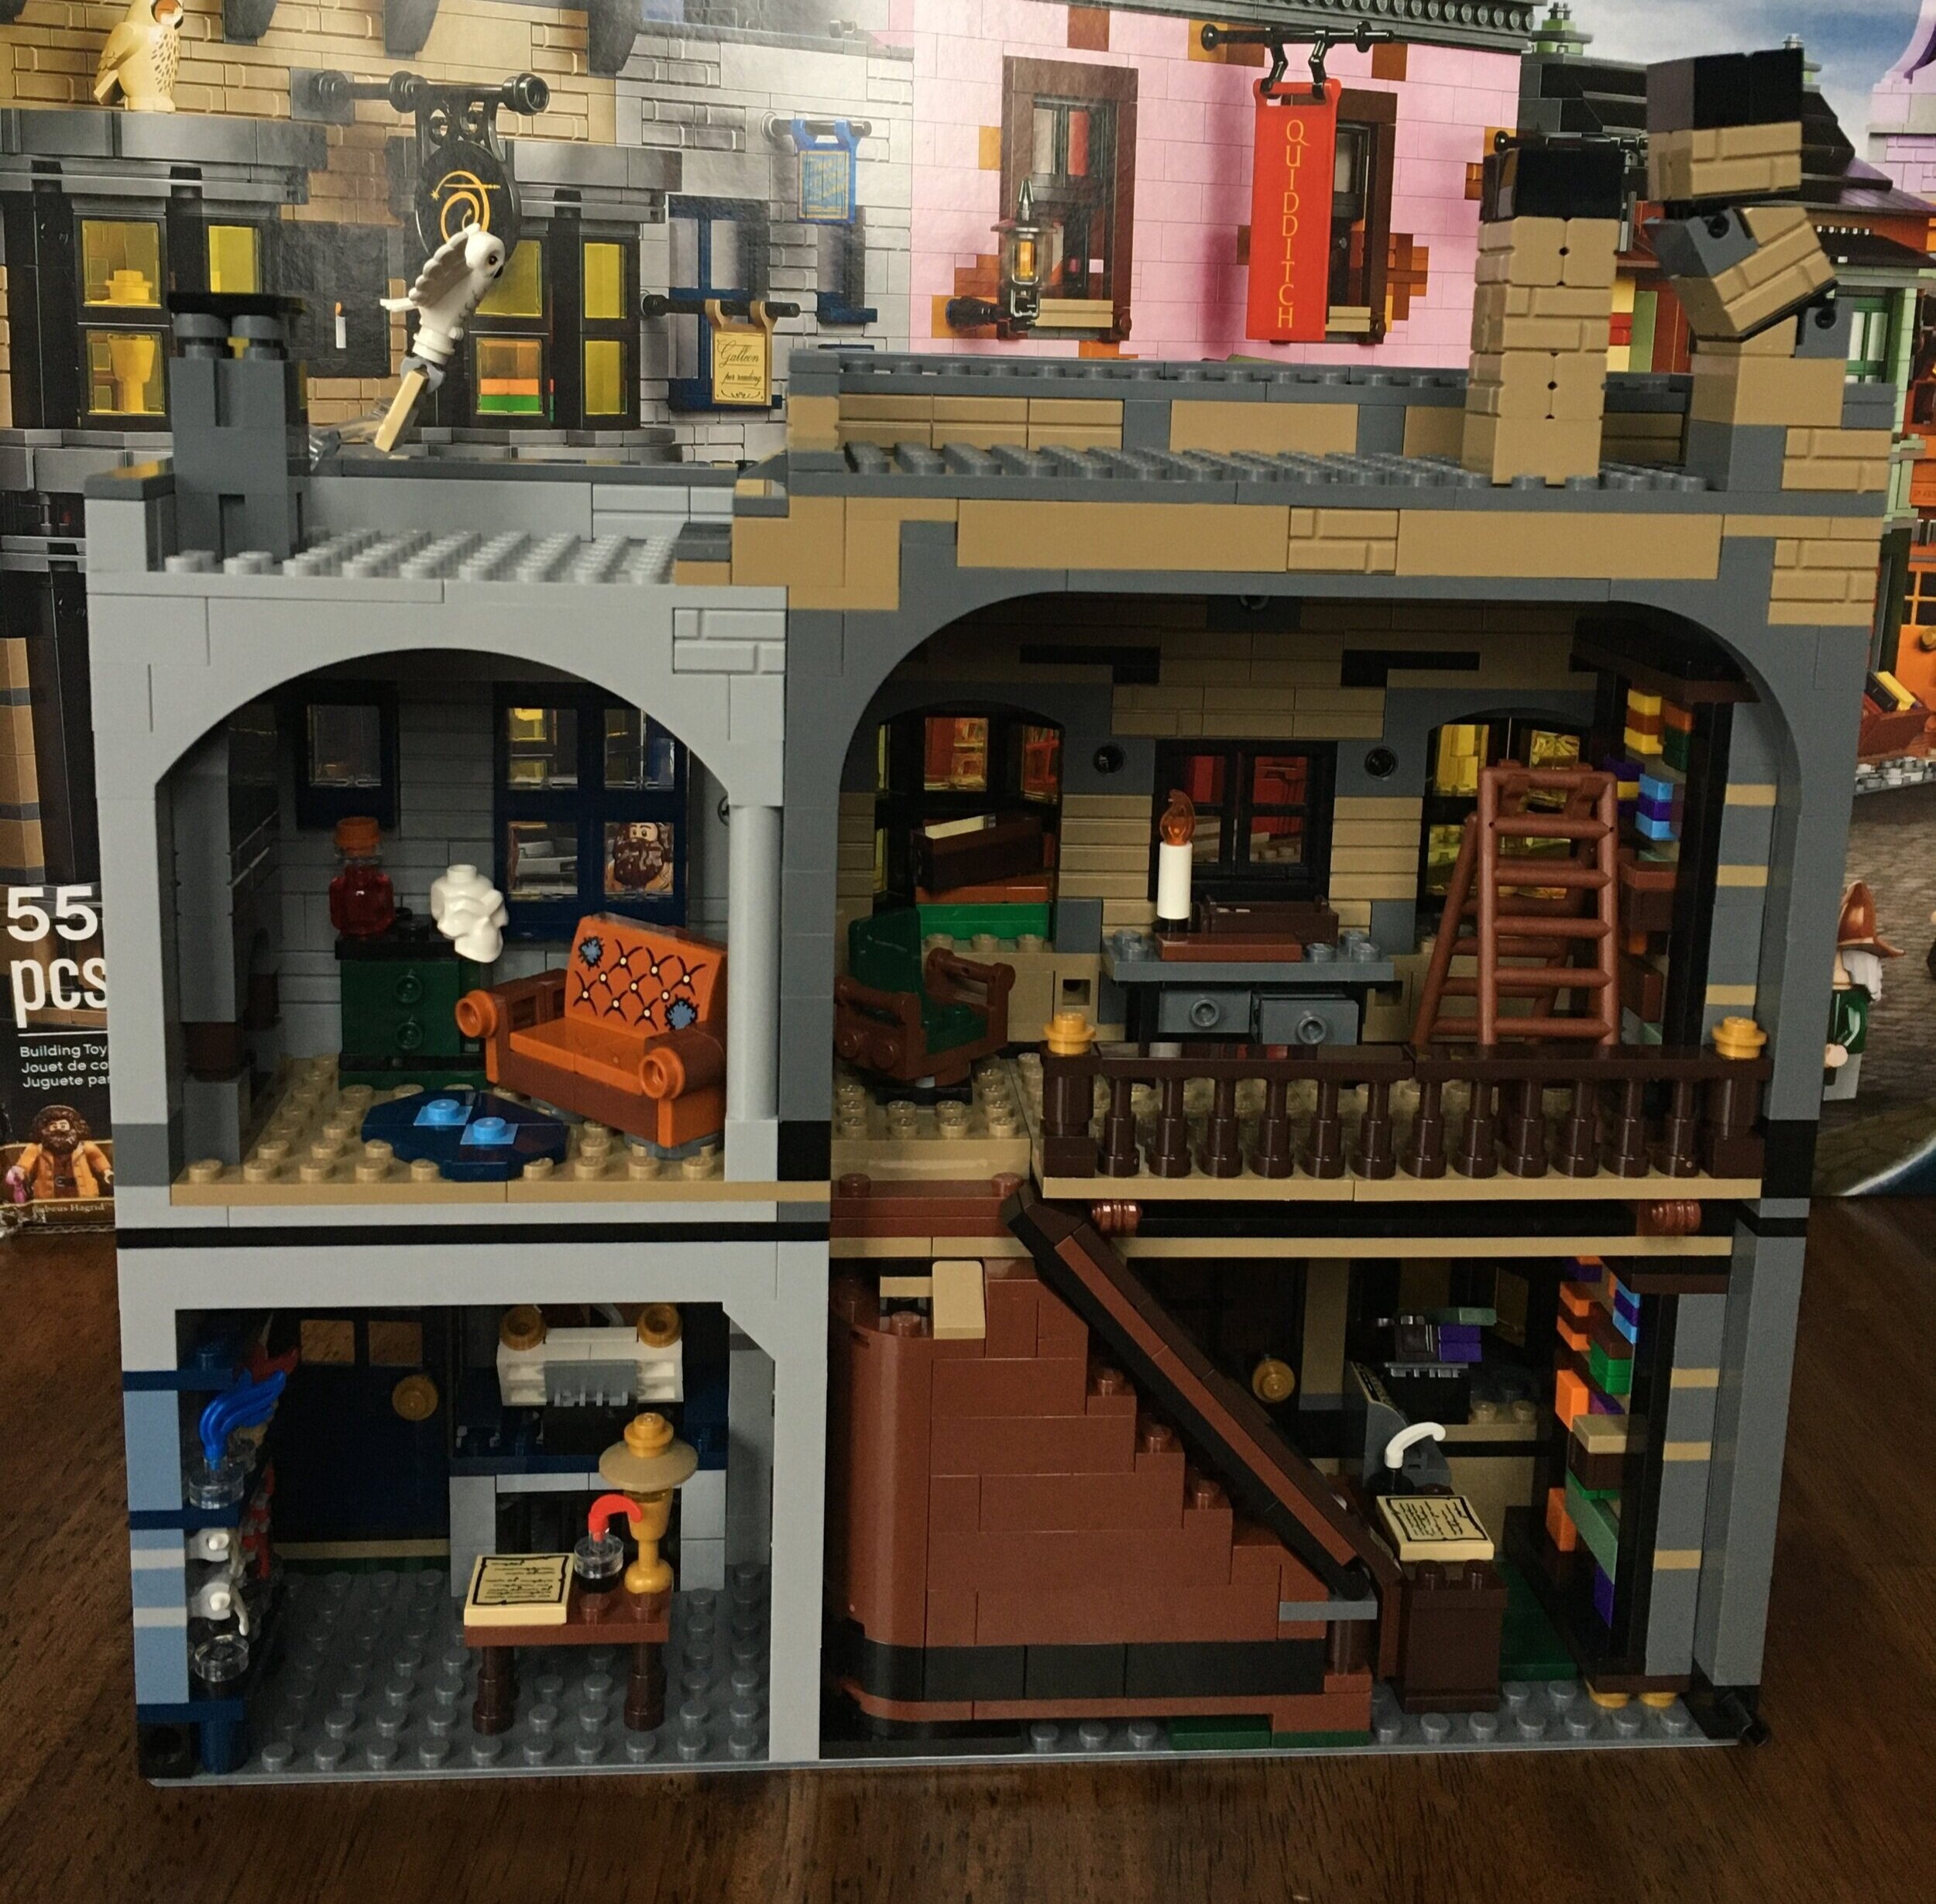
The fourth bag adds a sitting room with a fireplace above Scribbulus. It looks like it would fit for any wizard who needs it. It adds to the second floor of Ollivander’s too.

75978_build_4a.jpg
75978 build 4b.JPG

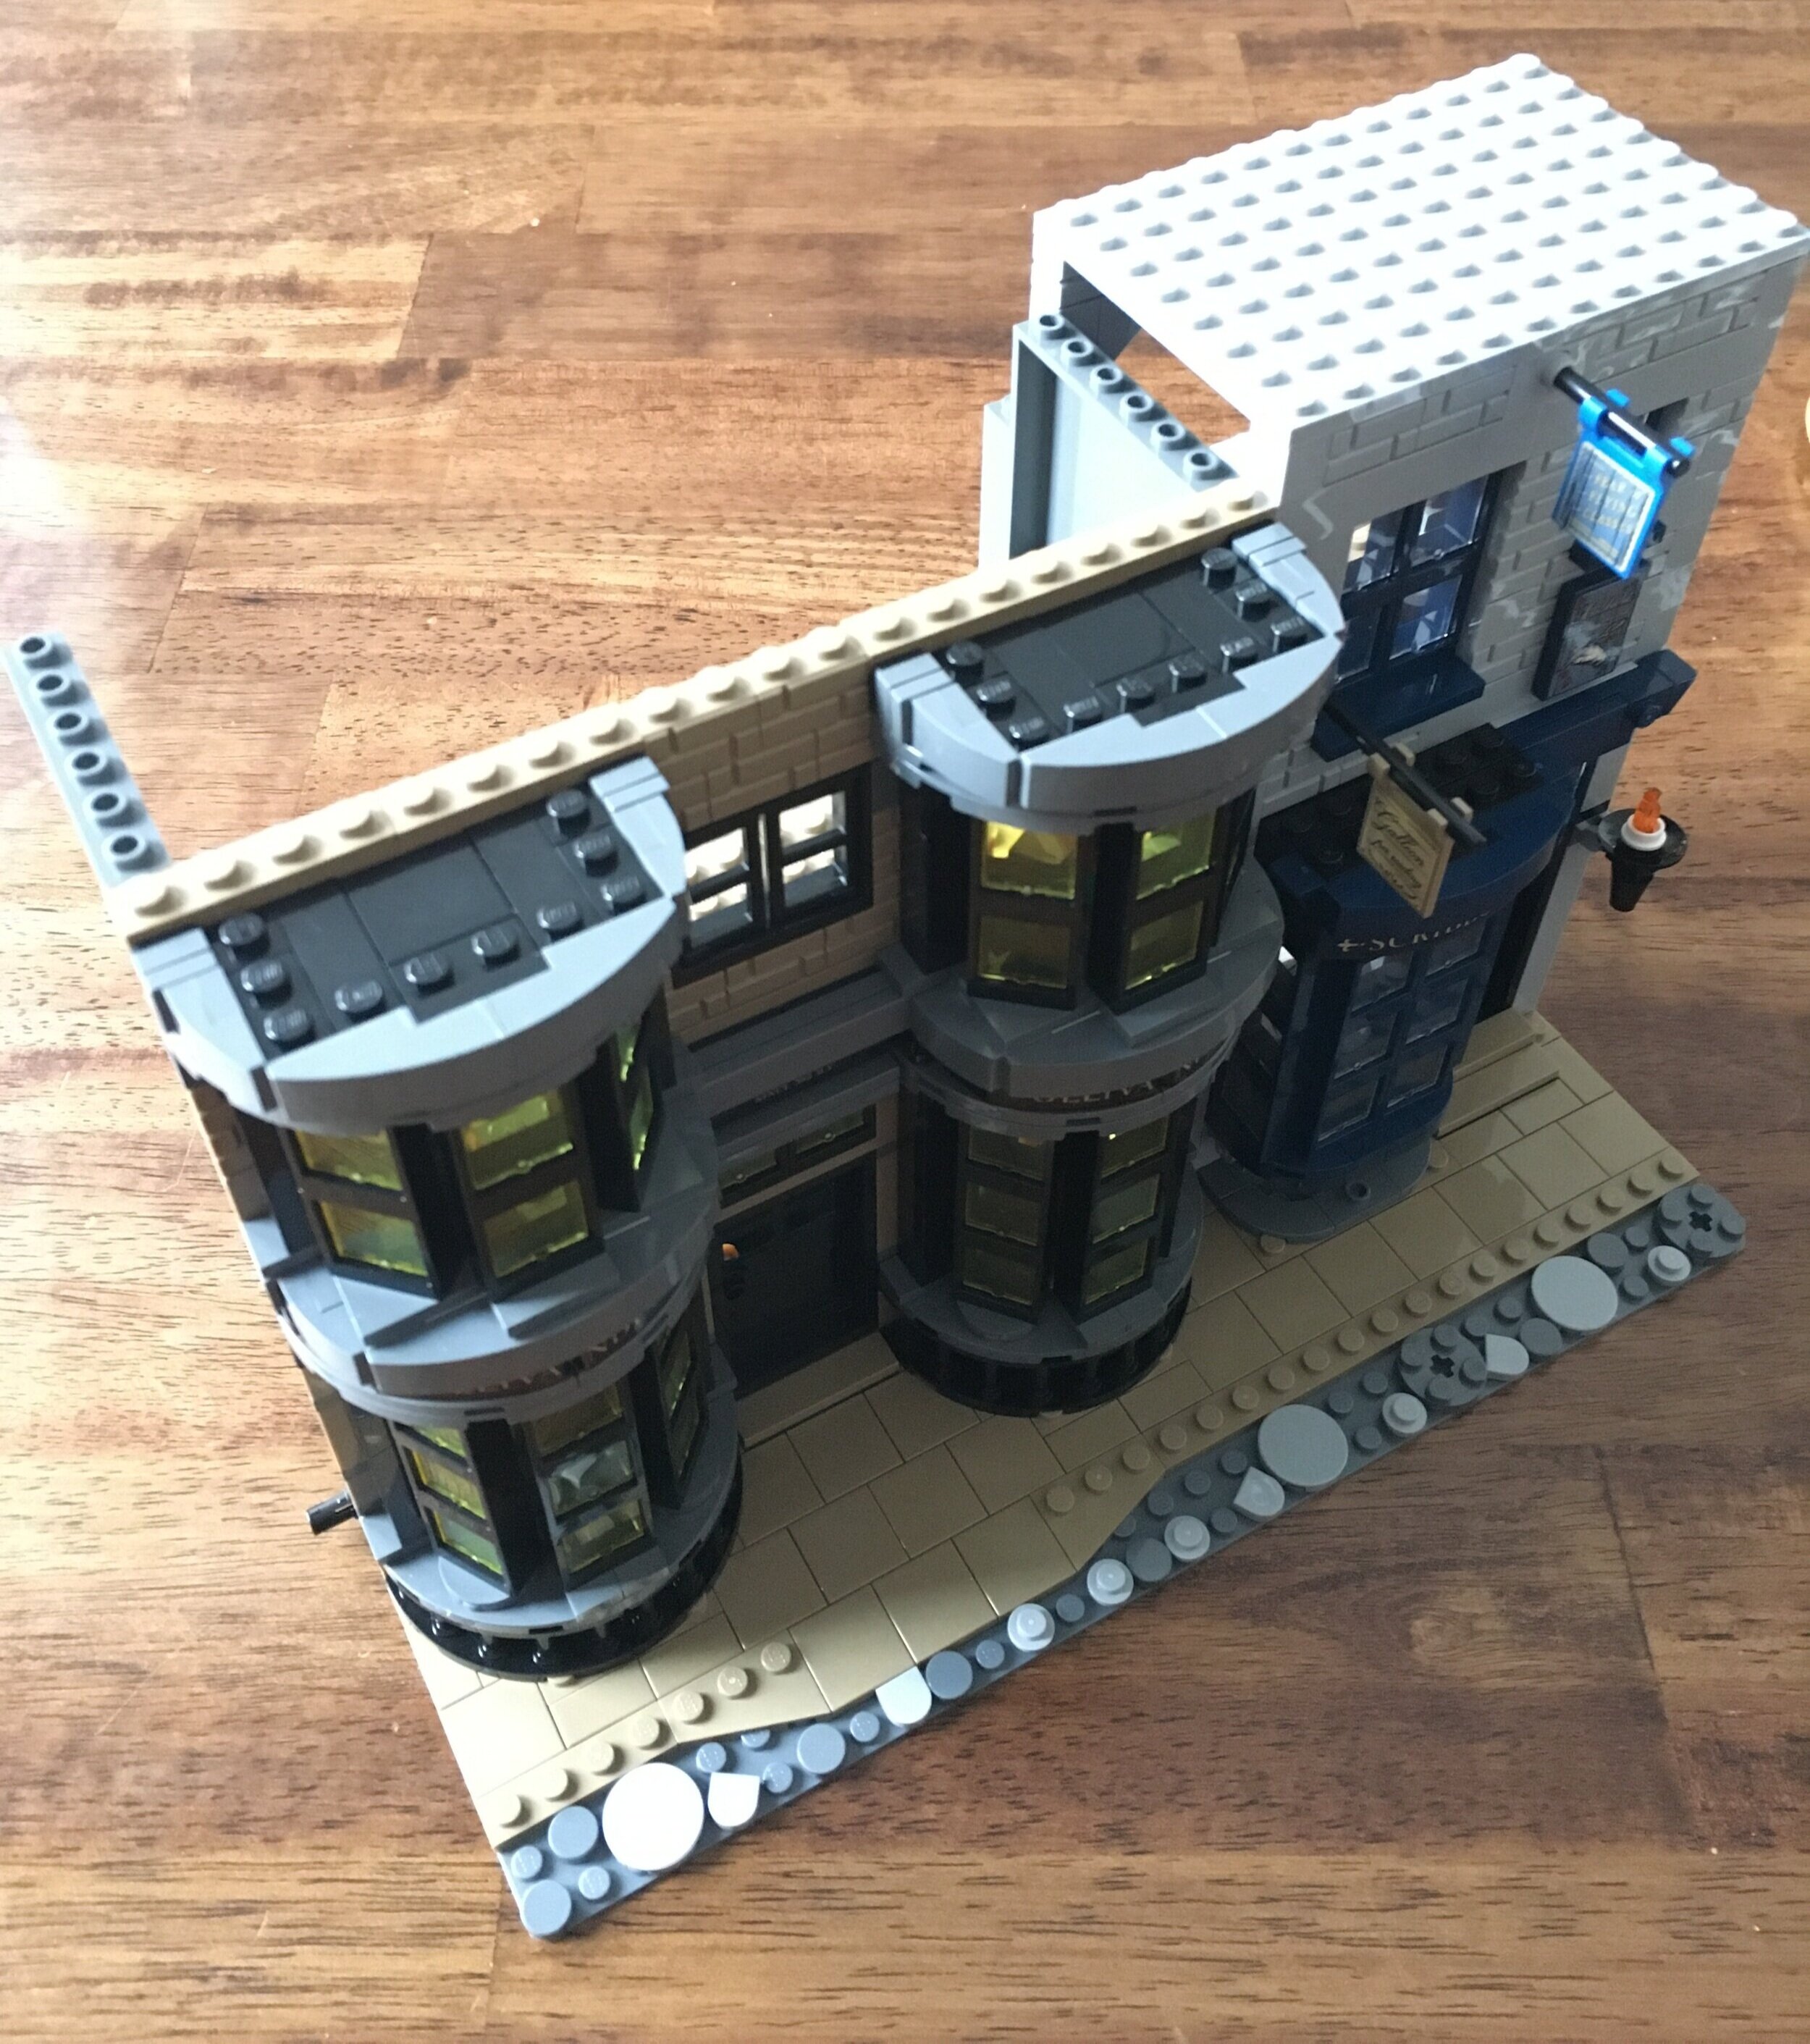
The fifth bag finishes this build with the roof and chimneys, another room of wands in Ollivander’s, and some owls. The chimney that is slightly crooked is a nice touch. The hinge pieces don’t exactly fit in asthetically, but the chimney seems to fit the magical world of Harry Potter. The second floor of Ollivander’s has a desk, a ladder, a chair, and another shelf of wands. You get 3 owls with this build. Hedwig and then two others. Hedwig is connected with a clear pole piece and he is flying a copy of the Daily Prophet. The other two are perched on Ollivander’s.

One last item is the various flags/signs on the buildings to advertise for the stores. I like how they are done and think they look cool, but the stickers are a pain. One on each side of the piece. It really put my sticker applying skills to the test.

75978_build_5c.jpg
75978_build_5d.JPG

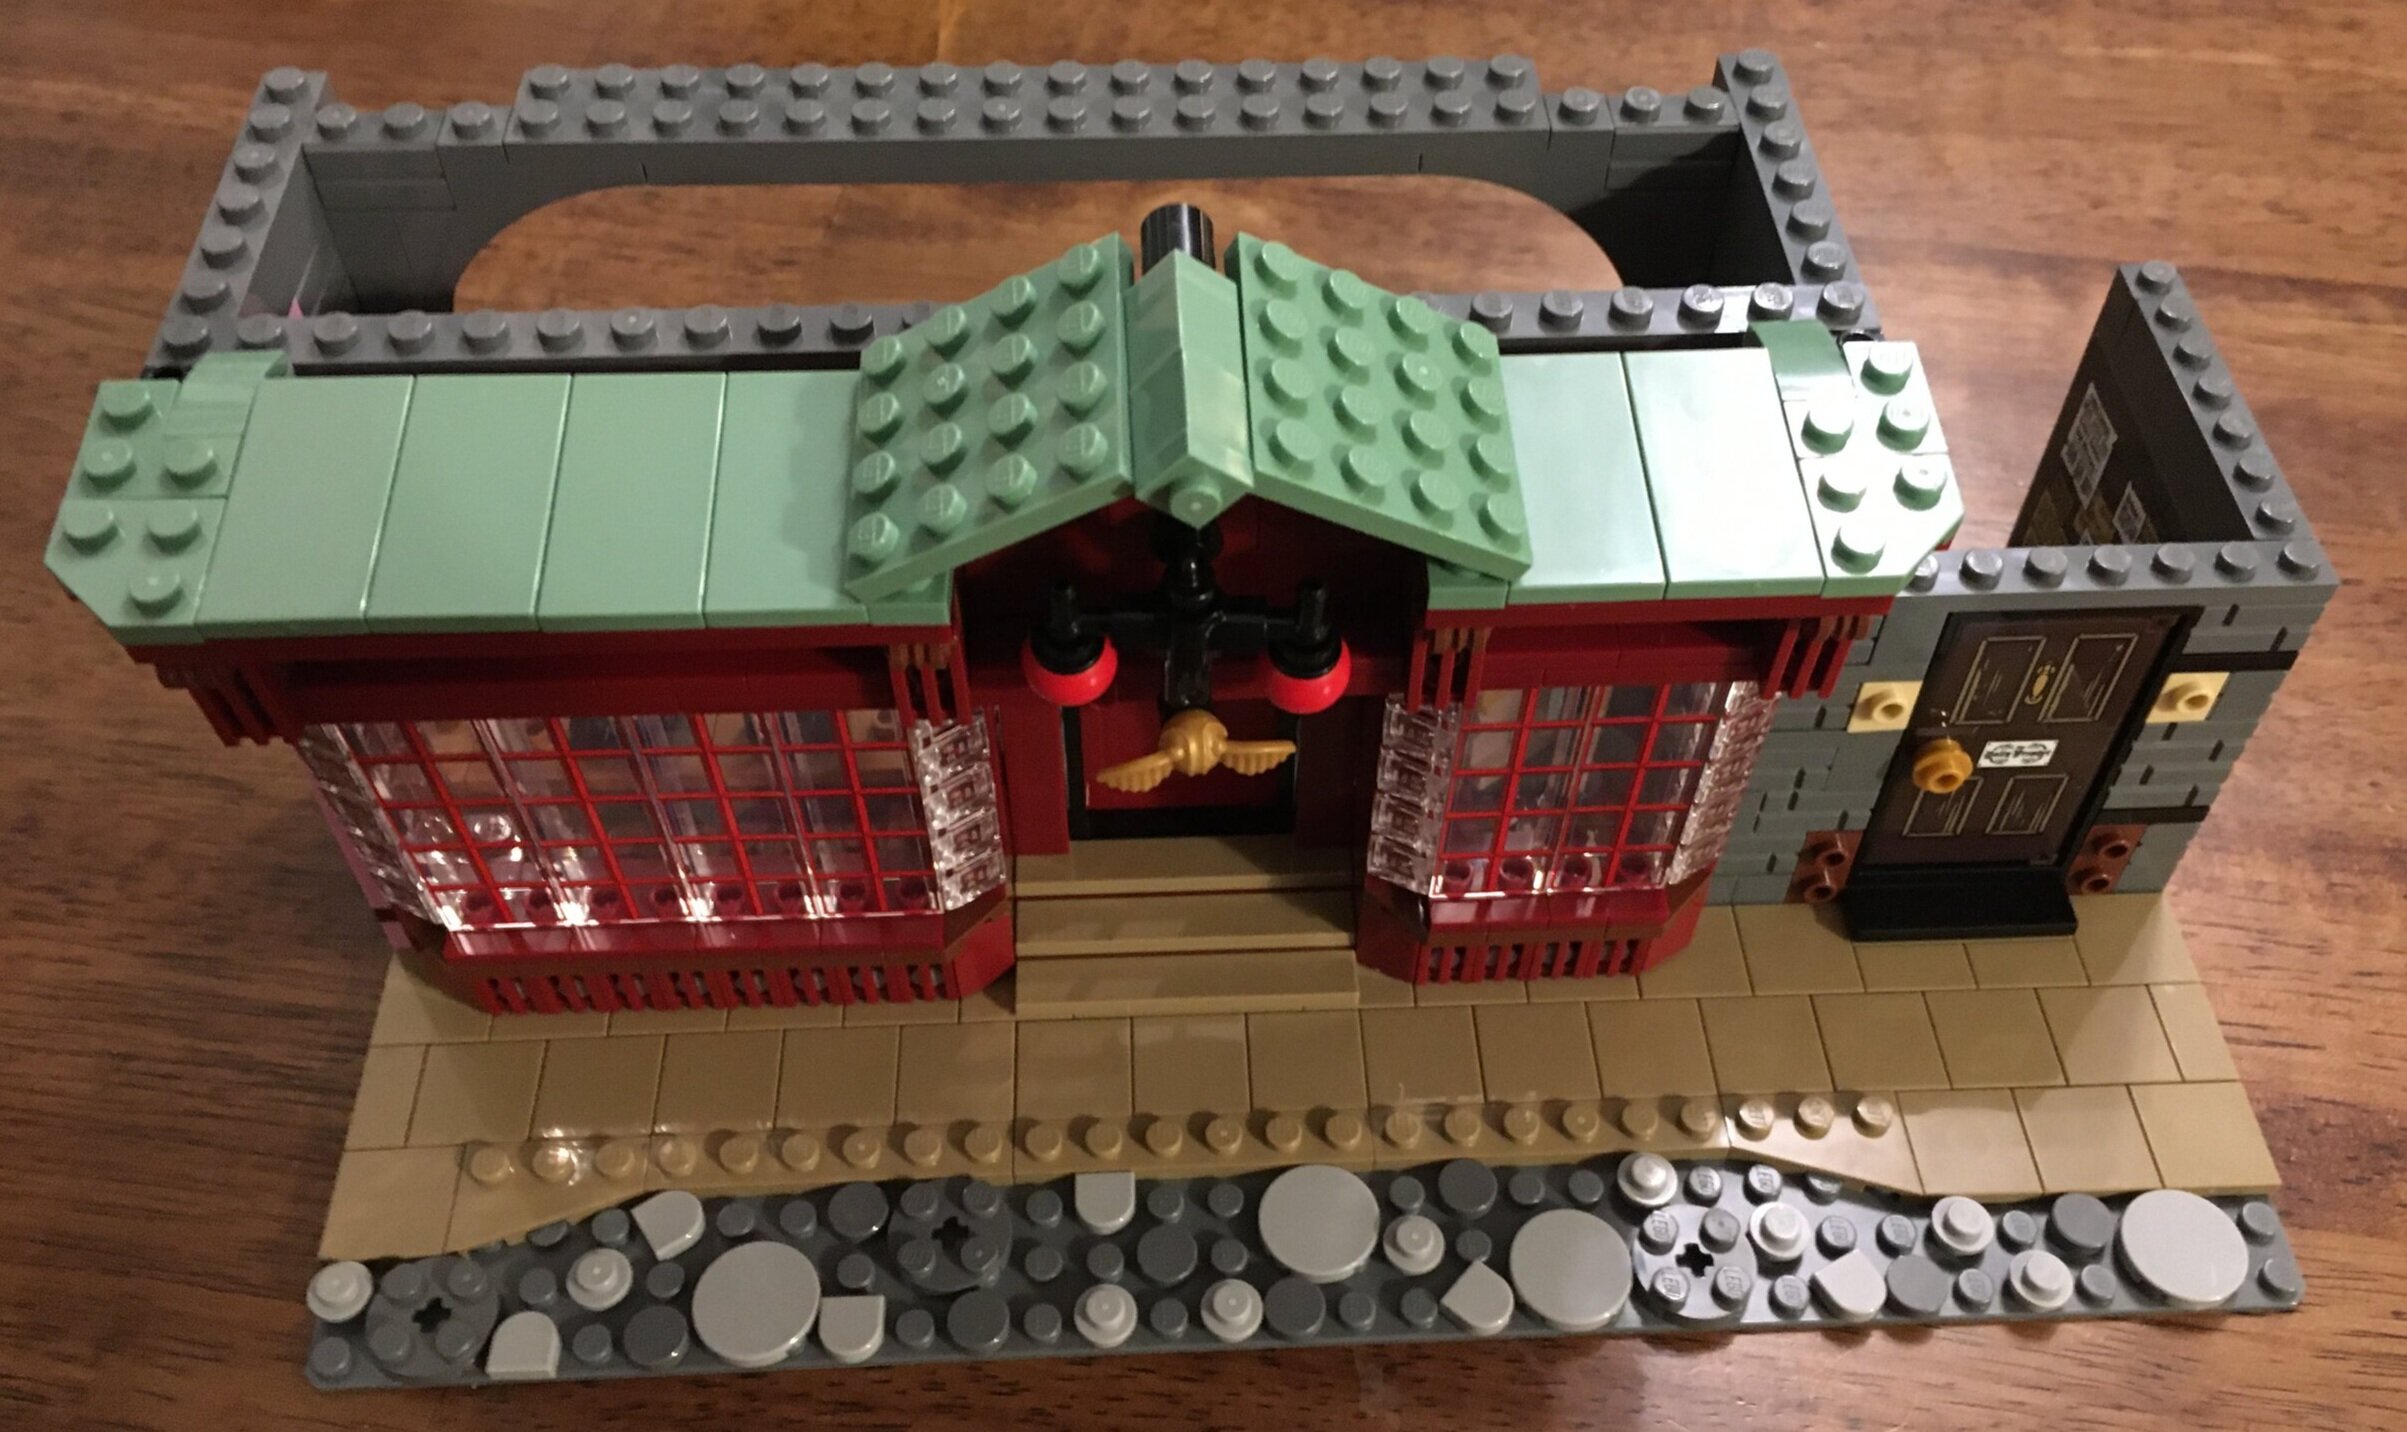
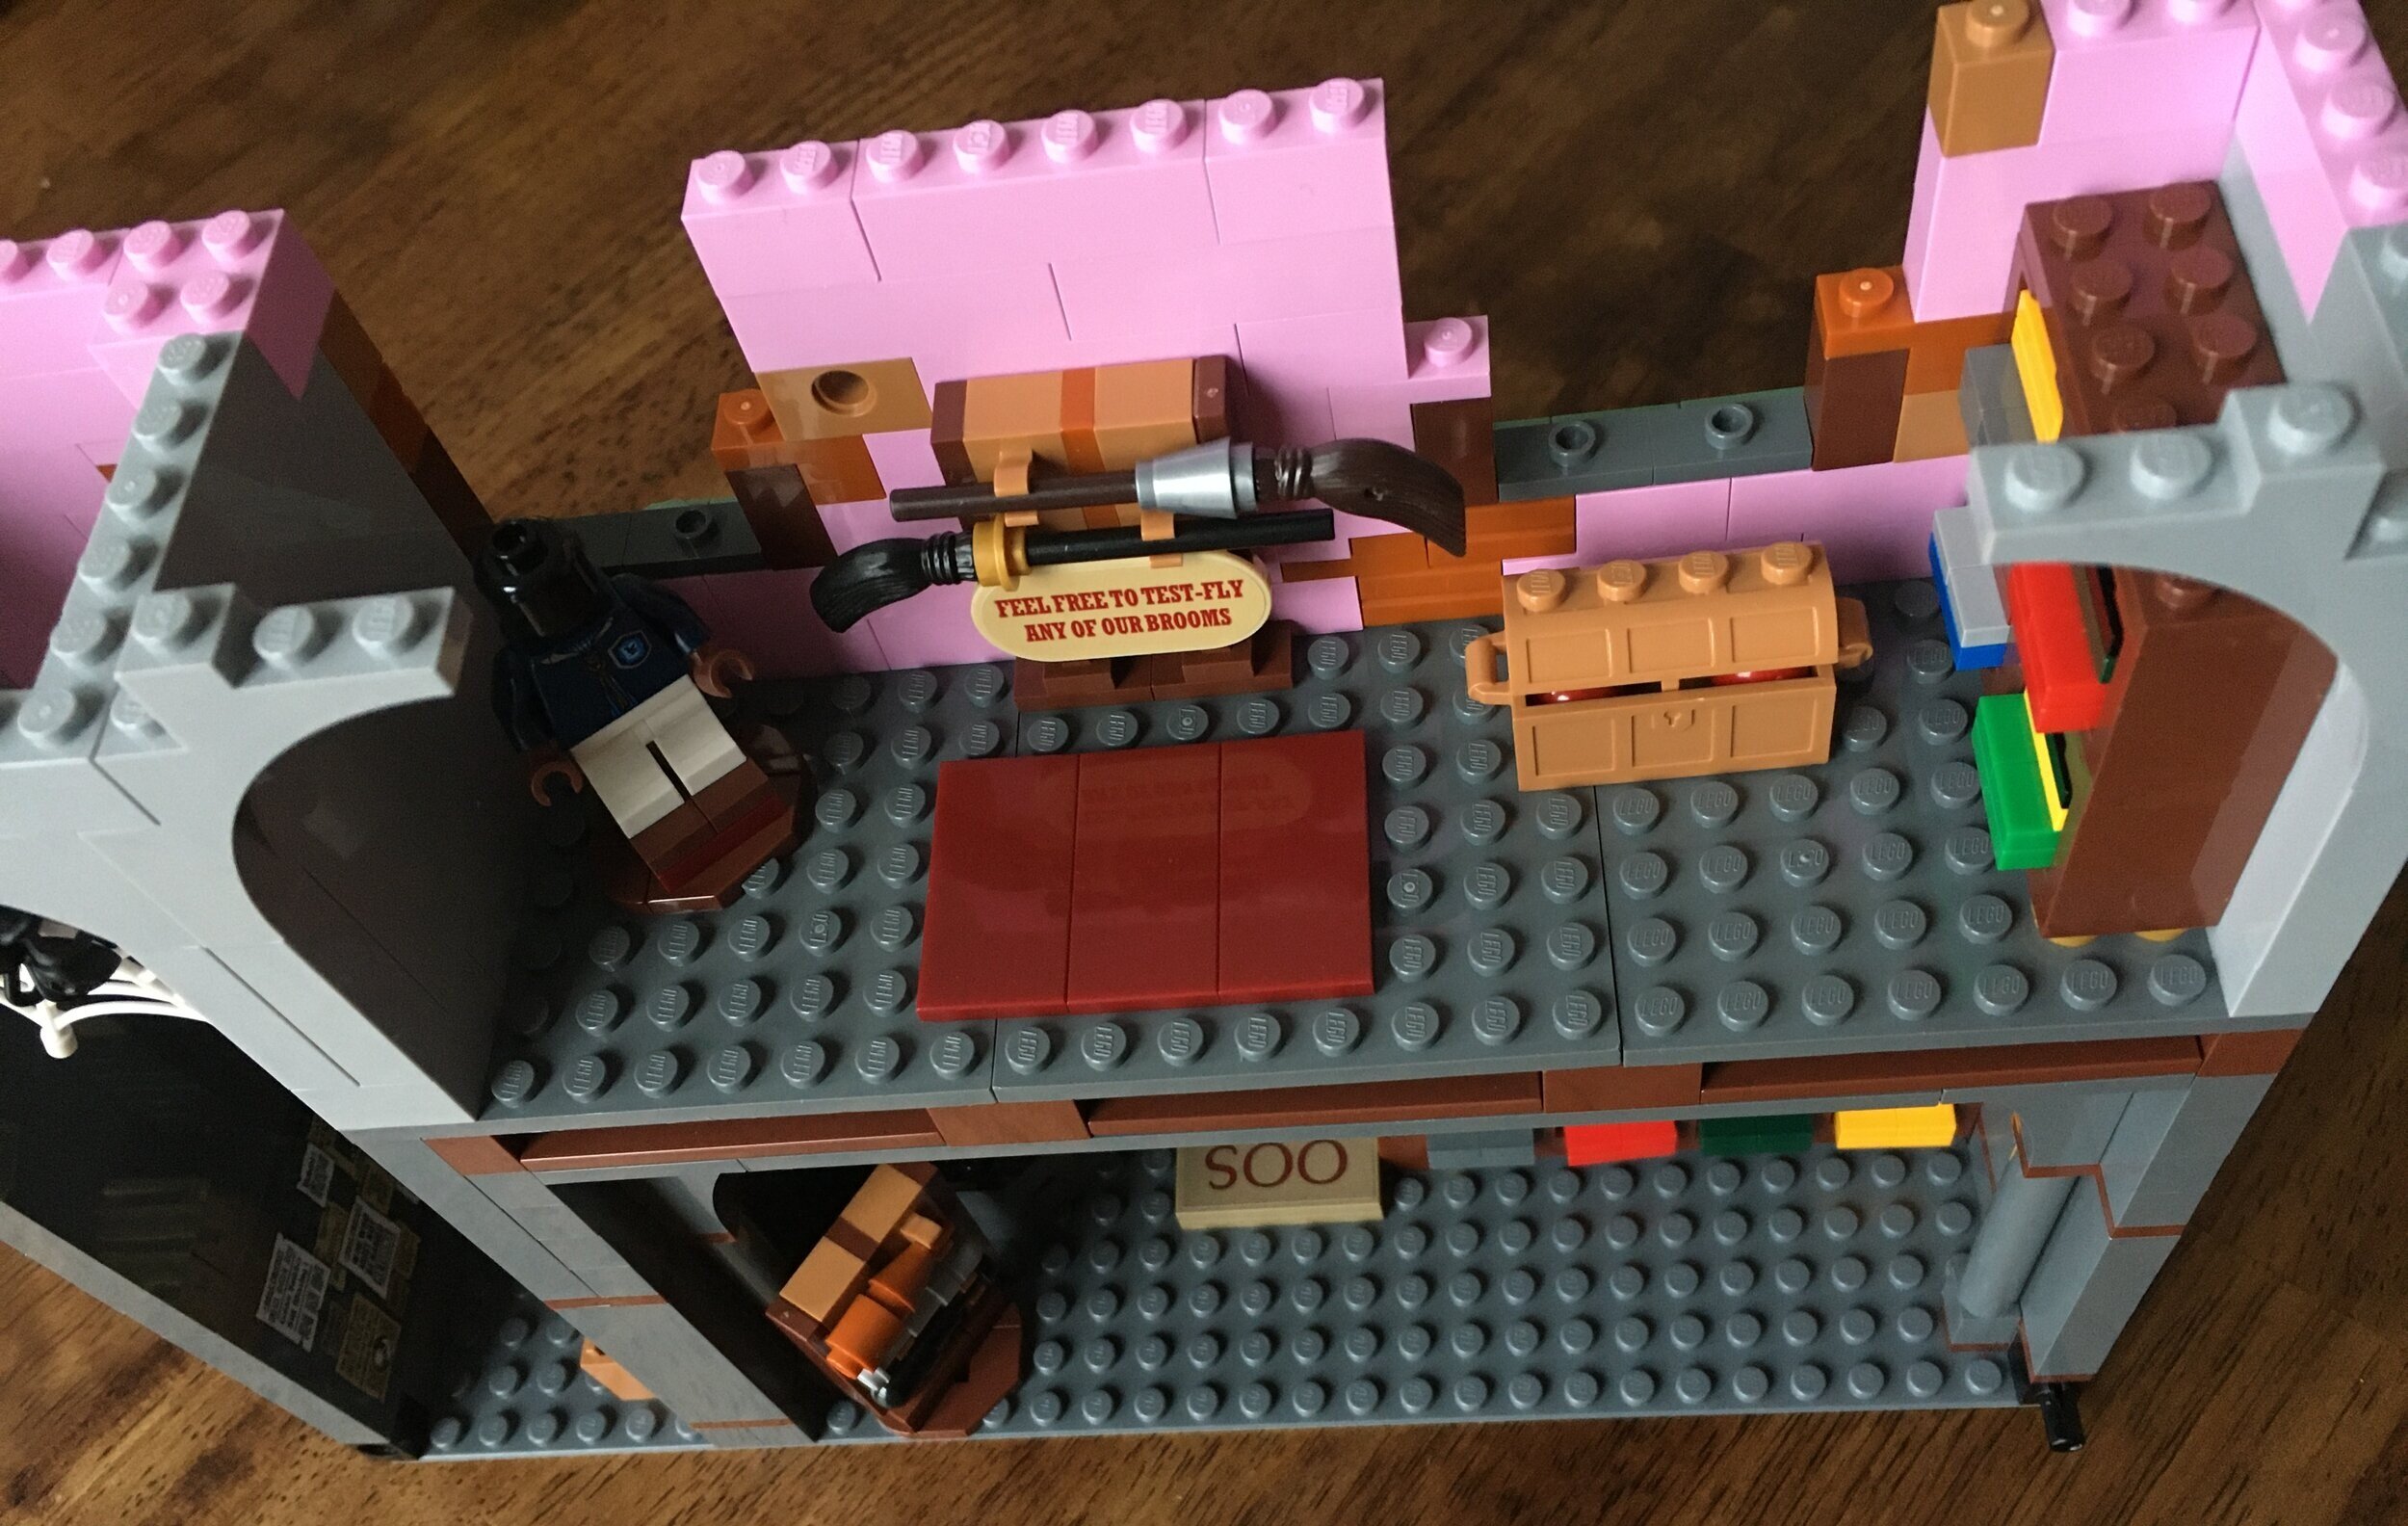
The sixth set of bags start Quality Quidditch™ Supplies and The Daily Prophet™. The sidewalk and road are similar to the previous building. The Quidditch shop has some fun details inside to include brooms, minifigures displaying uniforms, and various uniforms stacked on shelves.

The Daily Prophet seems like an after thought. Or there weren’t a lot of details available. It’s just an empty space with 2x2 tiles of the newspaper laying around.

75978_build_6a.JPG
75978_build_6b.JPG

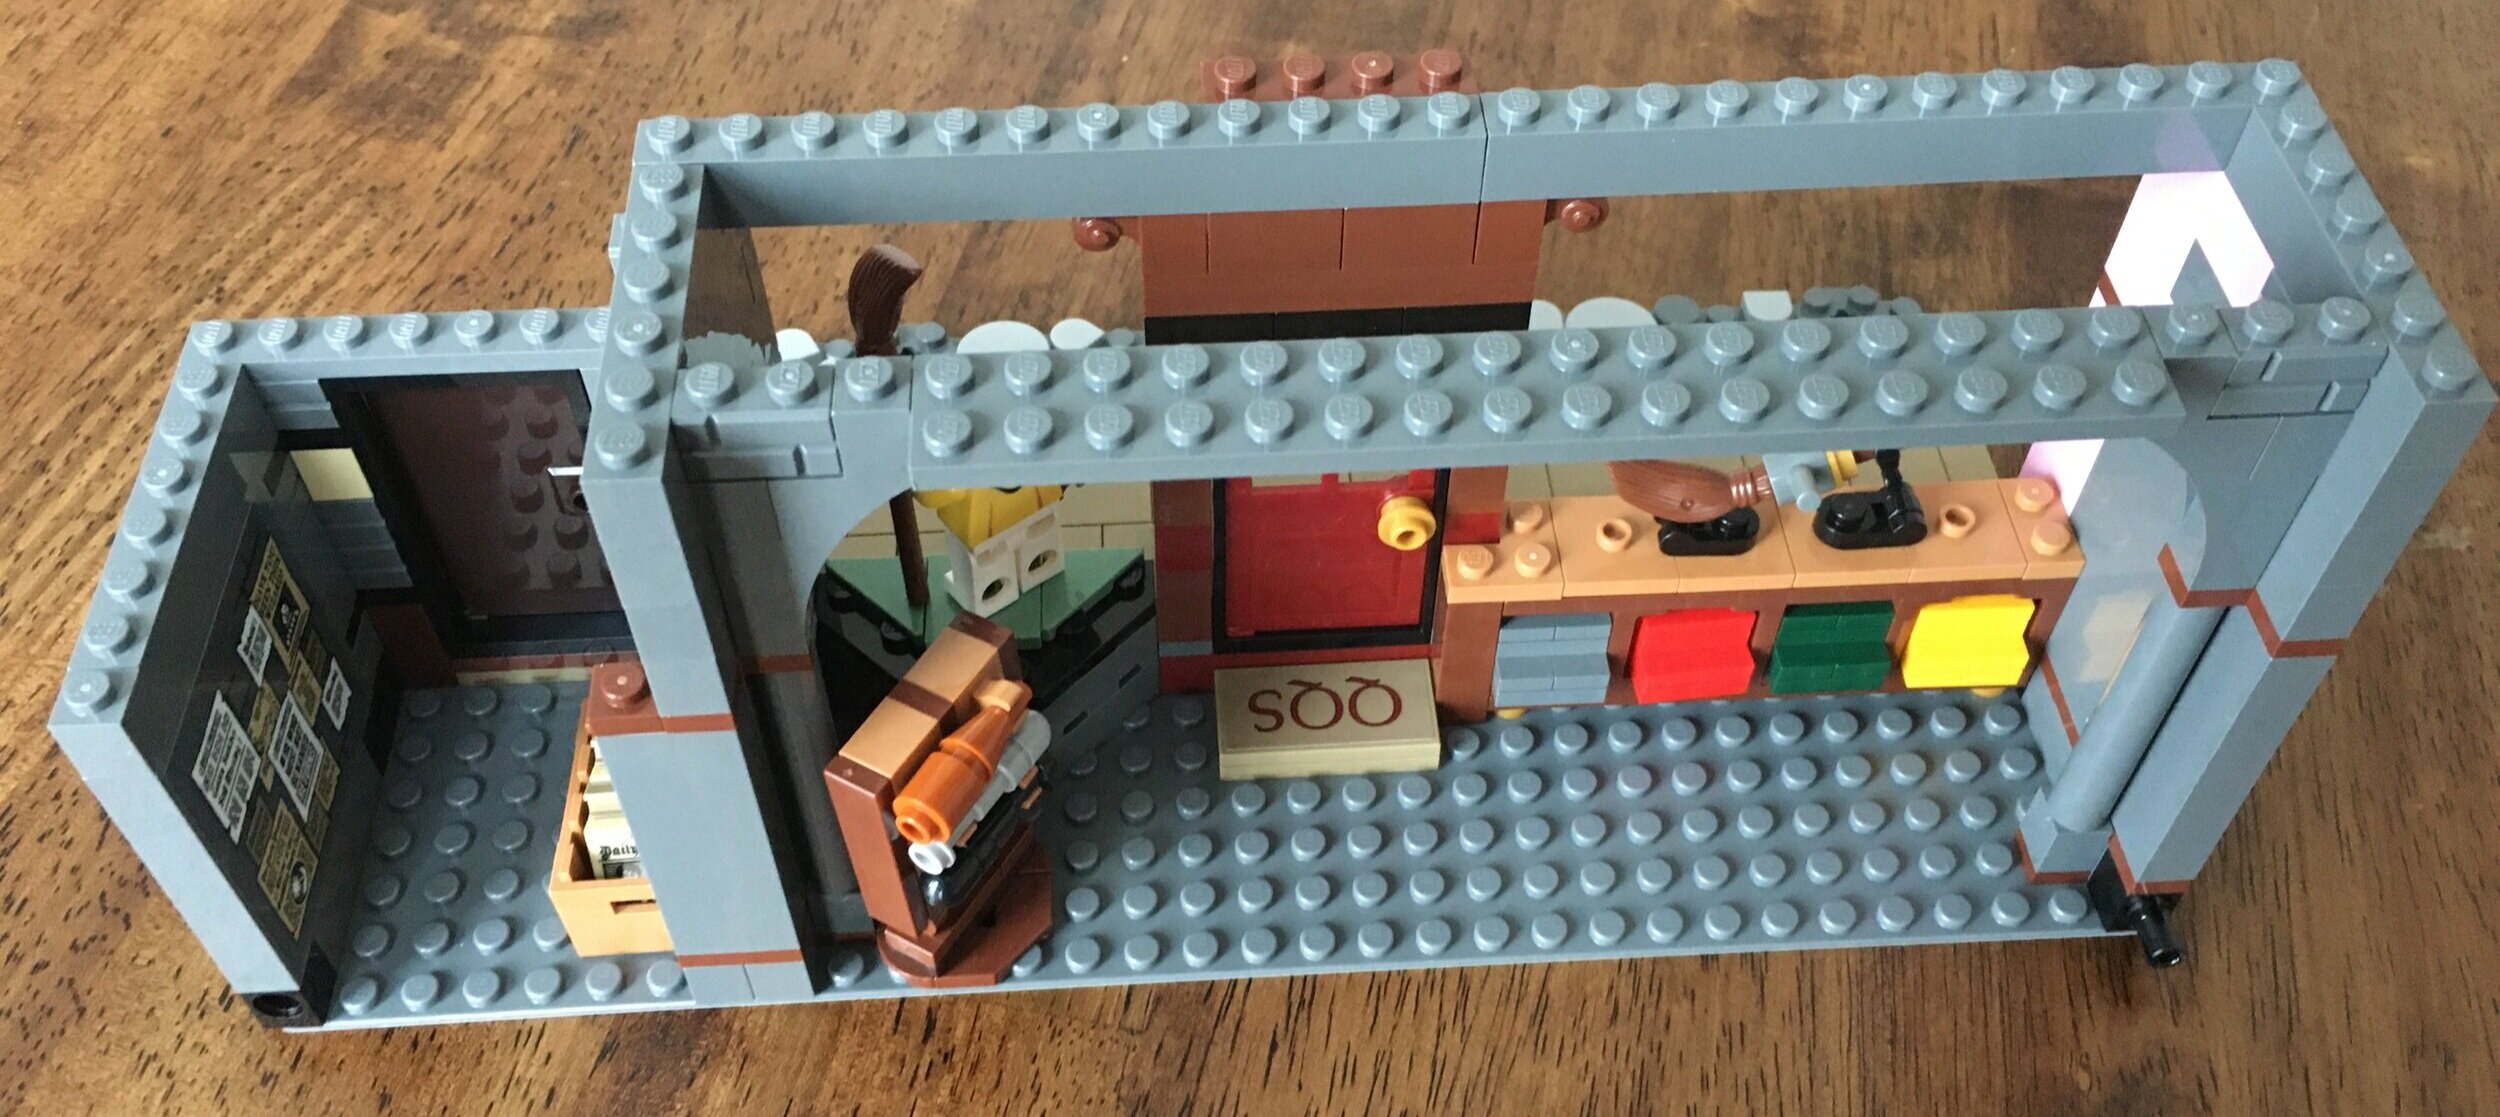
The seventh bags add the front façade to the first floor of the Quidditch shop. The brick red with the greenish color fits in well. I love the printed red on the clear bricks to create the windows with the added clear cheese slopes. It almost has an Asian/Chinese Festival look to it. The Quidditch equipment above the door looks cool too.

I forgot to throw him in the picture, but Ron Weasley’s minifigure comes in this bag.

75978_build_7a.JPG

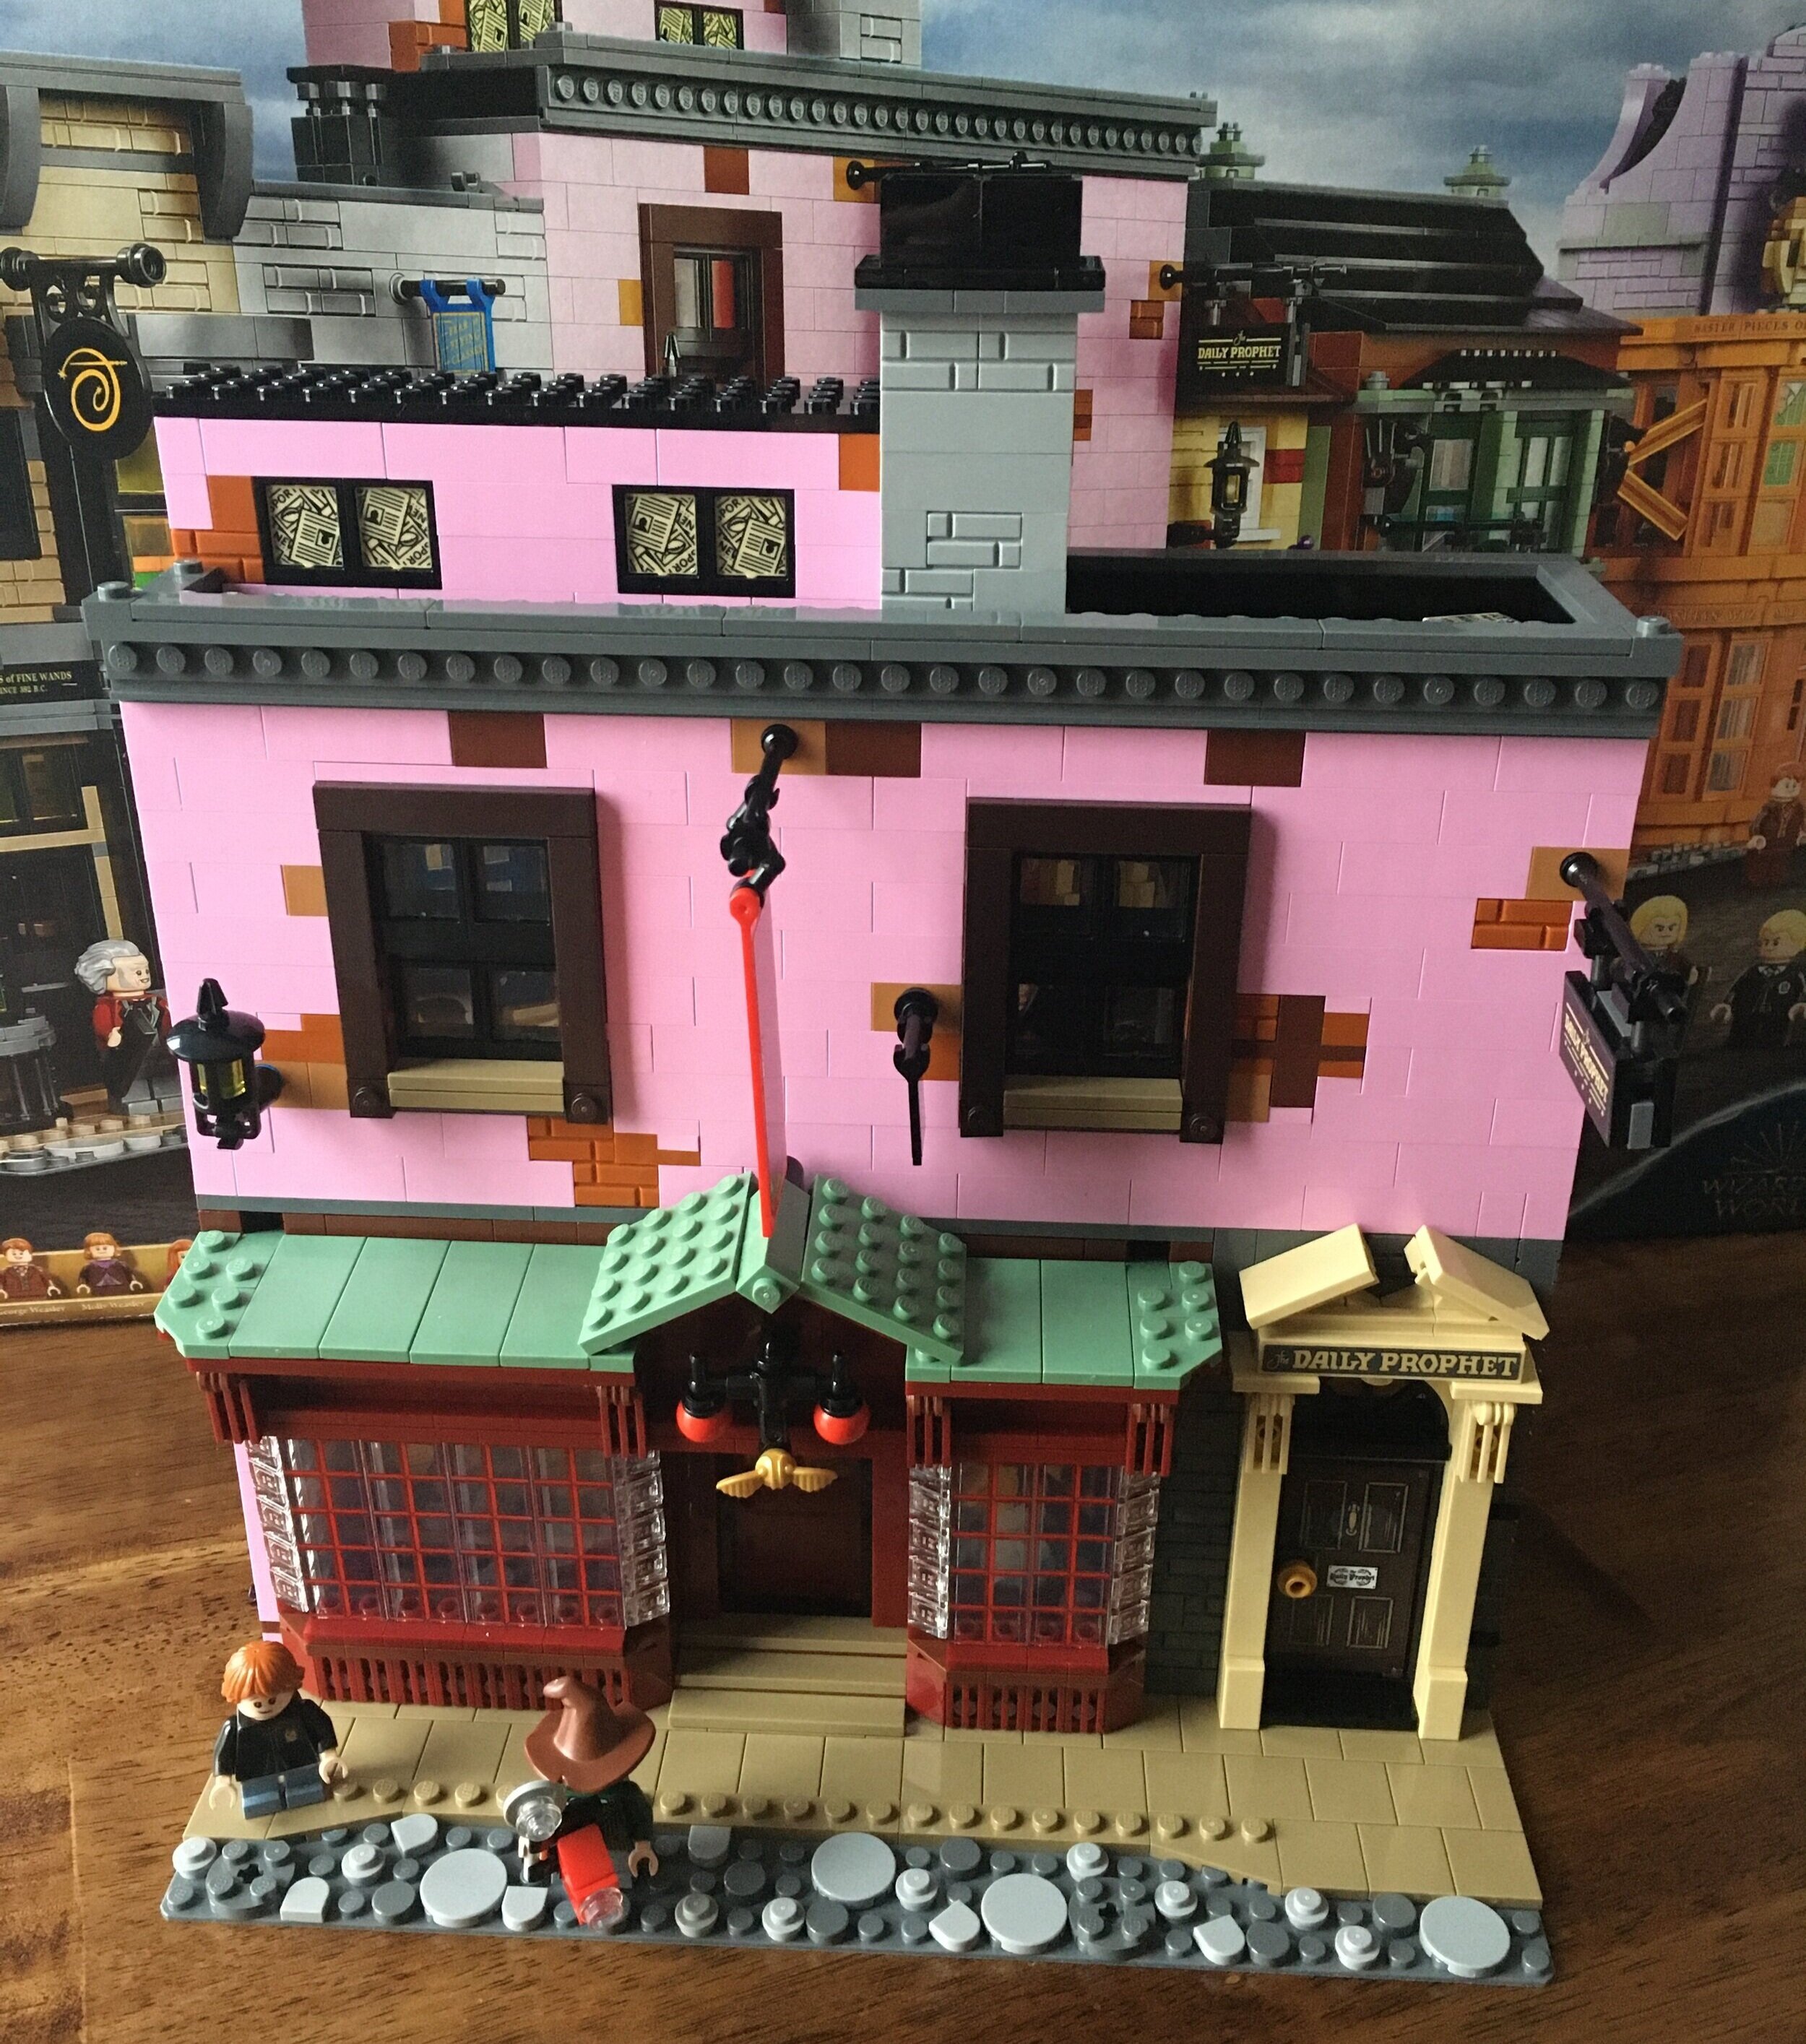
The eighth bags build the second floor of the shop to include more gear, clothes, and then a minifigure displaying a uniform. The pink color brightens things up after the dark grey and tan-ish color from Ollivander’s

75978_build_8b.JPG

The ninth set of bags finishes the set up. As mentioned, the Daily Prophet leaves a bit to be desired. A large spider web, stacks of papers, a rat eating cheese. and more newspapers. A desk or a magical printer maybe?

The Daily Prophet photographer shows up in this bag with a camera.

This one is another great building for the set. The Quidditch shop is the main selling point for me with the design of the first floor exterior. The interior details are cool too. No minifigure to work in the shop though.

75978_build_9a.JPG
75978_build_9b.jpg

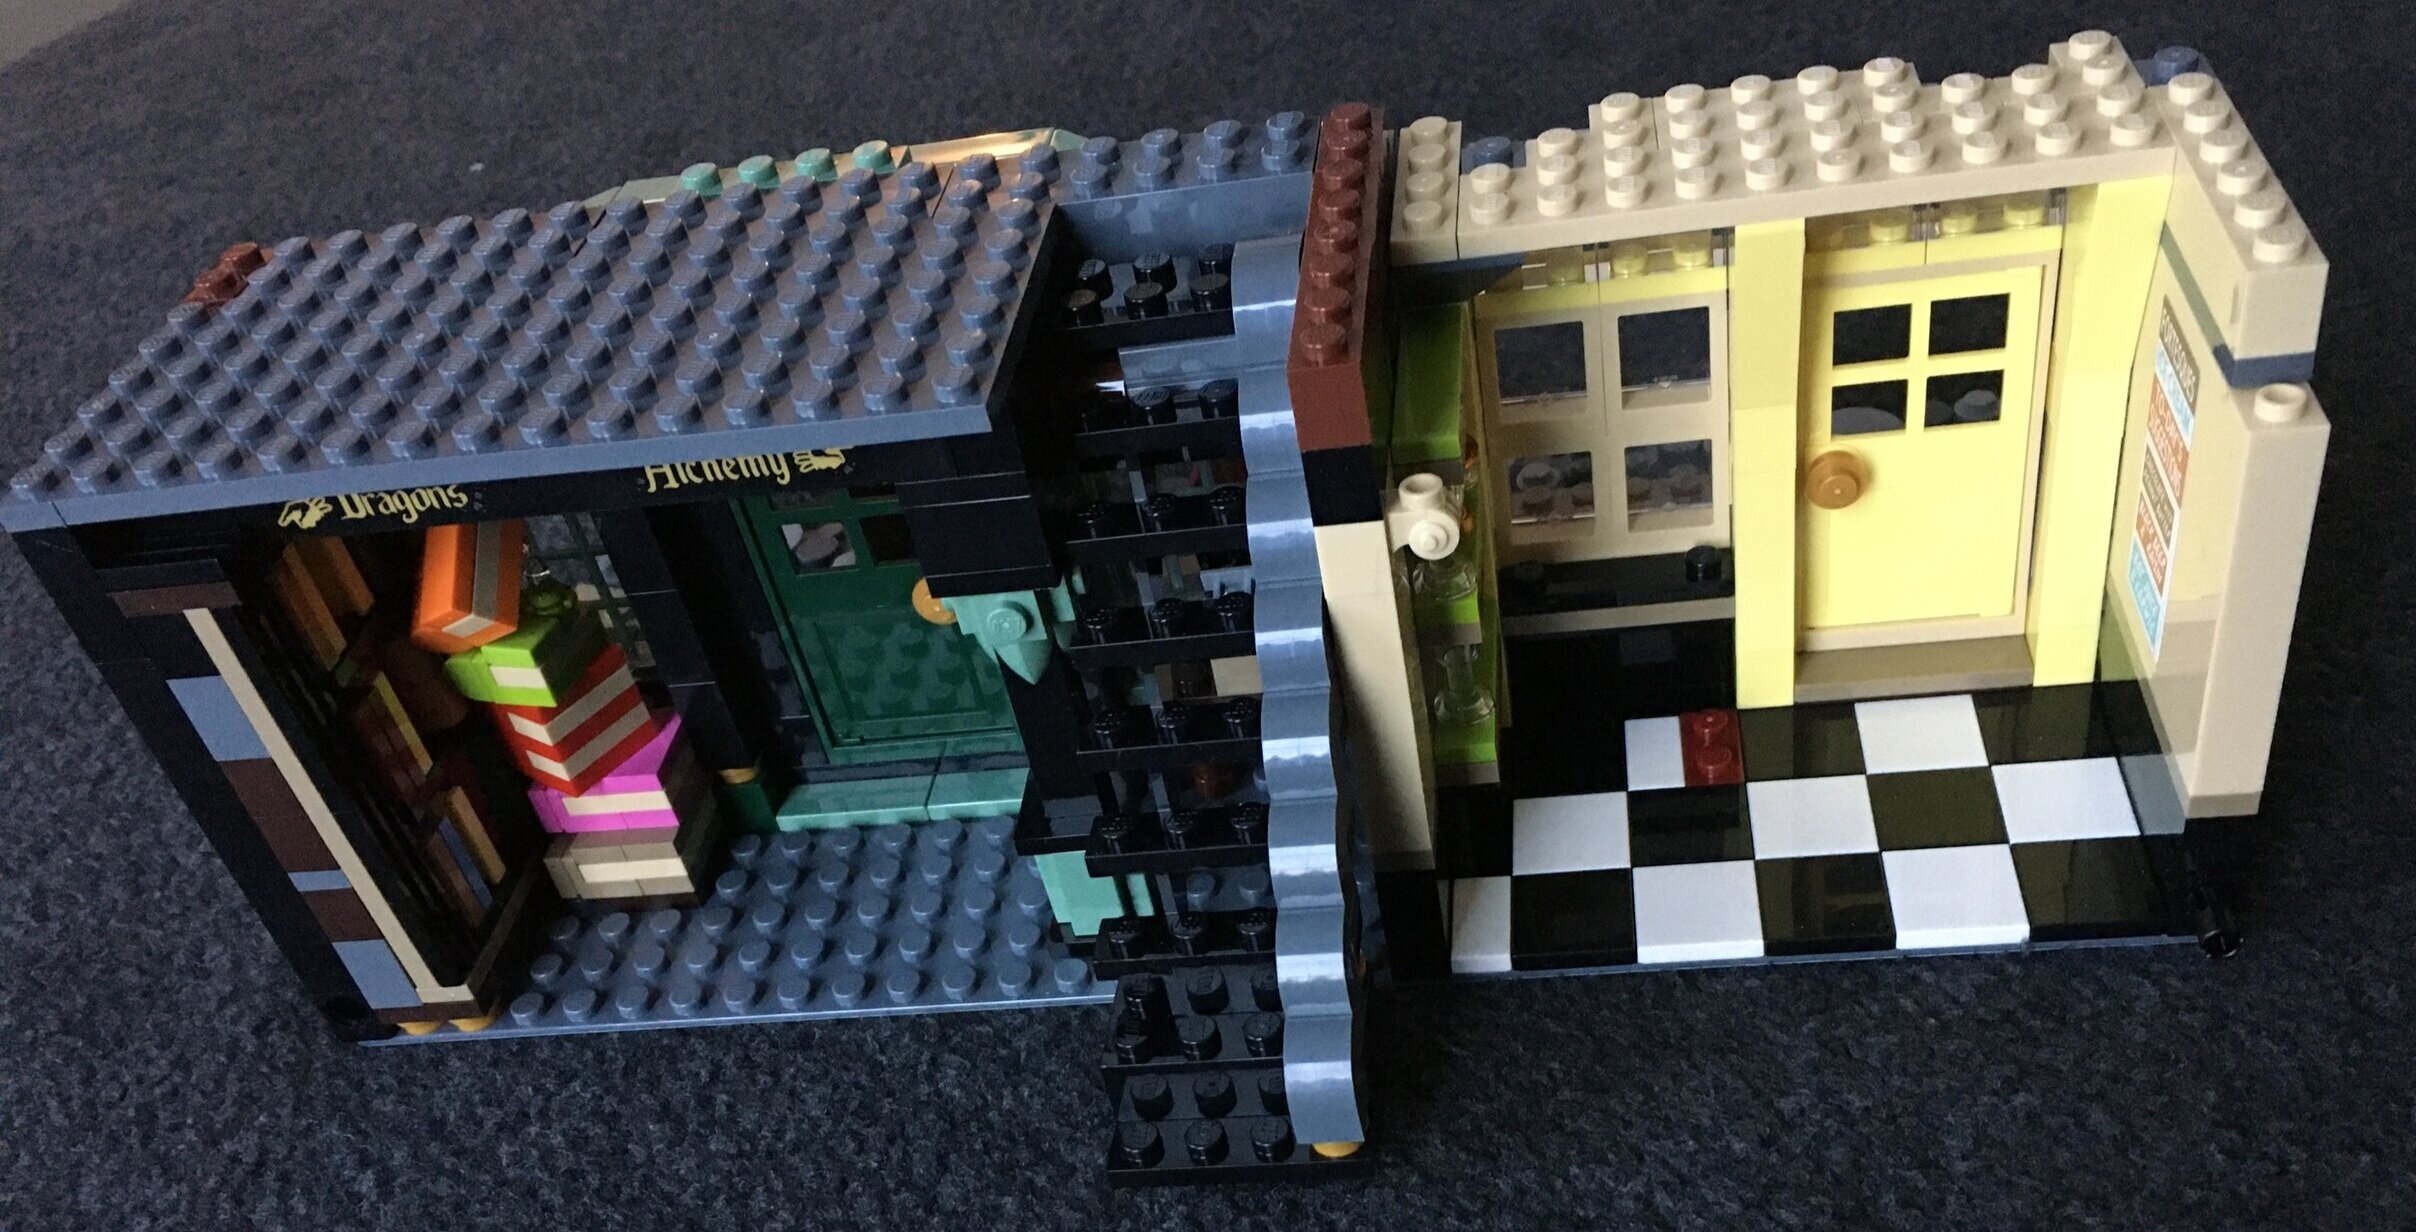
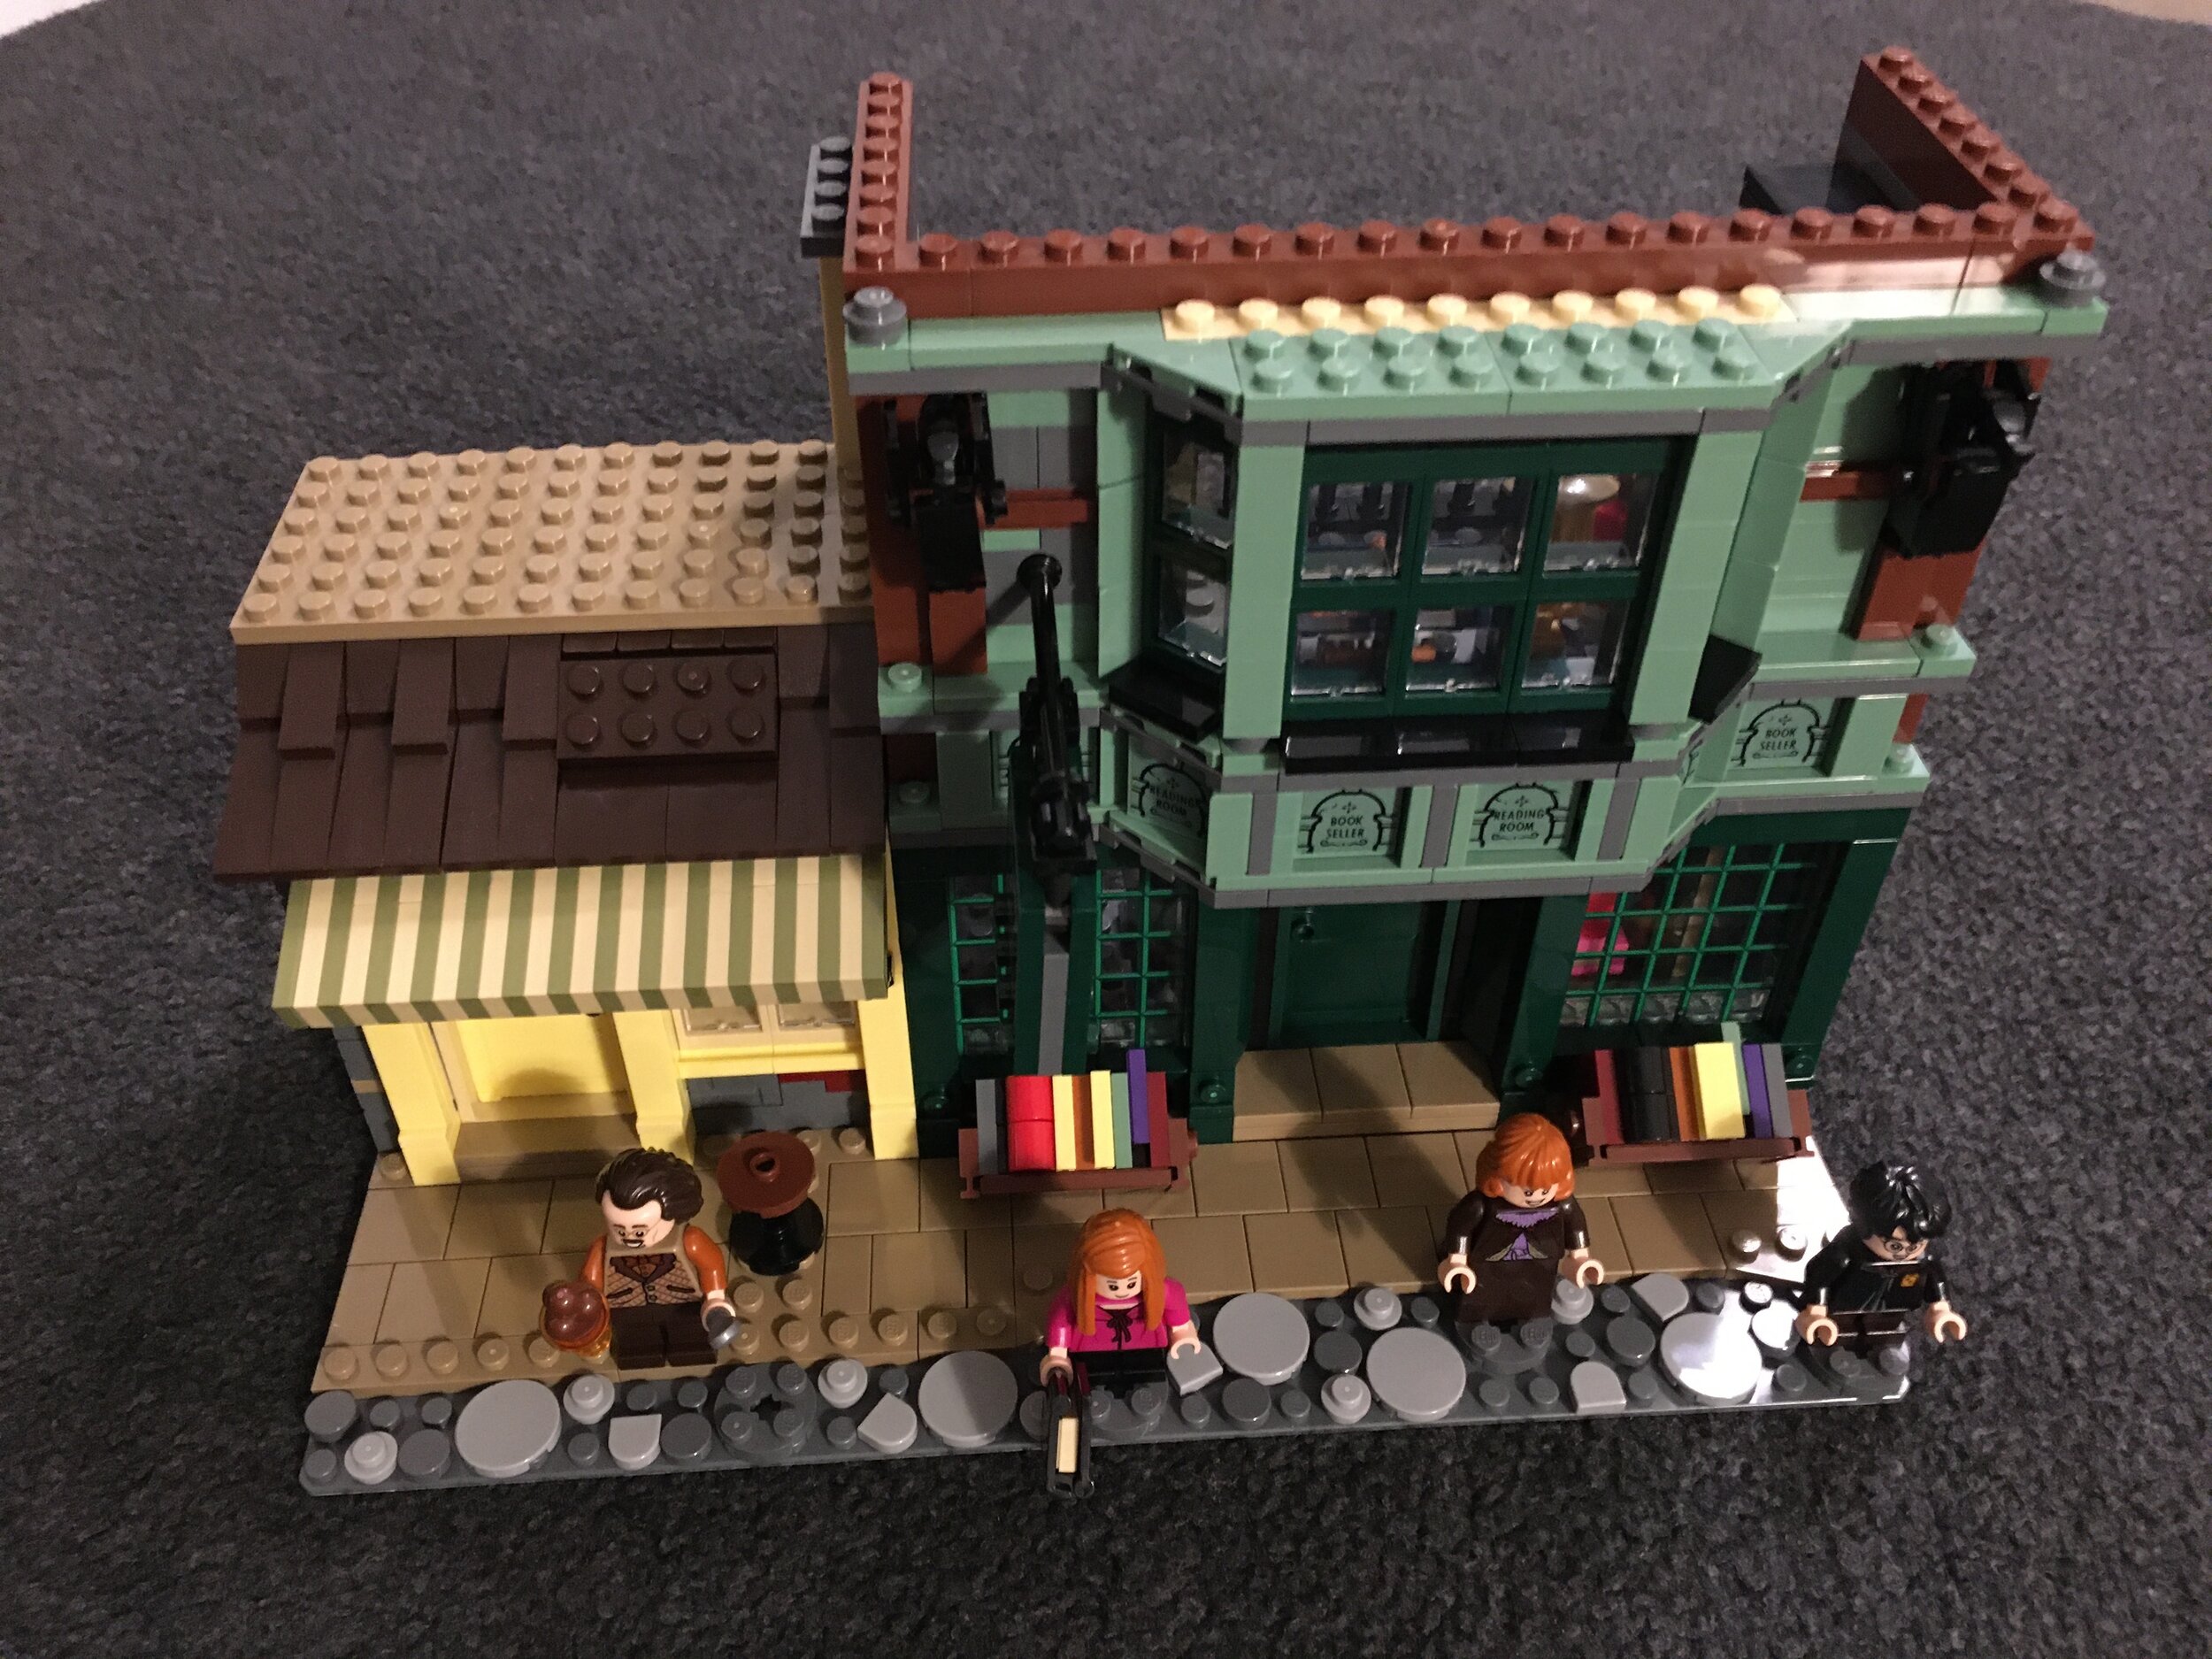
The tenth bags build Flourish & Blotts and Florean Fortescue’s Ice Cream Parlor. Flourish & Blotts is used in the second book/movie “The Chamber of Secrets.” They actually go inside the store so I’m sure the designers had a bit more to go on than just some quick movie stills.

This part of the build includes Mrs. Weasley. It also starts to build Flourish & Blotts. A similar window type piece is used for this one as the Quidditch shop only it is green colored.

75978_build_10a.JPG

The eleventh set of bags builds the first floor section of Flourish & Blotts with some book shelves, a book display, and the stairwell. The stairs are on a hinge and they fold up if you want to put the buildings back to back.

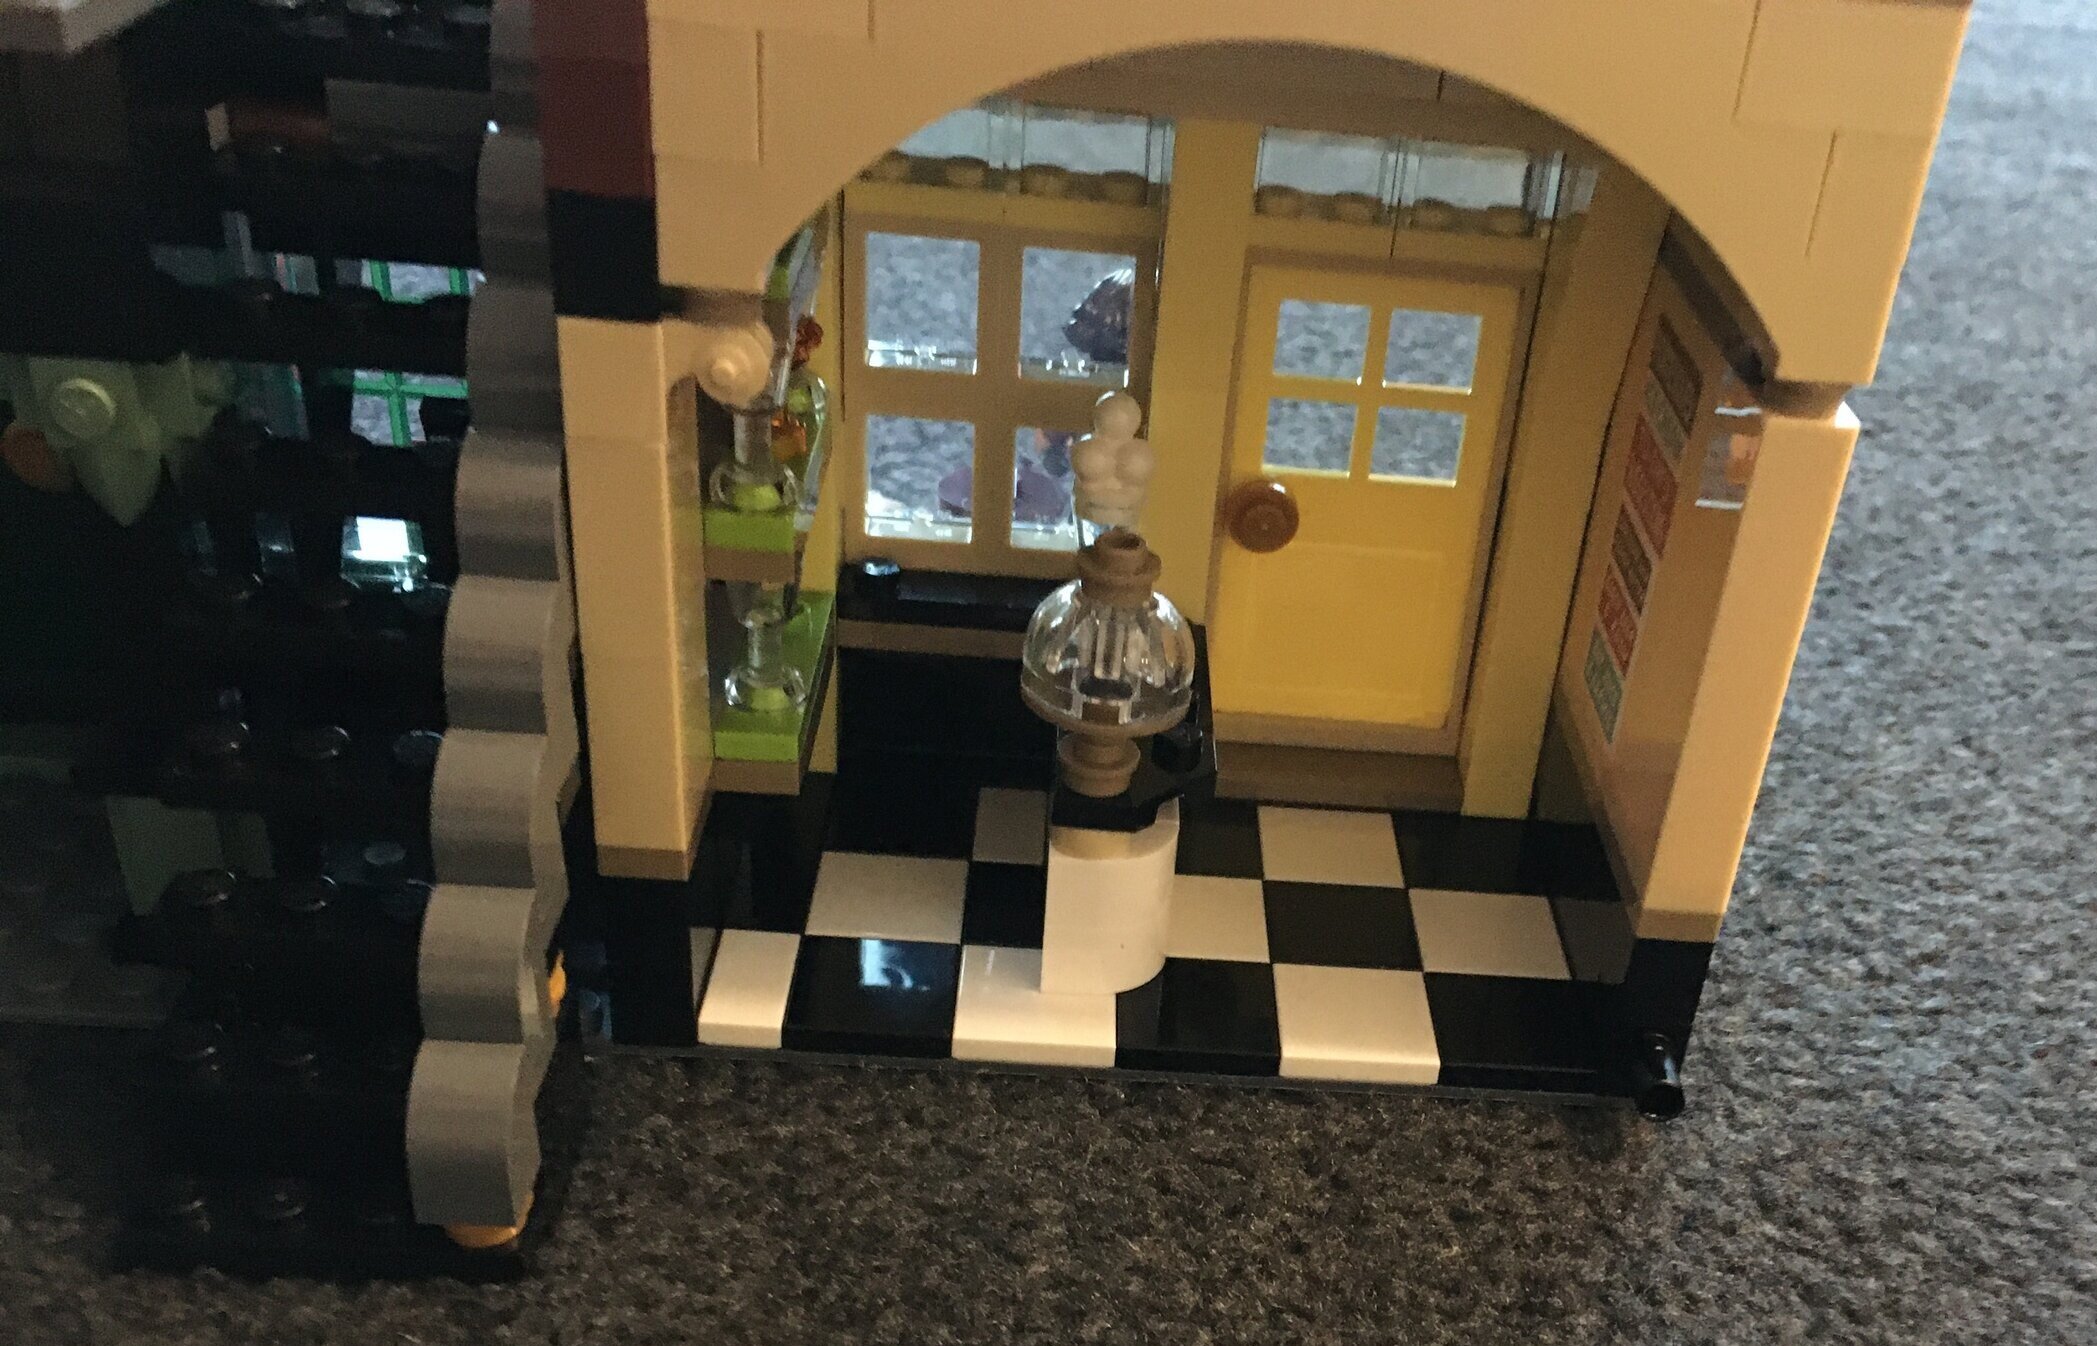
This section also starts on the Ice Cream Parlor with the black and white checkered flooring, a shelf with some ice cream dishes, and the fun sticker with flavors on the wall.

Ginny Weasley’s minifigure comes with this bag to include a copy of Gilderoy Lockhart’s book “Magical Me.”

75978_build_11b.JPG

My pictures of build 12 are awful. Sorry about the bad lighting.

Here you build the counter in the ice cream parlor, some books on display outside of Flourish & Blotts, the first floor ceilings, the façade of Flourish & Blotts, and the awning of Florean Fortescue’s Ice Cream Parlor. There are some interesting build techniques. The awning is rather simple, with 1x3 plates stacked with clip pieces mixed in. They clip onto the building and then some lipstick type pieces are used to hold the awning up. The Flourish & Blotts façade with the signs is all brick built and stickers. I like how the angles were achieved and I’m glad they didn’t use a big piece to get it all done. The use of different sized slopes to achieve the roof of the first floor present a cool effect as well.

Florean Fortescue comes in this set of bags.

75978_build_12a.JPG
75978_build_12b.JPG

Bag 13 adds Harry Potter.

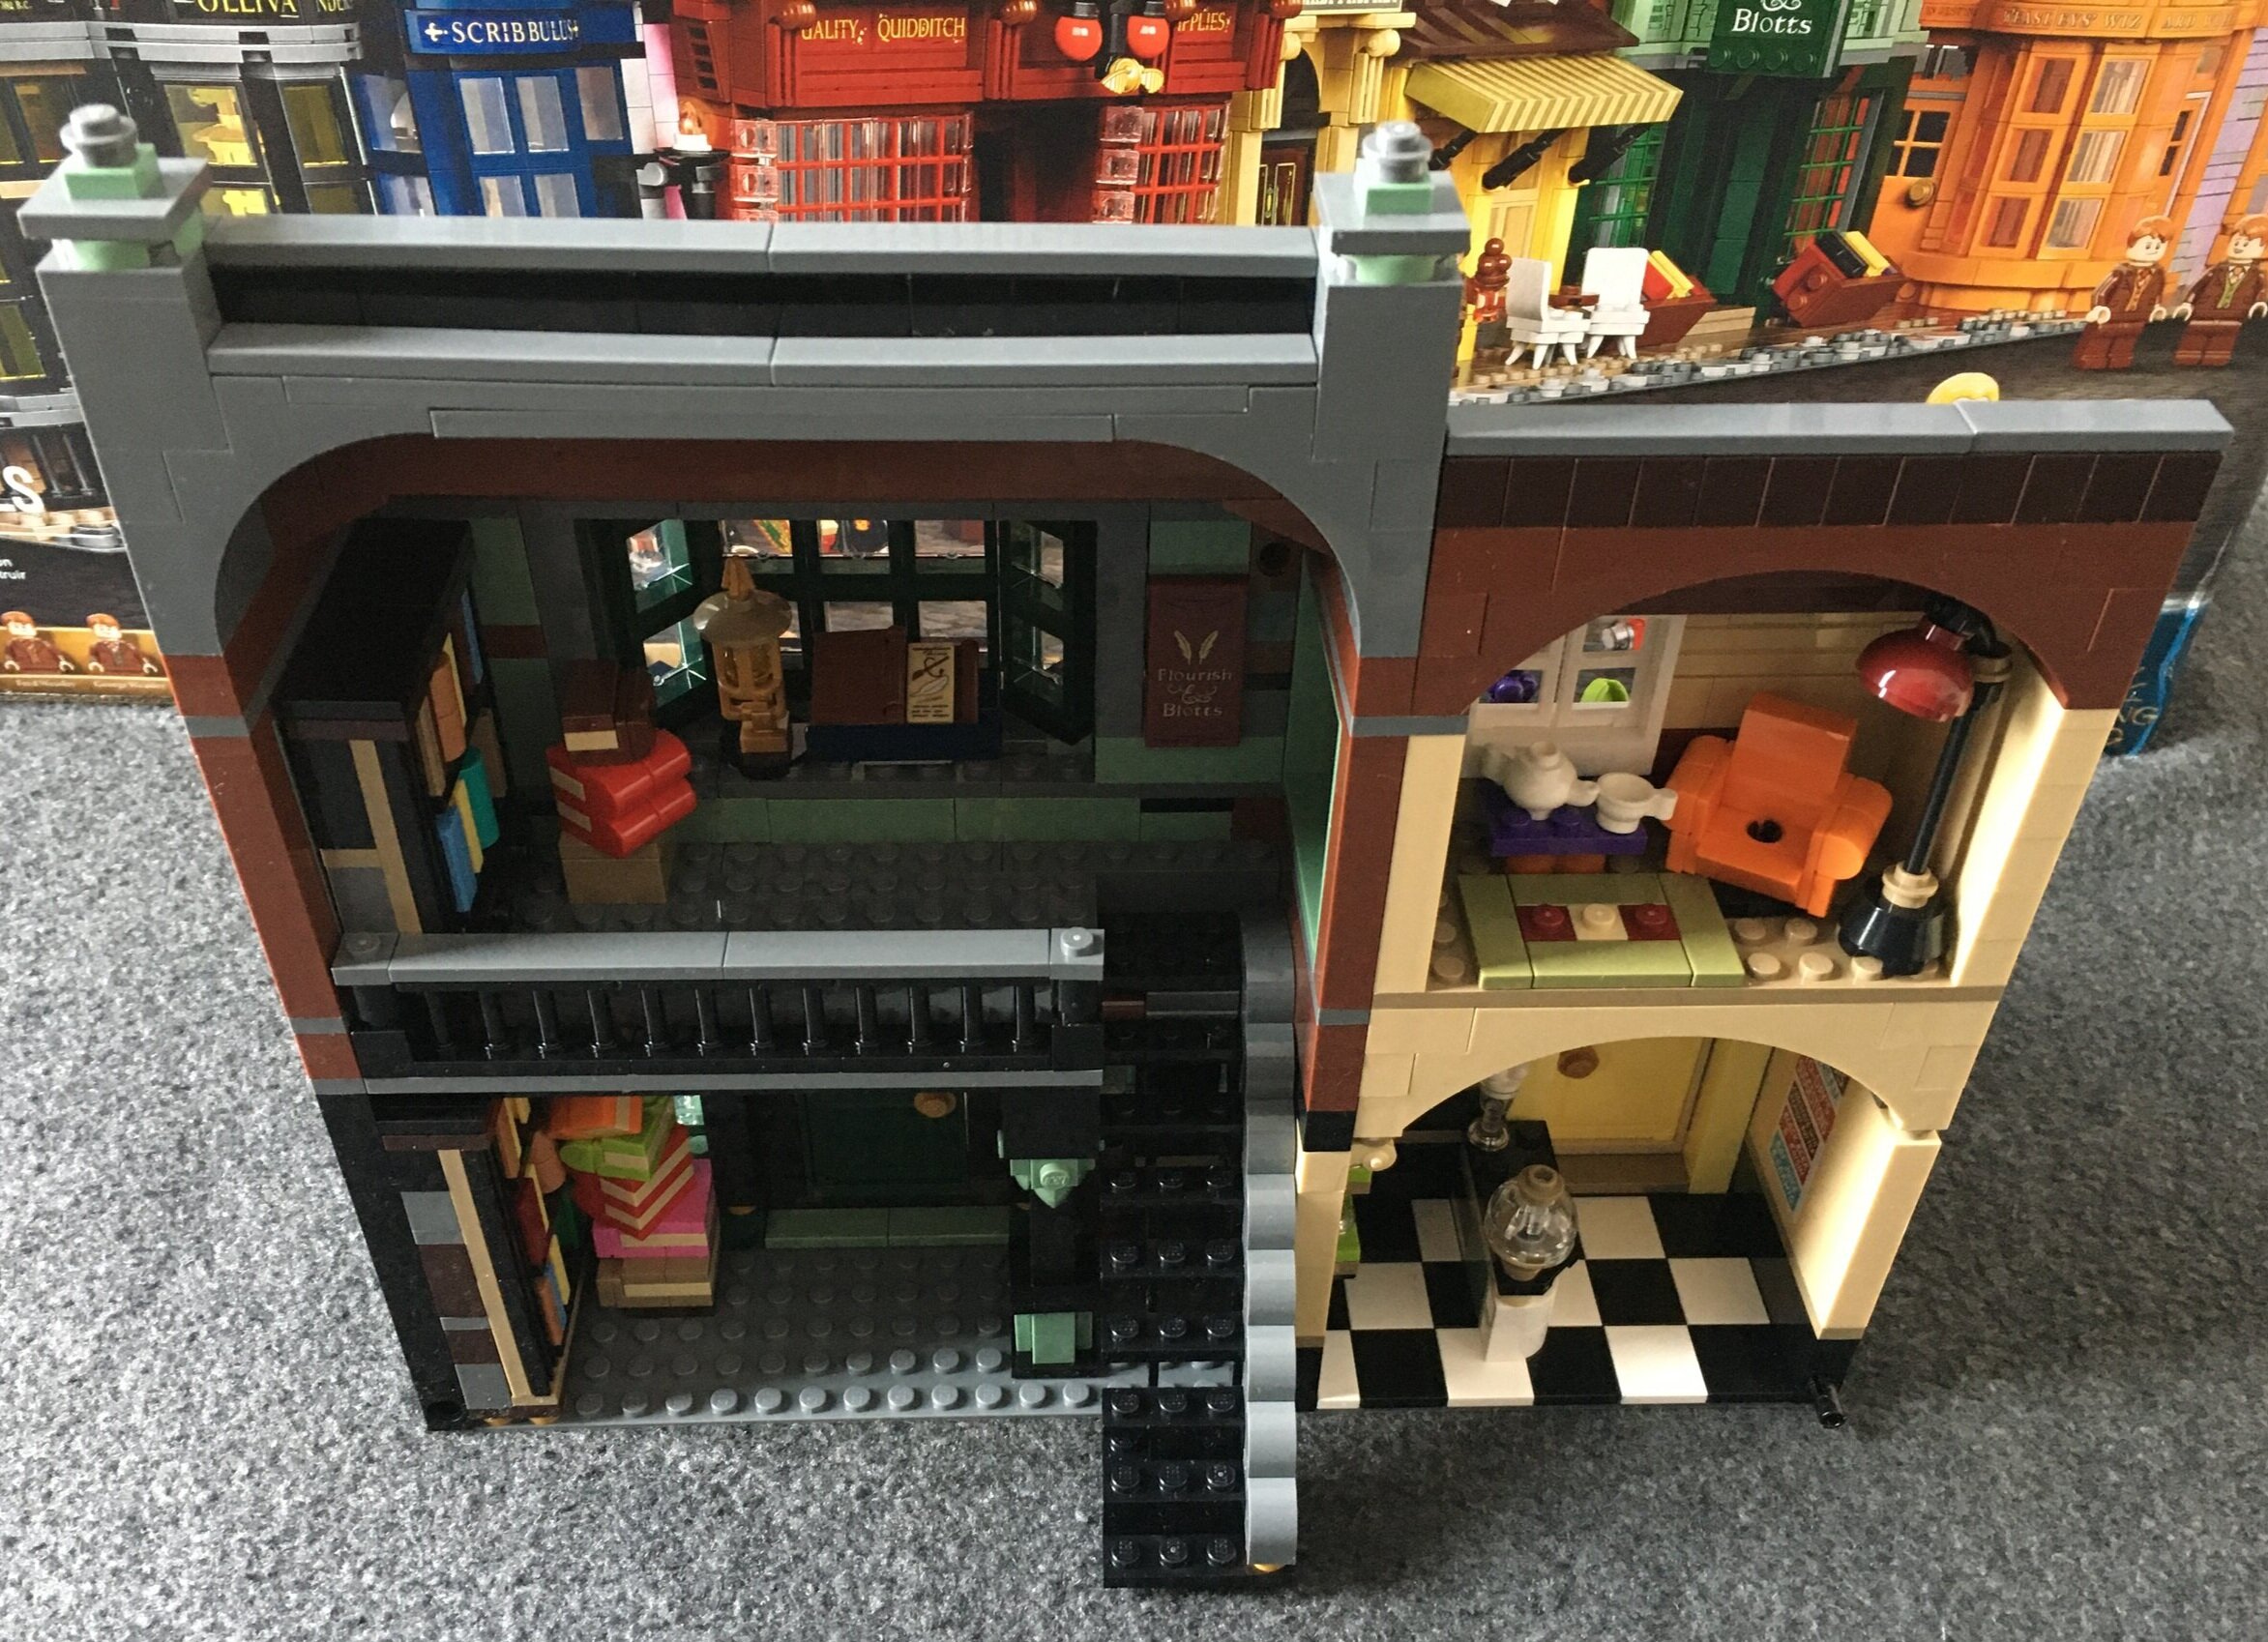
You also build the second floor of Flourish & Blotts. There is a window section that matches the signage below and then inside you get a book shelf, a lamp with a book on display, and another book display on the floor. Externally there is a simple, yet cool dragon head like gargoyle on either side of the windows. You also build the main sign and attach more stickers.

75978_build_13a.JPG
75978_build_13b.JPG

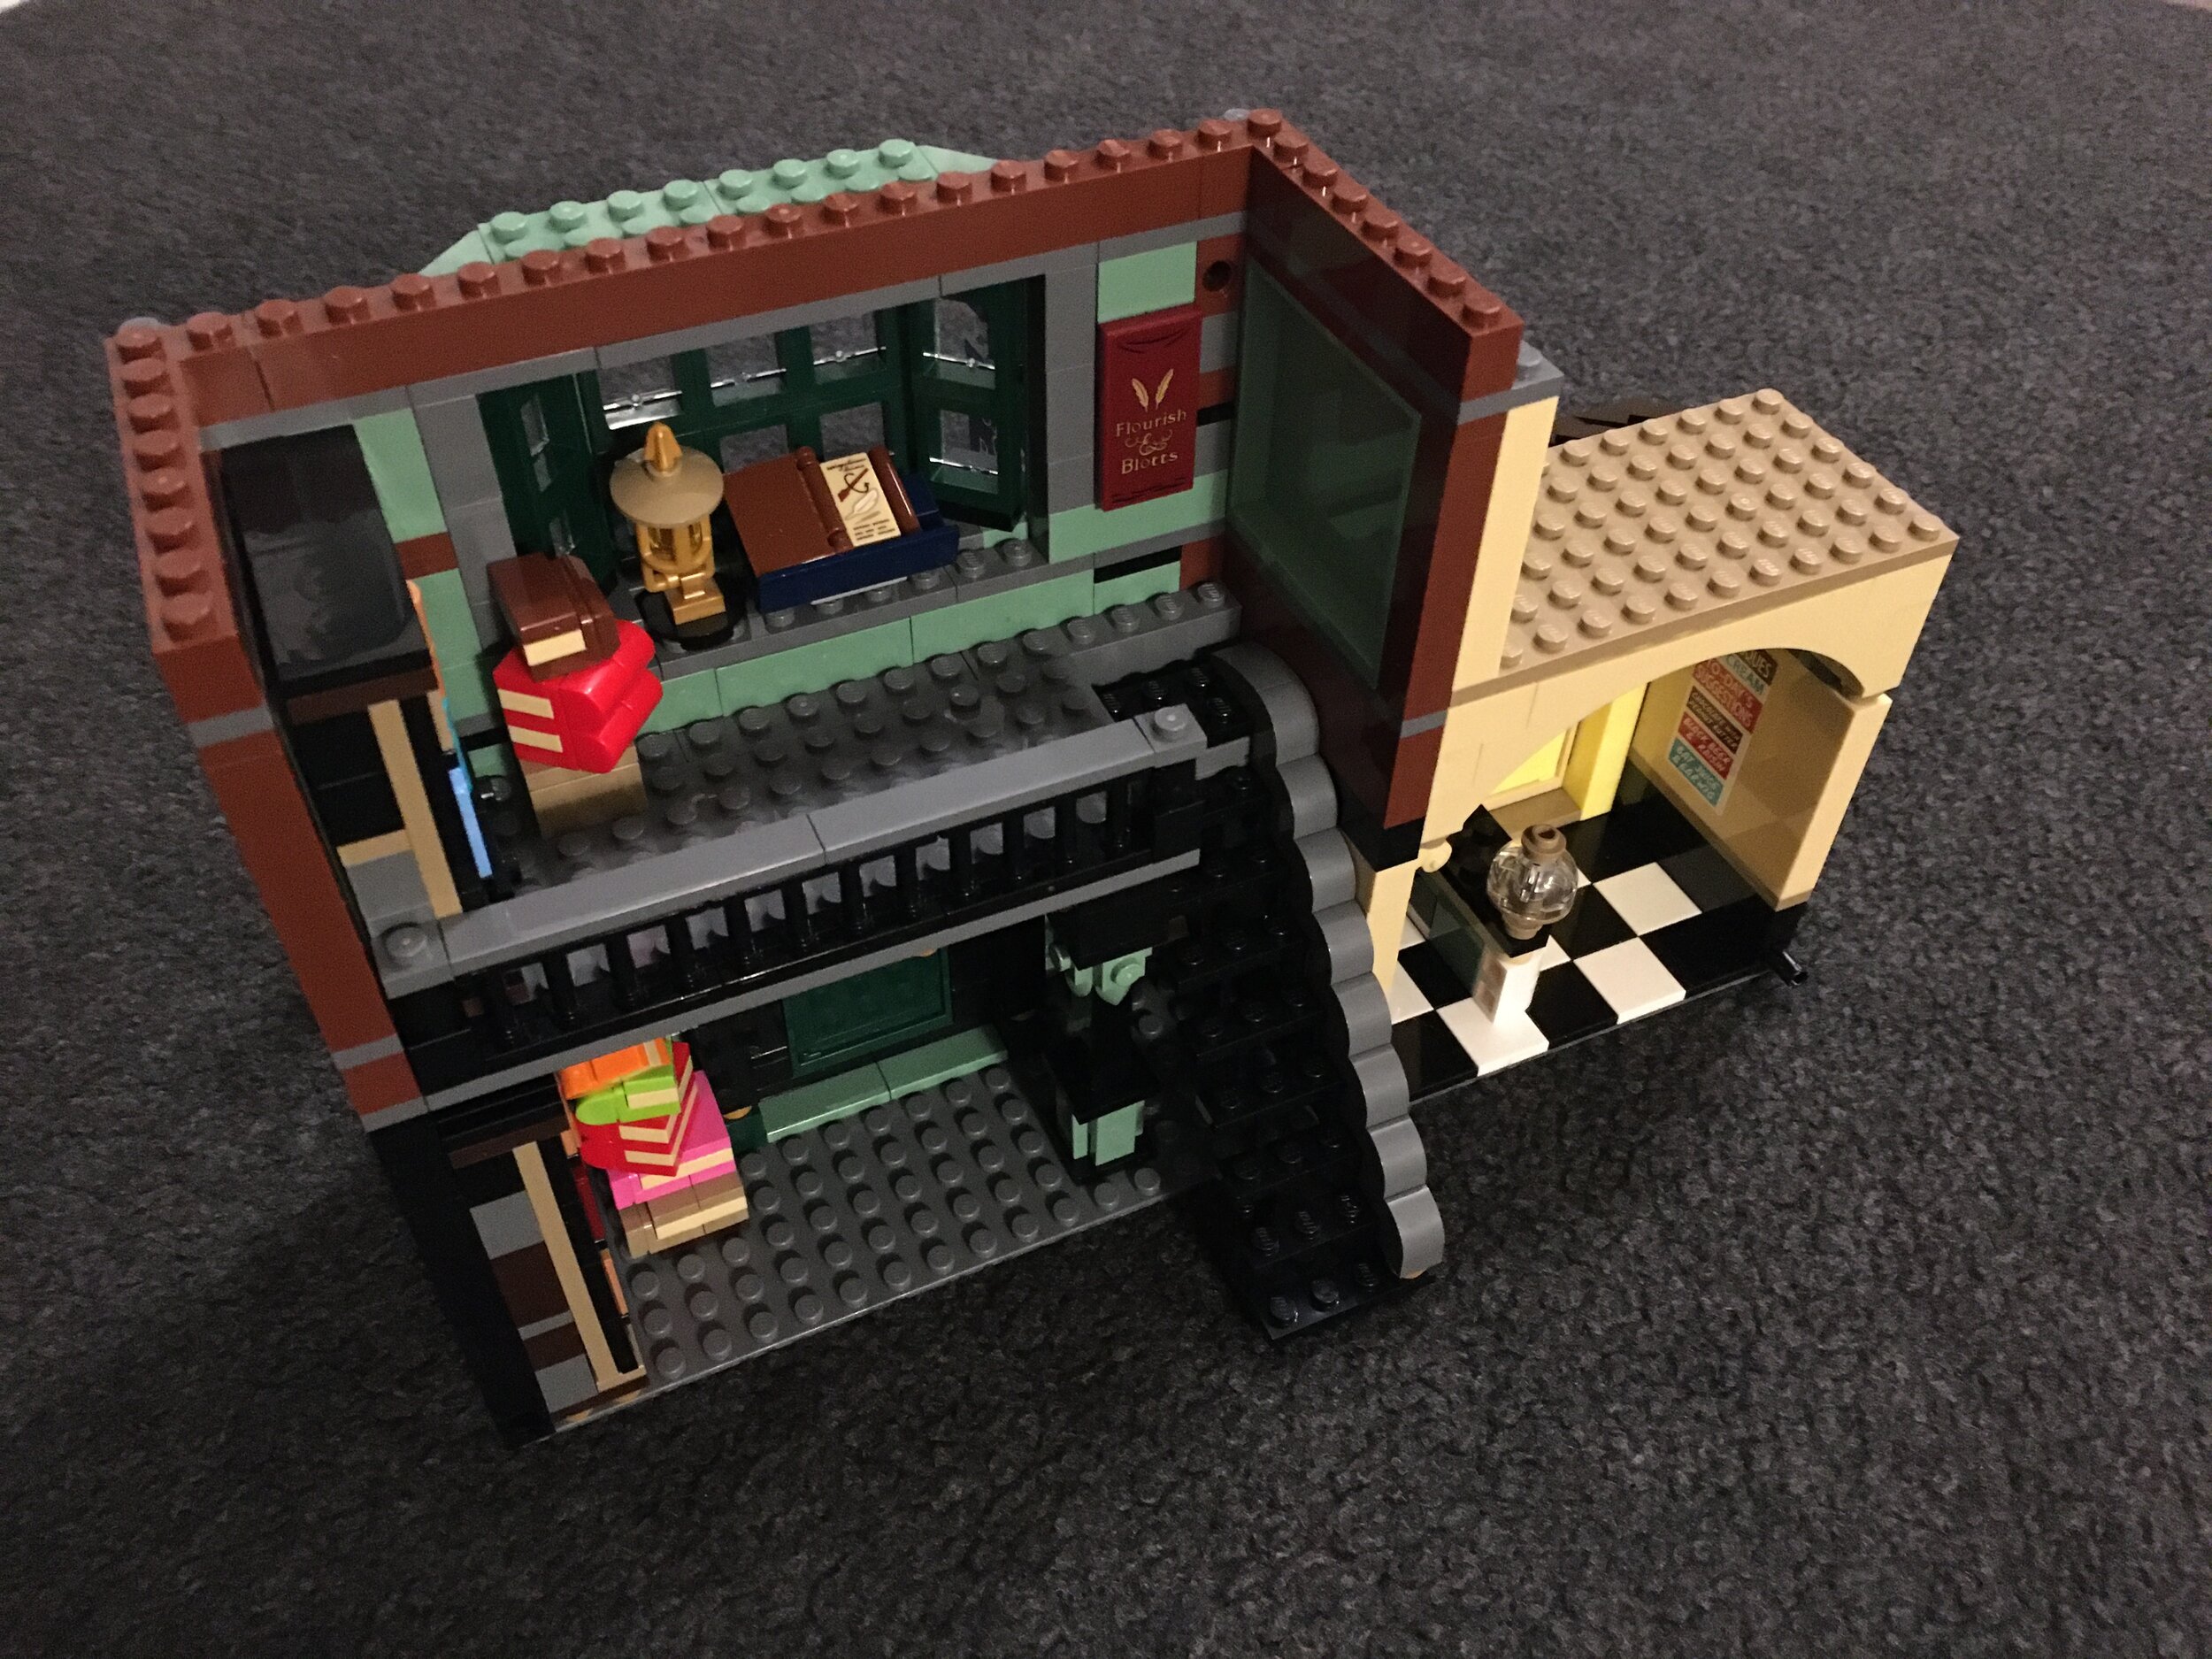
Bag 14 finishes up this section. You get Gilderoy Lockhart with another copy of his book, the desk for him to sit behind to sign books, a seating area outside of the ice cream parlor, the seating area display on the roof area of the ice cream parlor, and a lamp on the front. Inside the second floor of the ice cream parlor is a small sitting room with an arm chair, coffee table with tea set, lamp, and rug. The roof is completed for both buildings. The roof on the ice cream parlor matches the one on the first floor. Flourish & Blotts has a simple set of slopes.

As mentioned, there is a seating area outside of the ice cream parlor. The table is attached by studs, but the chairs are not. No big deal really unless you need to pick the set up. The desk is another story as it really doesn’t fit inside. I guess you could put it outside or build up a scene with additional bricks in the back? It kind of seems out of place.

I like this building with the different green colors of Flourish & Blotts and the roof and awning pieces of Florean Fortescue’s Ice Cream Parlor. So far, I’m enjoying the build. Even if there are a ton of stickers…

75978_build_14a.JPG
75978_build_14b.JPG

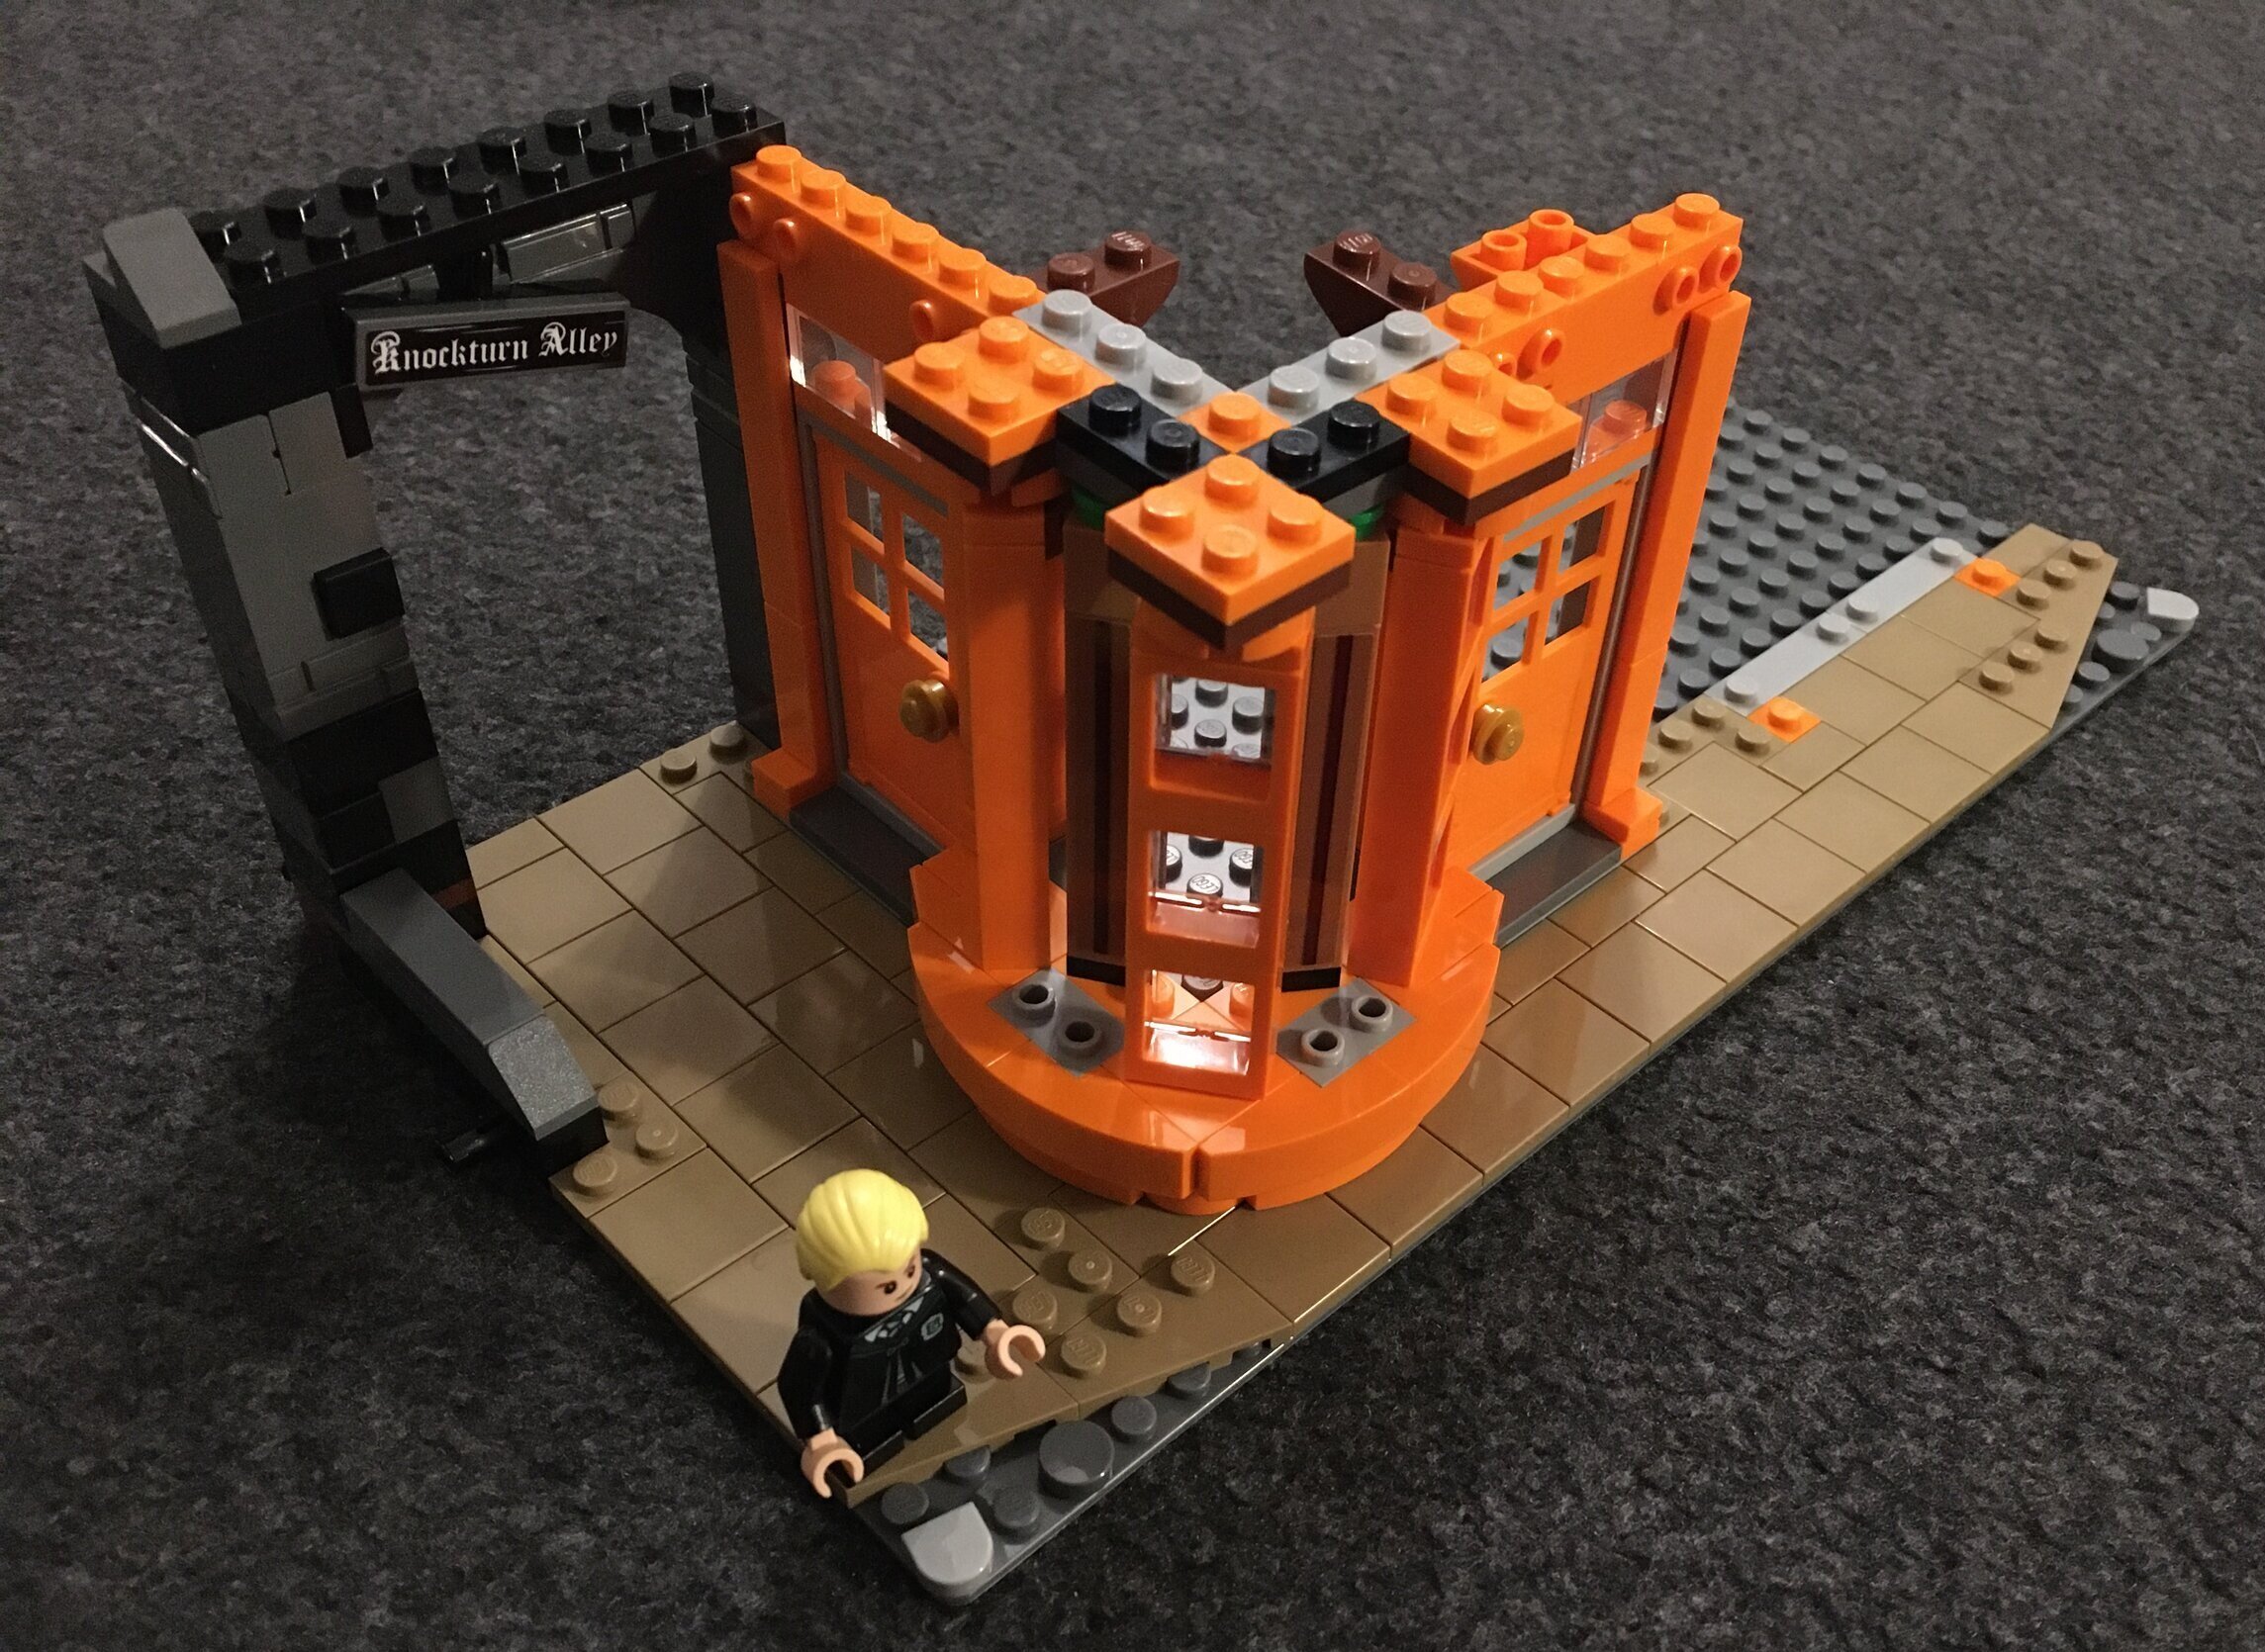
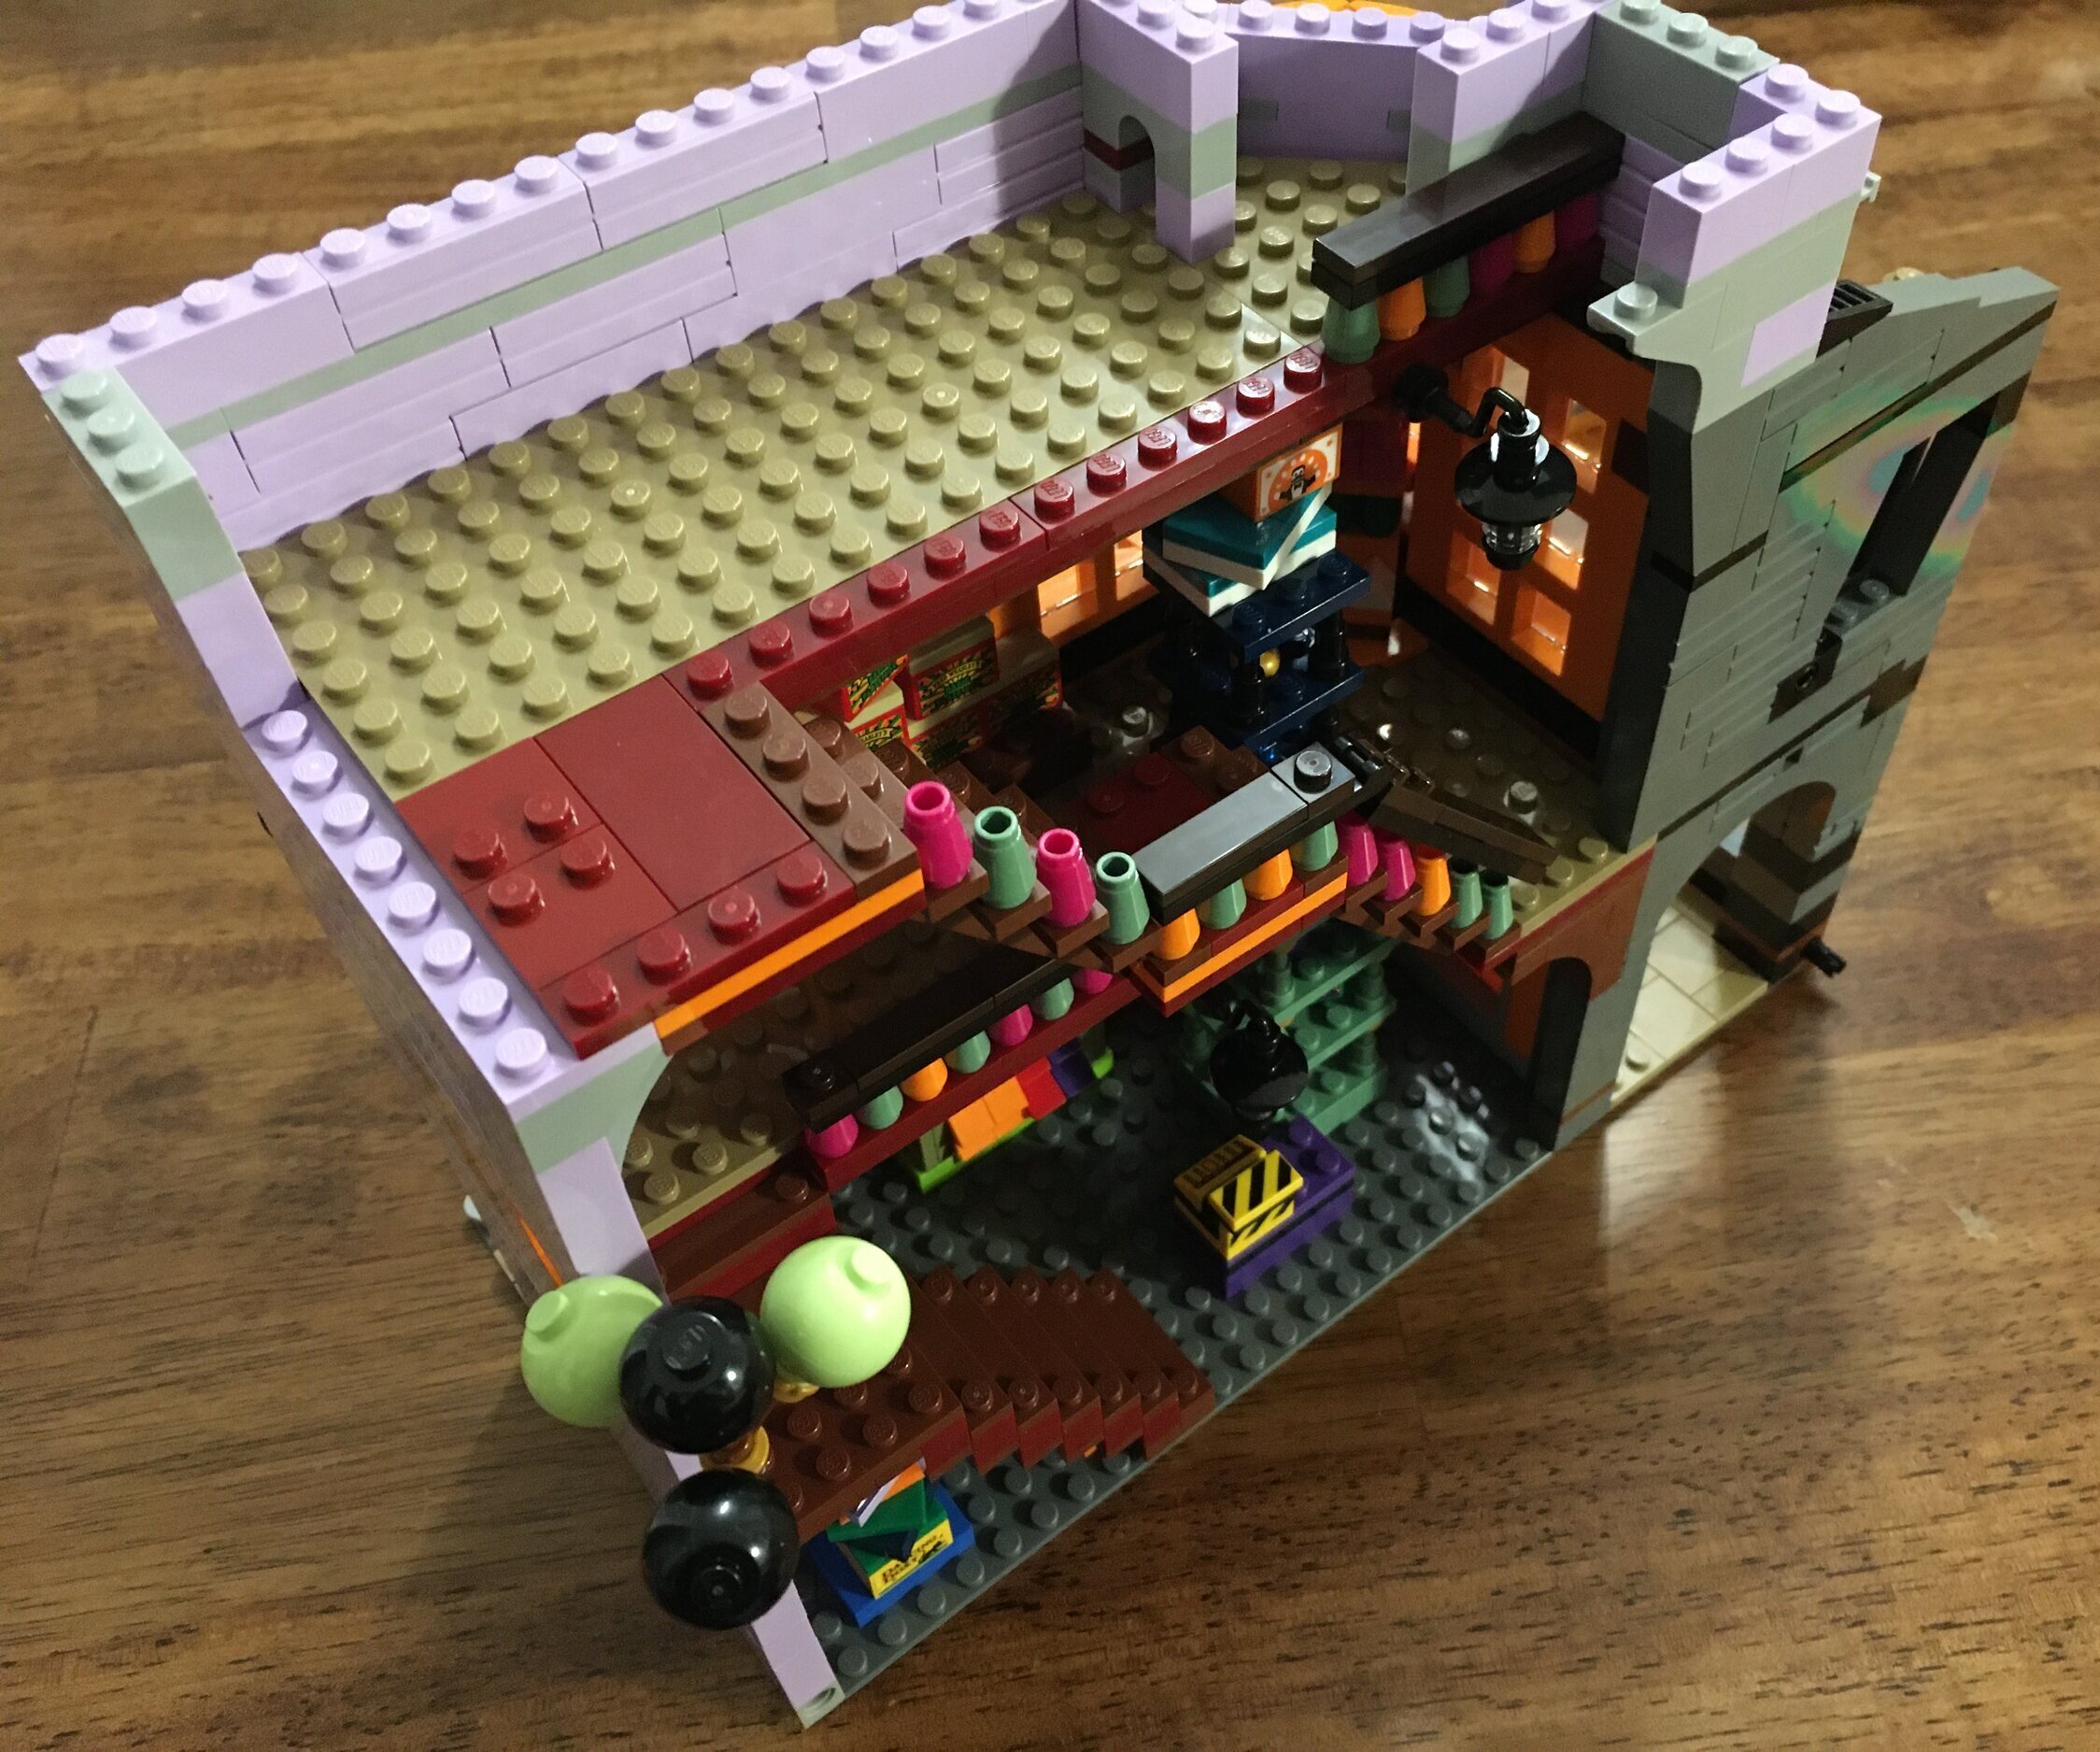
The last of the four buildings is Weasley’s Wizard Wheezes & Knockturn Alley. This one helps to mix up the movies/books a bit as Flourish & Blotts was spotlighted in the second book/movie and Weasley’s is from book #6. Knockturn Alley shows up a few times. Either way, I’m okay with the mixing of books/movies. You can set it up as desired and include/exclude buildings as you want.

Bag 15 starts off the Weasley’s store with some bright orange bricks to contrast some of the other buildings in the set. Knockturn alley is started too with an archway.

This bag contains Draco Mallfoy’s minifigure.

75978_build_15.JPG

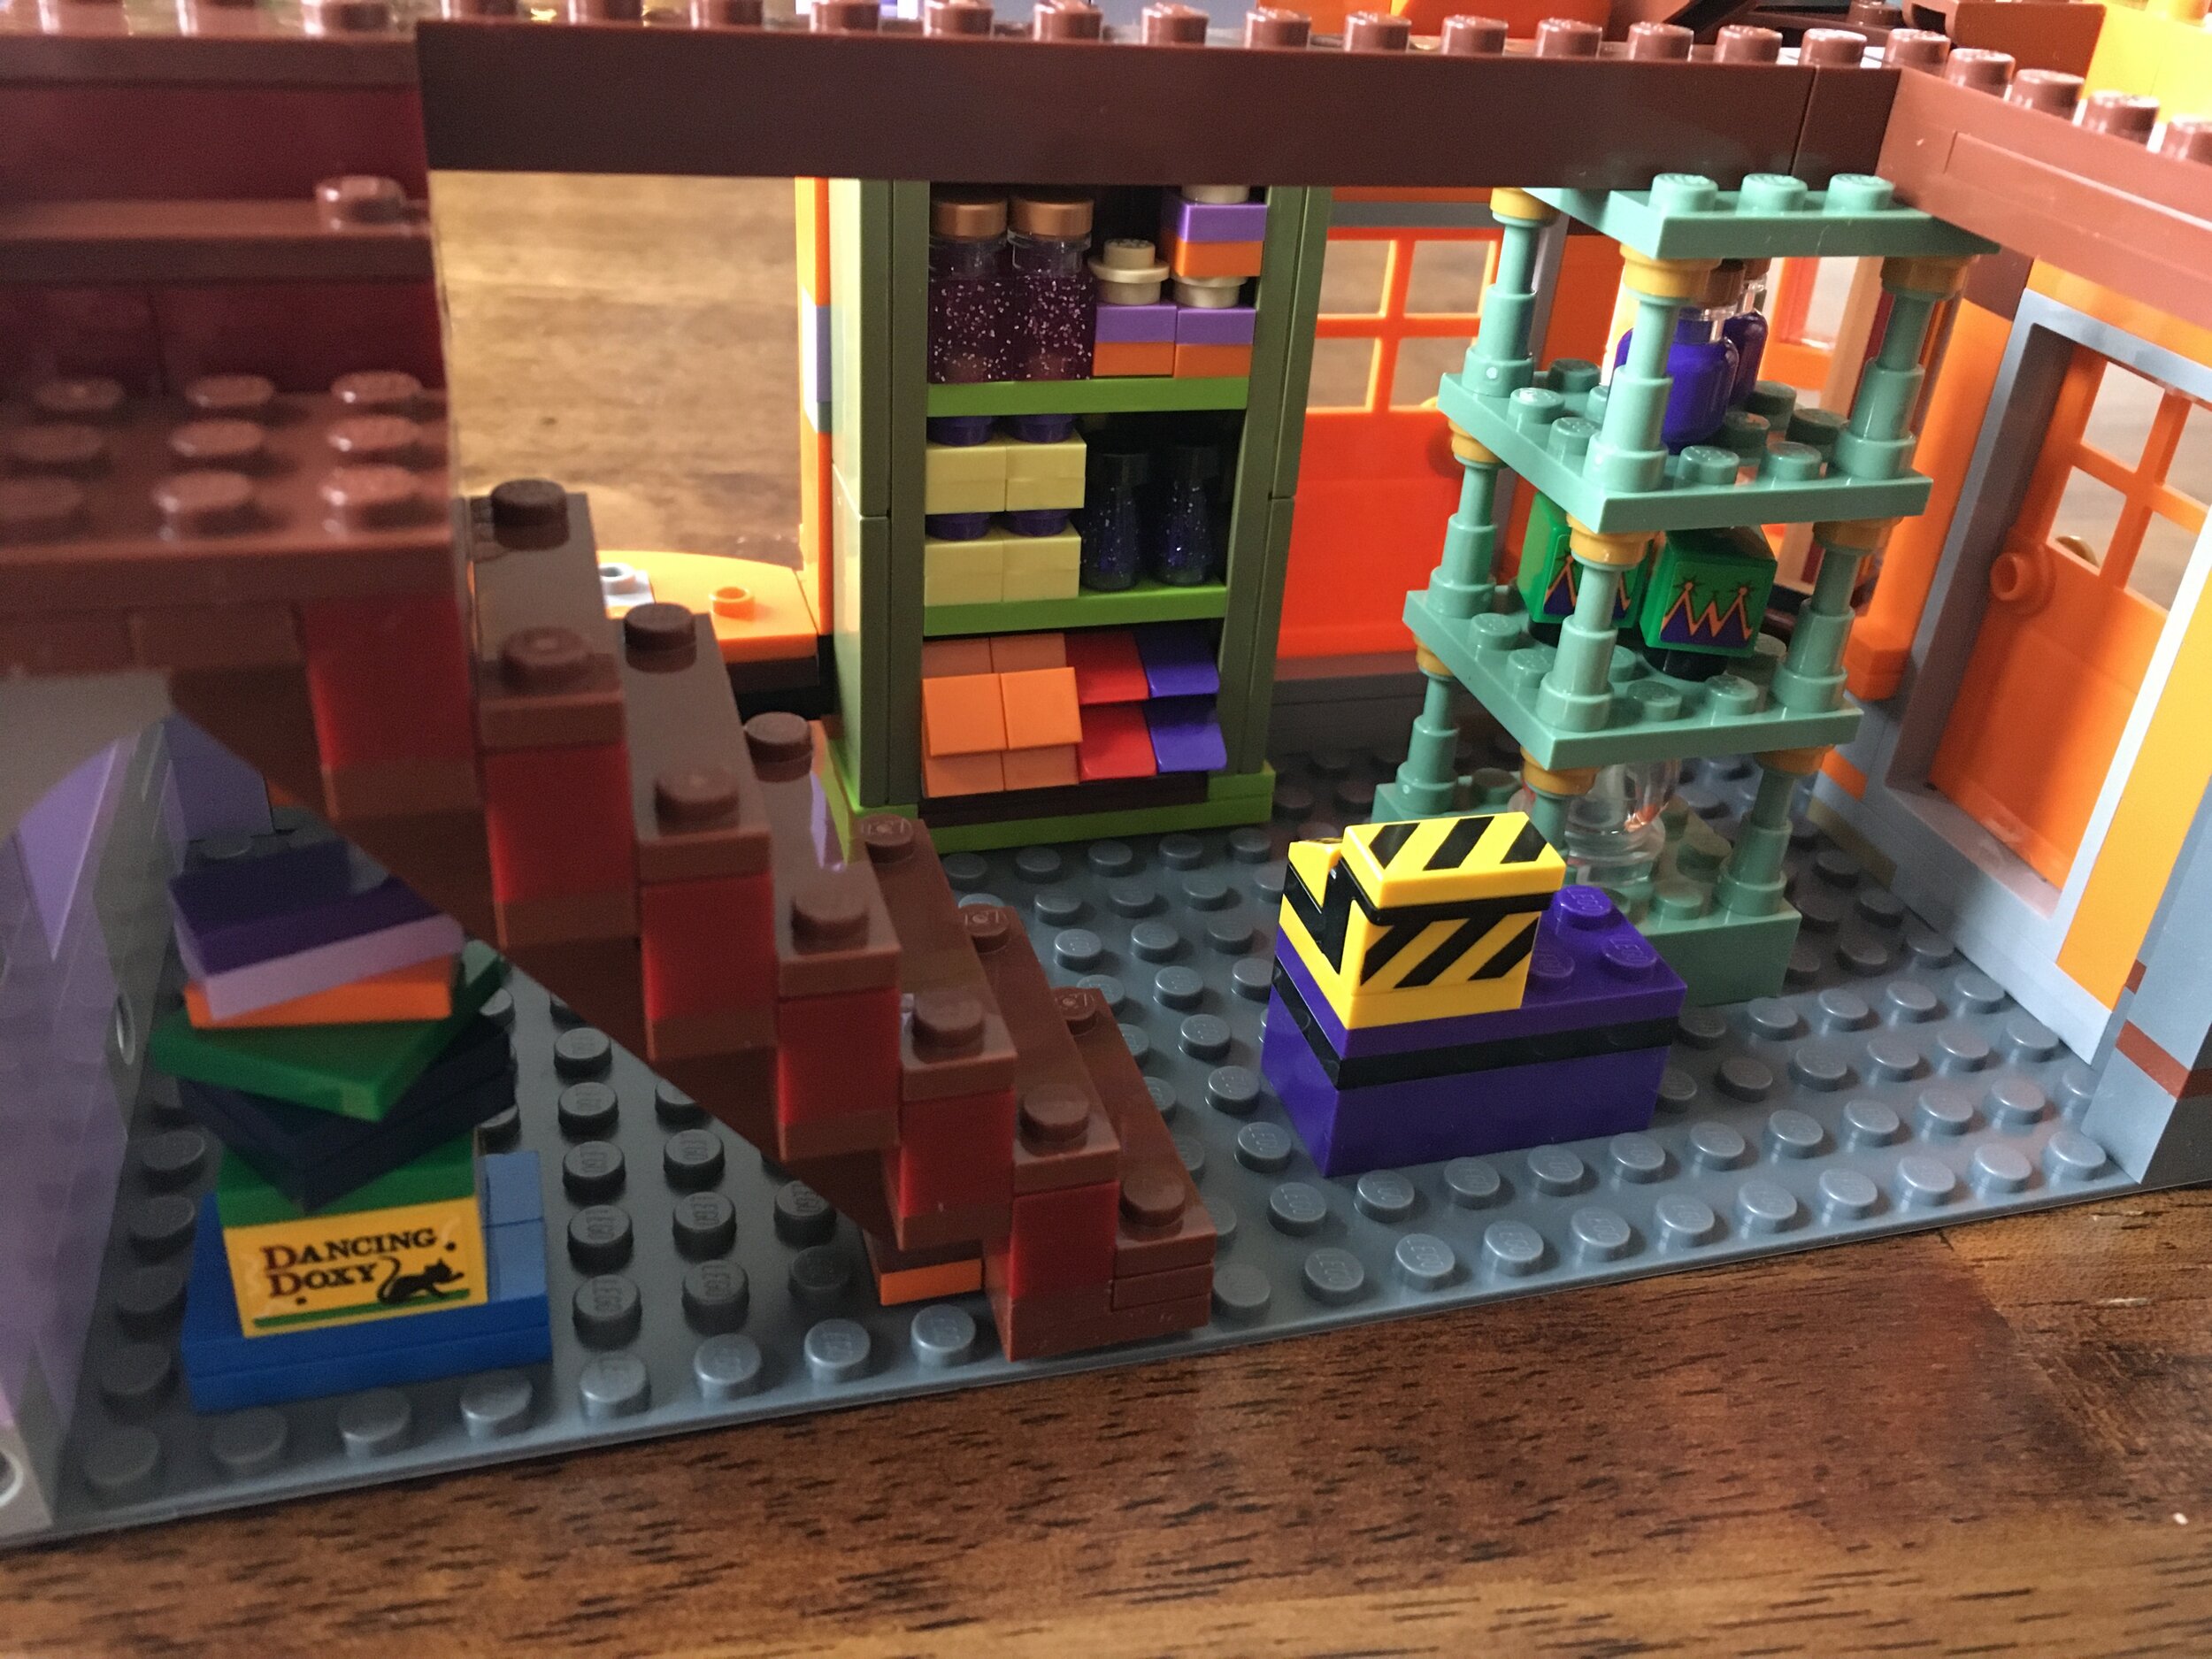
Bag 16 helps build out the first floor with a lot of details and items for purchase on shelves and display. This also means a lot of stickers too so get ready. You build a stairwell to the next level as well.

Lucius Malfoy comes in this bag. Unlike other Harry Potter sets, the minifigures don’t come with accessories here. Most of the other ones include wands for characters. Here they do not, but Lucius comes with his cane that he walks around with.

75978_build_16a.JPG
75978_build_16b.JPG

Bag 17 finished up the first floor. I like how they achieved the rounded section of the building while building up the windows to be at different angles. You also start work on the second floor. In the picture, I show the side of the building to highlight some of the larger stickers. The stickers for this build are numbered up to 41 and that doesn’t count where there are multiples of some stickers. Thankfully, the largest one is shown and the rest are smaller.

The George Weasley minifigure comes in this bag.

75978_build_17a.JPG
75978_build_17b.JPG
75978_build_17c.JPG

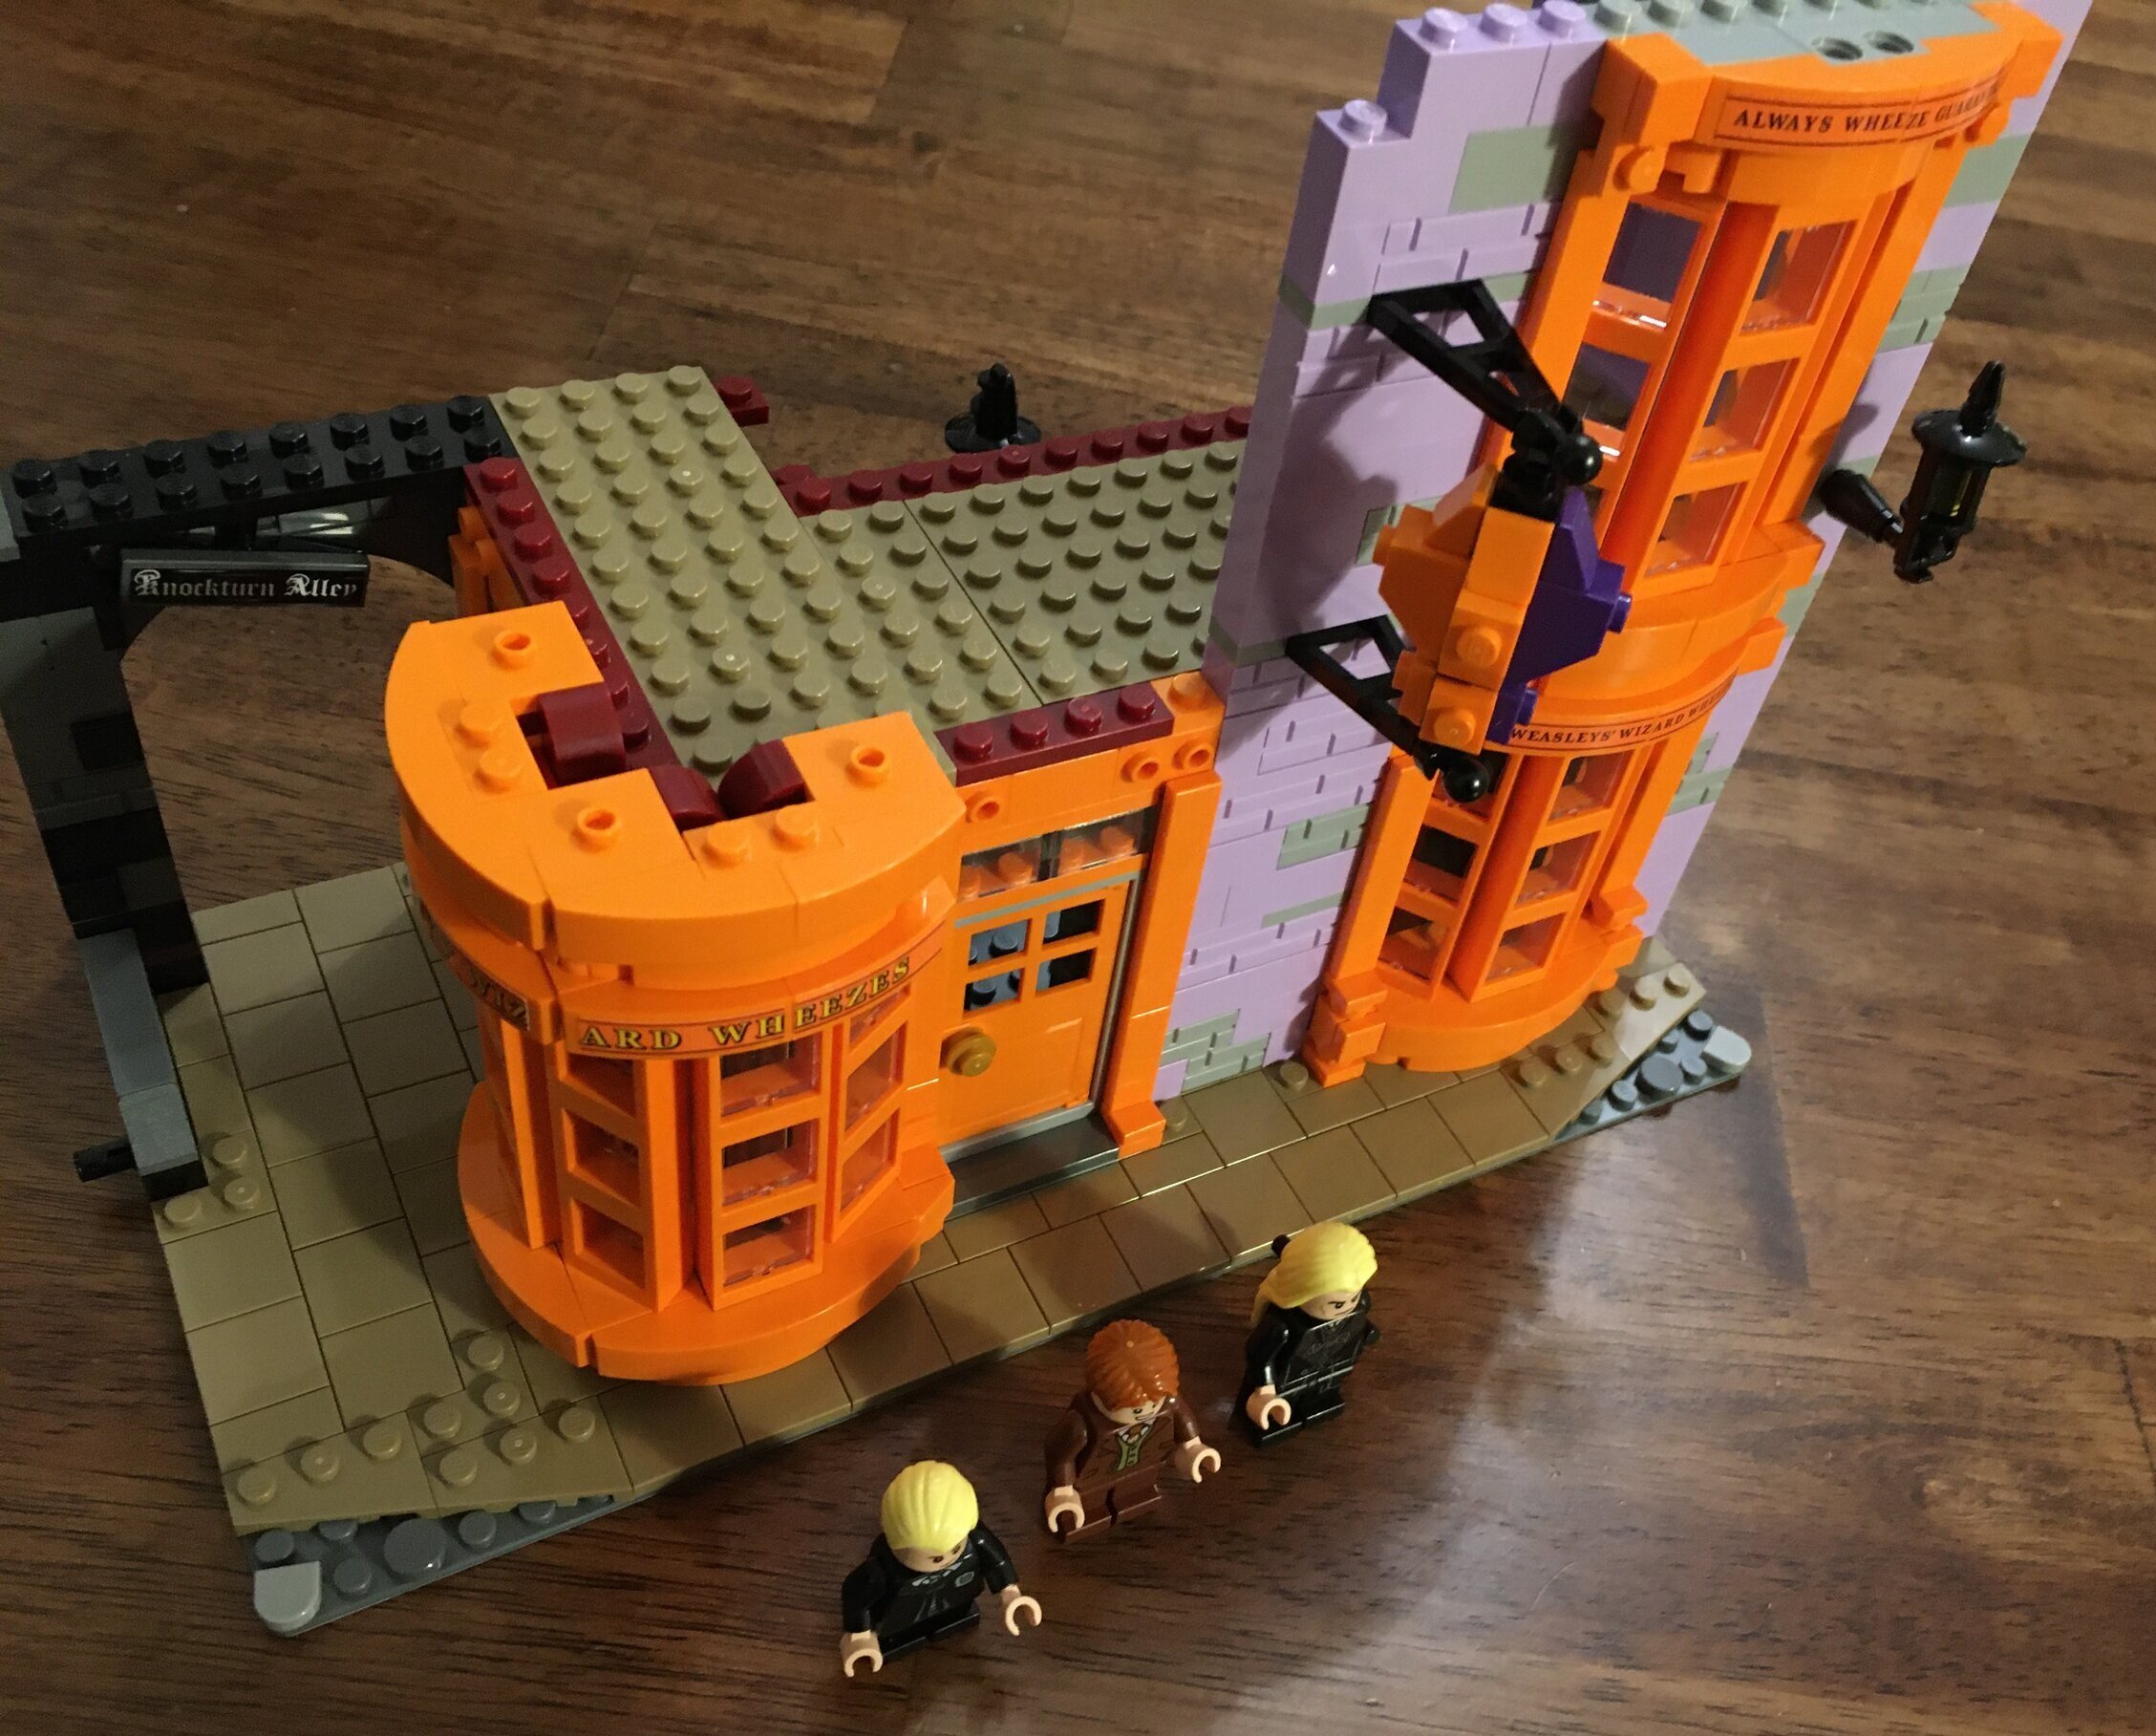
Bag 18 continues work on the second floor and completes the two story rounded window section. They use some clever techniques to fill up the corner and then put the figure in tipping his hat. Putting the brick built figure in was a bit challenging. I had to give it a few tries to get it right and it wasn’t exactly clear to me on the instructions.

Lots of stickers go on the outside of the building. As mentioned before, it was a challenge for me to space them out properly. This was especially hard on the orange curved pieces. I didn’t want the words to look disconnected, but I didn’t want there to look like there were large gaps in the lettering either. It would be nice if the stickers more closely matched the size of the brick you were putting it on. That way you wouldn’t have to guess as much.

Fred Weasley comes with this bag. If you can tell him apart from George that is…

75978_build_18a.JPG
75978_build_18b.JPG

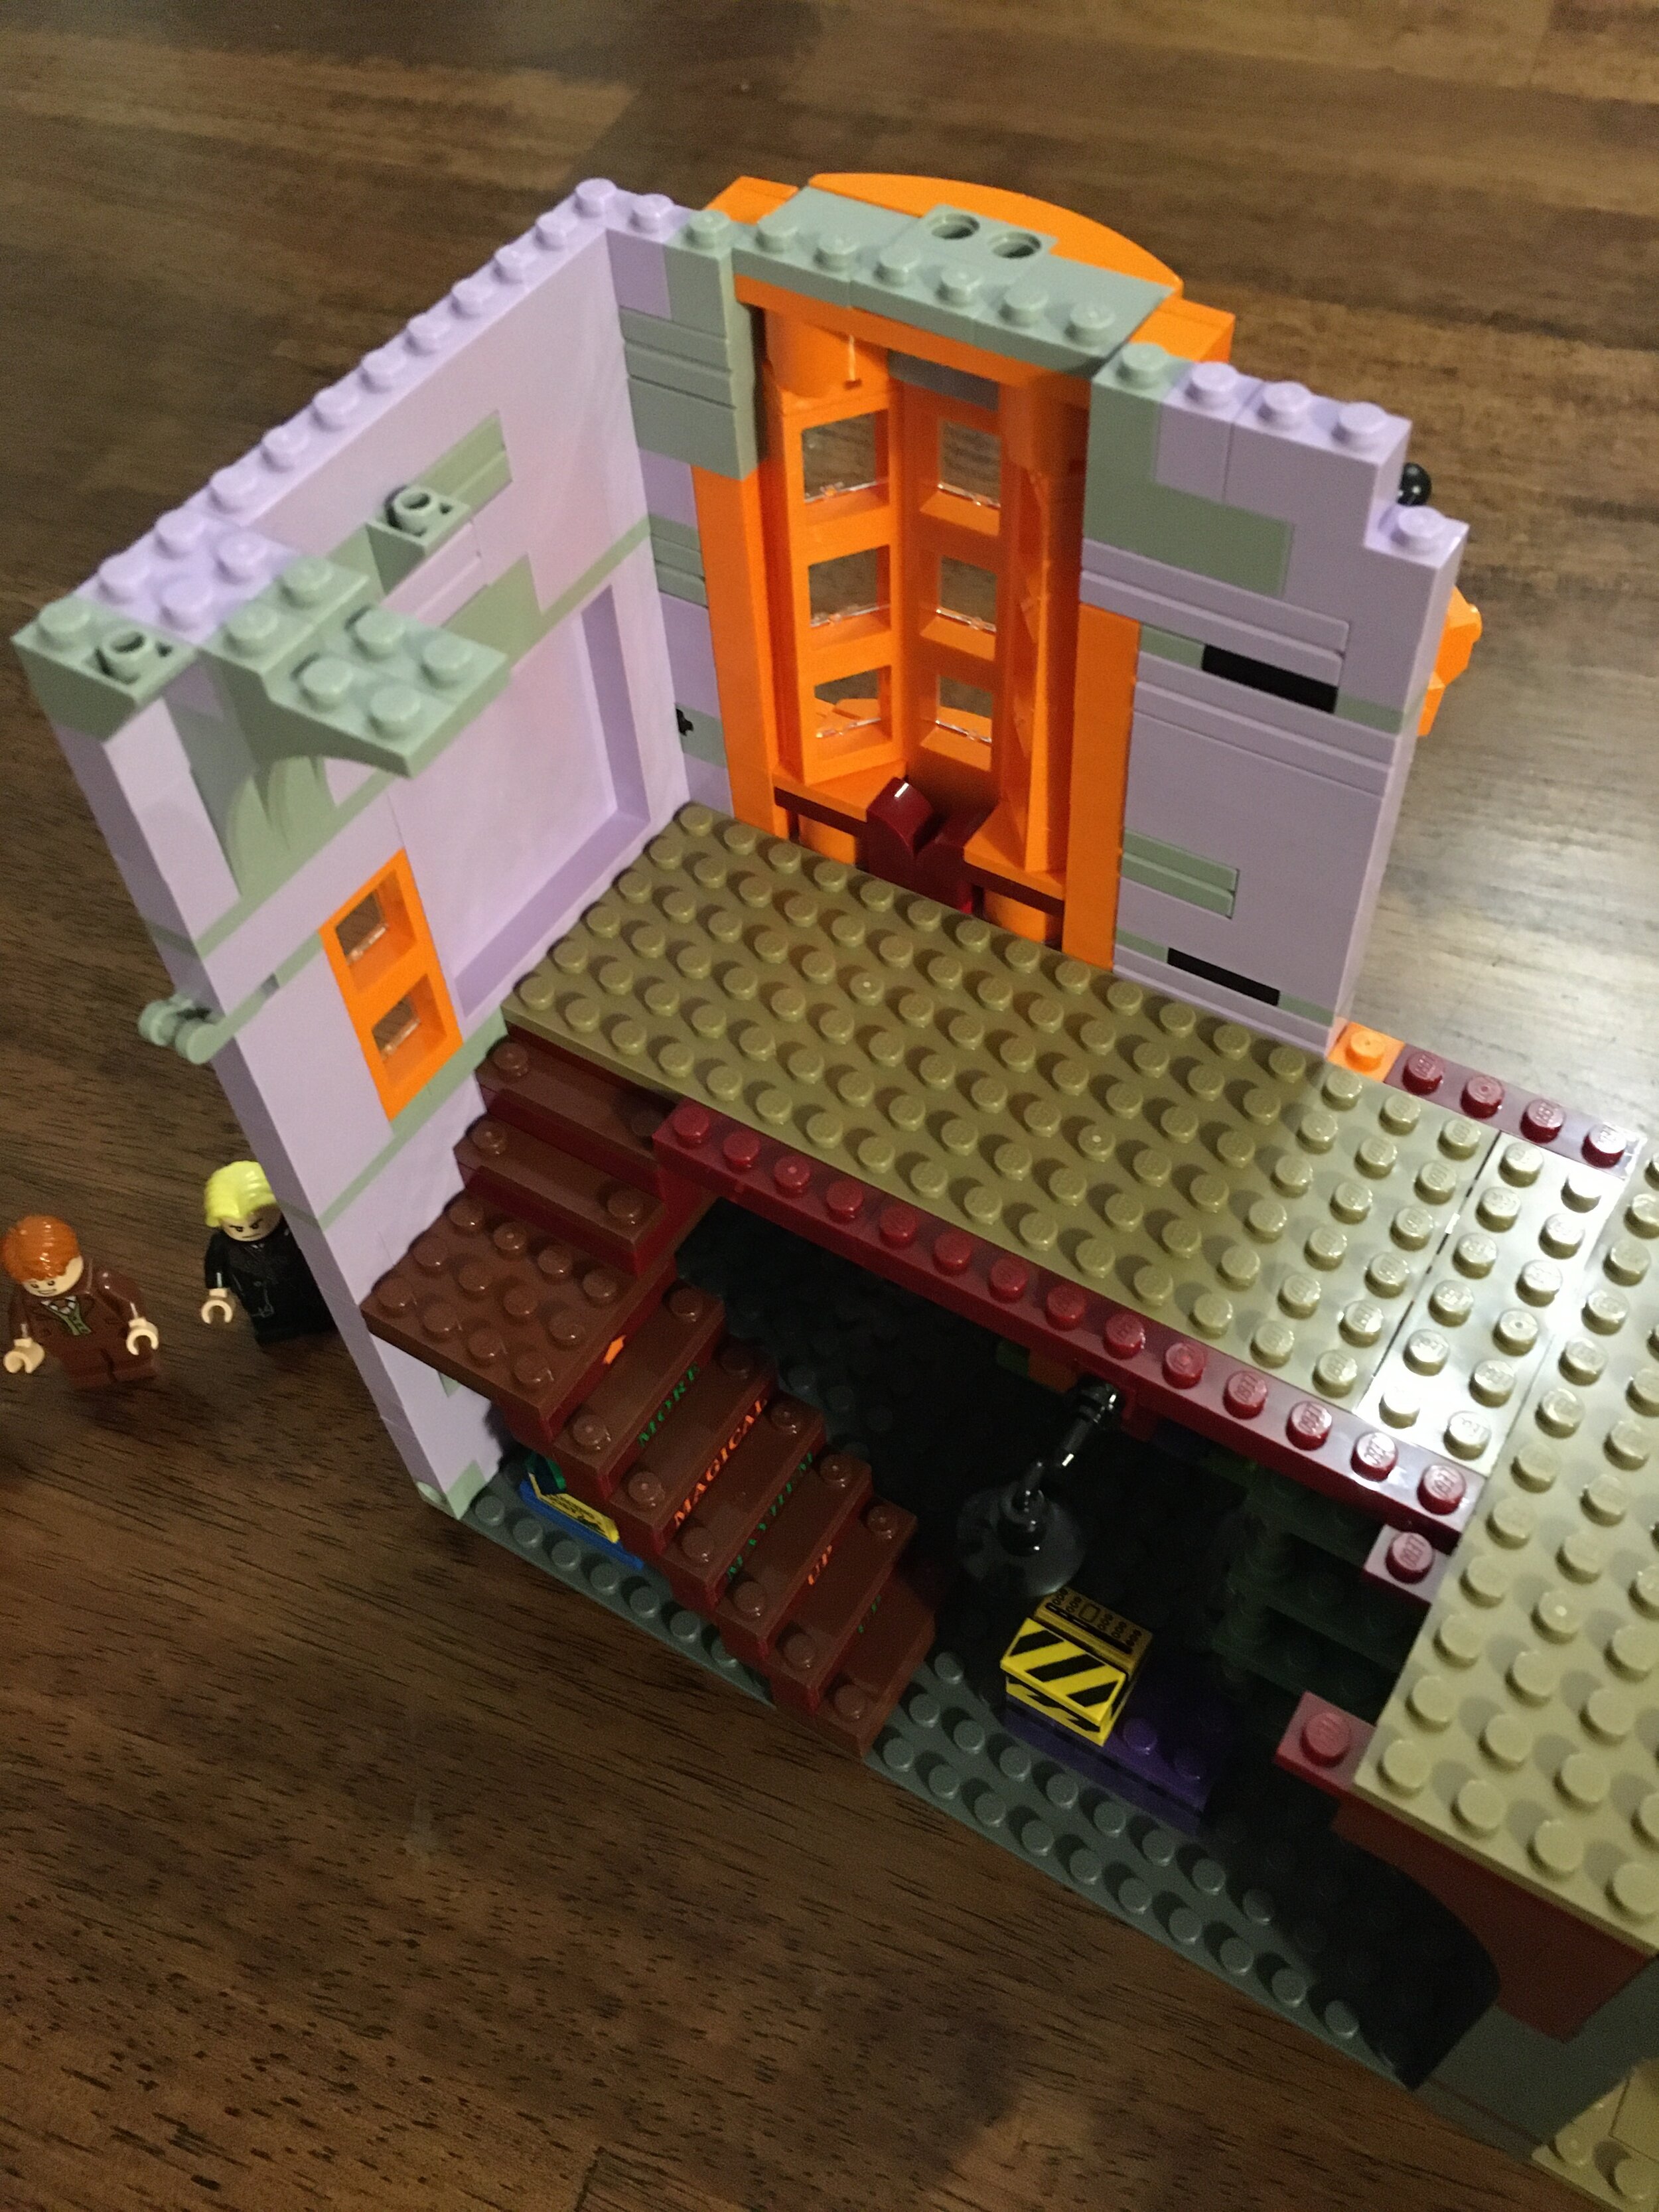
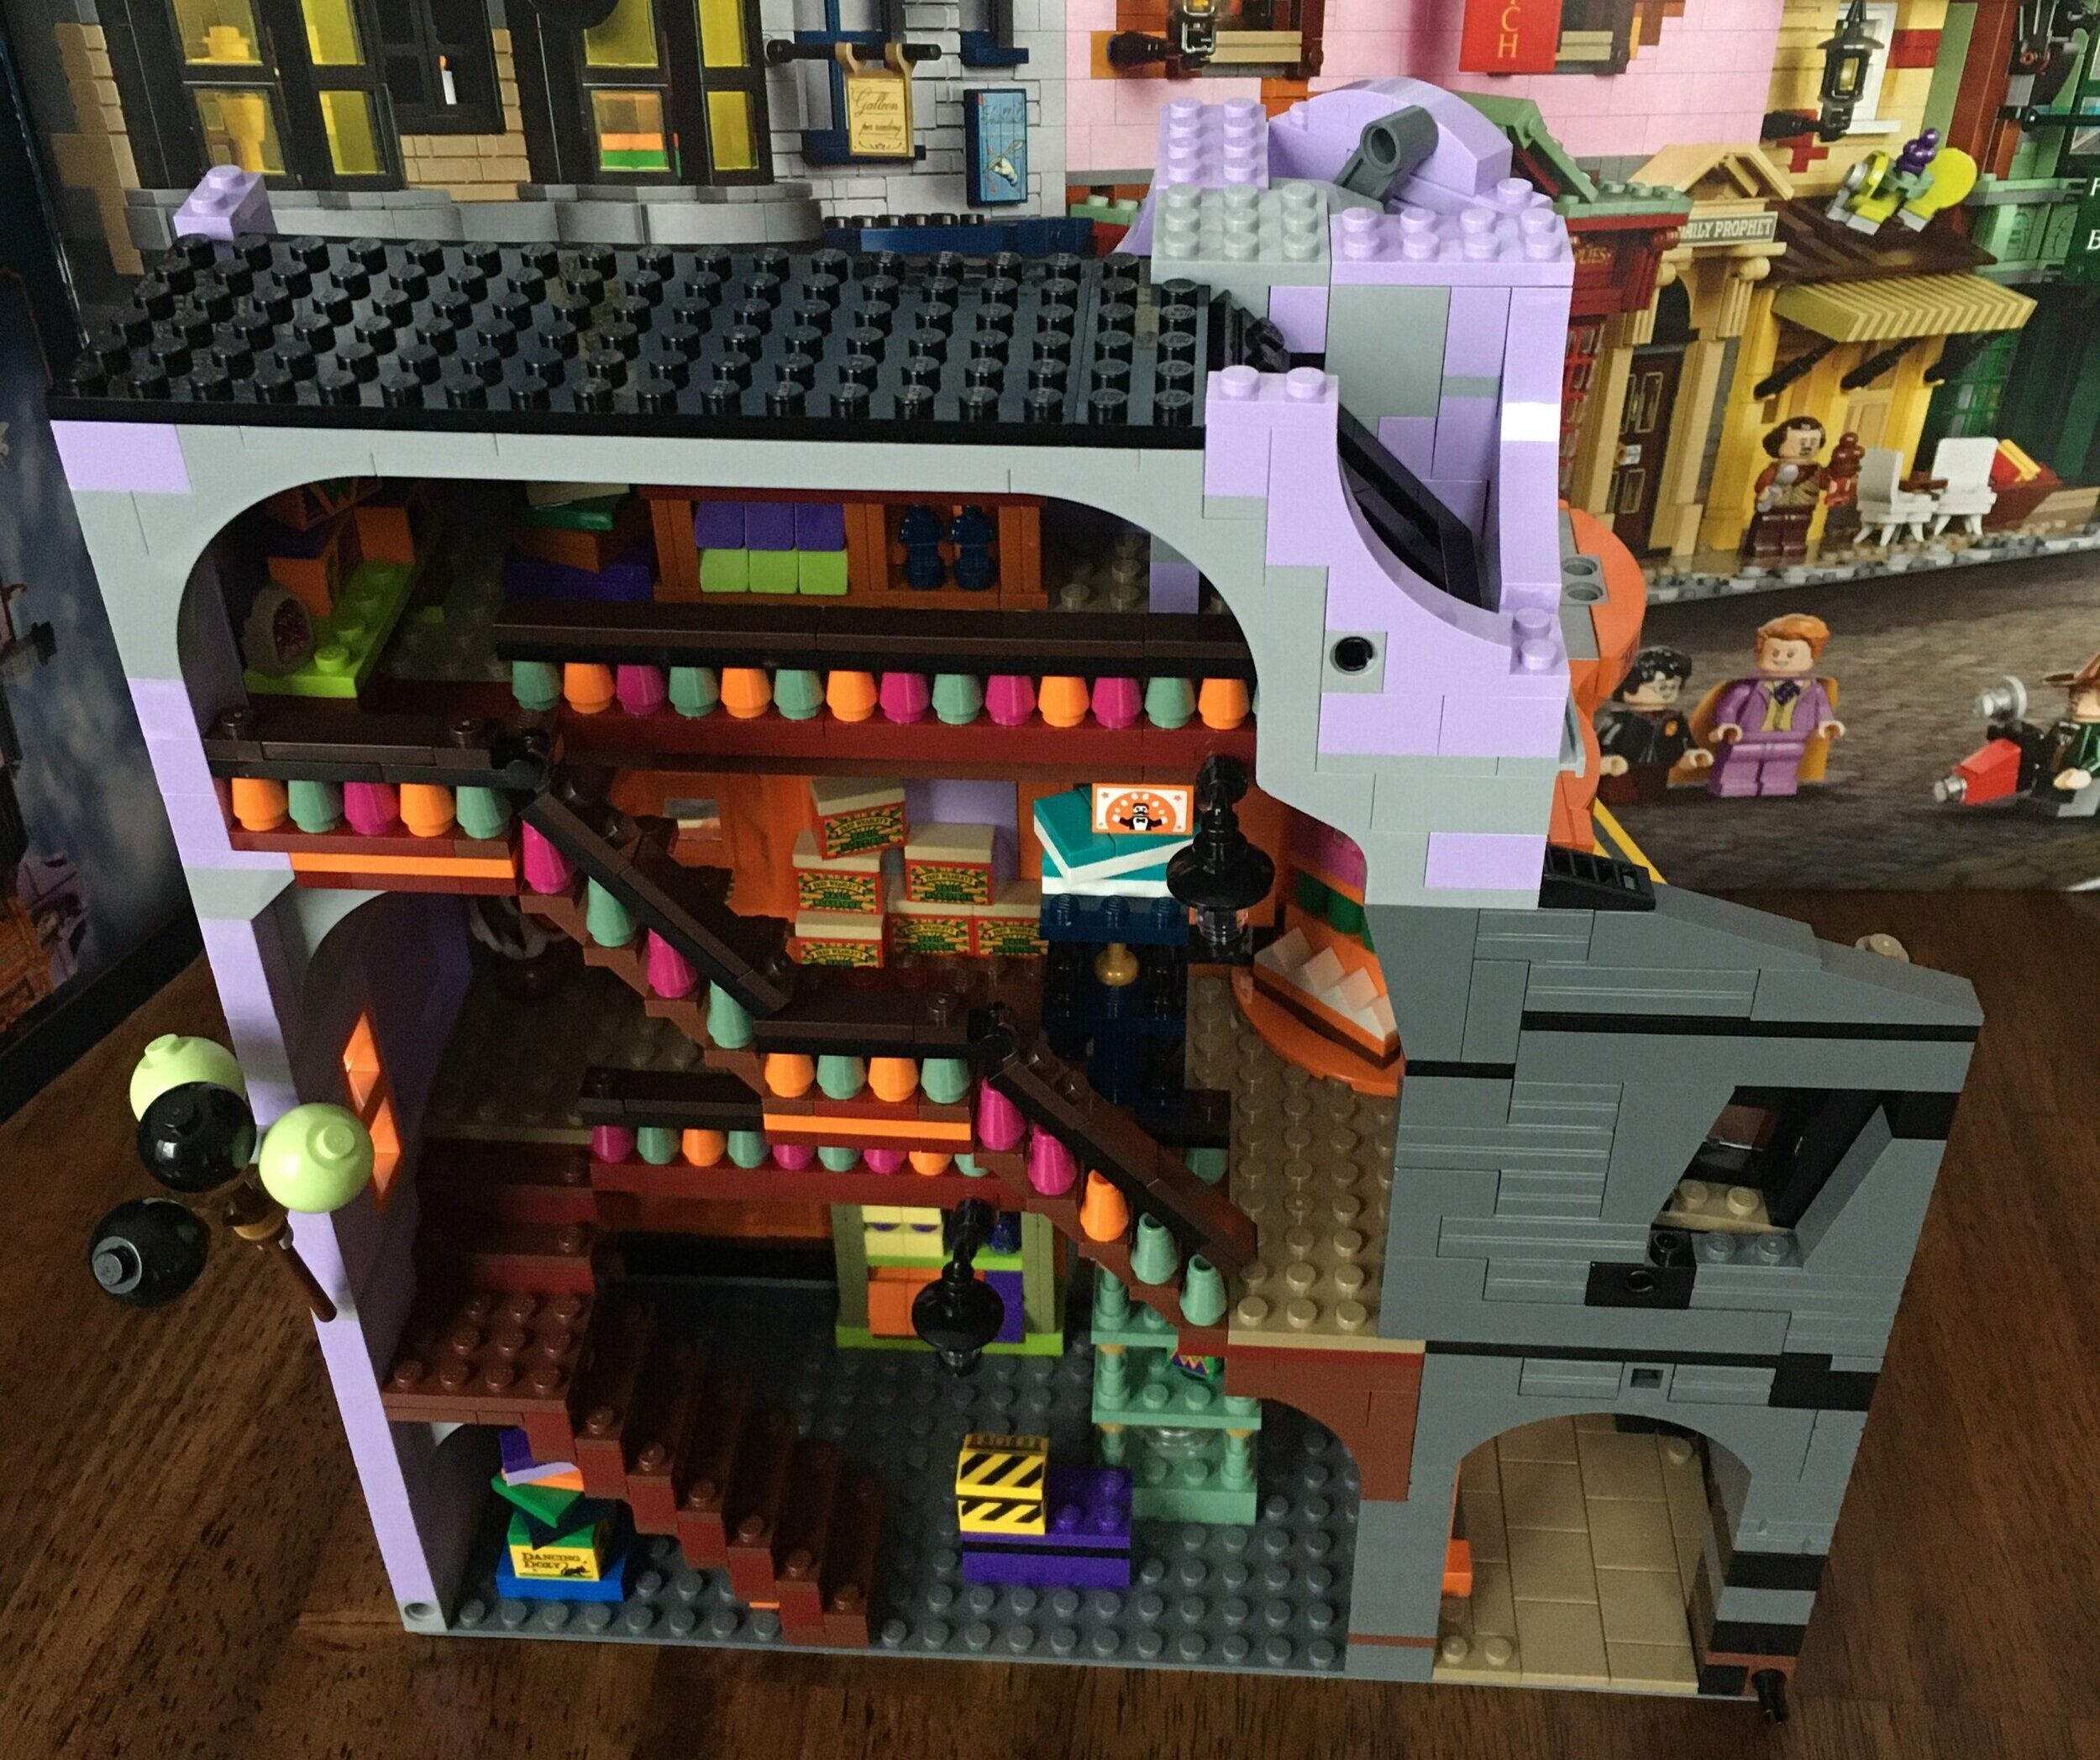
Bag 19 finishes up the second floor and gets you stairs to the third level. The stairwell has a very colorful railing to brighten things up. You also add some balloons which need to be removed if you want to put the sets back to back.

On the outside, you build up Knockturn Alley with a “window to nothing” above the alleyway. I guess you could take it upon yourself to build up a building behind it. No complaints from me though. I like how the designers were able to achieve a crooked, angled window look without huge gaps.

75978_build_19a.jpg
75978_build_19b.JPG

Bag 20 wraps it up. The head is added to the figure in the front and there are some Technic elements used to make the character “tip” his hat. In the movie, a rabbit appears every other time he tips his hat. Obviously LEGO didn’t create that effect, but it’s cool to have some motion with the building. The hat doesn’t tip up too high for me, but I’m sure I could adjust it more if I wanted it to.

This building is a bit taller and the third floor has some inventory as well. The color contrast with the black and light purple/lavender color looks pretty cool.

You get another small build with this bag. It is a table where you can buy love potions as highlighted in book/movie #6. It’s a fun addition to the building, but like the desk for Flourish & Blotts, you can’t fit it in the building. So either extend the building or just set it behind the building with some of your own bricks.

This building was fun to put together with lots of different building techniques, colors, and elements. So many stickers though…

75978_build_20a.JPG
75978_build_20b.JPG

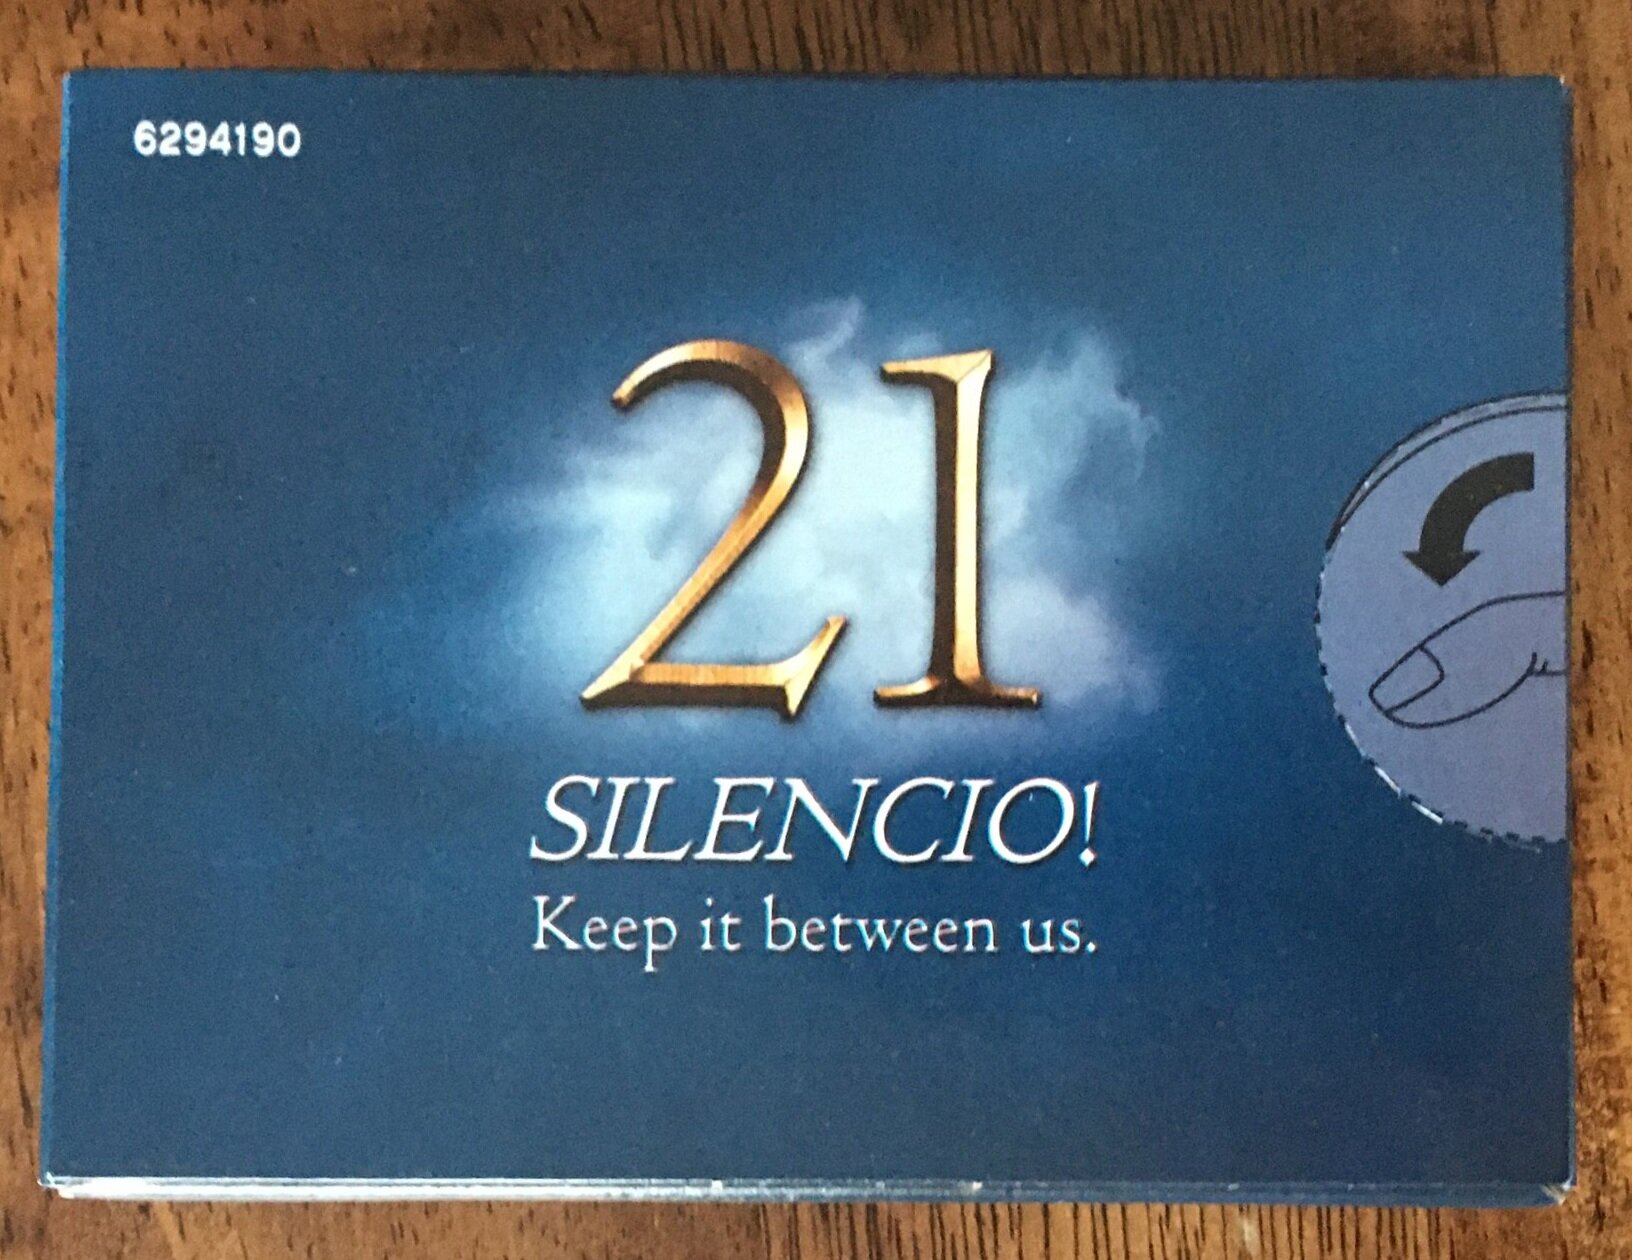
Then there’s box 21. It says “Silencio! Keep it between us.” I guess this is supposed to be a secret box so pretend you’re not reading this section. Although the instructions are included in book for so it’s not really secret. The box includes another Harry Potter minifigure. He has two faces with the other not pictured having dirt and dust from when he went through the flue network incorrectly during the second book/movie. It also includes Hagrid with his pink umbrella. You build a small stand for them to stand on and then behind them you attach a plate with a printed sign. It has the LEGO and Harry Potter logos along with a quote from the movie (and book?) from Hagrid to Harry. I think this is a nice addition to the set. Especially if you want to use this set as a display piece.

75978_build_21a.JPG
75978+build+21b.jpg

Besides the Harry and Hagrid minfigures in box 21, you get another 13 characters from the book/movie. I think it’s a good collection of minifigures to include some of the more popular and some of the ones we don’t normally see. They don’t come with too many accessories, but I think that’s okay. In the movie, you don’t see them with wands or other items unless they are buying things.

minifigs.jpg

Here’s a picture of the final build all lined up. They are similar to the modular building series in that you can connect them, rearrange them, and for these you can put them front to back. No corner buildings or anything, but I guess that leaves it up to you to build them. I’m okay with the backs being open so you can see the details inside. I understand these are not modulars.

$400 is pretty steep for this set so definitely look for opportunities to get gifts with purchase or double VIP point bonuses. I got cash back and had a gift card so that helped.

Should you buy this set? I say this set is for Potter fans. A great addition to the world and a fun build if you know some of the details. This set is also for MOC builders. There are a ton of great pieces and great colors in this set. For about 7 cents a piece you can get some great parts. I’d love to see what some of the pro builders out there could do with this set.

If you aren’t a Potter fan or don’t want the pieces, I’d consider other sets first. Just my opinion.

I’m a Potter fan and I think the set was great. On a YouTuber I follow, it was mentioned that it would be great for the 2021 Potter sets to add onto Diagon Alley. What if they did a Gringots set you could add to this street? It would be pretty awesome!

What did you think of this one? Better or worse than Hogwart’s Castle?

Happy building!

75978_final.jpg

Set Review - #75551-1 Brick-Built Minions and Their Lair - Minions: The Rise of Gru

We had the original “Despicable Me” movie, then the sequels, then spin offs, and now that we have brick built Minions, we’re all set, right? Released on 27 April 2020 in the US, this set contains 876 pieces and 3 minifigures. It retails for $49.99 in the US which works out to $0.057 per piece. I found it for 20% off on Amazon.com so $10 off which helped although five cents a piece is pretty good.

This set contains minifigures for the three main Minions who are Kevin, Stuart, and Bob. Then you can build larger versions of all three. Unfortunately you can’t build all three at once. You can build Stuart and then Kevin or Bob. You need another version of the set or some of your own bricks to have all three at once. Is it worth it? Onto the review…

Here is the front and then the back of the box. The front shows the larger Stuart and Kevin with all three minifigures. It also shows how the larger Minions open up in the back to show their lairs. The back shows the internals of all three, it shows you how the eyes spin, and then shows that you can switch Kevin to be Bob.

75552_box_front.jpg
75551_box_back.jpg

The set contains five parts bags. Two are labeled with a 1 and three are labeled with a 2. One of the first bags contains a piece separator. There is a sticker sheet with a bunch of stickers and then two instruction booklets. The first booklet builds Stuart and the second builds Kevin and Bob.

75551_contents.jpg

The first two bags build Stuart. He is distinguishable by his sole eye. The outer body is a similar build for all three minions except for some minor differences (height, eye color, hair, and the mouth piece. The eye and mouth are all printed pieces so if you just wanted the Minions without all of the internals, you could get away with out using any of the stickers.

One thing that doesn’t quite work with this build is the torso and head of the Minion is not even with the top part of the head. There is a slight break where the curves are not quite even. Considering it’s built with LEGO bricks, we can’t complain, but it does make me wonder if there’s another way to make the head seem a bit more smooth.

Stuart has a cool pad to hang out in with a sound system, dart board, boomerang, and a fold down bed. Above his bed and connected to his eye is a 2x2 round brick to spin his eye around

75551_build1a.jpg
75551_build1b.jpg

The second set of bag builds Kevin (listed first in the instructions). Kevin is built similar to Stuart only he is a few studs taller. Additionally, he has two eyes versus the one. There are gears in place so both eyes can spin. He has a small smile compared to Stuart’s open mouth. Additionally, he has a small sprig of hair versus Stuart’s hair.

Inside Kevin has his command center with various screens and dials. He also has his fire extinguisher and some tools along with a banana to snack on. Lots of stickers, but not too bad to assemble. The minifigure is pretty similar only smaller.

75551_build2a.jpg
75551_build2b.jpg

The second set of instructions starts from scratch again. It doesn’t give any guidance as to whether you should disassemble all of the parts of Kevin or certain parts. I kept the bottom intact and then parts of the top, but the internals are all swapped out so you are forced to make take apart most of the pieces.

The assembly of Bob is similar to that of Kevin only he is shorter. Inside he has some weapons and a few posters. Also one of his eyes is green versus two brown like Kevin.

75551_build3a.jpg
75551_build3b.jpg

Overall it’s a good build. The three Minions are built mostly the same, but they have enough differences to make it interesting. You get some decent pieces as well. The larger Minions have some good play features and while you can have all three assembled at once, you can easily switch them out. The minifigures are pretty good too and you get some hats to put on them as well. With a 20% discount, I couldn’t complain with the price. Definitely a must buy for any brick and Minion fans.

What are your thoughts on this one? We saw a larger character with #75979-1: Hedwig. We also have the larger sized Minions. Will there be more? Should they have put all three larger Minions into the set? Will it force people to buy two sets so they can get all three?

Happy building!

How I Got an Orange Classic Space Minifigure

I attended BrickCon 2020 virtually back in early October 2020 and finally got to building the convention model (I was building something else). You can see my other posts here and here. If you look at the post about SWAG you can see all of the stuff I got (for a fee). The set came in this small box with a printed sticker on it. The sticker has the Convention logo and some views of the set.

One of the big highlights is the minifigure in the set. It’s an orange classic space minifigure. If you’re reading this after 2020, this was the year the orange spaceman joined the crew which could be found in the LEGO Minifigure: A Visual History. Instead of buying the book to get the minifigure, I got this set. The difference is the minifigure cranium. The one from the book is the classic yellow with two dots for eyes and the single line smile. The one in the BrickCon set is a female with some eyebrows and lipstick. Anyways, this adds to the other recent additions to include the ones found in #70841-1: Benny’s Space Squad (2019) and then the LEGO Ideas #21109-1: Exo Suit from 2014.

BrickCon_box_front.jpg
brickcon_box_side.jpg

Since it’s not an official set, it comes with some instructions and a standard plastic bag filled to the brim with parts. No piece separator here and the instructions don’t have anything about the designer. By the way, the designer was Chris Malloy. He’s the managing editor of The Brother’s Brick and designed a great set. His page is here.

brickcon_contents.jpg

Here’s the completed set. There are four 8x8 stud plates. Each one is connected to the others with Technic pins. It is designed so that you can add additional plates to the set as well. From left to right, you start with the the ladder from the space ship that the spacewoman climbed down. Then the next one is part of a castle wall with a deceased guard next to his spear and flag. There are a few pumpkin like plants with some leaves growing out of them. The final plate has part of a façade that has fallen over. There are some plants growing on them and the paint is wearing off (from white to gray).

Unlike official LEGO sets, there are some connections that wouldn’t fly. They are a bit flimsy and you have to be pretty delicate when assembling everything.

Also, the parts selection is pretty impressive. Besides the orange spacewoman, there are some less common parts. The pumpkins, the plants, the yellow and black branches, a silver curved tile, and a few others. Even if you don’t like the model, there are plenty of parts for other sets.

Did you attend Virtual BrickCon 2020 and did you get the set? Did you like it?

Happy building!

brickcon_set.jpg

Set Review - #42115-1 - Lamborghini Sian FKP 37 - Technic

There are a few themes LEGO has sucked me into. One is modular buildings. The other is the Technic "super cars.” The first one was #42056-1: Porsche 911 GT3 RS back in 2016. The second was #42083-1: Bugatti Chiron released in 2018. The third car was released on 2 June 2020 in the US. It’s #42115-1: Lamborghini Sian FKP 37. It contains 3,696 pieces and retails for $379.99 in the US. This works out to $0.103/piece. Considering a lot of those pieces are tiny Technic pins, this car is expensive! Thankfully, I found it locally for ~$286 which I think is a much more reasonable price for the set. So if you live in the US, now is the time to complain as the Europeans get some discounts that you never see.

Like the previous cars, the box is unlike your standard set. The top half of the box looks like the hood of the car with the Lamborghini logo. The bottom part is a picture of the completed set with the name logo in the upper left. Unlike the Bugatti which was labeled as 16+, this one is labeled as 18+.

42115_box_front.jpg
42115_box_back.jpg

The sides of the box continue on the car shape with the front and back of the vehicle on the box.

42115_box_sidea.jpg
42115_box_sideb.jpg

Taking the top of the box off reveals six boxes in the shape of the engine covering in the back of the car. The boxes are numbered 1 through 6. After removing the boxes, there are two instruction books on the bottom. When you put the books next to each other, you can see the completed model.

For reviews, I normally pull out all of the bags so you can how many parts bags there are in the set. I didn’t do that here as the parts bags are all contained in the numbered boxes. I didn’t count as I opened them either. Sorry…

42115_box_open.jpg
421153_box_contents.jpg

The instructions are similar to previous Technic super car models with a lot of details and extras on the actual vehicle and the model. I found the extra details interesting. You are also given some QR codes that you can scan to take you to YouTube videos about the design process. The videos were interesting with some interviews of LEGO and Lamborghini personnel. I tried to watch while building, but couldn’t focus enough on the build so I watched them separately. I think I would have rather had one longer video versus a bunch of shorter clips, but not a major issue to me.

I bought my set in Germany so the instructions came in English and German. Not the North America version in English, French, and Spanish.

42115_ins1.jpg
42115_ins2.jpg

Box 1 - Gearbox and Rear Suspension

Each box is split up in the instruction book with a write up on that section and a corresponding video. Box one builds your transmission and where the back wheels go. The transmission is a challenging thing to build. I really had to pay attention to part types, angles, sizes, and how things were linked up. I made a few small mistakes, but thankfully caught them before I went too far.

The transmission is open on the bottom of the car so you can see the movement as you cycle through gears. This is different from the previous cars. While not realistic, it is a nice touch to see what is going on I guess. Also it’s on the bottom so it’s not like you see it all the time unless you flip it over.

I didn’t time myself on the build, but I think this part took a while for me. Might have been just because I was taking my time with it to make sure I got it right.

42115_build1a.jpg
42115_build1b.jpg
42115_build1c.jpg

Box 2 - Engine and Front Suspension

With box two you can attach all the wheels now and the engine is installed. You can also shift the car into drive, neutral or reverse now. The wheels have a pretty solid suspension. One of the things from the videos is the car actually has some bounce to it. It is not much, but is way more versus the Bugatti.

42115_build2a.jpg

The engine has 12 cylinders that you can’t see working, but you get to install them all anyways. It’s not a big deal that you can’t see them in my opinion. I think it’s more about the build experience. The engine covering includes some printed tiles which add to the detail. I like the ones with the Lamborghini name on them. Super thankful there are no stickers on this one.

42115_build2b.jpg
42115_build2c.jpg

Here’s a closer shot of the front of the car at the end of box 2. I didn’t take a before step picture so you can’t see the details underneath. It’s a challenging part to assemble, but it comes together well. There were a few instances where I really had to stare at the instructions and compare it what I built to make sure it was all right. Some trial and error too. No mistakes so far…

42115_build2d.jpg

Box 3 - Interior Details and Seats

This box adds some details as mentioned, but also adds some movements. You install the initial parts of the scissor doors to come later and the mechanism to raise and lower the spoiler.

42115_build3a.jpg

The steering wheel is installed and like the previous vehicles, the wheel is functional. The other picture shown is the passenger side where you can see the Technic part used to raise and lower the spoiler. You can also see how some System pieces are added to the Technic pieces for detail purposes.

42115_build3b.jpg
42115_build3c.jpg

A quick look at the back. Not a lot of detail is added. Mostly structure to install other parts later.

42115_build3d.jpg

Box 4 - Rear Spoiler

Now the car is starting to look more like a car. We’ve got a roof over where the passengers sit, a covering over the engine in the back, coverings over the rear wheels, and the spoiler. If you’ve seen anything about this car, you know that LEGO has had some issues with parts and colors. This is the part of the build where those issues became readily apparent. The spoiler itself has multiple shades of green on it. While the design of the spoiler is cool and fairly accurate compared to the real car, the color is disappointing. With a $380 price tag, you would expect a much higher quality.

42115_build4a.jpg
42115_build4b.jpg

Here’s a closer view of the back of the car. You can see the System tiles used to create the Italian flag which is a fun detail. I’m also a big fan of the brake lights. They used more System pieces mixed in with Technic pieces. If you look closely at the spoiler, you can see the color differences. The rear also has a cool “Lamborghini” tile in the lime green with black lettering.

42115_build4c.jpg
42115_build4d.jpg

Box 5 - Scissor Doors

The fifth box finishes up the majority of the car. This includes the front hood, the lights, the front bumper, and the doors. I found a few parts a bit challenging to put together as the instructions just show the assembly next to the spot it is supposed to go.

42115_build5a.jpg
42115_build5b.jpg

Here’s another view of the front of the car. It seems like the front dash is quite large compared to the rest of the vehicle. I’m not sure if it is proportioned correctly, but perhaps there is a reason.

The scissor doors have a piece you can push in behind the “cab” of the car. The doors pop up like a real Lamborghini. No complaints here. It’s a fun detail.

42115_build5c.jpg
42115_build5d.jpg

A few close ups from this part of the build. I’m not sure how I’d re-design the light bars, but I’m not a fan of how they were built. They do look similar to those of the actual car and I understand that the geometry is tough to re-create. I’ll have to think on this one…

I like the brakes with the printed brake calipers. I’m also glad they are not stickers. It’s a small detail that you really can’t see with the vehicle completed, but I’m a fan.

42115_build5e.jpg
42115_build5f.jpg

Box 6 - Rims and Tires

The lime green color issues with this model are disappointing, but the gold rims are awesome. They really make the vehicle stand out. It’s the same wheels as the Bugatti and there’s a small 1x1 round tile with the Lamborghini tile on it.

42115_build6a.jpg
42115_build6b.jpg

This second part of the build for this box is a brief case. The previous two cars had cases as well. This one has the fewest details of the three so far and in my opinion it seemed like a last minute add. The brief case doesn’t have much to it. It’s rather plain and bland. I would have rather done without the bag.

42115_build6c.jpg
42115_build6d.jpg

The last part of the build is a display plate. It’s a 4x6 plate with some studs. Impressively it is all printed on unlike a lot of the UCS type sets where there is a large sticker. It’s a nice addition to the model and for people who want to display it. They have it mounted on some Technic pieces so it can be angled up. A nice touch in my opinion.

42115_build6e.jpg

Here are a few pictures of the final product with the wheels on . Overall, it’s an impressive model. I enjoyed the build process and getting away from System builds. I enjoyed all of the details and the mechanical connections. I didn’t enjoy the price originally posted. I was super thankful to see the price come down in Germany and to get it at a substantially lower rate, but I have yet to see it go down in the US. I’m hoping LEGO can adjust pricing in the future… either more car/build experience or lower price. We’ll have to see what LEGO does in the future. In the meantime, what do you think? Is it worth it?

Happy building!

42115_final1.jpg
42115_final3.jpg
42115_final2.jpg
42115_final4.jpg
42115_final6.jpg

I have the Porsche in storage, but here is a picture of the Lamborghini and Bugatti together. The Lamborghini is slightly longer. Any thoughts on cool ways to display them? Here’s a Beyond the Brick clip where someone shows off his LEGO room and he has two of the cars hanging on the wall.

42115_42083.jpg

Set Review - #60203-1: Ski Resort - CITY

#60203-1: Ski Resort was release on 1 September 2019 in the US. It retails for $89.99 and contains 806 pieces and 11 minifigures. This puts it at $0.112/piece. As I write this, it shows as sold out in the US on LEGO Shop @ Home so I may be too late to the game. It still shows available here in Germany. I purchased it in Germany for around $54 which was a much better price, Why are the CITY sets so expensive all of a sudden?

While not an advertised sub-theme, the CITY theme had #60222-1: Snow Groomer back in 2019 as well. We’ll see if they add more in the future or not.

Onto the review…

The box is pretty standard with the full set displayed on the front and some of the play features on the back.

60203_box_front.jpg
60203_box_back.jpg

The set contents are eight parts bags, the instructions and stickers in a sealed package, and then an 8x16 white plate. Bag one has a piece separator.

60203_contents.jpg

The first bag builds a snow mobile, a trailer to carry a stretcher, a snowman, a dog, and 4 minifigures. The snowmobile is pretty simple, but it gets the point across and has some playability. The snowman looks pretty similar to ones in the past with a top had, red scarf, and a broom as arms. The dog is the standard CITY dog figure.

The minifigures are pretty good. There are two snow patrol figures with a male and a female and then two kids with the shorter legs.

60203_build1.jpg

The second bag is a helicopter design. I seem to have accumulated a bunch of these through the years and they all look very similar. In terms of realism, LEGO CITY helicopters lack some realism, but they must be popular as LEGO keeps repeating them. There is one minifigure who is the pilot.

One difference on this chopper is the tail piece. Instead of building out a tail with bricks you get a BURP. I’m not sure if this is a new thing or not. It looks better, but takes away from the build experience as you just attach one piece.

60203_build2.jpg

Next up is bag three with this SUV and snow plow. It’s a pretty tough looking vehicle with space for gear in the back, some skis, poles, and the ability to store some equipment. The plow in front is pretty large too. The bag comes with a female minifigure in a ski patrol uniform. I like this vehicle and am pretty impressed with how it looks despite being a CITY set.

60203_build3.jpg

Bag four gives us a small snack stand with hot chocolate and goodies to eat. You also get some trick gear to include a small rail to ski/board on and then a mini-half pipe. The half pipe is rather small. You could get maybe one trick off of it if you did it right. I get the point though and that it is meant as a play feature. You get two more female adult minifigures to eat at/work at the snack stand.

60203_build4.jpg

Instead of going by bag, I decided to go by the remaining parts of the build. Next up is a winter gear shop. It’s a small store front with snow shoes, snow boards, skis, a hat, a helmet, and poles for sale. The store is only the front part, but I like the design. The front is designed to make it look like it is built as a log cabin with printed tiles to look like the ends of logs. The stickers help with detail to include the store logo and a board out front listing the sales. I like the snow board over the door as a decoration. This one comes with a store worker and then a snow boarder and skier all decked out with helmets and gear.

The inside of the store has some inventory, a check out stand, and the display areas. Not bad considering the size and easily expandable as desired.

The top of the store has a large plate with clips. It comes with a large sticker and is supposed to be a screen you can use to watch your favorite minifigures ski. I chose not to attach the sticker as I thought it was too big and looked kind of silly there. I’ll remove the large gray part before making it a part of a city scene some day.

60203_build5.jpg
60203_build5.jpg

The last part of the build is a small chalet type building used as ski patrol HQ. Like the store, it is only the front half, but I like the design of the front and think it would look fun as a full up building if you wanted to expand it. The inside has a medical area, an office area, and a work area on the upper level.

I also like the stickers on the side with the route map for skiers and then the name of the ski area “Mount Clutchmore.” Very clever.

60203_build6a.jpg
60203_sign.jpg
60203_build6b.jpg

That wraps it up. This is a fun set in a great sub-theme of CITY, but is way too expensive at its original price. I’m glad I found it at the discount I did and recommend you look for the same. Since the set is retiring, you might be able to find a good discount out there. If you find it at a discount, this is a great start a future MOC for a ski area/resort. Lots of fun details and some good play features.

What are your thoughts on this one?

Happy building!

60203_final.jpg

Set Review - #60253-1: Ice Cream Truck - CITY

I’m not sure when the first one was, but LEGO CITY has done a few food trucks over the years. The last one I can recall is #60150-1: Pizza Van. That was from 2016. #60253-1: Ice Cream truck was released on 2 January 2020 in the US. It retails for $19.99 and contains 200 pieces. That works out to roughly $0.10/piece. I purchased mine locally for just under $17.

The box is your standard set up with the full set on the front and some play features on the back. This set is meant for the 5+ age range and it shows in the build. Onto the review…

60253_box_front.jpg
60253_box_back.jpg

This set contains two parts bags (both numbered), two instruction booklets, a sticker sheet, and two 2x16 light gray plates.

60253_contents.jpg

Bag 1 starts building the truck. The back comes with a few cones and some ice cream. The back side of the truck has hinges so it can open up for playability. Not much else here… it’s a pretty simple build.

There are two minifigures. A female figure who is the truck operator and then a male minifigure who is on a skateboard. The skateboarder comes with a purple skateboard, a blue helmet which can be switched for a black hair piece. It also comes with a black hair piece.

60253_build1.jpg

Bag 2 wraps up the build. The other side of the back has a sliding window for the minifigure to serve out of. It also adds the cab and all of the decorations. There are a lot of stickers to include the menu, some signage, and the face on the ice cream bar on top. I failed on the sticker for the ice cream bar as I centered it. If you zoom in, you can see there is a gap between the brown part and the brown drip on the sticker. I should have placed it in line with the brown. Not a big deal, but lesson learned I guess.

Overall, not a bad set. It fits in well with a city scene and adds some different vehicles besides the usual fire and police activity in LEGO CITY. The build is very simple, but to be expected for the 5+ range. My little guy tried to play with it, but the ice bar on top fell off easily and the front cab does not remain on well. Not a big deal for an AFOL thought. I’m glad I found it on sale and recommend waiting for a sale if you’re looking to pick this set up.

Happy building!

60253_build2a.jpg
60253_build2b.jpg

Set Review - #60262-1: Passenger Airplane - CITY

The LEGO CITY theme is back with another passenger airplane. This one is #60262-1: Passenger Airplane. It was released on 24 August 2020 in the US for $99.99. It contains 669 pieces and has 9 minifigures. This works out to $0.149 per piece. I picked it up locally on sale for about $72.

The last CITY passenger plane came out back in 2016. You can see my review of #60104-1: Passenger Terminal here. It had 694 pieces and 6 minifigures, but retailed for the same price. Like this set, it contained an aircraft, a small terminal, some ground crew gear, and the minifigures.

Onto the review…

The front shows the full set with the minifigures in action. It also shows the length of the aircraft (54 cm/21.2 in). The back gives the play features like usual.

60262_box_front.jpg
60262_box_back.jpg

The set contains 9 parts bags. 7 of the bags are numbered and 2 are un-numbered with large pieces inside. It also includes the large wing which has been pretty standard in CITY sets. The instructions and stickers are in a plastic wrapping. There are 4 instructions booklets and a small sticker sheet.

60262_contents.jpg
60262_instructions.jpg

Bag 1 builds a 4-stud wide red sports car. It comes with the minifigure Poppy Starr. This minifigure is from a LEGO CITY TV show that I didn’t even know existed. I’m not sure if this set or car is seen on the show or not. Anyone?

The build of the car isn’t anything special, but it’s designed to fit in the aircraft as you’ll see later.

60262_build1.jpg

The second bag builds an airport vehicle. This vehicle can tow various equipment to include stairs (built later) and the lift to transport the car to the aircraft. While there’s nothing special about the vehicle, it seems to be in line with the small vehicles you see driving around any airport in the world towing various pieces of equipment or baggage trains. You can easily create your own additional pieces of equipment to tow around and attach to this vehicle.

The trailer isn’t too hard to build, but I question if a 6 year old could do it as the box states. Maybe with some help they could? The design does hold the car built in the last bag and can “lift” it up. There is no mechanism to move the car into the aircraft, but I guess that’s something you can build on your own as most 6 year olds aren’t concerned about that.

Two minifigures in this bag. One is an airport worker with a hard hat and ear protection. The other is a passenger with a Hawaiian shirt on. He has a large piece of luggage which is different from the standard LEGO briefcase I’m used to seeing. This one looks like it could be a roller bag or something… just no wheels.

60262_build2.jpg

Bag 3 builds the small terminal. I’m not sure why it is included in this set. I understand that the set is designed for playability, but to me I’d rather see the terminal as a separate set. The aircraft set could be focused on the plane itself and some ground crew. Then the terminal set could be a bit larger with some more detail. This terminal has a small baggage claim, a vending machine, and a check in desk all crammed onto an 8x16 plate.

The facility uses roller coaster track as the roof. I like the concept, but it seems like a cop out to not putting any effort into making a curved roof. Easy for a 6 year old to install I guess. There’s also a small control tower with a radar dish attached. Like many CITY sets, the minifigure has to jump or climb to the top, but it gets the job done I guess.

Four minifigures in this bag. A female with a black bag sporting a guitar shirt, a male wearing a carrier to carry a baby and holding a bottle, the baby, and then an airport worker with a coffee mug. I love the baby carrier concept. Bonus points to the designer who came up with that piece!

60262_build3a.jpg
60262_build3b.jpg

Bag 4 starts to build the fuselage. Not a lot of details yet and like past CITY passenger planes, it uses a lot of BURPs to achieve the shape. One area I appreciate is the cockpit. Besides the printed slopes for controls, they added in a steering column which moves. It is just a bucket handle on a droid arm, but still a nice detail.

This bag has two minifigures to include a female pilot with some cool shades and a male flight attendant.

60262_build4a.jpg
60262_build4b.jpg

Bag 5 adds the standard wing piece along with some seating and details on the wings to include the winglets on the tips of the wings and the farings to hold the engines on. I’ve seen a few complaints about not enough seating, but I think the inside is large enough to make changes to as required. Add in your own additional seats if you don’t like how it looks. It is just LEGO after all.

60262_build5.jpg

The sixth bag adds in the windows in the cabin, a small bathroom on board, and starts to build the cargo compartment. The horizontal elevator on the tail is also added.

60262_build6.jpg

Bag seven finishes the build with BURP pieces to complete the top of the cabin, a BURP tail with a printed logo, a cargo door that rotates up and has a small latch to hold it down, and the engines. The engines are not a single piece, but instead are multiple cylinders attached together with around piece with a sticker on it for the fan blades. I’m indifferent on the design. Not sure if it is better or worse than previous jet engines. Besides the aircraft, you get the steps to get on and off the aircraft. No hand rails though so watch out.

60262_build7.jpg

Nine minifigures in total which isn’t’ bad. It’s a good selection with some good accessories. I would have liked a co-pilot for the second seat in the cockpit, but we’ll take what we get.

60262_minifigs.jpg

Here’s the full set. If you ask me, it’s in line with all previous CITY passenger plane sets. Lots of playability, some fun details, and good minifigures. While the piece count went down slightly, the price remained the same. If you can find it on sale like I did, even better. This is probably not a great set for adults unless you want pieces or you have a CITY airport (or like me, plans to build one). A good set for kiddos. My little guy absconded the vehicles and both of my kiddos enjoyed flying the plane around.

What are your thoughts on this one? If you’re an adult and hate the CITY plane designs, I recommend you check out the YouTube channel Big Planes. The builder here makes some incredible MOCs of actual aircraft and doesn’t use BURPs.

Happy building!

60262_final.jpg

Set Review - #75968-1: 4 Privet Drive - Harry Potter

Another of the 2020 Harry Potter series… #75968-1: 4 Privet Drive. Also released on 24 August 2020 in the US, this one cost $69.99 in the US. With 797 pieces, it works out to $0.088/piece. This set captures a scene from the second book/movie titled “The Chamber of Secrets.” It’s where Ron rescues Harry from the room he was locked into so he can go to Hogwarts. If you don’t know what I’m talking about, look it up on line.

The set has the standard box with the front showing the full set while the back shows the other side of the set along with some play features.

75968_box_front.jpg
75968_box_back.jpg

This set contains 5 parts bags, a sticker sheet, an 8x16 plate, and the instructions. Bag one includes a piece separator.

75968_contents.jpg

Bag one starts off on the bottom floor with some furniture, the door (with stickers to show the letters coming in, but they can’t fit due to the boards nailed on), stairs up to the next level, and then the street sign with an owl. Proportions wise, I think they fit a decent amount of details in considering the size of the set and it seems to match the movie scene well. The minifigure for Mr. Dursley is in bag one.

75968_build1a.jpg
75968_build1b.jpg

The second bag finishes up the first floor with some details like the fireplace, carpeting, a plant on an end table, and the railing leading to the second level. Additionally it finishes the small room under the stairs where Harry was locked away in the first book. This section has a small door on the one side and then uses hinge pieces to open up to the small space.

The minifigure for Dudley is in this bag.

75968_build2a.jpg
75968_build2b.jpg

The third bag starts the second floor where Harry’s room is located. It adds the walls, a bed and some details to include a copy of the Daily Prophet newspaper, a picture of Harry’s parents, and some clippings from Hogwarts. It also adds the window that Mr. Dursley bars up. This window is placed in using friction and there are no studs in contact with the frame so it can easily be pulled out.

On the first floor by the fireplace, a Technic gear is added. This is connected to a small mechanism that allows you to slip 1x2 tile letters down a slot. They can then come out the fireplace similar to the movie how Harry wanted his letter welcoming him to school. The gear allows you to open or close the slot as desired.

The front of the home has some plant life for decoration. I like how they did the roof with the slope bricks offset by one tile each. It’s a pretty simple way to add in some details without making it an over technical roof build.

The Mrs. Dursley minifigure comes in this bag.

75968_build3a.jpg
75968_build3b.jpg

The fourth bag finishes the roof. It uses the same technique as the small porch area on the first level. I’m a fan of how it looks. If you don’t like it or the set, at least you get a bunch of the black slope pieces to use in MOCs as desired.

This bag contains Dobby and the cake/pudding Dobby levitates over the Dursley’s guest. It also contains Hedwig which is the same figure from #75969-1: Hogwart’s Astronomy Tower and #75979-1: Hedwig.

75968_build4a.jpg
75968_build4b.jpg

The fifth build completes the set with the Harry minifigure and the Weasley’s flying car. It’s a different build from the original one we saw in #75953-1: Hogwart’s Whomping Willow. The two minifigures don’t fit in super well, but the truck has space for Harry’s trunk.

75968_build5a.jpg
75968_build5b.jpg

Lastly, there’s the final view in the side room of the house. Not much has changed there other than the light on the outside.

Final look at all the minifigures… There are 6 in total plus a Hedwig. Not a bad mix if you are a Harry Potter minifigure collector.

Overall, it’s a good build with some good play features and it captures the movie scenes well. There are some decent pieces you can use in MOCs if you don’t want to keep the set together. The small size of the set with the ~$70 price tag make it seem a bit overpriced. I picked it up on sale here for ~$52 and I recently saw it on sale on Amazon.com for around $56 so better. Unless you’re a big Harry Potter fan or collect the minifigures, I would steer clear of this one. Or maybe if you can find a better sale. This one seems to me like a $39 set.

What are your thoughts on this one?

Happy building!

75968_final_side.JPG
75968_minifigs.jpg

Set Review - #75967-1: Forbidden Forest Umbridge’s Encounter - Harry Potter

Continuing my review of the 2020 Harry Potter sets, this one is #75967-1: Forbidden Forest Umbridge’s Encounter. It depicts a scene from the fifth book/movie titled “Order of the Phoenix.” The set contains 253 pieces and retails for $29.99 in the US. This works out to $0.119 per piece. The US release date was 24 August 2020. The set was released on 3 May in Germany and I found it on sale for around $22.

Nothing special about the packaging. Full set on the front with play features on the back.

75967_box_front.jpg
75967_box_back.jpg

The contents are 2 parts bags, 2 instruction booklets, and a small sticker sheet.

75967_contents.jpg

One highlight for me in this set was seeing the sand green sausage. I thought it was new, but apparently this is the third set it has been in. I’ve only seen this in red so nice to see another color.

hot_dog.jpg

Bag 1 builds a small tree structure that opens up to include some of Grawp’s items. It also includes a Harry Potter minifigure and 2 Centaurs. For minifigure collectors, these are probably a big draw in this set.

75967_build1.jpg

Bag 2 includes Hermione and Professor Dolores Umbridge. The build is Grawp who is a relative of Hagrid (I forget the exact tie). In seeing the box, I thought Grawp would be a lot of BURP pieces, but it uses a lot of SNOT techniques and not as many molded pieces. The hands are molded and the face, but everything else is regular pieces.

Overall, not too much special to this set besides the Centaur figures. Probably a must buy for Harry Potter collectors. I recommend finding options to get it on sale as it’s a bit much at over 10 cents per piece.

Happy building!

75967_build2.jpg

Set Review - #75966-1 - Hogwarts Room of Requirements - Harry Potter

Continuing with the 2020 Harry Potter series, here is #75966-1: Hogwarts Room of Requirements. It was released in the US on 24 August 2020 (3 May 2020 in Germany). It contains 193 pieces and retails for $19.99 in the US. This works out to $0.104 per piece. I picked it up here in Germany on sale for just under $17.

Onto the review…

Here’s the box with the set on the front. It is the standard front with the Harry Potter logo, pictures of the actors, and the minifigures on the bottom. The back shows some of the play features as well as the other side of the set.

75966_box_front.jpg
75966_box_back.jpg

The contents are two numbered parts bags, the instruction booklet, and a sticker sheet. It’s not a ton of stickers, but I am not a fan of the small stickers you have to place on a larger panel or brick.

75966_contents.jpg

The first bag builds part of the room. It includes the outer sliding door that opens when the students need it to. There is a door behind it so they can get in. I like the larger translucent blue bricks for the windows and am trying to think of some cool ways to use them elsewhere.

This bag has the Luna Lovegood minifigure.

75966_build1a.jpg
75966_build1b.jpg

At 193 pieces, the build goes quickly. Bag 2 includes the remainder of the set to include Technic elements to knock down the proclamations. For minifigures you get Harry, Hermione, and the training Dementor. You also get some patronus charms to include a rabbit and… a gopher? Finally you get some “flick pieces” to shoot your charm from the minifigs and have them land somewhere on the floor for you to find later.

75966_build2a.jpg
75966_build2b.jpg

Overall, it’s not a bad set. You get a few decent pieces, there are minimal stickers, the minifigures are okay, and you get some translucent pieces. It’s not a bad set to pick up if you are a Harry Potter fan and you can get it at a discount. The set has holes for Technic pins so you can connect it to others released over the past few years to create a larger scene. Beyond that, not much else to say. It’s a smaller set with not a lot too it, but it’s designed for that price point so you can’t expect much more.

What are your thoughts on this one?

Happy building!